Recently, the subtle pattern has been used more often in the design of websites. Today we will learn how to create several types of these fillings. The whole process should take you only a few minutes if you use the Pattern Creation feature in Adobe Illustrator CS6. Let’s begin!
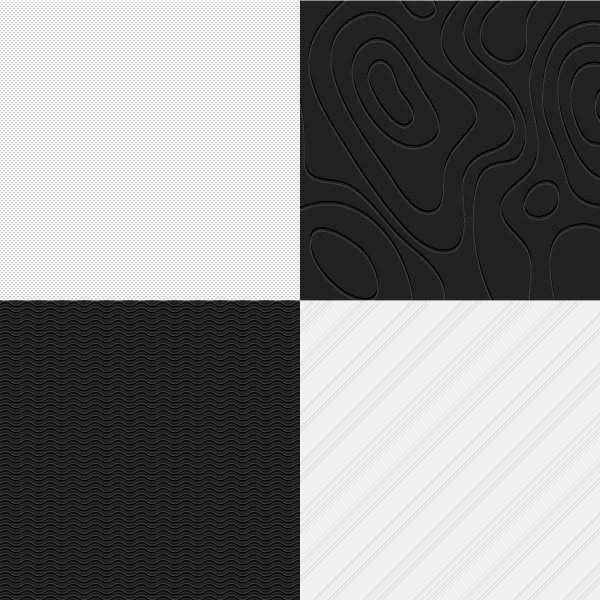
The Subtle Pattern differs from the other patterns in such a way, that the shades of the elements have only a slight difference between one another and between the main background color. These patterns are mainly in the Low-key (dark) and High-key (light) lightning styles.
The Pixel Pattern
Step 1
Chose the Pixel View mode (View > Pixel View) to create the pixel pattern. In this case all the created objects will be placed exactly on the lines of the pixel grid, because the Snap to Pixel mod will be turned on automatically.
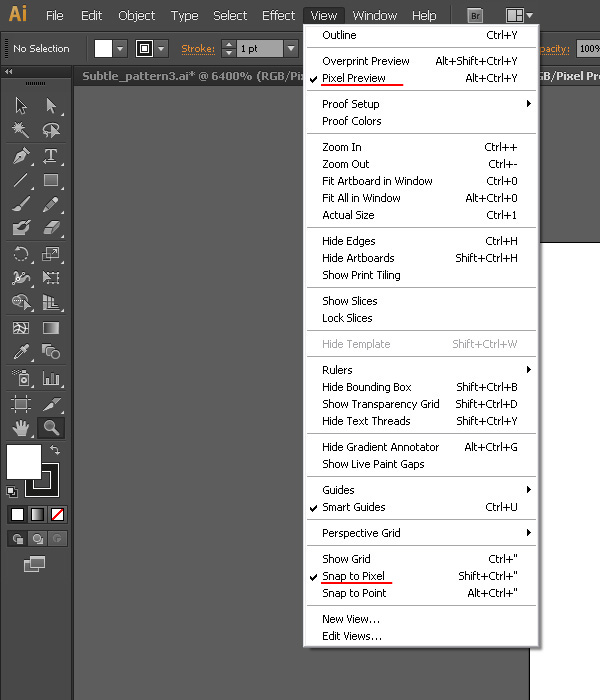
Moreover, when you zoom the artboard, you will be able to see the lines of the pixel grid, which will make the creation of the pattern much easier.
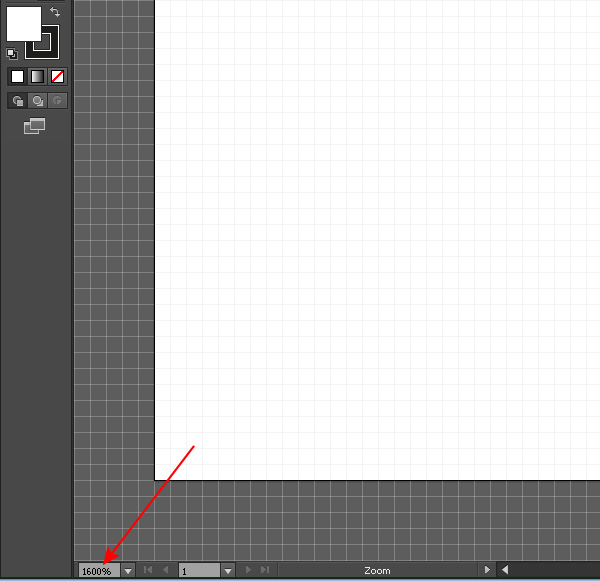
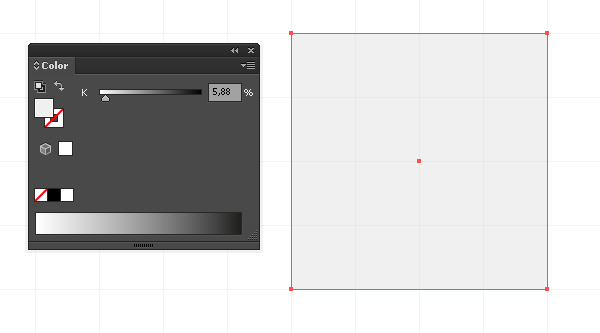
Now let’s create a plain but attractive pattern. Take the Rectangle Tool (M) and create the 4*4px size rectangle with the light-grey fill.
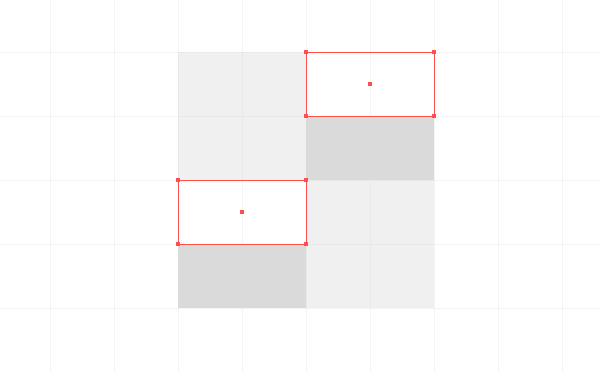
Let’s create two more 2*1px size rectangles with a bit darker grey fill and place them as it is shown on the picture below.
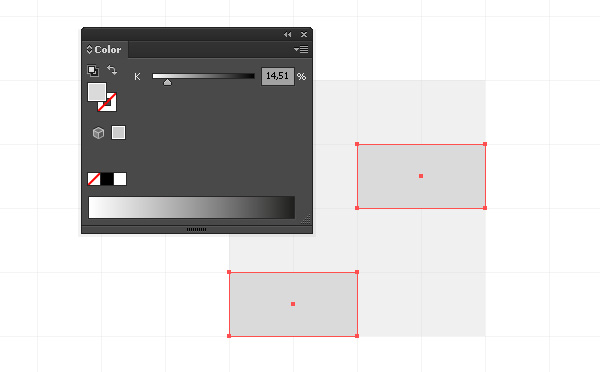
Now create two white rectangles of the same size.
Step 2
Select all the created objects and go to the Object > Pattern > Make
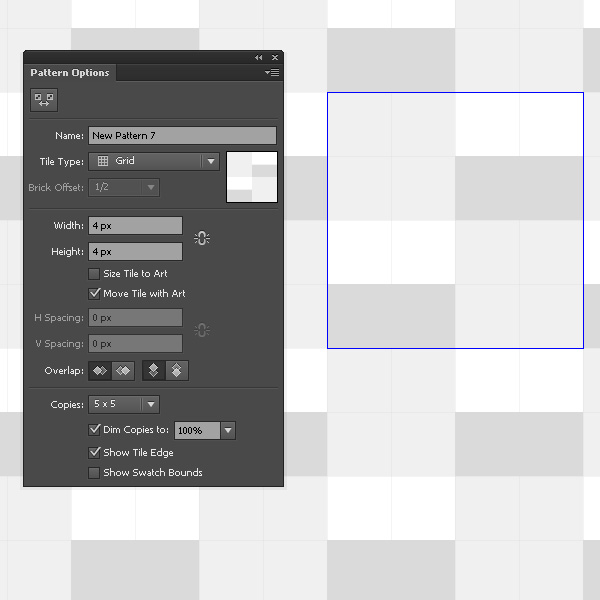
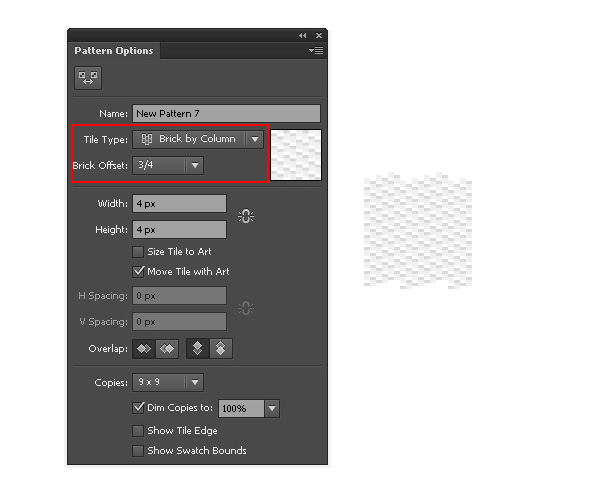
As the result of these actions, we are in the create-pattern mode. You can edit this pattern with the Pattern Options panel. You can have a look at the pattern in the full size and decide if you need to edit the color of its elements.
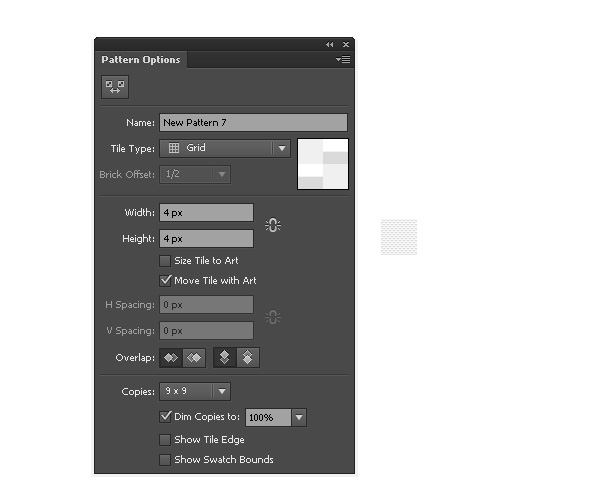
We can also apply to the pattern different Tile Types, which allows us to create some several types of patterns from one element
Step 3
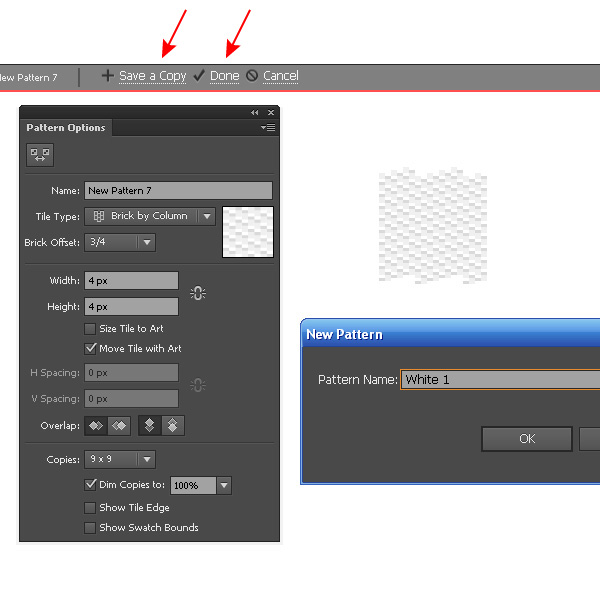
To save a couple of variants of the pattern, click on the Save a Copy on the Top bar. To save one pattern click on the Done.
All the saved patterns were added to the Swatches panel. Now, let’s create a couple of figures and apply the created patterns to them.
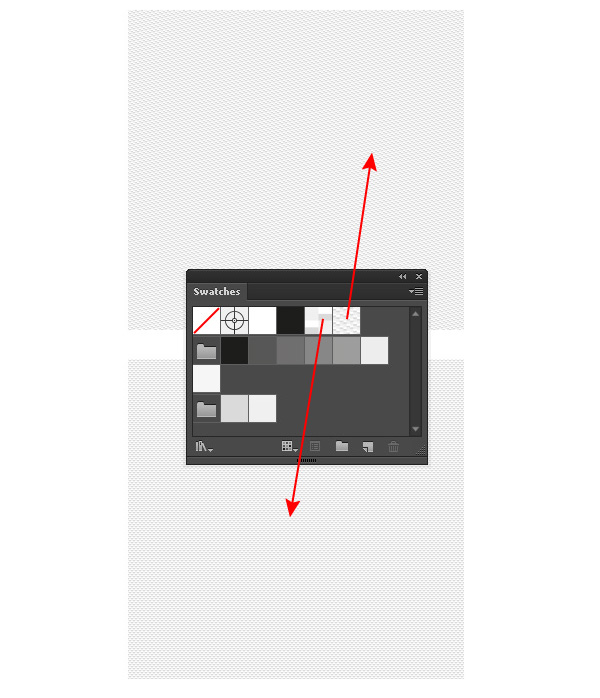
If for some reason you are not happy with your result, click on the image twice in the Swatches panel and edit it in the Pattern creation mode.
Step 4
You can create more complicated patterns using the described technique. On the picture below you can see one of my patterns, which was created with the pixel net and the Rectangle Tool (M)


Wavy Pattern
Step 5
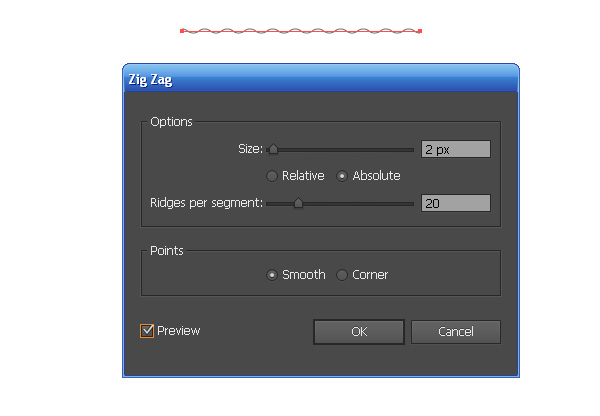
Let’s create the horizontal straight line segment with the Pen Tool (P).

Keep the segment selected and go to the Effect > Distort & Transform > Zig Zag and set the parameter which are shown on the picture below.
Go to the Object > Expand Appearance, then take the Scissors Tool (C) and cut the path in the A and B points.
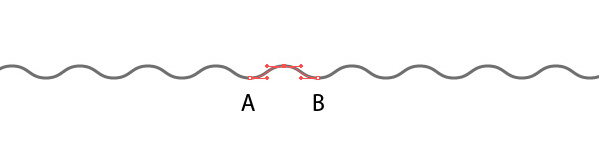
Delete the left and the right parts of the path.
Step 6
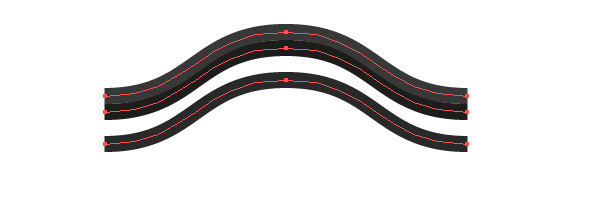
Double the paths two times; color the copies in different shades of the dark-grey color.
Select all the created paths and go to the Object > Pattern > Make. Select the Pattern Tile Tool in the Pattern Options panel and decrease the height of the Bounding box.
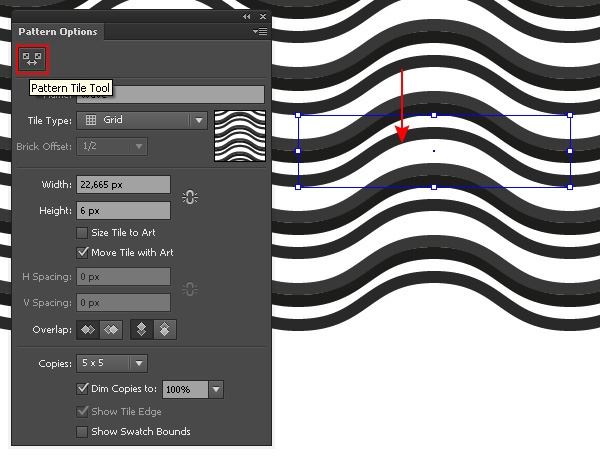
Click "Done" on the Top bar.
Step 7
Let’s create a big rectangle with the dark-grey fill using the Rectangle Tool (M). Add the new fill to this object in the Appearance panel.

Now apply the created wavy pattern to this fill.
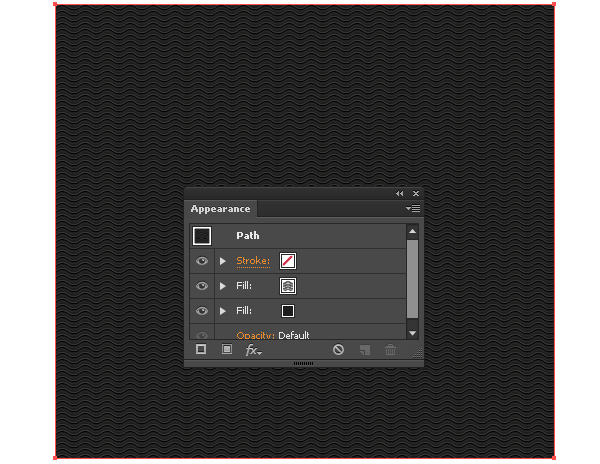
Now edit, if necessary, the color of the lower fill or the color of the strokes of the pattern.
Handmade Pattern
Step 8
Let’s create a rectangle with the dark-blue fill. Take the Pencil Tool (N) and create a couple of the closed grey-colored paths.
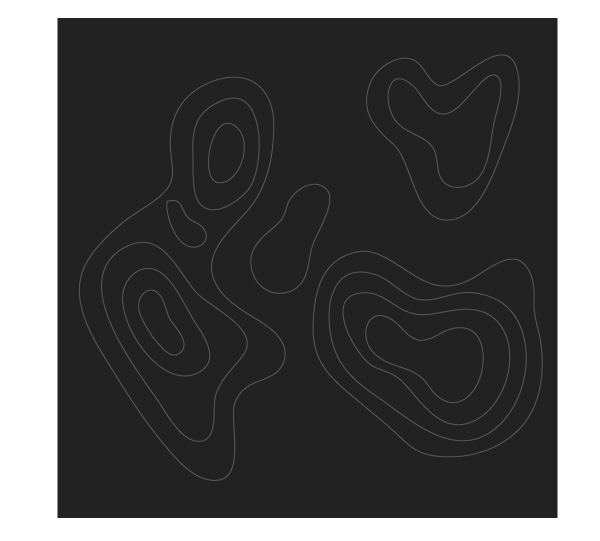
To create the closed paths with the Pencil Tool (N), keep the Option selected at the same time when you are heading to the endpoint.
Step 9
Select the created objects and go to the Object > Pattern > Make. Continue to create the path with the Pencil Tool (N). Try to combine the end and the beginning of the path as accurately as possible, which go beyond the Tile Edges.
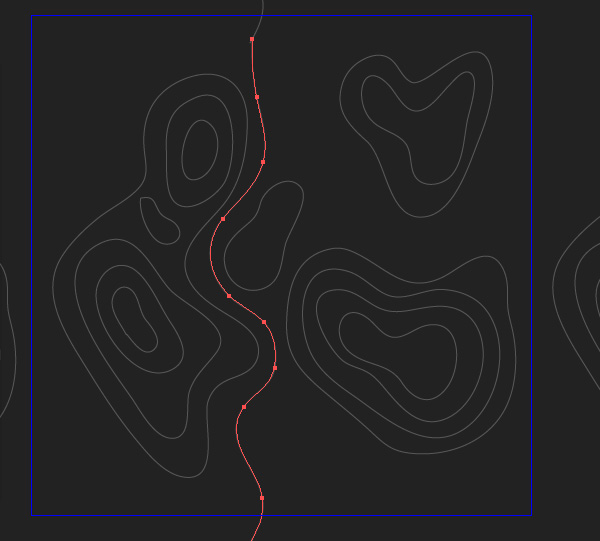

To do the exact match, use the Direct Selection Tool (A).
Step 10
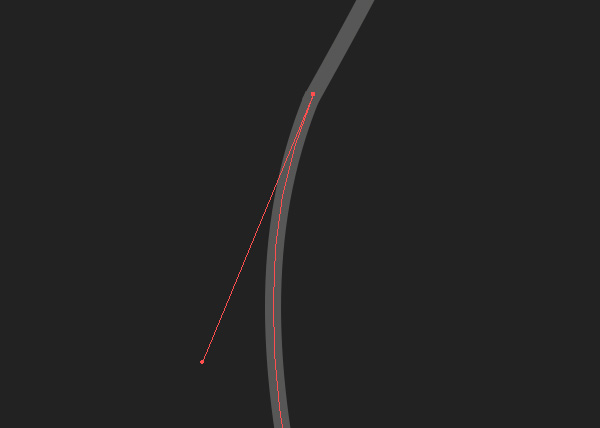
Group the created paths, and then copy the group and paste it back (Command + C then Command + B). Substitute the color of the strokes fill of the lower group for black and shift this group to a couple of the pixels up.
Click "Done" on the Top bar.
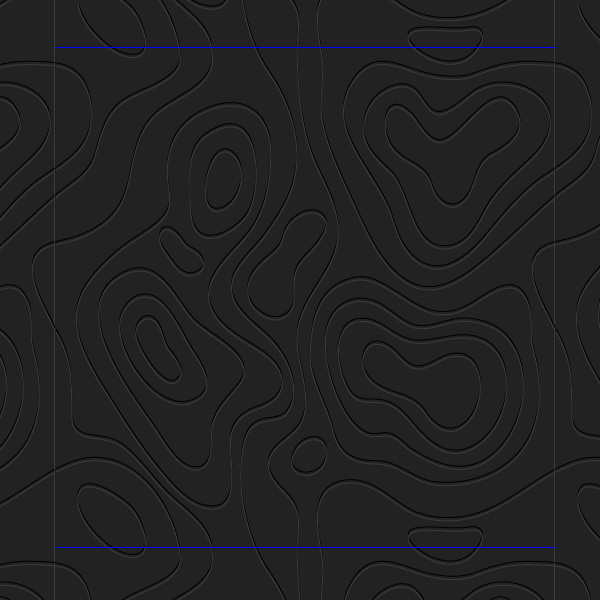
Conclusion
You can use the described techniques to create the textures of the vector illustrations. You have probably noticed that the artworks which have textures look more professional and saturated.