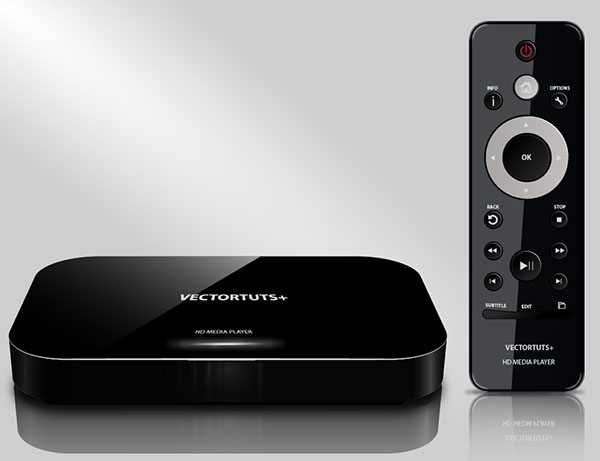
In this tutorial, I’m going to show you how to make your own HD media player with a remote control using Adobe Illustrator tools, such as the: Rectangle Tool, Ellipse Tool, gradients and the 3D option Extrude & Bevel.
Step 1
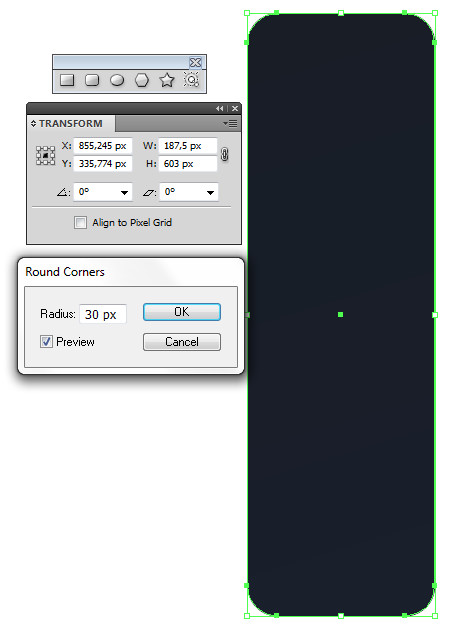
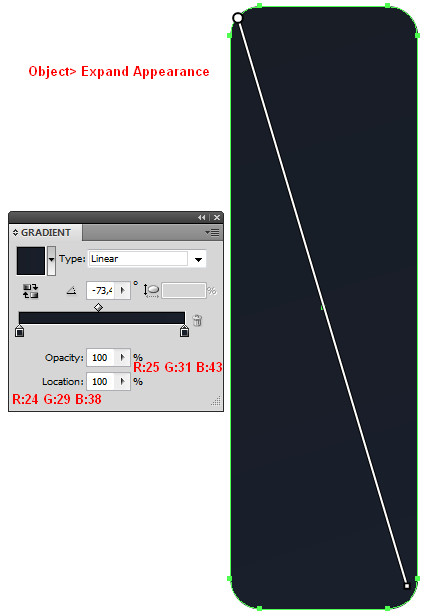
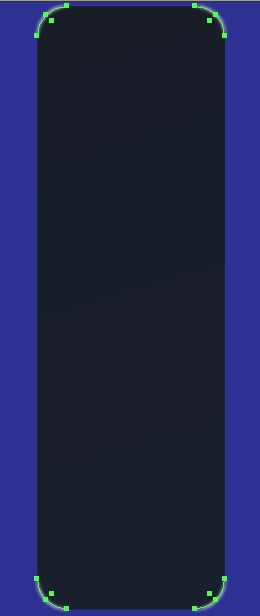
Pick the Rectangle Tool (M), draw a rectangle with size W=187,5px and H=603px, then rounded corners with a Radius of 30px. Right after that go to Object > Expand Appearance and fill the shape with Linear Gradient and the colors: R=24 G=29 B=38 to R=25 G=31 B=43.
Step 2
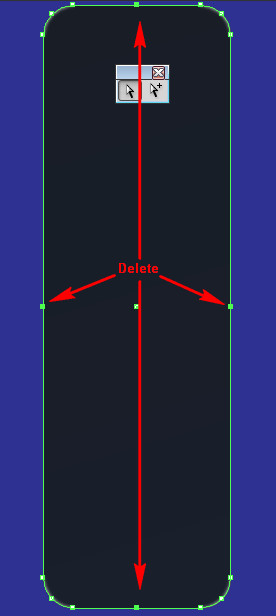
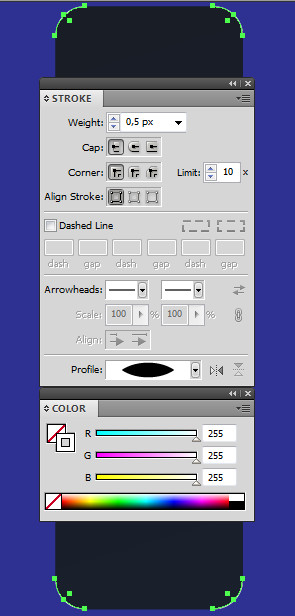
Copy the shape from Step 1 by using Command + C followed by Command + F. Now go to Object > Path > Add Anchor Points and delete the four key points of the shape with the Direct Selection Tool, as shown in the picture below. Group the four corners which remained and apply Stroke color: 0,5px to them with white color:
Step 3
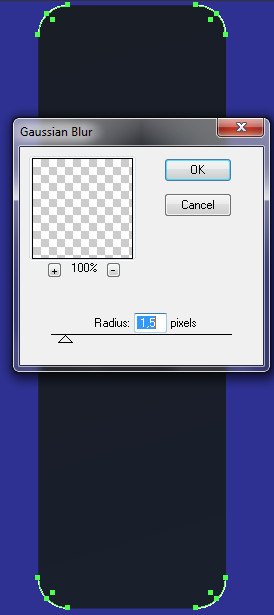
With the shapes from the previous step that you applied Stroke color to still selected, go to Effect > Blur > Gaussian Blur, then set the Radius to 1,5px and click OK.
Step 4
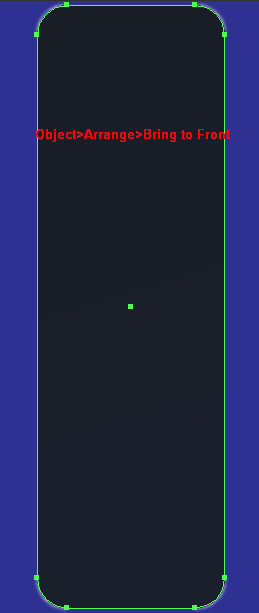
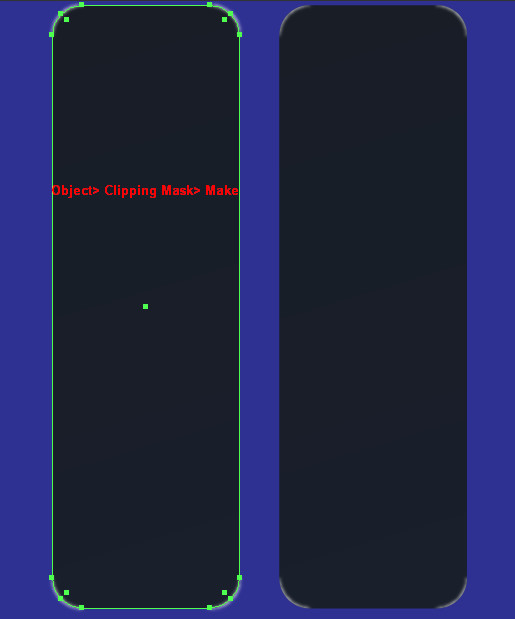
Now copy the shape from Step 1 using Command + C followed by Command + F. Move the copy over all the other shapes by going to Object > Arrange > Bring to Front. Then select the shapes from the previous step that you applied Gaussian Blur to, and the shape which you moved over the others, then go to Object > Clipping Mask > Make.
Step 5
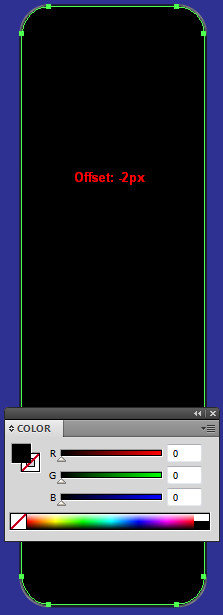
Select the shape from Step 1, go to Object > Path > Offset Path, set Offset to -2px, click OK and change the Fill color to black.
Step 6
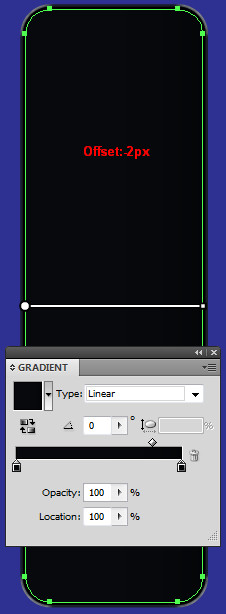
With the shape from the previous step that appeared after applying Offset is still selected, again go to Object > Path > Offset Path. Now apply Offset: -2px, click OK and fill it with Linear Gradient colors R=7 G=9 B=13 to R=4 G=5 B=7.
Step 7
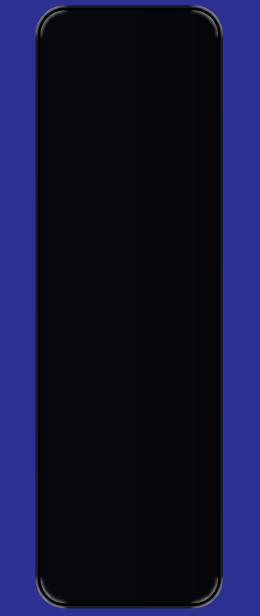
Repeat the same action you did for the black corners of the shape from Step 1, but this time do the same with the shape from the previous step.
Step 8
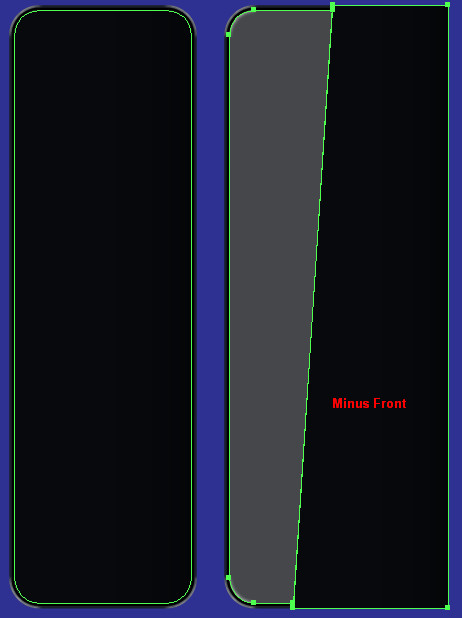
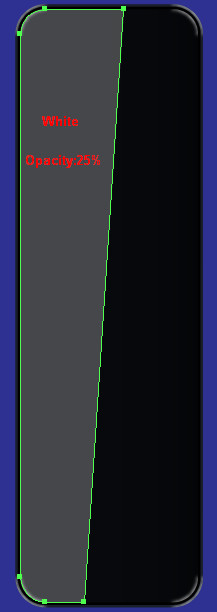
Copy the shape from Step 6 by using Command + C followed by Command + F, move the shape over all others by going to Object > Arrange > Bring to Front. Use the Pen Tool (P) to make a shape over the previous one, then select both shapes, open the Pathfinder Panel, and click on the Minus Front button. Fill the new shape with a white color and reduce the Opacity to 25%.
In the next few steps we are going to add the remote control buttons.
Step 9
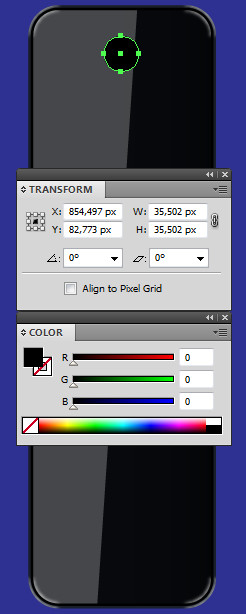
Pick the Ellipse Tool (L), draw a circle in the center at the top of the previous shapes, and fill it with a black color. Look at the picture below:
Step 10
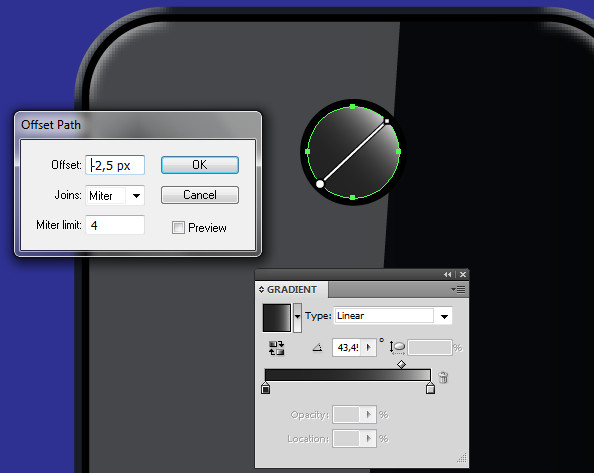
With the shape from the previous step that you filled with a black color still selected, go to Object > Path > Offset Path, set Offset to -2,5px and click OK. Fill the new shape with Linear Gradient colors that go from dark gray to light gray as shown.
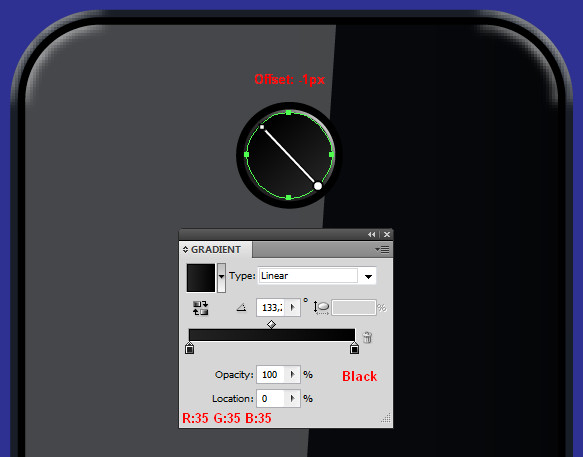
Step 11
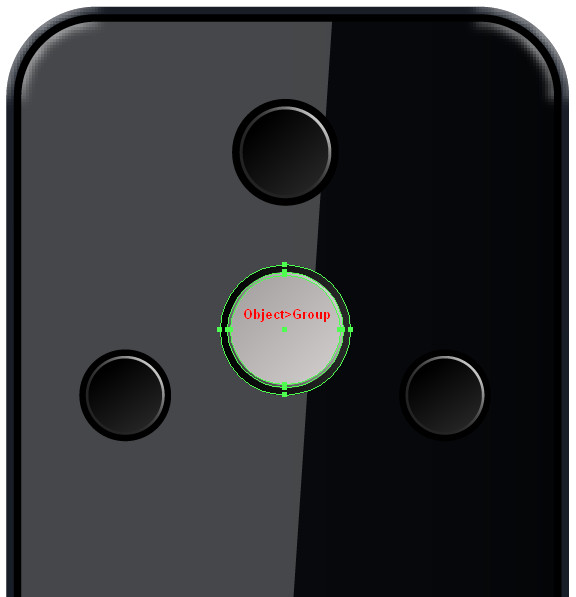
With the shape you filled with a Linear Gradient in the previous step still selected, again go to Object > Path > Offset Path. Now set the Offset to -1px and change the gradient’s colors from R=35 G=35 B=35 to black. Then group the button’s shapes by going to Object > Group (Command + G).

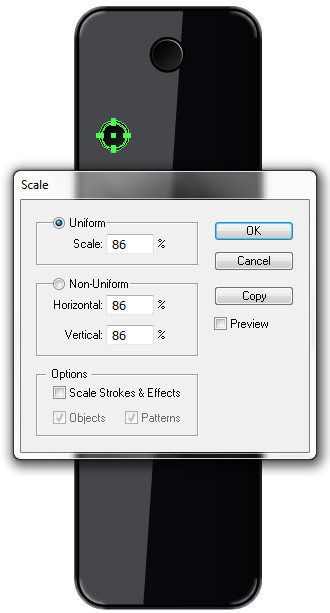
Step 12
Copy the button’s group that you created in the previous step by using Command + C followed by Command + F. Now move the copy into position as shown in the picture below and go to Object > Transform > Scale. In the new open window set Uniform Scale to 85% and click OK.
Step 13
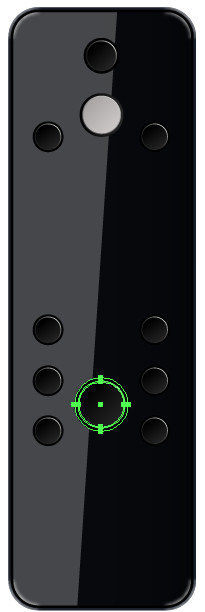
Copy the button from the previous step 7 times by using Command + C followed by Command + F. Now move the copies into positions as shown.
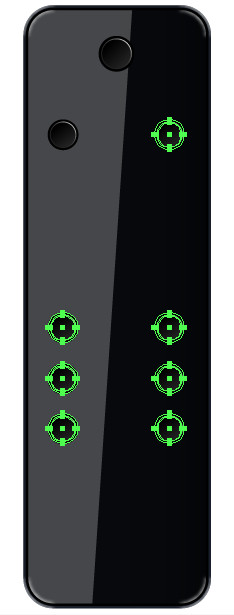
Step 14
Now we’ll continue adding the rest of the buttons the same way, as shown below:
Add the following buttons in position as shown below:
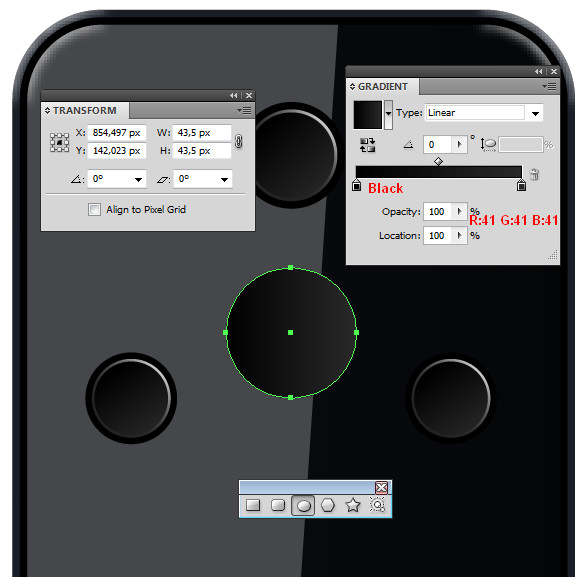
Step 15
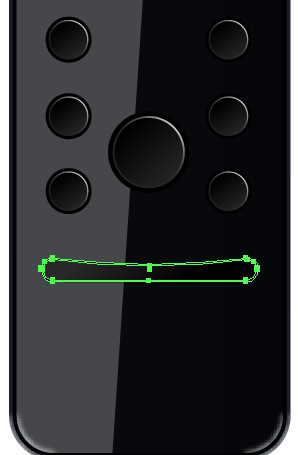
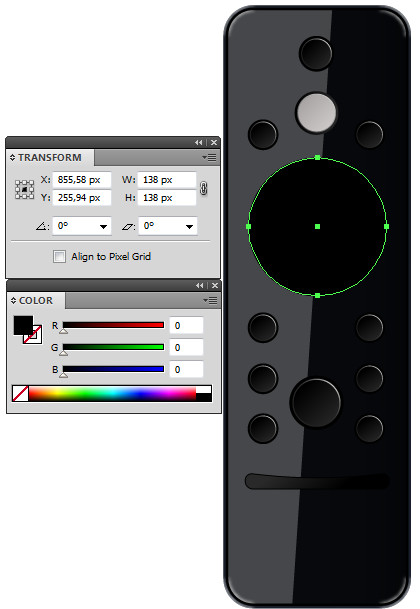
Now we have left to add just one button, which is the last one. Pick the Ellipse Tool (L), draw a circle with the size W=138px to H=138px, fill it with black color, and place it in position shown below:
Step 16
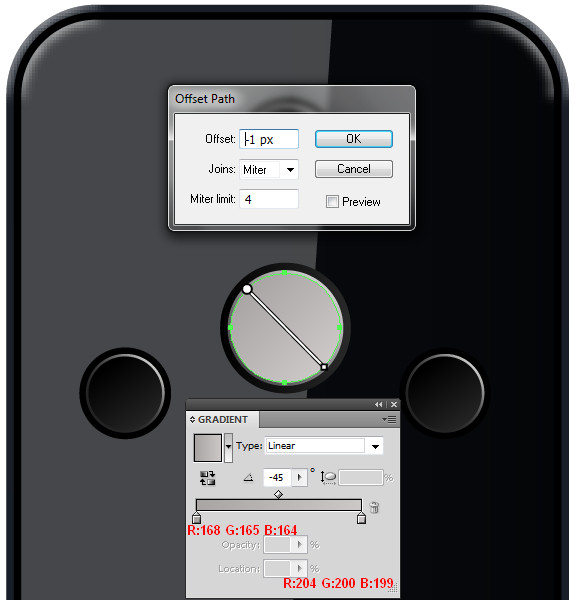
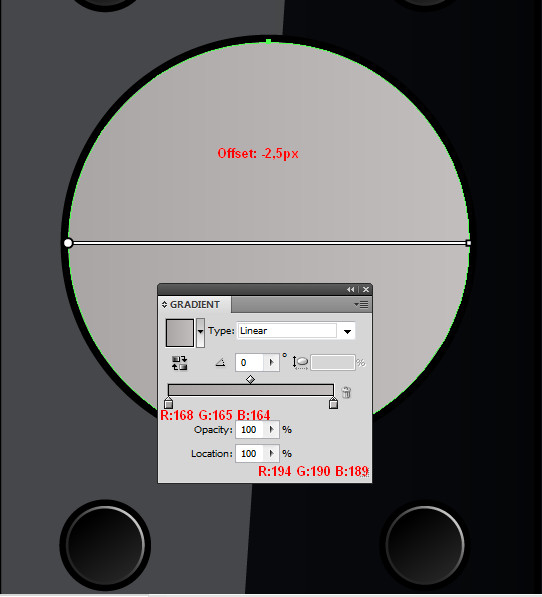
With the shape from the previous step still selected go to Object > Path > Offset Path, set the Offset to -2,5px and click OK. Now fill the new shape with a Linear Gradient with the colors R=168 G=165 B=164 to R=194 G=190 B=189.
Step 17
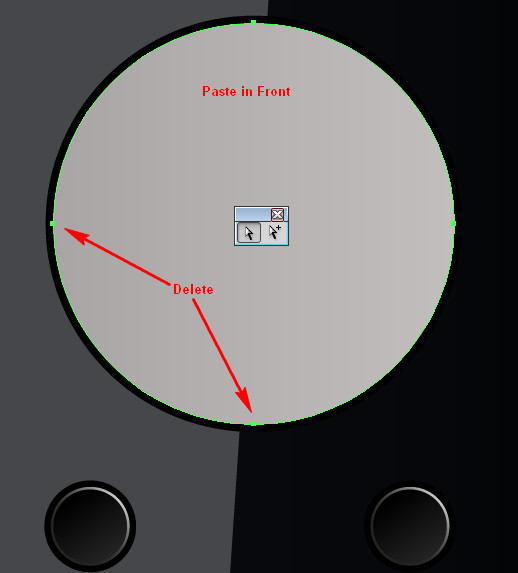
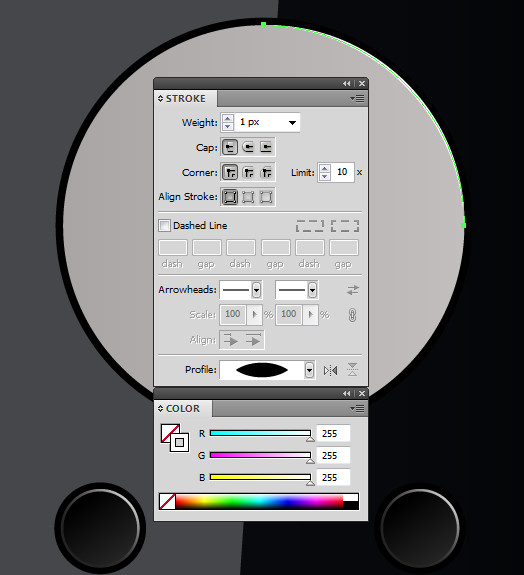
Copy the shape from the previous step by using Command + C followed by Command + F, delete the bottom and left key point of the copy with the Direct Selection Tool (A), then turn off the Fill color. Now apply a white Stroke color with 1px. To do this open use the Stroke Panel (Command + F10) and use the following settings: Weight of 1px and Profile of Width Profile.
Step 18
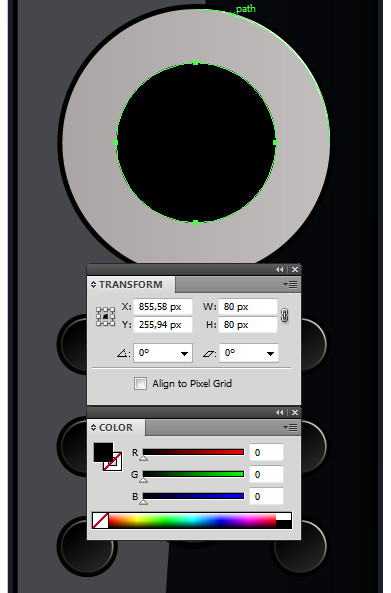
Pick the Ellipse Tool (L), draw another circle in the center of the others with the size W=80px and H=80px with a black color.
Step 19
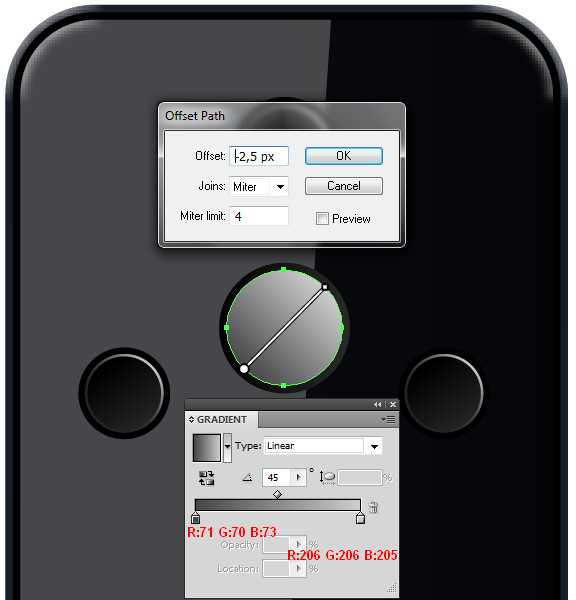
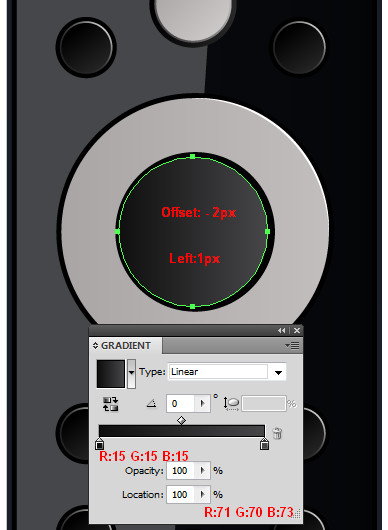
With the shape from the previous step still selected, go to Object > Path > Offset Path. Set the Offset to -2px and Click OK. Move the new shape 1px to the left and fill it with a Linear Gradient using the colors: R=15 G=15 B=15 to R=71 G=70 B=73.
Step 20
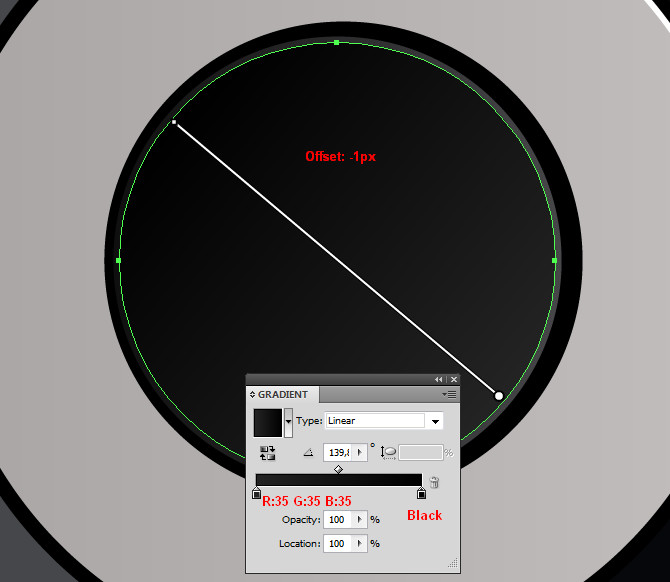
With the shape that appeared in the previous step selected, again go to Object > Path > Offset Path. Set the Offset to -1px, click OK, and fill the new shape with a Linear Gradient using the colors: R=35 G=35 B=35 to black as shown.
Now you only have left to add the necessary text on the buttons. You can also add the necessary symbol from the Symbols Panel by going to Window > Symbols. Now we are done with the player’s remote control so far. In the next steps we are going to create the HD media player.
Step 21
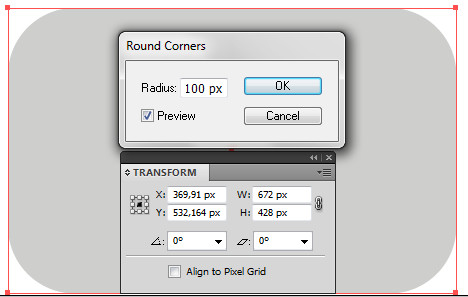
Pick the Rectangle Tool (M) and draw a rectangle the size W=672px to H=428px. Now go to Effect > Stylize > Round Corners and set the Radius to 100px, then click OK.
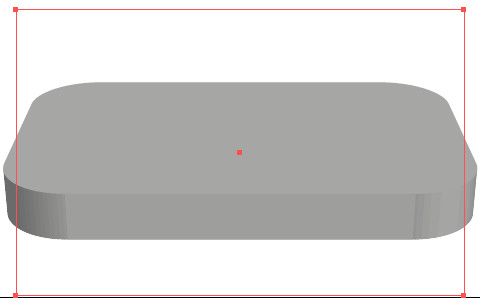
Step 22
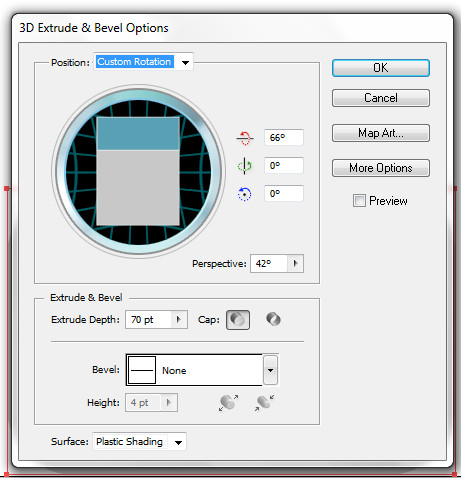
With the rectangle you rounded the corners to in the previous step still selected, go to Effect > 3D > Extrude & Bevel. Set the values as shown in the picture below, click OK, and right after that go to Object > Expand Appearance.

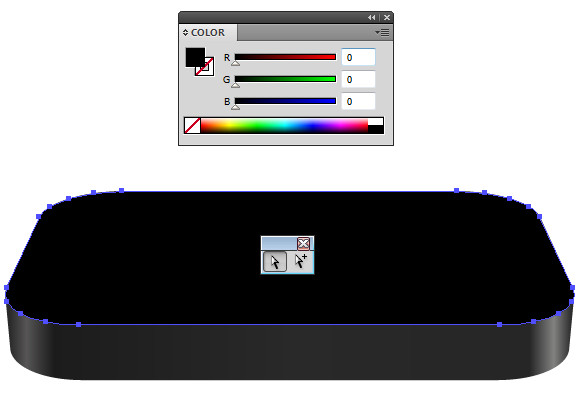
Step 23
Pick the Direct Selection Tool (A), click on the top part of the player and fill it with a black color as shown.
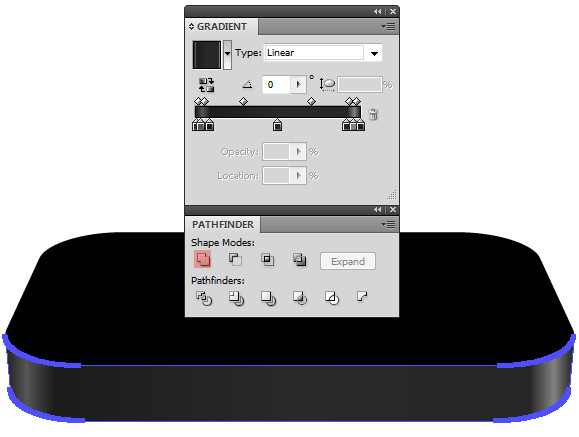
Step 24
Now select the bottom part of the player from the group and open the Pathfinder Panel. Click on the Add to Shape Area button and fill it with a Linear Gradient as shown.
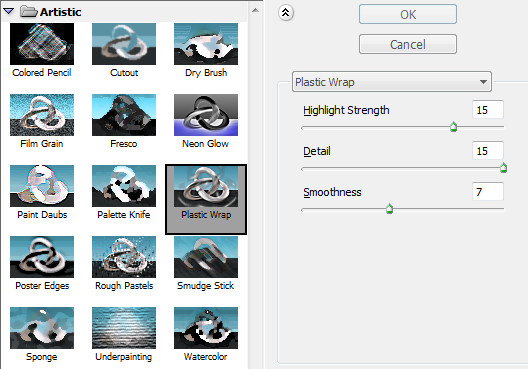
Step 25
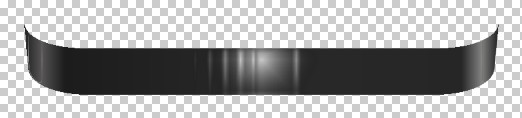
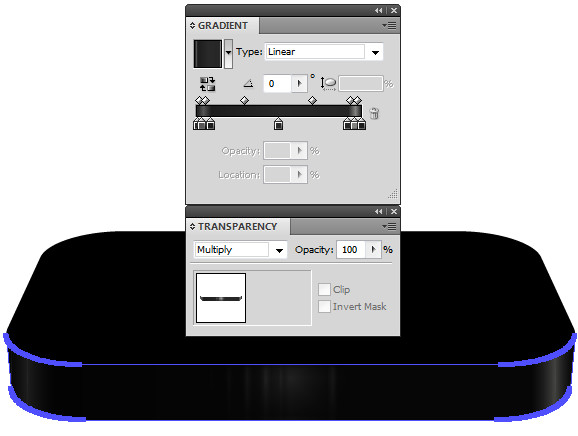
With the shape from the previous step that you filled with a Linear Gradient selected, copy it by using Command + C followed by Command + F and go to Effect > Effect Gallery > Artistic > Plastic Warp. Now in the new open window apply the values shown in the picture below. Click OK and change the Blending Mode from Normal to Multiply.
Step 26
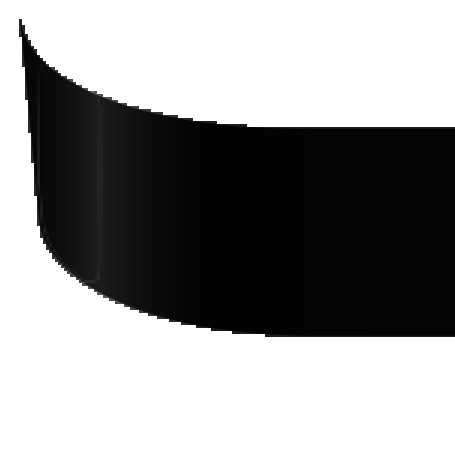
After you applied the Plastic Warp effect, you’ll notice pixels at the edges of the shape. In order to remove them, copy the shape by using Command + C followed by Command + F. Now open the Appearance Panel, remove the Plastic Warp effect, then select the shape with the applied Plastic Warp effect and the shape on top. Now apply Object > Clipping Mask > Make.

Step 27
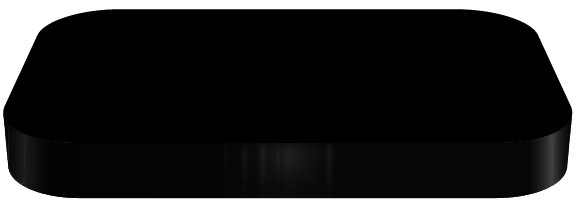
Select the shape from Step 24, copy it by using Command + C followed by Command + F, and move it over the other shapes. Now go to Object > Arrange > Bring to Front, then with the Direct Selection Tool (A) select the bottom key points and press Delete on the keyboard.
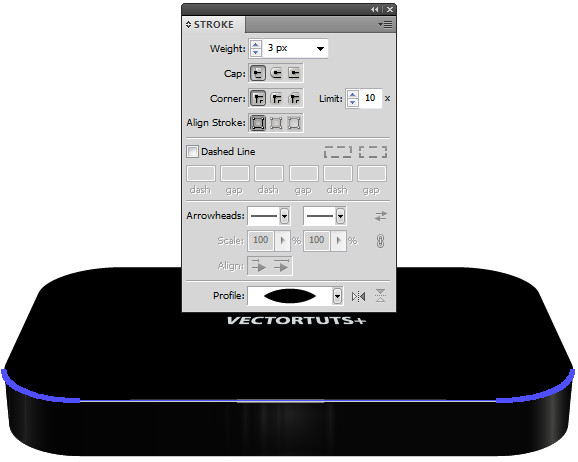
Step 28
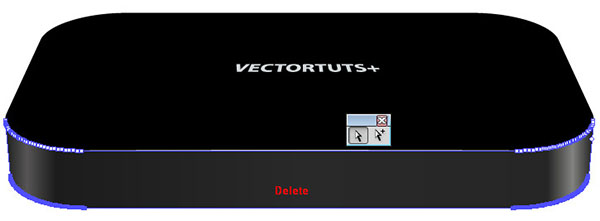
With the shape that appeared in the previous step still selected, turn off the Fill color and apply a Stroke of 3px with the color: R=206 G=206 B=206.
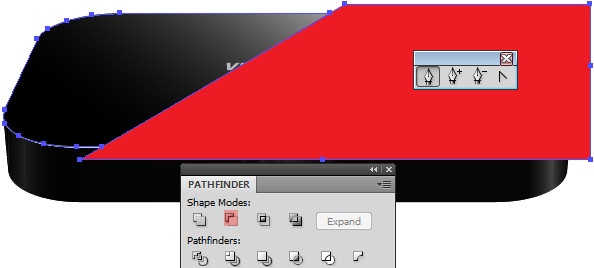
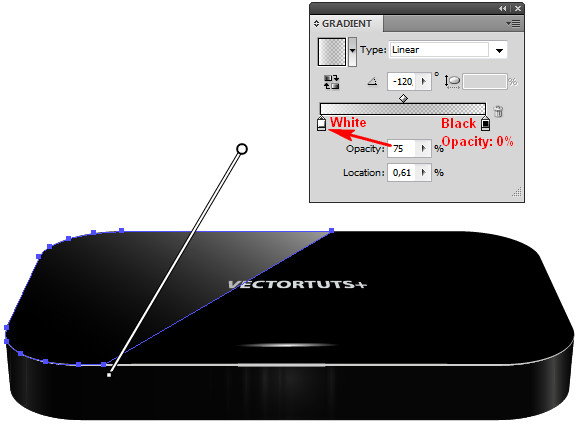
Step 29
Select the top part of the player that you filled with a black color at the beginning, copy it by using Command + C followed by Command + F. Use the Pen Tool (P) to make a shape shown in the picture below, then select the copy and the shape you just made. Now open the Pathfinder Panel, click on the Minus Front button, and fill it with a Linear Gradient as shown.
Step 30
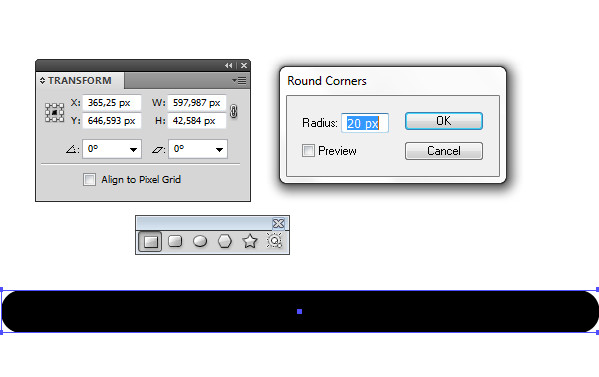
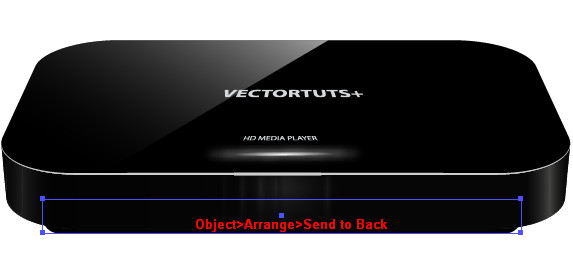
Pick the Rectangle Tool (M), draw a rectangle with size and rounded corners of 20px as shown. Fill the shape with a black color and send the shape under all others by going to Object > Arrange > Send to Back. Now place the shape in position as shown.
Step 31
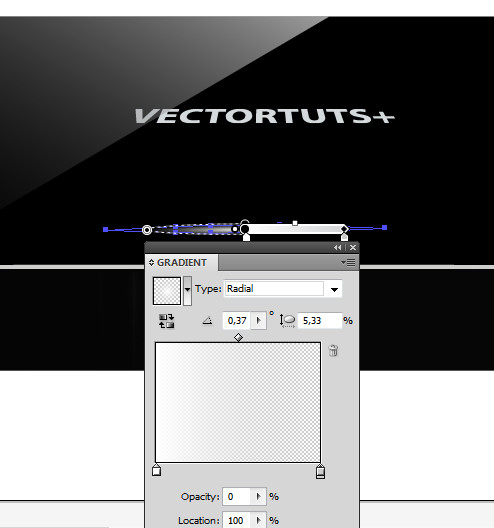
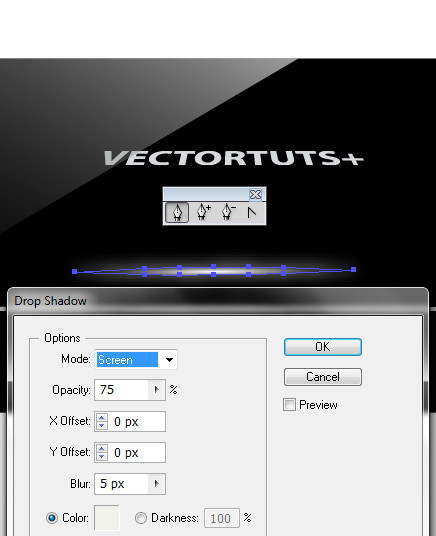
Pick the Pen Tool (P), make a shape at the center of the player as shown in the picture below, fill the Radial Gradient as shown and apply Drop Shadow with values as shown below:
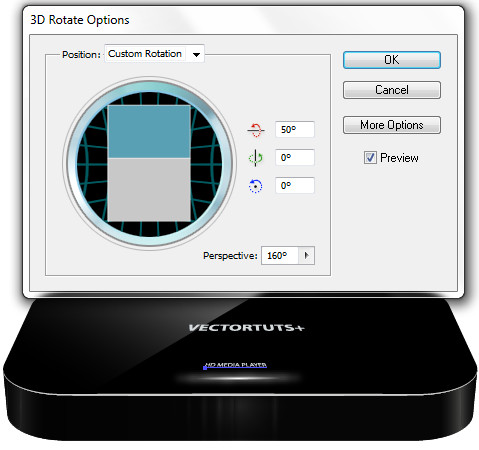
Step 32
Now all you have left to do is to add the necessary text on the player. After you’ve written the necessary text go to Effect > 3D > Rotate. Set the values as shown in the picture below and click OK.
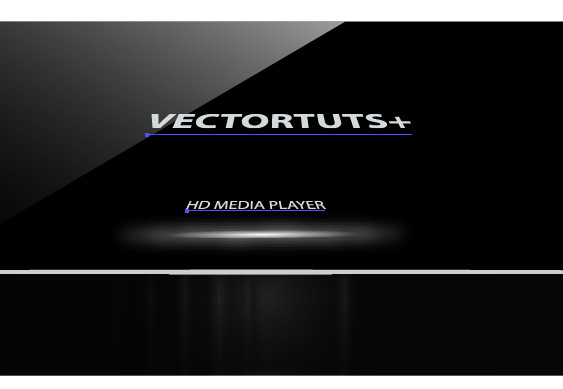

Conclusion
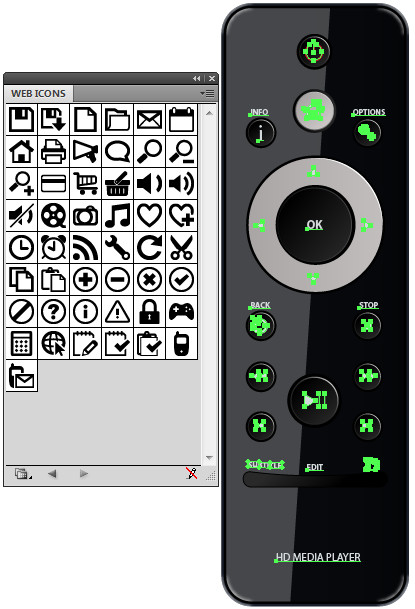
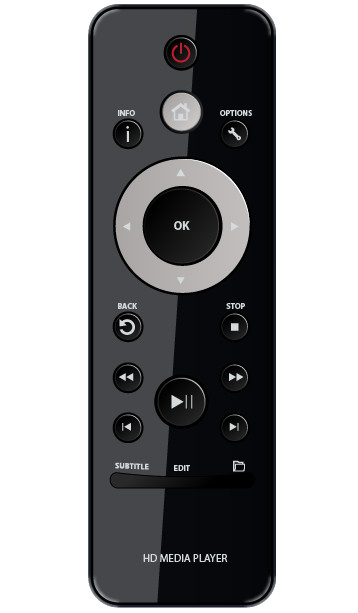
And at the end you can add a background, shadow and reflection in the way you want. Here is the final result: