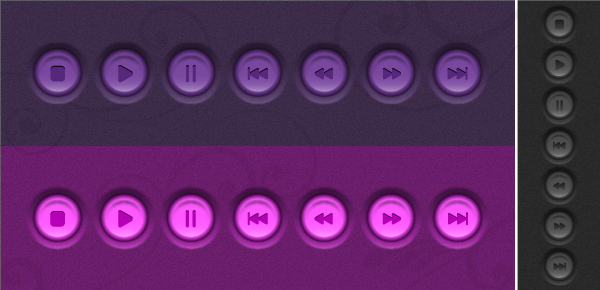
Follow this new quick tip and learn how to draw a set of player buttons, purple and pink style this time because gray and black may be a bit boring sometimes. They are easy to make and we will use effects like Outer Glow, Gaussian Blur, Transform and the Blend Tool.
Step 1
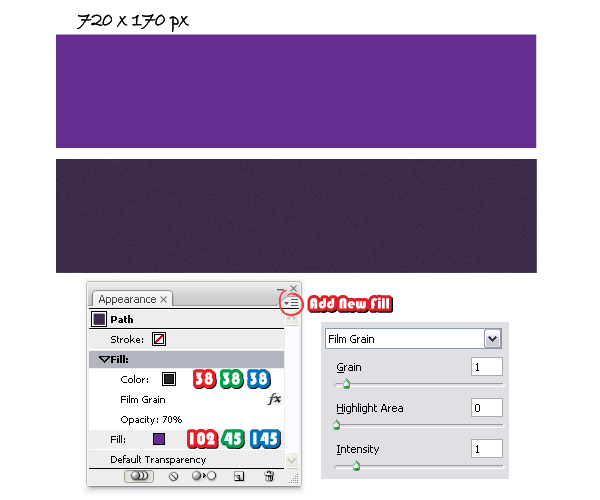
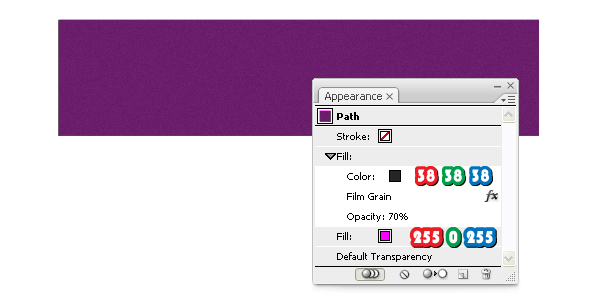
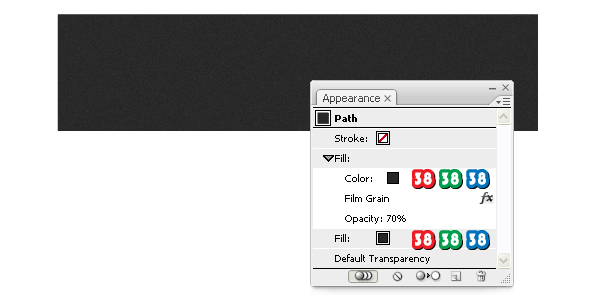
Open a new web document. The outer circle of the buttons is semi-transparent so the background is important this time. Take the Rectangle Tool (M) and draw a 720 x 170 px rectangle then select purple as the fill color. Go to the Appearance Panel and from the fly-out menu choose Add New Fill. Change this second fill color to dark gray (85% black) then go to Effect menu > Artistic and apply the Film Grain effect. Lower the Opacity to 70% and the background is ready.
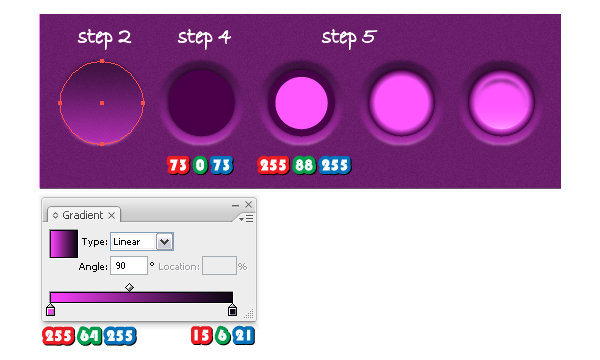
Step 2
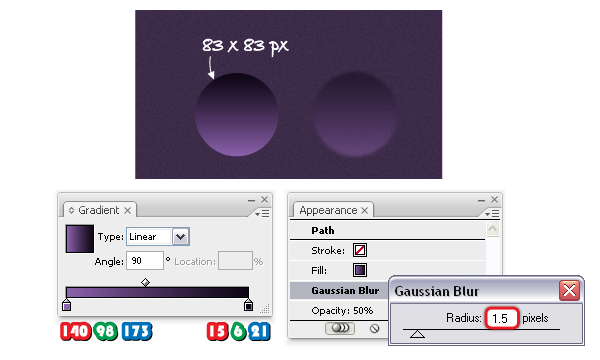
Take the Ellipse Tool (L) and draw an 83 x 83 px circle. Fill it with the linear gradient shown and change the angle value to 90 degrees. Next, go to Effect menu > Blur > Gaussian Blur and apply a 1.5 px Radius. Reduce the Opacity to 50% to make the circle semi-transparent.
Step 3
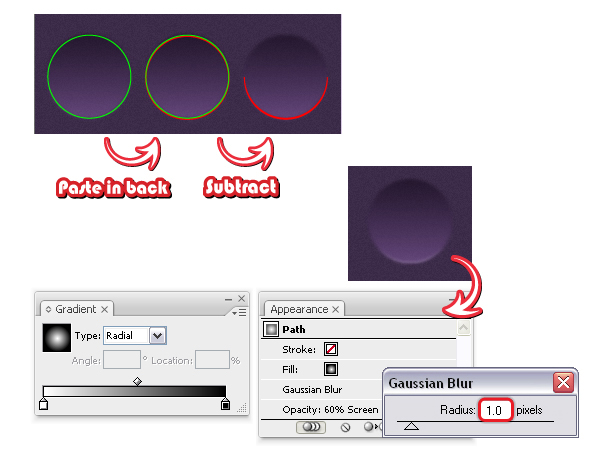
Copy and Paste in front the first circle and remove the existing appearances. Copy and Paste in back the new circle (green) to get another circle (red). Before you continue, go to Edit menu > Preferences > General and set the Keyboard Increment to 0.5 px. Now, select the red circle and move it a bit by pressing two times the Down Arrow key on your keyboard. Select both circles and click Subtract from shape area > Expand from the Pathfinder Panel.
Send the resulting shape in back and fill it with a radial gradient from white to black. Next, go to Effect menu > Blur > Gaussian Blur and apply a 1 px Radius then change the Blending mode to Screen (black becomes transparent). Reduce the Opacity to 60%.
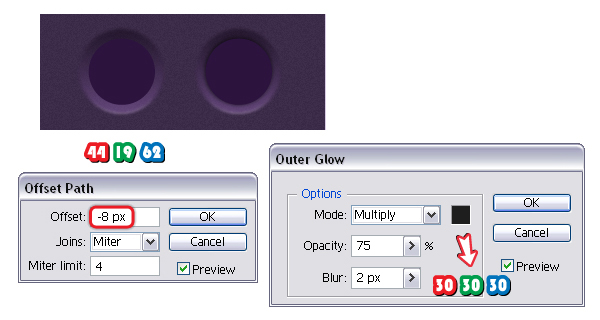
Step 4
Having the first circle selected, go to Object menu > Path > Offset Path and apply a -8 px Offset value to obtain the smaller circle. Remove the existing appearances and fill it with the purple shade indicated. Go to Effect menu > Stylize and apply the Outer Glow effect using the settings shown. This way you will obtain a discrete shadow around this second circle.
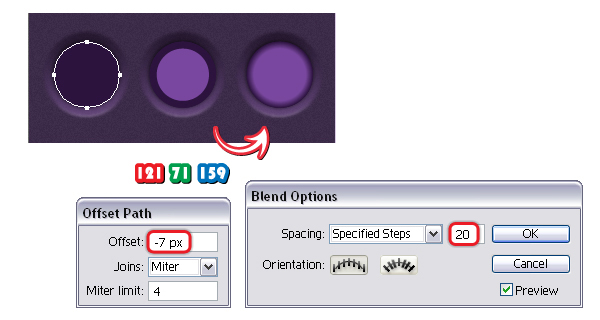
Step 5
Copy and Paste in front the second circle, keep the fill color but remove the Outer Glow effect from the Appearance Panel. Having this new circle selected, go to Object menu > Path > Offset Path and apply a -7 px Offset value to obtain a smaller circle again. Change the fill color to purple. Now select both circles obtained at this step, go to Object menu > Blend > Blend Options and choose 20 Specified Steps then go back to Object menu > Blend and select Make.
Step 6
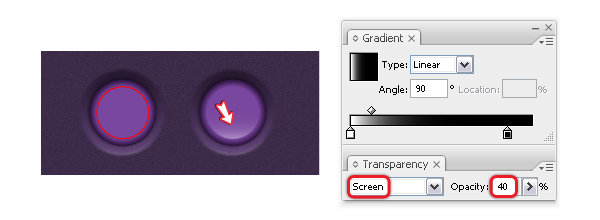
Next, go to the Layers panel and select the smaller purple circle from the Blend group and Copy and Paste it in front but drag it outside the Blend group because we don’t want it there. Fill the new circle (red) with a linear gradient from white to black and change the angle value to 90 degrees. Change the Blending mode to Screen (black becomes transparent) and lower the Opacity to 40%.
Step 7
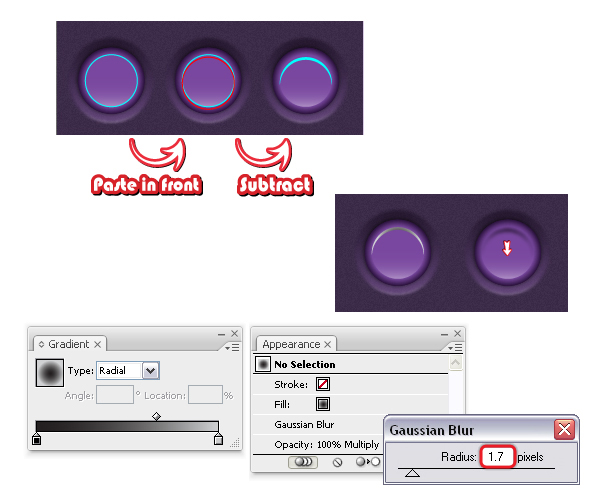
Copy and Paste in front the last circle and just give it a blue stroke. Now, Copy and Paste in front the blue circle to obtain the red circle then move it by pressing the Down Arrow key on your keyboard five times (the keyboard Increment is still set to 0.5 px). Having both circles selected, press Subtract from shape area > Expand from the Pathfinder Panel then fill the resulting shape with a radial gradient from black to gray. Next, go to Effect menu > Blur > Gaussian Blur and apply a 1.7 px Radius then change the Blending mode to Multiply. Press two or three times the Down Arrow key on your keyboard to move this moon-shape a little below.
Step 8
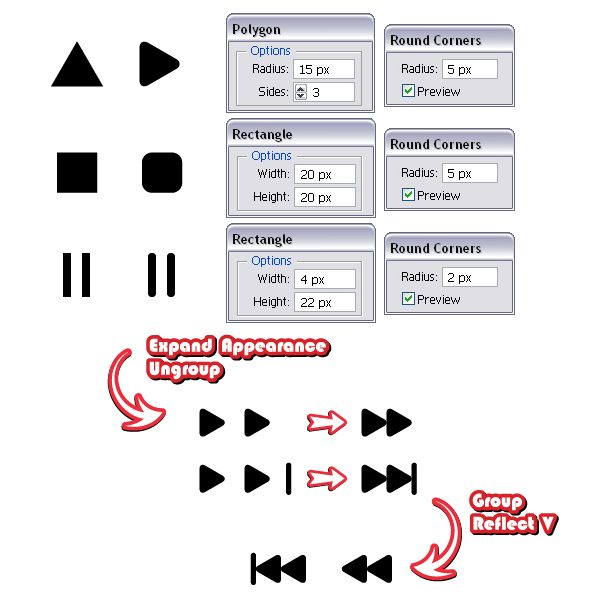
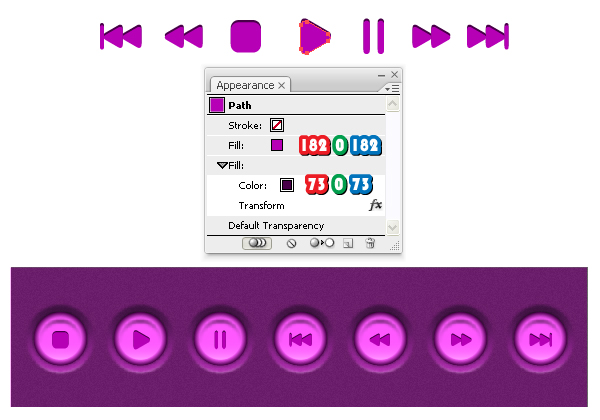
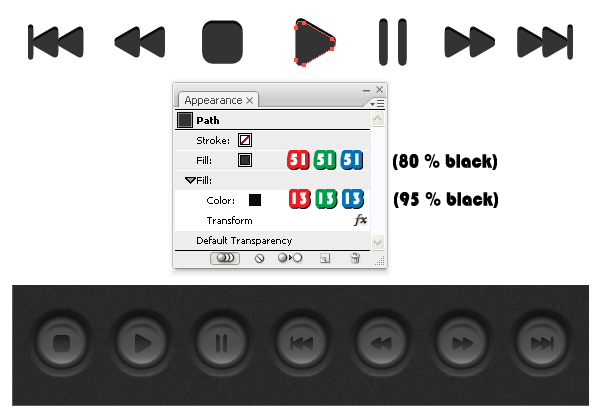
Let’s continue with the player’s symbols. For the Play symbol take the Polygon Tool, click on your artboard and enter the values shown to obtain a triangle. Rotate it minus 90 degrees then go to Effect menu > Stylize > Round Corners and apply a 5 px Radius. For the Stop symbol draw a 20×20 px square using the Rectangle Tool (M) then apply again the Round Corners effect. The Pause symbol is made from two thin rectangles (4×22 px) and this time select a 2 px Radius when you apply the Round Corners effect.
Next, select the Play, Stop and Pause symbols and from the Object menu select Expand Appearance then Ungroup. Scale and multiply the Play symbol and use it along with the Pause symbol to create the Play Faster and Play Next symbols as shown below. When they are done, group the shapes that compose them then go to Object menu > Transform > Reflect, select Vertical and press Copy. This way you will get the symbols Play Slower and Play Previous.
Step 9
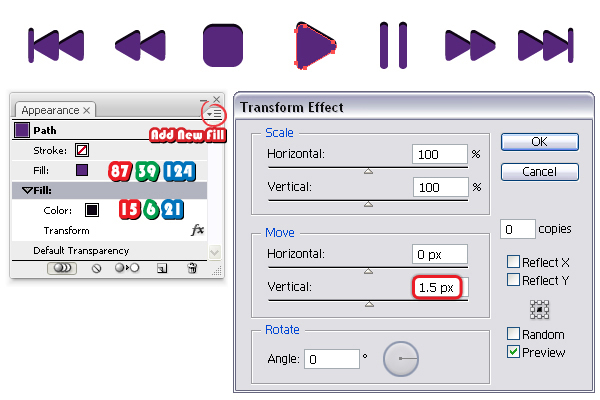
Fill the Play symbol with the purple shade indicated then go to the Appearance Panel and from the fly-out menu choose Add New Fill. Change the second fill color with the one shown then go to Effect menu > Distort&Transform > Transform effect and in the Move section, Vertical select 1.5 px. Do the same thing for the rest of the symbols.
Step 10
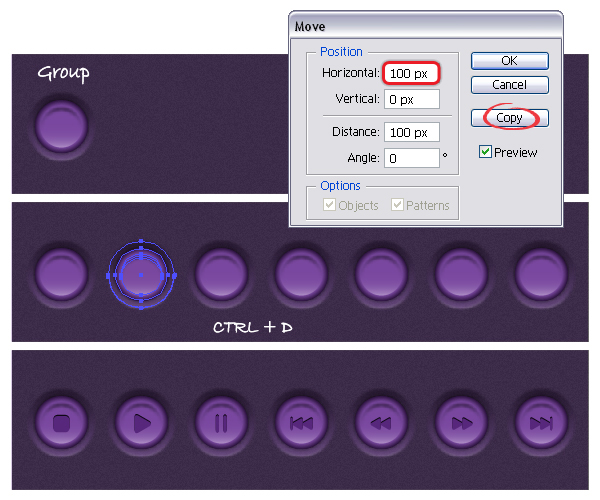
Let’s go back to the button from step 7. Group all the shapes that compose it then go to Object menu > Transform > Move. Choose to move the button 100 px horizontally then press Copy. Now, press Command +D (Transform Again) to repeat this action five times. All that is left to do is to arrange the symbols and you are done.
Step 11
The background behind the pink buttons is the same as the purple background. You can simply make a copy then replace the two fill colors with the ones indicated.
To create the pink buttons all you have to do is to replace the purple shades with pink shades. In the image below you can see the main steps and the colors that you have to change. If other colors or gradients are not mentioned here means that they remain the same.
Also change the two fill colors for the symbols as indicated. Now repeat the step 10 and the pink symbols are ready.
Step 12
If you don’t like girlish colors you can create the black version. Start with the background and replace the fill colors…
….then replace the purple shades of the buttons with gray shades as indicated below.
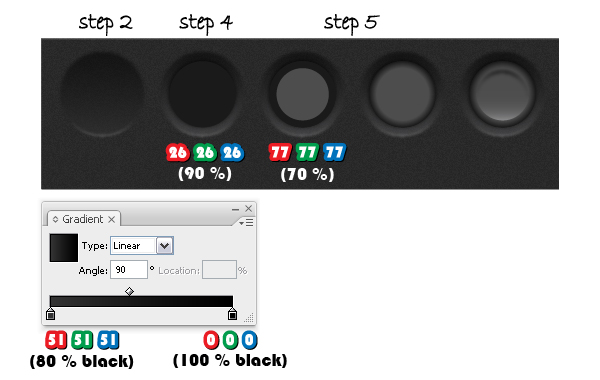
Also replace the two fill colors for the symbols then place them on top of the buttons and you are done.
Final Image
Here is the final image. I dare you to create these buttons using other colors that you like and then let me know how they turned out. Just make sure you match the buttons with the background color since the bigger circle is semi-transparent. Also, if you want to scale these buttons remember to expand all the effects used before you do this.