Today we will take a closer look at the creation of a seamless texture using Adobe Photoshop and Adobe Illustrator. It can be done much easier than it seems at the first glance. All you need to do is to follow the steps from this tutorial. Let’s start!
Step 1
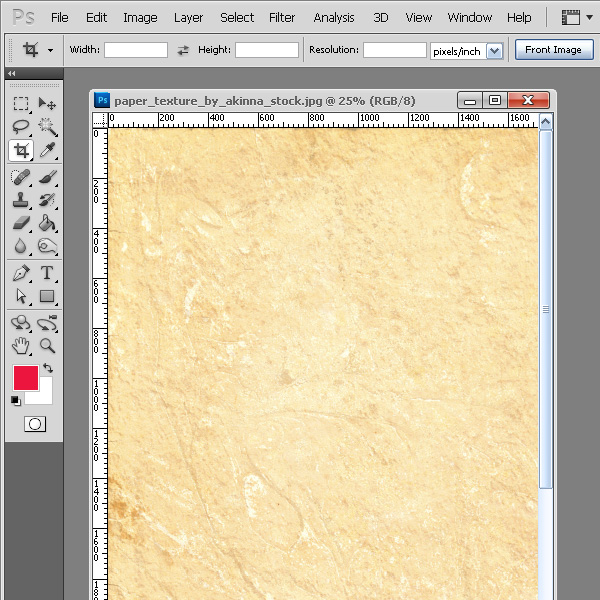
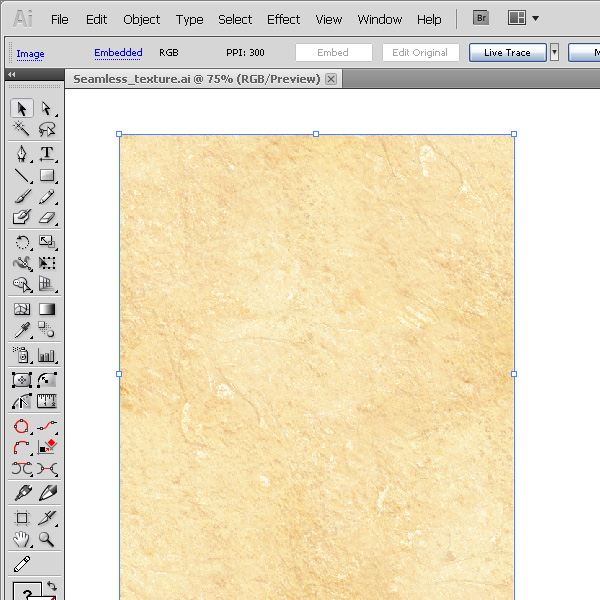
We are going to create the seamless vector texture based on the raster image. That’s why the first steps of this tutorial will be made in Adobe Photoshop. The paper photo texture will be used for the texture. You can download them here (credit to deviantART user ~akinna-stock). Open this image in Photoshop.
Step 2
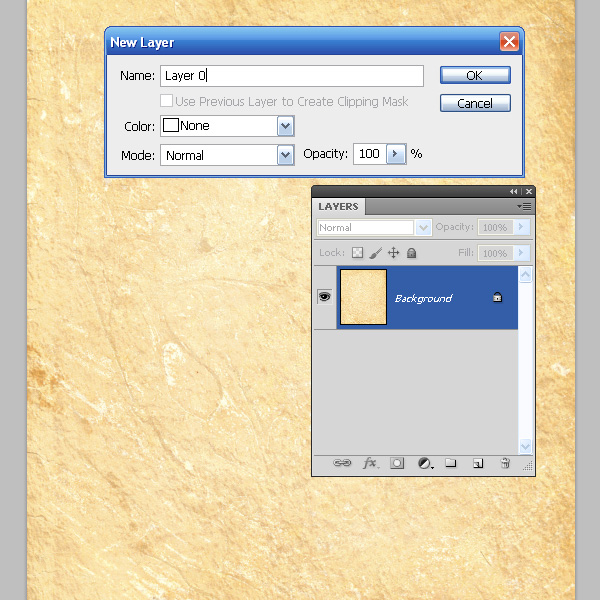
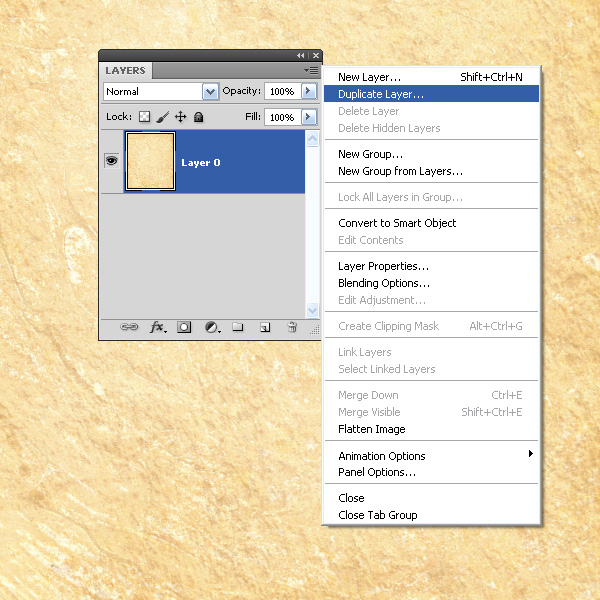
There are a couple of ways of creating a seamless textures in Photoshop. We will take a closer look at one the seamless textures, which, I think, fits best to our texture. Convert the Background layer into the regular layer – click twice on it in the layers panel and click on the OK button in the opened dialog box.
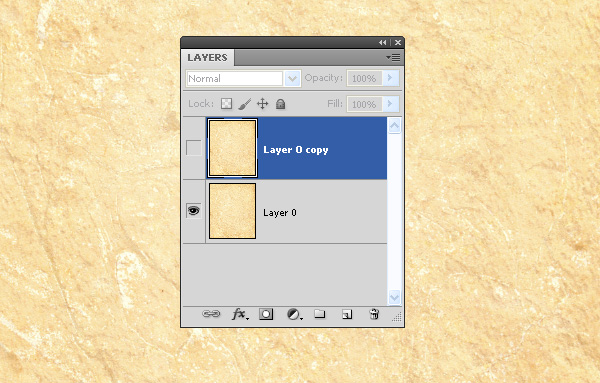
Duplicate this layer while selecting the appropriate item in the Layers menu.
Turn off the visibility of the upper layer.
Step 3
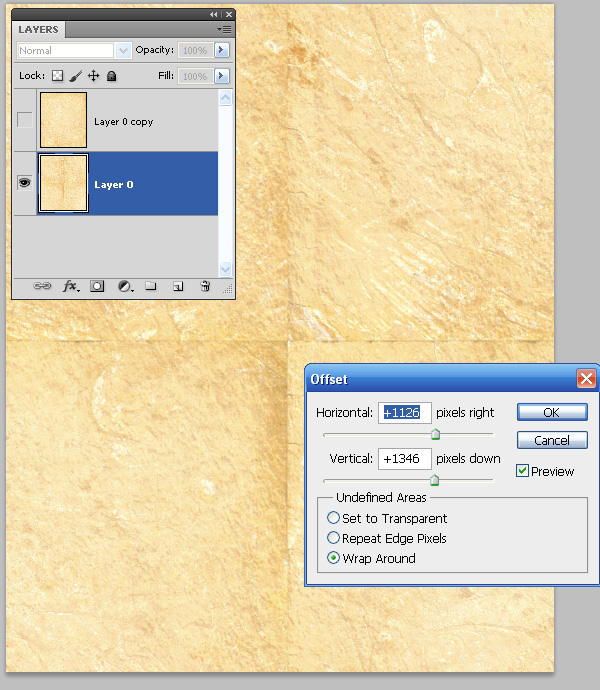
Select the lower layer, go to the Filter > Other > Offset and set the value of the horizontal and vertical displacement in such a way, that the matching point of the image would be placed somewhere in the center of the artboards.
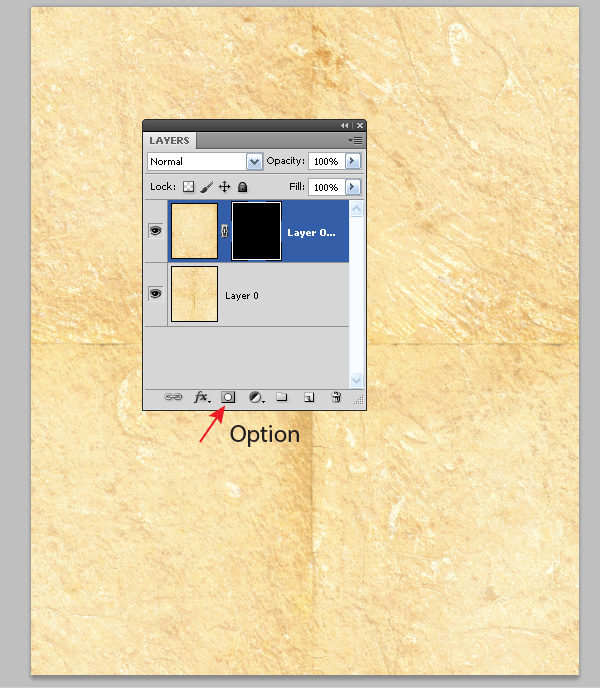
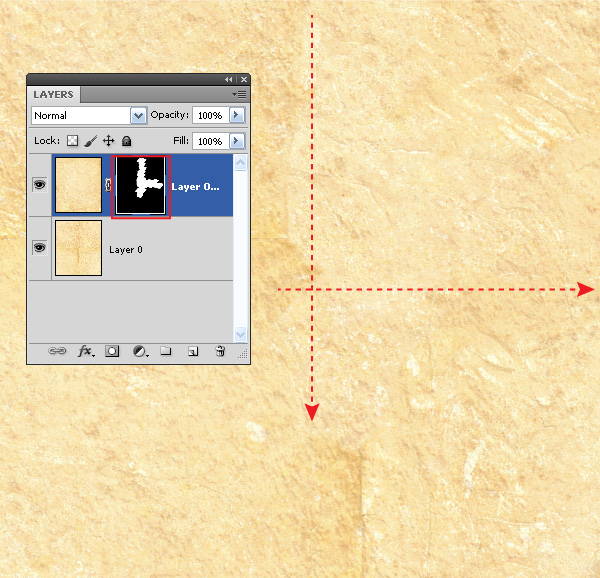
Turn on the visibility of the upper layer and create the black mask for it. To do so, click on the Add Mask button in the lower part of the Layers panel while holding the Option key.
Step 4
Take the Brush Tool (B) and open the Brush panel (F5). Choose the brush with jagged edges and set the white color for the Foreground.
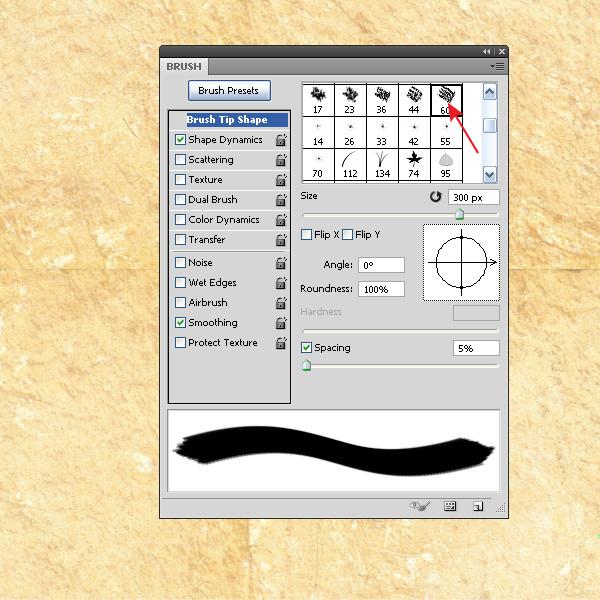
Note, if you want to change the size of the brush, use the "Left Square Bracket" and the "Right Square Bracket"
keys. Now make some brush strokes on the joints leveling the transition between the edges of the image (there should be chosen the black mask of the upper layer in the Layers panel).
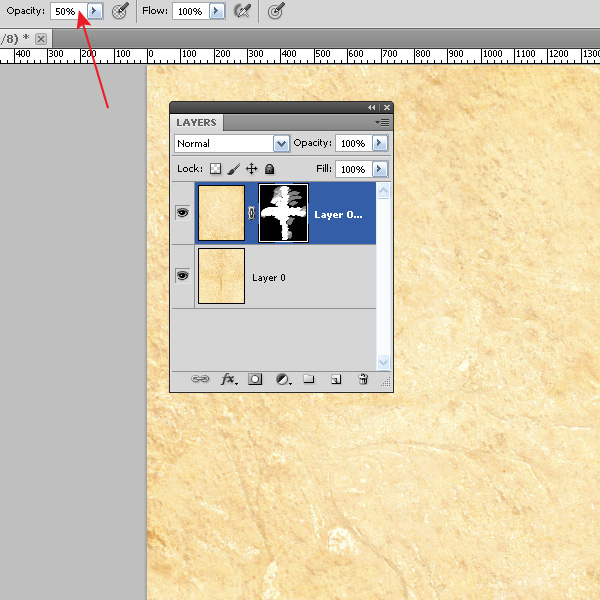
You can also change the transparency of the brush to give a more uniform outlook to the whole texture.
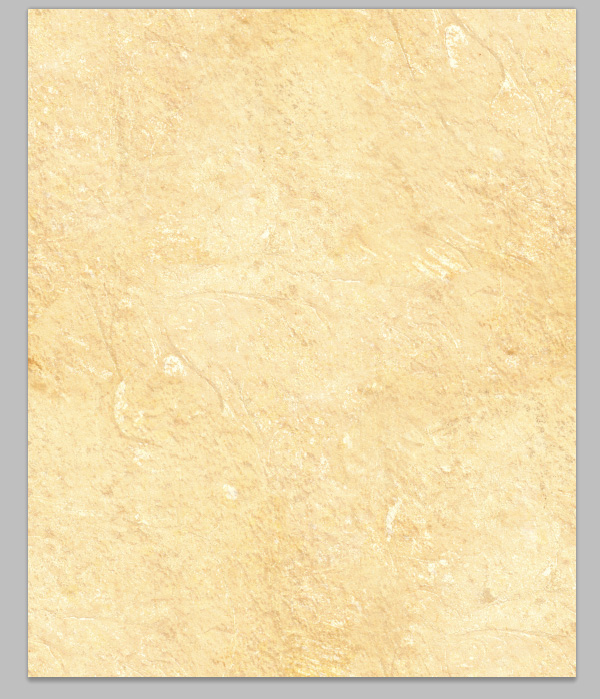
Now merge the layers.

Step 5
Start Adobe Illustrator and create a new document. Now drag the texture from Photoshop into Adobe Illustrator.
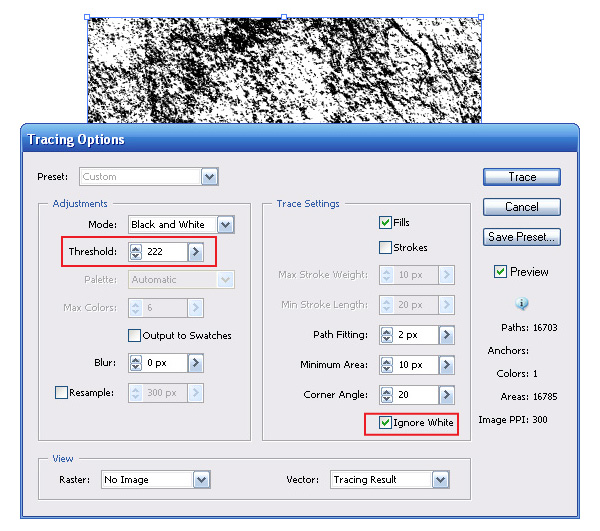
Convert the raster image into the vector objects. Keep the texture selected and go to the Object > Live Trace > Trace Options and set the parameters which are indicated on the picture below.
Step 6
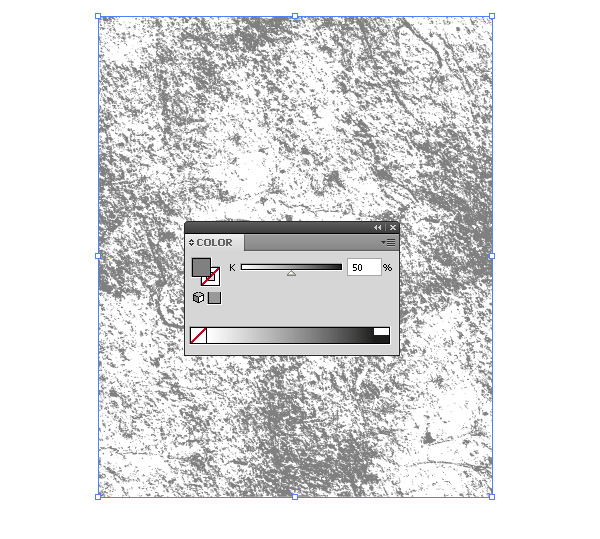
Now go to the Object > Expand and color the elements of the texture into the neutral grey color.
Let’s check whether we have really created the seamless texture. Go Edit > Define Pattern.
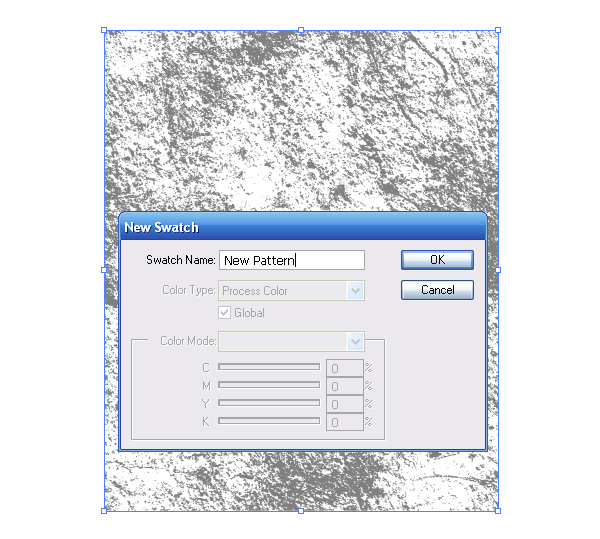
A new pattern in the Swatches panel was created with this action.
Step 7
Let’s create a rectangle, size of which is bigger than the size of the texture; apply the pattern, which was created in the previous step, to it.
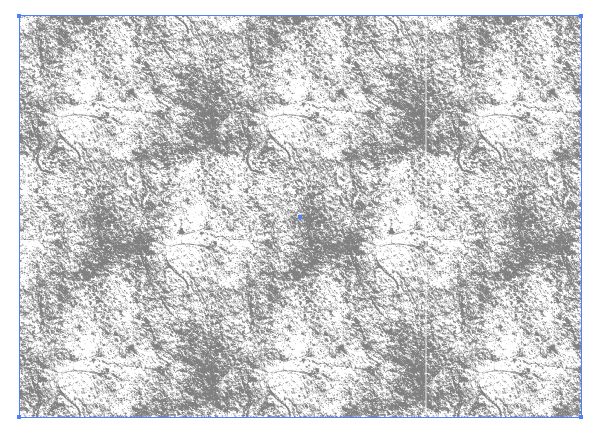
As you can see, the texture is seamless.
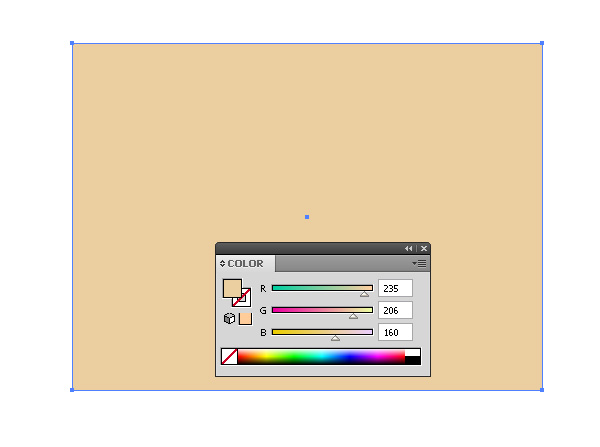
Step 8
Now let’s check out how you can use the created seamless texture in your projects. Create a rectangle with the necessary color fill with the help of the Rectangle Tool (M).
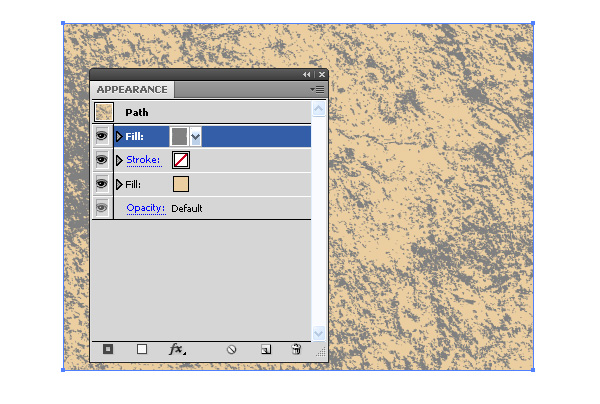
Add the new fill into the Appearance panel and apply the seamless pattern to it.
Step 9
Change the Blending Mode of the texture into the Screen or the Multiply depending on what results you are trying to reach.
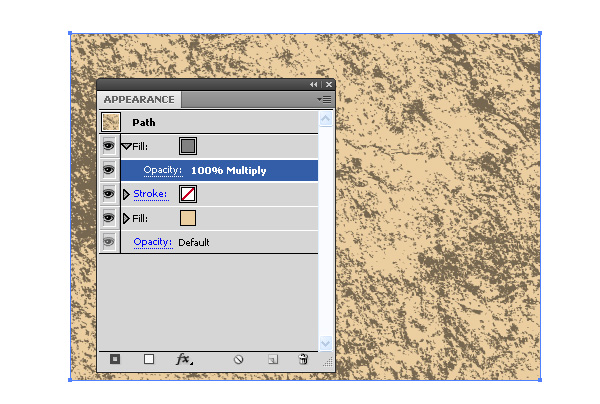
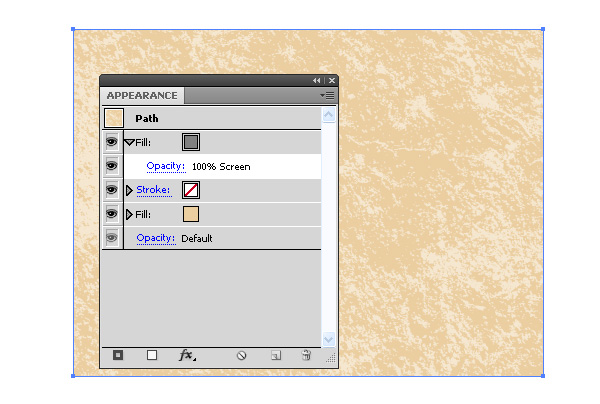
You can also edit the intensity of the texture while changing the opacity of this fill.

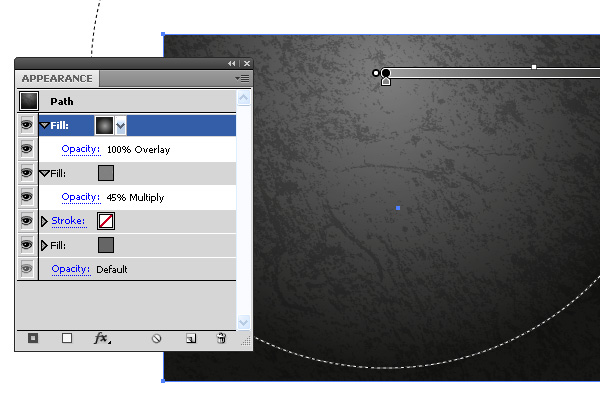
Step 10
You can get interesting effects while using the gradient fills and different Blending modes in the Appearance panel.
Conclusion
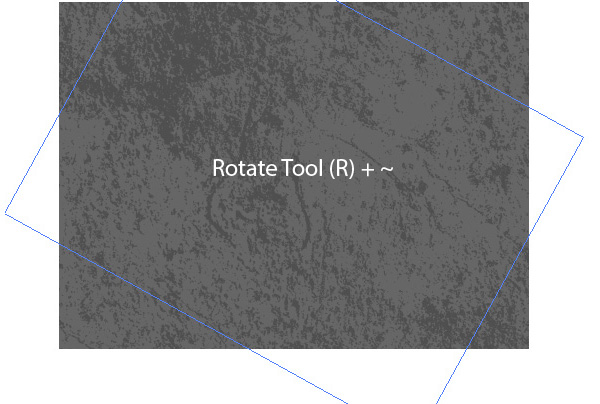
As a conclusion, I would like to give you a small tip on how to edit the patterns. You can transform them with the Direct Selection Tool (A), the Rotate Tool (R) or with any other tools of transformation. If the button ~ is held, while the one of these tools is applied, then the transformation will be made only with them. The object, to which the pattern was applied, will stay unchanged.