Image may be NSFW.
Clik here to view.
Image may be NSFW.
Clik here to view.
Clik here to view.
Inspired by the London 2012 Olympics, I’m going to show you how to create a running track in less than 10 minutes using a custom Art Brush and Shape Tools.
Introduction
Being a UK resident, you can’t turn on the TV, radio, go shopping etc… without mention of the Olympics, I’m just thankful I’m not living in London! So inspired by this great sporting event, I’m going to show you how to create a running track in less than 10 minutes. So let’s get to it!
Step 1
Use the Rectangle Tool (M) to draw an even square by holding down on Alt + Shift and pulling outwards. Give it a black fill with a null stroke. Use the Line Segment Tool (\) to a horizontal 2pt Stroke Weight white line at the near top and bottom of the square.
Clik here to view.

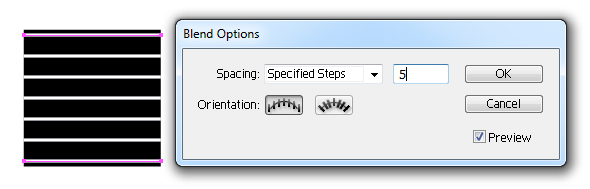
Select both lines and then create a Blend with them (Command + Alt + B). Go to Object > Blend > Blend Options to change to "Specified Steps" and the value "5". This will add "5" lines in between our original two, to create six tracks.
Clik here to view.
Add a 2pt vertical line towards the right side of your tracks.
Clik here to view.

Step 2
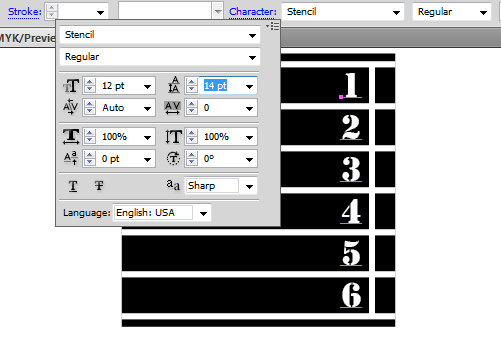
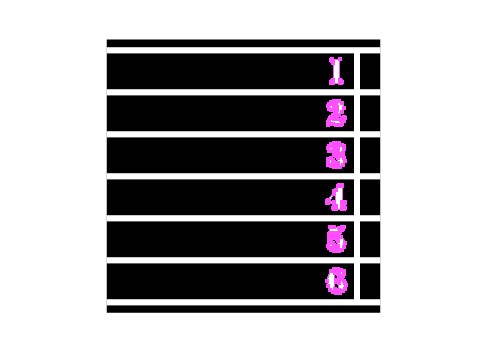
Use the Type Tool (T) and click in the center of one of the tracks. I’ve put the numbers "1" to "6" on each line and used the Leading options in the Character screen to space them accordingly. I’ve used the standard Stencil typeface, so no need to download from an external source.
Clik here to view.
Once I’m happy with my numbers, I’ve went to Object > Expand.
Clik here to view.
Step 3
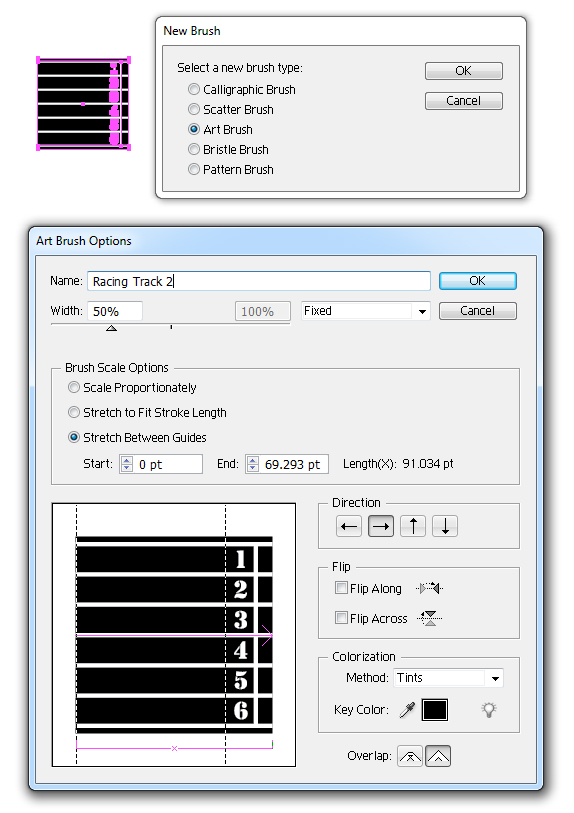
Now to create two different Art Brushes. The first will be just the white line blend and black square, so hide the numbers and vertical line. Go into the Brush panel and click on New Brush. In the dialogue box, select "Art Brush" and click on Ok. Use the settings below.
On the off chance that I may use this brush again, I gave my running track a black background. This is so it can make use of the Colorization Method "Tints" which will change any black to the line color selected when you’re using it.
Clik here to view.

The second Art Brush will have the vertical white line and numbers unhidden. The only difference when adding the brush is the setting Brush Scale Options is set to "Stretch Between Guides". The start and end of the guides does not include where the numbers and vertical line is, as we’re just wanting to stretch the tracks.
Clik here to view.
Step 4
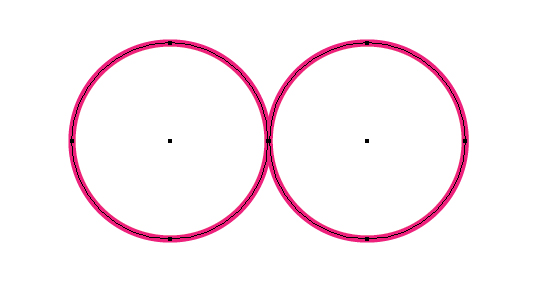
I’m going to create the track shape. Draw an even circle using the Ellipse Tool (L) and then duplicate it. Line it up as shown below.
Clik here to view.
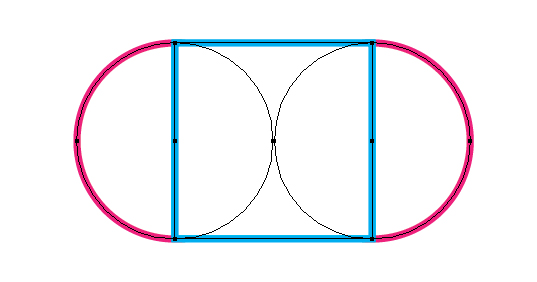
Use Smart Guides (Command + U) to help you draw a Rectangle (M) between the upper and lower points of the circles.
Clik here to view.
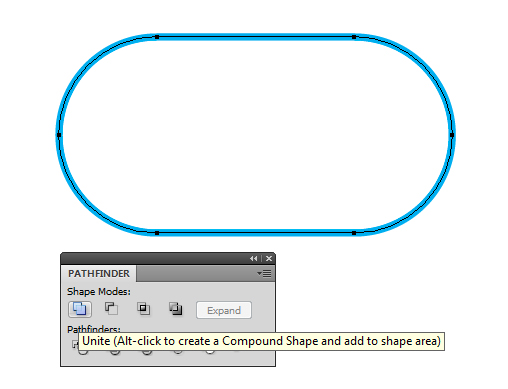
Step 5
Combine all the shapes by selecting all three shapes and using Pathfinder > Unite.
Clik here to view.
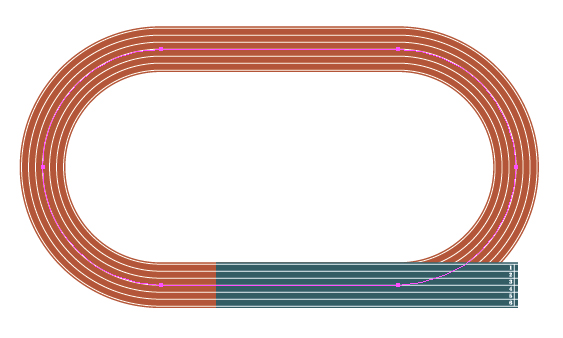
Step 6
Apply the racing track without the numbers on the overall rounded track shape and then apply the racing track with the numbers on a horizontal line along the bottom, drawn with the Line Segment Tool (\). I’ve used the stroke color C=6, M=70, Y=76, K=26.
Clik here to view.
To allow the lines to overlap each other add a copy on top and below the rounded track shape. Set the top line to Blending Mode Lighten, which will only make visible the white lines of your track.
Clik here to view.

Step 7
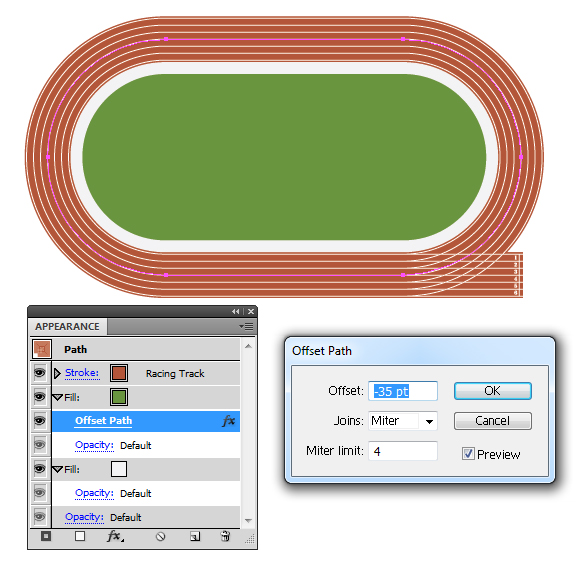
In the Appearance panel, I’ve added two fills. First an off white fill border and then a green (C=64, M=23, Y=100, K=6) fill which is Effects > Path > Offset Path > Offset -35pt for the grass.
Clik here to view.
Step 8
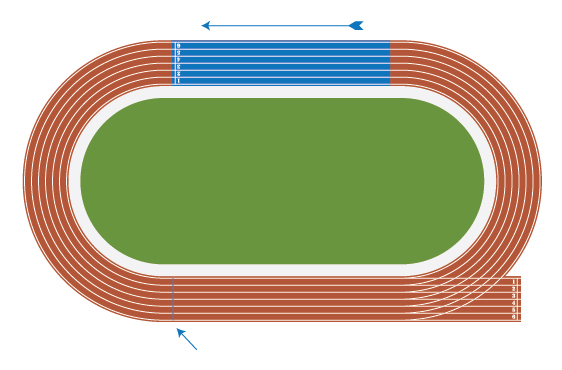
To finish off the track, I’ve added an additional white vertical line along the bottom for a finish line and an addition numbered track along the top, again set to Blending Mode Lighten. Note the direction of how I’ve drawn the upper track, to ensure the numbers line up to the bottom track… for example the inside track should line up as track 1 and the outer as track 6.
Clik here to view.
Conclusion
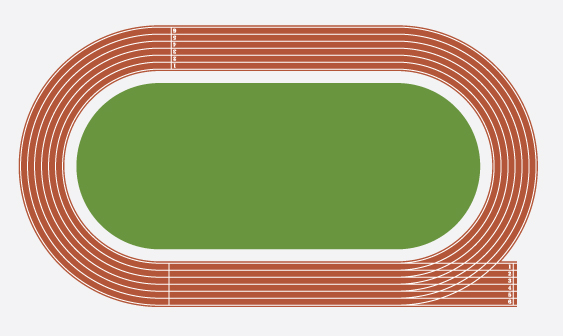
I hope you’ve enjoyed today’s tutorial and are able to create your own Olympic inspired graphic with my favourite, the Art Brush.
Clik here to view.
Clik here to view.
Clik here to view.
Clik here to view.
Clik here to view.
Clik here to view.
Clik here to view.