In today’s tutorial, I’m going to show you how to create a notepad spiral pattern brush to then use in a notepad styled background. It’s quick, easy and has many uses.
Introduction
In today’s tutorial, I’m going to show you how to create a quick notepad spiral pattern brush to then use in a notepad styled background. There really isn’t much to it, so let’s begin!
Step 1
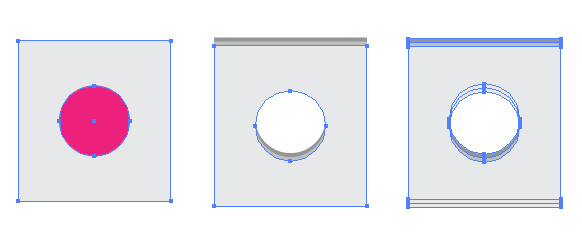
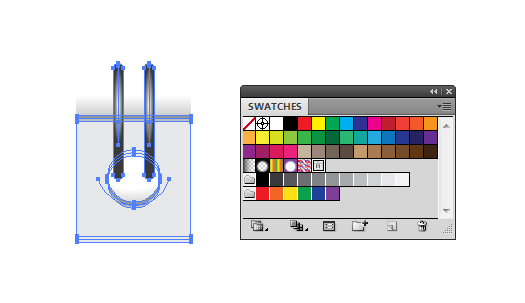
Use the Rectangle Tool (M) and hold Alt + Shift and pull outward to create an even square. Do the same with the Ellipse Tool (L) to create an even circle. Use Smart Guides (Ctrl + U) to ensure you’ve placed it in the middle or use the Align panel to centralize it. Then use Pathfinder > Minus Front to remove the circle from the square.
Duplicate the shape twice and use your arrow keys to nudge each shape upwards as shown below and color them from light grey to mid grey.
Step 2
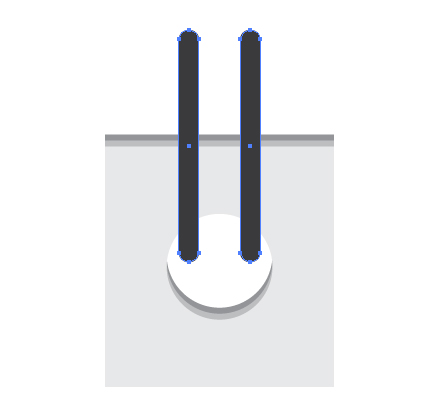
Use the Rounded Rectangle Tool to create a long slim shape for one of the binders and then duplicate it. Use the arrow keys again on your keyboard to nudge it to the side so you have two bindings for the hole as shown below.
Step 3
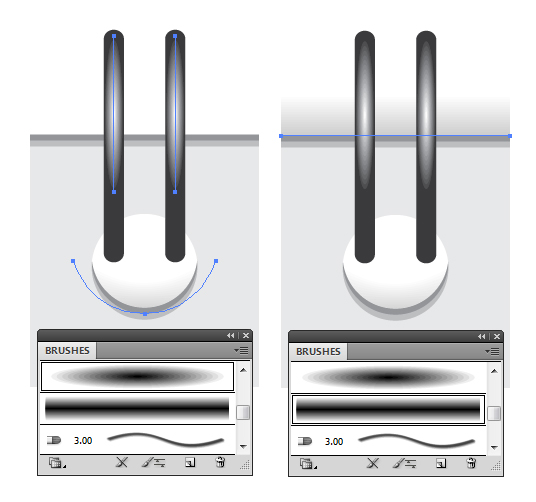
I’m going to add a shine and shadow to the binding and hole by using circle and rectangle art brushes created from Blends. You can create them by following my jellyfish tutorial. I’ve added the circular blend brushes to the binding and along the bottom of the hole and the rectangle for along the back of the notepad.
The shadow blends have a black stroke and a 0.5pt Stroke Weight and set to Blending Mode Multiply, Opacity 20%. The shines on the binding are white with a 0.14pt Stroke Weight.
Step 4
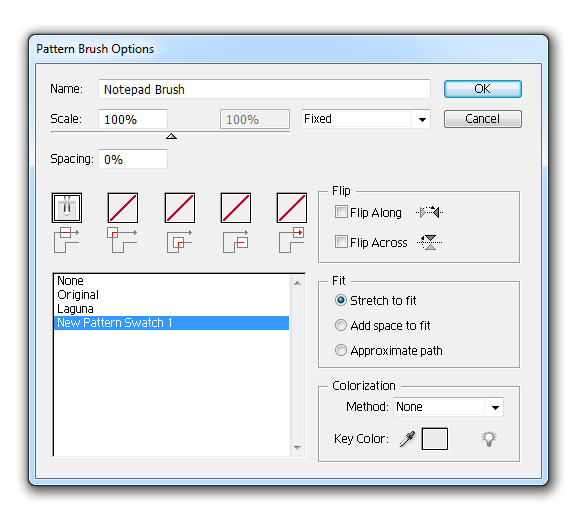
Select All of your shapes (Ctrl + A) and then Group them (Ctrl + G). Drag and drop them into your Swatch panel.
In the Brush panel, click on New Brush > Pattern Brush and for the Side Tile select the “New Pattern Swatch 1″ from the list below. Click on Ok once done.
Step 5
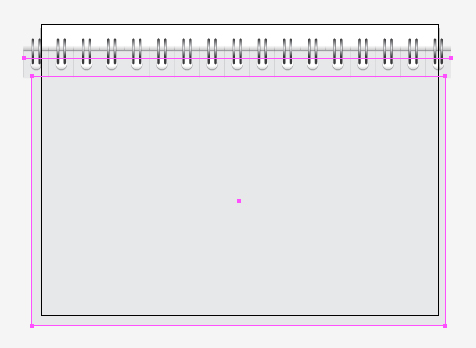
For your notepad background, you’ll need to use the Line Segment Tool (\) with your brush applied. Then use the Rectangle Tool (M) to draw a rectangle below the brush, making sure it’s the same grey as the grey in the brush. You’ll notice that on the screen shot below, there are faint dark grey vertical lines. These won’t appear once you Save for Web & Devices.
Step 6
For the ruled lines, use the Line Segment Tool (\) to draw the initial horizontal line. This will be 1pt Stroke Weight with a navy blue stroke color set to Blending Mode Multiply, Opacity 20%. Then go to Effects > Transform & Distort > Transform and use the below settings.
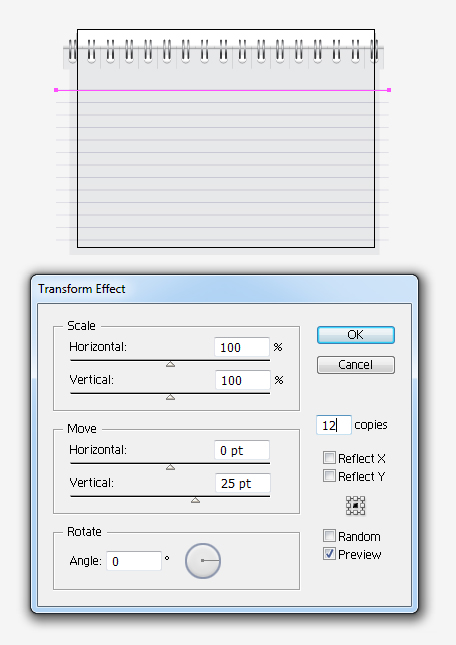
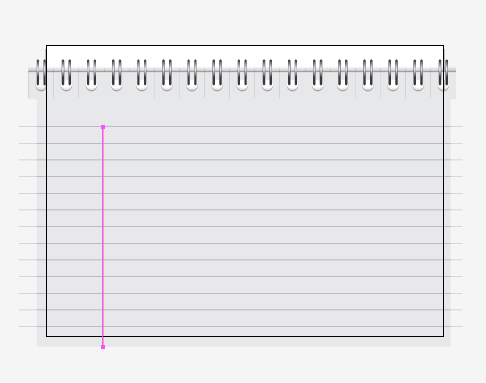
Add a vertical magenta line with a 2pt Stroke Weight and Opacity of 80%.
Step 7
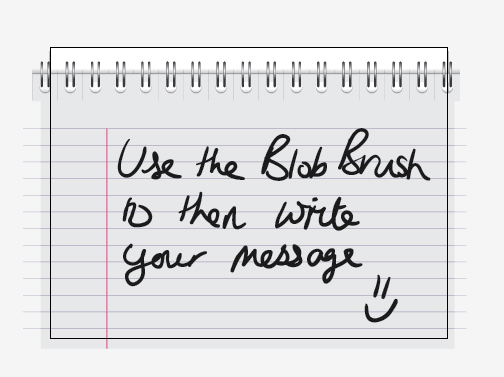
For writing and drawing on the notepad, I prefer using the Blob Brush Tool (Shift + B). The reason being is that you can go into the options by double clicking on the icon in the Toolbar and changing the size and it’s influenced by “Pressure” from your graphic tablet. Click on Ok once you’re done.
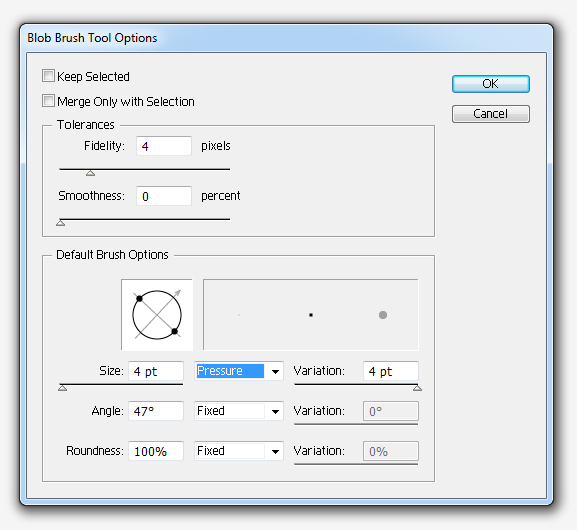
Set the Opacity to 90%, so you can see the lines from the notepad underneath and it doesn’t look too bold. Then…
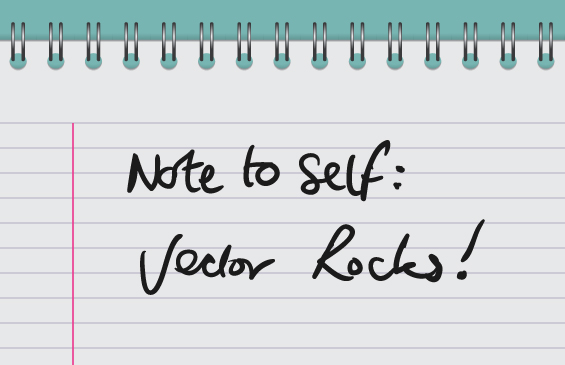
Conclusion
You can use this quick tip to produce anything from a website background to a quick desktop wallpaper. There are so many possibilities from something oh so quick and easy to make.