Today I want you to create a flaming torch. You’ll learn some excellent vector illustration techniques in this tutorial, as well as use powerful Illustrator tools, such as: 3D tools, Bristle brushes, and Meshes. Follow along, while creating your own impressive artwork, let’s get started!
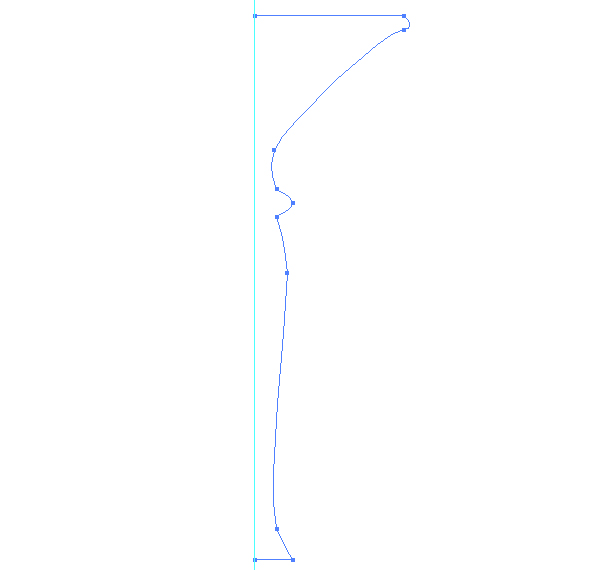
Step 1
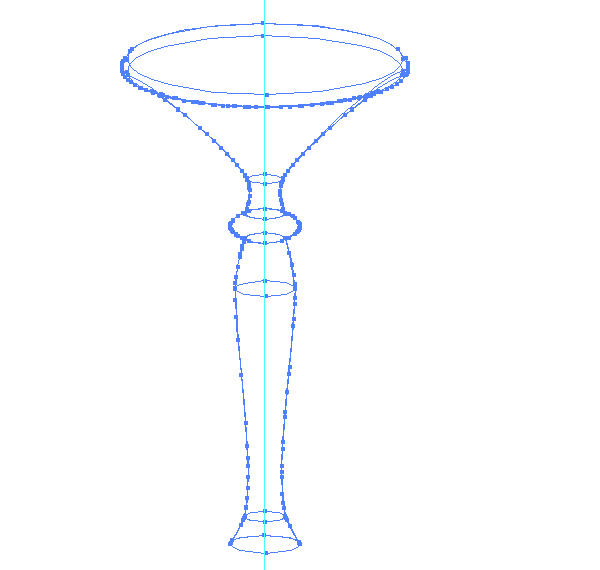
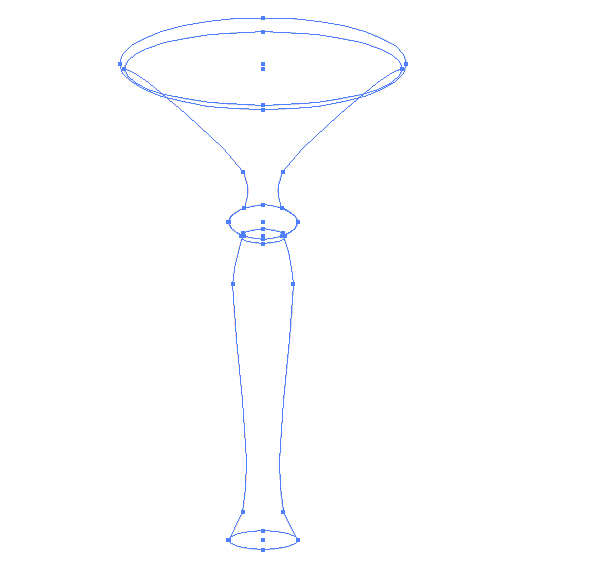
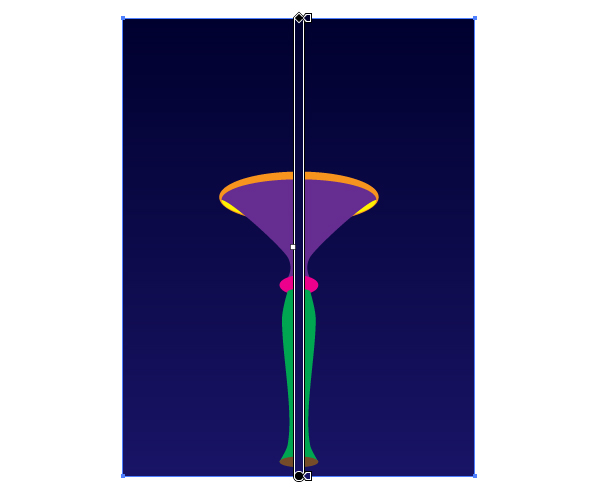
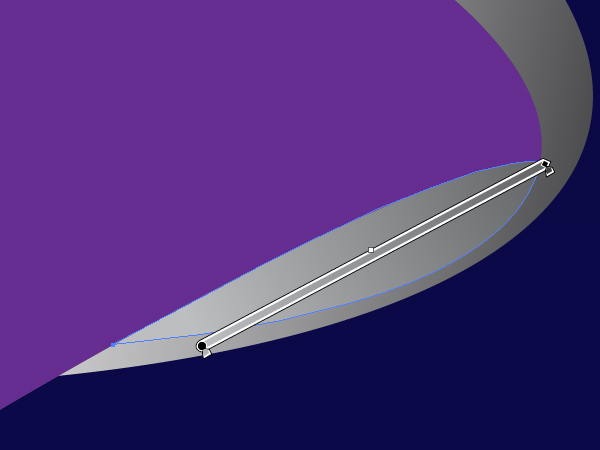
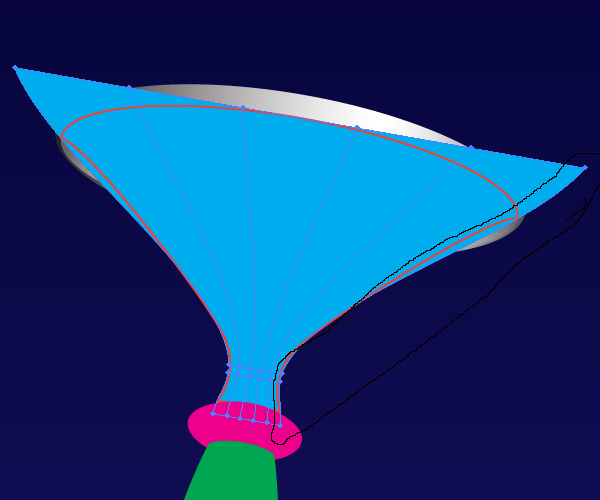
Take the Pen Tool (P) and illustrate a lateral contour of a torch as shown in the image below where the vertical line is a guide line.
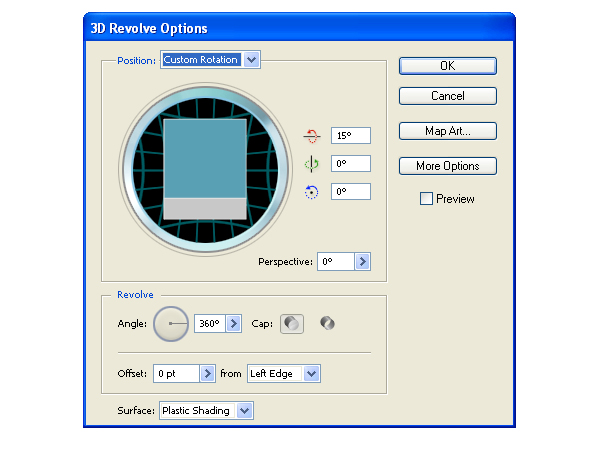
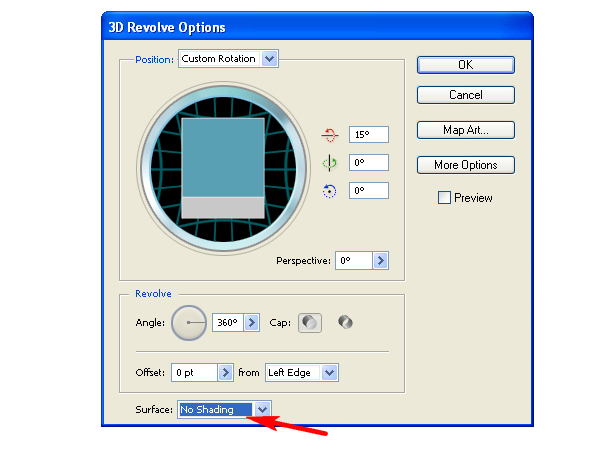
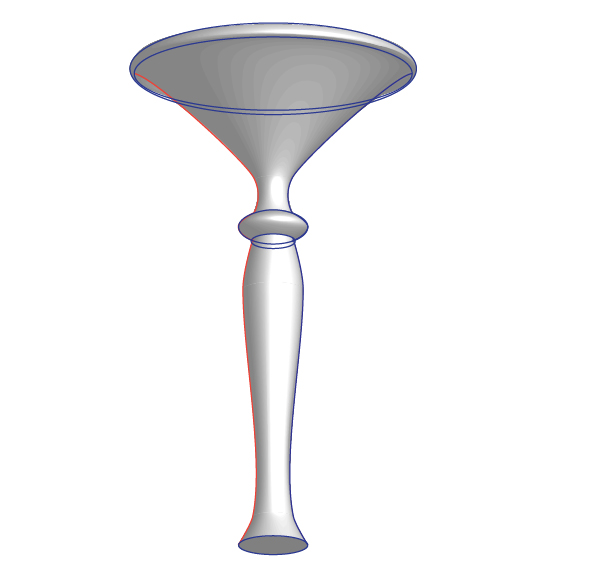
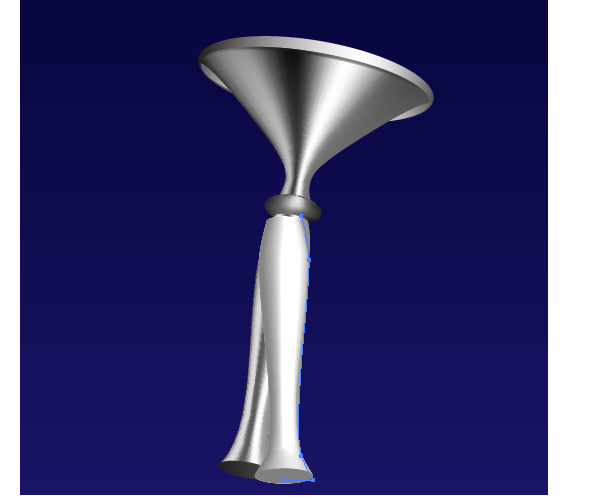
Go to Effect > 3D > Revolve and specify the following options…
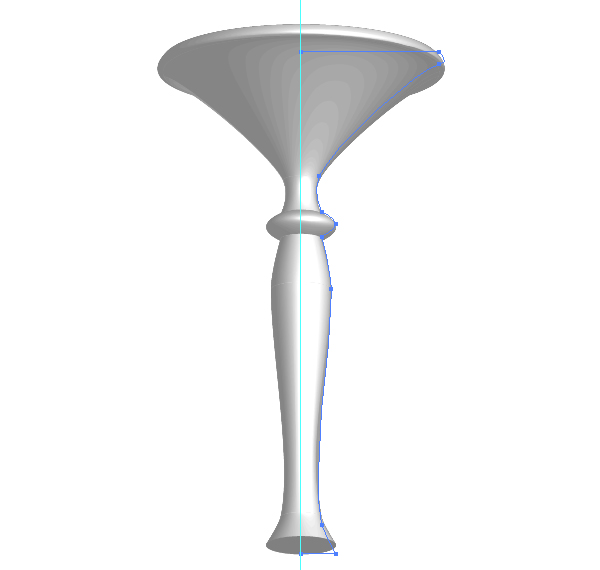
…in order to receive the next image of our 3D torch. Copy it then and Paste in Front (Command + C then Command + F). Save the copy of the 3D object for further using it this tutorial.
Step 2
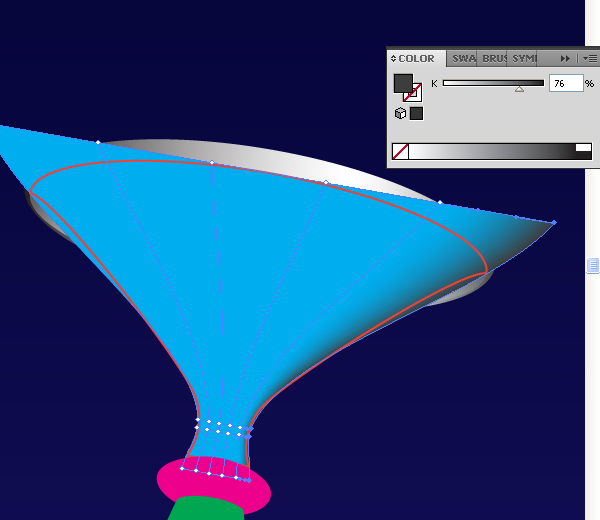
After this go to the Appearance palette, and click there the "3D Revolve" link, and change the rendering style to No shading. Perhaps you know that this simple operation will decrease the quantity of paths after expanding.
And go to Object > Expand Appearance.
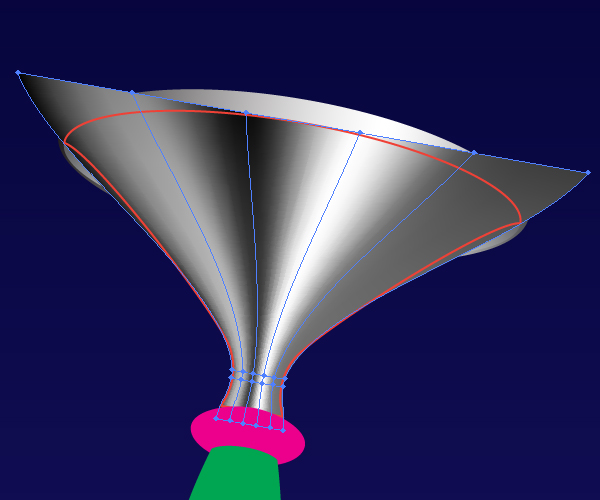
Delete the unnecessary parts and unite the necessary ones by using the Pathfinder palette or the Shape Builder Tool (Shift + M). You need to achieve the following result.
Generally speaking, you could lock your 3D object in the Layers palette, and outline it by using the Pen Tool (P) as it is shown in the image below. Choose the convenient way for you.
Step 3
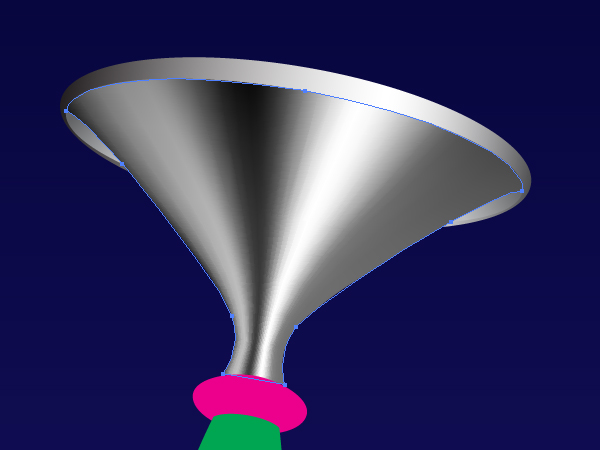
Fill the received paths with different colors and you will receive the main geometry sketch of the torch.
Before painting the paths I advise you to create a background using the Rectangle Tool (M), and fill it with a vertical gradient because you need to achieve a harmonious color combination between torch and background. Follow your feeling of beauty.
Step 4
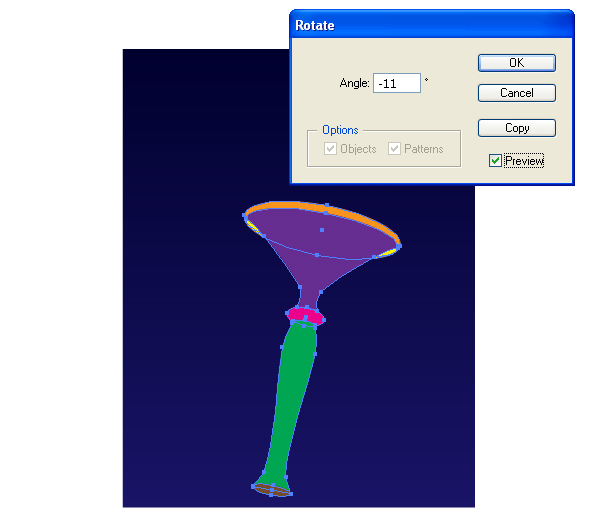
After that it is interesting to rotate the torch by going to Object > Transform > Rotate.
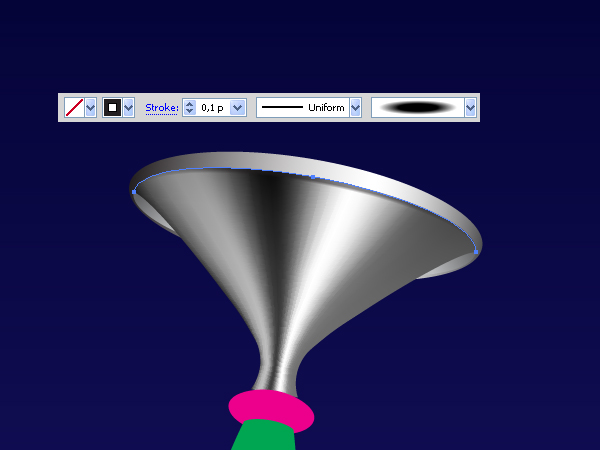
Select the orange ellipse which represents a torch’s cup and fill it with an angled linear gradient.

Step 5
The lateral yellow paths should be filled with angled linear gradients too.
Step 6
Now let’s look at how to paint the violet path. What will we receive if we use a usual gradient filling?
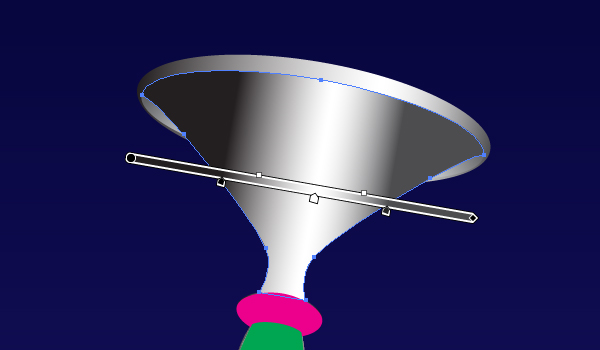
We see here that it is a poor decision, because we need to form a cup shape with color distribution. But what if we use meshes? Let’s make an attempt. Take the Rectangle Tool (M) and illustrate the following semitransparent path over the violet one.
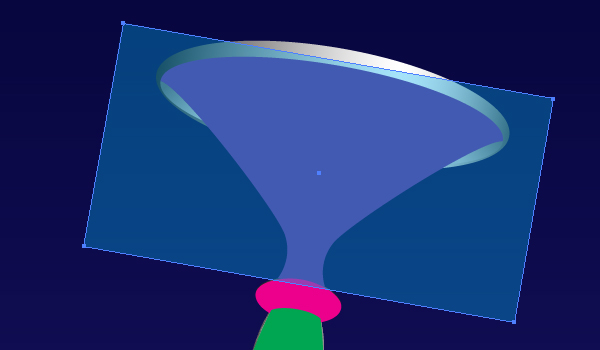
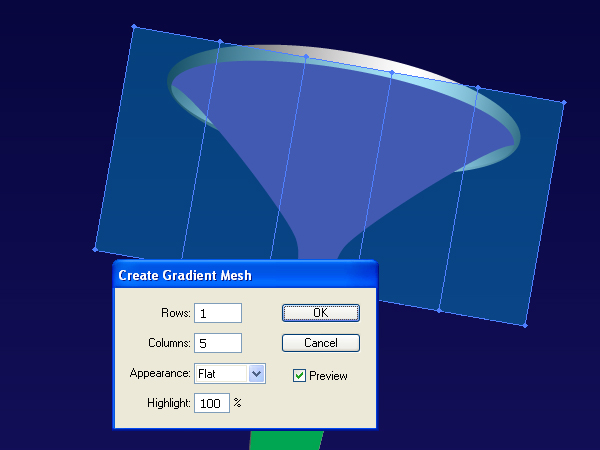
Go to Object > Create Gradient Mesh and set there the values that you see in the diagram below.
Step 7
Take the Mesh Tool (U) and add a horizontal mesh line as shown. This mesh line must intersect the violet path in the narrow part.
Add another mesh line close to this one. You need to do this in order to edit the received mesh accurately because the violet path becomes wider after the narrow part again.
Then change the opacity of the mesh to 100%.
Step 8
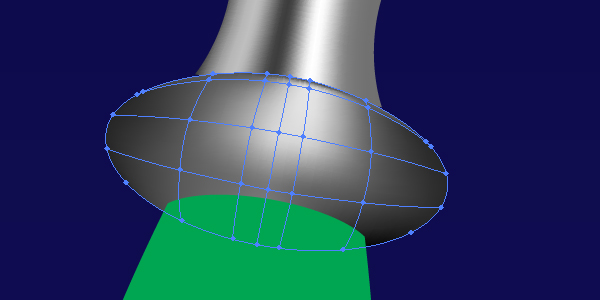
Grab the Lasso Tool (Q) and select the central mesh nodes shown in the image below.
Go then to Object > Transform > Scale and set there such values which allow you to move the mesh nodes to each other in order to represent a cup shape. Do the same with the other mesh nodes. See the helpful diagram below where the orange path represents the borders of the violet one and shown for your convenience only.

Step 9
Take the Lasso Tool (Q) again and select the mesh nodes from the right to the left, and change the colors of them.
You should receive something like the following.
Step 10
Select the violet path. Bring it to front by going to Object > Arrange. Then select both: the violet path and the mesh and go to Object > Clipping Mask > Make (Command + 7).
Step 11
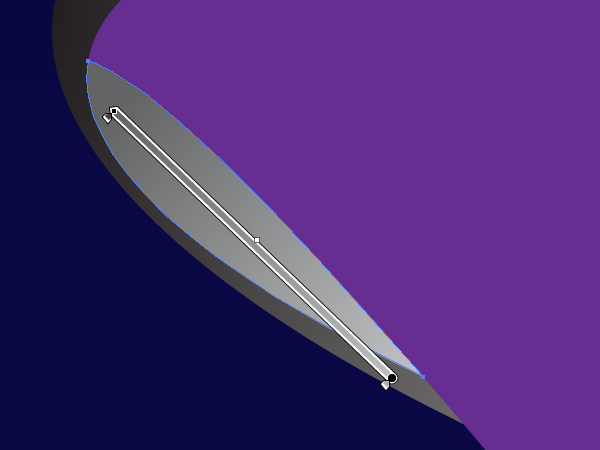
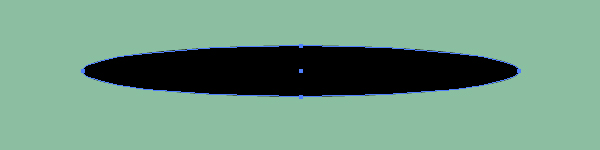
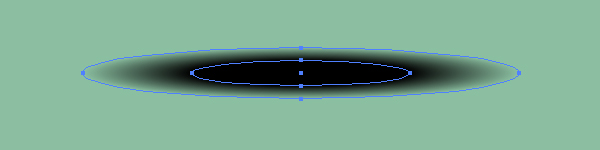
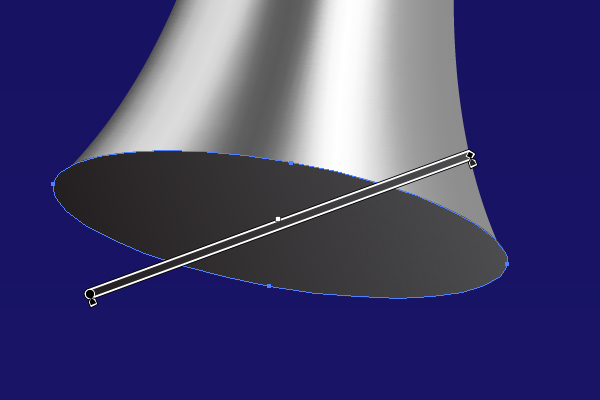
Take the Ellipse Tool (L) and draw an elongated, horizontal, elliptical path filled with black. See the helpful diagram below, where the olive background is made for your convenience only, and not important for this tutorial.
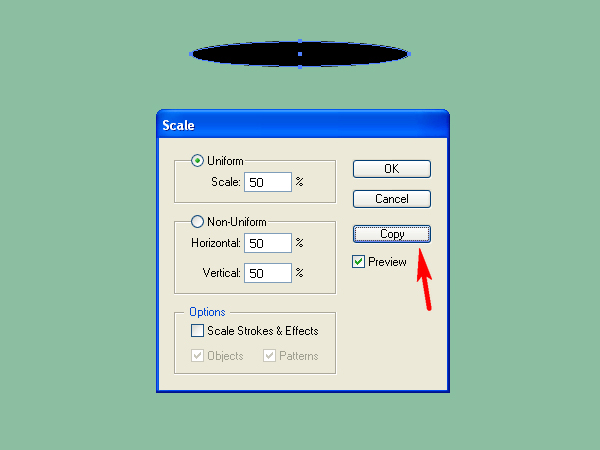
Go to Object > Transform > Scale, and set the values shown in the diagram below. Then click the Copy button.
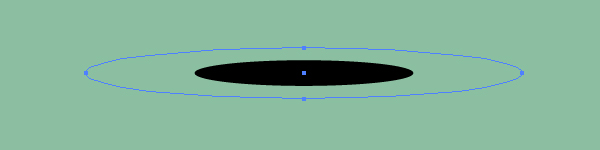
You will receive the next image

Change the opacity of the biggest ellipse to 0.
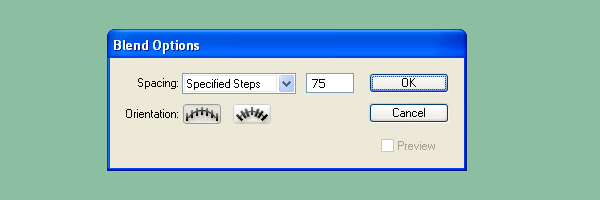
Go to Object > Blend > Blend Options. Set the Spacing to Specified Steps, and the quantity of steps to about 75.
Select both ellipses and go to Object > Blend > Make (Command + Alt + B).
Step 12
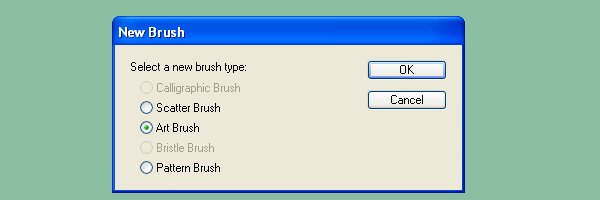
Drag and drop this blend into the Brushes palette. Select the Art Brush option in the dialog box.
Set the items for the brush as shown in the diagram below, and name the brush as “Black brush.”
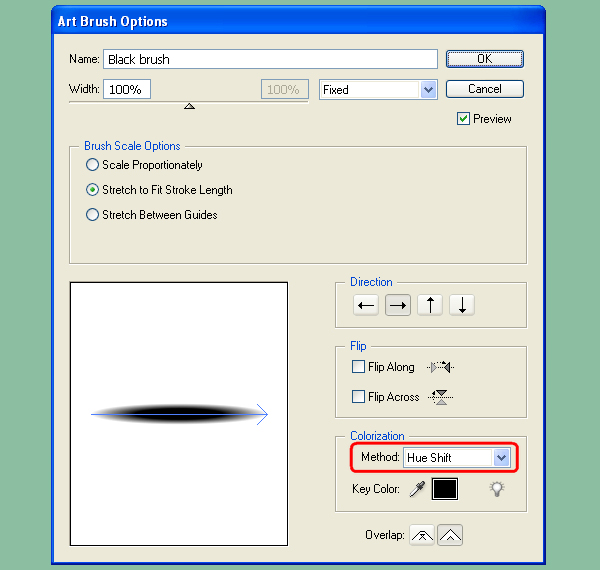
Pay attention at the colorization method of the brush indicated with red in the image above. This way of using the colorization will allow you to use only one Art brush for different colors. By using this simple way you could achieve the possibility to change the brush color by changing the corresponding Stroke color in the Control panel.
Step 13
Illustrate the shown path, and apply the “Black brush” to it. Crop it with a corresponding clipping mask.
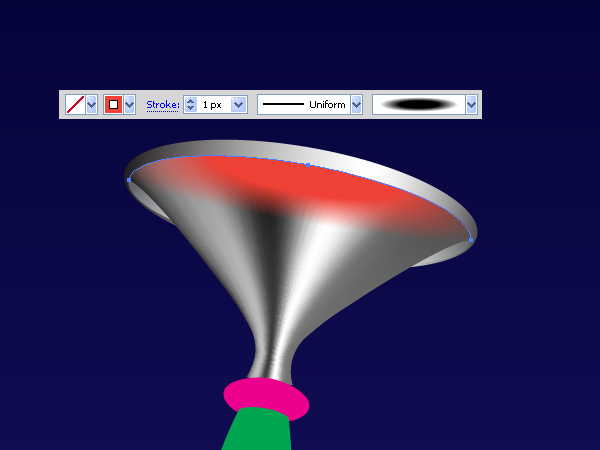
Change the Stroke color, the Stroke weight and the opacity of this path in order to receive the shade from the bounds of the cup.
Step 14
Select the crimson path. Go to Object > Create Gradient Mesh and produce a usual mathematical figure which is named as "Ellipsoid of revolution." :) Then do the same with the green path. See the helpful diagrams below and do it by yourself without assistance.
The lowest brown path is filled with an angled linear gradient.
Step 15
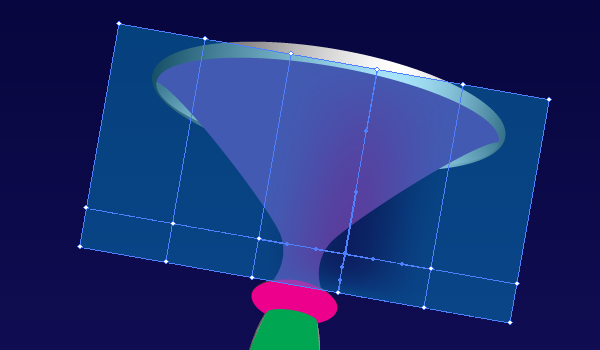
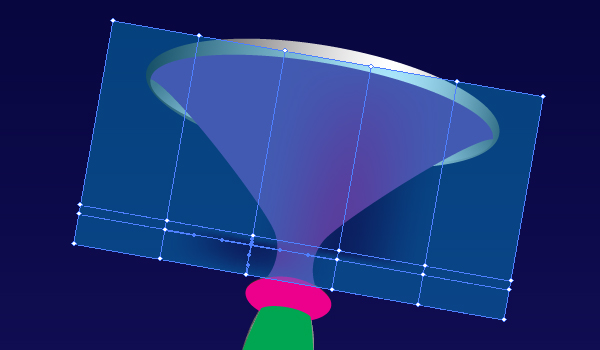
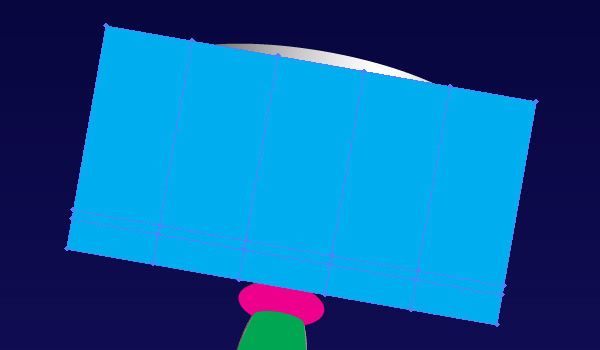
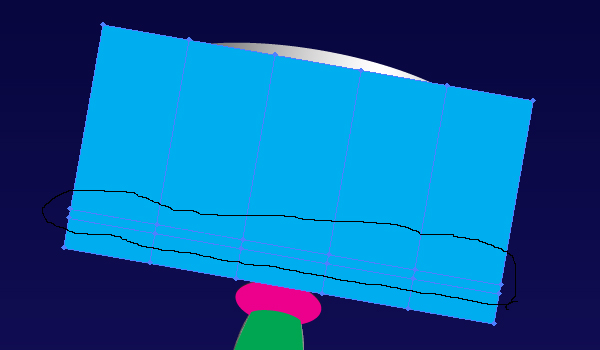
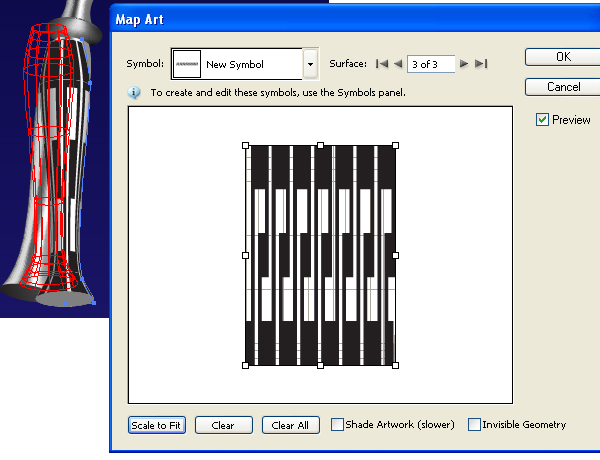
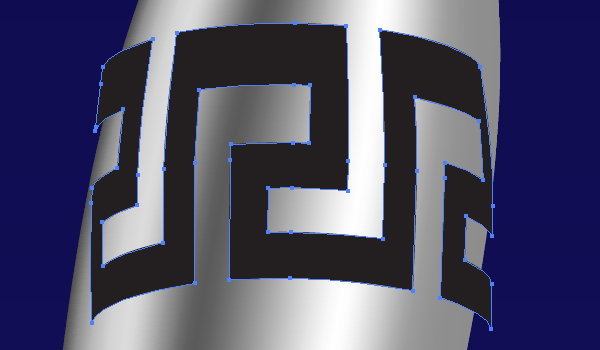
Take the Pen Tool (P) and illustrate the following patterned path. Make every effort to place this path in the corresponding guide lines shown in the figure below.
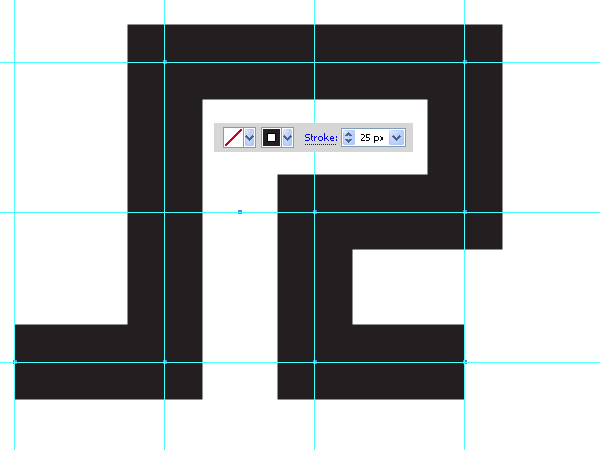
Copy this path and Paste it in Front (Command + C then Command + F). Move it to the right. Join both paths together by going to Object > Path > Join (Command + J). Repeat these manipulations as many times as you desire. You should receive the next image as a result of these actions.
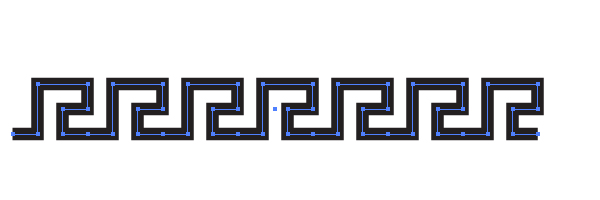
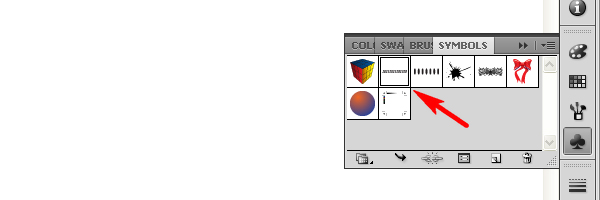
Drag and drop this path into the Symbols palette.
Step 16
Do you remember that we saved 3D object in the first step? It is the very moment to use it. First, take the Scissors Tool (C) and click in the indicated point with it. Why should you do this? Because it will allow you to decrease the parts of 3D object and map the art fast.
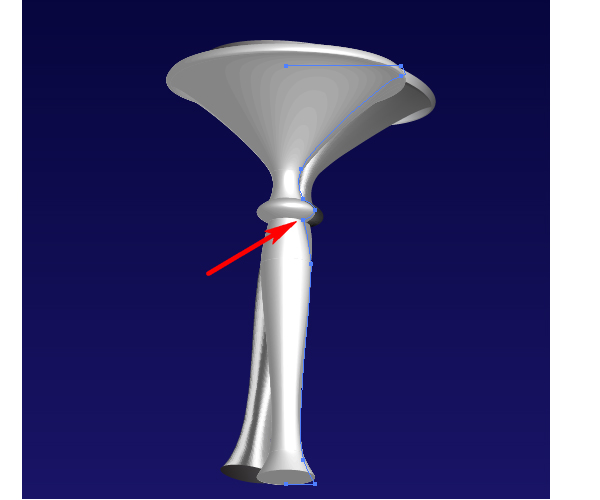
Delete the superfluous top 3D part.
Step 17
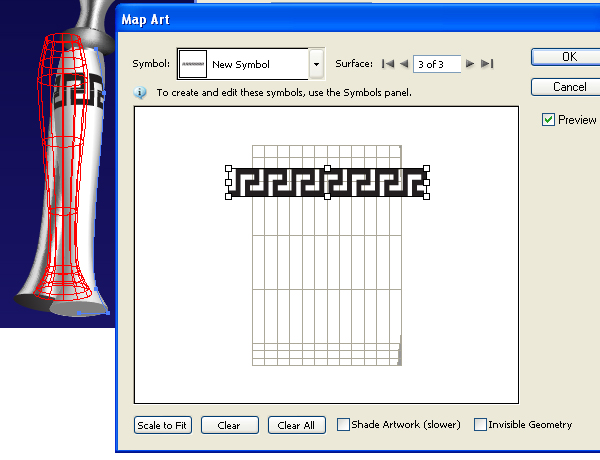
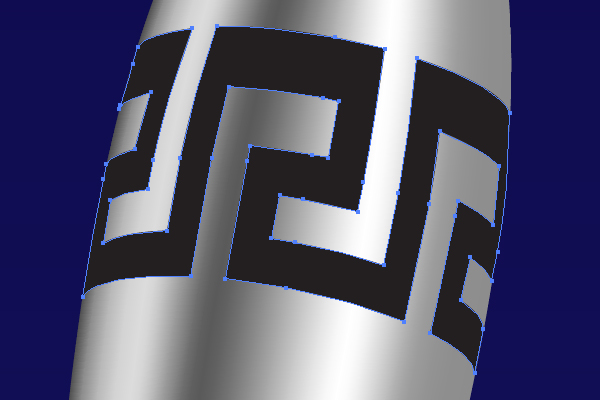
Go to the Appearance palette, click the "3D Revolve" link and click the Map Art button in the dialog box.

Apply the created symbol to the surface of 3D object,…
…and place the symbol in the top part of the object as shown.
Step 18
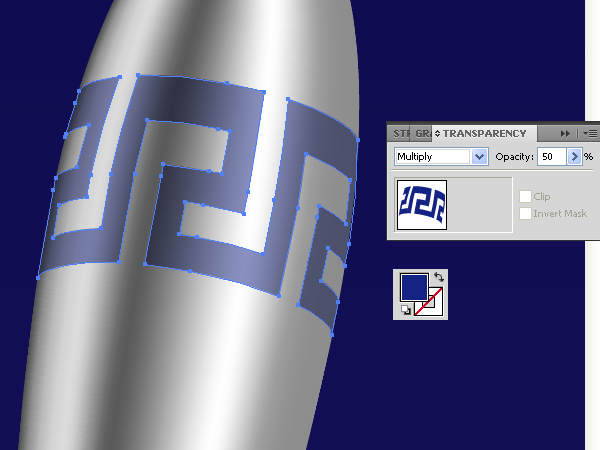
Then go to Object > Expand Appearance, and go to Object > Ungroup as many times as it needs. Delete after that the unnecessary parts of 3D object, and unite all the necessary parts of the patterned symbol. Leave only this symbol undeleted.
Rotate it to the coincidence with the torch.
Step 19
Change the color of this path, change the Blending Mode of it to Multiply in the Transparency palette, change the opacity too. You should receive the soft color distribution over this object after these actions. See the image below.
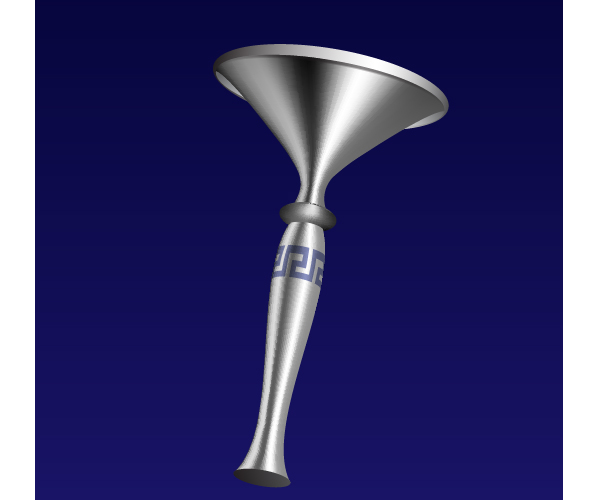
You have received the next image after all those doings.
Step 20
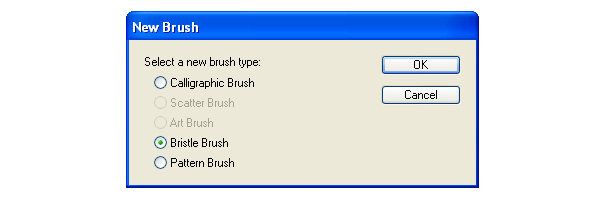
How to illustrate flame? There are several different ways. For example, you can use blends. Or you can use meshes for this purpose. But what if to use the Bristle brushes? Let’s try! Open the Brushes palette, and click there the New Brush button. Select the Bristle brush in the dialog box.
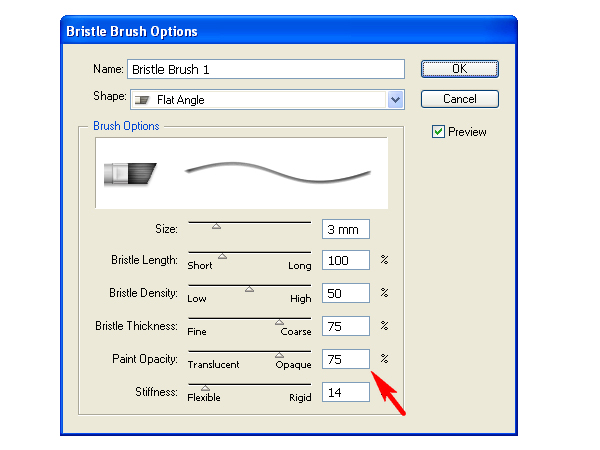
Specify the shown options for the "Bristle brush 1." Pay attention at the Paint opacity.
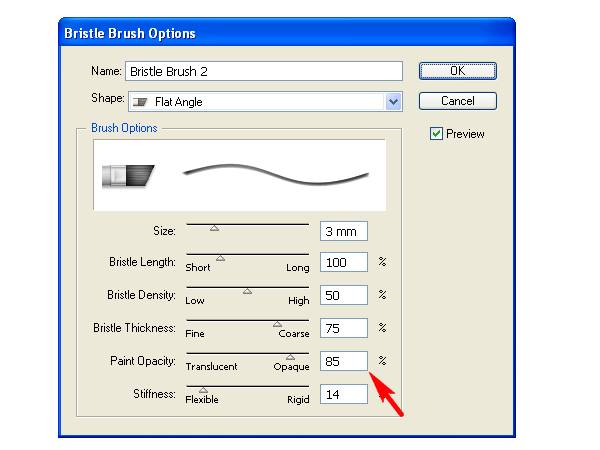
Produce the "Bristle brush 2" the same way…
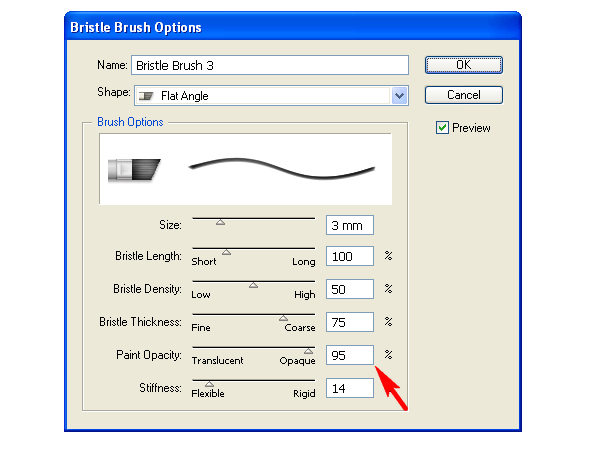
…and the "Bristle brush 3."
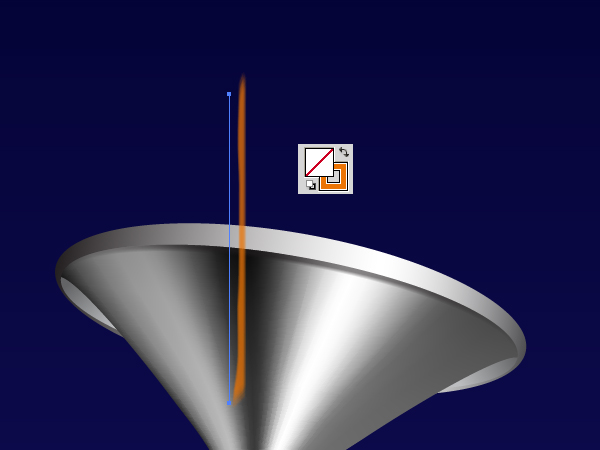
Step 21
Set fire to the torch now. Draw a vertical line and apply the "Bristle brush 1" to it. Change the color of the Stroke to brownish red.
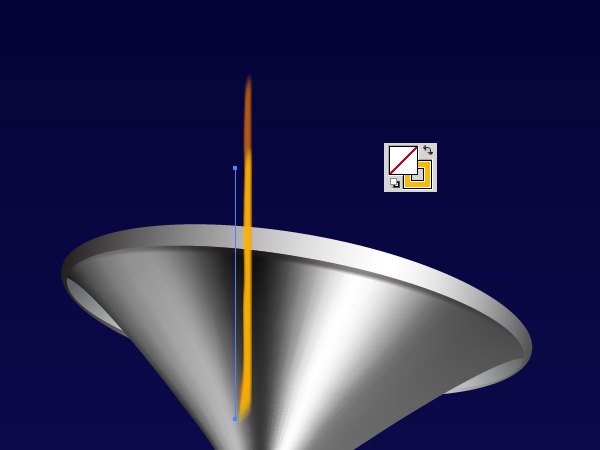
Copy it and Paste in Front (Command + C then Command + F). Decrease the length of the line segment, and apply the "Bristle brush 2" to it. Change the color of the Stroke to orange.
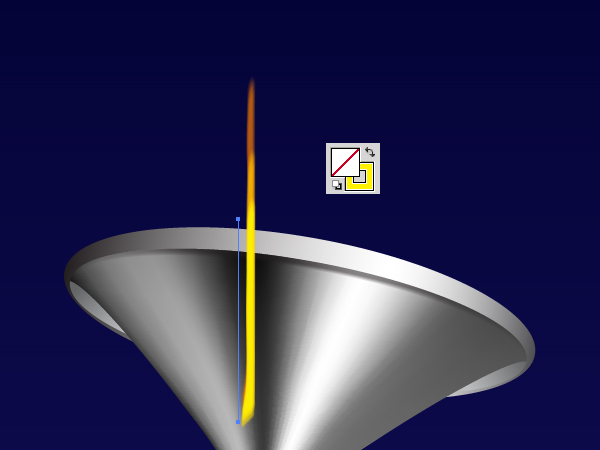
Copy it again and Paste in Front (Command + C then Command + F). Decrease again the length of the line segment, and apply the "Bristle brush 3" now to it. Change the color of the Stroke to yellow.
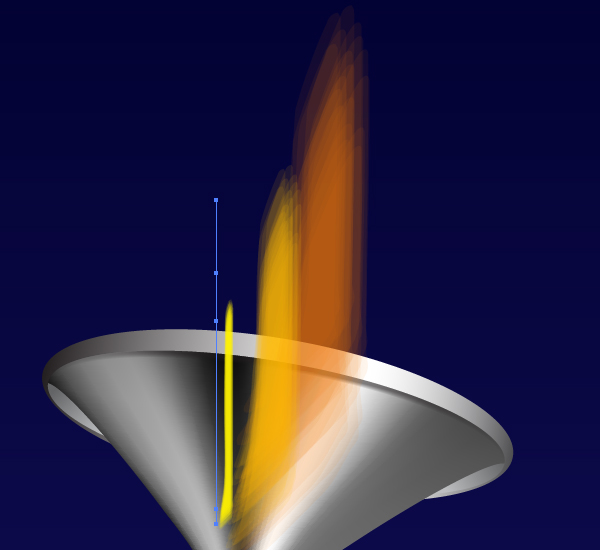
Step 22
Change now the Stroke weights of the paths. I have used 9px for the red path, 6px for the orange path, and 1px for the yellow one.
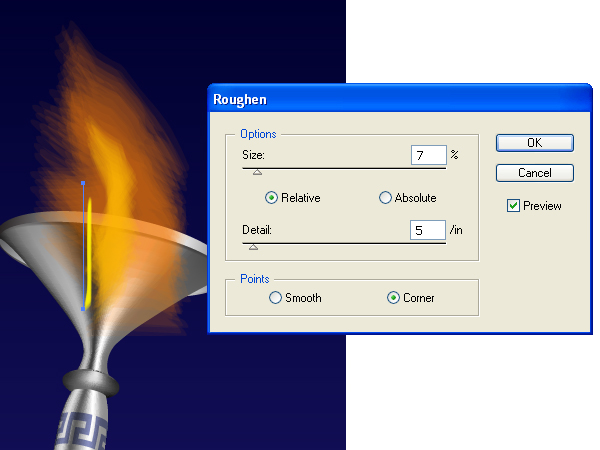
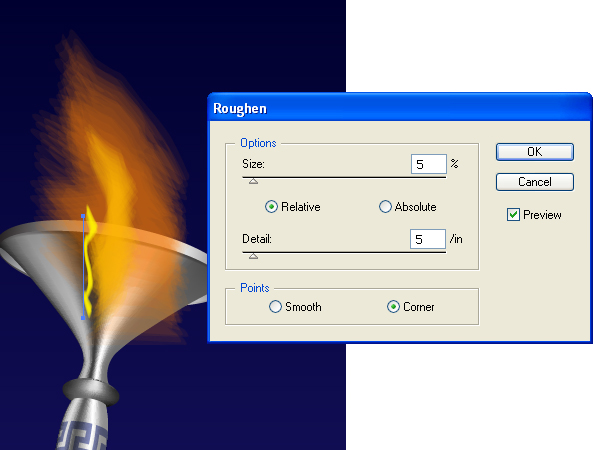
Select now the orange path and go to Effect > Distort & Transform > Roughen. Set there the acceptable values.
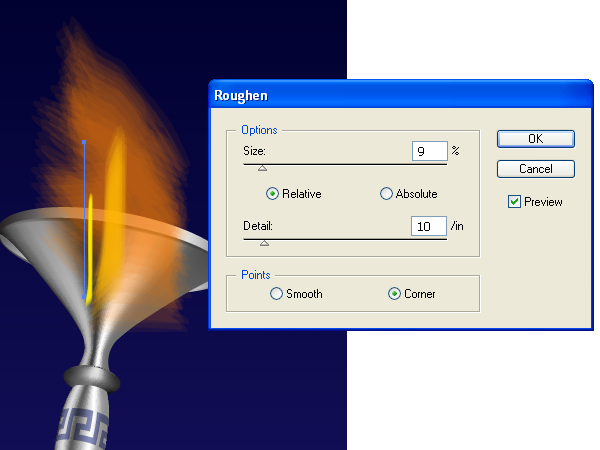
Do the same with the other paths.
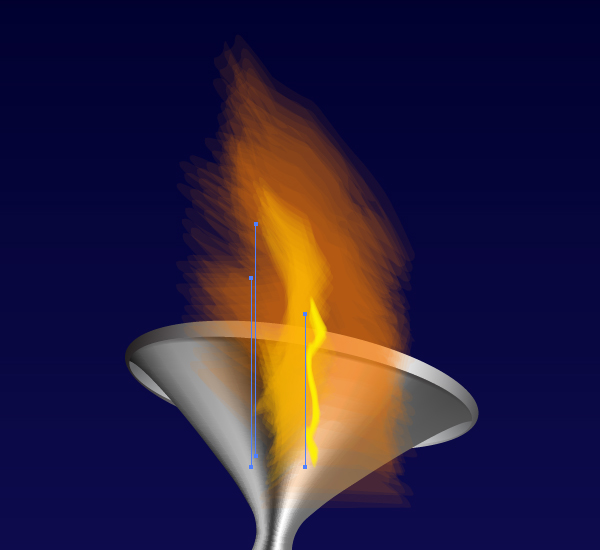
Place the received paths in the right positions.
Step 23
In order to create the light distribution softer, copy the orange path and paste it in back (Command + C then Command + B). Apply the "Bristle brush 1" (which is more transparent) to it. Then increase the Stroke weight (from 6px to 7px in my own artwork). Move the copy of the path to the right position. See the image below.
Do the same with the yellow path. Apply the "Bristle brush 1" to the back copy of it, and increase the Stroke weight (from 1px to 3px in my own artwork). Move it too.
Step 24
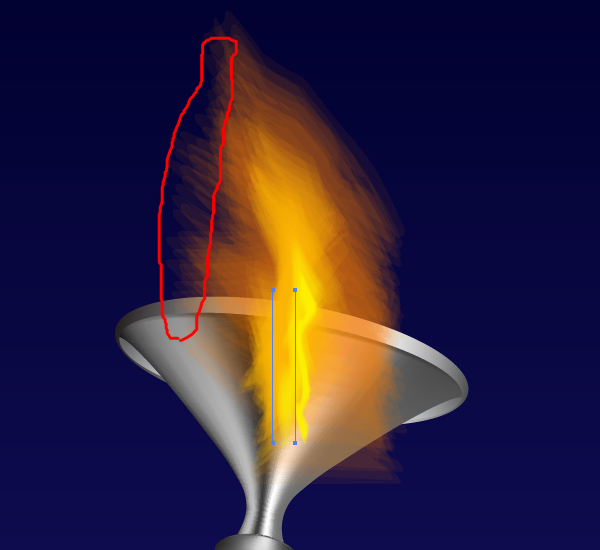
We need now to make softer the left area of the flame shown with red in the image above. Select the red path and go to Object > Expand Appearance.
Then double click the Warp Tool and change the corresponding options as shown.
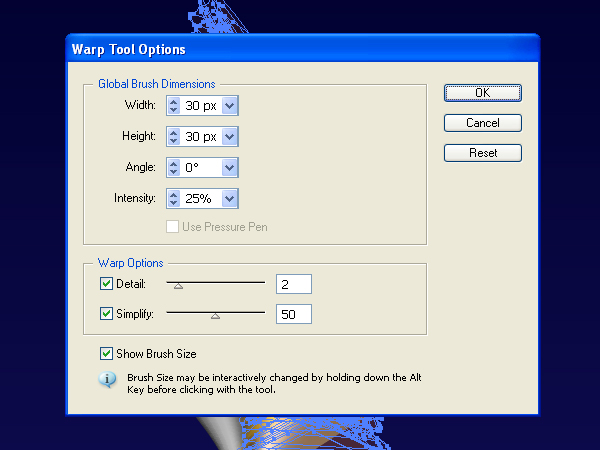
Take the Warp tool (Shift + R), and move this brush over the left side of the flame slightly. After that crop the flame with a clipping mask. And send it under the torch. You should receive something as the following.
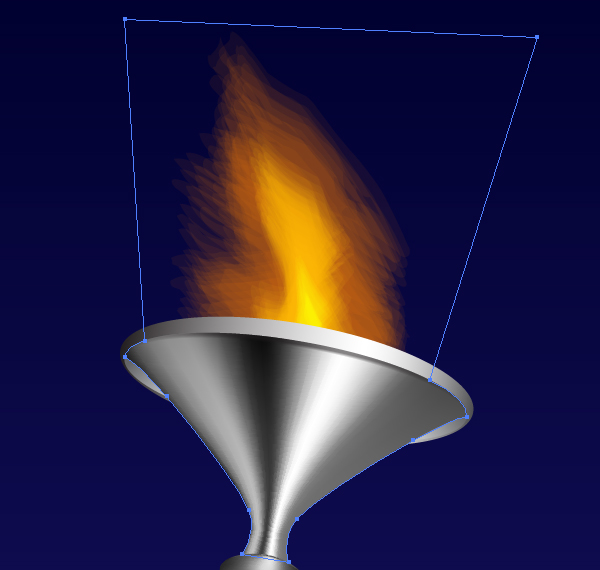
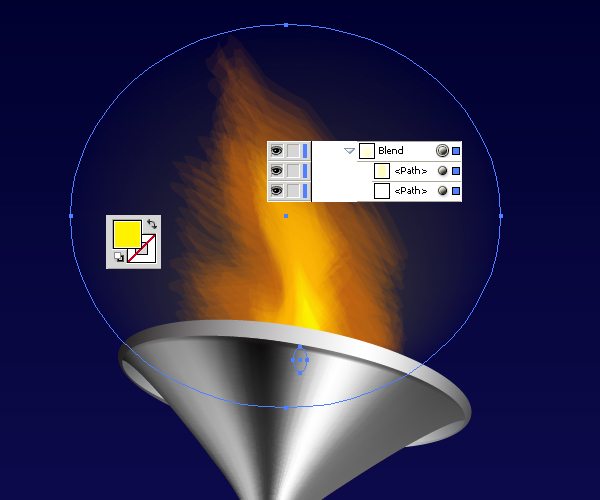
Step 25
Produce a blend which will represent light from the fire. Do it by yourself. Up to this point in the tutorial you already know how to achieve this without assistance. The helpful image is below.
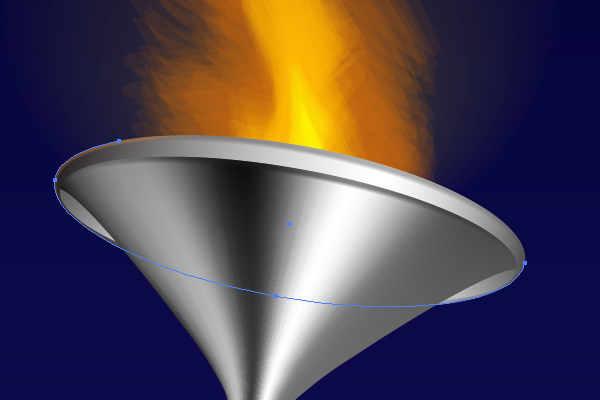
Illustrate a light spot from the flame on the cup. Use the "Black brush" for this.
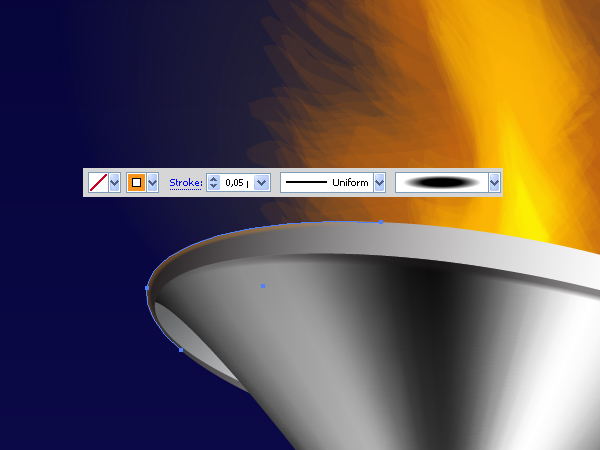
And add the color saturation to the borders of the cup by using the "Black brush" as shown in the figures below. And your artwork will be completed.
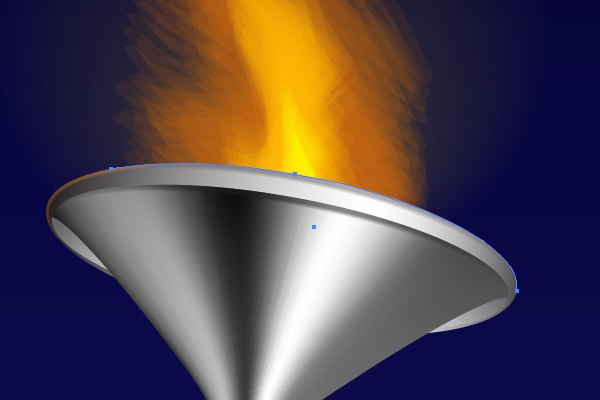
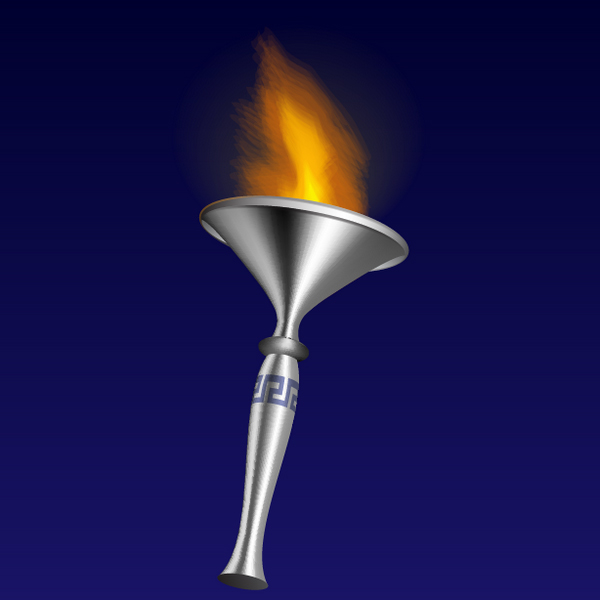
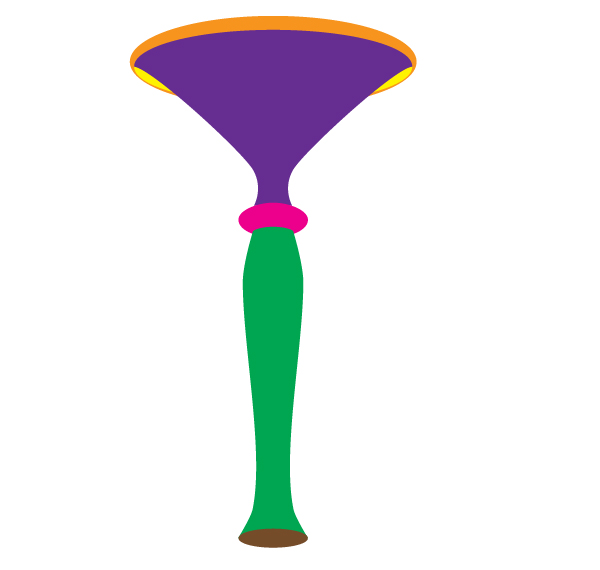
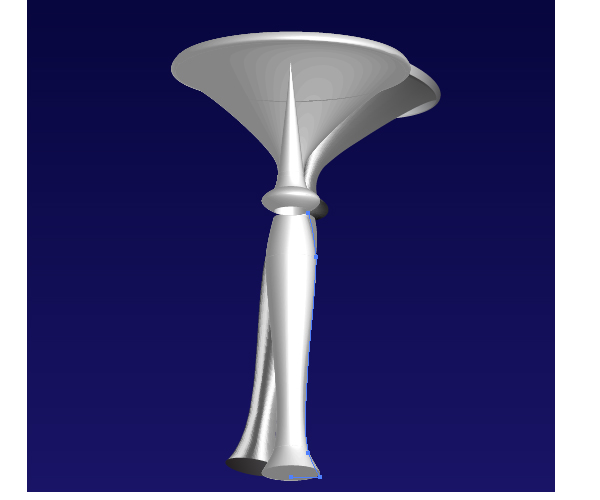
Conclusion
Here’s the finished illustration. I hope you’ve enjoyed this tut!