It’s hard to get a grungy look in vector because it’s such a clean medium to work with. However, by playing with Image Trace and Art Brushes, you can achieve that messy edge. In today’s tutorial, I’m going to show you how to create a quick, grungy CMYK pattern in Adobe Illustrator CS6 using the new Image Trace feature and Pattern tools.
Resources
I’m going to be using a stock image from Photodune for this tutorial and I’ve opted for the “Small” size. The larger the stock image the more details Image Trace will pick up on. So let’s jump into it!
Step 1
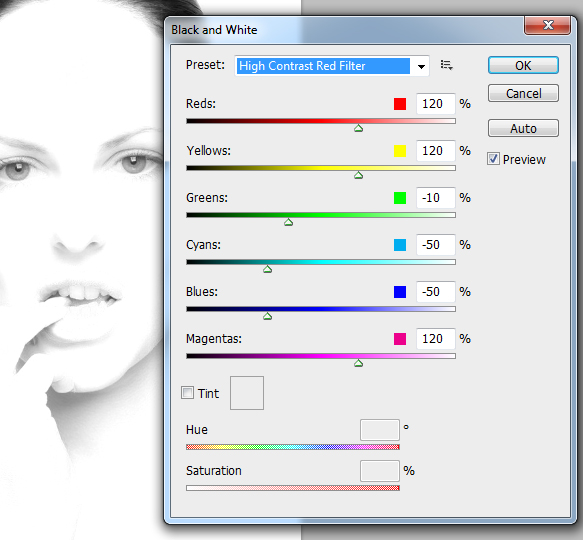
The first thing I’m going to do is modify the contrast of the original image. I’m going to open it in Photoshop and go to Image > Adjustments > Black and White. I’ve selected “High Contrast Red Filter” from the Preset drop down menu and then clicked on OK.
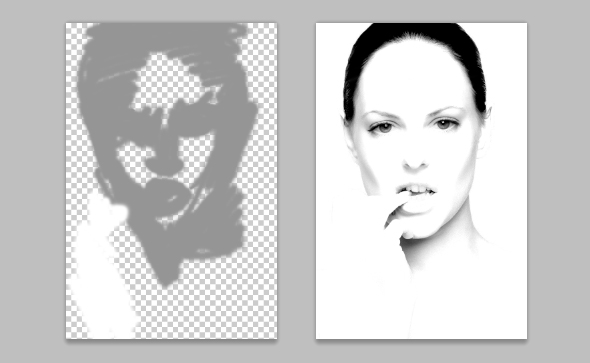
I then apply Create a New Layer and I increased the contrast around the face with the Brush Tool (B) using a medium gray shade and the Blending Mode of the layer set to Color Burn. I then Create a New Layer and add white strokes with the Brush Tool (B) to cover part of the hand. I then use the Crop Tool (C) to trim the image and File > Save for Web & Devices to be used in Adobe Illustrator.
Step 2
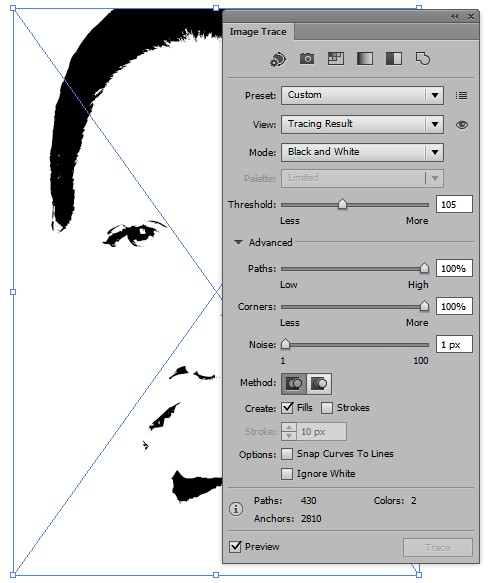
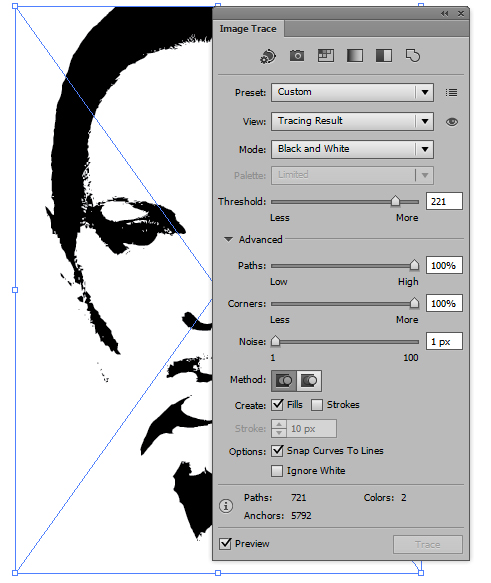
Create a New Document and then go to File > Place and locate your modified stock image. When you Place an image on your artboard, along the top of your UI you’ll have several options to do with Image Trace. Click Image Trace and then go into the “Image Trace Panel” to access the details.
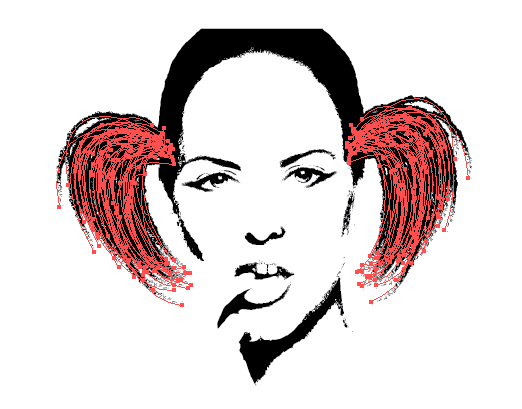
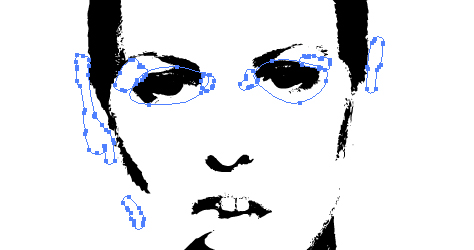
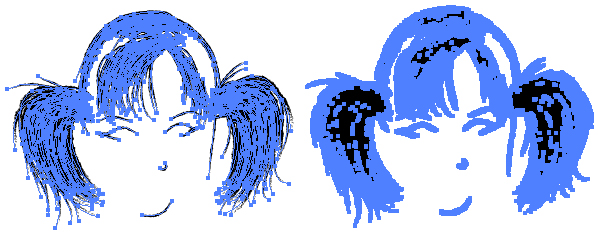
So my experiment started with the idea that I wanted the eyes to be clearly defined. After playing with the settings I realized that I couldn’t get a balance of having the eyes traced clear enough to see the iris and pupil and to also have the rest of the features visible. So I duplicated the stock image and applied Image Trace to both copies, yet with different settings as shown below.
The settings that I chose (note the Noise value), will create a grungy edged effect on the result, which is perfect for what I have in mind.
Step 3
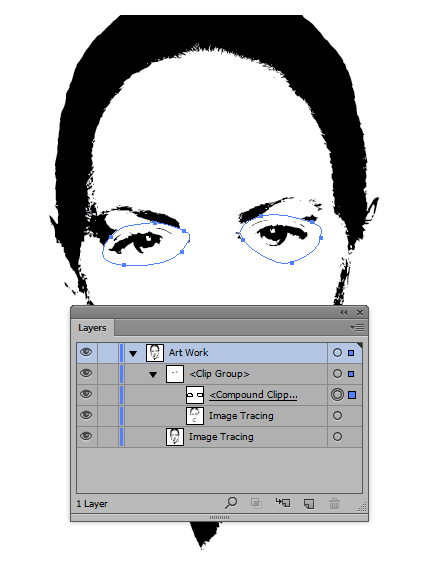
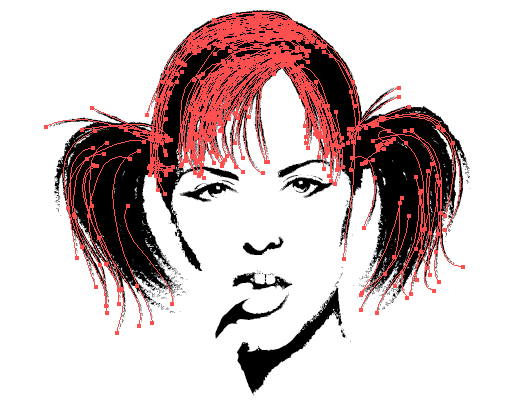
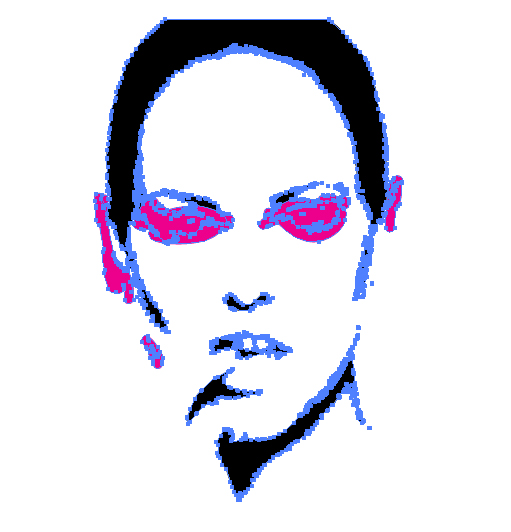
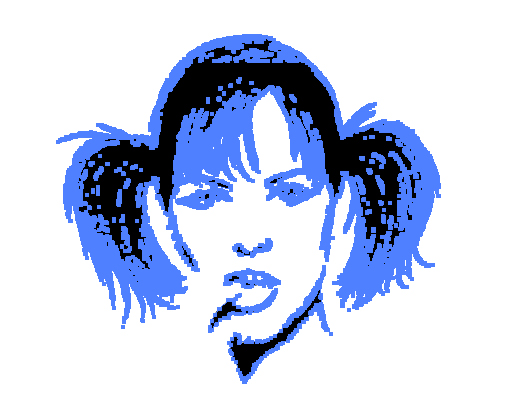
As I’m only interested in the eyes from one of the Image Traced stock images, I’m going to use a Clipping Mask (Command + 7) on the first image. Using the Pen Tool (P) I’m going to draw two shapes and then make them a Compound Path (Command + 8).

I’ve then used this to create a Clipping Mask (Command + 7).
Step 4
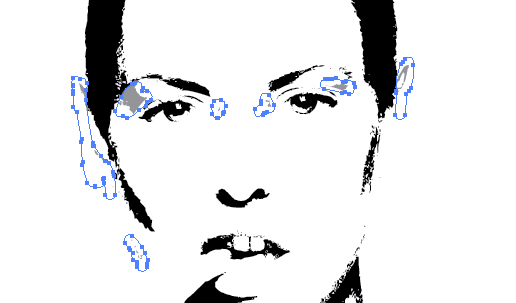
I’m going to use the Blob Brush Tool (Shift + B) with a white stroke to just draw over the areas I wish to hide. Once drawn, combine them to make a Compound Path (Command + 8). I reduced the Opacity on the brush in the screenshot below purely for demonstration purposes.
Step 5
I’m going to use the Paintbrush Tool (B) to draw some lines around the facial features to add extra details. I’m going to use the “Charcoal – Feather” brush which you can access from going into the drill down menu and going to Open Brush Library > Artistic > Artistic_ChalkCharcoalPencil. This brush has a slight taper to it where the tapered end is a lot more rough. This is perfect for adding black lines around the eyes, nose, bottom lip and eyebrows.
Step 6
Using the Paintbrush Tool (B) again and the same brush, I used a 2pt Stroke Weight strokes to create a pony tail on one side of the head and then Grouped the strokes (Command + G). I then duplicated the Group and Object > Transform > Reflected it Vertically to create pigtails on either side of her head.
Then using 1pt strokes, I added a fringe/bangs, shaped her head and added strokes to the pigtails to make them look less copy and pasted.
Step 7
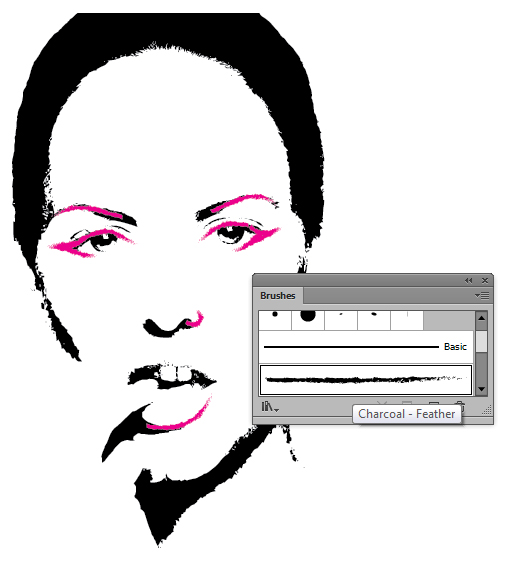
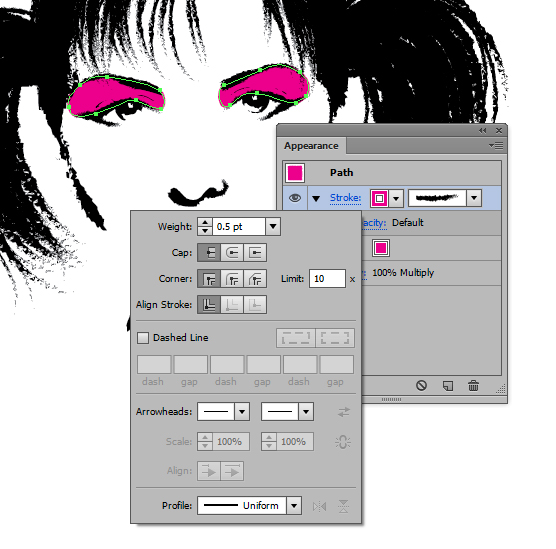
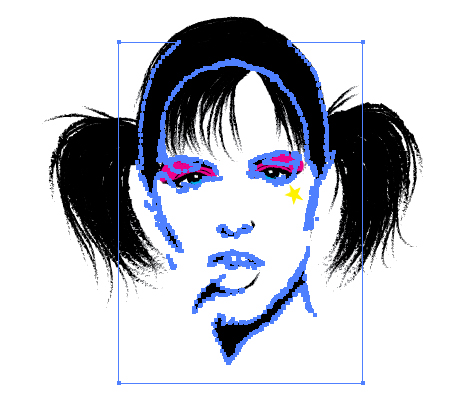
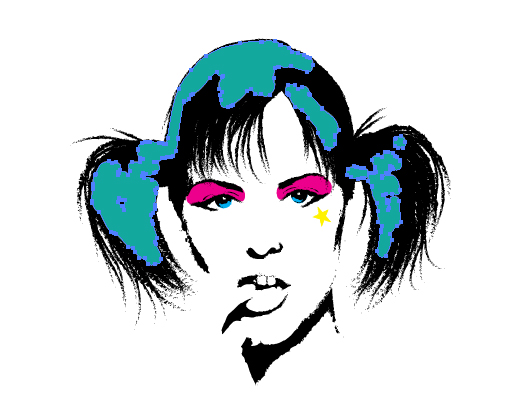
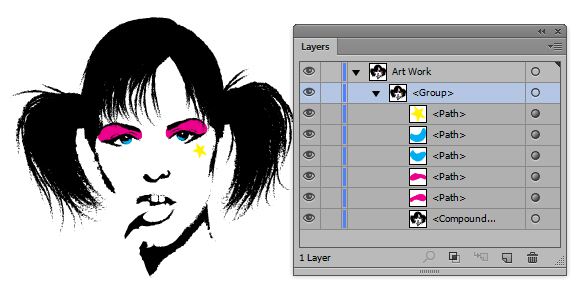
As my illustration seemed to be heading in the direction of a punk/grungy look, I thought I’d add some CMYK inspired decoration. First, I used the Pen Tool (P) to add Magenta eyeshadow with the “Charcoal – Feather” brush as a stroke with a 0.5pt Stroke Weight. This will prevent it from having a clean edge. I then set the shapes to Blending Mode Multiply so you can see the black underneath.
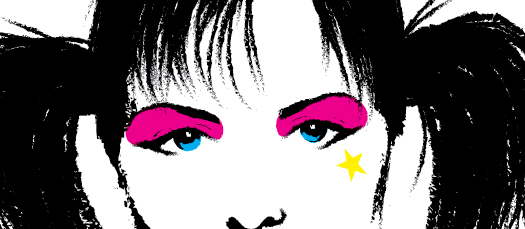
I then go on to add Cyan shapes for the eyes and a Yellow star using the same method.
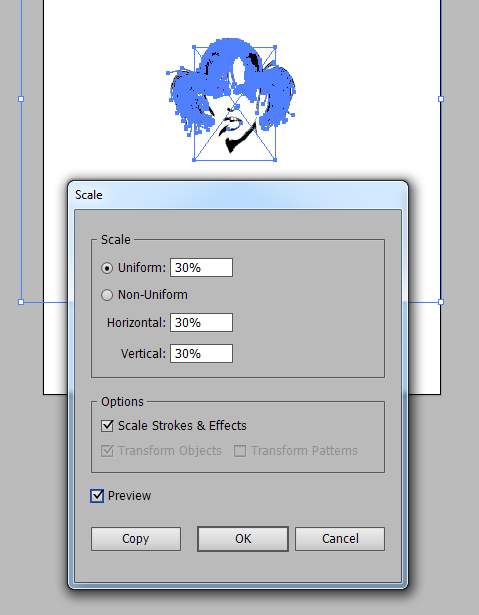
Step 8
So I decided to turn the grungy illustration into a pattern. The first thing I wanted to do is reduce the size of the girls head. To ensure all elements have been scaled correctly, Select All (Command + A) of the shapes/strokes and go to Object > Transform > Scale and make sure the box “Scale Strokes & Effects” is ticked. I reduced the size to 30% and clicked on OK.
Step 9
Now it doesn’t take a genius to realize with all the complex shapes and strokes I used may create a problem with the Pattern Tool. In fact I had to learn from my mistakes. When I applied the Pattern Tool to the illustration we have at the moment, Adobe Illustrator CS6 crashed on me. This hasn’t dissuaded me from using this to create a pattern though. I just need to reduce the amount of paths and points.
The first thing to do is to Expand both of the Image Traces. Use the Direct Selection Tool (A) to select part of the white and then Select > Same > Fill Color to select all of the white and then delete it. You want to be left with just the black of the Image Trace. For both images, make sure they are both Compound Paths (Command + 8).
Step 10
It gets a little complicated when you’ve got Clipping Masks and then the shapes created with the Blob Brush Tool (Shift + B). Duplicate the Clipping Mask shape and use it with Pathfinder > Intersect to isolate the shape for the eyes from one trace.
Then combine the Blob Brush Tool shapes and the original Clipping Mask shape using Pathfinder > Unite and make it into a Compound Path (Command + 8). Use this to then Pathfinder > Minus Front from the other tracing. What you should be left with is one trace without eyes and one trace which is just eyes.
Step 11
With the strokes for the hair, select them and then go to Object > Expand Appearance and then Object > Expand. Then use Pathfinder > Unite to combine the overlapping shapes.
Now with the shapes for the hair, the eyes and the face, use Pathfinder > Unite to combine and then create a Compound Path (Command + 8). However, do you notice all those unnecessary holes at the top of the head?
Step 12
The unnecessary holes that you saw on the previous step will increase the point count. I’m going to use the Blog Brush Tool (Shift + B) to just draw over those areas and then Pathfinder > Unite to create a Compound Path (Command + 8) again.
I then Select All (Command + A) and create a Group with all my shapes (Command + G). I reduced the number of points and paths for my pattern. Although it’s still a complex shape, it should be less memory intensive for me to use the Pattern Tool.
Step 13
To create my first pattern, I’m going to select the group and go to Object > Pattern > Make. You’ll get a Pattern Options dialogue box. In this instance, I’m going to organize the Tile Type “Hex by Column”. Next, I brought the pattern closer together by ticking “Size Tile to Art” and given the Horizontal and Vertical Spacing -8mm value. A positive value will increase the space between the tiles.
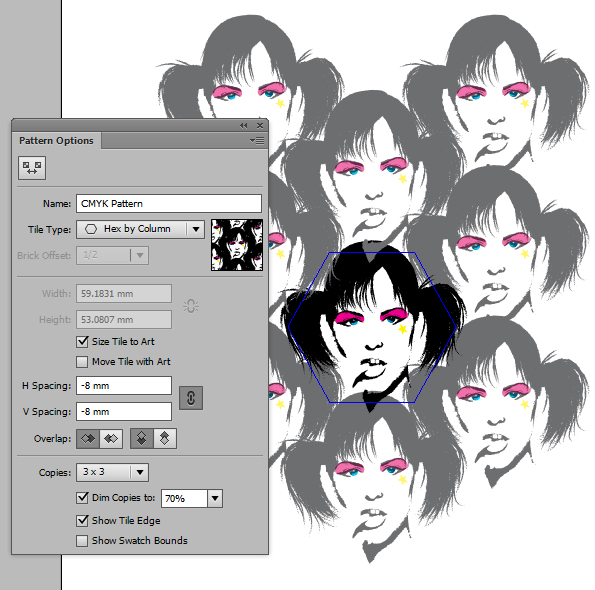
Click on Done when you’re finished and your new pattern will be added to your swatch. Below is the result from our first pattern!
Pattern Variation
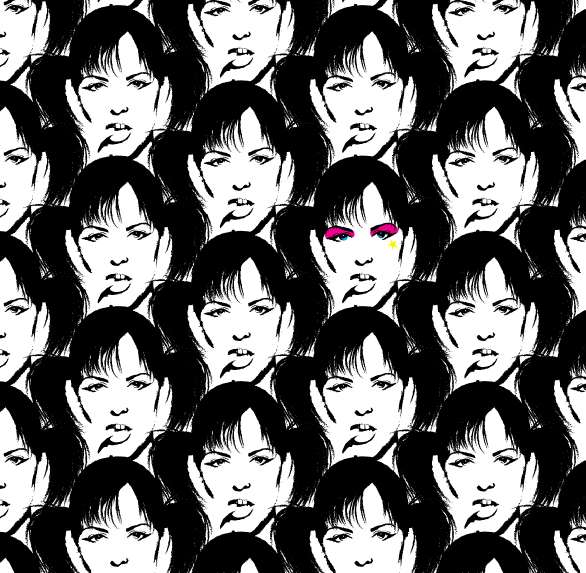
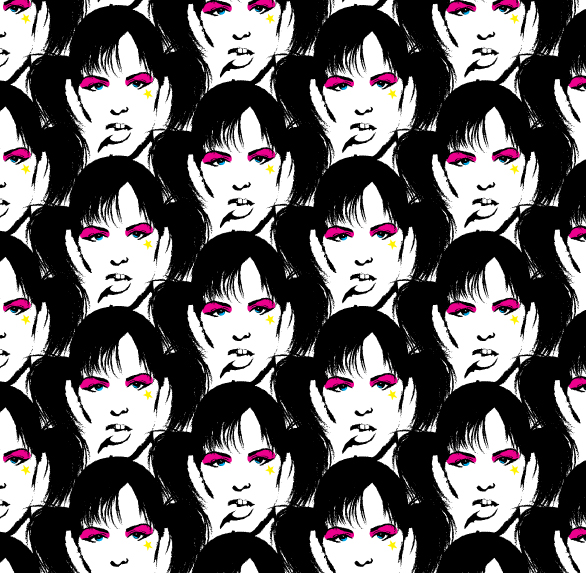
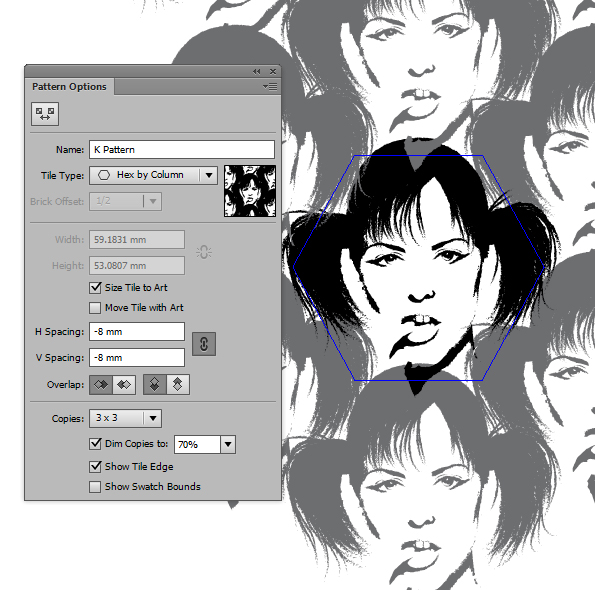
Not content with just the one pattern, I thought I’d hide the colors from the portrait group so the pattern was purely black and white. I otherwise kept the same settings from before.
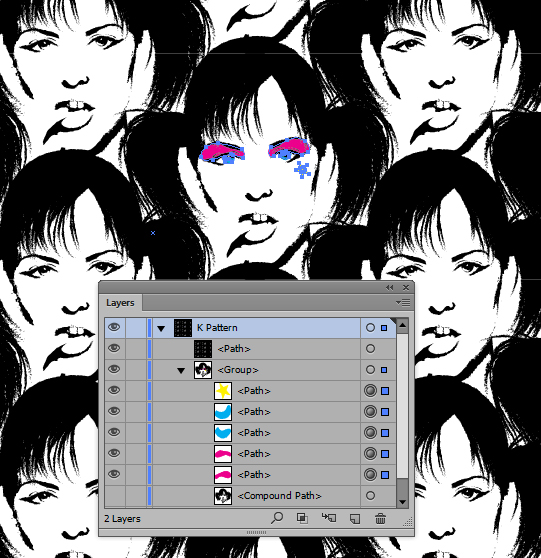
I then lined up the original face to the pattern filled within a Rectangle (M) and hid the shape to avoid any distortion, then made visible the CMYK make up. This will create a person standing out from the crowd, in a punk style pattern!
Conclusion
When tools come along which save you time, even little experiments such as this makes an evening playing around with Illustrator worthwhile. The Pattern Tool especially is par with gradient on stroke as my favorite features of AI CS6 due to the many possibilities and how easy it is to use.
Try it yourself to see what you can create.