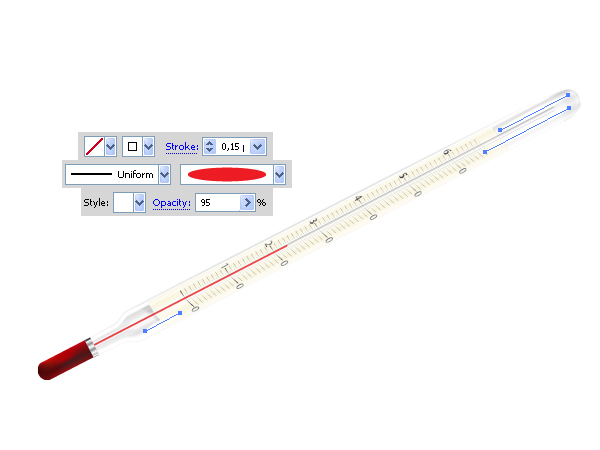
In today’s tutorial we’re going to create a spirit thermometer using a geometry sketch, filled with gradients and using customized Art Brushes in Adobe Illustrator. With some finishing touches with the Type Tool and Gradient Mesh, you too can create this detailed illustration. So let’s begin!
Step 1
To begin with you will need to create the main geometry sketch of the thermometer which is shown in the diagram below.

The scaled images of this sketch are shown below for your convenience.

This sketch is flat because it has none of the light distribution. If you know how to achieve the main outlines of the object and its elements, go to the Step 12. If not, read the following steps carefully.

Step 2
We’re going to start by creating the bulb of spirit at the bottom of our thermometer. Using the Rounded Rectangle Tool, draw a vertical path which has no Stroke and has a red Fill.

With the Lasso Tool (Q), select both lower anchor points.

Go to Object > Transform > Scale, and set all the values to zero in the opened dialog box.

With the Pen Tool (P), delete one of the lowest anchor points.

After that select the lowest anchor point with the aid of the Direct Selection Tool (A), convert it to smooth and change the shape of the path as shown below.

Step 3
Copy this path and Paste in Front (Command + C then Command + F). Go to Object > Transform > Scale, and change the horizontal value of the scaling as shown.

Move it some pixels to the left.

Step 4
Copy the initial path and Paste in Front again (Command + C then Command + F). Select both…

… and then go to the Pathfinder panel, and click the Minus Front.

Go to Object > Ungroup and fill the paths with different colors as it is shown in the diagram below.

Step 5
Using the Rectangle Tool (M), draw a rectangular path over the rounded paths which have been just illustrated. Fill it with gray.

Go to View > Rulers > Show Rulers (Command + R). Then drag the vertical Ruler and drop it in the center of the paths in order to create a Guide-line. Lock the Guide-line in the Layers panel.

Step 6
Using the Pen Tool (P), draw the left part of the main body of the thermometer.

See the helpful images below where the second and the third images are the scaled ones. As you can see from them, the first and the end anchor points of the path should be located on the Guide-line.


Step 7
Go to Object > Transform > Reflect, and click the Copy button in the dialog box, shown below.

Move the copy to the right so the points meet at the Guide-line.

Step 8
To connect the paths, select both lines…

…and go to Object > Path > Join (Command + J). Then Swap Fill and Stroke (Shift + X).

Step 9
Draw the brown path which will represent an indicator panel as it is shown in the diagrams below. Pay attention that the right side of the panel should be lifted up because we will rotate the thermometer after creating the main geometry sketch.


Select the dark blue path, Copy it and Paste in Front (Command + C then Command + F).

Select then both: the copy of the dark blue path and the brown path, then go to the Pathfinder panel, and click the Intersect button.


Step 10
Draw a vertical green line – a tube for the spirit. Increase the Stroke Weight if necessary.

Go to the Stroke palette, and change the Cap of the path to the Round Cap.

Step 11
Go to Object > Expand, then go to Object > Ungroup. Move the path some pixels to the left, because you need to keep in mind that our thermometer will be rotated after creating, and consequently you need to remember about the angle of view. See the image below for reference.

Draw the red vertical path which will represent the spirit in the tube.

Rotate all the paths of the thermometer by going to Object > Transform > Rotate, and your main geometry sketch will be completed.

Step 12
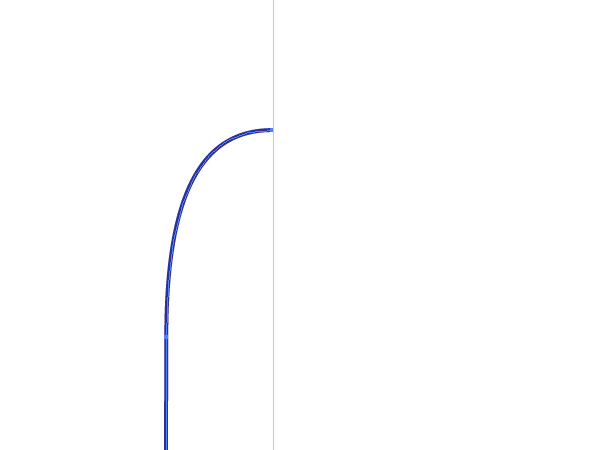
In order to continue the creating of a thermometer model, we will need to create Art Brushes for the shading. Using the Ellipse Tool (L), draw an elongated elliptical path filled with black.

Copy it and Paste in Front (Command + C then Command + F). Go to Object > Transform > Scale and decrease the ellipse copy twice as small. In other words, set the percentage to 50%.

Change the Opacity of the largest ellipse to 0%.

Go to Object > Blend > Blend Options and set the values in the dialog box as shown.

Select both ellipses and go to Object > Blend > Make (Command + Alt + B).

Step 13
Drag and drop this blend into the Brushes panel, and choose the Art Brush option in the opened dialog box.

Specify the options for the brush in the second dialog box. Name this brush “Black brush.” Change the Colorization Method of it to Hue Shift.

Step 14
Create another Art Brush. Using the Ellipse Tool (L) and draw an elongated elliptical path filled with red.

Drag and drop this ellipse into the Brushes panel, and choose the Art Brush option in the opened dialog box as well. Then change the Colorization Method of it to Hue Shift too so as to manage the brush colors more effectively. Name this brush “Art brush 1.”

Step 15
Fill the dark blue path with an angled linear gradient. See the picture below as a reference.

This main part of the thermometer made of glass. Which is why we will need to decrease the Opacity to 15%.

Fill the indicator panel of the thermometer with a light yellow.

Step 16
The green spirit tube should be filled with an angled linear gradient, and the Opacity of it should be decreased also.

Change then the Opacity of the spirit path, because it is semi-transparent too.

Step 17
Select the end red path which represents a spirit reservoir, and go to Object > Create Gradient Mesh. Set the values which you can see in the image below.

Using the Mesh Tool (U), change the mesh nodes colors by selecting them and choosing the appropriate hues.

Step 18
The orange and the violet paths over the spirit reservoir are the light spots. They should be illustrated by filling them with white in the beginning.

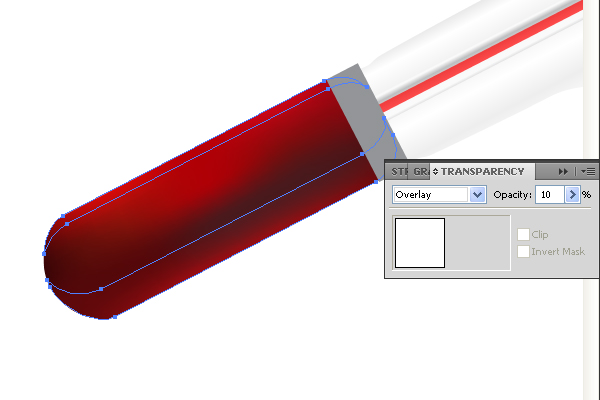
Change then the Blending Mode to Overlay for both these paths in the Transparency panel.

…and decrease the Opacities of the paths.

Step 19
The connecting detail is filled with a usual angled linear gradient.

Step 20
The indicator panel of the thermometer drops a shadow. In order to illustrate this, with the Pen Tool (P), draw a path shown below, and apply the “Black brush” to it with gray Stroke color.

Change the Stroke Weight and the Opacity of the path.

Crop this path by using the corresponding Clipping Mask, by going to Object > Clipping Mask > Make (Command + 7).

Apply the “Black brush” to the next path, and crop it with the Clipping Mask as well.

Step 21
Emphasize on the border of the thermometer by using the “Black brush” applied to the shown path again.

Apply then the “Black brush” with both: white and gray Stroke colors to the paths shown below so as to represent light distribution on the thermometer glass. Crop the paths with a Clipping Mask (Command + 7).


Step 22
Using the Pen Tool (P), draw a stroke shown below over the indicator panel.

Copy it and Paste in Back (Command + C then Command + B). Move the copy to the top of the indicator panel.

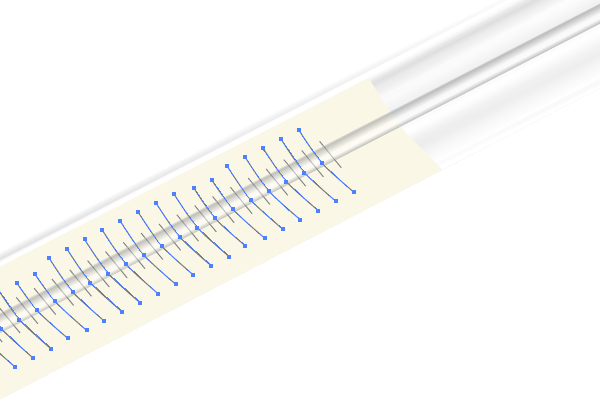
Create the Blend from these two paths. See the image below.

Create another blend the same way. These new strokes should be located between the strokes of the first blend.

Step 23
Select the first blend…

…go to Object > Expand, and click the OK button.

Open then the second Blend in the Layers panel, and change both paths in it so as to decrease the Stroke Weights, and the Stroke colors of them.

Change the Stroke Weights, and the Stroke colors of the other paths shown below the same way.

Step 24
Using the Type Tool (T), add the numbers of degrees to the thermometer. Then change the indicated (with red arrows) values in the Character panel, rotate the numbers by using the Rotate Tool (R), and change the merged strokes of the thermometer indicator panel (shown with a green arrow) in order to avoid their coincidences with the numbers.

Step 25
Add further numbers. Place them in the right positions on the indicator panel, Object > Expand them as you did it earlier in this tutorial, and change the Fill color to gray.

Step 26
Increase then the Stroke Weights of the selected paths in the picture below. Change the colors of them from dark gray to light gray.

The numbers are located under the thermometer glass. In order to achieve this effect, Copy the indicator panel, and Paste in Front (Command + C then Command + F), fill it with an angled linear gradient which you can see in the diagram.

Then change the Blending Mode and the Opacity of it in the Transparency panel.

Step 27
Usually glass has light spots. To recreate this, draw the following paths, and apply the “Art brush 1″ to all of them. Then change the Opacities of them, and change the color to white. Follow the image below.

Illustrate the reflection of spirit on the indicator panel, by using the “Art brush 1″ as well. This reflection is hardly seen but it must be illustrated too.

Step 28
We need to emphasize on the end of the spirit tube. Do it by using the “Black brush.”

Repeat these manipulation with the next path shown below.

And do the same on the connecting detail.

Step 29
Copy the spirit tube, and Paste in Front (Command + C then Command + F). Fill it with an angled linear gradient that goes from gray to white in color, and from 0% to 100% in Opacity. You need to do this because the spirit tube front part is glassy too.

Also Copy the main part of the thermometer, and Paste in Front (Command + C then Command + F). Reverse the gradient of it (because any thermometer is a rounded object if to view it from an end) by clicking the corresponding button in the Gradient palette, and decrease the opacity of the path.

Step 30
Copy the spirit tube, and Paste in Front (Command + C then Command + F) again. Name this copy “Tube.” Fill it with a shown angled linear gradient.

Then using the Pen Tool (P), draw a path which will represent a reflection of the small strokes of the indicator panel on the spirit tube. Create a Blend as you did it before in this tutorial from the paths so as to illustrate reflections for all the strokes on the spirit tube.
Decrease the Opacity of the Blend. Change the Caps of the paths in the Blend to Round Caps in the Stroke palette.

Select both: this Blend and the “Tube”…

…go to the Transparency panel, open the fly-out menu and choose Make Opacity Mask command.

Conclusion
The final image is below. Use the techniques you’ve learned here in your own artworks. I hope you’ve enjoyed this tutorial.
