In this tutorial I will show how to sketch in Adobe Illustrator with the Paintbrush Tool (B), then how to clean this story board up with line art using the Pen Tool (P), Pencil Tool (N), Line Segment Tool (\) and Scissors Tool (C) and finally adding the flat colors using Live Paint (Shift + L). The purpose here is to show that you can create a very detailed illustration while using the tools mentioned in the simplest manner. I’ll later show you how to finish off your vector scene in Photoshop over on PSDtuts+ .
Step 1
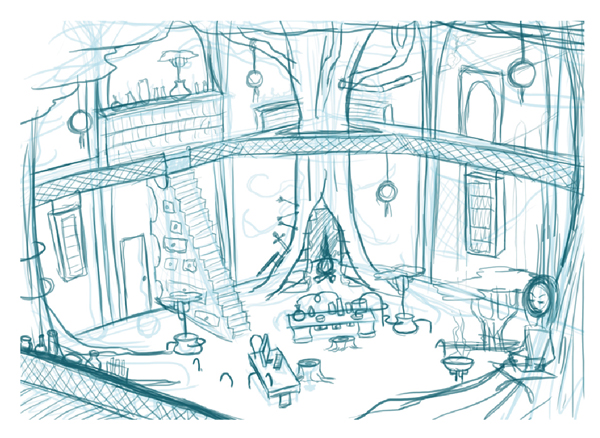
Drawing a rough sketch is easy, you don’t have to worry about anatomy or perspective yet; you just need to get your idea down onto your blank canvas. Personally I do this in Adobe Photoshop, and more often than not, I clean the sketch up in there as well before importing it into Adobe Illustrator. However, today we will be sketching in Illustrator.
Start by opening a New document; File > New > Select CMYK with a Landscape Orientation and click OK. Now we import the rough; File > Import > Select your rough and click on Import. We want to adjust the size to the canvas, so select the image, hold onto a corner and press down on Shift + Alt to maintain the sketches ratio. Once that is done, select the layer the image is located in and lower the Opacity between 30% and 50%, rename it to "Rough" and then Lock it.
Step 2
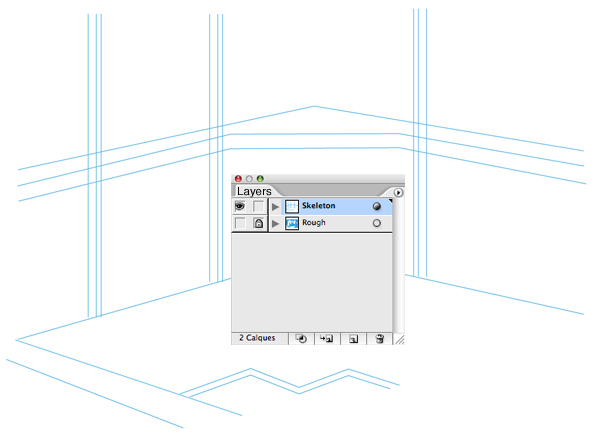
Create New Layer, naming it "Skeleton" and make sure it’s placed on top of your "Rough" layer. We want to focus on the perspective here and create the lines that will become the skeleton of what is to become a greenhouse in the far away future. Since this is at a slight above angle, you want to make sure to show the top of the railing that aligns in the middle of the windows. To do this we want to select the Line Segment Tool (\), set whichever color (in my case blue) on Toggle Stroke (X) and start shaping out the lines. Don’t worry about lines overlapping, that will matter when making the line art.
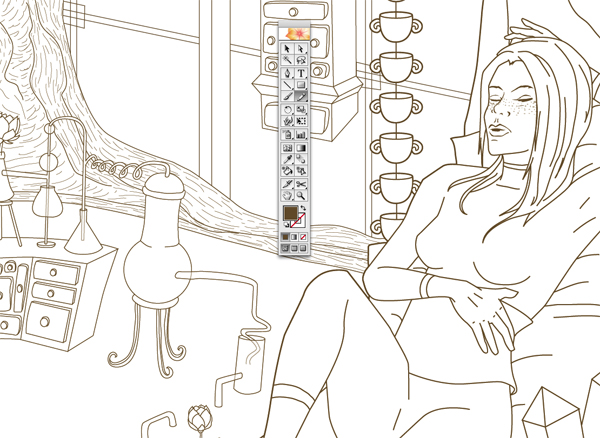
Tip: Holding down Shift when using this tool will allow you to draw perfectly straight lines horizontally and vertically. Apologies, my program is in French, so everything appears in French. You can’t change the language without re-installing the program!
Step 3
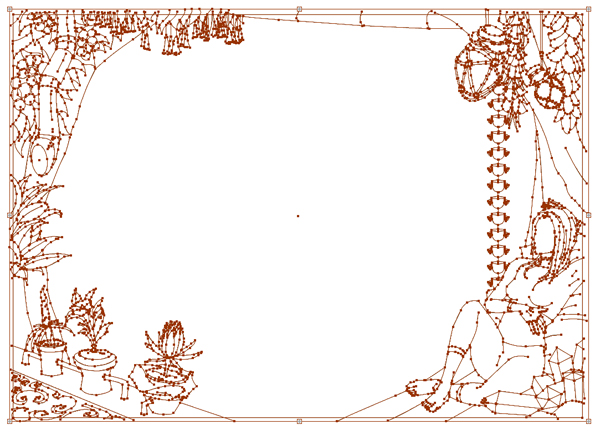
Here we begin using the Paintbrush Tool (B), using its default setting, the width set to 0.3pt. This may be too thin if your canvas is very big, or too thick if your canvas is really small, so you want to find a Stroke Weight which is comfortable on your own eyes. I generally stick between 0.3pt up to 0.6pt.
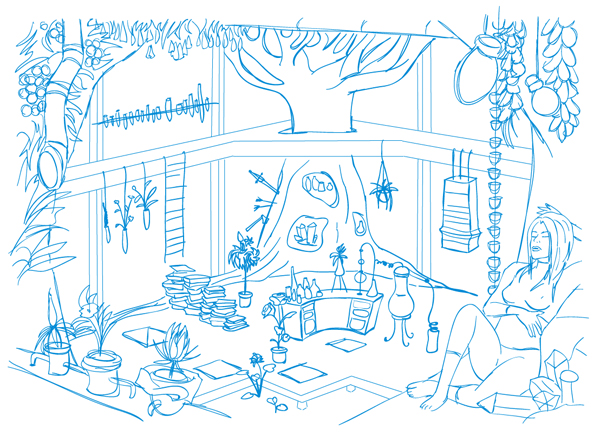
This is another rough, but you want to worry more about the size of the character and the frame she is sitting on compared to the lower part of the room. Details are not as important yet. I personally like to use circles and squares to shape things out. Much like the room, I create skeletons I will use as a base to then draw a sketch on top of. This is also where I change things from the initial rough. I deleted the second desk and switched the stairs with a hanging ladder instead and realized that the fireplace I’d wanted to put in the tree made that corner of the drawing look too crowded.
Step 4
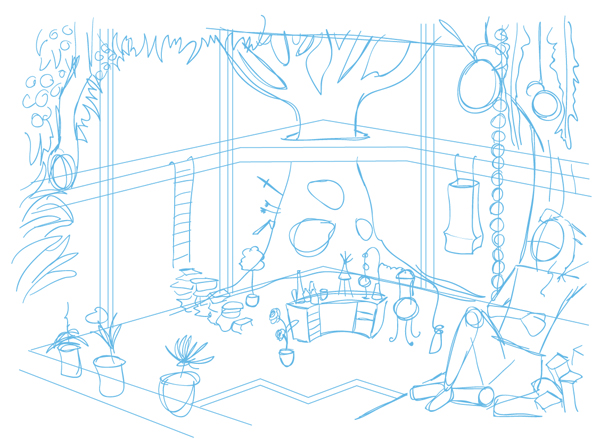
Locking the layer that contains the second rough sketch and room skeleton, we then create a new layer on top of that one named "Sketch". At this point you can delete the first rough sketch and lower the Opacity on the "Skeleton" layer between 30% and 40%. This way it’ll be your base but neither will it hinder you as you sketch out the illustration.
Continuing with the Paintbrush Tool (B), we start shaping out the forms of the character and objects, adding detail and additional elements. You will want to pay extra attention to detail where it concerns the frame, as the line art will need more work there than the lower part of the room does. Sometimes the sketch isn’t enough for me to start building my line art on, so I create a second sketch layer and go in deeper with detail to make my reference stronger, but in this case I personally didn’t need it.
Step 5
Before we set up the line art and start drawing away, I’ll explain what, why and how I use the following tools to create the line art. Throughout the years I’ve tried to find ways to perfect my style and today I have a few rules that I follow and apply through certain tools. This can differ for every person and I’m sure my methods won’t work for everyone, but hopefully some of it can be helpful.
The Pencil Tool (N) allows you to draw freehand and you don’t need to think about where you place your anchor points to later on manipulate. I use the Pencil Tool (N) for everything that, for lack of a better term, ‘breathes’ (Trees, flowers, water, etc). But I also use it on objects that are soft (Pillows, Fabric, etc). And then last but not least, wood texturing or ornamenting. All these are unique in their shapes; it’s rare and/or impossible to find a flower identical to another, meaning the human eye won’t necessarily notice the imperfection in your lines since there are supposed to be imperfections. Here are the lines made with the Pencil Tool (N) in this illustration:
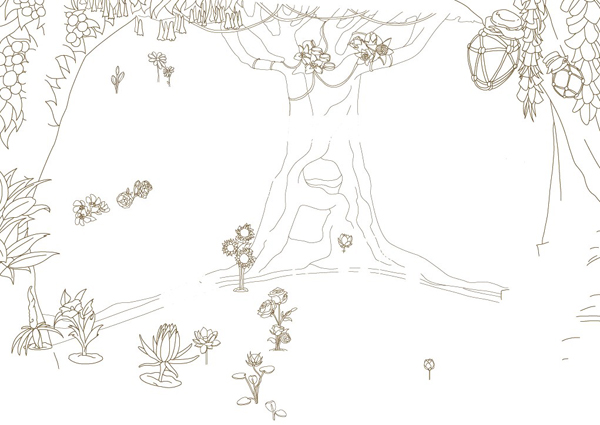
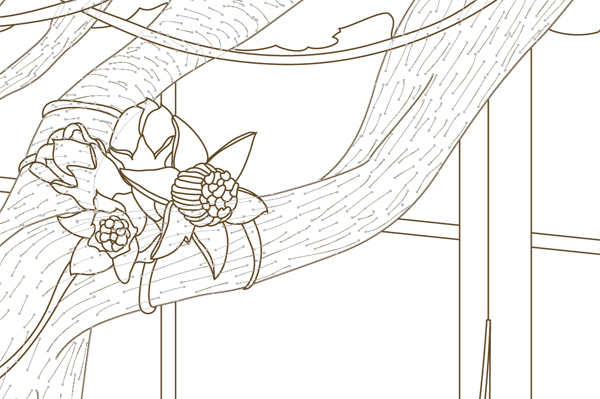
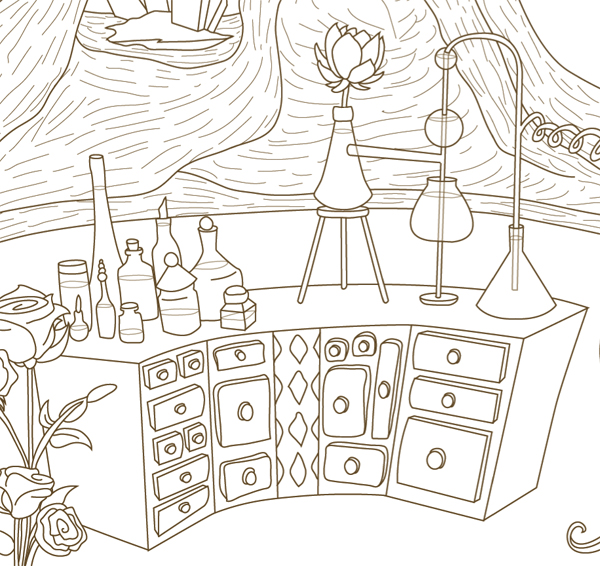
Here’s a close up of the wood area and a hand drawn texture pattern in line art.
Step 6
The Pen Tool (P) is awesome for everything that needs a certain amount of precision or objects that have hard edges. Whereas you can "wing" the shape of nature due to it never being identical, hard objects are a different story (beakers, pots, cupboards, desks, etc). If you don’t draw the object close to what it should look like, the viewer will instantly notice. I’ve added the lines made with the Pen Tool (P) on top of the Pencil Tool N) lines:
Step 7
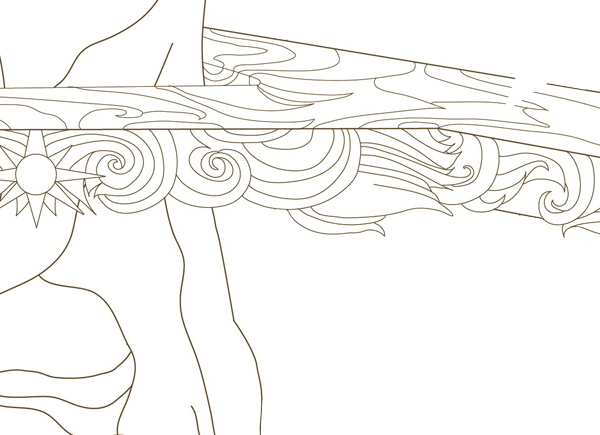
The Line Segment Tool (\) is great to draw frames and in this piece I used it to make the greenhouse’s windows (of course this could be done with the Pen Tool (\) as well). I often mix this tool with the Scissor Tool (C). I will focus on one specific part of the drawing to show how you can use these together.

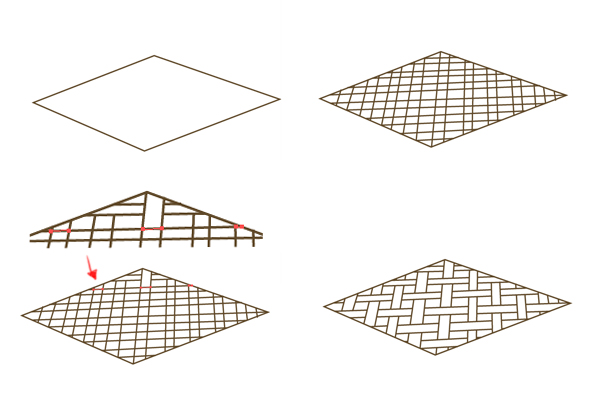
The square openings in the illustration’s floor have a handmade pattern. For this we used the Line Segment Tool (\) and the Scissors Tool (C). We shape it out with the Line Segment Tool (\) first, allowing the lines to overlap one another and once complete, we select each line one by one and used the Scissors Tool (C) to click on the spot of the line we want it to be cut at. Once we created the new line selections, we select those we want to remove and hit delete on our keyboard.
Step 8
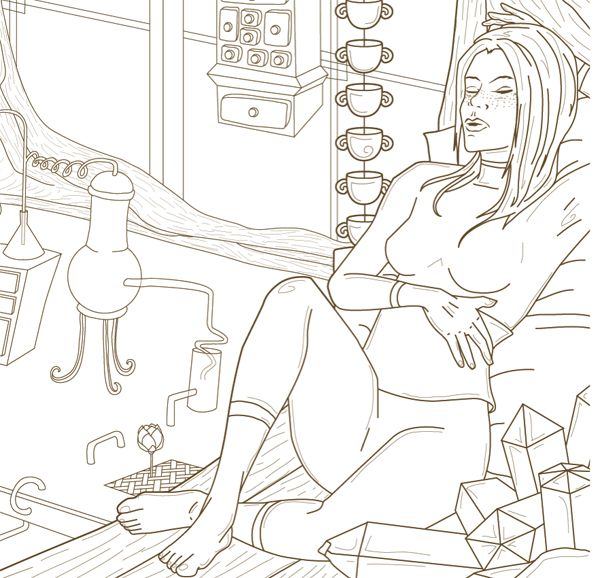
As you’ve most likely noticed, I left out the character’s line art. The reason for this is that I use both the Pencil Tool (N) and the Pen Tool (P). In this case her clothing is close to her body, so you can see every curve. This needs to be very precise (since if there is an obvious imperfection, the viewer will notice instantly), so I used the Pen Tool (P) to draw out her body and head shape. But then I used the Pencil Tool (N) for her hair and her facial features. Hair flows and moves, so you want to avoid having it look stiff and the Pencil Tool (N) is perfect for that.
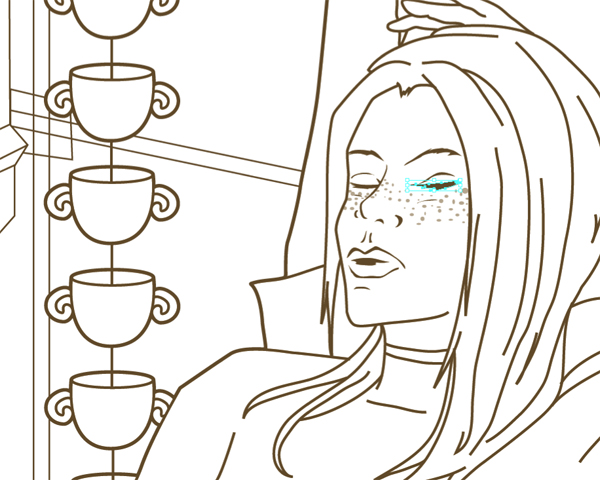
As for the facial features, I use the Pencil Tool (N) set to Toggle Fill (X) rather than Toggle Stroke (X). Faces are what people are drawn to right off the bat. You want these to stand out from all the other lines. Hand shaping the thickness and flow of the line by using toggle stroke is a way to do this.
Side Note: When I draw freckles I lower them in Opacity (between 20% and 40%) because otherwise they would be too harsh and would distract from the rest of the facial features.
Step 9
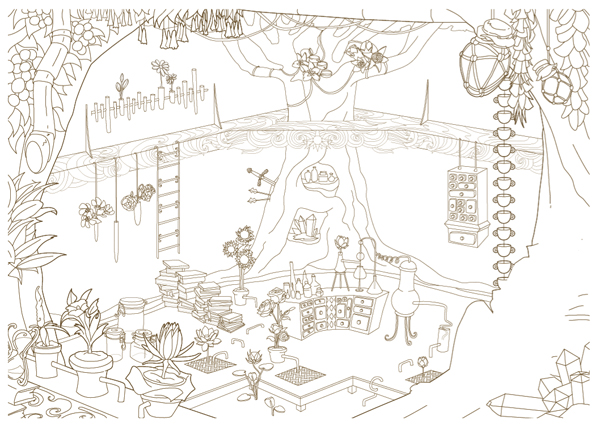
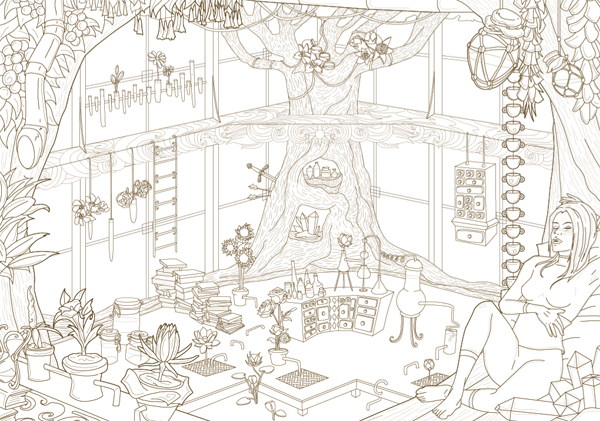
Now we’re going to set up the lines. We want to separate the line art into two layers; "Foreground" and "Background". The line art of the foreground will be thicker than that of the background as it will give a certain amount of depth to the illustration. In this case, we are going to use a Stroke Weight of 0.5pt for the foreground and 0.3pt for the background. I chose a dark brown for my lines since I personally find that black is very harsh on the eye and doesn’t work as well with the colors I use. Then, keeping the different ways on using the Pen Tool (P), Pencil Tool (N) and Line Segment Tool (\) in mind, we can start drawing out the line art on top of our Paintbrush Tool (B) sketch!
Step 10
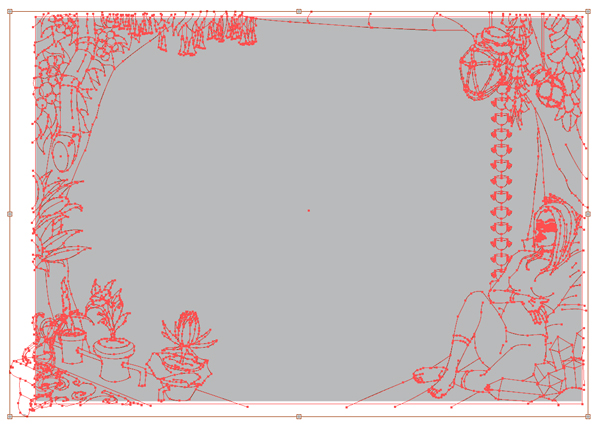
We could call the line art completed right there, but taking a closer look you’ll notice that the foreground (even with a thicker Stroke Weight than the background), doesn’t pop out as much as it should/could. There is an easy way to rectify this; we are going to create an outline. To do this we are going to use Live Paint (Shift + L) and the Pathfinder panel. Since we separated the foreground from the background, we are going to Lock and hide the "Background" layer. Once that is done, we duplicate the "Foreground" layer, rename it to "Outline" and place it in between the "Foreground" and "Background" layer. Once this is done, we lock the "Foreground" layer and select the "Outline" layer and then use Live Paint (shift + L or Object > Live Paint > Create).
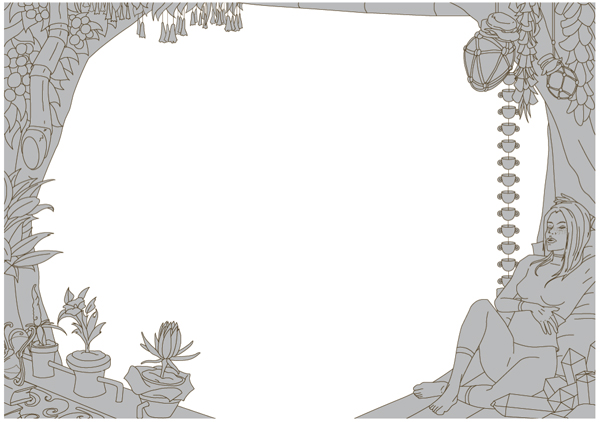
Keeping it selected, we delete the line art from the Toggle Stroke box (this is where you double check having duplicated the “Foreground” layer) and then we select a light grey (or whichever color you fancy) and allow it to fill in your newly created Live Paint selection. You want to use a different color than your canvas color so you can see what you’re doing.
Step 11
Now that we’ve done that, we want to remove the grey from areas that was filled in due to being enclosed, but you will need an outline just like the rest. Press Shift + H so the Live Paint is still selected, but we aren’t hindered by the strokes anymore. Select the Live Paint Bucket (K) and make sure that you have no color in your Toggle Fill and Toggle Stroke. Now spot all the areas that need to be without color and start deleting the grey from them. A red outline will appear to show you that you are working on a Live Paint active area.
Remember to get any smaller areas, for example where the hanging cups are in my composition.
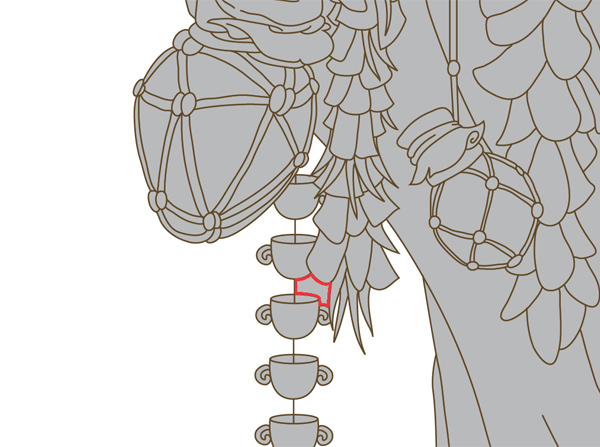
It can be tedious but it will help separate the immediate foreground from the background.
Step 12
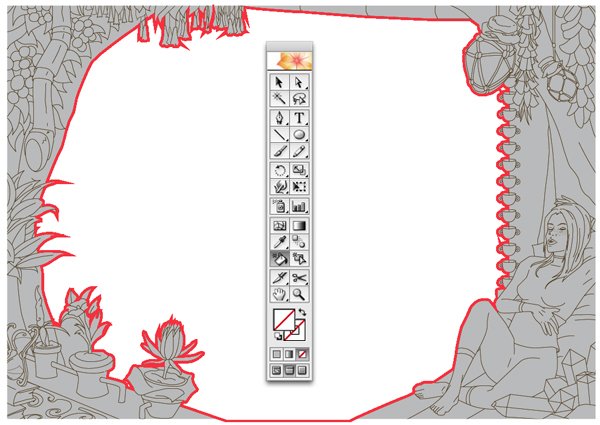
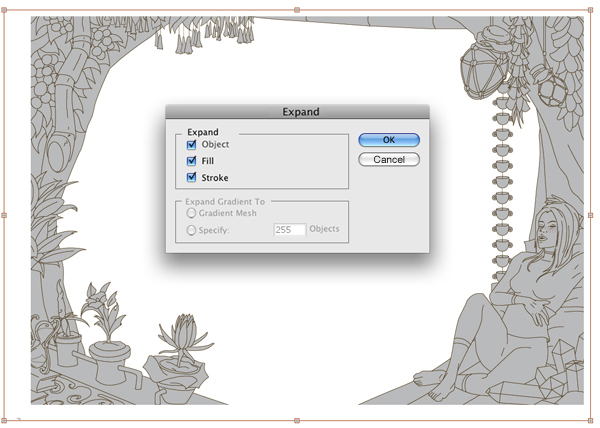
Having cleaned up the selection, keep the Live Paint selected and go to Object > Expand (Decompose in French). A window will pop up and you want to make sure all three options are checked (if they aren’t, Expand the Live Paint twice. That normally does the trick). Click OK.
Step 13
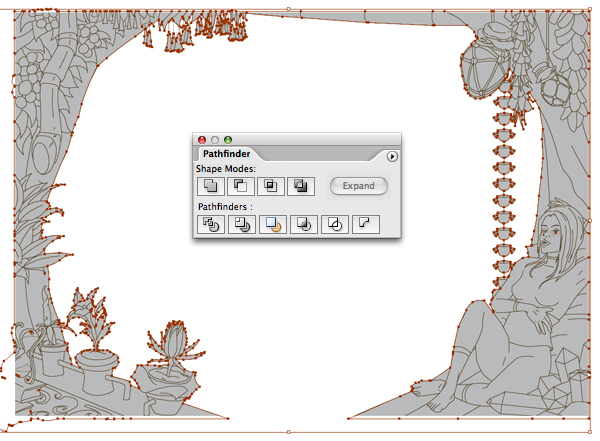
After successfully Expanding the Live Paint, we are going to bring out the Pathfinder (Window > Pathfinder). Press Shift + H again so you can see your selected lines and then going to the Pathfinder, we’re going to use the option ‘Merge’ (highlighted in the screenshot). You’ll see that it all turns into one big shape.
Step 14
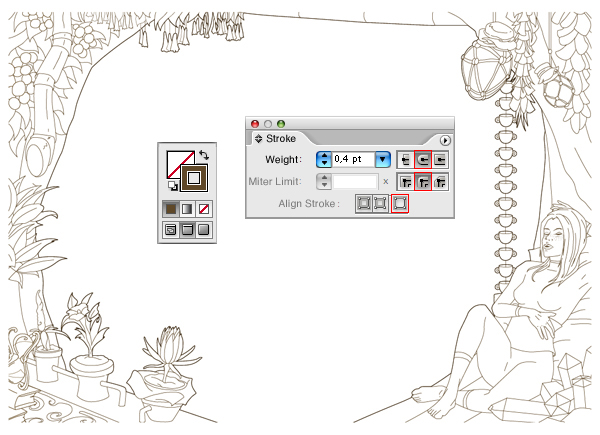
Since this will be an outline, we are going to delete the grey and return the same color used for the line art (in my case brown) into the Toggle Stroke (X). It will automatically put it at 1pt, center it on top of the original line art and give it square edges (this is default). We are going to change the Stroke Weight to 0.4pt and by selecting the Align Stroke to Outside option in your Stroke panel rather than center, it will sweetly snuggle your original line art. To make it a bit less harsh, we are also going to select the Rounded Corner option in the Stroke panel. Outline complete! We can Lock that layer and move on to the next step.
Step 15
The foreground now stands out from the background thanks to the outline, but due to the larger size of the objects, nature and character compared to the back, the line art feels ‘flat’. This actually applies to the tree in the background as well; it doesn’t have any texture at all, and while you could throw a pattern onto it, the main issue with patterns is that it’s repetitive. Patterns are very effective when you’re drawing an entire forest and your fading some of the barks out in the back, but since there are only three of them here and they are the primary focus, we want to make sure you can’t see the copy paste in the texture.
Create New Layer on top of the "Background" layer and name it "Tree Texture". Because the general Stroke Weight of the background line art was at 0.3pt, we are going to use a Stroke Weight of 0.18pt to draw out the texture. I personally like the texture to be less ‘in your face’ than the tree outline, hence why I suggest a thinner Stroke Weight.
Using the Pencil Tool (N) we are going to draw short lines that follow the shape of the tree branches and bark. It’s all organic, so you don’t have to over-think it, just draw them in the direction that feels natural and you generally can’t go wrong. It may seem silly, but sometimes it’s good to walk out of your house and stand up close to an actual tree and just stare. Your neighbors will think you’re weird, but anything for artsy stuff.
Step 16
Create New Layer on top of the "Foreground" layer, naming it "FG Detailing". We are going to apply this same process on the trees in the foreground. Since the Stroke Weight of the foreground was thicker (0.5pt), we’ll be using a Stroke Weight at 0.2pt for the tree texture. Normally I’d have gone with 0.3pt, but since that is the Stroke Weight of the background, I went with a thinner width to keep them disconnected from each other.
In this same process I add inner lines to the character and objects in the foreground to make their line art appear more detailed (less flat) from the background. There is no real logic to their placement, just aim for what looks aesthetically pleasing.
Step 17
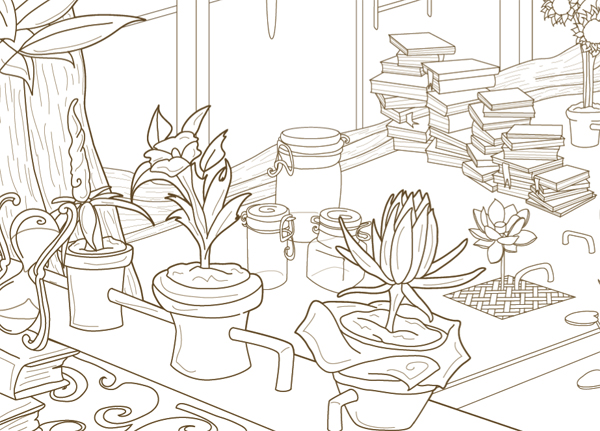
Create yet another new layer and place it on top of your "Background" layer, naming it "Water Rings". Here we add some water rings inside the pots and beakers that we lower in Opacity (50%) so they appear slightly transparent. You can either do this with the Ellipse Tool (L) to make the circles more precise, or with the Pencil Tool (N) so there is less precision.
Step 18
Now we’ve finished the line art. Select all your foreground layers ("Foreground", "FG-Detailing") and Group them together (Ctrl + G) and then select all your background layers ("Background", "Water Rings", "Tree Texture" and "Outline") and Group those together (Ctrl + G).
When your file gets really heavy and frustrates you more than anything to work on, here are two things you can do to lighten things and speed up your program. Hide the background while you work on the foreground (vice versa). Or turn your line art into symbols before you start coloring. In this case we’re going to turn it into symbols. Before we do this, we need to prep the file for coloring.
Step 19
Close your file and duplicate it (mine was on my desktop, so I duplicated it there). Rename the duplicate to something memorable. Open the duplicate and delete the layer that contains the sketch (if you’ve kept your roughs and skeleton up until now, delete those out too).
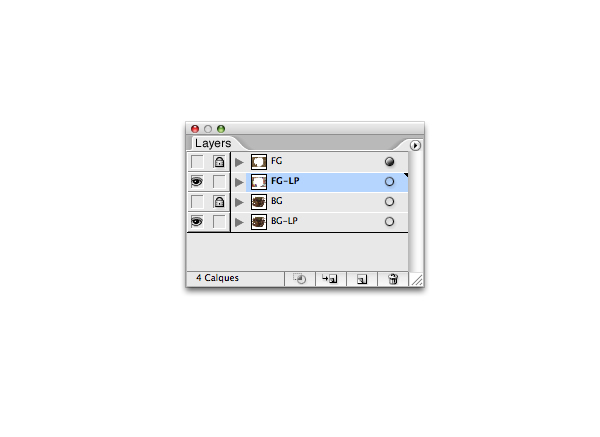
Now we are going to duplicate the "Foreground" layer and the "Background" layer. Place the duplicates beneath their originals. Name the "Foreground" duplicate as "FG-LP" (Foreground Live Paint) and the second as "BG-LP" (Background Live Paint). Once that is done, Lock and hide the "Foreground" and "Background" layer. We could have just put all the line art together and made one big Live Paint, but the main reason we won’t, is because as we will be post processing this illustration in Photoshop, it’ll be easier to shade and highlight the foreground separate from the background.
We are going to turn both layers ("FG-LP" and "BG-LP") into their individual Live Paints (Shift + L) and just like we did with the outline, we are going to delete the Toggle Stroke (X) in both layers, making it so the Live Paint selection is present, but without any color. Lock them and we’ll come back to them in a minute.
Step 20
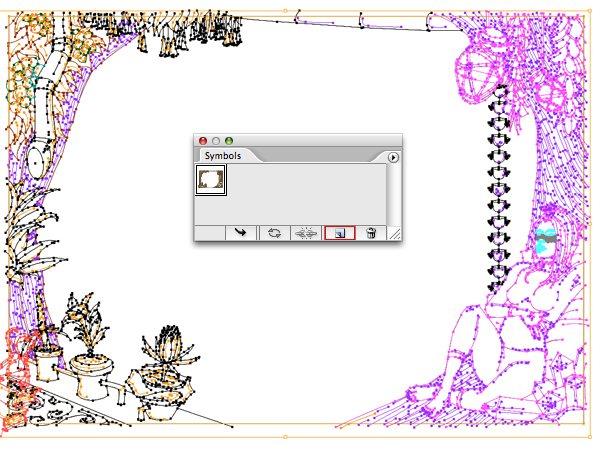
Now we are going to turn the line art into Symbols. Unlock the "Foreground" layer, select it and then locate your Symbols panel (Window > Symbols). Click on New Symbol. Once it is in there, Create New Layer (name it "Foreground Symbol") and load your symbol in by selecting it in the symbol window and clicking on the black arrow.
Note: I have CS2, but have once worked in CS4 and know that when you create a symbol in there, it automatically creates itself on top (replacing it) of whatever you made a symbol of in the first place. It doesn’t do that in CS2. If you have CS2, you keep your foreground layer while loading in the Symbol since now you have to move the symbol around until it matches up with the line art’s placement. After matching up your symbol with the initial line art, you can delete the "Foreground" layer and Lock the foreground symbol. Repeat this process with the "Background" layer.
Tips on Live Paint: It’s quite sensitive. I once spend an hour wandering inside my layers to understand why it wouldn’t work. Turned out I’d left a hidden reference layer containing a .jog file in there. Previously made Live Paints and/or masks don’t make Live Paint happy either, so you want to Object > Expand them before creating one.
Step 21
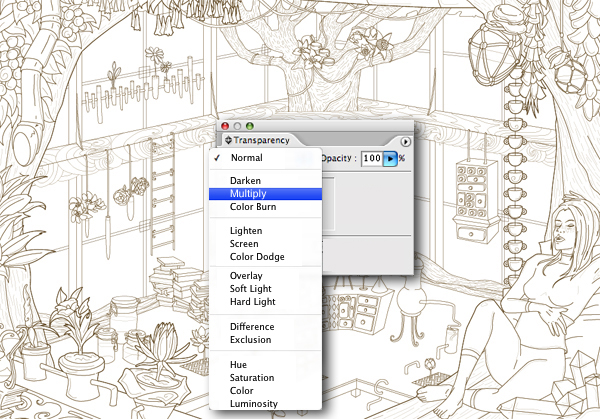
Last step before introducing the flat colors to the illustration. I personally don’t like to leave my line art without a Blending Mode on top of my colors. I find the edges look strange and the colors don’t mesh. When you don’t put a Blending Mode, you get a very strange mix of light line art on top of dark flats, or when you use a brown similar to the brown I used in the line art, you won’t be able to distinguish them, etc. Basically putting a Blending Mode on your line art will allow the lines to merge with your colors instead of becoming very obvious, or not at all (depending on your color choices). We are going to select the foreground symbol layer and background symbol layer and apply a Blending Mode Multiply.
Step 22
Colors are fun, but sometimes tricky. For an icy atmosphere you can go with blues, whites and greys. For a warm one you can go with reds, oranges, yellows and browns. If your illustration is part of a story with a color scheme decided on in the story, you have to match those up with the atmosphere you’re going for.
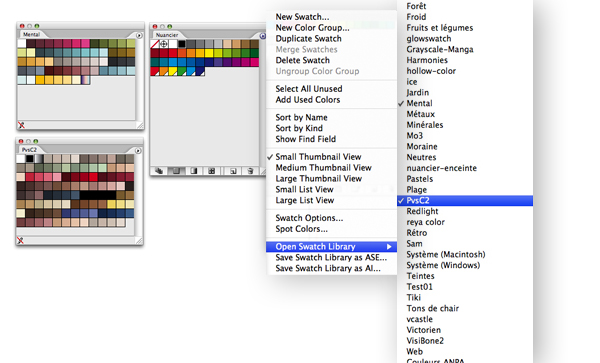
This is a story board of a story I’ve written, so I need to include the character’s coloring and revisit the room she’s in in the written text to remember what colors I described there. She is pale with black and blue hair and wears clothes in different shades of blues. She lives in a castle where there is a greenhouse that supposedly is filled with the colors of the rainbows, but not in a way where it agrees the eye. With this information, I bring out my color palettes I’ve created a while ago. The one titled "Mental" holds the colors that I use for the characters in this story and the "PvsC2" color palette is one I made for a random drawing a long while ago but often use since there are some great shades of brown and red in there. I also keep the default CMYK palette of Illustrator, since it carries all the colors of the rainbow.
To find the other color palettes Illustrator has to offer, click on the small round arrow at the top right corner of your Swatch panel and go to ‘Open Swatch Library’. A side window will appear and the list of palettes will show.
Step 23
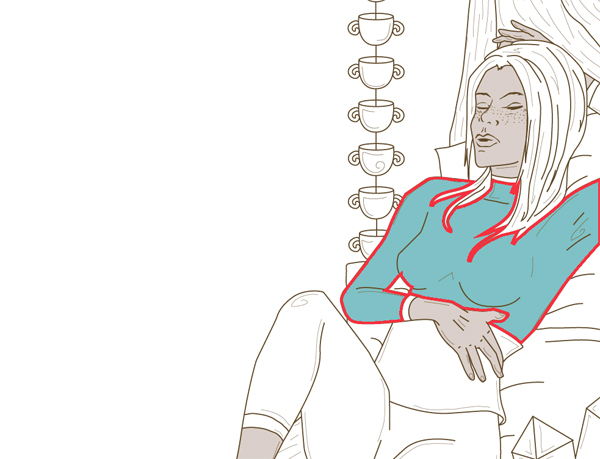
Now that we have our palettes and Live Paint at the ready, we can start coloring! Select your foreground or background (whichever you want to start with) and choose the Live Paint Bucket (K). Pick a color off your palette and start clicking on the area of the Live Paint you want in that color.
Note: If some areas of your line art won’t react to the Live Paint, it’s possible that you didn’t close up your lines properly, and so it either selects a larger part than you need (including its neighboring surrounding), or it doesn’t do anything at all. All you need to do to fix this is use the Pen Tool (P) or Pencil Tool (N), locate the opening in the line art that shouldn’t be there and then close it off in the Live Paint itself.
Step 24
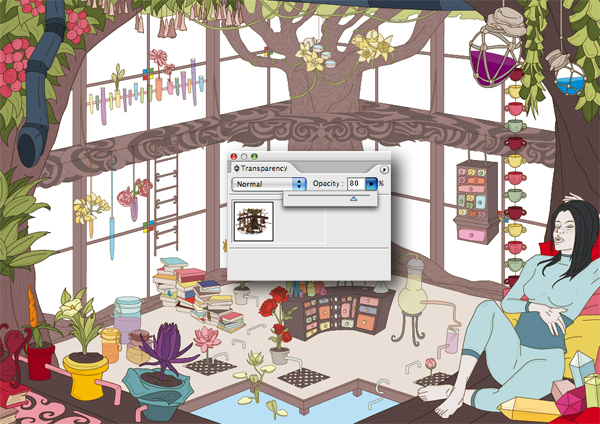
After having added all the flat colors, we are once again going to make the foreground pop out from the background and add more depth. This small tweak will help show the difference made between the foreground and background. We are going to lock the foreground symbol layer, the foreground Live Paint and the background symbol layer.

Once that is done, we select the background Live Paint and lower the Opacity to 80%. That’s it, now the foreground stands out properly both thanks to difference in line width and flat colors.
Step 25
To make the flats appear less flat, we are going to use a Gradient. Create New Layer that is placed on top of all the others and name it ‘Gradient’. Using the Rectangle Tool (M), draw a rectangle out that covers the entire illustration. Keeping it selected, add in a gradient to your liking and that would compliment your flat colors. You can find default gradients in your color palette, or you can make a new one and choose your own colors by using the Gradient panel; Window > Gradient.

Using the Gradient Tool (G) next, re-direct your gradient. To do this you simply drag out out a line in the direction you want the gradient to appear in. You want to take advantage of the fact that this gradient will help with your shading and highlighting afterwards, so make sure the darker color of your gradient covers the area of your illustration that your future light source will hit the least.

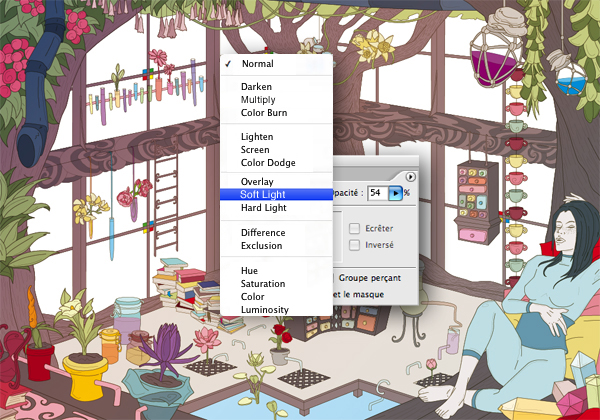
Step 26
With the gradient still selected, we are going to use the Blending Mode Soft Light (it is subtle but I personally like it) and lower the Opacity somewhere between 40% and 60%. That way it’s noticeable, but not overwhelming.
Step 27
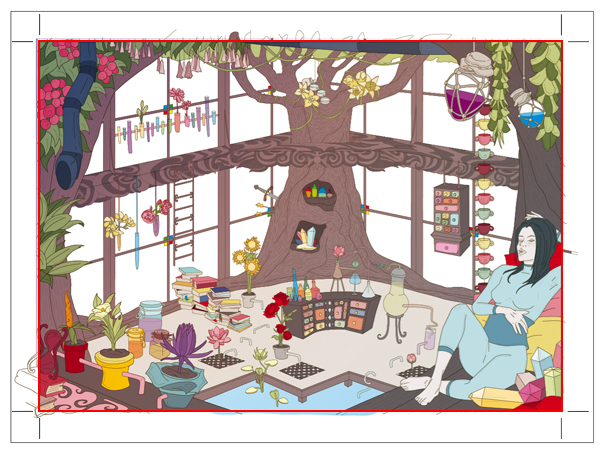
Finally, to make sure the excess line art doesn’t appear when saving the file and bringing it into Adobe Photoshop, we’re going to create a crop zone. This is specific for CS2, since versions above it have the Artboard option. Create New Layer, use the Rectangle Tool (M) set on Toggle Stroke (X) so you get an outline and not a filled rectangle. Make sure it hugs your illustration tightly and that the excess line art is outside of the rectangle. Keeping it selected we go into Object > Crop Zone > Create. It’ll do its magic from there and tada! When you save or export your illustration it will take this new crop into account. The grey outline is the original canvas and the red outline is the new crop we just made.
Step 28
From beginning to end we’ve separated the foreground from the background so that when we load these files into Photoshop, we won’t need to worry about being overly neat while shading and in case we need to darken or lighten the background from the foreground some more.
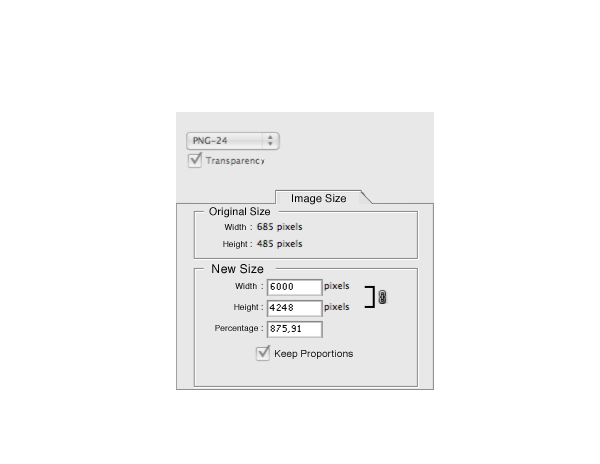
To save these, first hide all the background related layers, only keeping the foreground visible and then go to File > Save for Web. A window will open and load in the foreground illustration, to make sure the area where the background will be is transparent, save the file as a PNG. You can find the option to this on the right under Predefined Parameters.
The size of the illustration depends on what you want it for. The reason I don’t continue in Illustrator is because I don’t need it to be infinitely scalable and so it’ll be faster to post process in Photoshop. It also allows for a grittiness I haven’t been able to achieve in Illustrator yet. I saved it at 6000px in width, so it’ll be big enough to print a large poster if one day I would like to do so.
You’ll find the option to resize the image also on the right, under Predefined Parameters and under Image Size. Normally when you type in the numbers of the width, the height will automatically size along with it, if it doesn’t do that, make sure the Conserve Proportions box is checked. Apply the changes you just entered (Click on Apply right below the resize image options) and then save it. Once you’ve saved it to your desktop (or whatever folder you keep your files in), repeat that with the background. Make sure to save it at 6000px in width just like the foreground (or whatever size you chose) and as a PNG so the flat colors you set at 80% Opacity to help the foreground pop out, stays partly translucent.
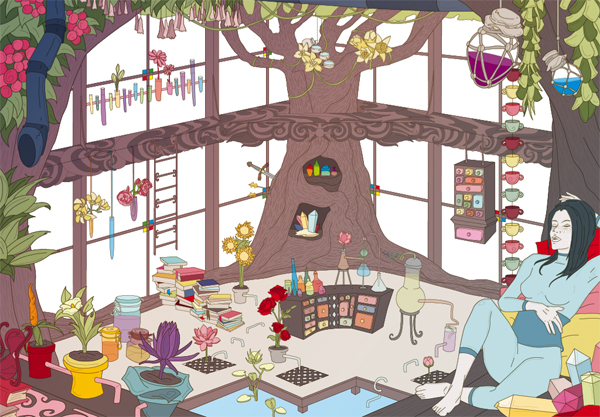
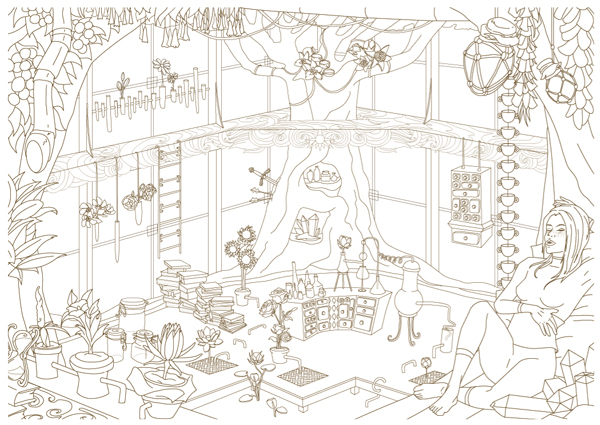
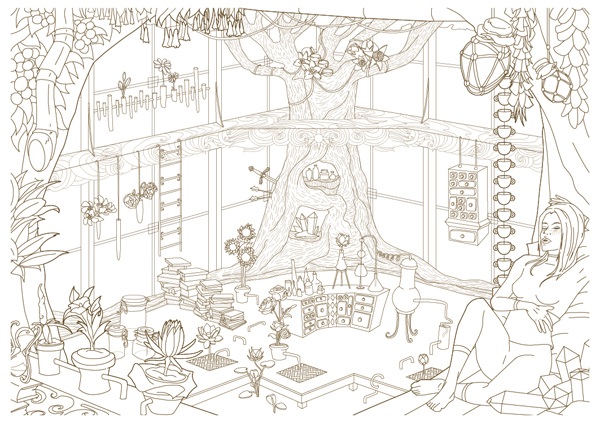
Final Image
Now the illustration is ready to be shaded, highlighted, textured and finished! To find out how to do this, you can check out Part 2 of this tutorial over on PSDtuts+ !