This tutorial will introduce you to a wide range of advanced Adobe Illustrator tools through creating a gloomy, jail wall text art effect. I’ll be using raster textures to create a pattern and texturing for our brick wall and barbed wire. So let’s get started!
Step 1
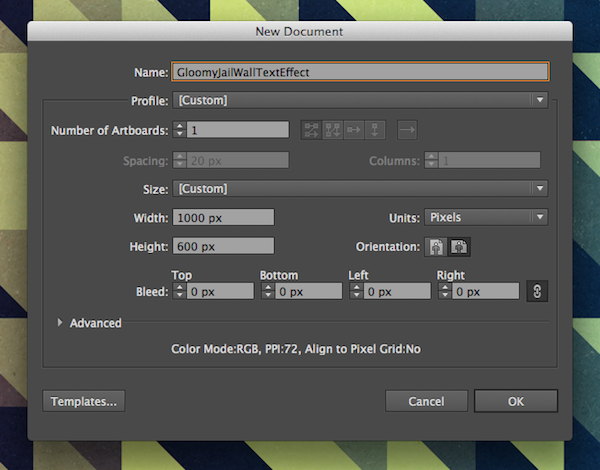
Start by creating a new blank document by opening Adobe Illustrator and going to File > New. Set the page size (in this example I set it as 1000 x 600 pixels) give it a name and click OK.
Step 2
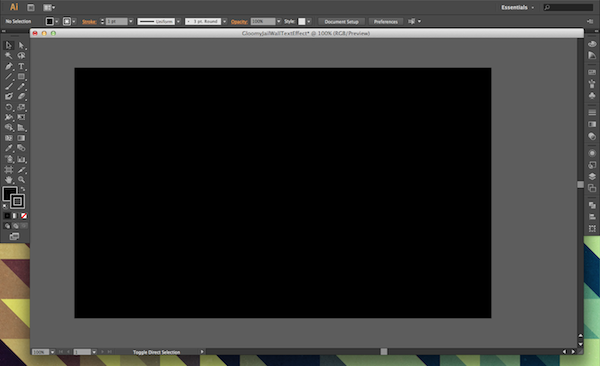
Now would be a good time to change our background color to black. Create New Layer by clicking the New Layer button at the bottom of the Layers panel. If you can’t see the Layers panel, go to Window > Layers (F7) to reopen it. Place the new layer behind the main layer and name it "Background" by double clicking it. Select the Rectangle Tool (M) and draw a box that covers your whole canvas. Change its fill to black and lock the layer.
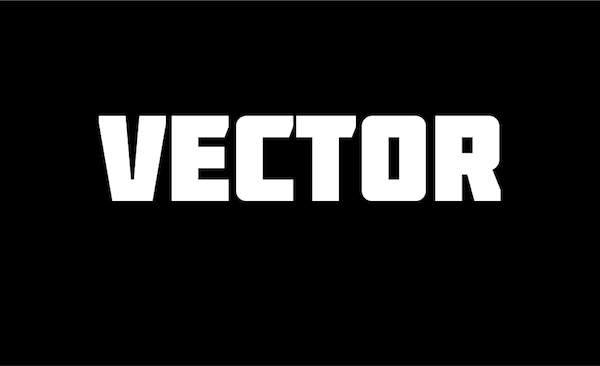
Choose your font by selecting the Type Tool (T) from the left toolbar and clicking somewhere on your canvas. Type "Vector", or other chosen word and change the font and size of the text to suit the page. I used "Molot" in this tutorial, but any big, bold text will do. Change the text color to white then convert the text into paths by going to Type > Create Outlines (Shift + Command/Ctrl + O) and Group the word by going to Object > Group (Command/Ctrl + G).
Step 3
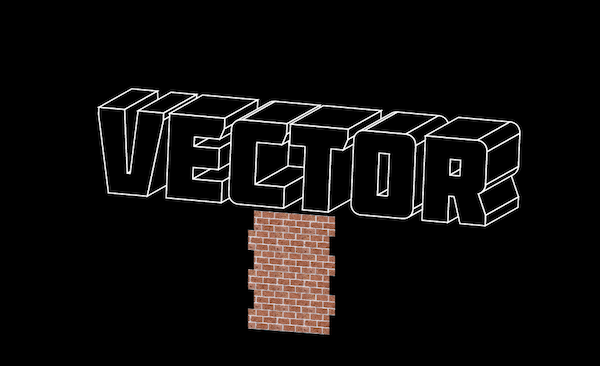
To create the 3D effect, go to Effect > 3D > Extrude & Bevel with the group still selected. In the resulting window, select the degree change, from top to bottom, as -10¡, 15¡, -5¡. Set the Extrude Depth as 200pt. Make sure the Surface is set to No Shading. Click OK

Step 4
Expand the shapes appearance by going to Object > Expand Appearance. To make the shape easier to work with, select the whole shape and change the fill to black and the stroke to white if you haven’t already. Ungroup the shape twice by going to Object > Ungroup (Shift + Command/Ctrl + G) to allow us to edit the paths within each letter.
Step 5
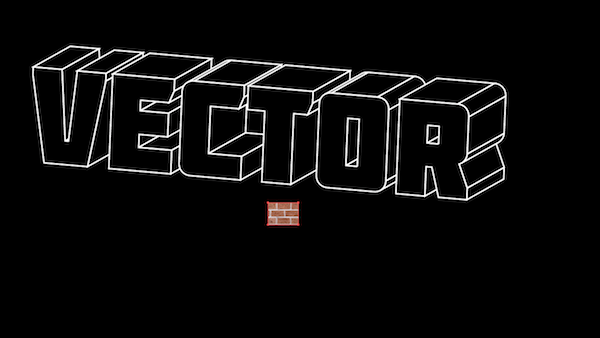
Now we can start creating our brick wall. Place your brick wall image onto the document by going to File > Place… and navigating to your brick wall graphic. I used the freely available graphic. If you have a complete brick wall already then you can skip Step 6 and 7. You may need to resize the image using the Free Transformation Tool (E).
Step 6
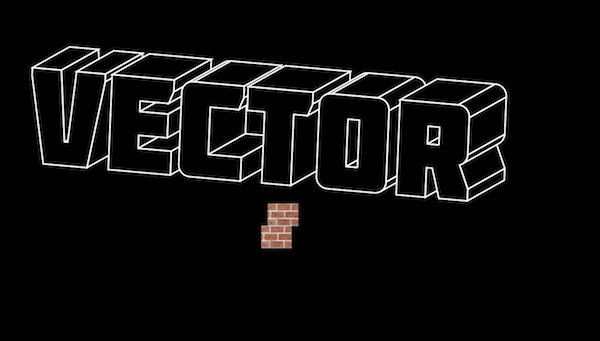
This wall may look small at the moment, but what it allows us to do is determine the level of detail we want the wall to be. Duplicate the wall image by clicking and dragging away from it whilst holding Alt. Place the new shape above the old one and a little to the right to stagger the bricks.
Step 7
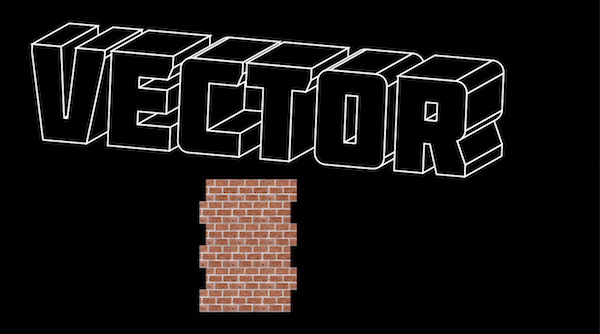
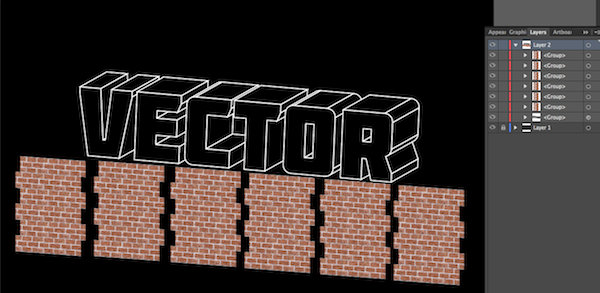
Select both objects, duplicate them both again using Alt, and move the duplicates to the right of the original shape to continue the wall. Continue to expand the wall upwards and sideways until it is just bigger than one letter in your word. You can use the Transform Again option – Object > Transform > Transform Again (Command/Ctrl + D) – to create larger wall textures if need be as it makes the process quicker.
Step 8
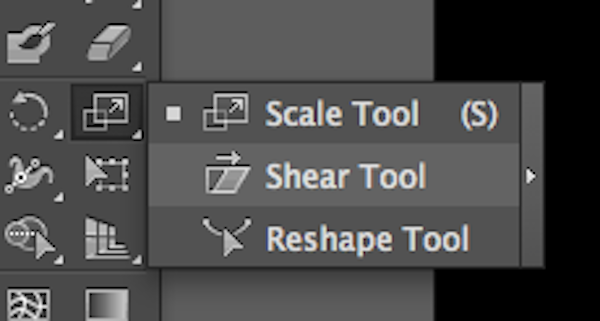
We need to apply a perspective to our wall texture so that it matches the Extrusion and Bevel effect that our text has. To do this, select all of the wall, group it by going to Object > Group (Command/Ctrl + G) and select the Shear Tool from the right sidebar. If you can’t see it, hold down the Scale Tool (S) and select it from the drop down menu.
Then select your wall group and drag the left side of the selection upwards. Try and match the bottom of your 3D text.
Step 9
Duplicate the selection 6 times (or the number of letters in your word) using the Alt method mentioned in Step 7.
Step 10
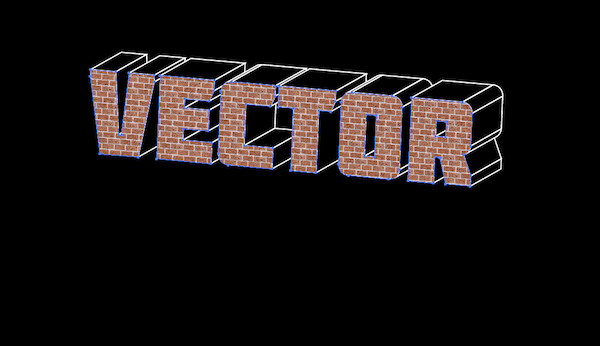
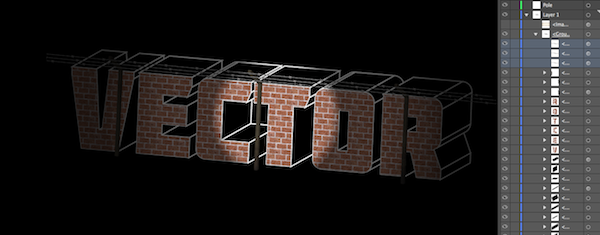
Now select the front face of the "V" in "Vector" by using the Direct Selection Tool (A) and clicking on the path of the "V". Go to Object > Arrange > Bring to Front (Shift + Command/Ctrl + ]) to make sure it is above the brick layers. Drag one of your brick groups behind the "V" path. With both the brick and "V" path selected, go to Object > Clipping Mask > Make (Command/Ctrl + 7). This will place the brick texture within the text face to create our wall effect. Repeat this step for all other letters.
Step 11
In the Layers window (F7), open each brick letter group and select the original letter path by clicking on the circle next to it.
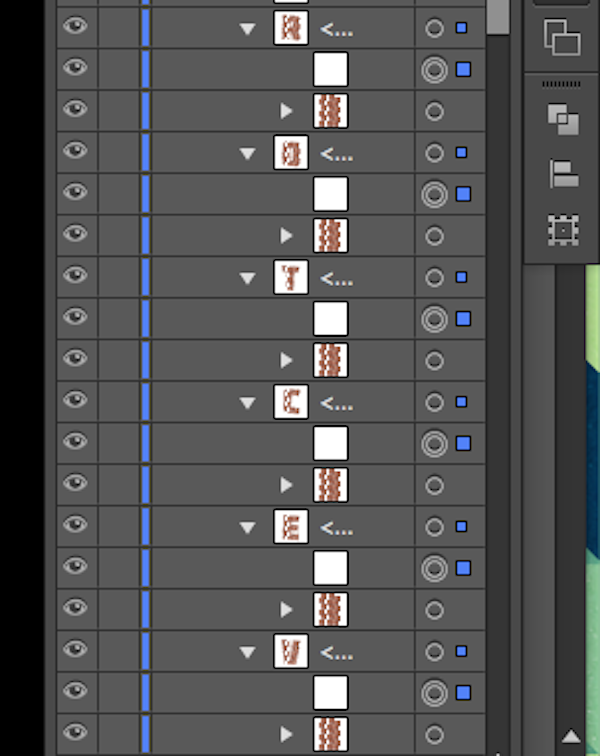
Change its stroke to white with a Stroke Weight of 2pt.

Step 12
Now for creating the spotlight. Select all of the text and group it (Command/Ctrl + G). Navigate to the Transparency window (Shift + Command/Ctrl + F10) and click Make Mask. Don’t be alarmed when your creation disappears. You can now add shapes to a mask. White is transparent, black is opaque, and shades of grey determine a level of opacity.
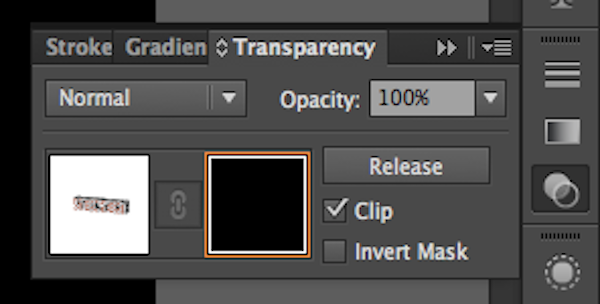
To create our spotlight, form a white rectangle using the Rectangle Tool (M) over what used to be your text. You will notice that your text will reappear. Reposition the rectangle to cover all of the text if need be.
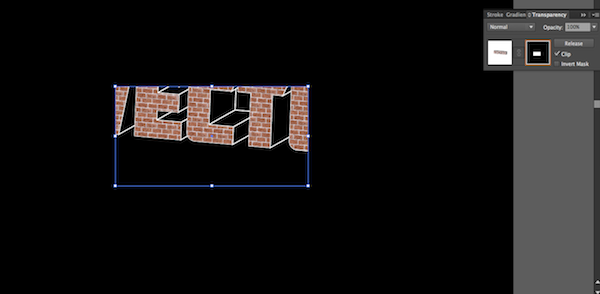
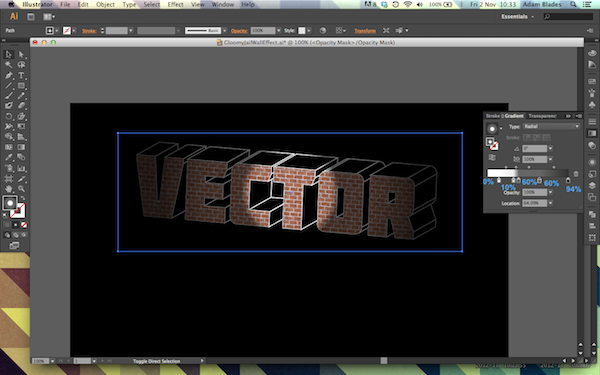
Step 13
We are going to apply a gradient to the rectangle, so open the Gradient window (Command/Ctrl F9) and apply the radial gradient shown below. Once you are happy, exit out of the mask by clicking the left thumbnail in the Transparency window.
Step 14
Now that you have created the spotlight we can work on the barbed wire. Exit out the mask by clicking on the small thumbnail image in the Transparency window. Make sure both of your current layers are locked and create a new layer in the Layers window (F7).
Step 15
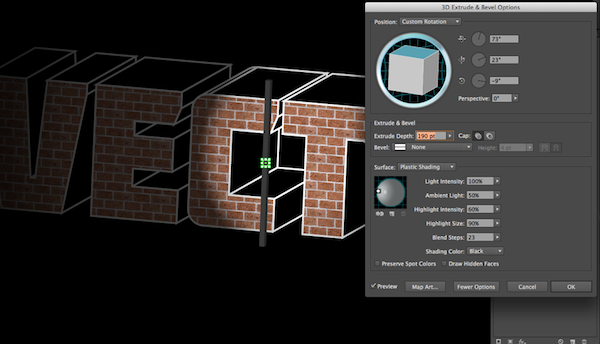
Now draw a very small perfect square using the Rectangle Tool (M) by holding shift whist dragging out the shape. Make a note of the squares dimensions as you will need to recreate it in the next step. Set the fill as an 80% grey. Then apply an Extrude & Bevel effect by going to Effects > 3D > Extrude & Bevel and set these options: 73¡, 23¡, -9¡. Set the extrude depth as 190pt (or whatever fits with your text) and make sure that cap is on and Plastic Shading is selected. Click More Options and move the angle of light so it is coming from the front-left. The aim is to create the correct shape and perspective seen in our 3D text. Use Preview to check your options to make sure they work. Click OK when finished. Expand the shapes appearance by going to Object > Expand Appearance.
Step 16
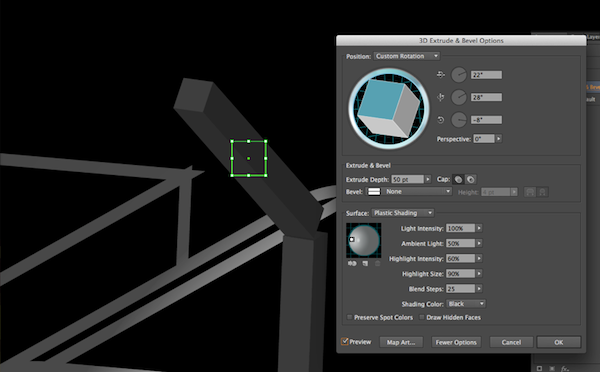
Recreate the same perfect square you made in Step 15. This time we are going to make the pointy arch using the same technique. Extrude the second square and play around with the settings to make it work with the pole. You can always tweak the Extrude & Bevel settings of a shape by going to the Appearance panel (Shift + F6) and clicking on 3D Extrude and Bevel. However, this only applies before you expand the shape. The settings I used are 22¡, 28¡, -8¡. Make note you will also have to change the light settings again to make the light source come from the same direction.
Step 17
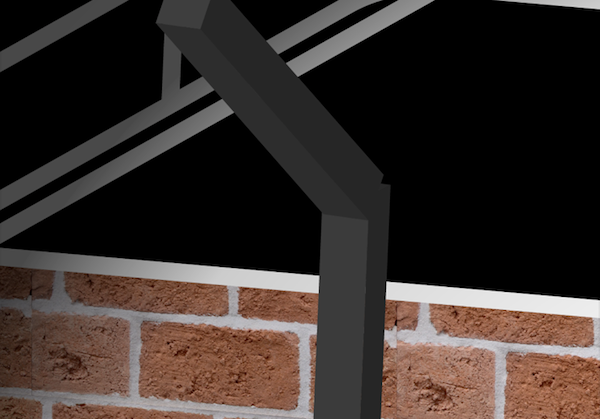
Expand the shape and place it just within the pole object to create the bend in the metal.
Step 18
However, there are still some corners that jut out awkwardly. To remove these ungroup the arched forward 3D shape (Shift + Command/Ctrl + G) and choose the Direct Selection Tool (A). Click on the corner anchors that don’t quite fit and drag them to the corners of the upright 3D object. If done right, the result should look something like the image below.
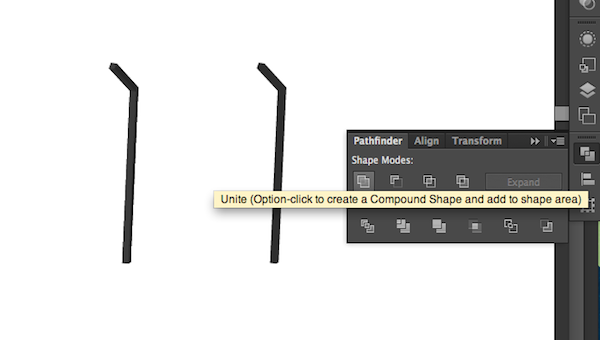
Step 19
Now that we have created our pole, we want to add some rust. We can hide both of the underneath layers for now so we are left with a white background. Duplicate our pole by selecting all of it using the Selection Tool (V) and going Edit > Copy (Command/Ctrl + C) and then Edit > Paste (Command/Ctrl + V). With the new object navigate to the Pathfinder window (Shift + Command/Ctrl + F9) and click Unite. The result is a grey outline of your shape. This has merged all of the paths and will allow use to put a grungy hue on top of our pole
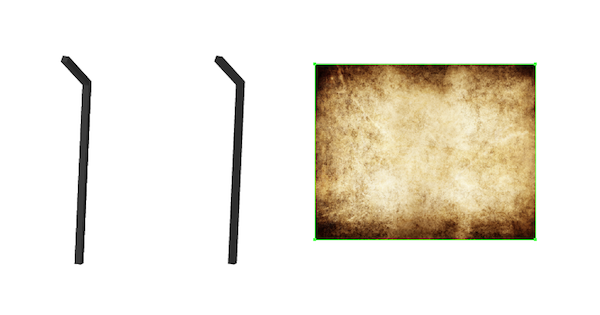
Step 20
Download a suitable rust texture, or use the same one I used. Place it into your document by going File > Place… and put it behind your outline.
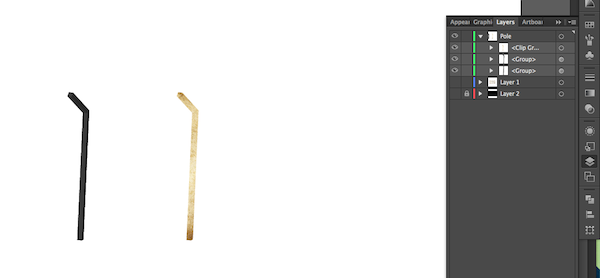
Step 21
Select both objects and go to Object > Clipping Mask > Make. This places the grunge inside the pole outline.
Now place the outline on top of the original pole and apply a Transparency effect of 40% Opacity and set Overlay as the Blending Mode in the drop down menu.
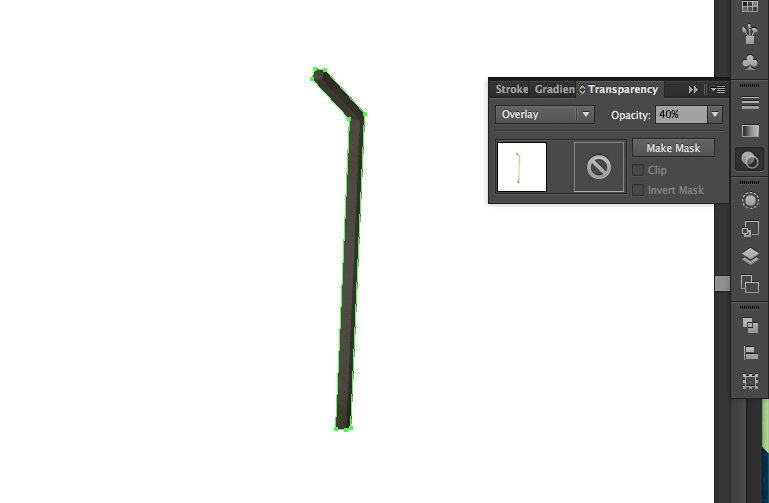
When you are happy, Group the layer and unhide your other two layers.
Step 22
Copy and paste the pole into two other positions along the wall. Once you have done that, move all three pole groups into your brick text group. This will apply the same mask to the poles, meaning that the once further from the light are darker, saving you a lot of time and effort.
Step 23
To create the barbed wire, download this Adobe brush. Once installed, draw three straight lines across the beams and select the barbed_wire brush from the Brushes Window. It can be accessed through the Brush Libraries Menu at the bottom left of the window. Change the Stroke Weight to 0.5pt.
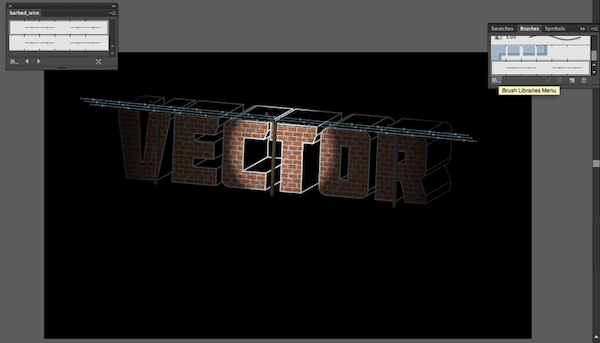
Step 24
In the barbed_wire window, drag the stroke into the Brushes window. With the barbed wire still selected, click the barbed wire stroke in the Brushes window and click Options of Selected Object below it in the Brushes window. In the next window, choose the colorization method as Hue Shift and click OK. If not already, set the stroke color as a 50% black.
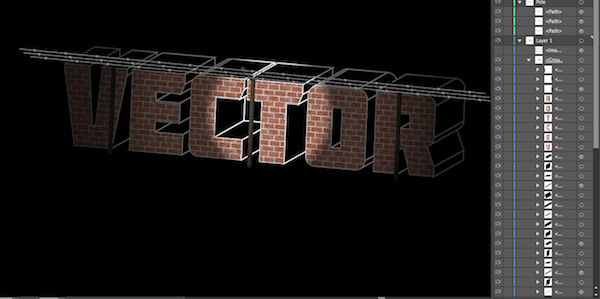
Step 25
Move the barbed wire objects into the main text layer into the gradient mesh group.
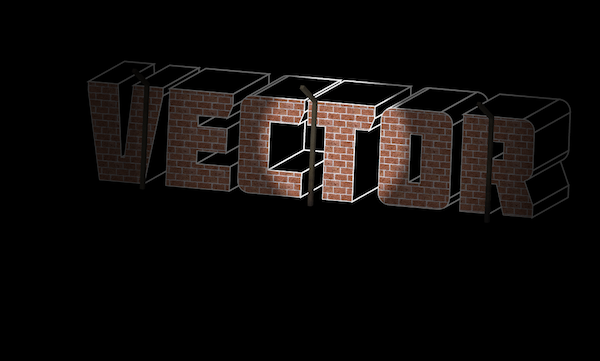
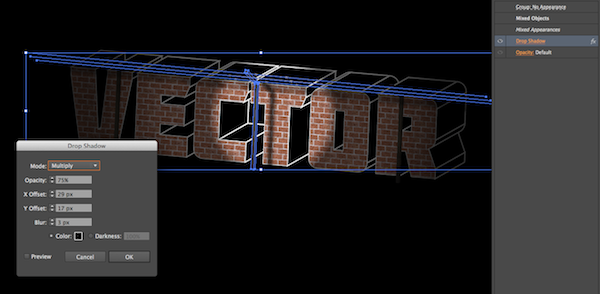
Step 26
Select both the middle pole and barbed wire and go to Effect > Stylize > Drop Shadow. Offset the shadow so that it falls onto the wall.
Step 27
For the finishing touches, places your grunge background again by going to File > Place and resize it so it covers all of your text.
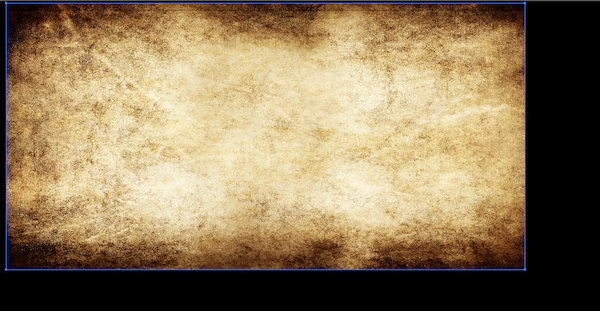
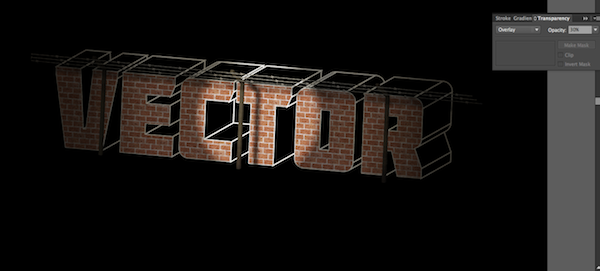
Then change its opacity settings in the Transparency window (Shift + Command/Ctrl + F10) to 30% Opacity and set the Blending Mode to Overlay.
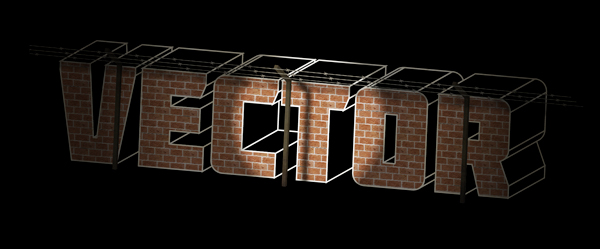
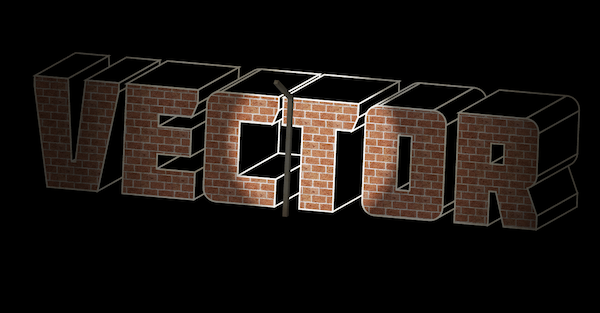
Final Image
Step back and admire your work. Have fun creating your own jail wall text effects in your future projects.