In today’s tutorial, we are going to learn how to create a vintage stopwatch using basic shapes, Blends and Art Brushes in Adobe Illustrator. You’ll learn how to use a variety of Illustrator tools. So let’s get started!
Step 1
To begin you will need to create the main geometry sketch of the stopwatch which is shown in the diagram below. We’ll be creating this initial plan to work from, there we can add highlights and shadows to make it look less flat. If you know how to achieve the main outlines of the object and its elements, go to the Step 7. If not, read the following steps carefully.

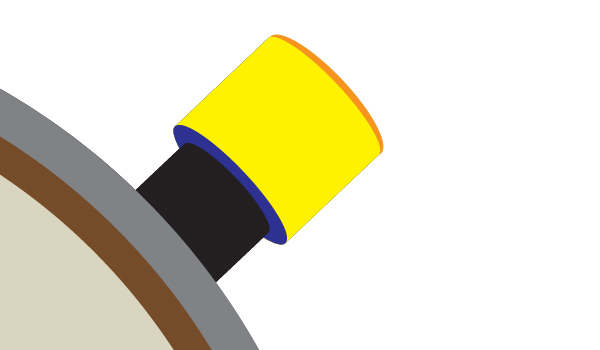
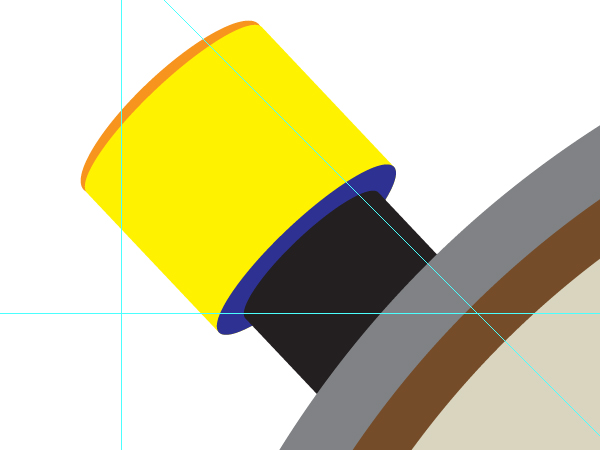
The scaled images of the tiny stopwatch parts are shown below for your convenience. Here is a close up of one of the side buttons.
And here is the central button at the top.

Step 2
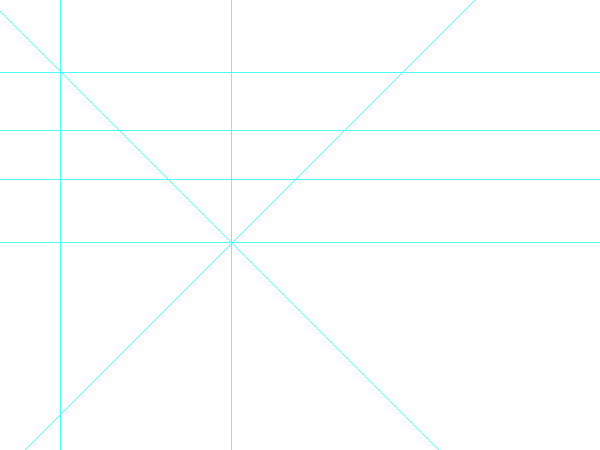
Go to View > Rulers > Show Rulers (Command + R). Then drag and drop the Guide lines from the Rulers in order to create the following image. Several Guide lines should be rotated by going to Object > Transform > Rotate. The intersection point of the rotated Guide lines will be the center of the stopwatch.
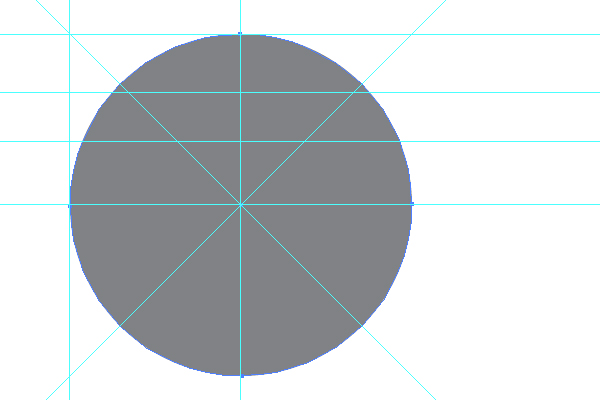
Using the Ellipse Tool (L), create a circle filled with gray.
Go to Object > Transform > Scale so as to decrease the dimensions of the circle, then click the Copy button in the dialog box of scaling, and change the color of the new circle as shown.
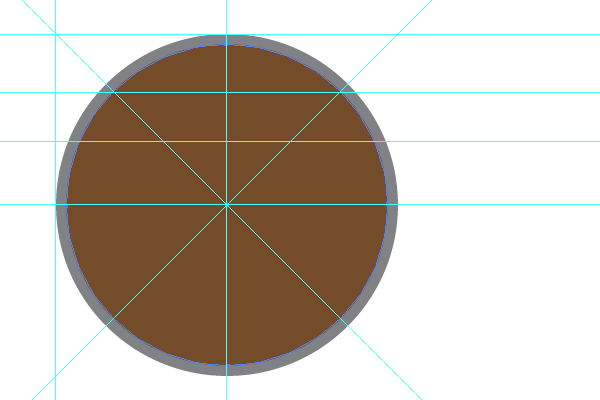
Repeat these manipulations in order to create the next circle shown below.
Step 3
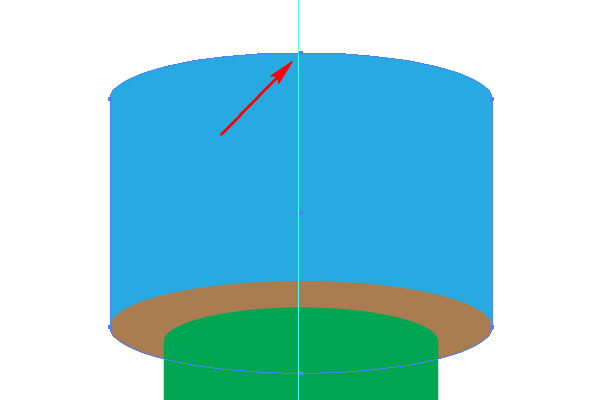
With the Ellipse Tool (L), create an ellipse over the circles as shown in the diagram below.
Copy it and Paste in Front (Command + C then Command + F). Move the copy downwards.
Using the Lasso Tool (Q), select the inner anchor points of both ellipses…
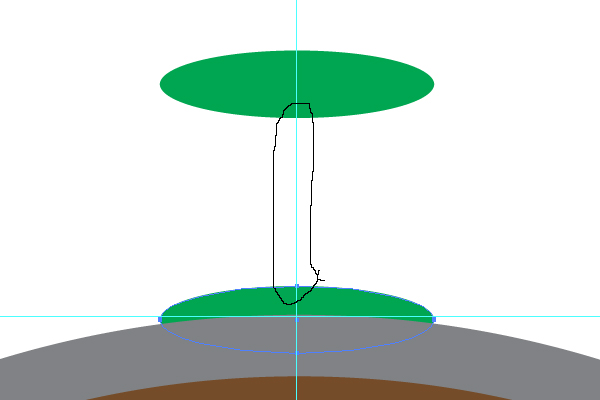
…then press the Delete button on your keyboard.
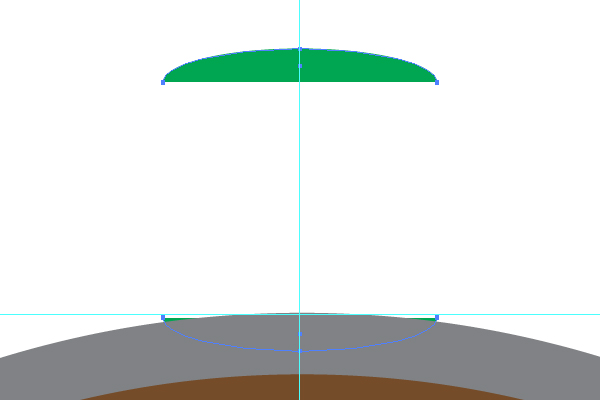
Go to Object > Path > Join (Command + J) twice to complete the shape.
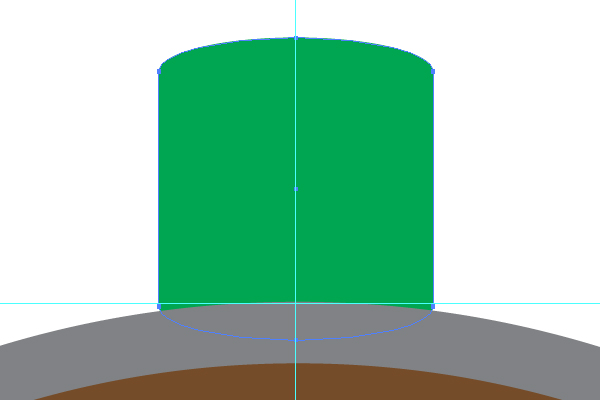
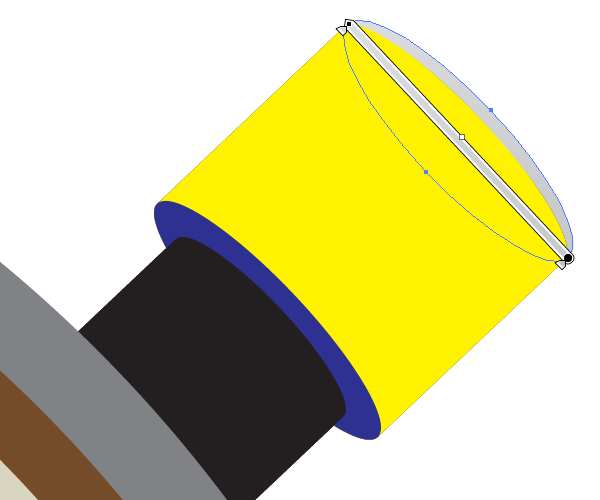
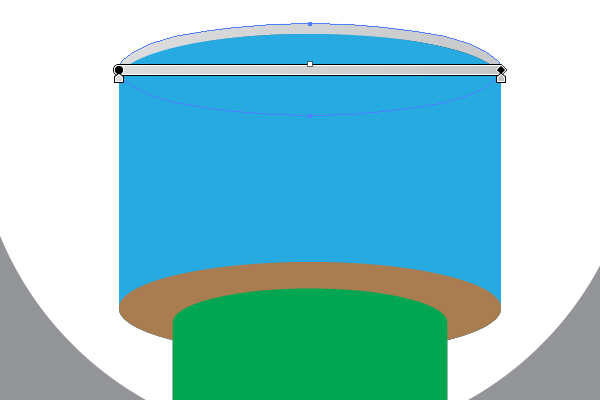
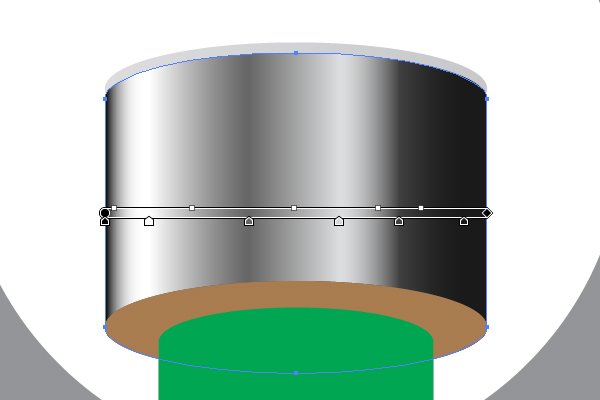
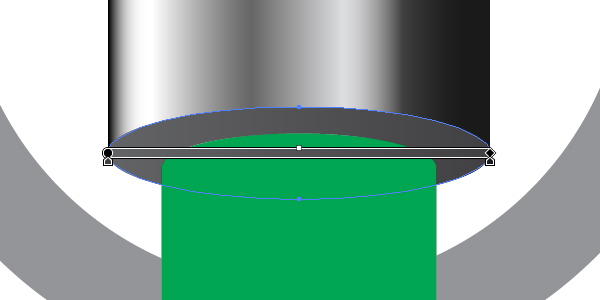
Step 4
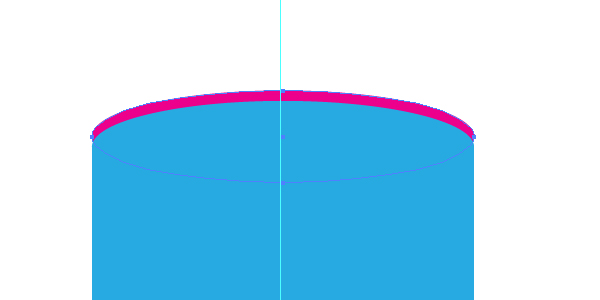
Draw another Ellipse (L) at the top of your cylinder shape.
And create the blue path the same way as you created the green cylinder. Pay attention that the anchor point indicated below should be moved downwards slightly.
Create the top part of this detail.
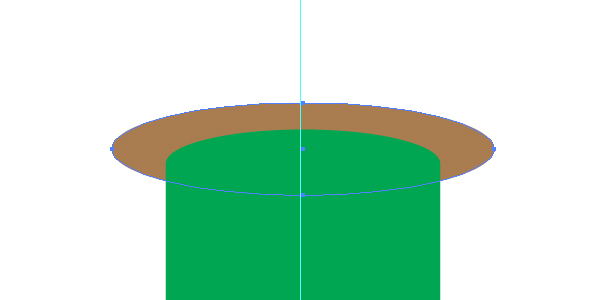
Step 5
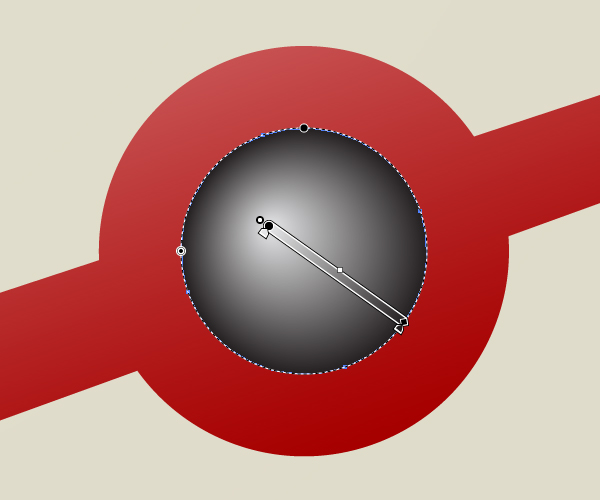
Use the Ellipse Tool (L) again to draw an even circle around the top button you’ve just created.
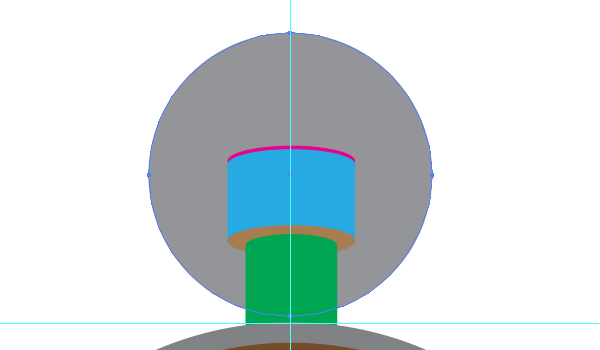
Go to Object > Transform > Scale, decrease the dimensions of the circle, and click the Copy button.

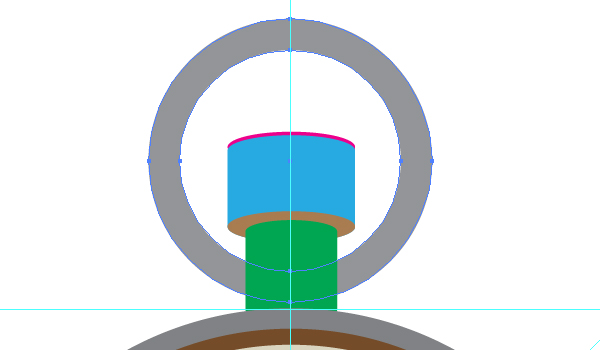
Select both circles and go to Object > Compound Path > Make (Command + 8) in order to create a ring.
Step 6
The right and the left buttons can be illustrated the same way.
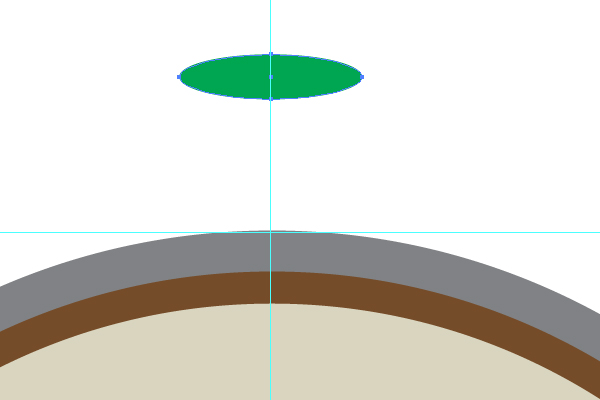
Step 7
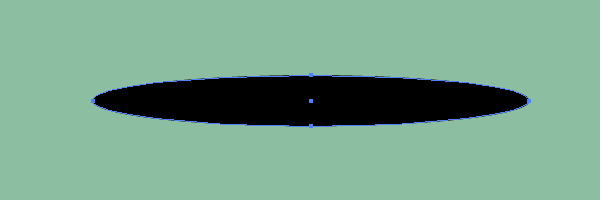
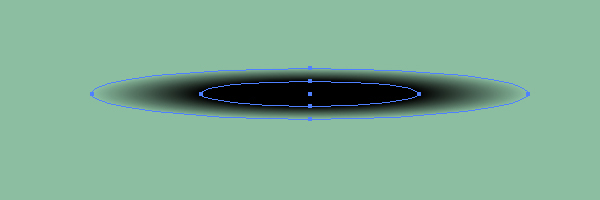
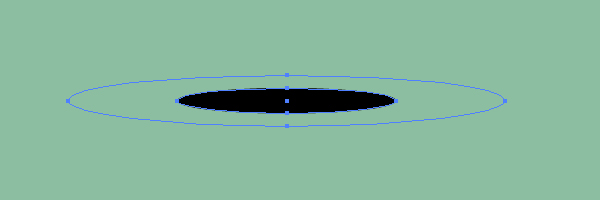
In order to continue the creating of stopwatch, first we should create some Art Brushes from Blends. Using the Ellipse Tool (L), draw an elongated elliptical path filled with black. Follow the helpful image below.
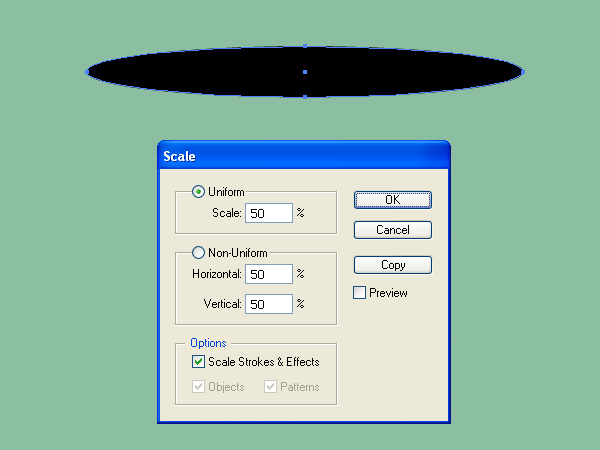
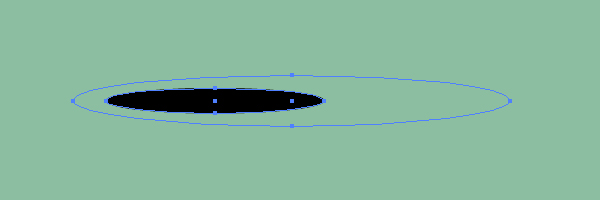
Copy it and Paste in Front (Command + C then Command + F). Go to Object > Transform > Scale and decrease to 50%.
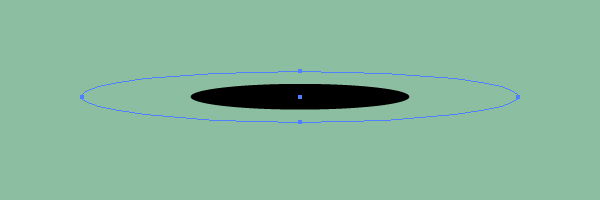
Change the Opacity of the largest ellipse to 0%.
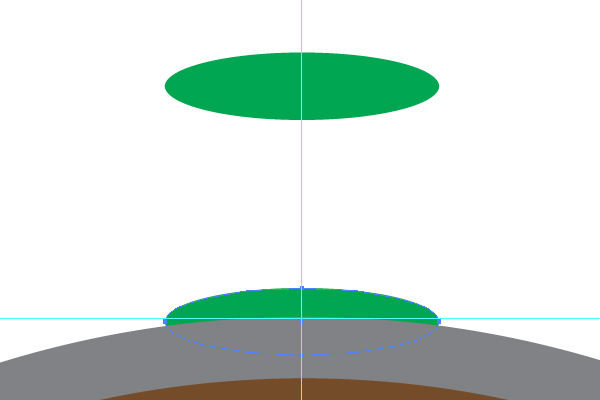
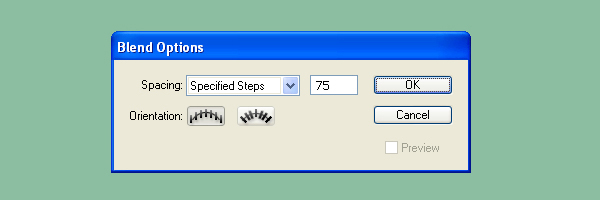
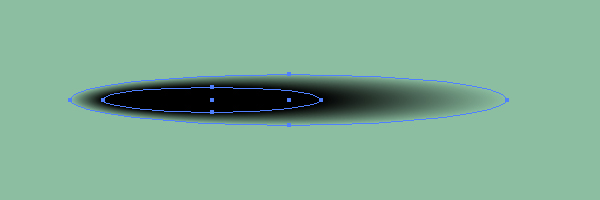
Go to Object > Blend > Blend Options and set the values in the dialog box as shown.
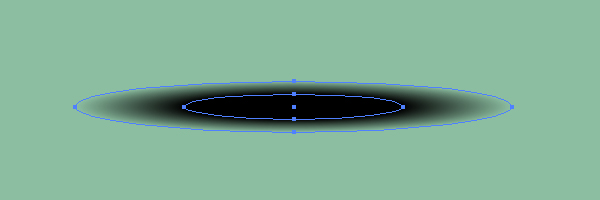
Select both ellipses and go to Object > Blend > Make (Command + Alt + B).
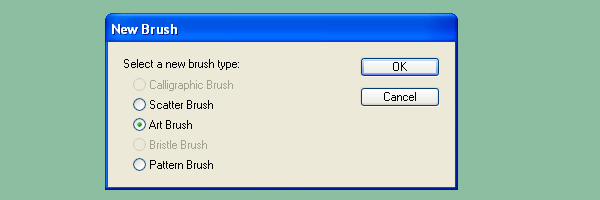
Step 8
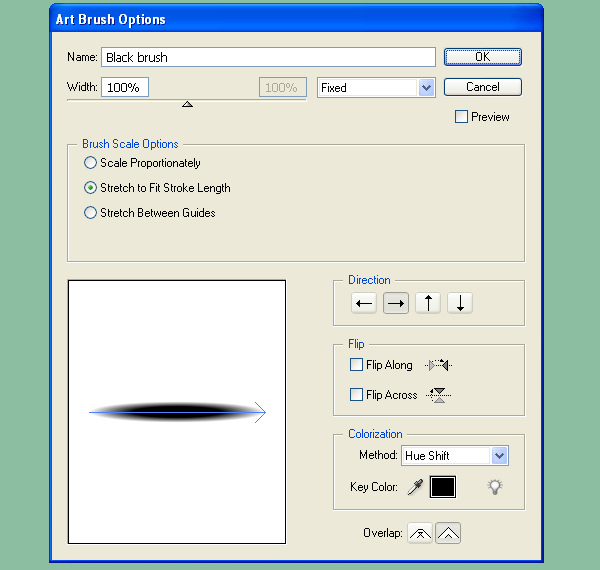
Drag and drop this blend into the Brushes panel, and choose the Art Brush option in the opened dialog box.

Specify the options for the brush in the second dialog box. Name this brush "Black brush". Change the Colorization Method of it to Hue Shift.
Step 9
Now select the blend of the "Black brush"…
…and release it by going to Object > Blend > Release (Command + Alt + Shift + B).
Move the inner ellipse to the left (see the image below)…
…and go to Object > Blend > Make again (Command + Alt + B).
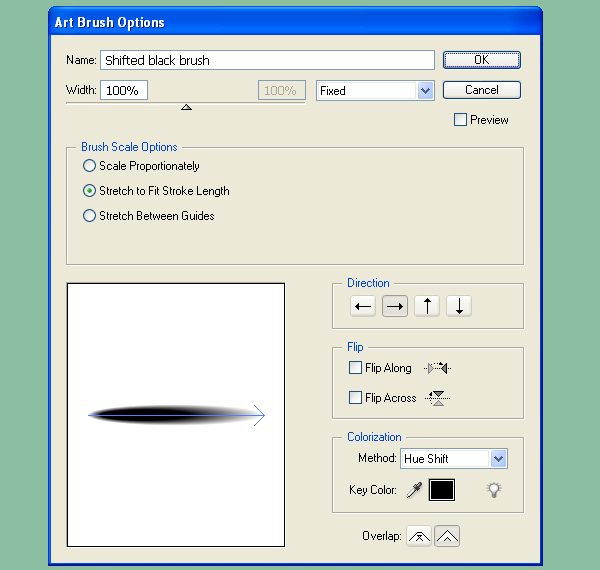
Step 10
Drag and drop this blend into the Brushes panel, and choose the Art Brush option in the opened dialog box.
Specify the options for the brush in the second dialog box. Name this brush "Shifted black brush." Change the Colorization Method of it to Hue Shift.
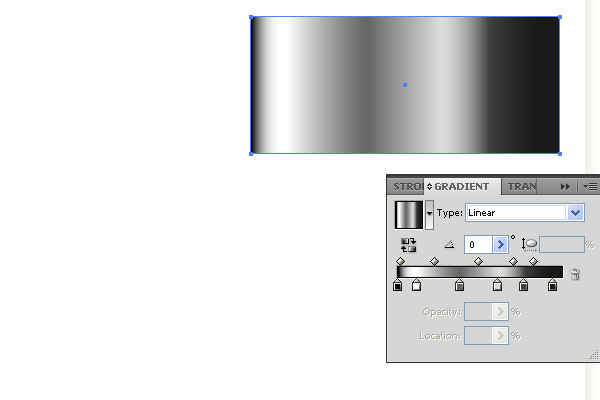
Step 11
Take now the Rectangle Tool (M), and draw the next path. Fill it with a linear gradient with visibility of black and white fringes. See the diagram below for reference.
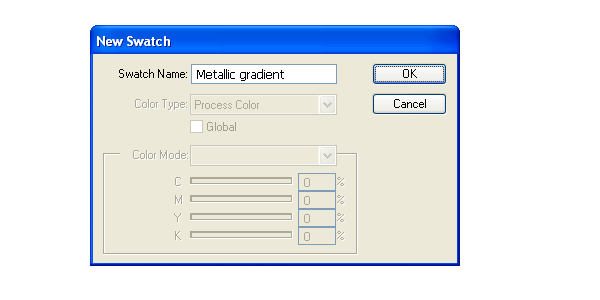
Then open the Swatches panel…
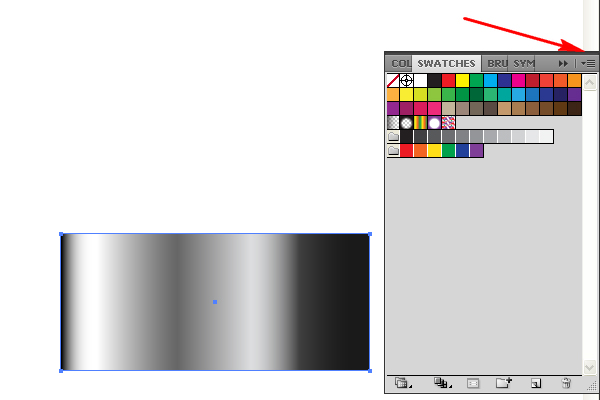
…open the fly-out menu by clicking the button indicated in the image above, and choose New Swatch command. Name this swatch "Metallic gradient".
Step 12
Select the top orange path of the right button, and fill it with an angled linear gradient.
Apply the "Metallic gradient" to the yellow path. Change the angle of the gradient as shown.
The blue path should be filled with an angled linear gradient too.
The black path is filled with an angled "Metallic gradient" as well.
Step 13
The left button of the stopwatch is filled the same way.
Step 14
The central big button of the stopwatch should be filled with usual linear gradients and with the "Metallic gradient" where it is necessary.
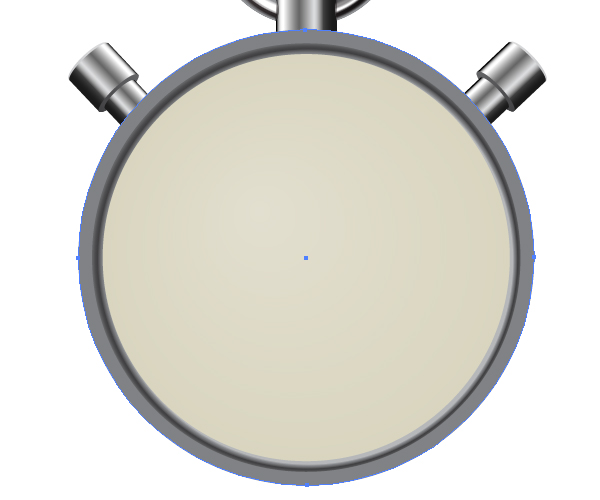
Step 15
Fill the brown path with a radial gradient.
The indicated color stops of the gradient are shown underneath.
Fill the stopwatch face with a subtle radial gradient too.
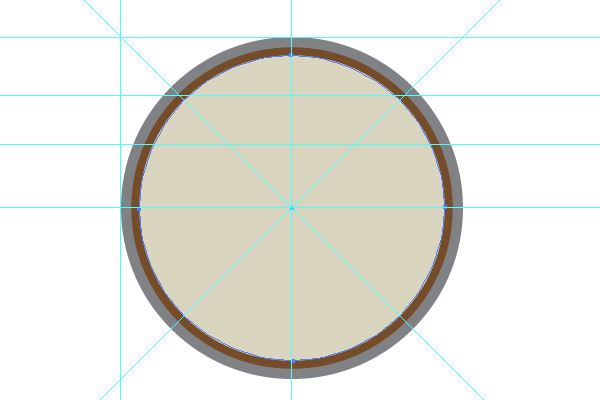
Step 16
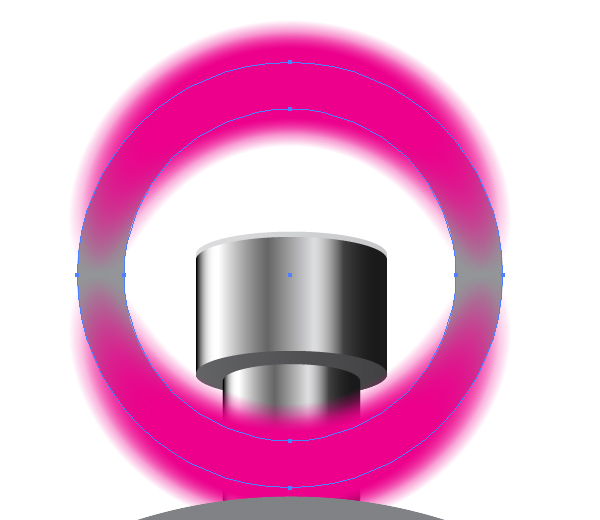
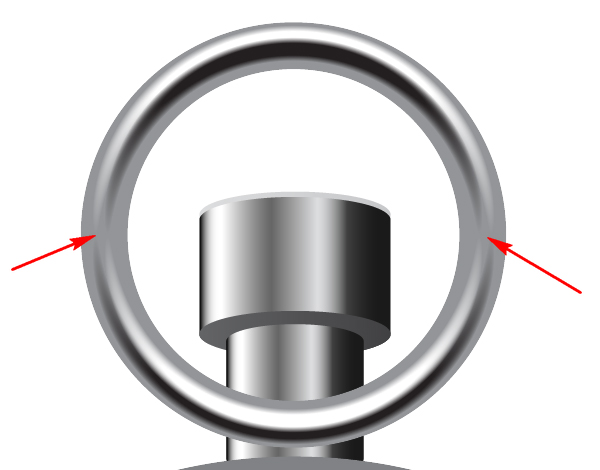
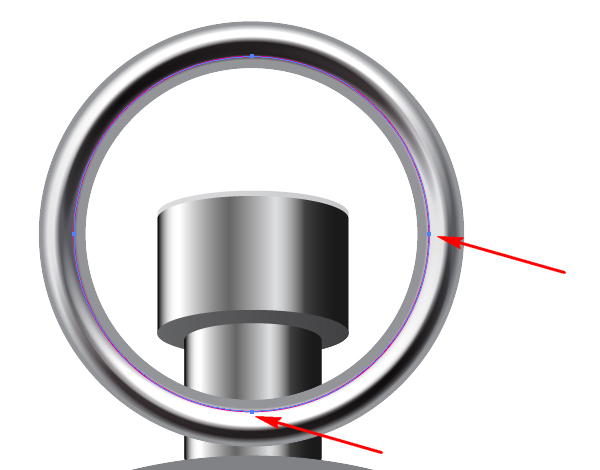
Let’s work on the top ring in order to create a 3D image from this flat gray picture. Yes, you may use the 3D Revolve Illustrator effect, but I advise you to use our Art brushes. Let’s see how they work.
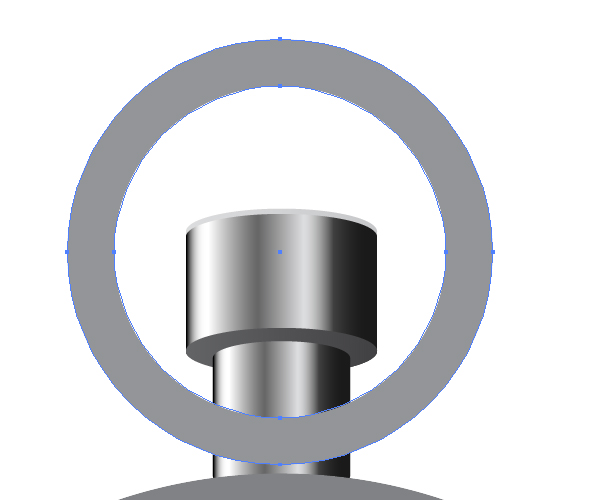
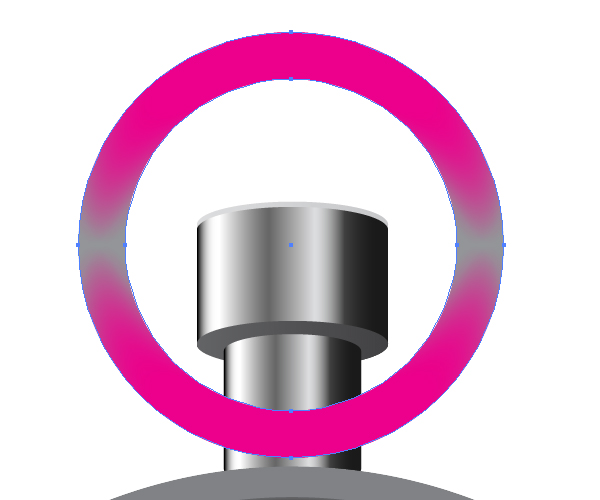
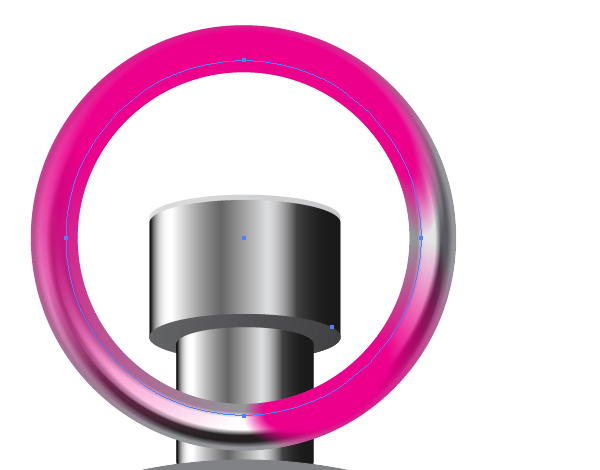
In the beginning draw two concentric circles over the gray ring using the Ellipse Tool (L).
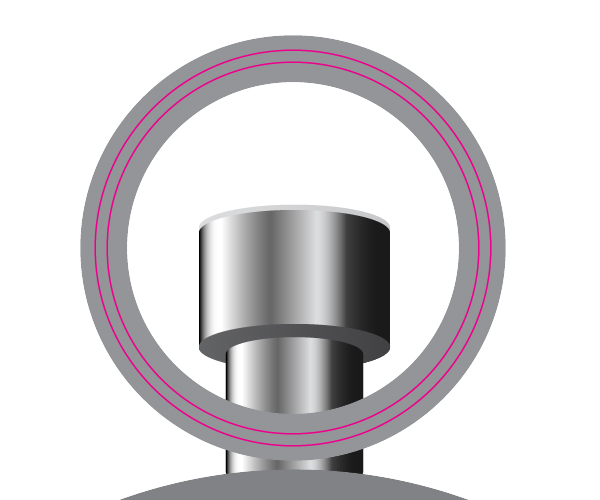
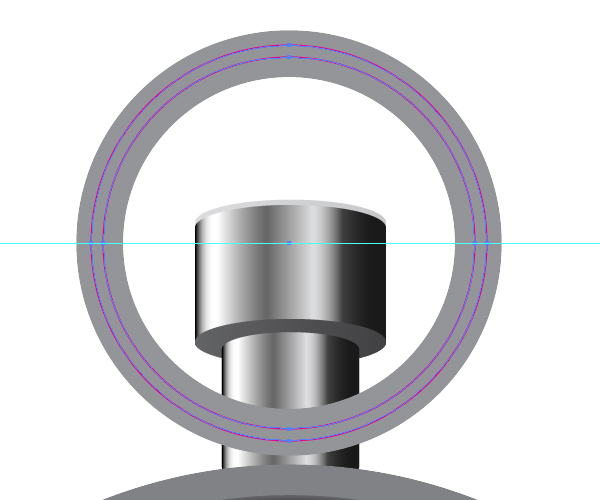
Then take the Scissors Tool (C), and click in the four anchor points which coincide with the horizontal Guide line shown below. In other words, you need to divide the concentric circles on the four semicircular paths.
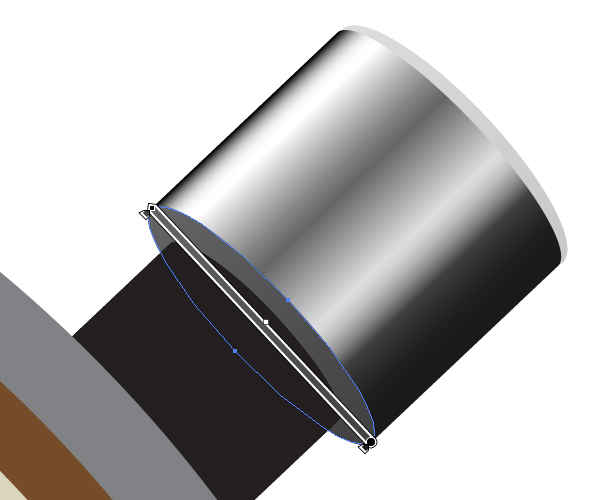
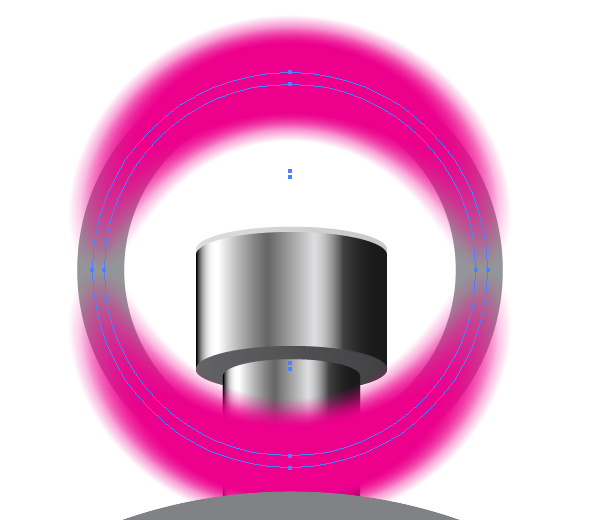
Step 17
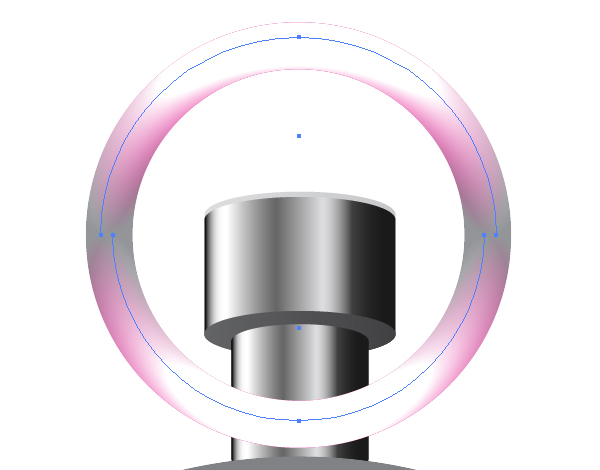
Apply the "Black brush" to all these four paths.
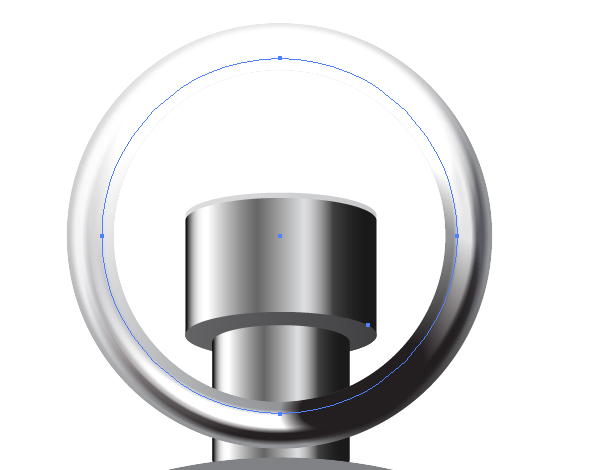
I do not advise you to leave this wonderful picture unchanged! Select the gray ring, Copy it and Paste in Front (Command + C then Command + F).
Create then a Clipping Mask from this copy by going to Object > Clipping Mask > Make (Command + 7).
Step 18
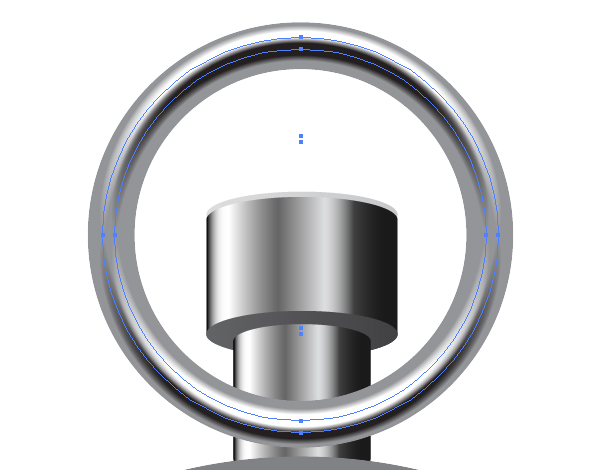
Change the Stroke color of the following paths to white.
Change the Stroke color of the next path to black.

After that decrease the Stroke Weights of the paths.
Step 19
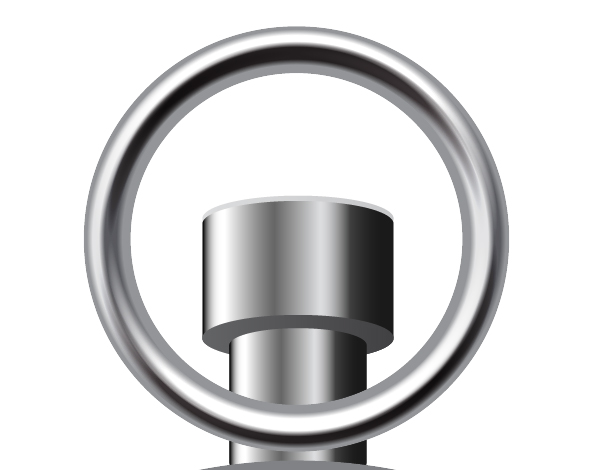
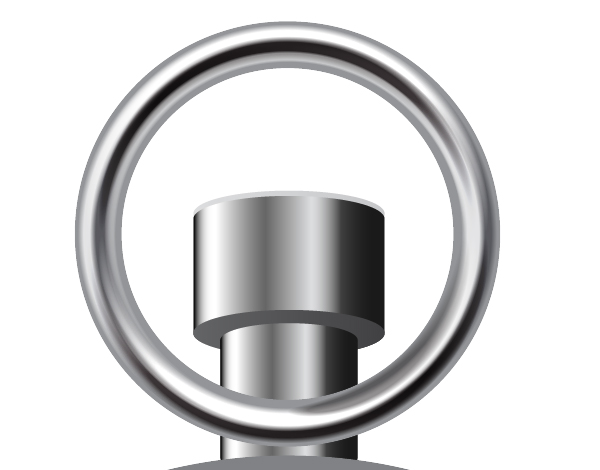
Now your picture looks like the following.
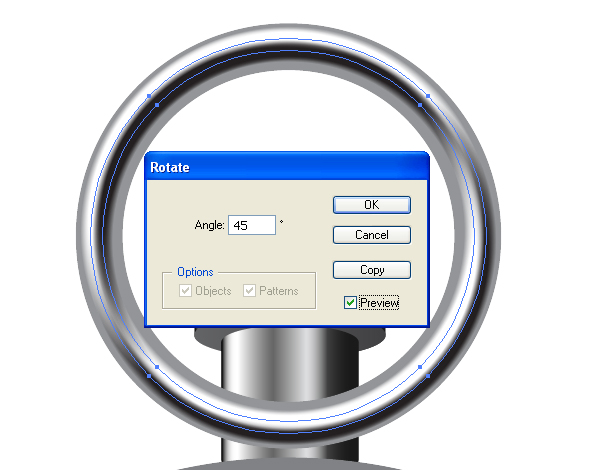
Do you like the color gradations pointed in the image above? If not (I do not like), how to fix them? Select all four paths to which the "Black brush" is applied, Copy them and Paste in Front (Command + C then Command + F). Rotate the copies by going to Object > Transform > Rotate.
Then change the Blending Mode of these new paths to Overlay and the Opacity of them in the Transparency panel…
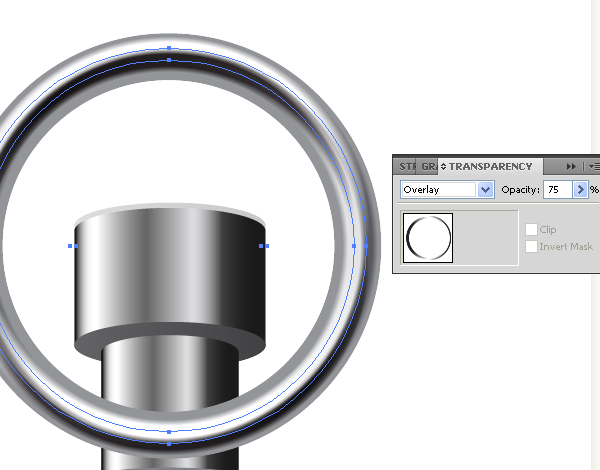
…and you will achieve the next more beautiful result.
Step 20
Illustrate the next path shown below, and click on the indicated anchor points of it with the Scissors Tool (C) in order to divide the path on two.
Apply the "Shifted black brush" to both paths. Crop them with the corresponding Clipping Mask (the same as used above).
Change the Stroke colors as shown below.
Change the Opacities and the Stroke Weights. You should achieve the image the same as shown below.
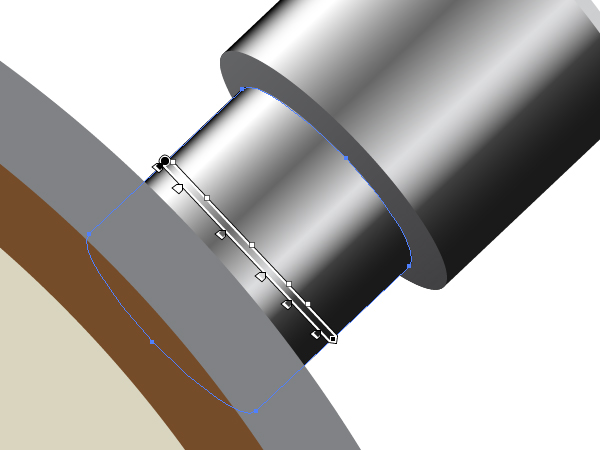
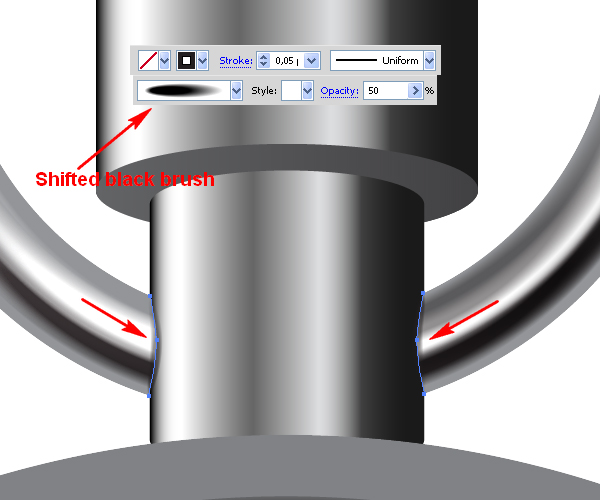
Step 21
Create a Clipping Mask (Ctrl + 7) for the ring shown underneath. It is simple, so do it by yourself.
Apply the "Shifted black brush" to the next paths. The helpful diagram is below.
Step 22
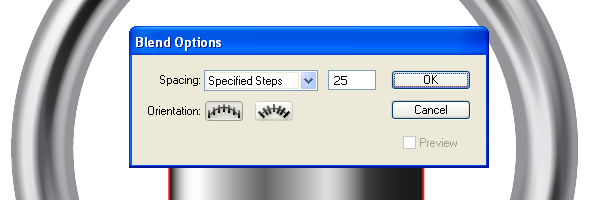
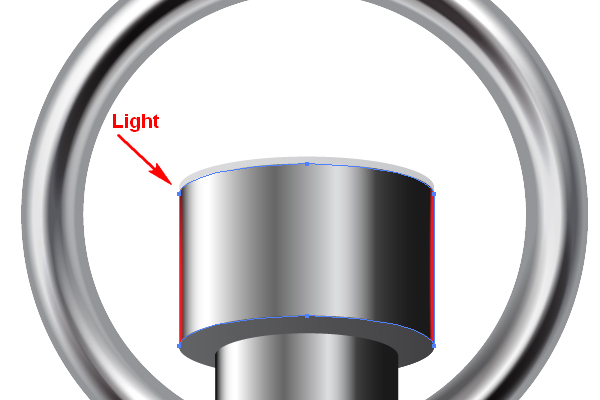
Now make the notches over the top stopwatch button.
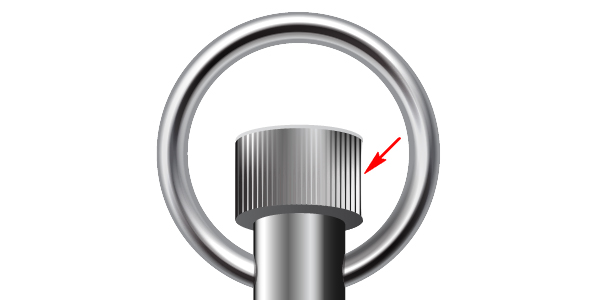
Draw in the beginning two vertical paths as shown below in red. (The second path can be a moved copy of the first one).
Go to Object > Blend > Blend Options, and choose the options which you can see in the diagram below.
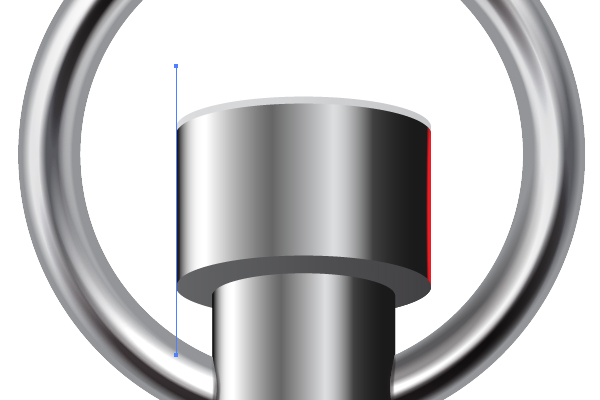
Step 23
Apply the "Shifted black brush" to the left line.
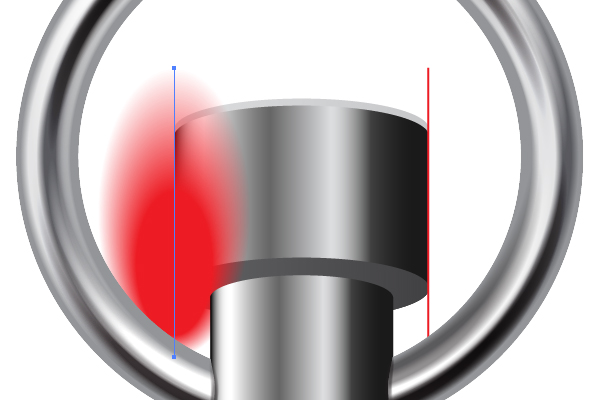
And apply the "Black brush" to the right line.
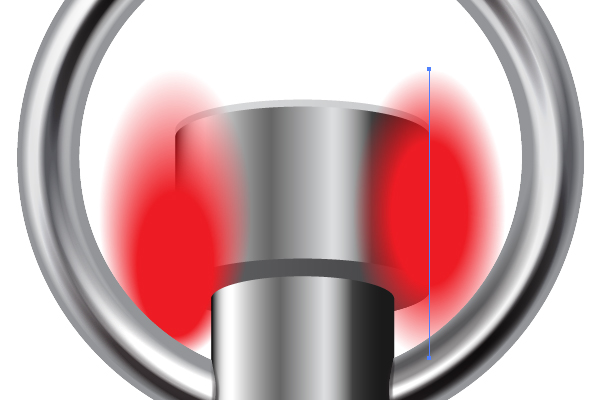
Decrease the Stroke Weights.
And crop the paths with the corresponding Clipping Mask.
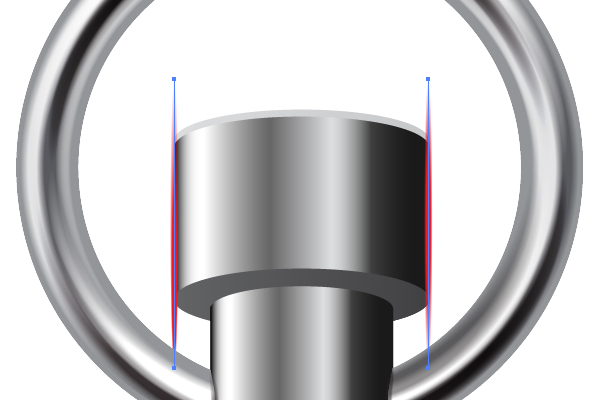
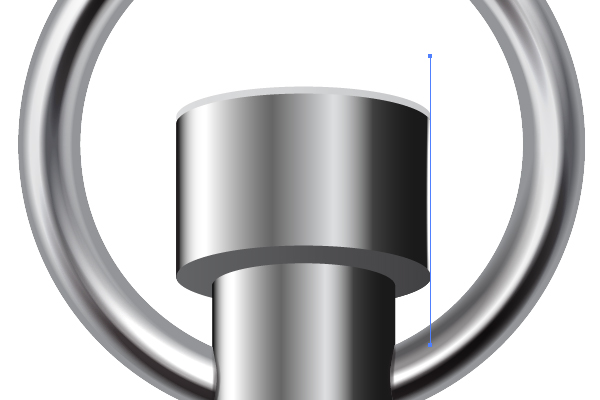
Step 24
Because of the light drops from the left (see the diagram above), change the Stroke color of the left line to black…
…and the Stroke color of the right line to white. Why not vice versa? Because we need to create contrast in the notches.
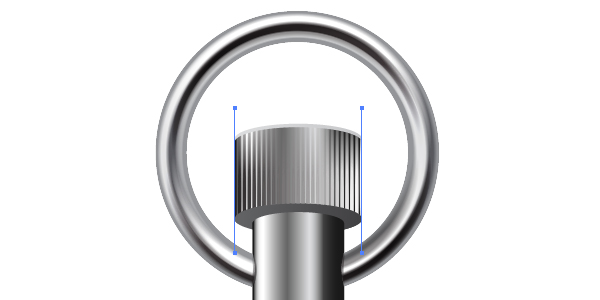
Step 25
Select both paths, and go to Object > Blend > Make (Command + Alt + B).
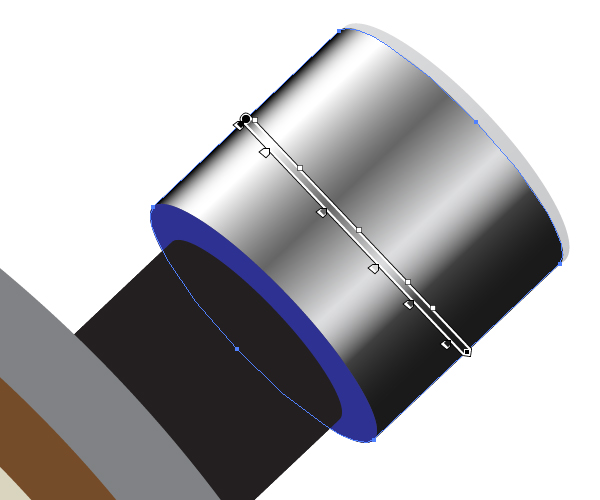
Step 26
The main gray part of the stopwatch…
…is illustrated absolutely the same way as the ring of the stopwatch. In other words, use the Art brushes and Blending Modes in order to receive the following image.
Step 27
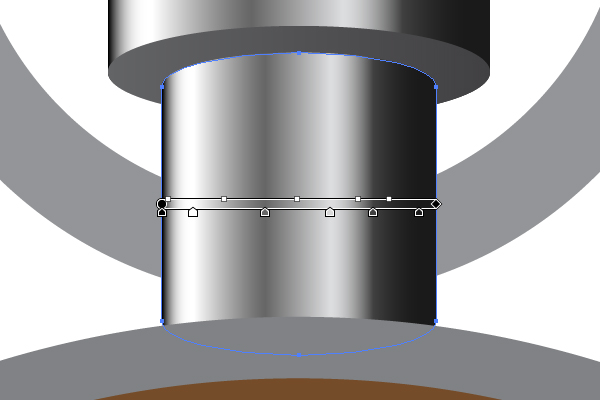
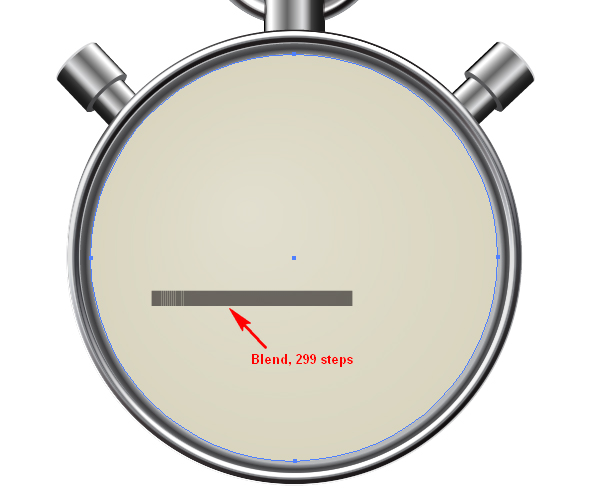
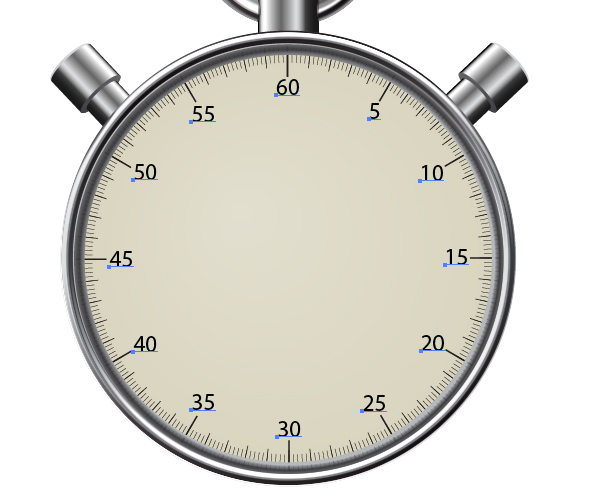
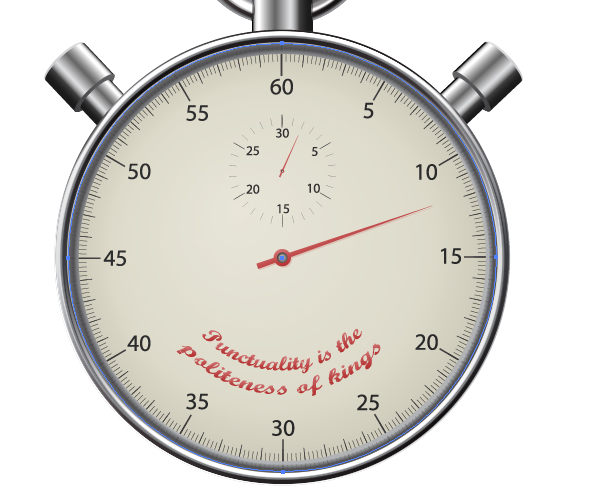
We should make the values of the stopwatch face. Every value means 1/5 of the second. Because of a minute consists of 60 seconds we need to have 300 stroke-values shown below.
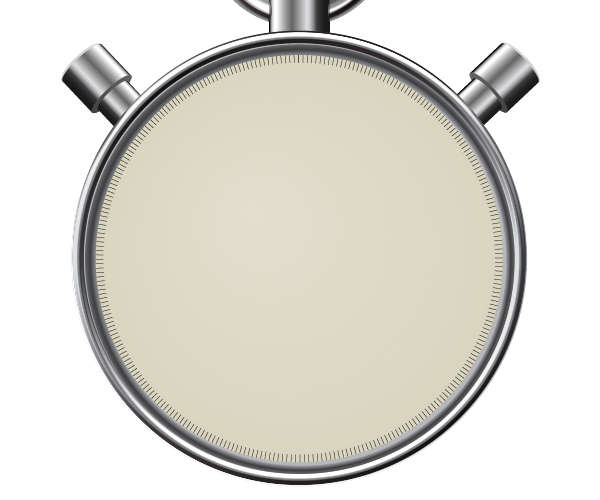
Draw a black vertical line which has about 20px in length.

Copy it and Paste in Front (Command + C then Command + F). Move the copy horizontally by going to Object > Transform > Move.

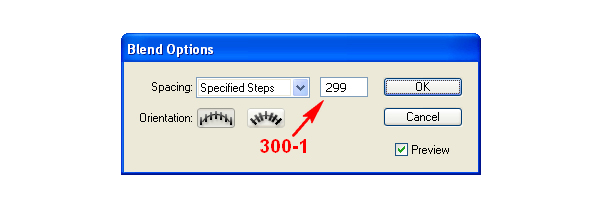
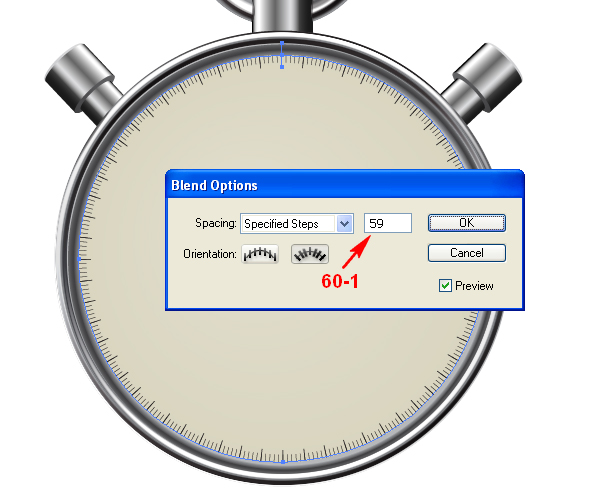
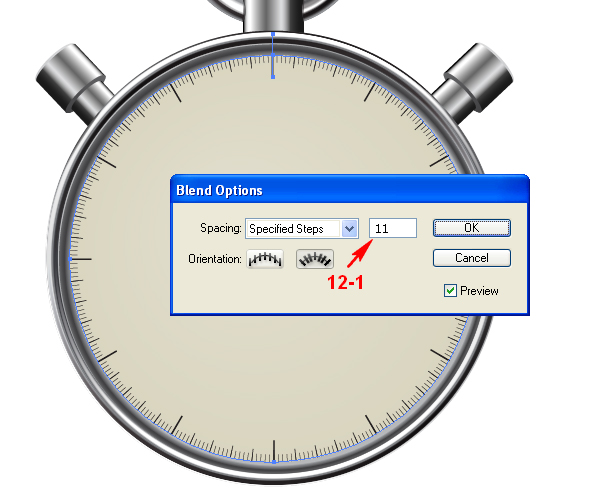
Go to Object > Blend > Blend Options, and change the number of steps to 299. Why not 300? Because 299 steps provide 301 lines in the blend, but when we place the blend in the circle, we will receive only 300 lines, because the first line will coincide with the last one.
Then go to Object > Blend > Make (Command + Alt + B).

Step 28
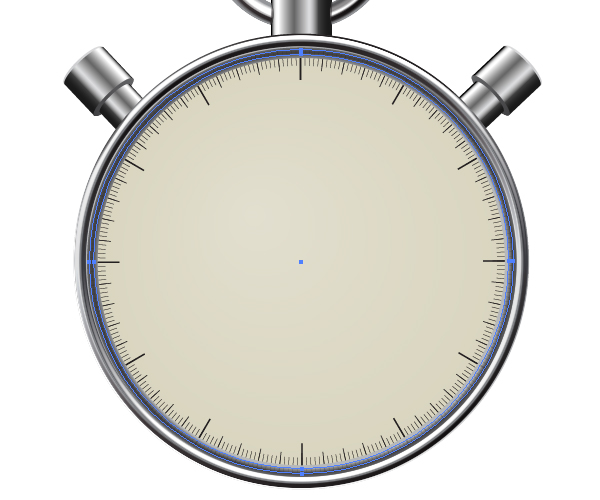
Select the path which represents the stopwatch face, Copy it and Paste in Front (Command + C then Command + F). Change both: the Stroke Weight and the Stroke color to None.
Take the Scissors Tool (C), and click in the top anchor point of this circle.
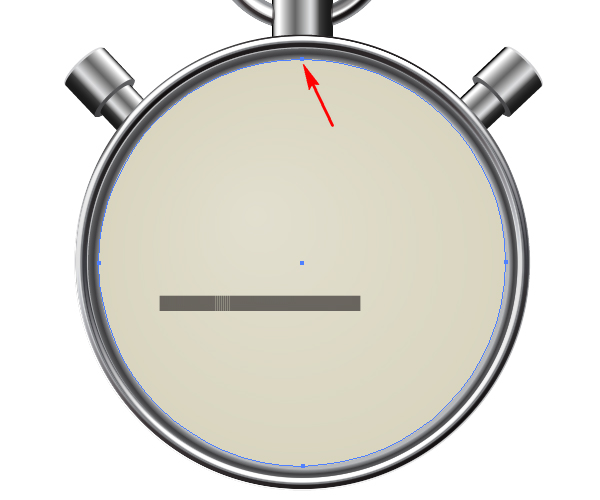
Select both: the circle and the blend of 299 steps, and go to Object > Blend > Replace Spine.
Change the orientation of the blend by clicking the corresponding button in the Blend Options dialog box.

Crop the blend with the corresponding Clipping Mask.

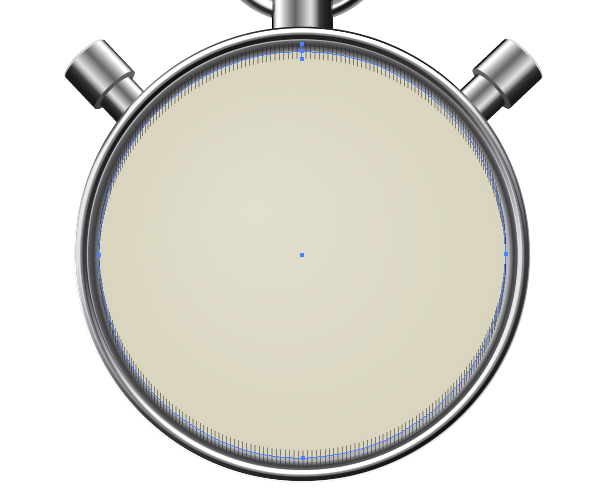
Step 29
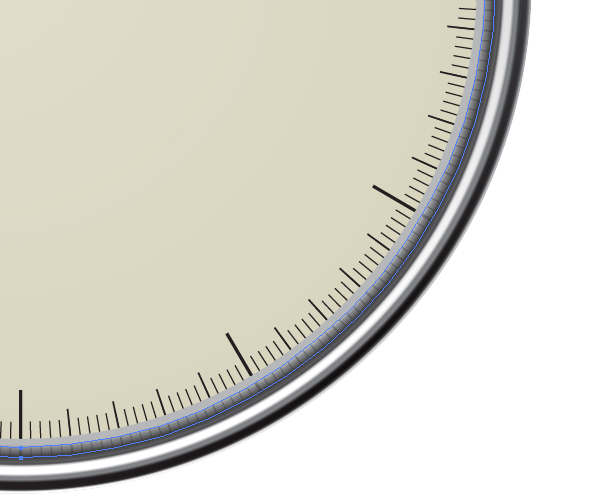
Copy the Blend and Paste it in Front (Command + C then Command + F). Change the number of steps in the Blend copy, and increase the vertical paths in the opened blend in the Layers palette by going to Object > Transform > Scale. The helpful image is below.
Create another Blend the same way.
Step 30
Select all three blends (without the corresponding Clipping path), Copy them and Paste in Back (Command + C then Command + B). Decrease the Opacity of them to about 30%, and crop them with the new shown Clipping Mask. You need to do this so as to show the reflection of the strokes on the metallic parts of the stopwatch.
Step 31
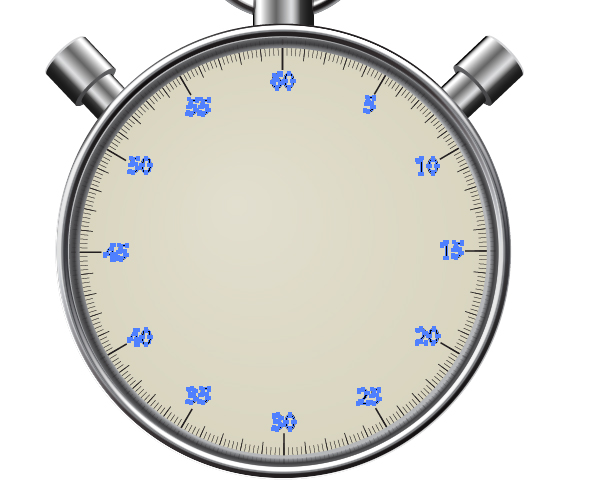
Using the Type Tool (T), print a number on the face.
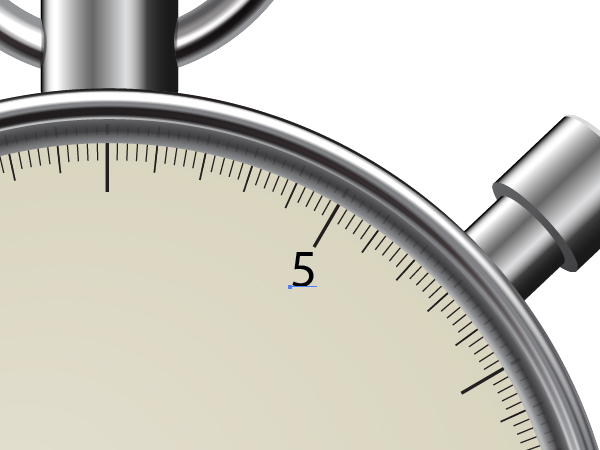
Repeat this action again and again.
Then go to Type > Create Outlines (Command + Shift + O).
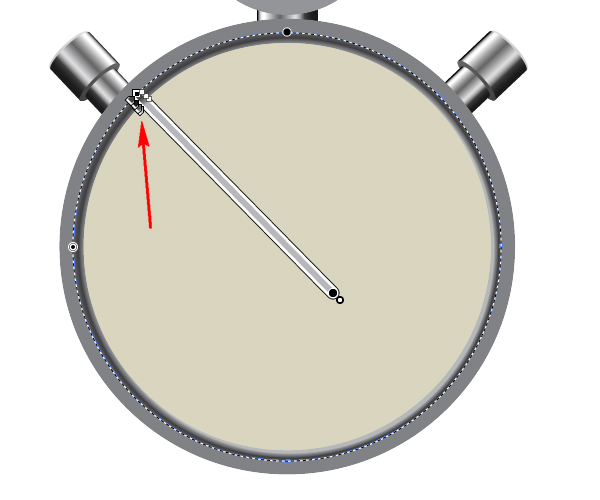
Step 32
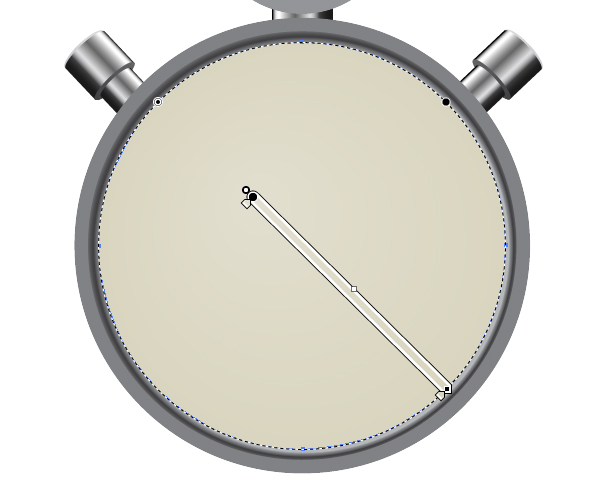
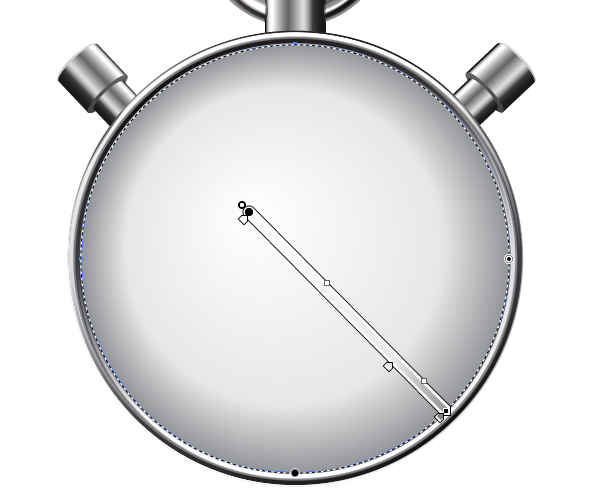
Using the Pen Tool (P), illustrate an arrow and fill it with an angled linear gradient.
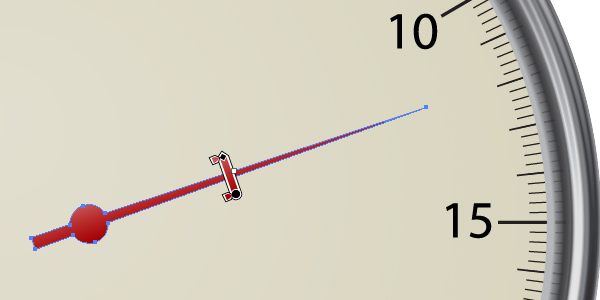
The bolt of the arrow is filled with a radial gradient.
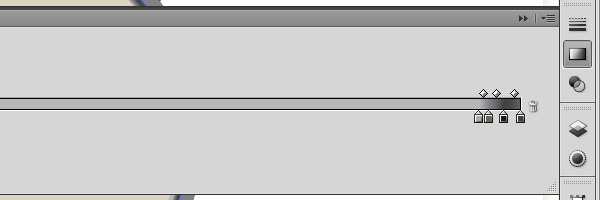
Step 33
The arrow has a shadow. In order to draw it, Copy it and Paste in Back (Command + C then Command + B). Decrease the Opacity of it to about 20%, and move it slightly as shown in the helpful diagram below.
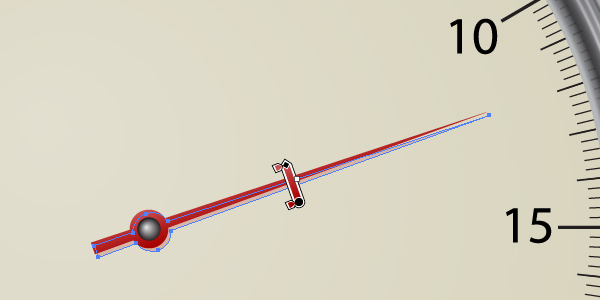
The minutes counter is illustrated the same way. Do it without assistance.

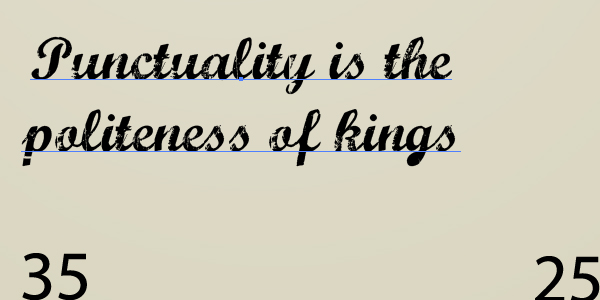
Step 34
Using the Type Tool (T) again and print the universally known phrase of Louis XVIII, the King of France, "Punctuality is the politeness of kings". Select an interesting and wonderful font in the Character palette. Follow your own feeling of beauty.
Go to Object > Envelope Distort > Make with Warp (Command + Alt + Shift + W).
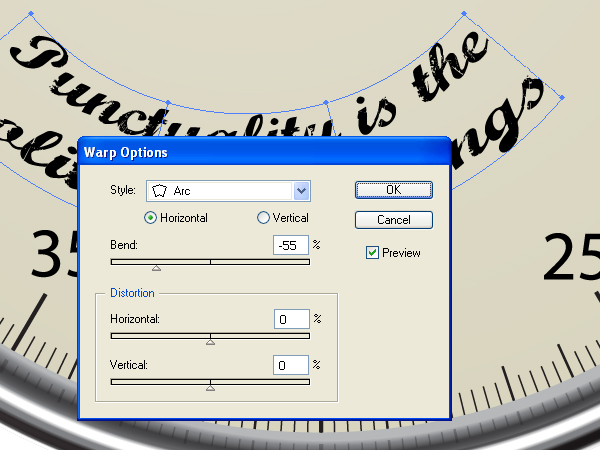
Specify the fitting values in the dialog box in order to locate the text in the right position.
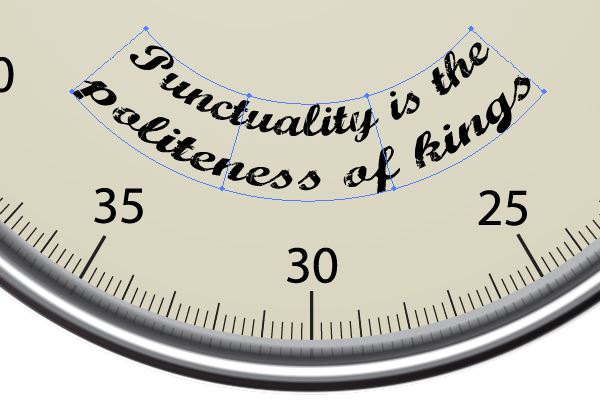
Step 35
Go to Object > Expand, and fill the letters with a gradient filling.

Step 36
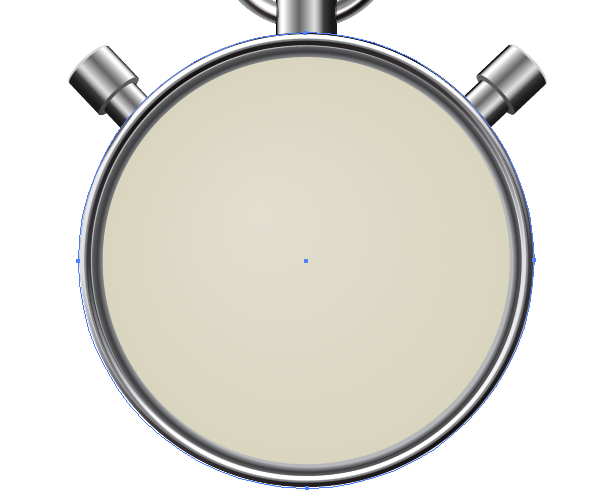
The finished step in this tutorial should be devoted to creating an exterior glass of the stopwatch. Illustrate a circle on the stopwatch, and fill it with a radial gradient.
And change the Opacity of it to about 20%.
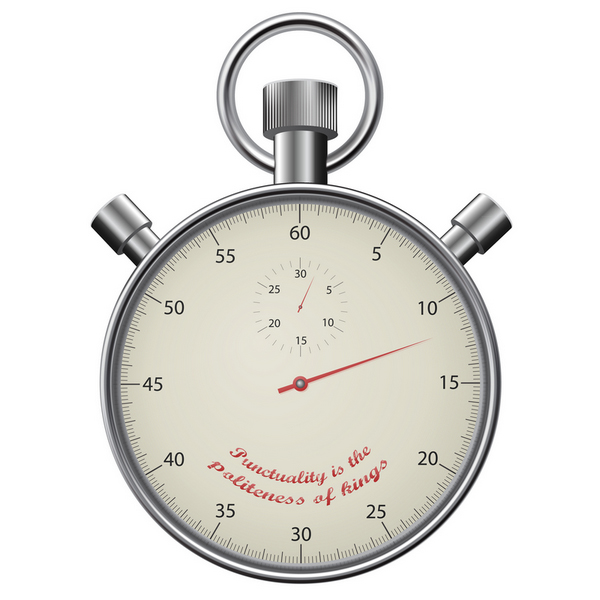
Conclusion
The final image is below. Use the techniques you’ve learned here in your own artworks. I hope you’ve enjoyed this tutorial.