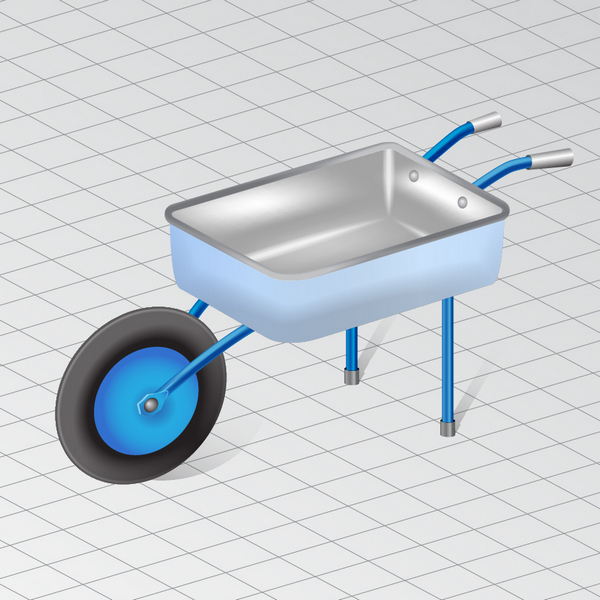
In today’s tutorial, we are going to learn how to create a wheelbarrow in perspective using basic shapes, Blends and gradients in Adobe Illustrator. So let’s get started!
Step 1
To begin you will need to create the main geometry sketch of the wheelbarrow in perspective which is shown in the diagram below. We’ll be creating this initial plan to work from, there we can add highlights and shadows to make it look less flat. If you know how to achieve the main outlines of the object and its elements, go to the Step 17. If not, read the following steps carefully.
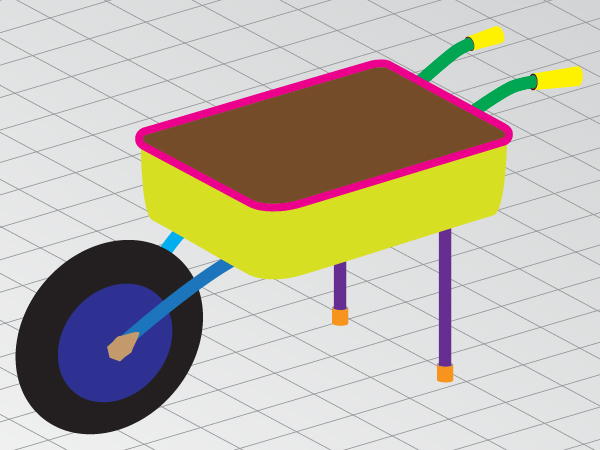
The scaled images of the tiny wheelbarrow parts are shown below for your convenience.


Step 2
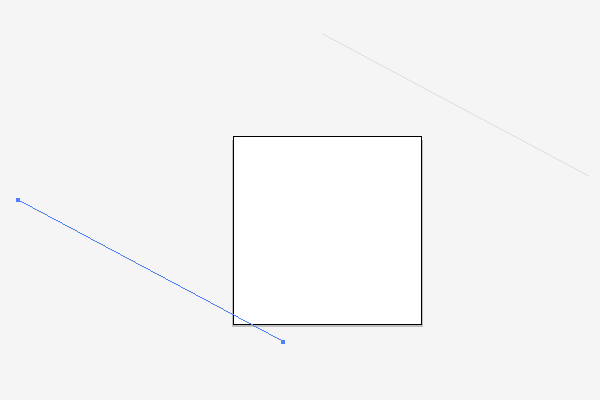
Using the Line Segment Tool (\), draw an inclined line, change the Stroke color of it to gray.
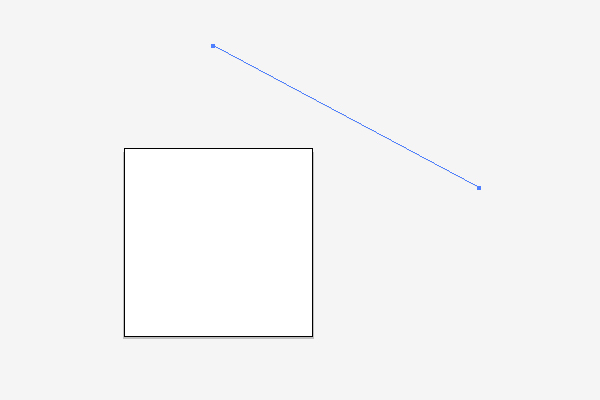
Copy it and Paste in Front (Command + C then Command + F), move it as shown below.
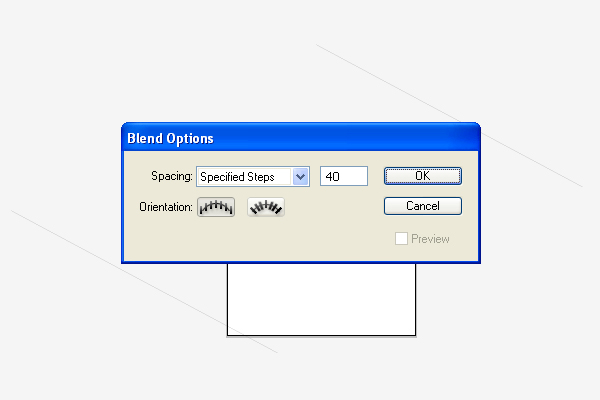
Go to Object > Blend > Blend Options, set the Spacing to Specified Steps, and the number of steps to about 40.
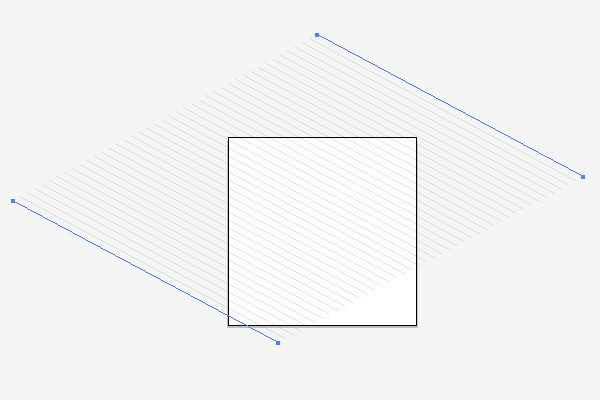
Select both paths, and go to Object > Blend > Make (Command + Alt + B).
Step 3
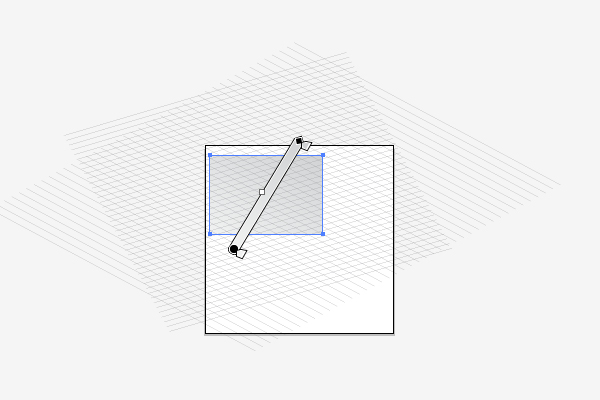
Create another blend over the first one the same way. Follow the image below.
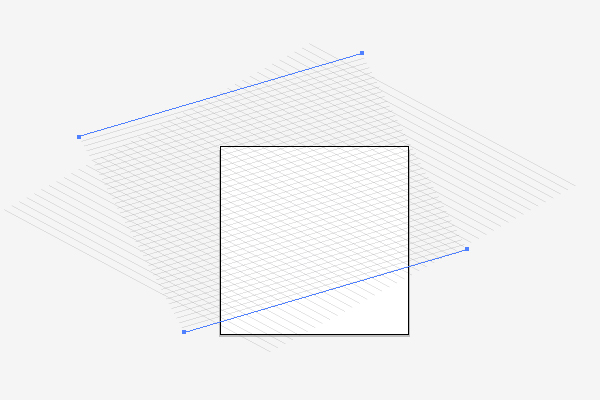
Take the Rectangle Tool (M), draw a rectangular path shown below, and fill it with an angled linear gradient.
Step 4
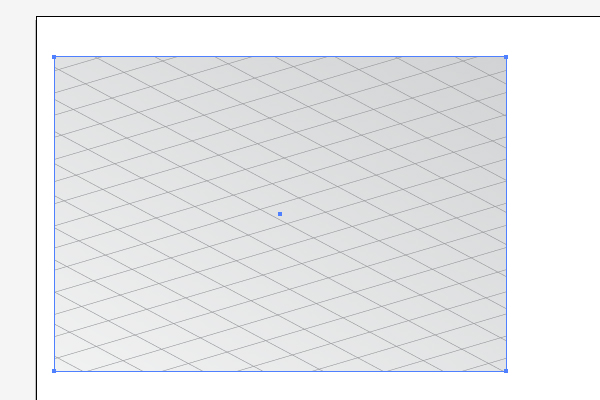
Copy this path, and Paste it in Front (Command + C then Command + F), select all the paths and the blends, and go to Object > Clipping Mask > Make (Command + 7). See the diagram below.
Step 5
For illustration of the wheelbarrow cavity, draw the shown path with rounded angles basing the directions on the lines of blends. Use the Pen Tool (P) for this operation. Follow the helpful image below.
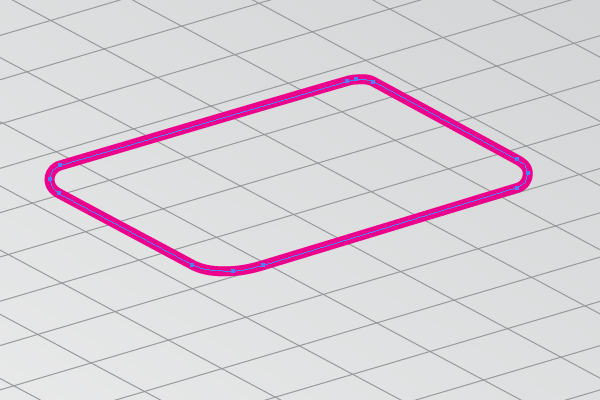
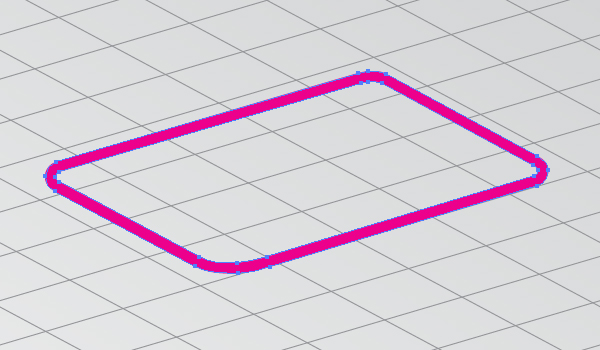
After that go to Object > Expand and then Object > Ungroup.
Step 6
Copy the created compound path and Paste it in Back (Command + C then Command + B). Apply Object > Compound Path > Release.
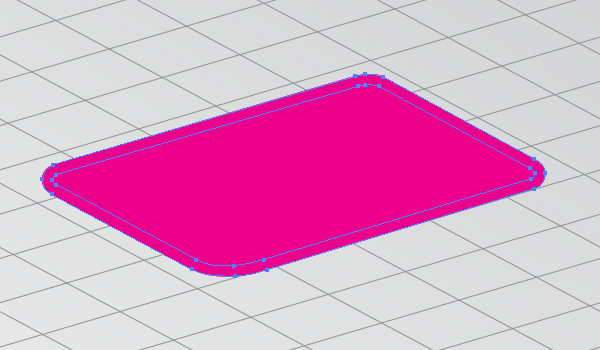
Delete then the outer path and change the filling color of the inner path, and you need to have two paths of the wheelbarrow cavity after that. Both are shown in the image below. Name the inner brown path "Path1."
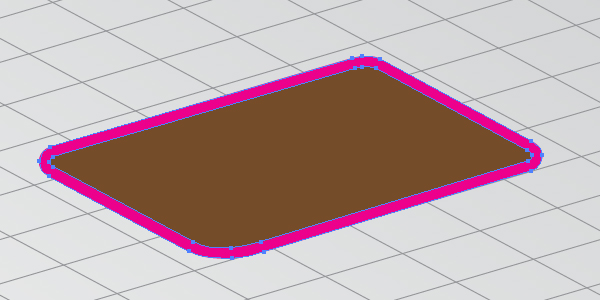
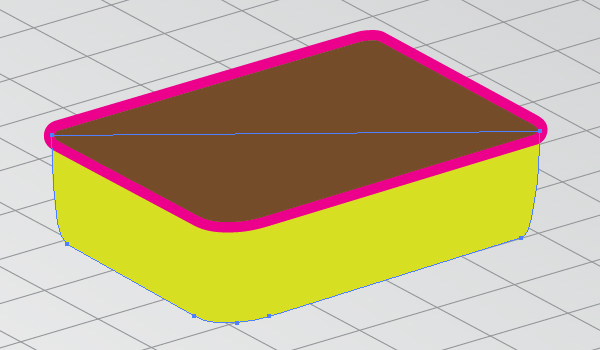
Draw the lateral surface of the capacity.
Step 7
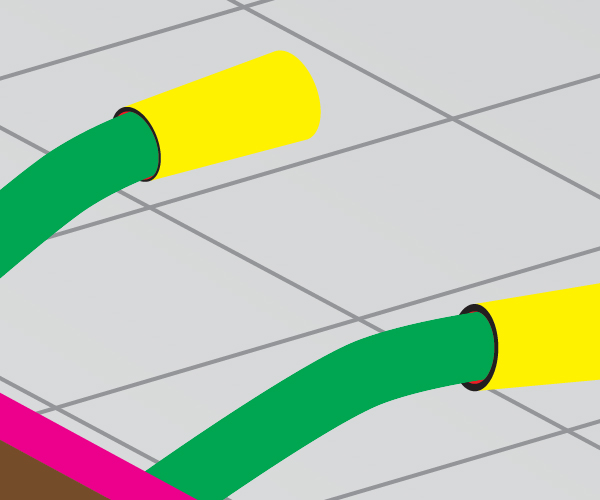
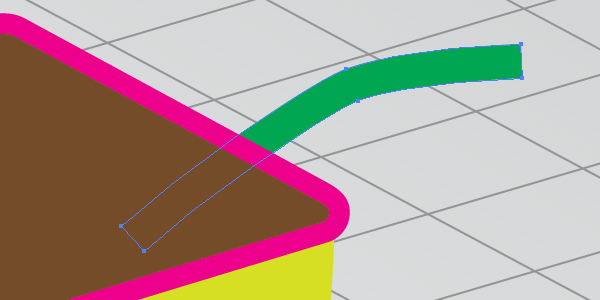
Take the Pen Tool (P), change the Stroke color to green and the filling color to null, and draw the path which will represent a wheelbarrow handle.
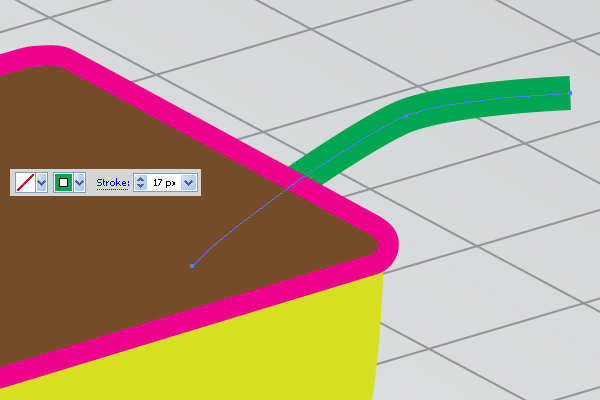
Go to Object > Expand, and go to Object > Ungroup then.
Step 8
Draw the red ellipse with the Ellipse Tool (L) at the right end of the handle.
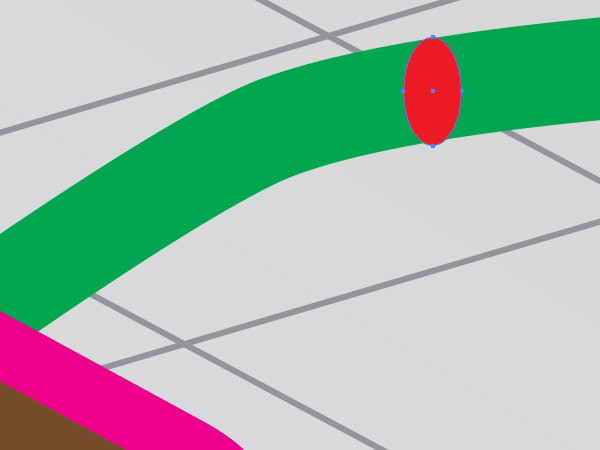
Go to Object > Transform > Scale, decrease the corresponding values in the dialog box and click the Copy button. Change the filling color of the ellipse copy.
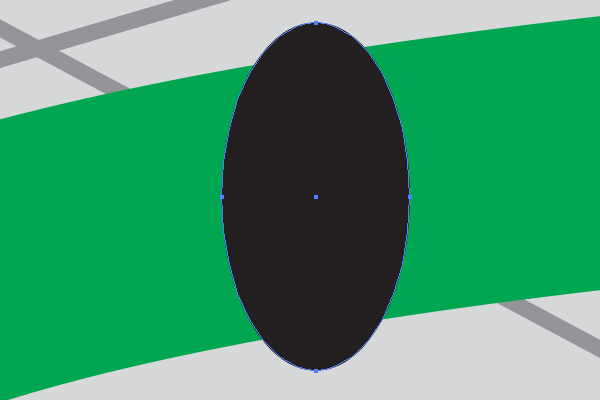
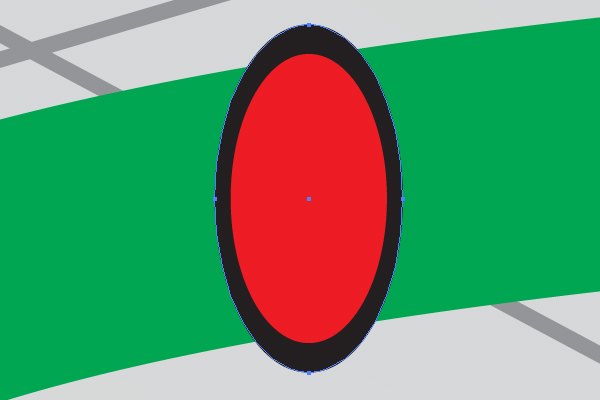
Send the copy of the ellipse backward.
Step 9
Copy the black ellipse, and Paste it in Back (Command + C then Command + B). Move it to the end of the handle as it is shown in the diagram below.
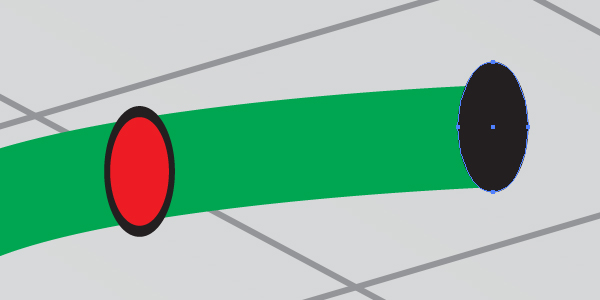
Increase the dimensions of the second ellipse by going to Object > Transform > Scale.
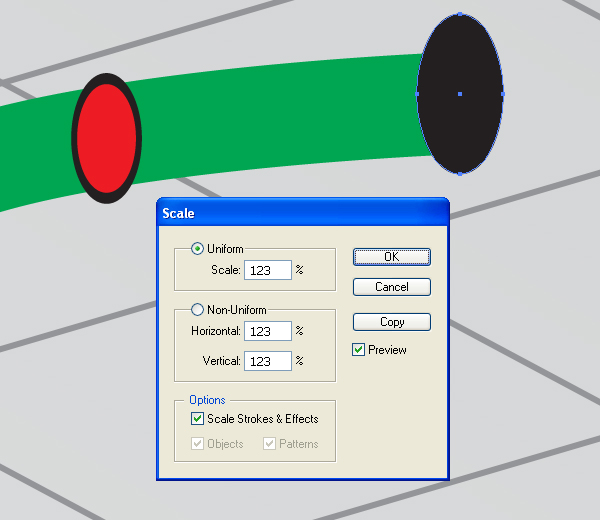
Step 10
Select the first ellipse, Copy it and Paste in Back again (Command + C then Command + B)…
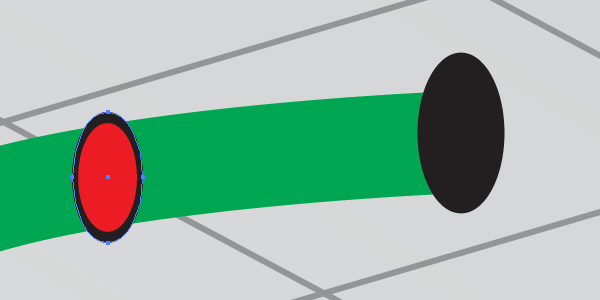
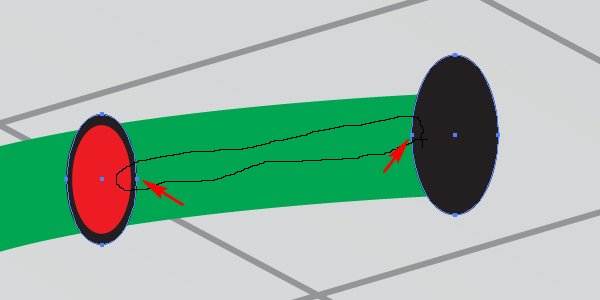
…select then both ellipses shown below…
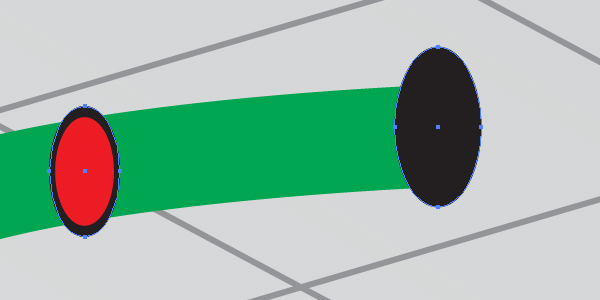
…grab the Lasso Tool (Q), and select the inner anchor points of both ellipses which you can see in the helpful image below.
Press the Delete button on your keyboard.
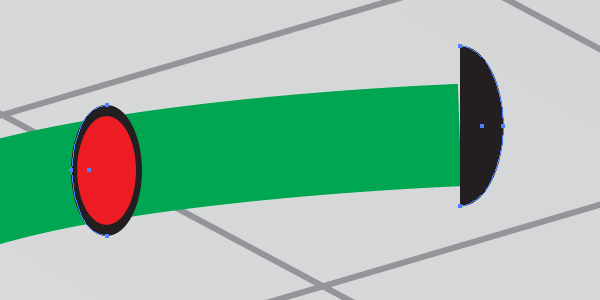
Go to Object > Path > Join (Command + J) twice.
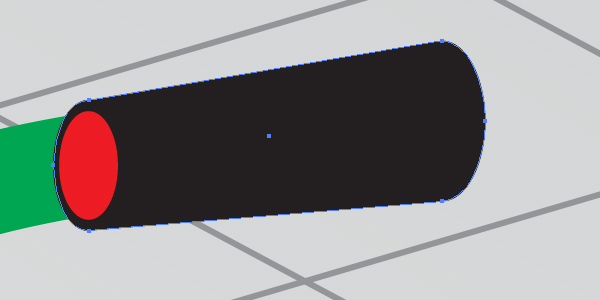
Step 11
Select the first ellipse, Copy it and Paste in Back again (Command + C then Command + B)…
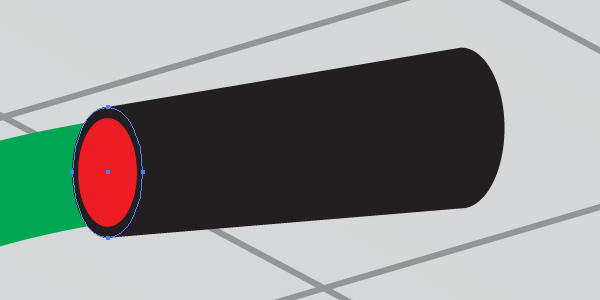
…select then both paths shown below…
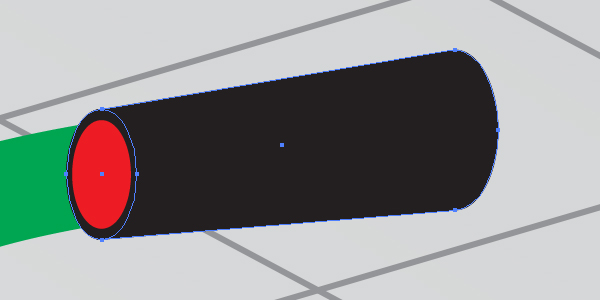
…go to the Pathfinder panel and click there the Minus Front button.
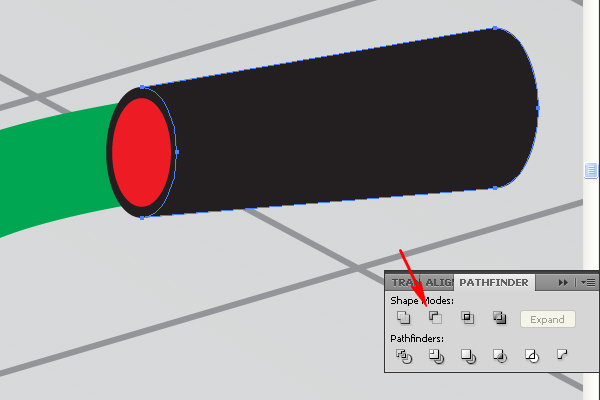
Change the filling color.
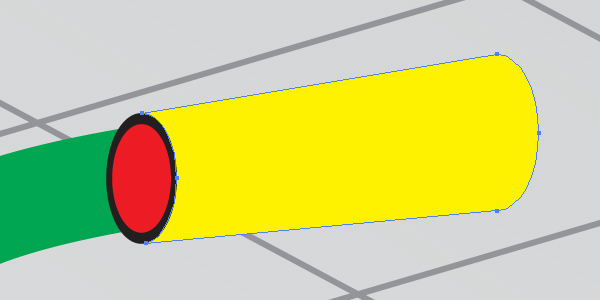
Step 12
Send the yellow handle backward.
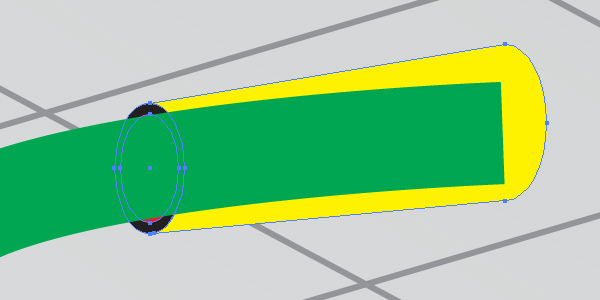
Copy the red ellipse, and Paste it in Front (Command + C then Command + F). Copy the green handle, and Paste it in Front too (Command + C then Command + F).
Step 13
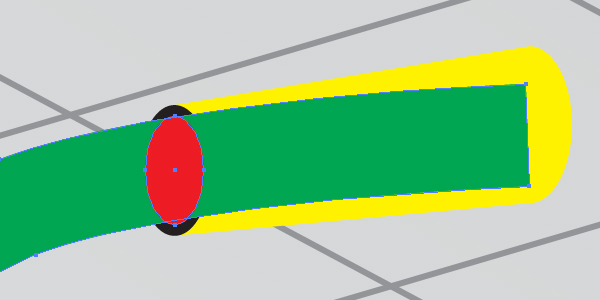
Take the Shape Builder Tool (Shift + M), and drag the line over two paths as shown. Or use the Pathfinder panel for these operations.
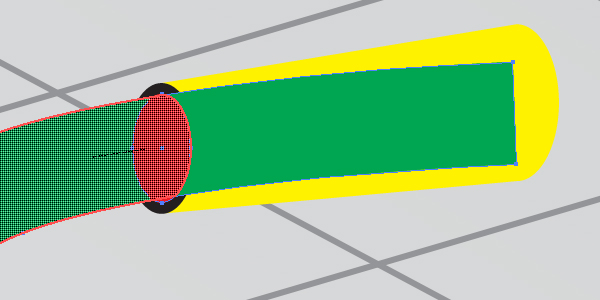
Delete the unnecessary paths in order to receive the following necessary one.
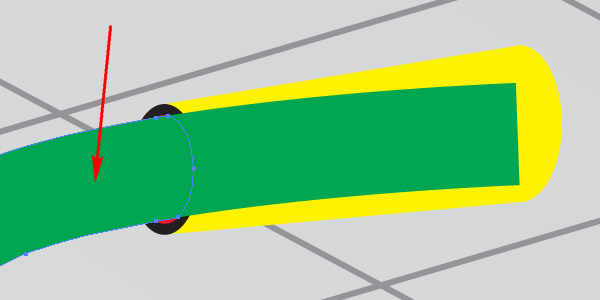
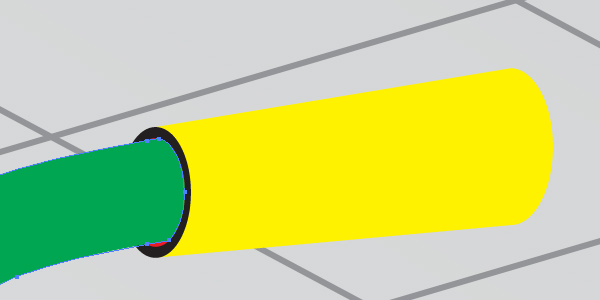
Then select both: the received path and the green path of the handle and go to Object > Clipping Mask > Make (Command + 7). And your green detail will be inserted into the yellow handle.
Step 14
Illustrate the second handle the same way.
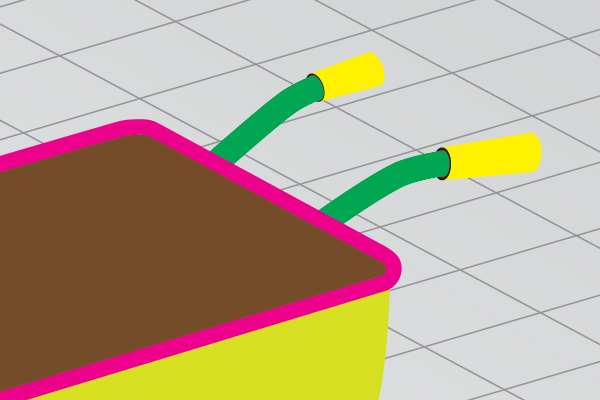
Step 15
The feet are illustrated absolutely as well the same way. Up to this point in the tutorial you already know how to achieve this without assistance, so do it by yourself. The helpful images are shown below.
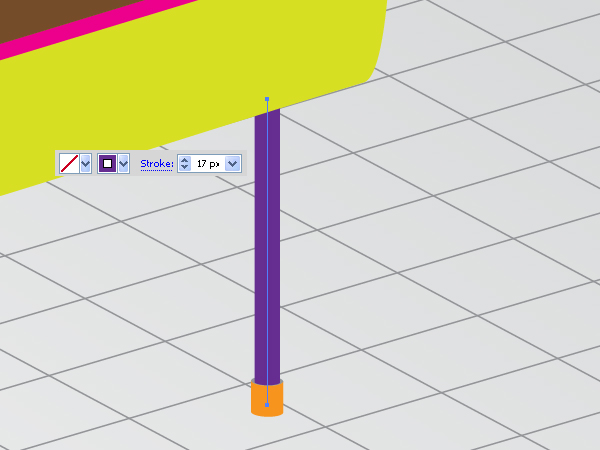
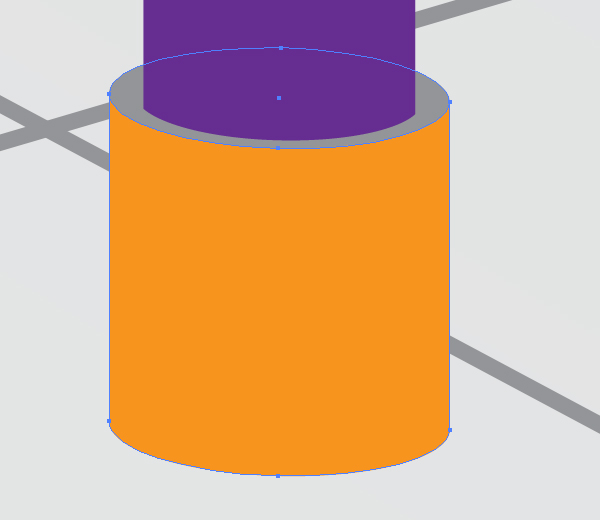
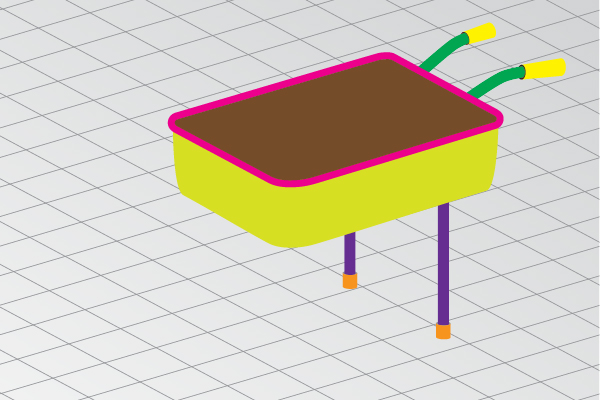
Step 16
The created wheelbarrow will not fall down, because the handles balance the front part of the cavity. But you need to put it by your hands in order to move it! Is it comfortable? If not, let’s draw a wheel at the front of it. Take the Ellipse Tool (L), and draw two ellipses shown below. Pay attention that the blue ellipse is moved from the center because we need to remember about the angle of view.
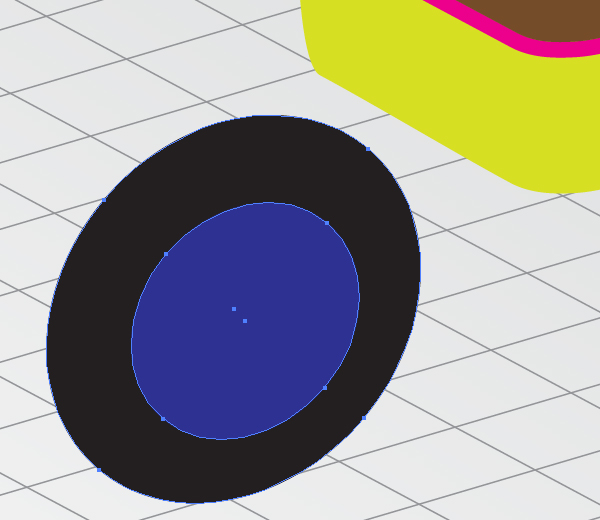
Besides, pay attention that the wheel must be located in the right perspective. See the image below for the reference.
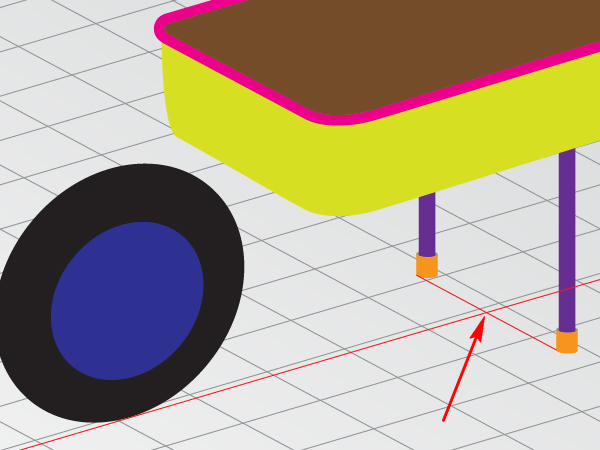
Create two connecting paths as well.
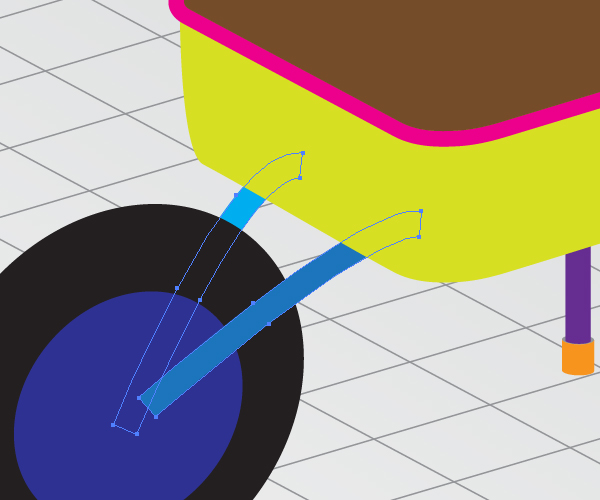
And draw another light brown connecting detail. And your main geometry sketch will be completed.

Step 17
In order to continue the creating of a wheelbarrow, we should create an Art Brush in the beginning. Take the Ellipse Tool (L) again and draw an elongated elliptical path filled with black. Follow the helpful image below.
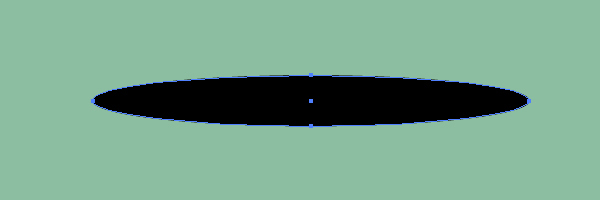
Copy it and Paste in Front (Command + C then Command + F). Go to Object > Transform > Scale and decrease to 50%.
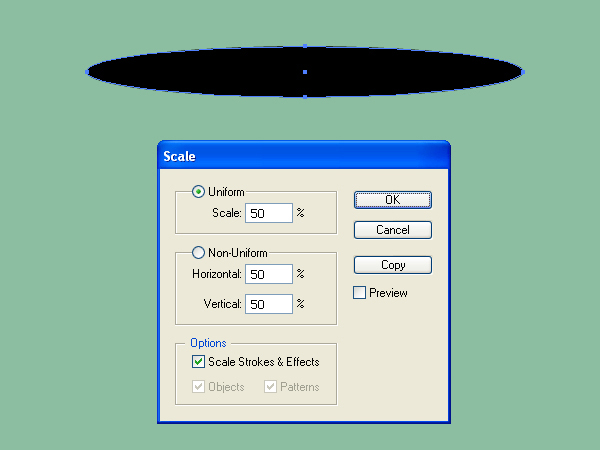
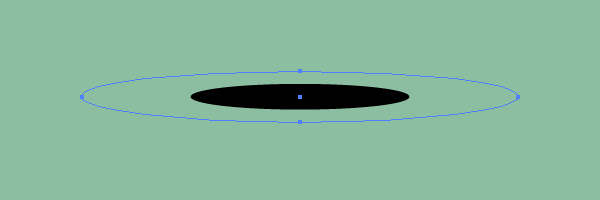
Change the Opacity of the larger ellipse to 0%.
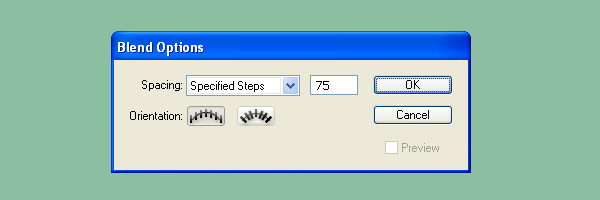
Go to Object > Blend > Blend Options and set the values in the dialog box as shown.
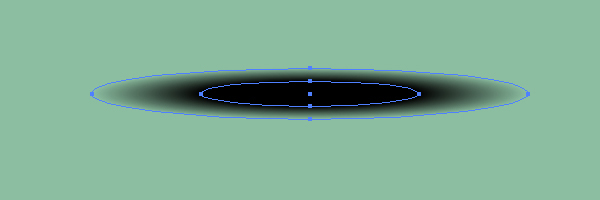
Select both ellipses and go to Object > Blend > Make (Command + Alt + B).
Step 18
Drag and drop this blend into the Brushes panel, and choose the Art Brush option in the opened dialog box.
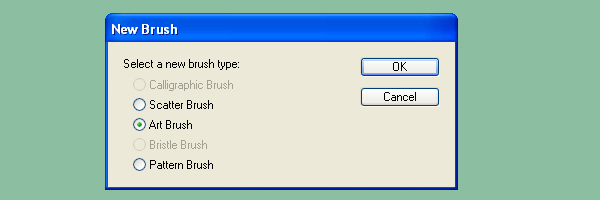
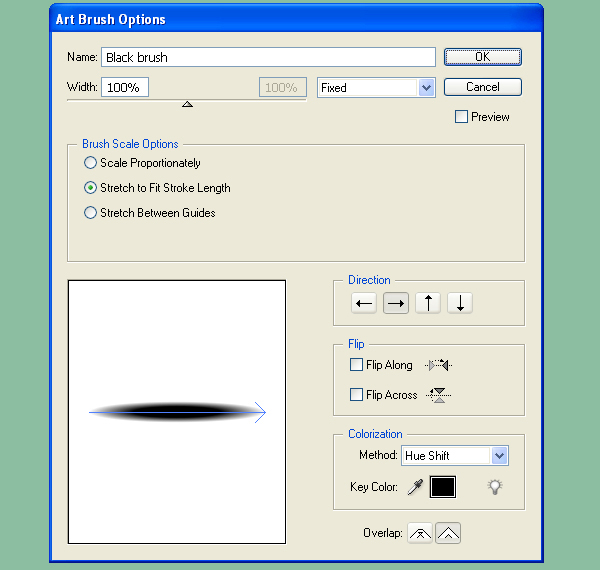
Specify the options for the brush in the second dialog box. Name this brush "Black brush." Change the Colorization Method of it to Hue Shift.
Step 19
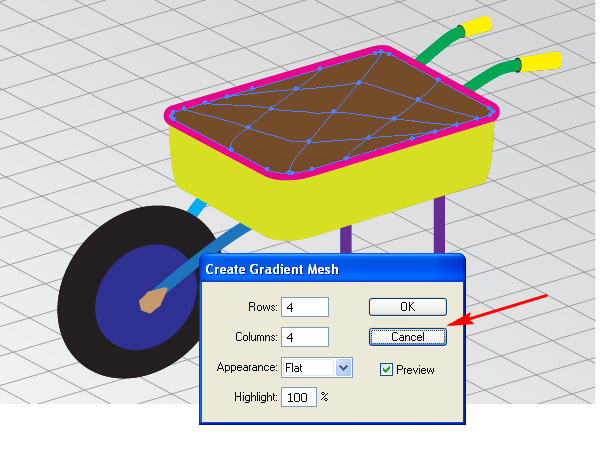
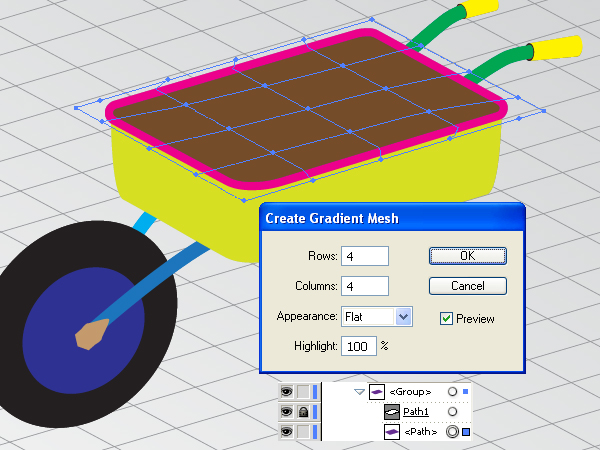
Let’s paint the inner part of the cavity (brown path). I advise you to use meshes for this purpose. Let’s try! Select the brown path, and go to Object > Create Gradient Mesh and I want you to click the Cancel button here, because this way of using the meshes is wrong. The automatic locations of mesh lines are not convenient for our task. We will go the other way…
Step 20
Take the Pen Tool (P) and illustrate a quadrangular path beyond the bounds of the brown one. See the image below for reference.
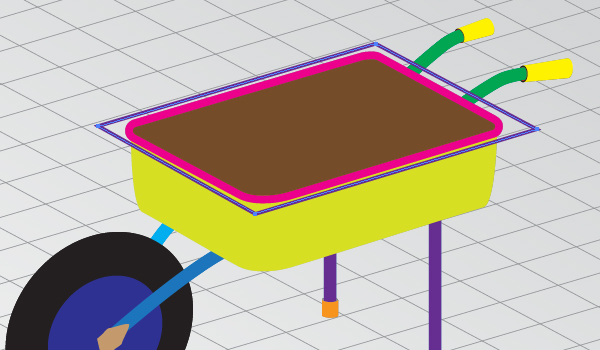
Fill this path with any color and place it under the brown one in the Layers panel.
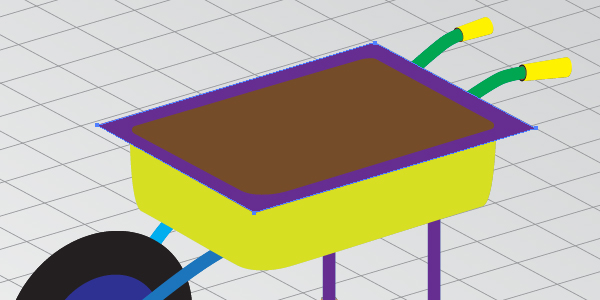
Crop the received violet path with a clipping mask created from the "Path1."
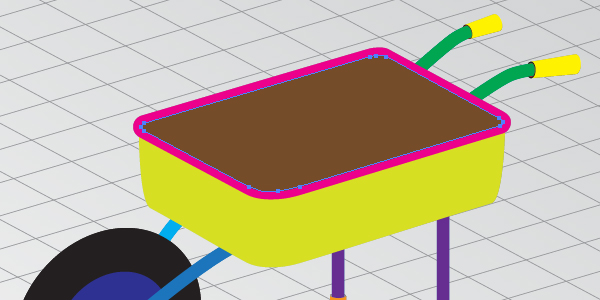
Now lock the Clipping path in the Layers palette, select the violet path and go to Object > Create Gradient Mesh. And you will receive the right distribution of mesh lines. It is more convenient for the further using.
Step 21
Change the colors of the mesh nodes by using the Mesh Tool (U) as shown below.
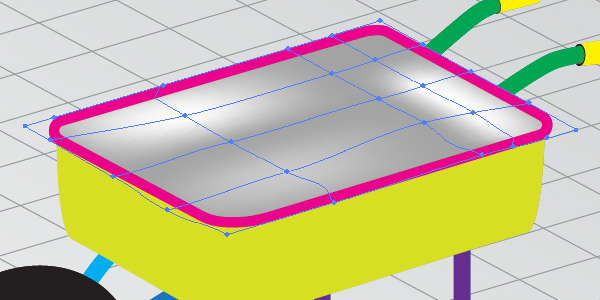
Apply the "Black brush" to the following paths in order to represent the right shape of the cavity. Change the Stroke color of the paths to white, change the Stroke Weight and the Opacities of the paths if necessary. Crop the paths with the same Clipping Mask. You need to achieve the following result.
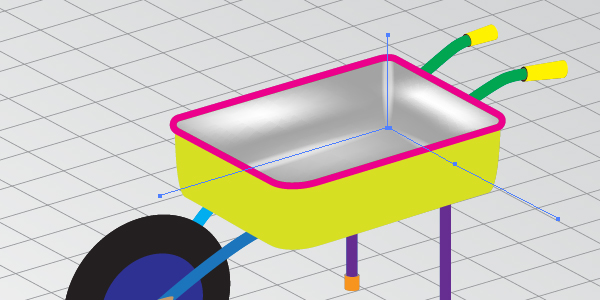
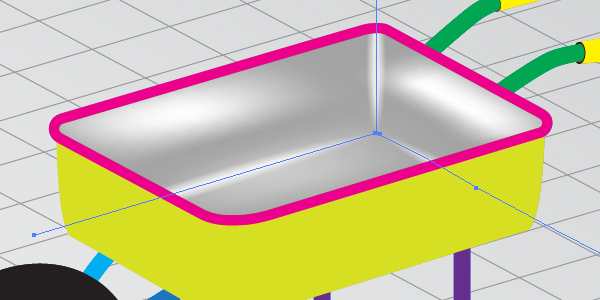
Copy the paths and Paste them in Front (Command + C then Command + F). Decrease the Stroke Weights of the paths so as to receive the next image.
Step 22
Fill the crimson compound path with gray.
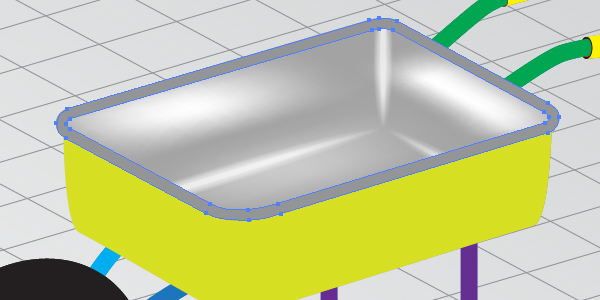
Take the Pen Tool (P) and illustrate the next two paths to which the "Black brush" with the white Stroke color is applied.
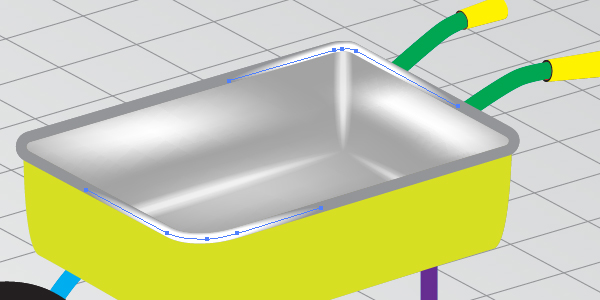
Repeat these manipulations so as to apply the "Black brush" with the black Stroke color to the next two paths.
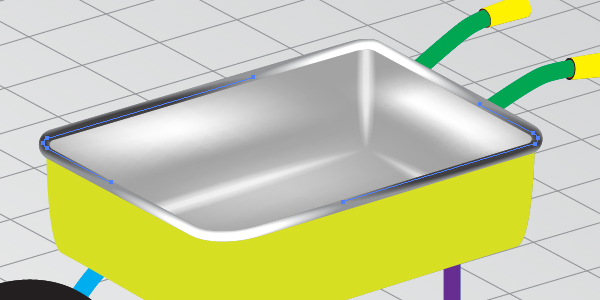
Step 23
Crop the paths with the corresponding Clipping Mask…
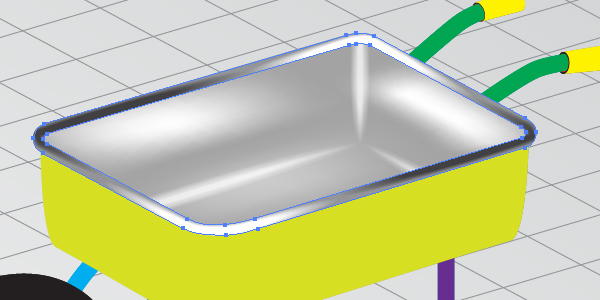
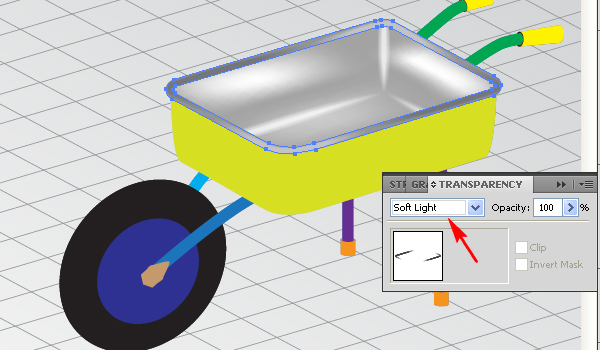
…go to the Transparency panel, and change the Blending Mode to Soft Light.
Step 24
Fill the lime lateral surface with a linear gradient.
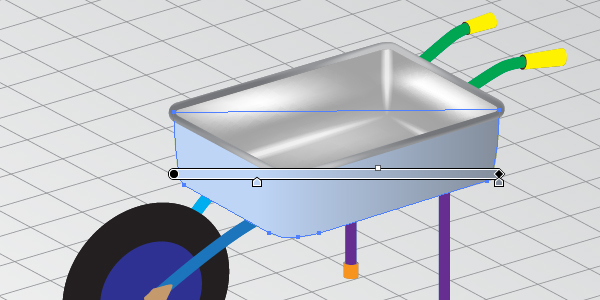
Copy it and Paste in Front (Command + C then Command + F). Fill the copy with another linear gradient shown below.
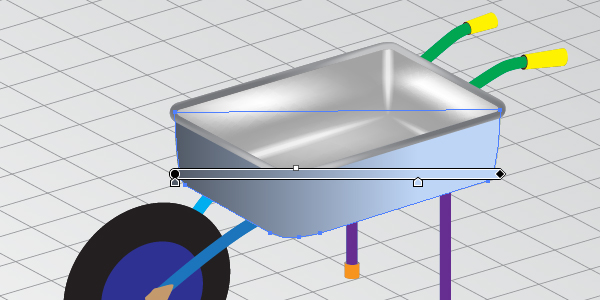
Change the Blending Mode to Overlay.
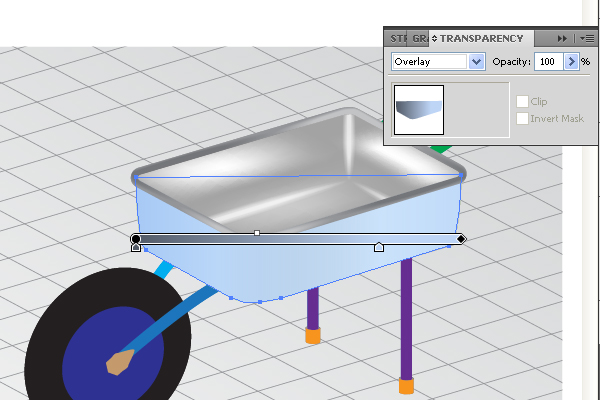
Step 25
Apply the "Black brush" to the following semitransparent path, and crop it with a Clipping Mask in order to locate it over the lateral surface of the cavity only.
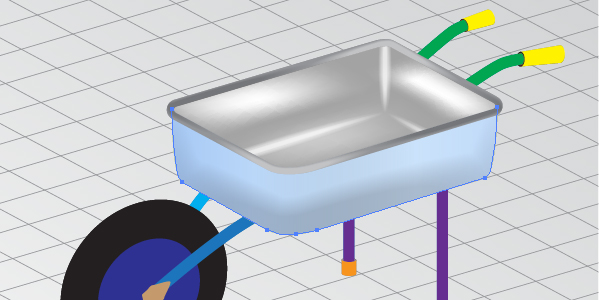
Step 26
Fill the yellow handle with an angled linear gradient.
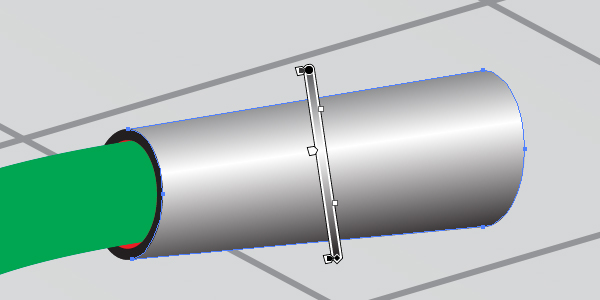
Fill the black path with a radial gradient shown below.
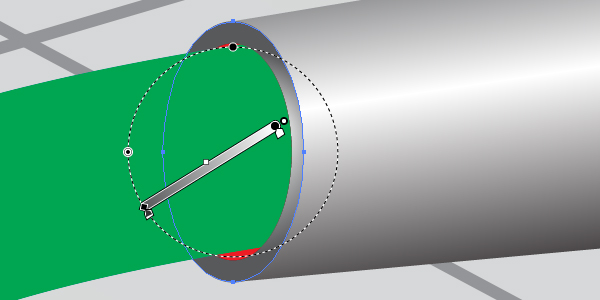
Fill the red path with black.
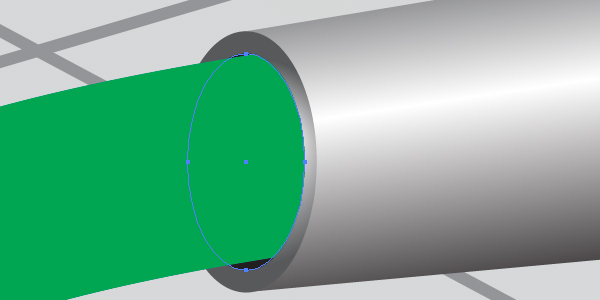
Fill the green handle with blue.
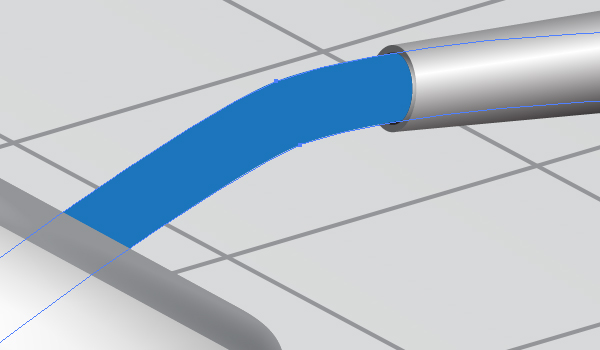
Step 27
Take the Pen Tool (P), and draw a shown path. Then apply the "Black brush" to it with the black Stroke color. Change the Stroke Weight if necessary.
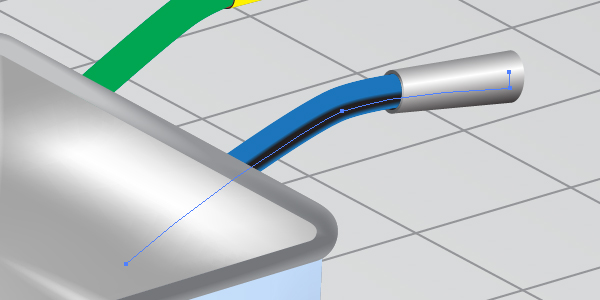
Draw another path the same way. Apply the "Black brush" to it with the white Stroke color.
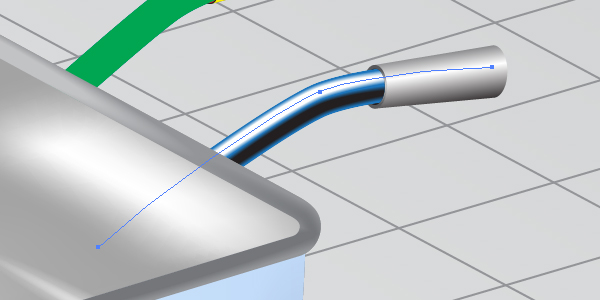
Change the Blending Mode of both paths in the Transparency panel.
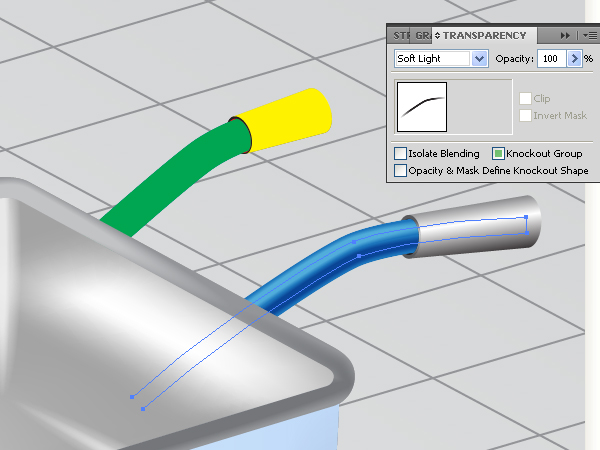
Step 28
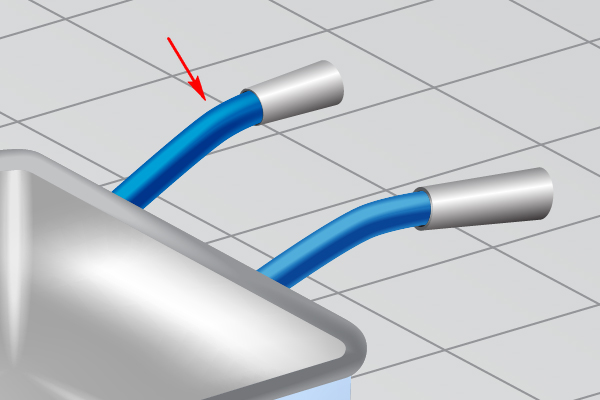
The next parts of the wheelbarrow are illustrated the same way. Follow the helpful images below, and do it by yourself.
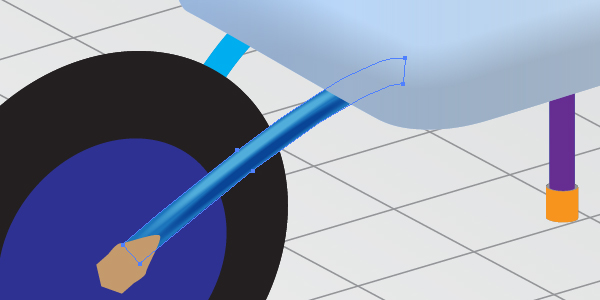
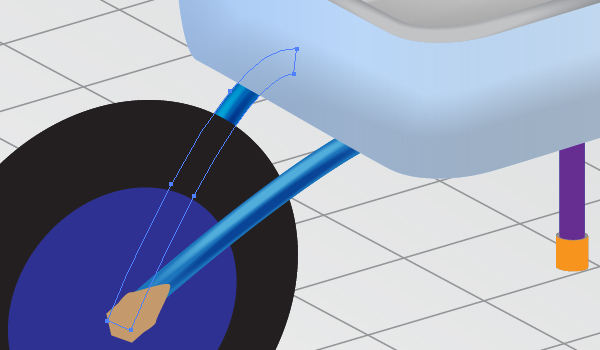
Step 29
Fill the orange part of the foot with a linear gradient.
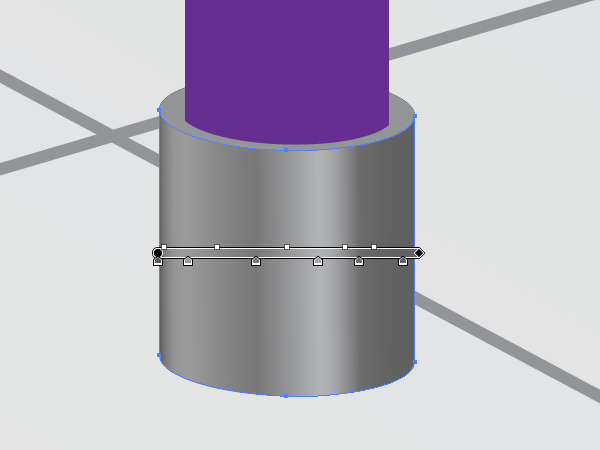
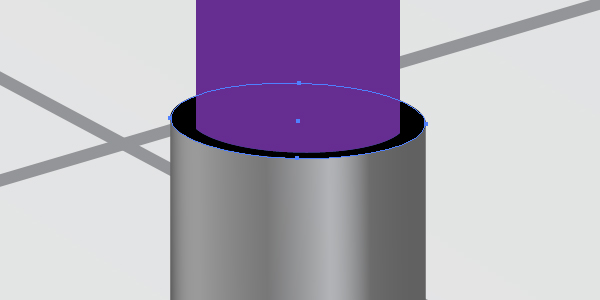
The gray ellipse should be filled with black.
Change the violet color of the foot to blue.
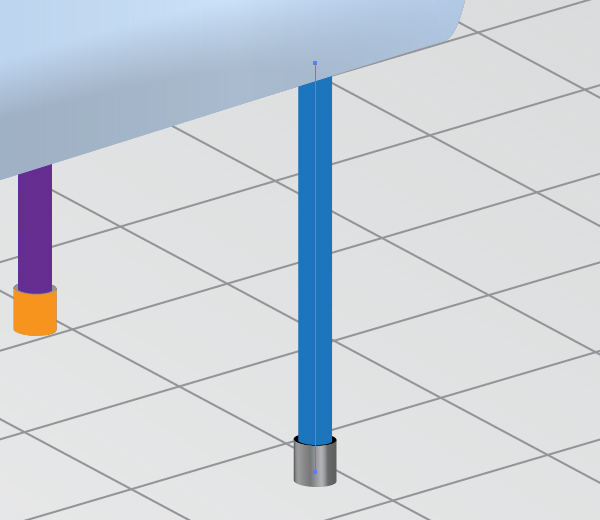
Copy the blue path, and Paste it in Front (Command + C then Command + F). Go to Object > Expand, then Object > Ungroup. Fill the received path with a linear gradient shown below.
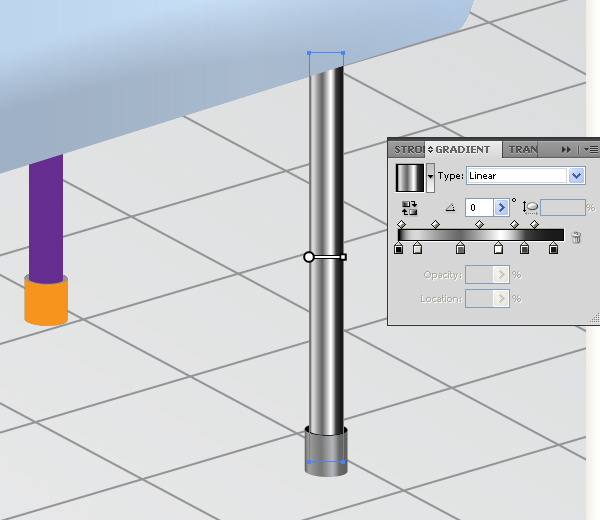
Change the Blending Mode of this path to Soft Light in the Transparency panel.
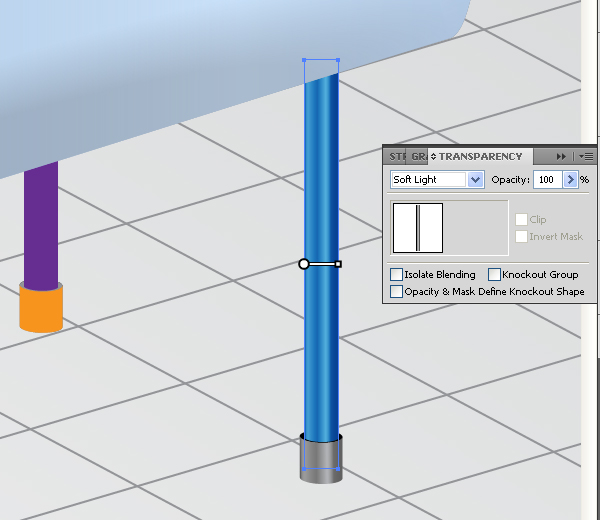
Do the same with the second foot.
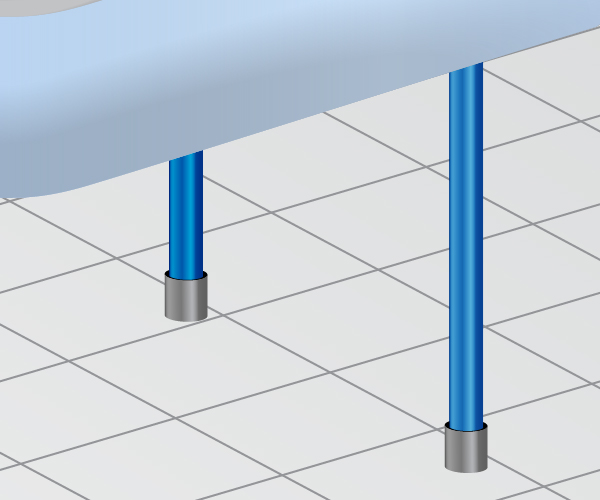
Step 30
Apply the "Black brush" to the semitransparent path with the white Stroke color. See the image below for reference.
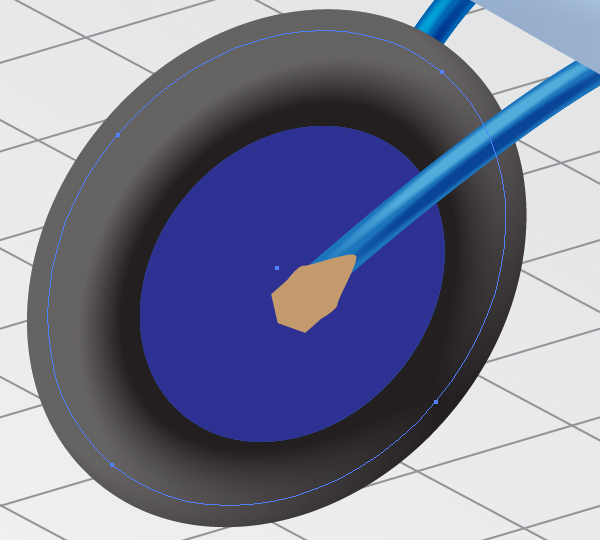
Copy the path, and Paste it in Front (Command + C then Command + F). Decrease the Stroke Weight, and change the Blending Mode of it in the Transparency panel.
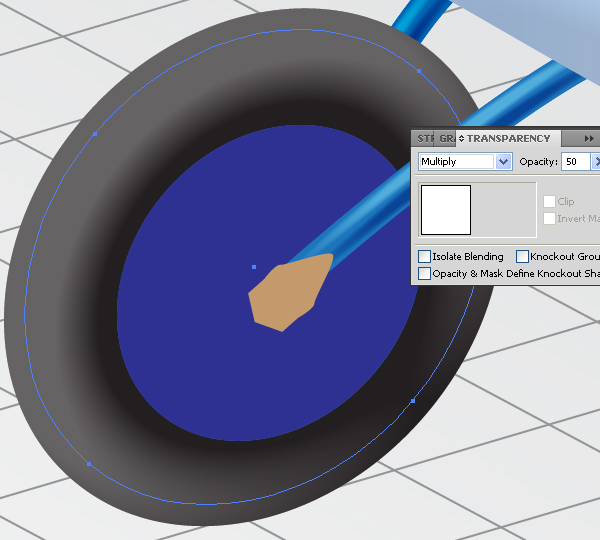
Apply the "Black brush" the same way to the next path shown below in order to emphasize on the border of the wheel.
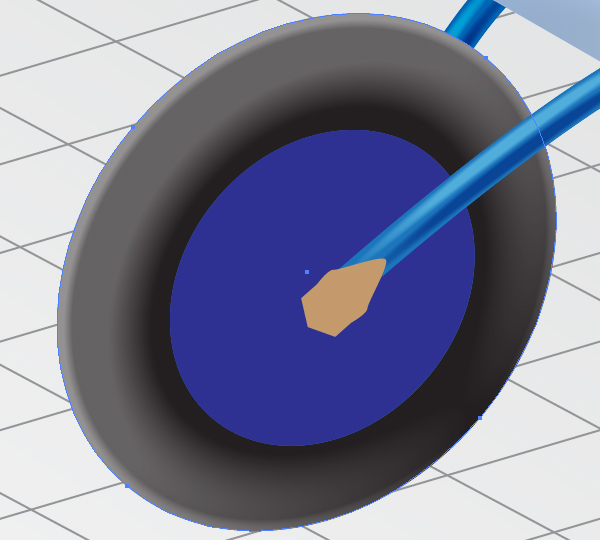
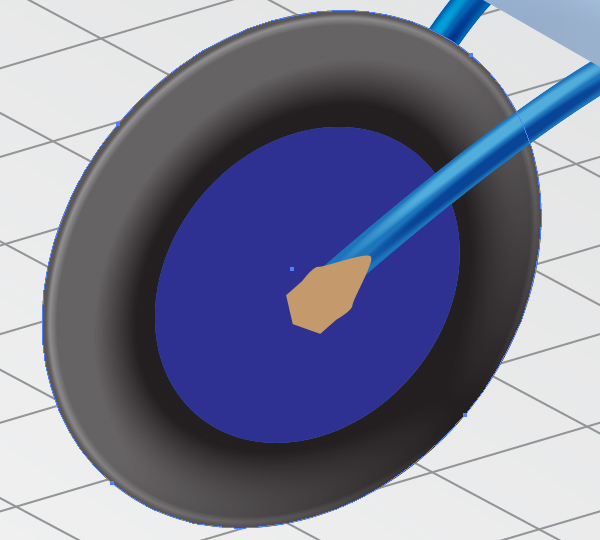
Copy the path, and Paste it in Front (Command + C then Command + F). Decrease the Stroke Weight, and change the Stroke color of the path to black. You should achieve the following result.
Step 31
Fill the dark blue path with a radial gradient shown below.
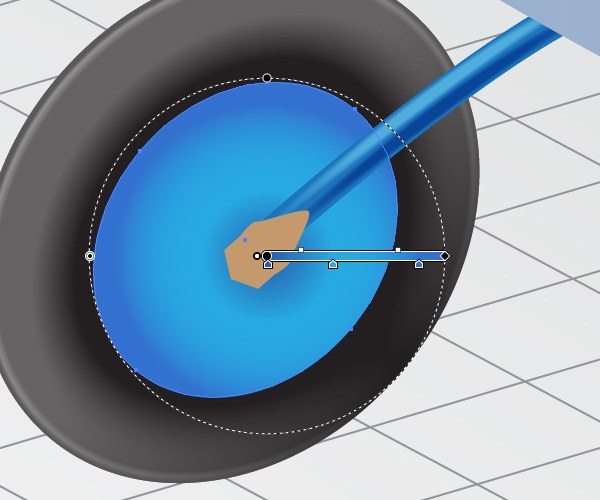
Fill the light brown connecting detail with a radial gradient as well.
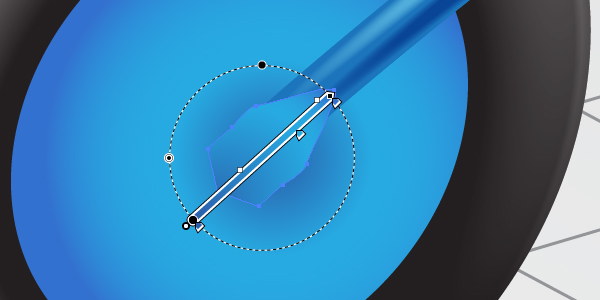
Step 32
Copy the path, and Paste it in Back (Command + C then Command + B). Move it slightly as shown and fill with light blue.

Apply the "Black brush" to the next path shown below in order to emphasize on the border of the connecting detail. Change the Stroke color to white, and the Blending Mode to Overlay.
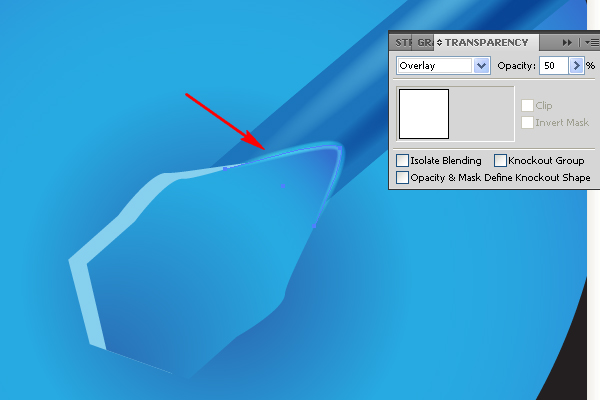
Do the same with another path shown below, and cropped with the corresponding Clipping Mask.
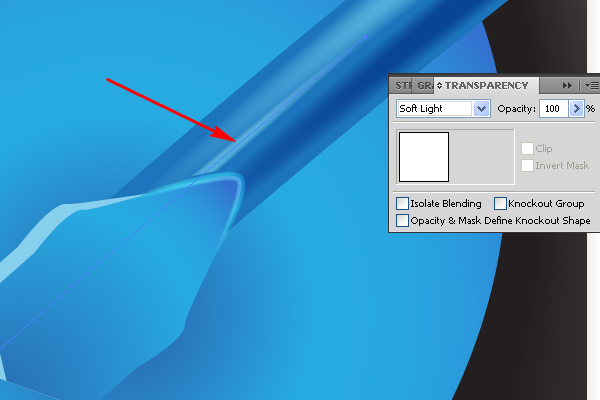
Step 33
Grab the Ellipse Tool (L) and draw an elliptical path on the connecting detail. Fill the received path with a radial gradient shown below.

Draw the other paths shown below.
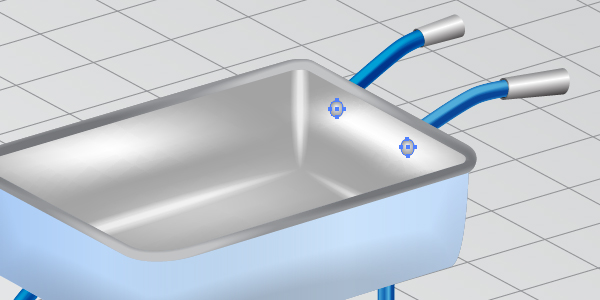
Step 34
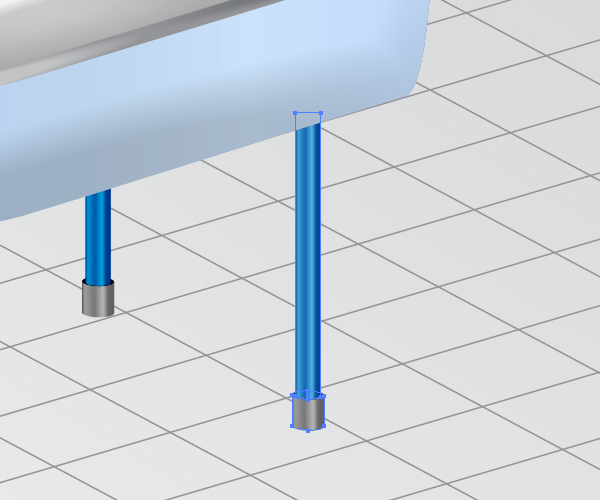
Select the first foot, Copy it and Paste in Back (Command + C then Command + B). Unite the paths of it by using the Pathfinder panel or the Shape Builder Tool (Shift + M), move it slightly as shown below, and fill it with a vertical gradient where the gray color stops are semi transparent.
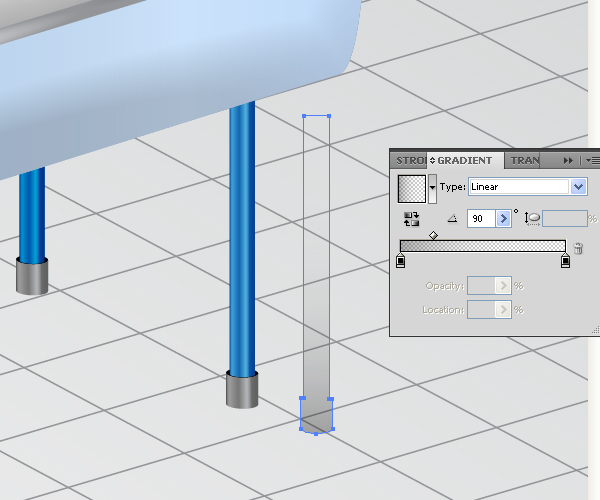
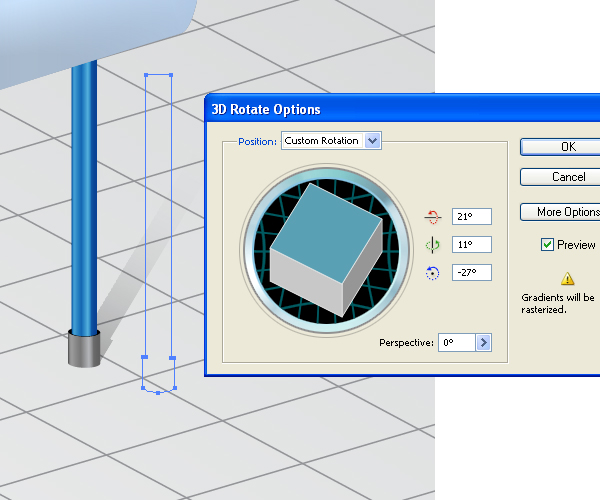
Go to Effect > 3D > Rotate, and specify the shown options in the opened dialog box. You should achieve the next result.
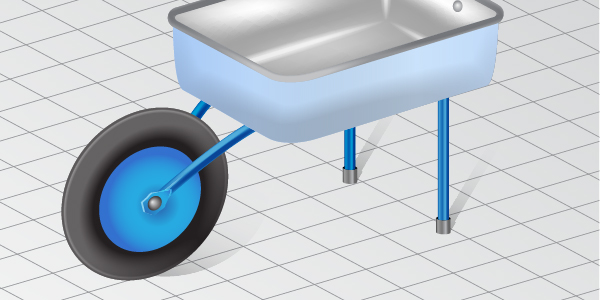
Do the same with the second leg, and the wheel in order to illustrate shadows. See the image below.
Conclusion
The final image is below. Use the techniques you’ve learned here in your own artworks. I hope you’ve enjoyed this tutorial.
