In this tutorial you will learn how to create your own modern TV on a stand. Using the Perspective Grid in Illustrator CS5 as the basis of your work you will learn how to quickly create a product illustration with perfect perspective.
Step 1
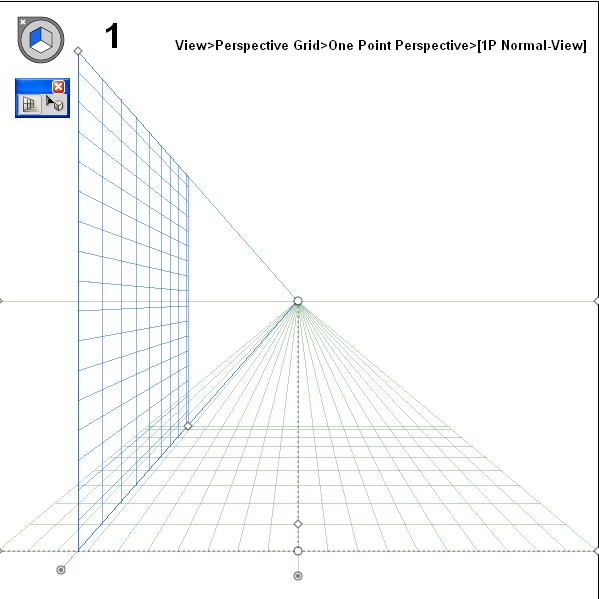
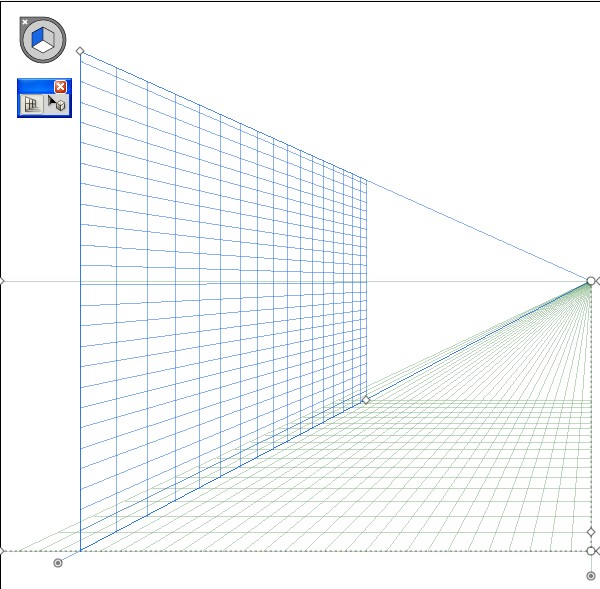
Open a new document with the size you want. I’ve used 600 x 600 px, click on the Perspective Grid tool (Shift + P). By default you will see [2P Normal-View] but we’ll need [1P Normal-View]. To do this, go to View > Perspective Grid > One Point Perspective > [1P Normal-View] and correct the perspective with the Perspective Grid Tool as shown in picture 1.1 below.
Step 2
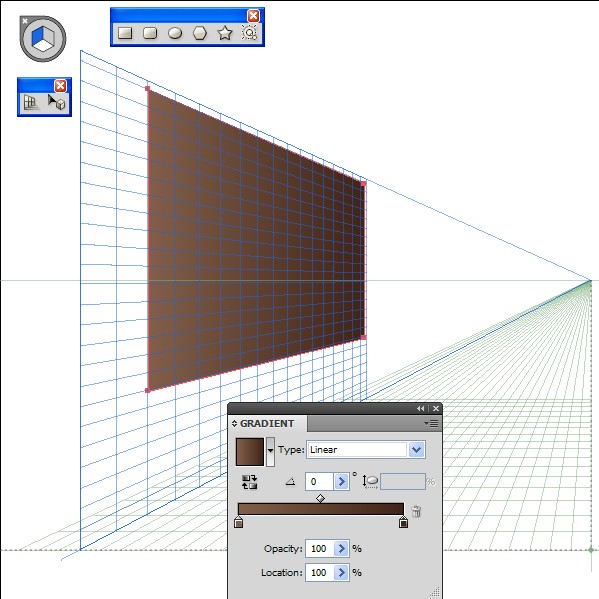
With the rectangle tool (M), create a rectangle as shown in the picture below and fill it with Linear Gradient colors brown to dark brown.
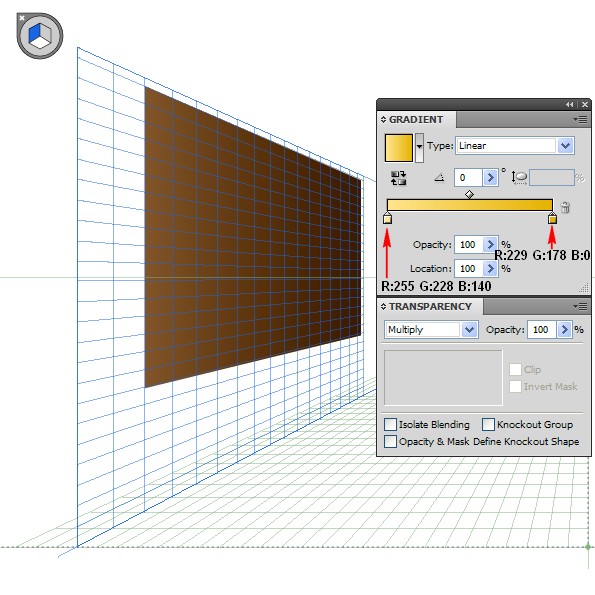
Step 3
With the shape from the previous step selected, copy it using Control + C followed by Control + F, change the gradient’s colors to R:255 G:228 B:140 to R:229 G:178 B:0 and change the Blending Mode from Normal to Multiply.
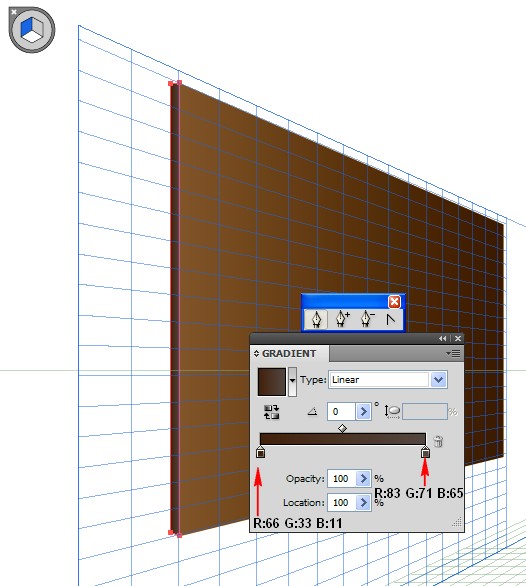
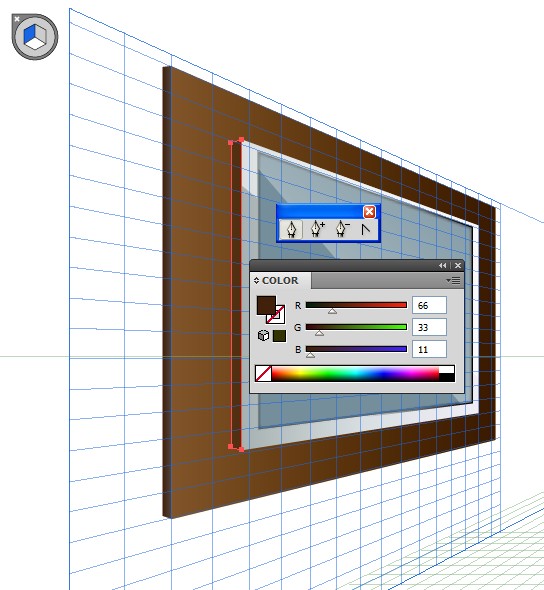
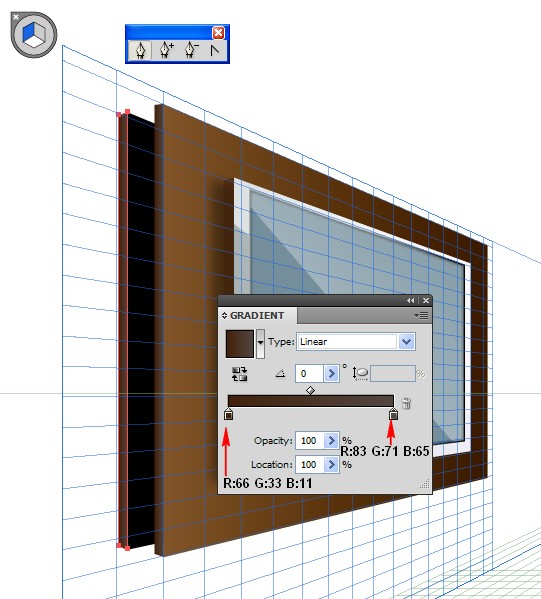
Step 4
With the Pen tool (P), create a shape on the left side of the previous shapes and fill with a Linear Gradient with colors R:66 G:33 B:11 to R:83 G:71 B:65, loOK at the picture below.
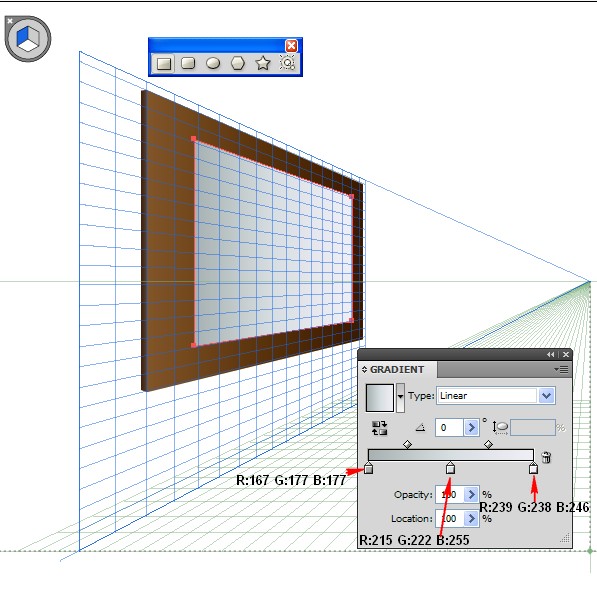
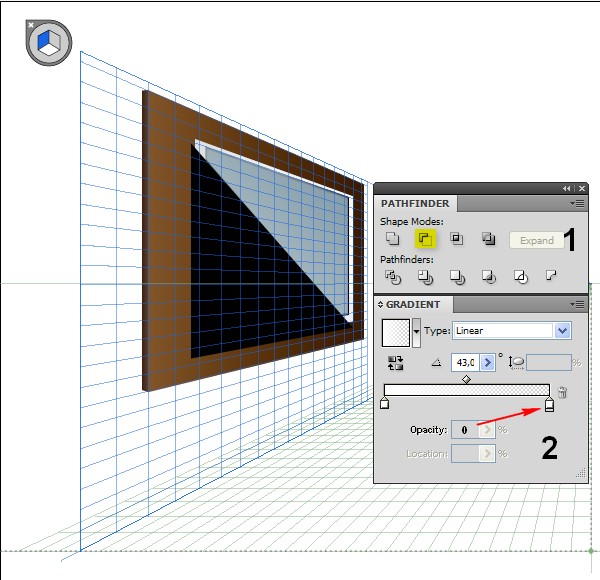
Step 5
With the Rectangle tool (M) create a rectangle over the previous shapes in a position as shown below and fill with Linear Gradient. To do this, open the Gradient panel. You need 3 Gradient Sliders. For the first one from left to right set color R:167 G:177 B:177, for the second one R:215 G:222 B:255, Location: 50% and for the third gradient slider R:239 G:238 B:246.
Step 6
Copy the shape from the previous step using Control + C followed by Control + F, pick the Pen tool (P), create a shape over the copy as shown below, then select the copy and the shape you just created, open the Pathfinder panel, click on the Minus Front button, change the color to white and reduce the Opacity to 60%.

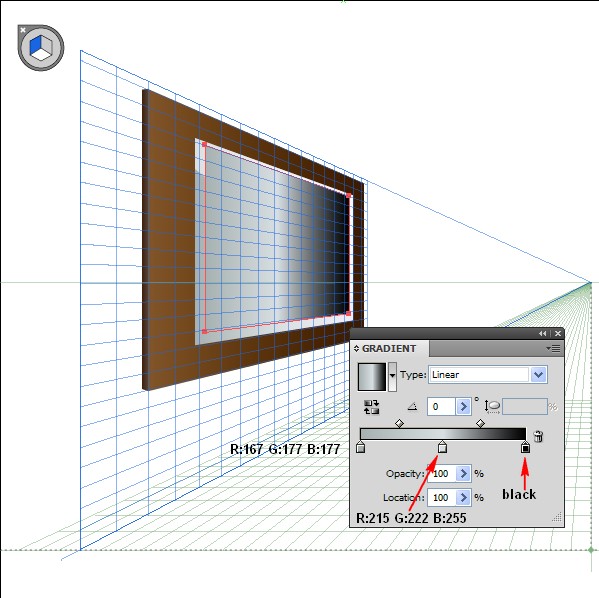
Step 7
Pick the Rectangle tool (M), create a rectangle over the previous shapes in a position as shown below and fill the shape with Linear Gradient. To do this, open the Gradient panel. You need three Gradient Sliders. For the first one from left to right set color R:167 G:177 B:177, for the second one R:215 G:222 B:255 and for the third gradient slider select black.
Step 8
With the last shape still selected, go to Object > Path > Offset Path, set Offset: -1px, click OK and fill the new shape with R:116 G:143 B:155.

Step 9
Copy the shape that appeared after applying Offset from the previous step, using Control + C followed by Control + F, with the Pen tool (P), create a shape over the copy as shown in the picture below. Open the Pathfinder panel, click on the Minus Front button, then fill the shape with Linear Gradient. You need two Gradient Sliders, for each slider, select white and reduce the Opacity to 0% for the second gradient slider.
Step 10
With the Pen tool (P) create a shape on the left side of the previous shapes as shown in the picture below and fill with R:66 G:33 B:11.
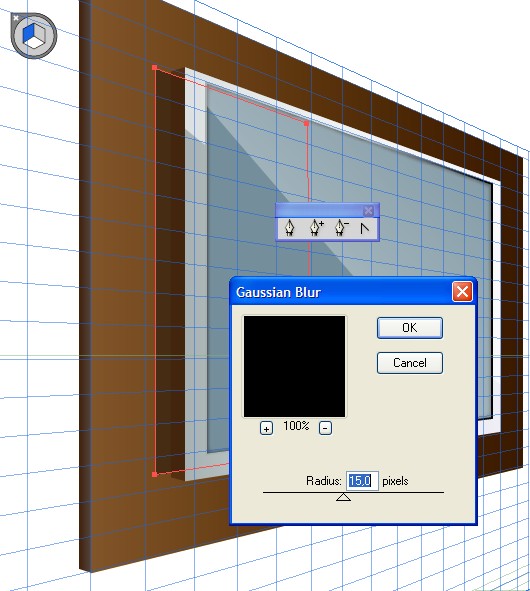
Step 11
Create another black shape under all other shapes of the TV and go to Effect > Blur > Gaussian Blur, set the Radius to: 15px and click OK.
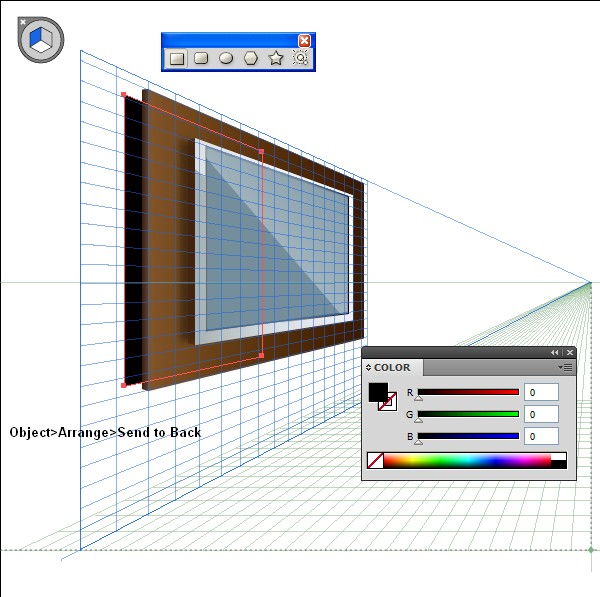
Step 12
Pick the Rectangle tool (M), create a rectangle with black color as shown in the picture below and send it behind all others by going to Object > Arrange > Send To Back.
Step 13
With the Pen tool (P), create a shape on the left side of the shape from the previous step as shown in the picture below and fill it with Linear Gradient colors R:66 G:33 B:11 to R:83 G:71 B:65. Now you can remove the "net" as we won’t need it in the next steps.
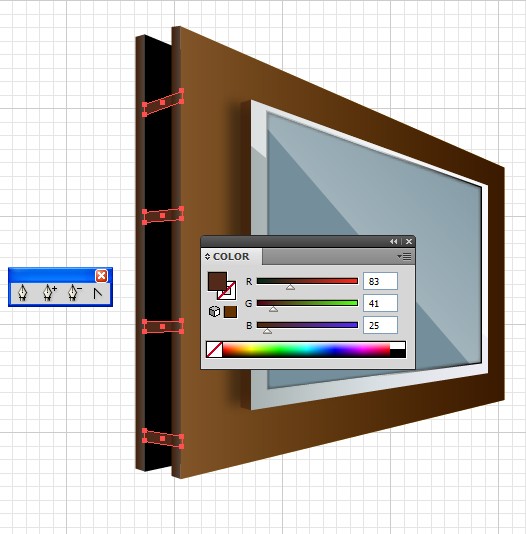
Step 14
Again, using the Pen tool (P), create shapes in position as shown in the picture below and fill them with R:83 G:41 B:25.
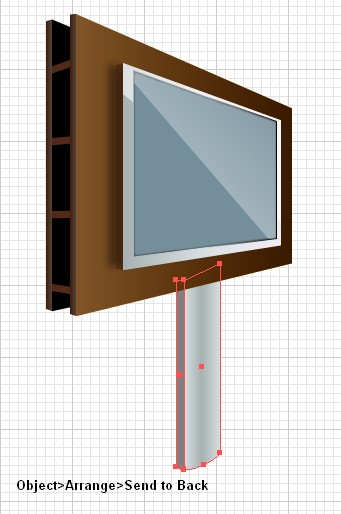
Step 15
With the Rectangle tool (M), create a rectangle in a position as shown in the picture below, then go to Object > Transform > Shear, enter the following settings: Shear Angle: -25 degrees, select Vertical and fill the shape with Linear Gradient by opening the Gradient panel. We’ll need three Gradient Sliders. For the first one set color R:215 G:222 B:225, for the second one R:167 G:177 B:177 and for the third Gradient Slider set the same color you’ve set for the first one.

Step 16
Using the Pen tool (P), add a shape on the right side of the previous shape, fill it with color R:128 G:128 B:128, then group both shapes by going to Object > Group and send them behind all others by going to Object > Arrange > Send To Back.
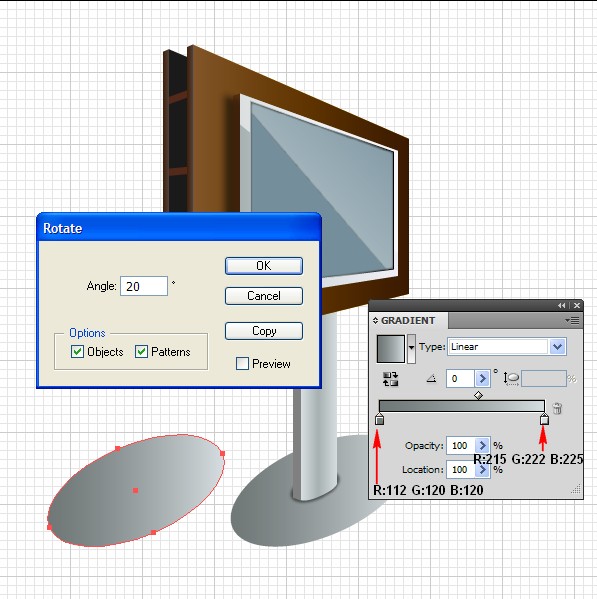
Step 17
With the Ellipse tool (L), create an ellipse under all others in a position as shown in the picture below, rotate the ellipse to Angle: 20 degrees and fill it with Linear Gradient colors R:112 G:120 B:120 to R:215 G:222 B:225.
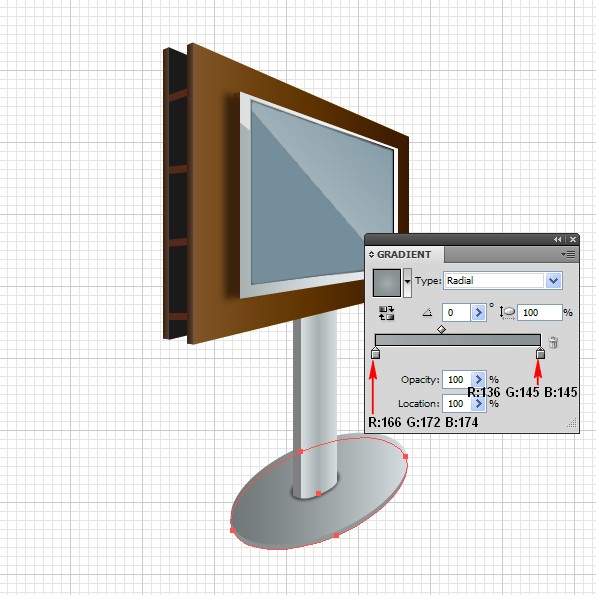
Step 18
Copy the ellipse from the previous step using Control + C, position it behind the original, press Control + B, move the copy a few pixels up, open the Gradient panel if you’ve closed it and change the following settings: Type: Radial, for the first Gradient Slider set color R:166 G:172 B:174 to R:136 G:145 B:145
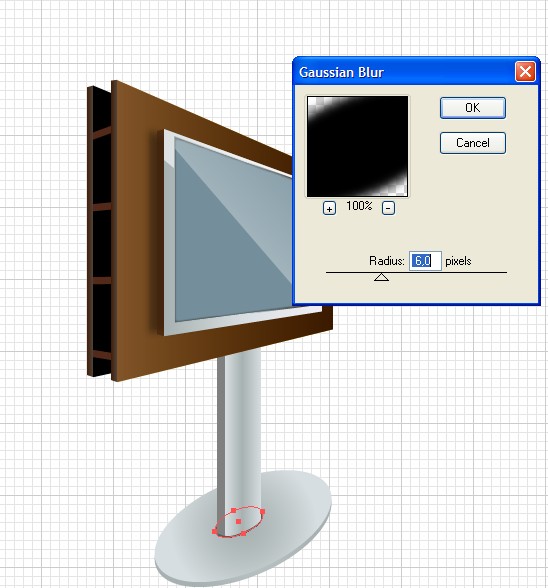
Step 19
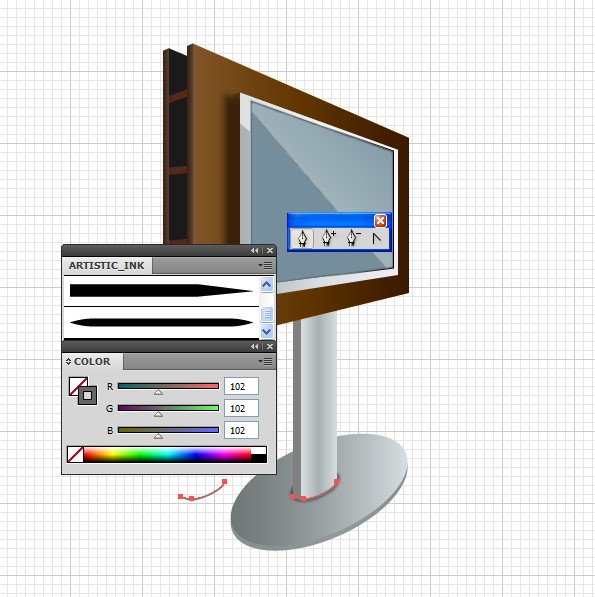
Create a black ellipse over the other two you created earlier and go to Effect > Blur > Gaussian Blur, set Radius: 6px and click OK, then with the Pen tool (P), create a shape as shown in the picture below, turn off the Fill color and apply Tapered Stroke with color R:102 G:102 B:102 Weight:0,2px
Step 20
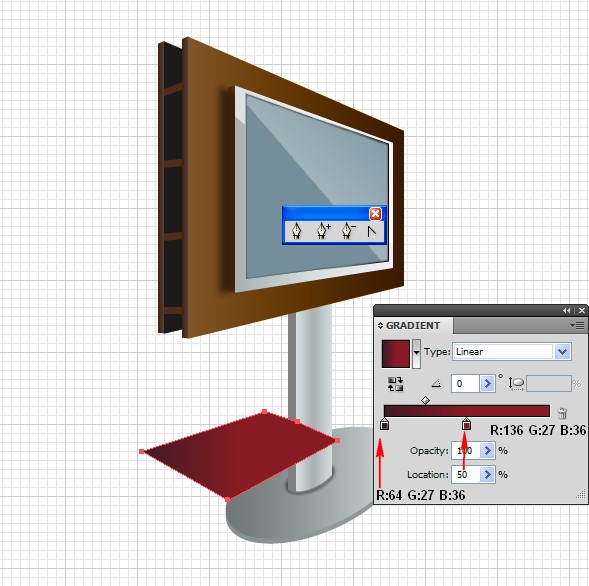
With the Pen tool (P), create a shape in a position as shown in the picture below and fill with Linear Gradient colors R:64 G:27 B:36 to R:136 G:27 B:36, Location: 50%.
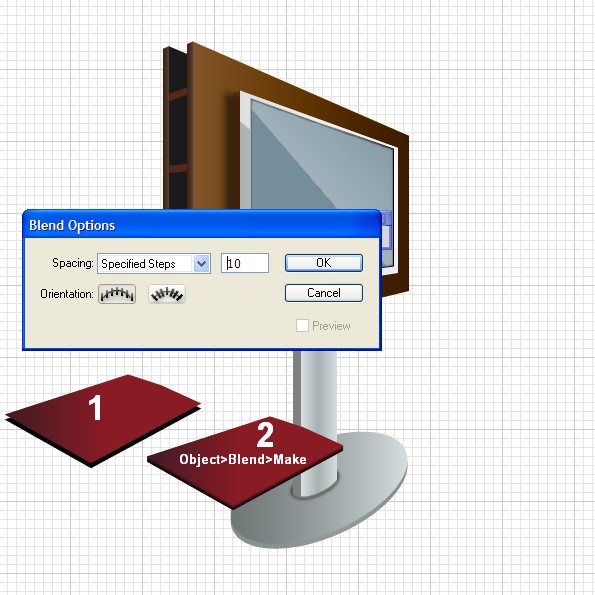
Step 21
Copy the shape from the previous step using Control + C, position it behind the original, click Control + B, move the copy a few pixels down, change the color to black and go to Object > Blend > Blend Options, in the new opening window select Spacing: Specified, Steps: 10, click OK and straight after that go to Object > Blend > Make.
Step 22
Using the same technique, create another shape with color R:136 G:27 B:36 on the other side as shown in the picture below and move the shapes under the group from Step 16.

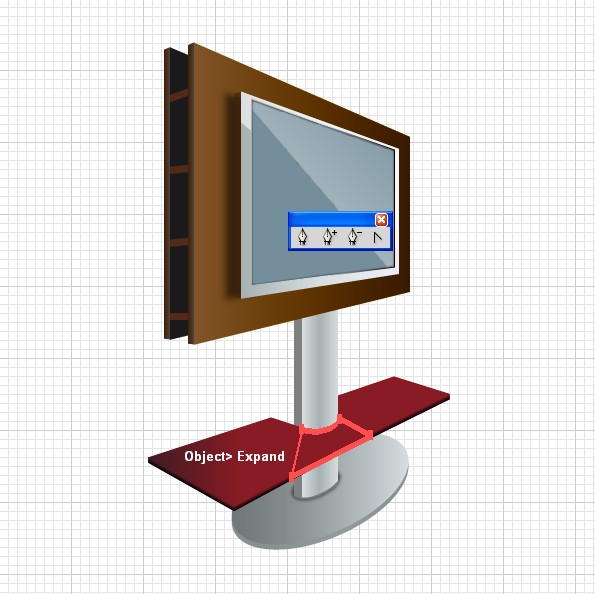
Step 23
We continue working with the Pen tool (P). Create a shape with color R:136 G:27 B:36 over all others, repeat the same actions you did in Step 21 and Step 22, then go to Object > Expand, look at the picture below.
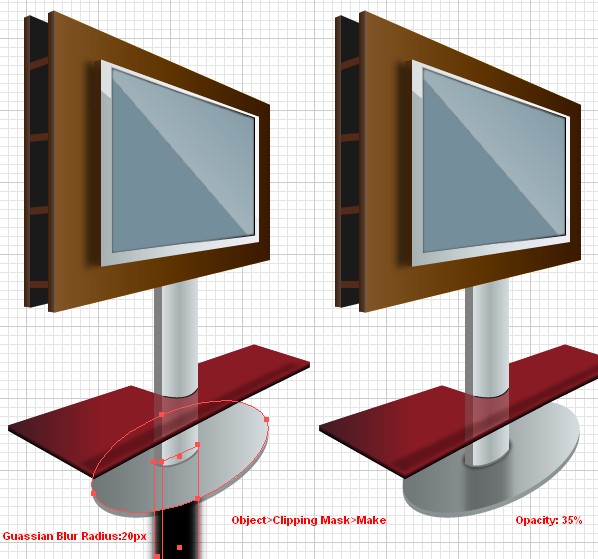
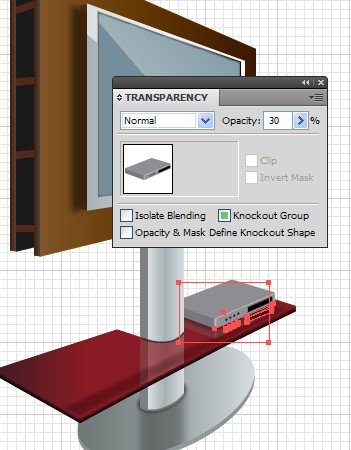
Step 24
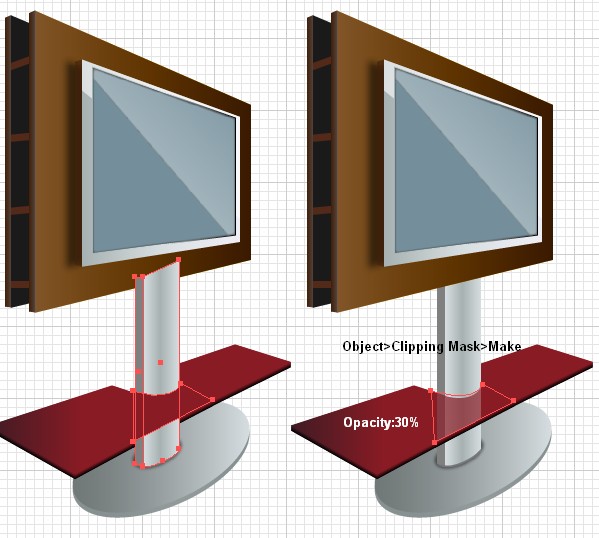
Now select the group from Step 16, copy it using Control + C followed by Control + F, move the copy over all others by going to Object > Arrange > Bring To Front, then copy the very top shape in the group that appeared in the previous step after you applied Expand using Control + C followed by Control + F, move the copy over all others. Now select the two shapes you moved over all other shapes, go to Object > Clipping Mask > Make and reduce the Opacity to 30%.
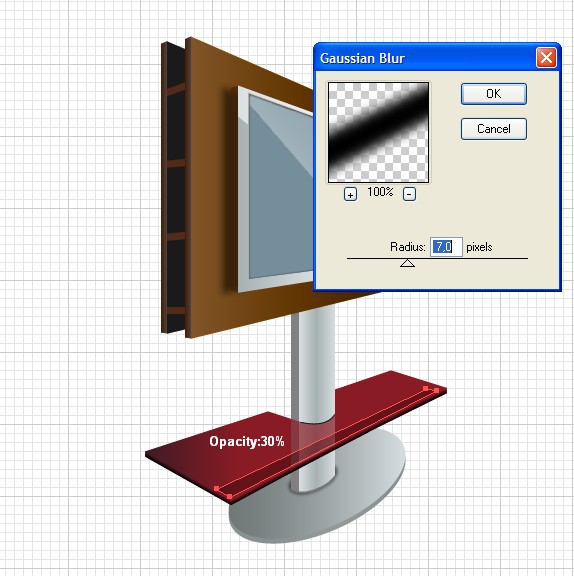
Step 25
Create a black shape in position as shown in the picture below and go to Effect > Blur > Gaussian Blur, set Radius: 7px, click OK and reduce the Opacity: 30%.
Step 26
Once again, copy the group from Step 16 using Control + C followed by Control + F, move the copy downward, change then color to black, apply Gaussian Blur with Radius: 20px, then copy the ellipse from Step 17, move it over the shape you applied Gaussian Blur to. Select both shapes, go to Object > Clipping Mask > Make and reduce the Opacity: 35%.
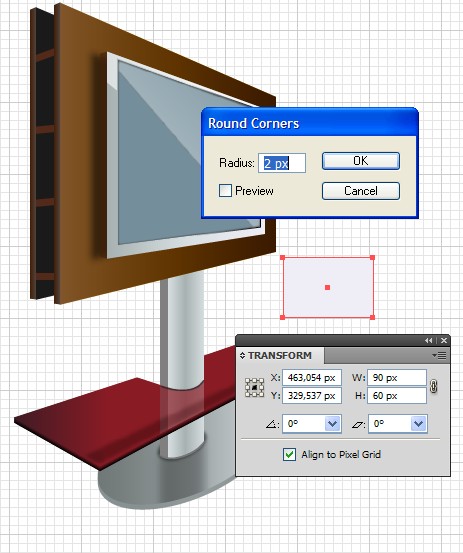
Step 27
Now it’s time to make the tuner. With the Rectangle tool (M), create a rectangle with dimensions 90px by 60px with 2px rounded corners.
Step 28
Now we’ll apply 3D effect to the tuner. To do this, select the rectangle you created in the previous step and go to Extrude > 3D > Extrude & Bevel. In the new opening window enter the following settings: Specify rotation around the X axis: 59, Specify rotation around the Y axis: -43, Specify rotation around the Z axis: 22, Perspective: 83, Extrude Depth: 10, click OK and position the tuner as shown in the picture below, also add buttons in the way you desire.
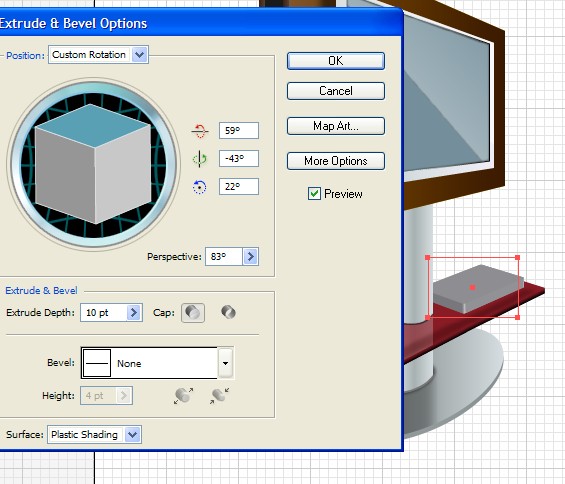
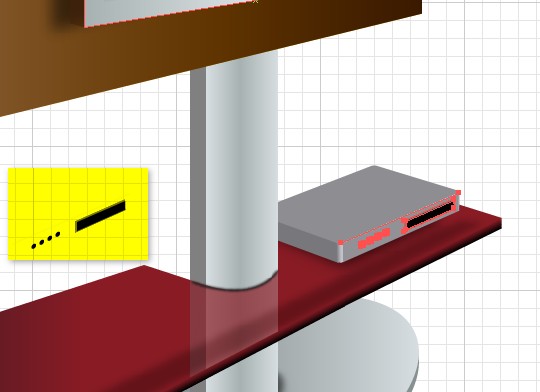
Step 29
Group all shapes of the tuner, then copy the group using Control + C followed by Control + B, move the copy a few pixels down and reduce the Opacity to 30%. This way you’ll create a reflection for the tuner.
Conclusion
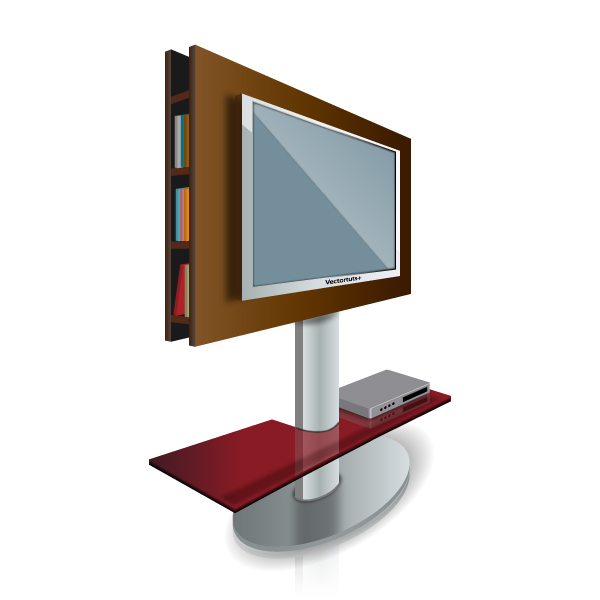
In the end, you can create books the same way you made the tuner. Then you can add reflection, shadow and anything you wish. Here is the final result.