Illustrator, unlike Photoshop, does not have many functions allowing you to randomize elements of your design. However, those that it has, can be just as powerful. We will use just these tools to create a simple, yet appealing, T-shirt or wallpaper design.
Step 1
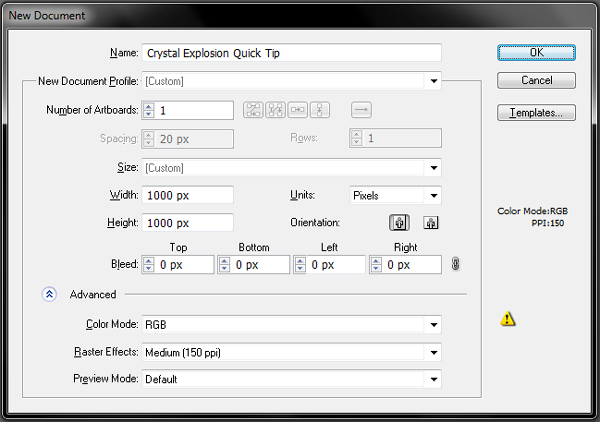
Let’s start by launching Illustrator and creating a new document (Control +N). Input the dimensions of 1000px by 1000px, select RGB Color Mode and set the Raster Effect to 150 ppi. Click OK and you’re done setting up your document!
Note: You can follow my guidelines and set precisely the same dimensions and later use the same values that I will be using, but feel free to experiment and not stick precisely to all the values. After all it is about randomization!
Step 2
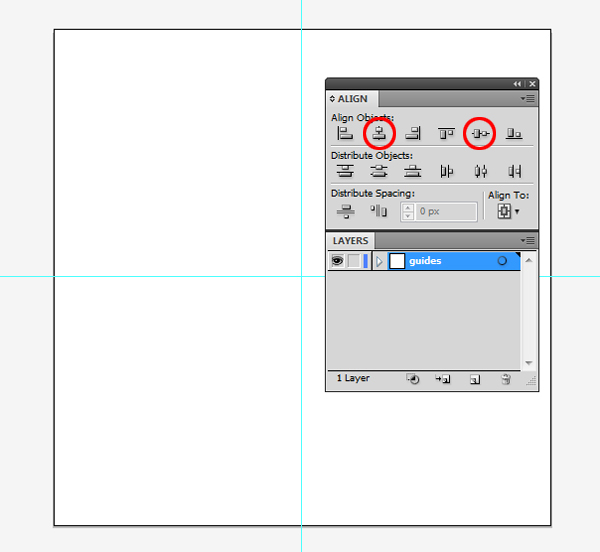
Let’s go ahead and establish the center of our artwork first. Go to View menu and choose Show Rulers (Control + R). Next click and drag out two guides out of the rulers- one vertical and one horizontal. Having selected both guides, bring up your Align Palette (Shift + F7) and use it to position the guides in the very center of the image. Rename this layer "guides" and lock it.
Step 3
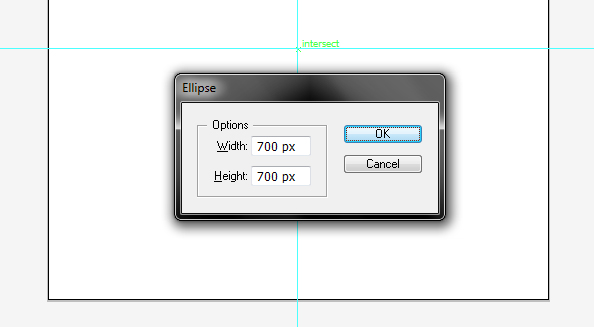
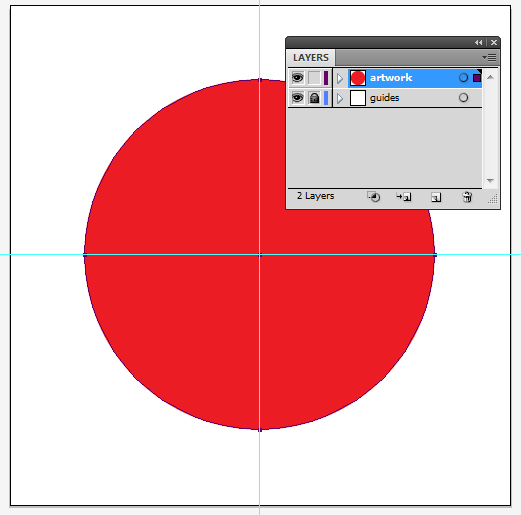
Create a new layer and call it "artwork." Make sure that Smart Guides are enabled (Control + U), then select the Ellipse Tool (Control + L) and Alt + Click at the intersection of the guides. Enter 700px for both dimension and hit OK. Fill the circle with CMYK red (C=0, M=100, Y=100, K=0) and give it no stroke.
Step 4
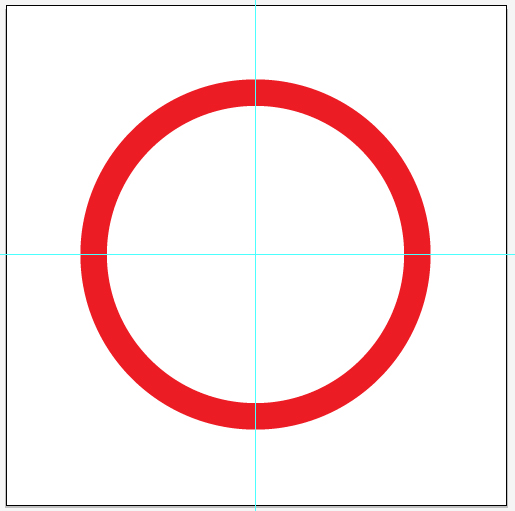
Copy the circle (Control + C), paste it in front (Control + F) and scale it down to 85%. Select both circles and go to Object > Compound Path > Make or simply press Control + 8. You should get a big red ring like the one below:
Step 5
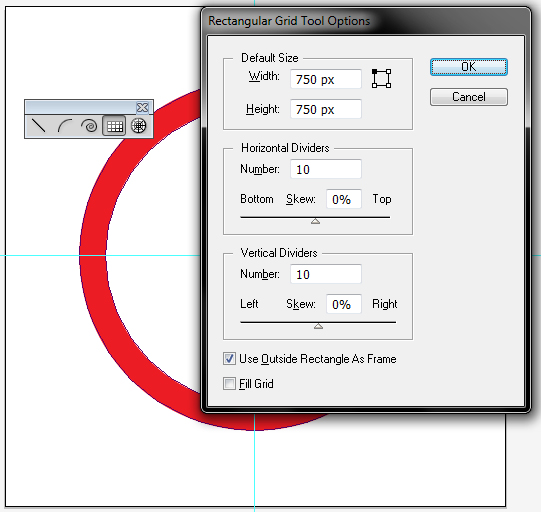
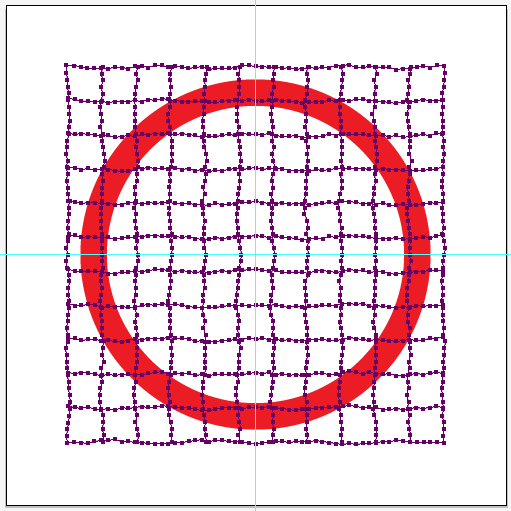
OK, the exterior ring is ready, now let’s break it into pieces. Select the Rectangular Grid Tool (it’s hiding in the Line Segment Tool group in your Toolbar). Alt + Click in the center of the image, change the Tool’s properties like in the image below and hit OK. You will get a quite dense grid on top of the ring. Give it some vivid Stroke color to distinguish it easily.
Eventually we are going to use the grid to cut the ring into little pieces, but for the time being it looks too uniform, so let’s roughen it up! We will use two effects to give it less smooth appearance, but since those effects employ anchor points to do the job, we must give Illustrator some more points to work with.

Step 6
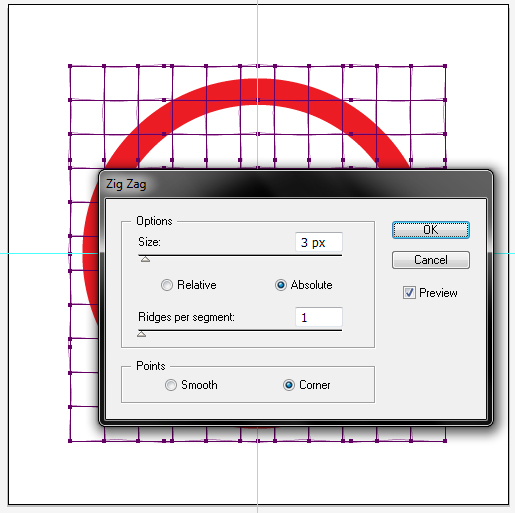
Select your grid and go to Object menu > Path > Add Anchor Points. Repeat this operation two more times. Next make sure the grid is still selected and go to Effect menu > Distort & Transform > Zig Zag. Input values as seen below and click OK.
Step 7
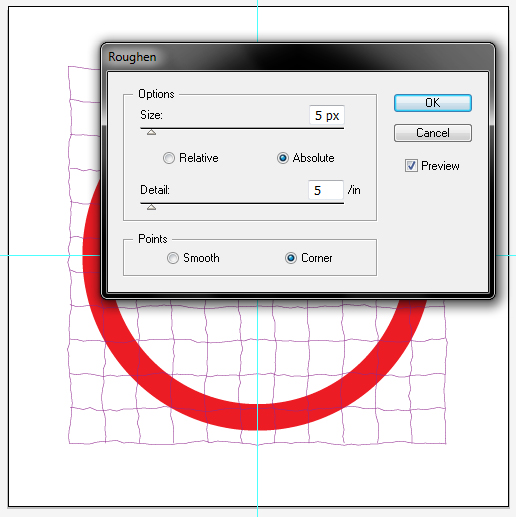
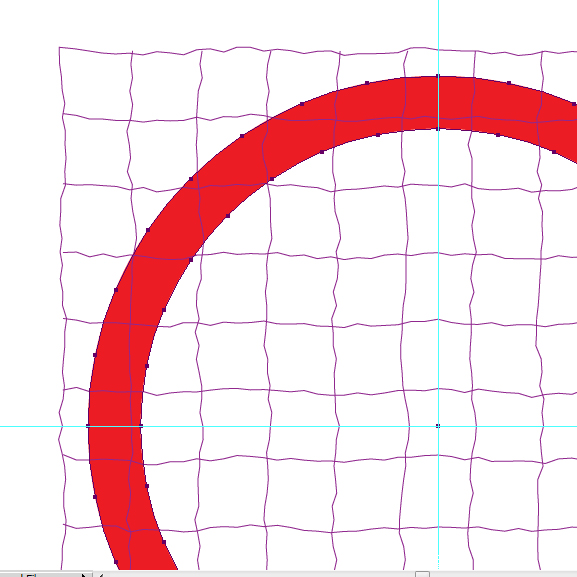
Ok, this looks a bit better but not quite rough enough. Once again go to Effect menu > Distort & Transform but this time choose Roughen. Apply the values as seen below and hit OK. Next make sure your grid is still selected, go to Object menu and choose Expand Appearance. This will apply the effects permanently but will enable you to further modify your artwork.
Step 8
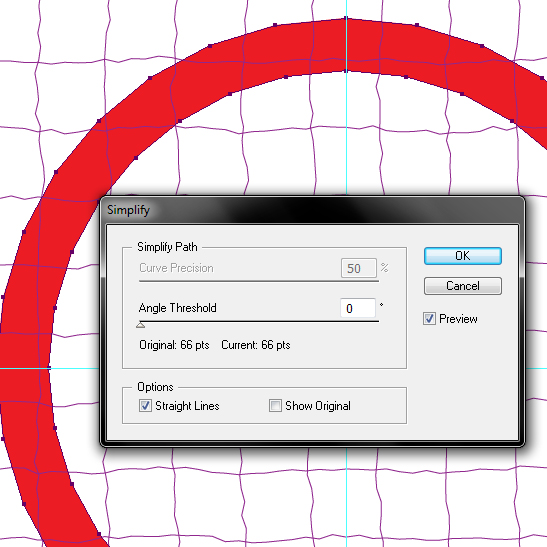
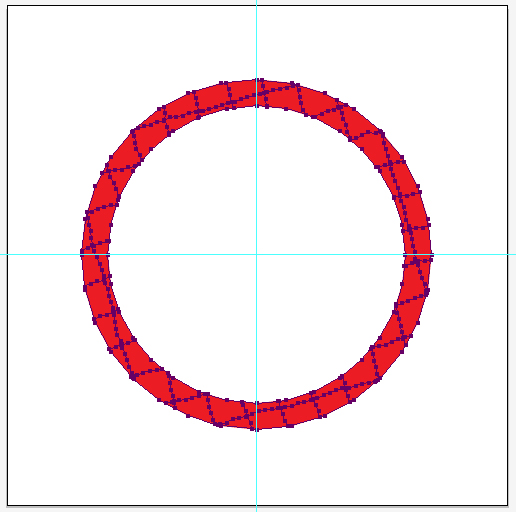
Your grid is taken care of, now let’s refine the ring. Select it, go to Object menu > Path > Add Anchor points. Repeat this operation two more times – your ring will get nicely populated with lots of anchor points. Now go to Object menu > Path > Simplify. Enter the values seen below and hit OK.
Step 9
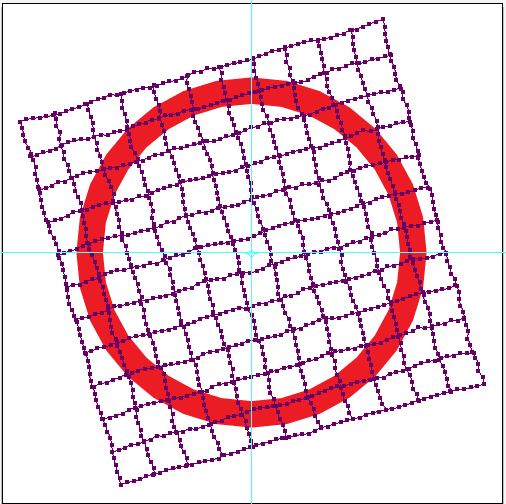
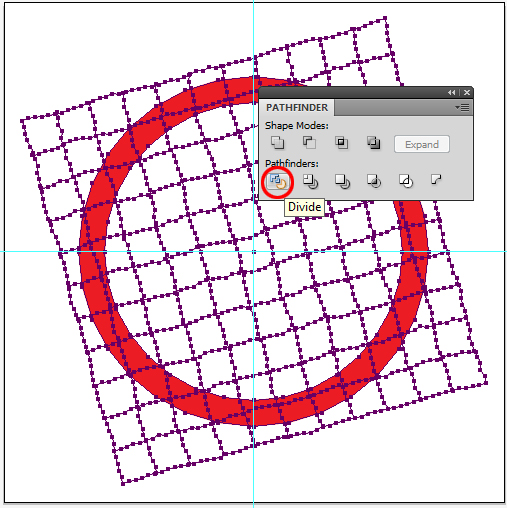
Select the grid and grab your Rotation Tool (R). Use it to rotate the grid randomly – the odder angle, the better. Use your Selection Tool (V) to select both the grid and the roughened ring. Bring up your Pathfinder pallet and click the Divide button.
Step 10
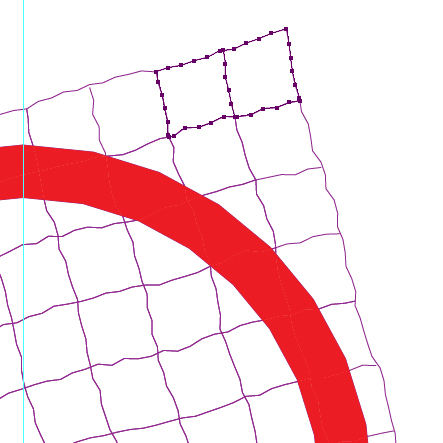
Next step is to delete all unnecessary grid elements. Click off the artwork to deselect it and then use your Direct Selection Tool (A) to Alt + Click one of the grid elements. Next go to Select menu > Same > Appearance. This will select everything you do not need so go ahead and press Delete. You will be left with the ring broken into pieces by the grid.
Step 11
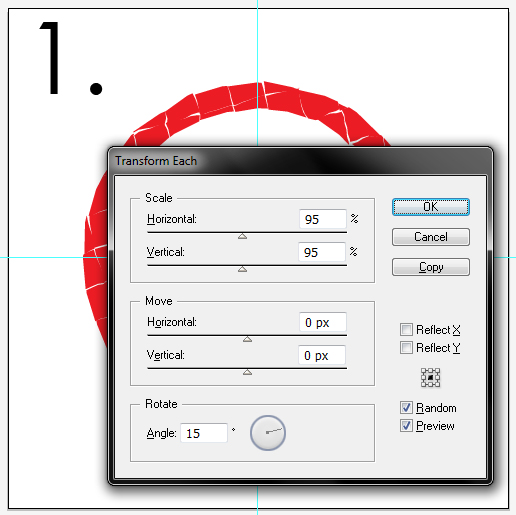
Ok, so far we have done almost everything but randomization. We’re getting to it right now! We will use the Transform Each command which lives in the Object menu. Select your artwork and ungroup it by going to Object menu > Ungroup (Shift + Control + G). Next open up Transform Each dialog box by going to Object menu > Transform > Transform Each (Alt + Shift + Control + D – basically you mash your fist into lower left corner of your keyboard and press D).
Input the values as seen below and click OK. Then open up the Transform Each dialog box again and apply another modification.

Tip: If you are not quite satisfied with the random effect, uncheck and re-check Random checkbox. Every time you do that, Illustrator will recalculate parameters of every object giving you a slightly different result. You can even use standard tools to reposition elements according to your liking.
Step 12
Ok, now let’s get going with the crystal. Start by adding a new layer (I called mine "crystal"), creating a diamond shape and filling it with CMYK cyan (C: 100, M: 0, Y: 0, K: 0).
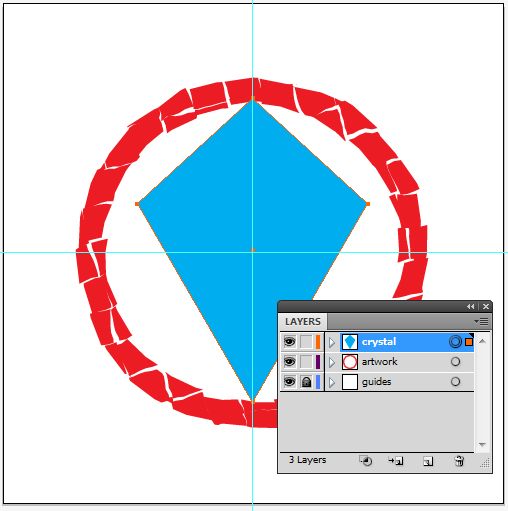
Step 13
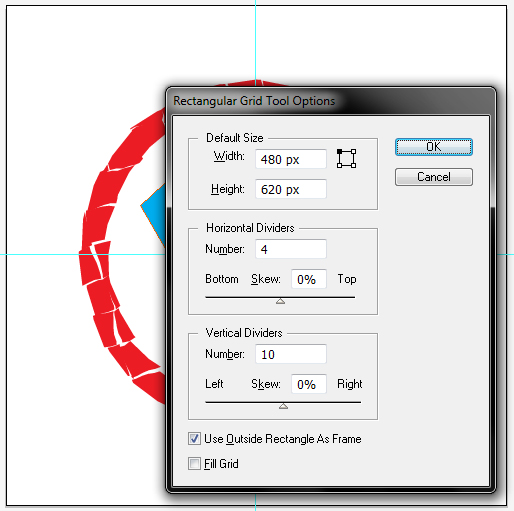
Once again grab the Rectangular Grid Tool and Alt + Click in the center of the image. Input the following values and click OK. Once again give it a Stroke color and no fill. Make sure the grid is selected and add more anchor points using the Add Anchor Points command (this time only once).
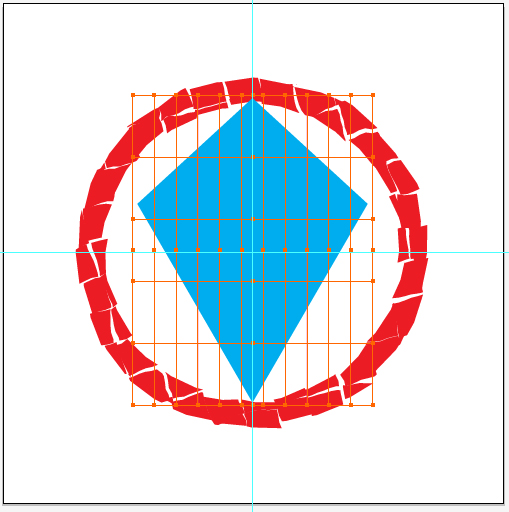
Step 14
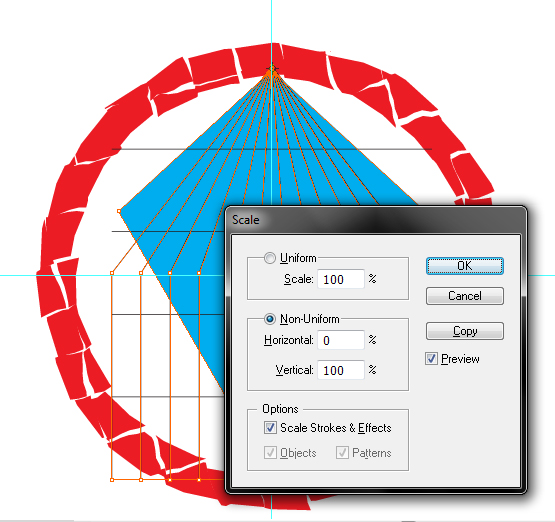
Lock all layers except for the "crystal" layer. Use your Direct Selection Tool (A) to marque over the most upper row of points of the grid. Select the Scale Tool (S), hit enter and scale them horizontally to 0%. Next do the same with the most lower row of points. This is the effect you’re looking for:

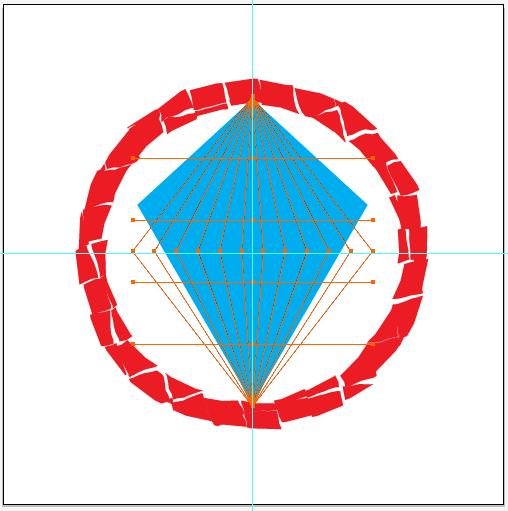
Step 15
Keep using the Direct Selection Tool to relocate sections of the grid adjusting it to the shape of the crystal. Drag middle anchor points to create an illusion of perspective. Use the image below for reference:
Step 16
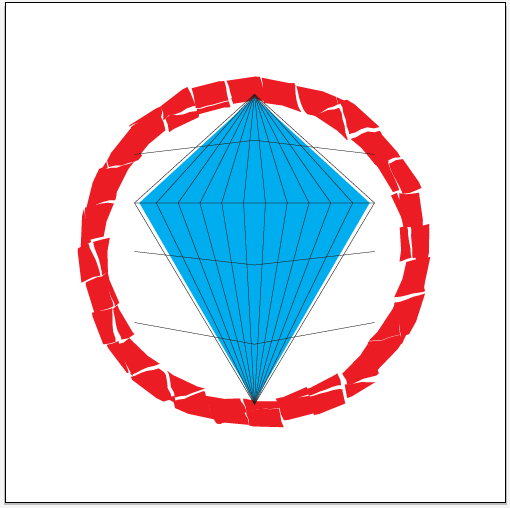
Now let’s shatter the crystal just the same way we have broken the ring. Select both crystal and grid and use the Divide command in the Pathfinder palette. Next get the Direct Selection Tool (A) and Alt + Click on one of grid pieces. Select all unnecessary pieces by going to Select menu and choosing Same > Appearance, and delete them. You should get a nicely cut crystal:
Step 17
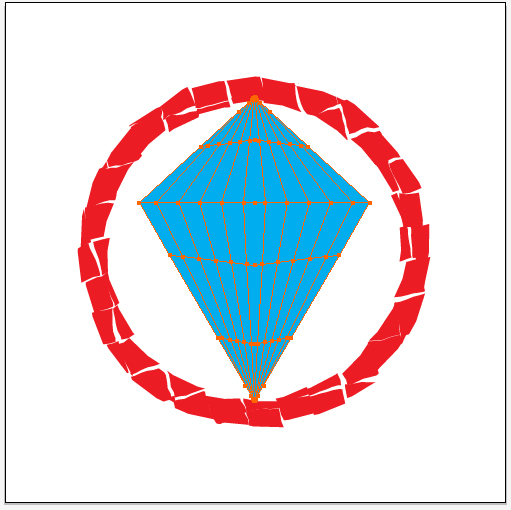
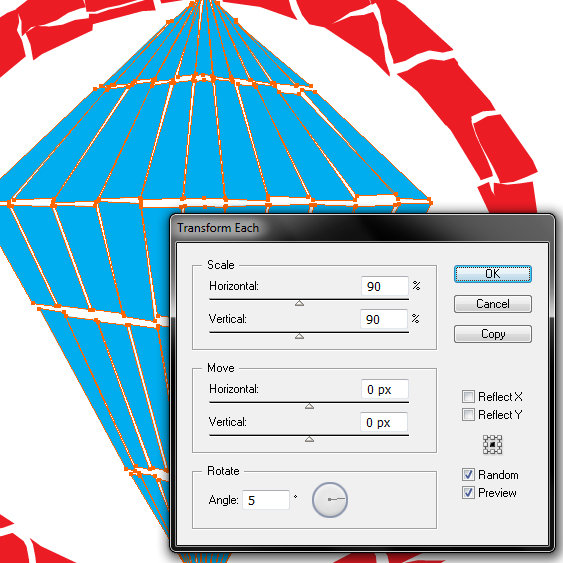
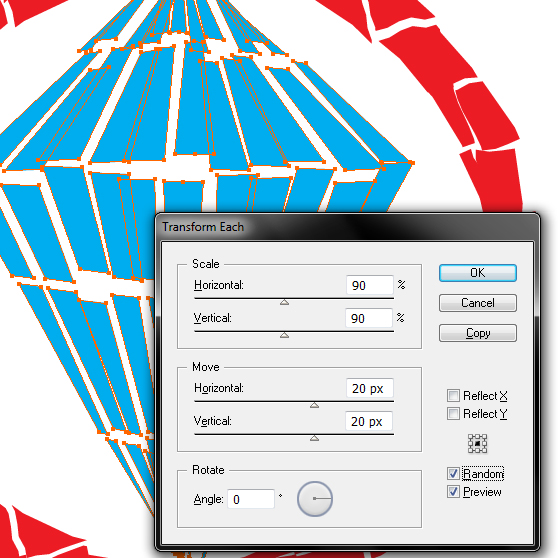
Make sure your crystal is selected and press Shift + Control + G to ungroup it. Open up the Transform Each dialog box (Alt + Shift + Control + D) and make following transformations. Of course feel free to modify elements that need fine tuning. Lastly, select all elements and reduce their Opacity to 80%.
Step 18
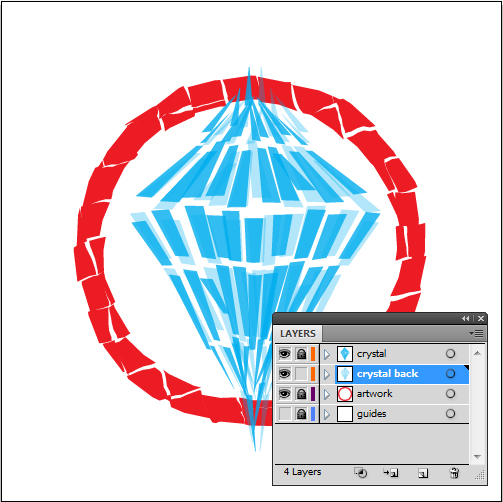
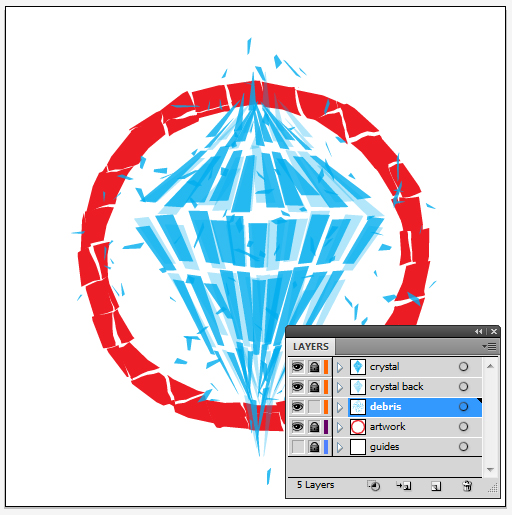
Duplicate the "crystal" layer, rename it "crystal back" and move it under the "crystal" layer. Select contents of the "crystal back" layer and reflect them vertically. Move some of the pieces around to make them look more random. Reduce their Opacity to 30%. You should be now looking at something more or less like this:
Step 19
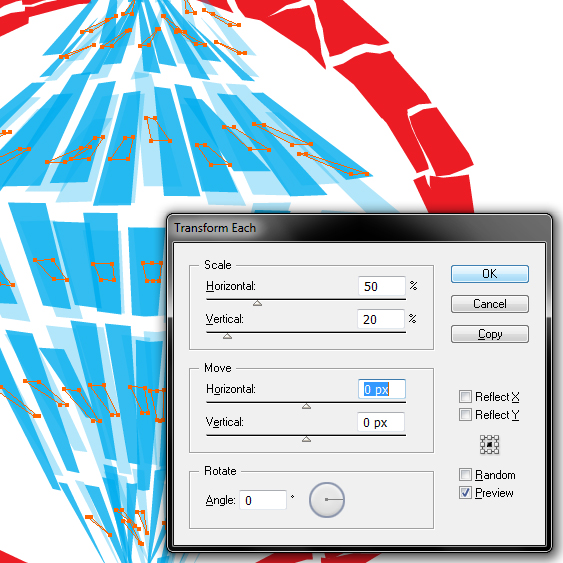
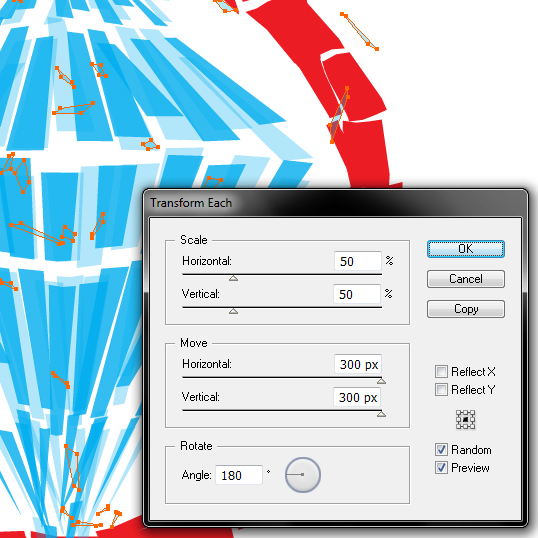
Duplicate the "crystal back" layer and move it below the original layer. Rename it "debris". Select its contents, open up Transform Each dialog box and apply two following transformations. The first one is not randomized!
Step 20
With the contents of the "debris" layer selected, press Control + C to copy them and Control + F to paste them in front. Rotate the newly pasted elements 90 degrees. Change all debris elements’ Opacity to 80%.
Step 21
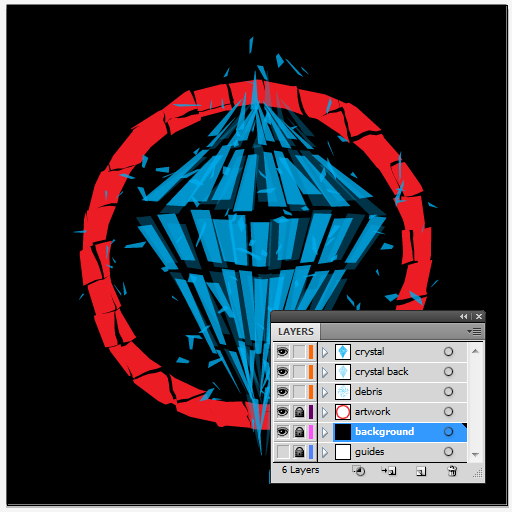
We’re almost there! Create a new layer and place it on the bottom of the stack. Rename it to "background". Using the Rectangle Tool (M) place there a 1000px by 1000px black rectangle and lock the layer.
Step 22
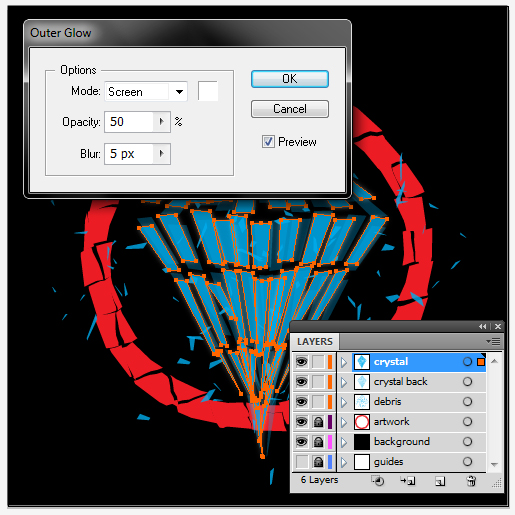
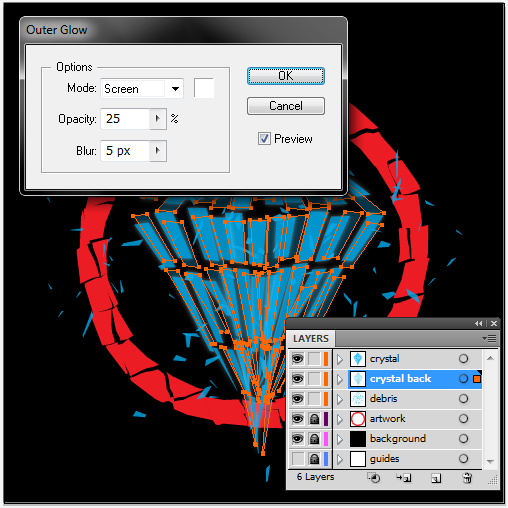
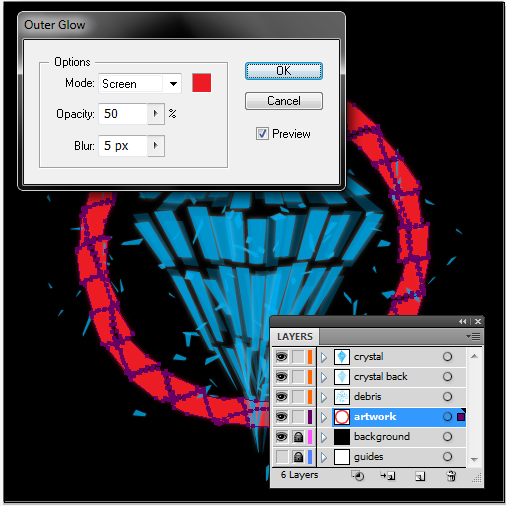
Last step! Select the contents of "crystal" layer and go to Effect menu > Stylize > Outer Glow. Use white for the crystals, CMYK red for the ring and apply the values seen below. Repeat this step for the "crystal back" and "debris" layers using the images for reference.

Conclusion
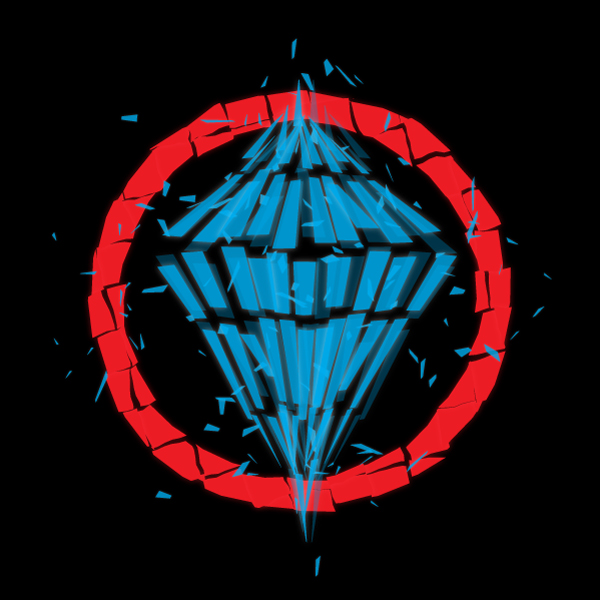
Done and done! Your shattered crystal design is ready! Now it’s up to you to find other things great for chopping up and shattering!
This Quick Tip is available as a Free Download to all Vectortuts+ visitors, and is just a fraction of the content you can access via our Premium Membership System and Tuts+ Marketplace!
Tuts+ run a Premium membership system that costs $9 a month (or $22 for 3 months!). Members have full access to the hundreds of full length tutorials, professional source files and periodic extra tutorials available from all our Premium Program sites!
We also have a new Tuts+ Marketplace that’s bursting with Premium quality tutorials – both from our Tuts+ Premium program and from unaffiliated authors – now, non-members will be able to purchase selected Premium tutorials on a one-off basis, without a Premium membership.
To begin downloading High Quality Vector Resources and Tutorials visit Vector Premium or the Tuts+ Marketplace today!