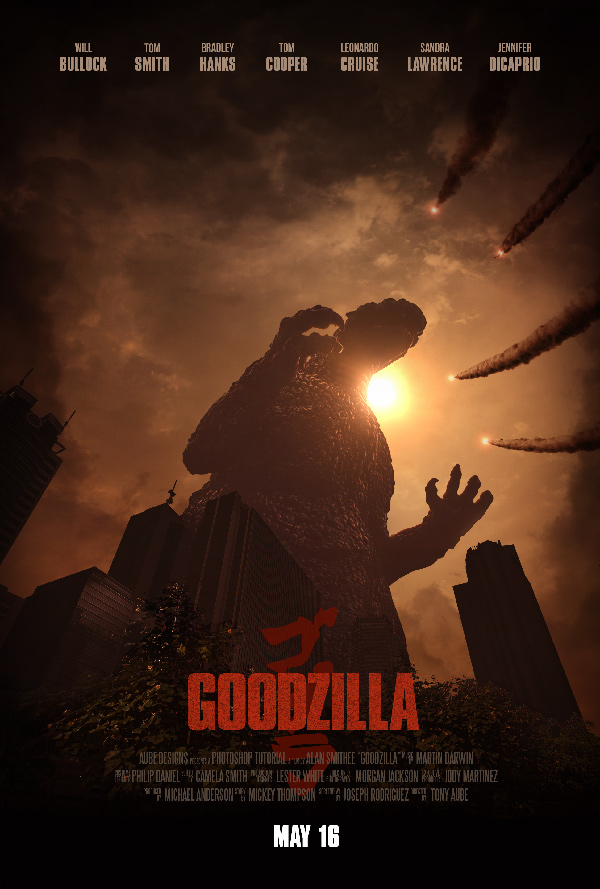
The original Godzilla movie is probably one of the most important and influential monster movies of all time. If you're a big fan of cinema, you have probably already heard about the new Hollywood remake, which is currently being promoted with some astounding artwork. In this tutorial, we will create a fan-made movie poster, astutely named Goodzilla in Adobe Photoshop. Let's get started!
Tutorial Assets
The following assets were used during the production of this tutorial. Make sure to download them before getting started. If they are not available, please find alternatives.
- Hong Kong 5
- Godzilla by galactic.supermarket
- Sunset 1
- Skies0263
- Red Arrows
- ConcreteBare0348
- Bebas Neue free font
- SteelThong free font
- Godzilla sign
- Evening Sky 1
1. Set Up the Base
Step 1
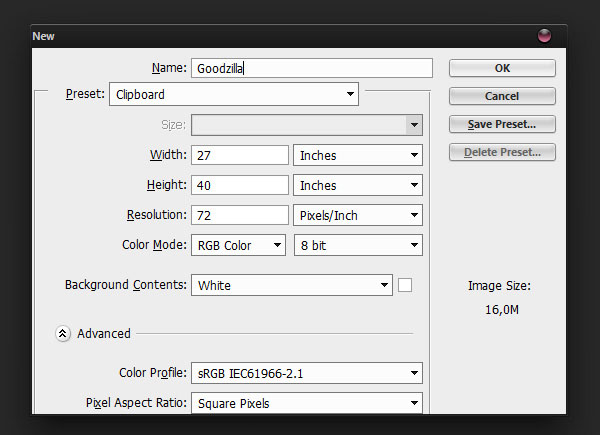
The best way to start this kind of montage is to get the basic images together. First, create a new document. Make sure to give your file a name (in my case, Goodzilla), and make it 27 x 40 in, which is the most common movie poster size.
If you want the best printing quality, the resolution should be 300 pixels/inch. However, this will make your PSD file very heavy. In my case, since the image will only be viewed on screen, I chose the default resolution, which is 72 pixels/inch.
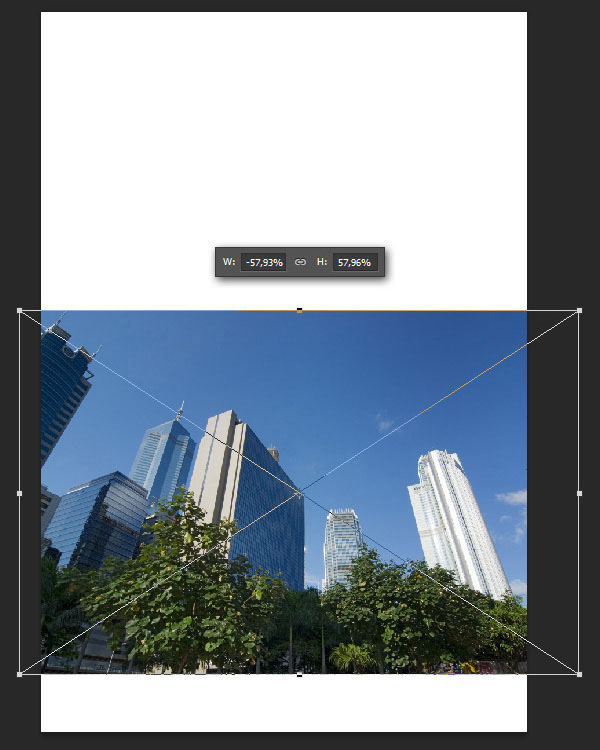
Go to File > Place Embedded and place Cloudy Hong Kong 5 on your canvas. While placing the image, use the upper Options Bar flip it horizontally and scale it down to about 60%. Press enter to confirm.
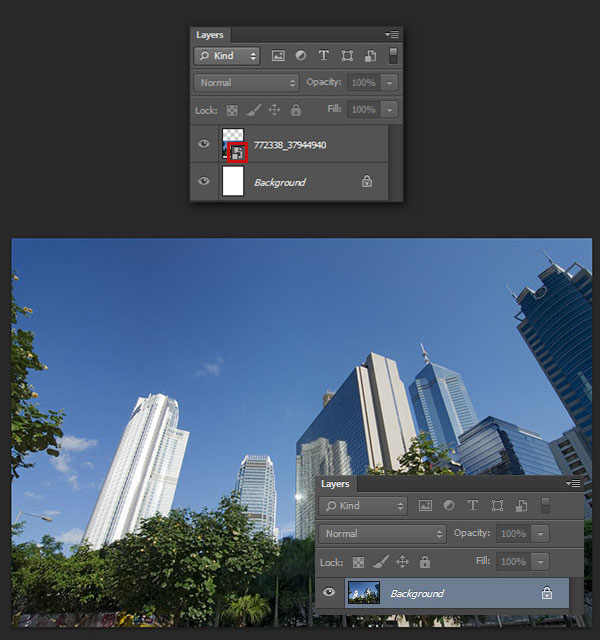
Make sure the layer was placed as a Smart Object, which should shows with a small file icon over the layer thumbnail. Enter the file by double-clicking on the Smart Object layer's thumbnail.
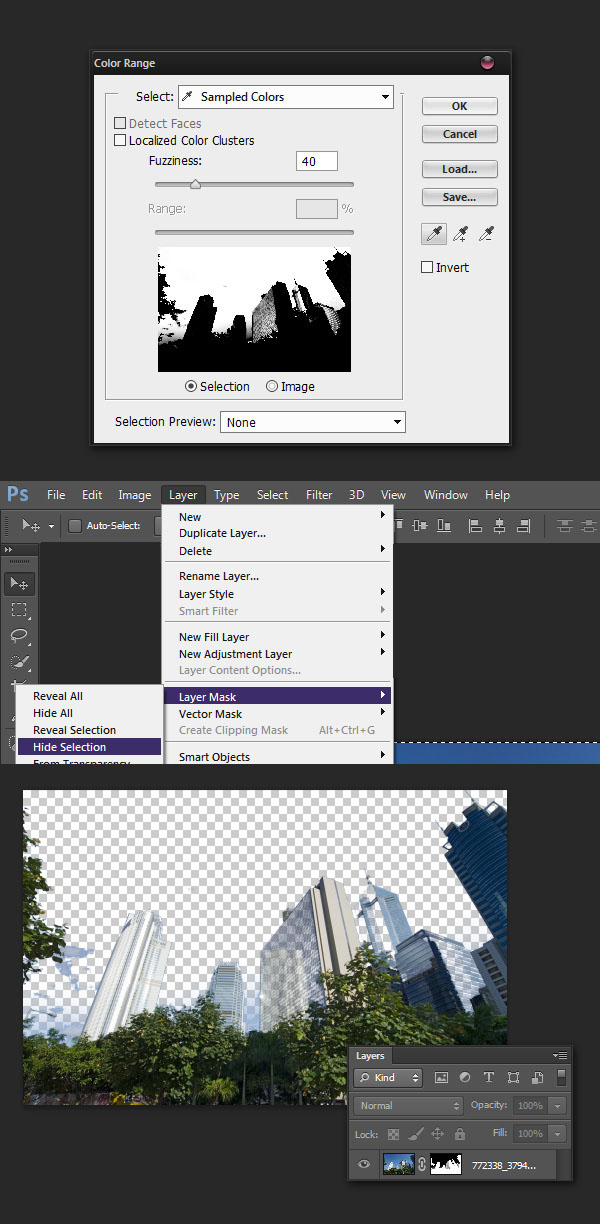
Now, we'll mask out the sky. To do so, go to Select > Color Range, and click on the sky to sample its color. Then go to Layer > Layer Mask > Hide Selection. You should get the following result.
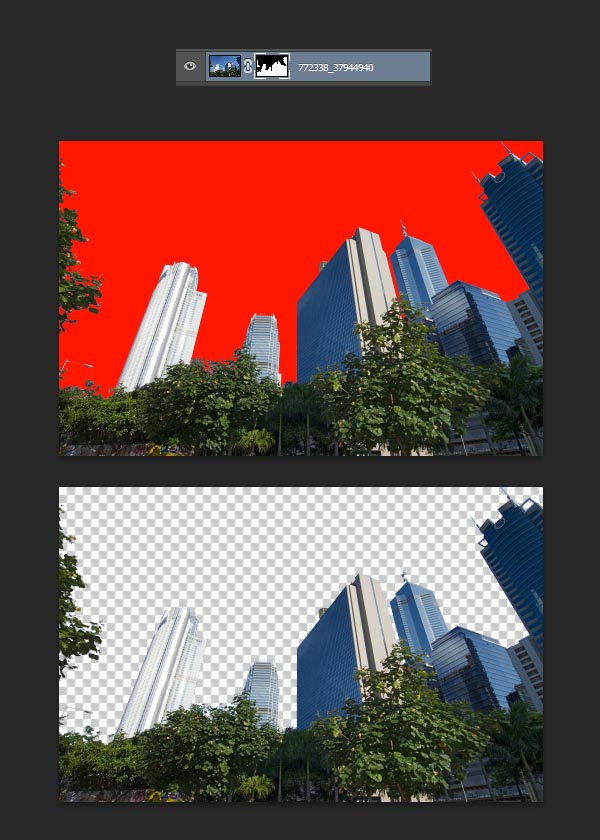
Well, that was easy, but the result is far from perfect. We'll need to refine the mask. To do so, click on the layer mask to select it, and, using your favourite tool, paint back in the buildings using white, and hide the unwanted elements using black. In the following example, I've shown in red the part that was hidden along with the final result. Most of the work was done using the Polygonal Lasso Tool (L) and the Fill shortcut (Alt-Backspace). Make sure to take your time to do a good job. There is no trick there, only patience!
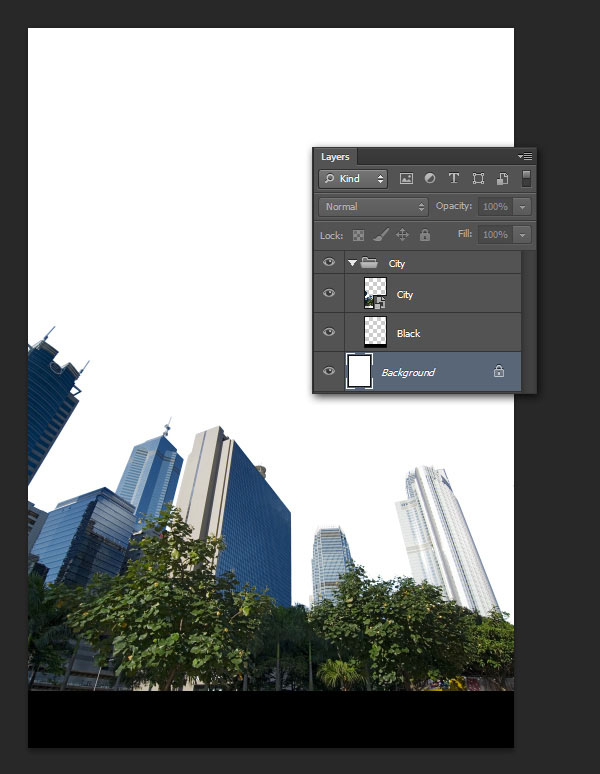
Once you are done, save and close the smart object. Rename it City, and place it in a group (Control-G), and name it City as well. Create a New Layer (Control-N), and fill the bottom part of the image with black. Name the layer Black.
Step 2
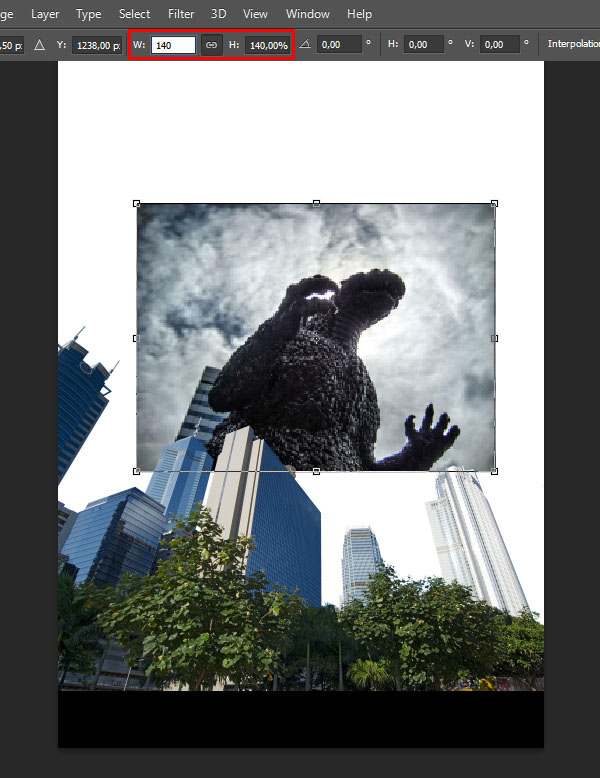
To create our monster, we'll use a photo of a statue taken in Japan. Place Godzilla on your canvas. Since the image is small, you will need to scale it up by 40% so it fits nicely. Don't worry if it doesn't looks realistic yet, we'll cover it up later using color adjustments and haze.
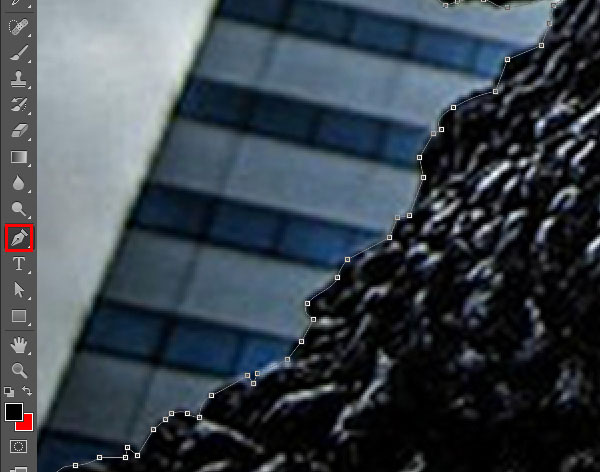
In this case, we'll need to hide the sky as well as the buildings. The best way to do so is to create a path around the statue using the Pen Tool (P).
Once you are done, go to the Paths pannel, make sure your Work Path is selected, and press the Load Path as selection icon.
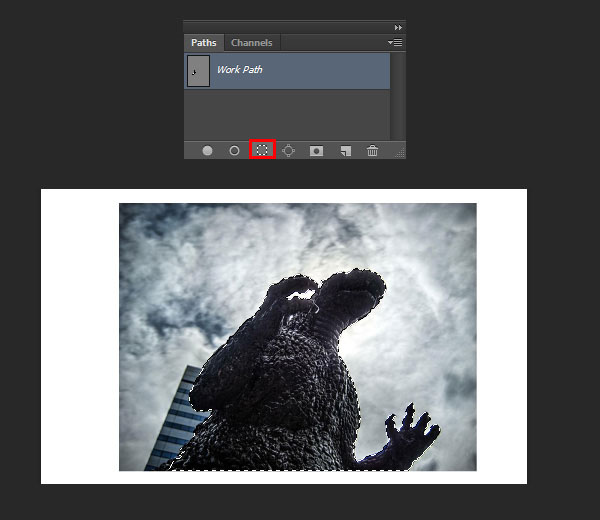
With the selection active, go to your Layers panel and press the Add a mask button to hide the background. Name the layer Goodzilla.
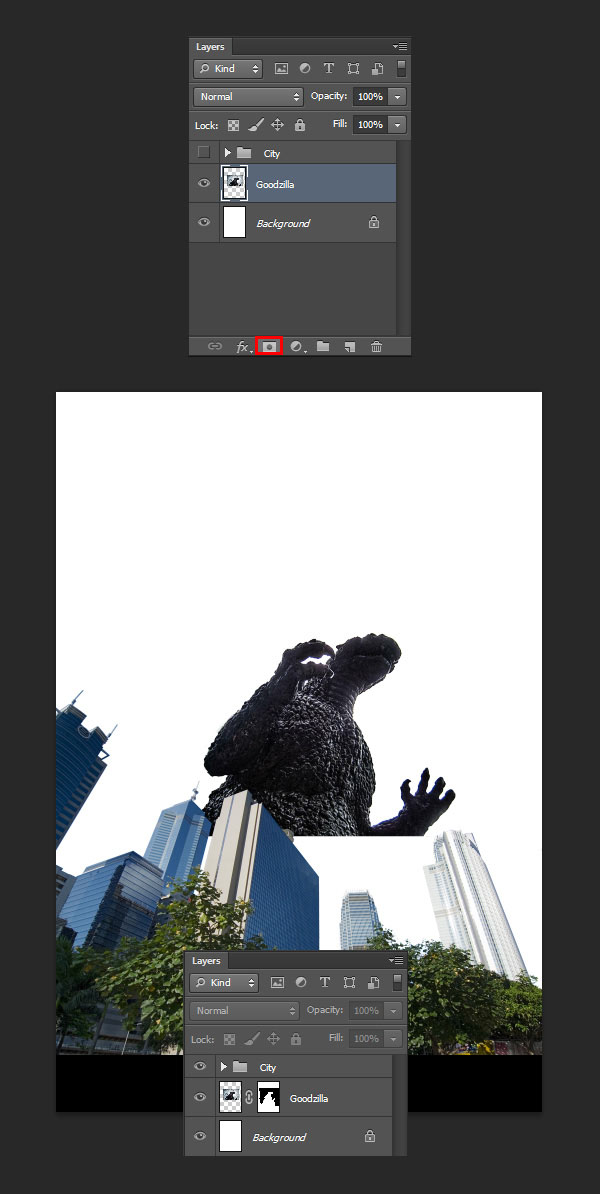
Hide the City group. Create a new layer and name it Body. On this layer, paint in black the bottom of the monster's body. This doesn't have to be perfect since most of this area will be hidden with buildings and haze.
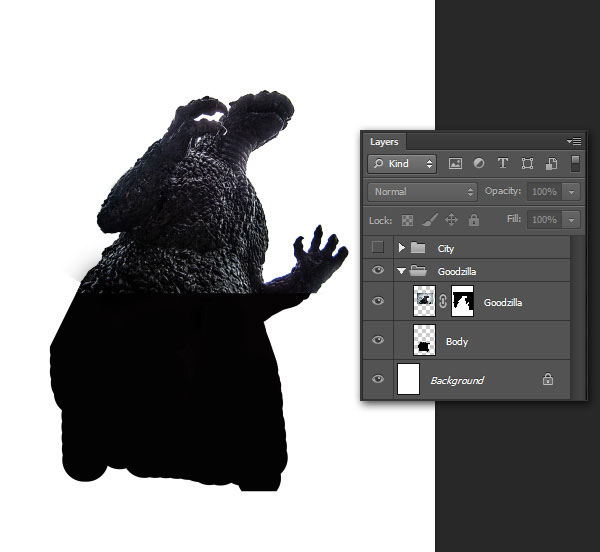
Create a new layer and name it Texture, and clip it on Body. Using the Clone Stamp Tool (S), use Alt to pick a textured area, and paint back some texture on the body. Once again, this doesn't have to be perfect.
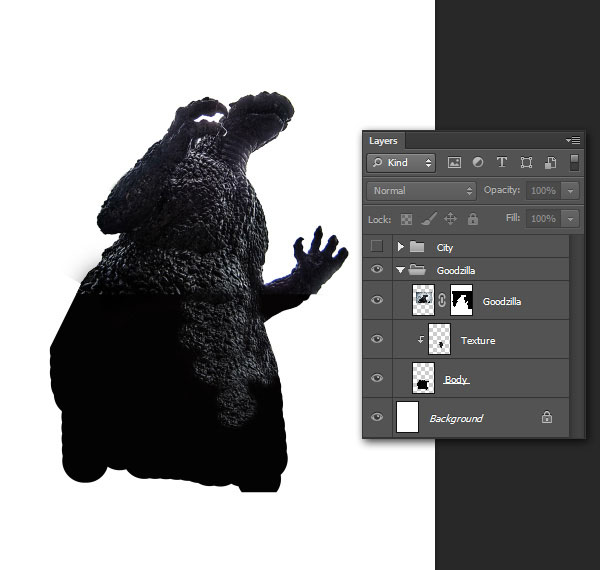
Unhide the City group. You should get the following result.
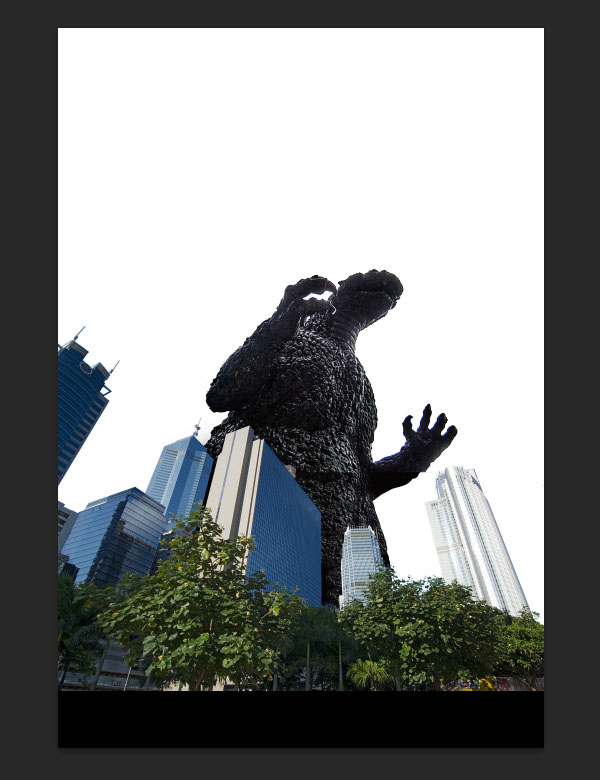
Step 3
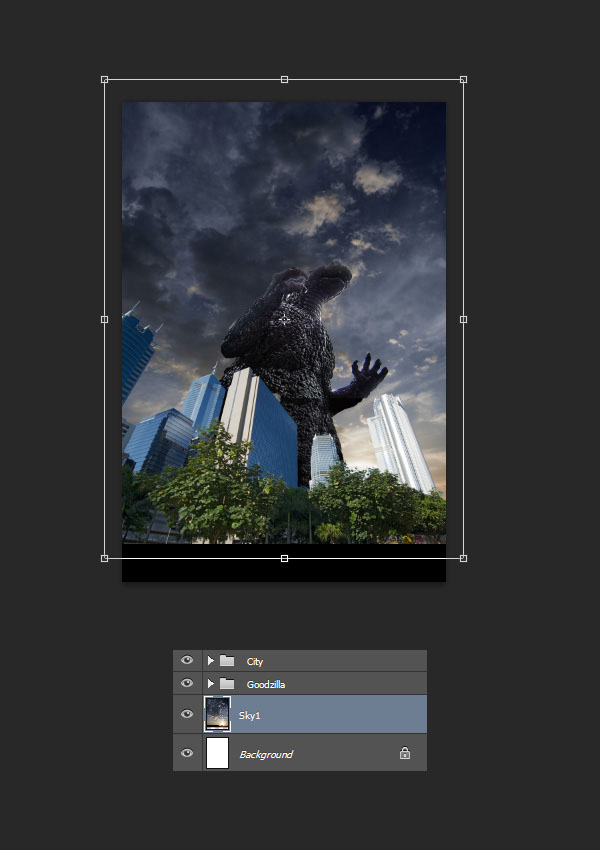
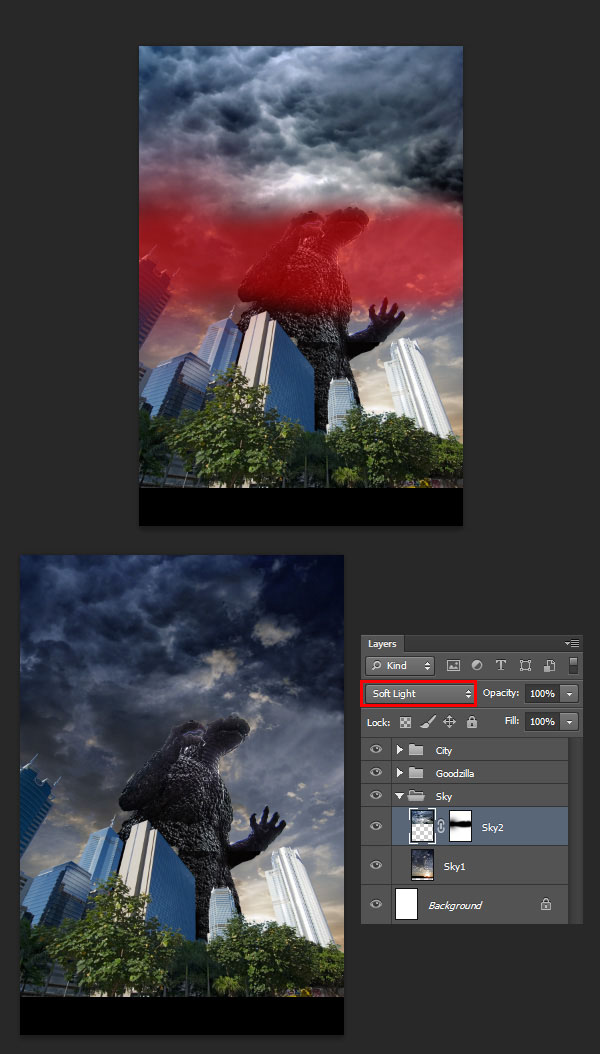
Place Sunset 1 and scale it so it fits the canvas. Name the layer Sky1.
We can make the sky more interesting by combining it with a more intense looking sky. To do so, placeSky0263 and scale it so it fits the upper part of your canvas.
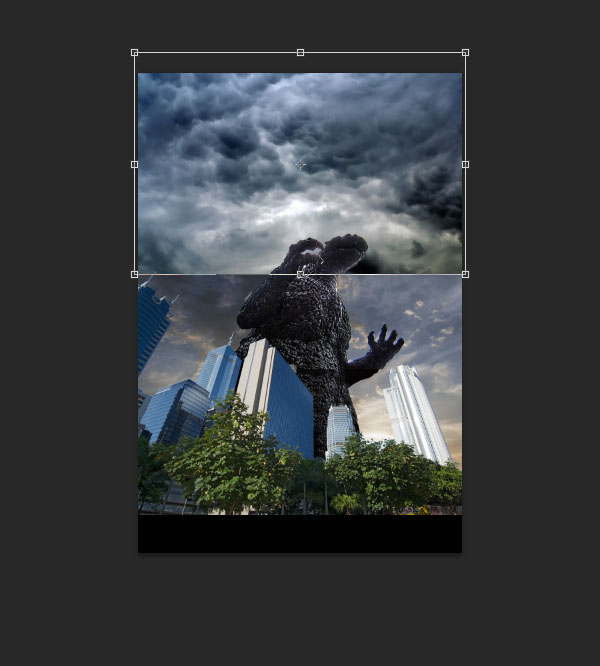
Name the layer Sky2, set it to Soft Light and mask out the bottom with a soft black Brush so it blends nicely.
2. Create the Mood
Step 1
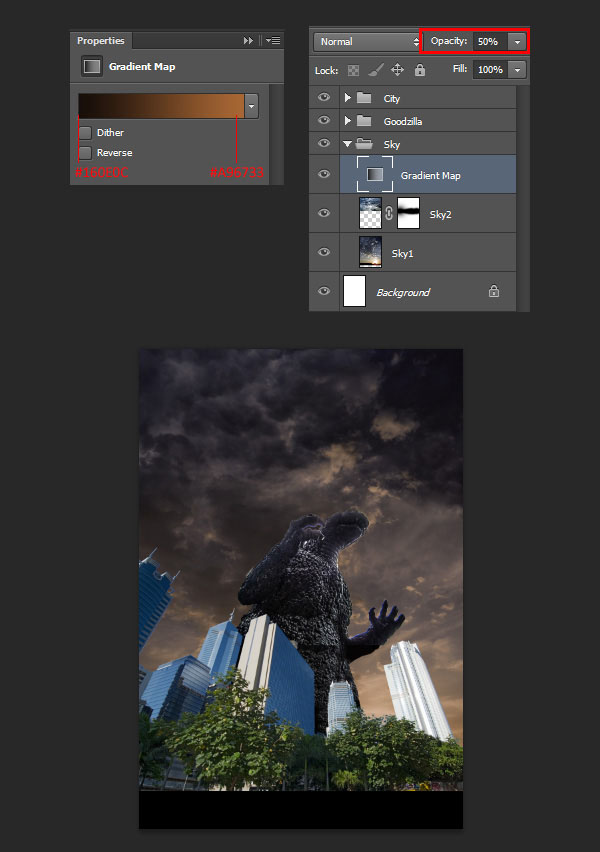
Now that we've got everything set up, we can begin adjusting colors to set the overall mood of our final image and make sure that everything blends nicely together. We'll start with the sky. Inside the Sky group, create a Gradient Map adjustment layer (Layer > New Adjustment Layers > Gradient Map) and input a gradient ranging from #160E0C to #A96733. Make sure that the layer is set 50% Opacity.
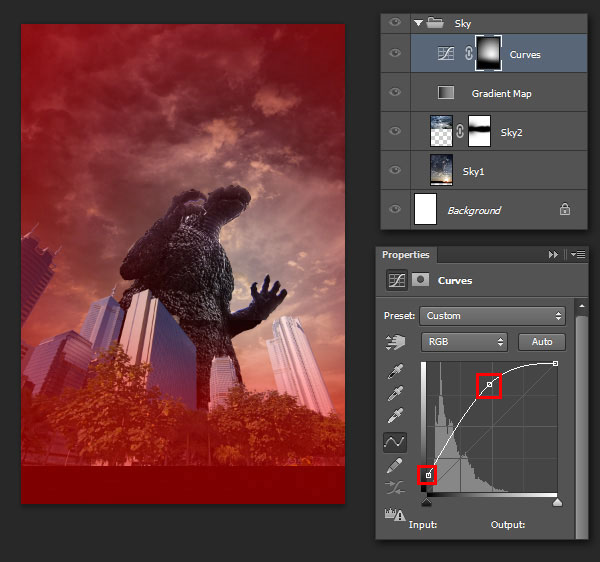
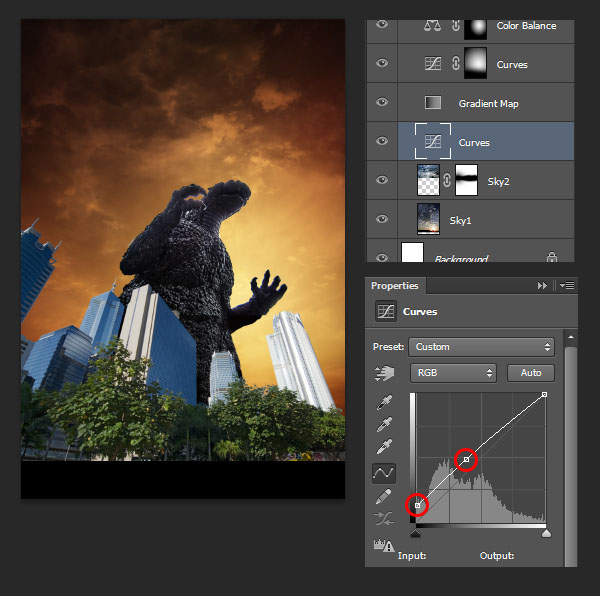
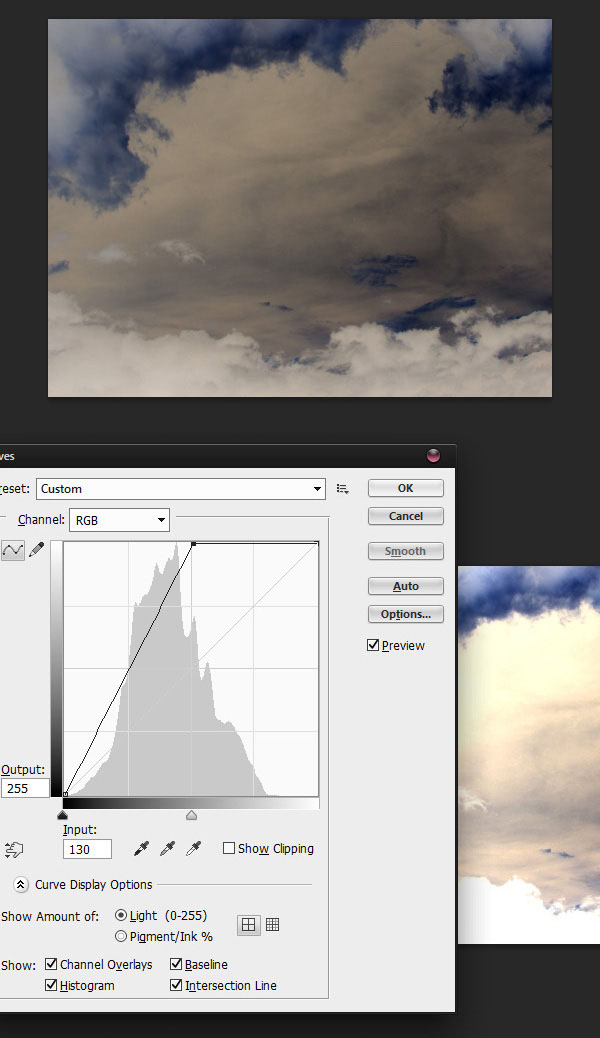
We'll also lighten up the sky. To do so, create a Curves adjustment layer and set it as shown in the example below. Also, make sure the layer has a mask,fill it with black (Edit > Fill), and use a large white soft Brush to paint back in the adjustment around the center of the image.
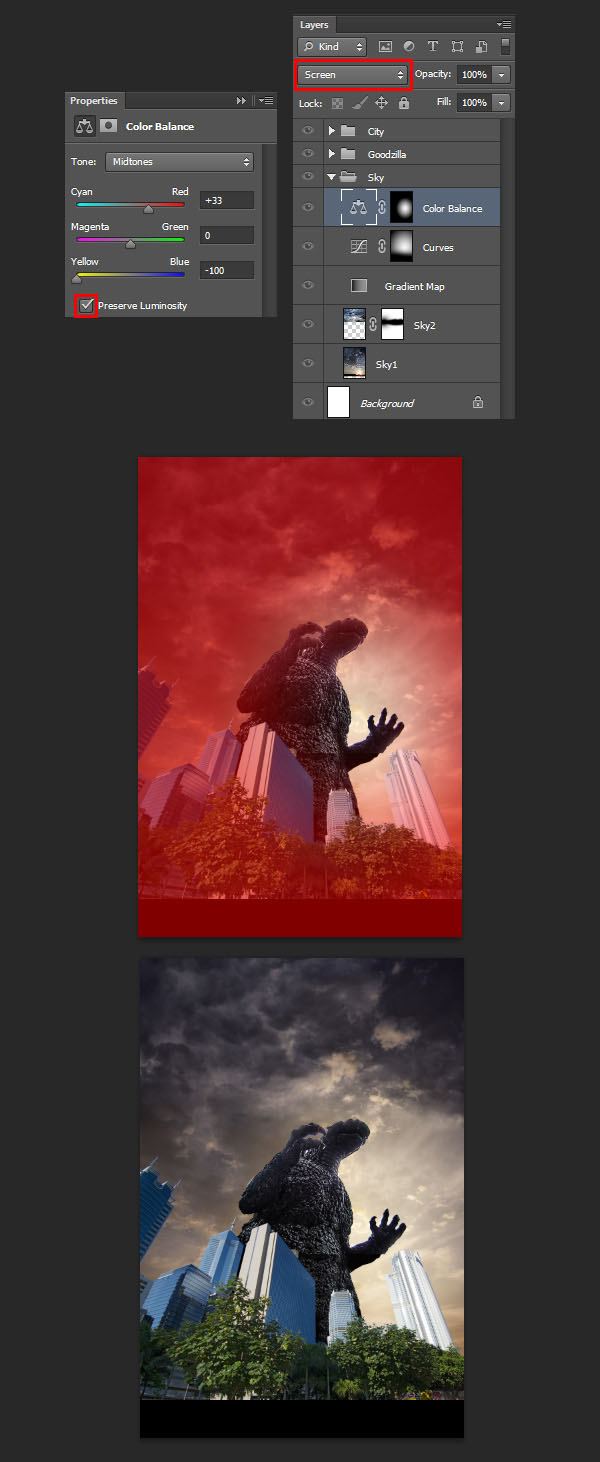
We can brighten up even more the center of the image by creating a Color Balance adjustment layer with the following values. Make sure the layer is set to Screen, and, once again, mask in only the center of the image.
Next, create a New Layer, and fill it using a large soft Brush and the following three colors.
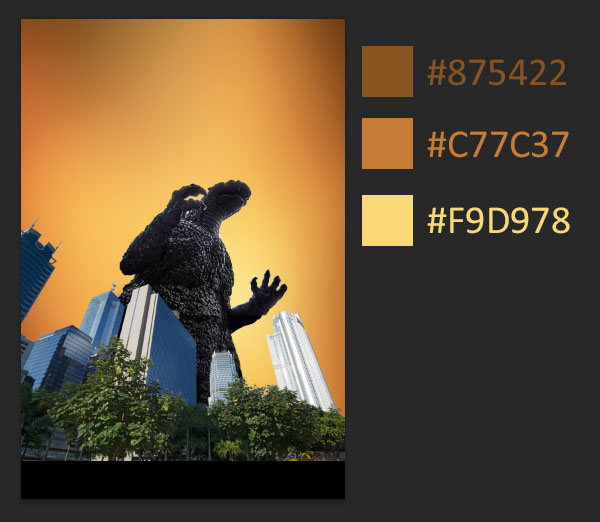
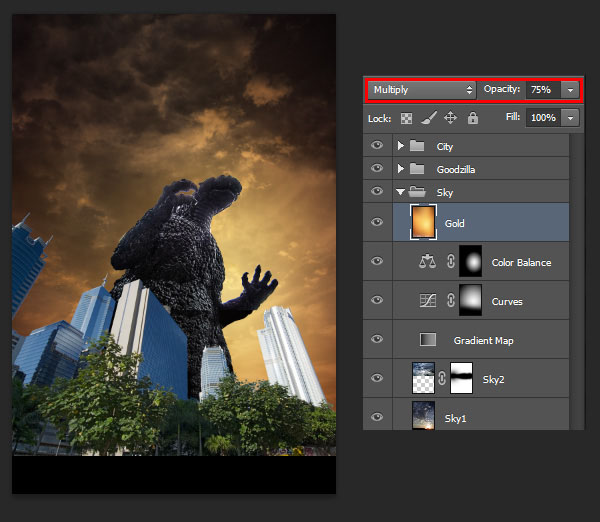
Name the layer Gold and set it to Multiply and 75% Opacity.
Repeat the process with the following three colors.
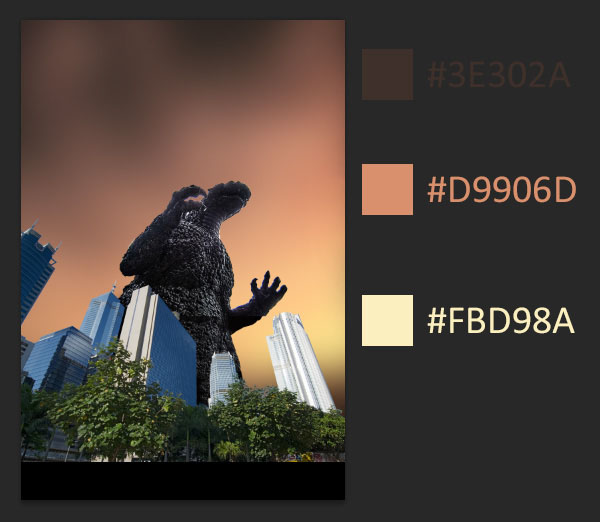
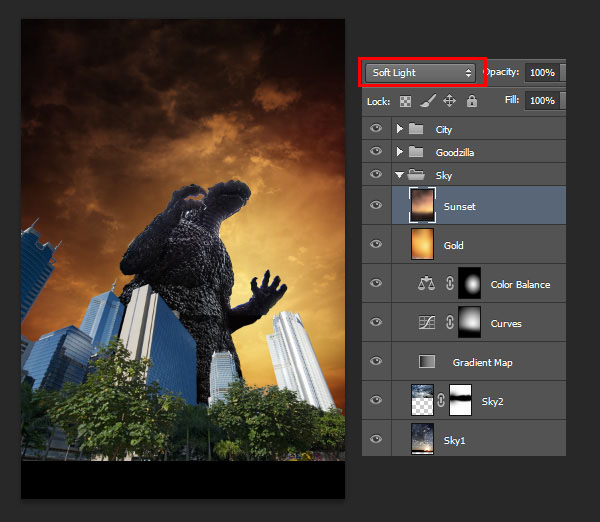
And this time set it to Soft Light, 100%Opacity. I named this layer Sunset.
Finally, brighten up the sky one last time with a Curves adjustment layer
Step 2
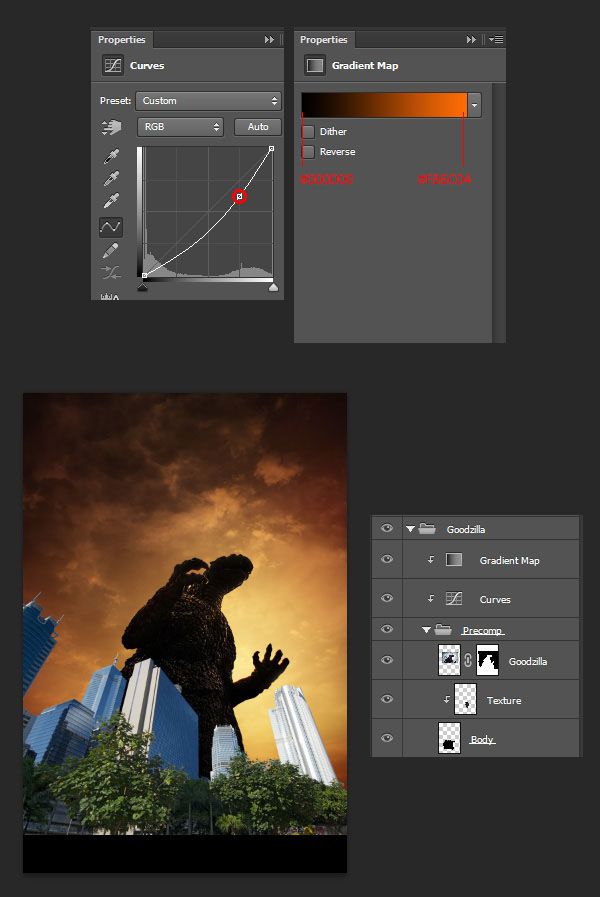
Now that we've set up a nice atmosphere, we can work on blending the monster within. Since the monster is placed against the main light source, it should be darker. Its hue will also need to fit with the sky. To do so, groupGoodzilla, Texture and Body together, and clip a Curves and a Gradient Map adjustment layer to the group. Give those layers the following settings. I named the group Precomp.
If you look at the original Goodzilla layer, you will notice a blue highlight on the edges of the statue, which is mainly due to the strong backlight. We can specifically tweak that highlight by creating a Hue/Saturation adjustment layer targeting only the Blues.
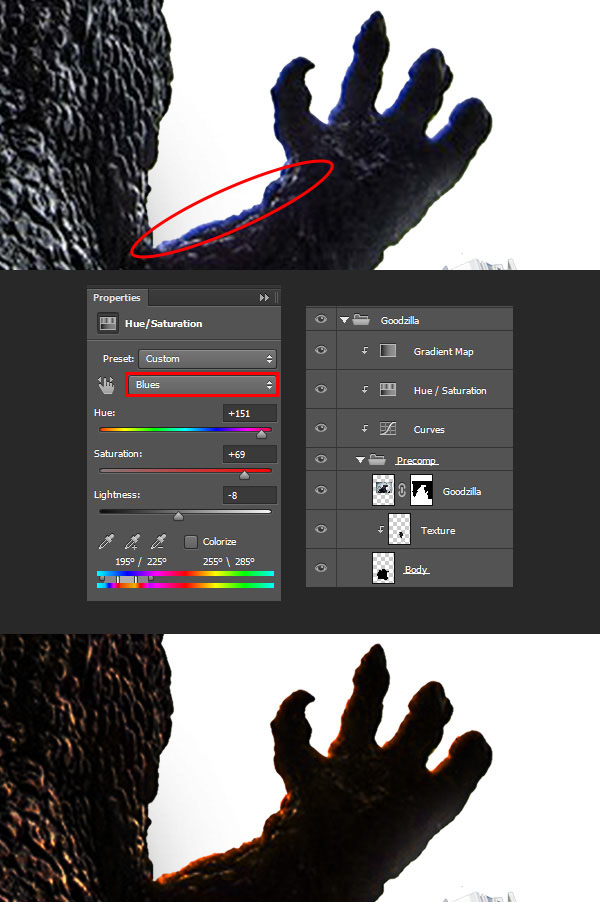
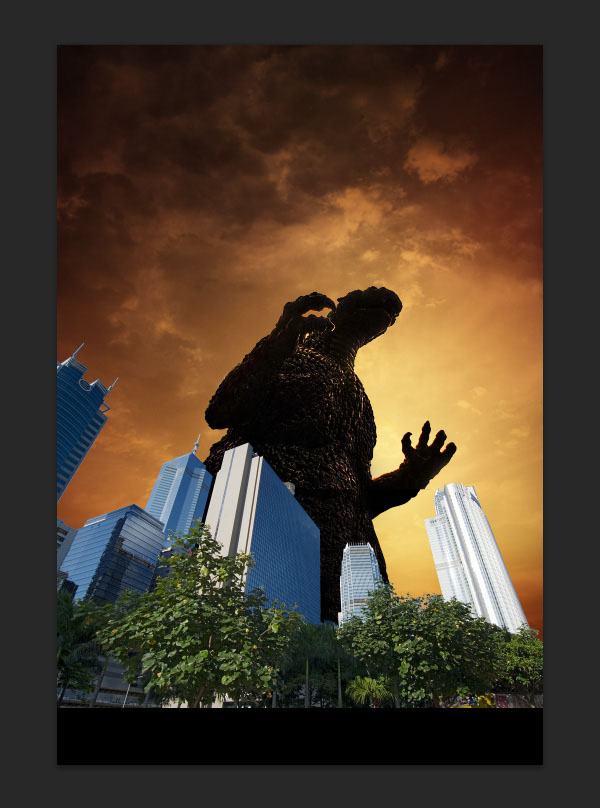
Once you are done, you should get the following result.
Step 3
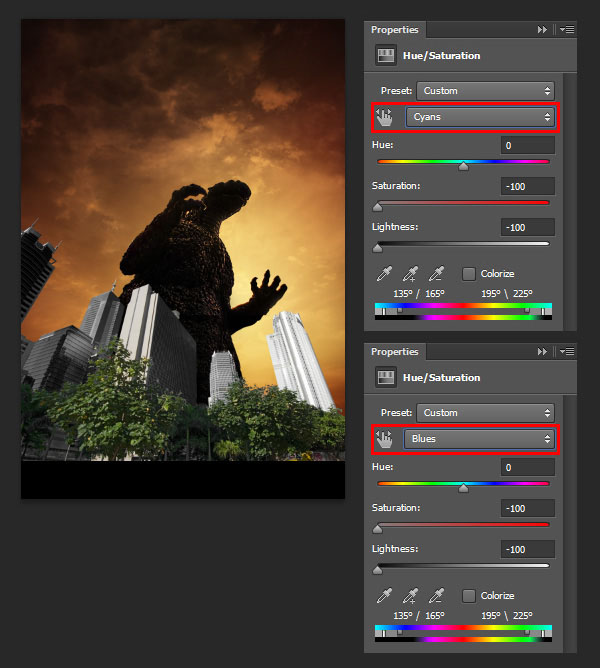
For the city, we will use three adjustment layers. Start by creating a Hue/Saturation layer targeting both Cyans and Blues. For both of these, bring the Saturation and Lightness to -100.
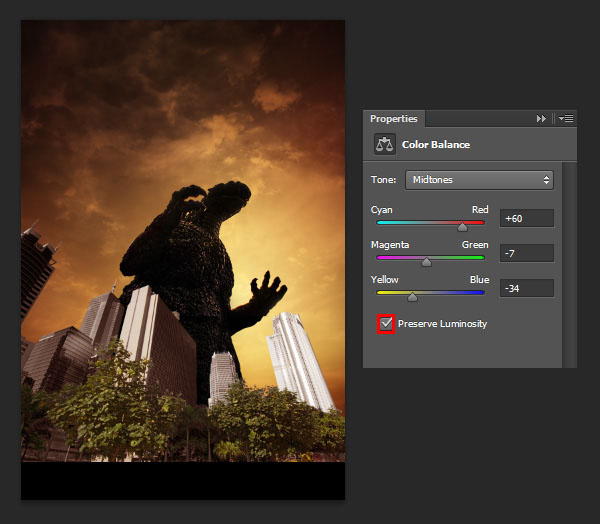
Then, add a Color Balance with the following settings.
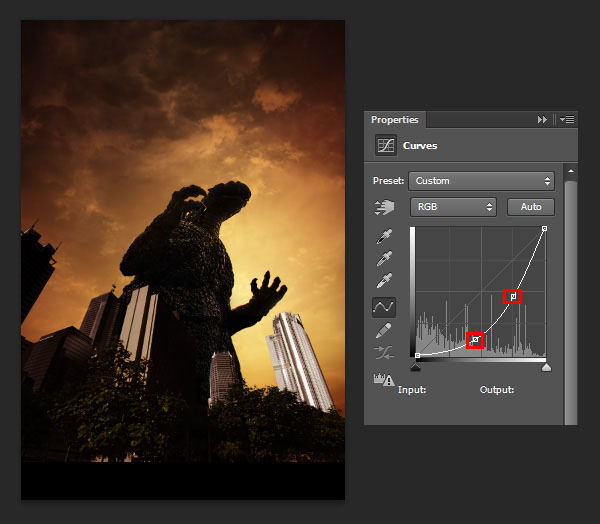
And finally, darken everything using a Curves adjustment, to give it the same backlit aspect.
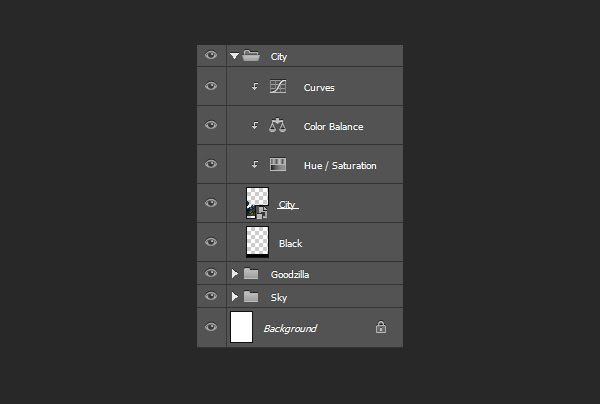
Make sure to clip everything to City.
Now, the building still doesn't seems to fit the scene. That is because, in the original photo, the light source come from the opposite direction than in our scene. To correct this, double-click on the layer's thumbnail to enter the Smart Object. Create a New Layer, set it to Multiply, and paint on the following area with #2A4467.
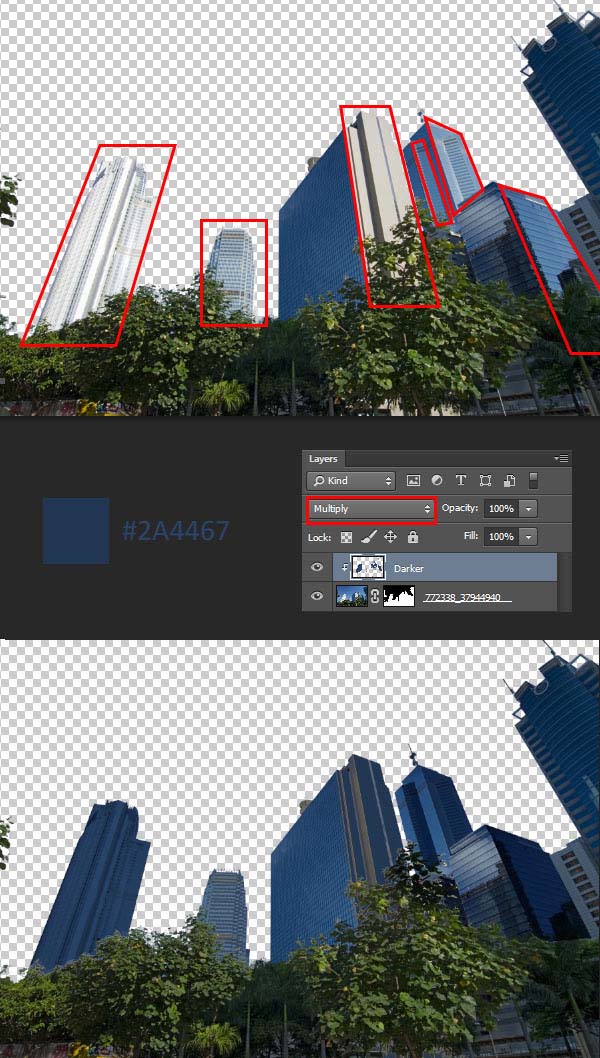
Once you are done, Save and Close the Smart Object, and you should get the following result.
Step 4
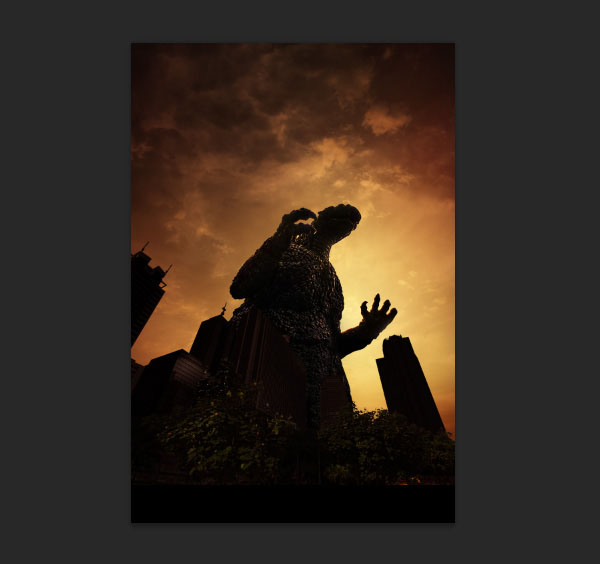
In this step, we'll give our image a better sense of depth by adding haze. When outside, if you look at the horizon, you will notice that as things get further away from you, they tend to take up the color of the atmosphere and lose details. This is because the air is not perfectly transparent, and over great distance, it becomes visible. This effect is accentuated if there are particles in the air, such as humidity, or, in our case, dust from the destruction of the city! This means that, in our image, as things get further away from the viewpoint, they should lose detail and take up an orange hue. Doing will help conveying the sheer magnitude of the monster as well as hiding the fact that the original photo is a statue.
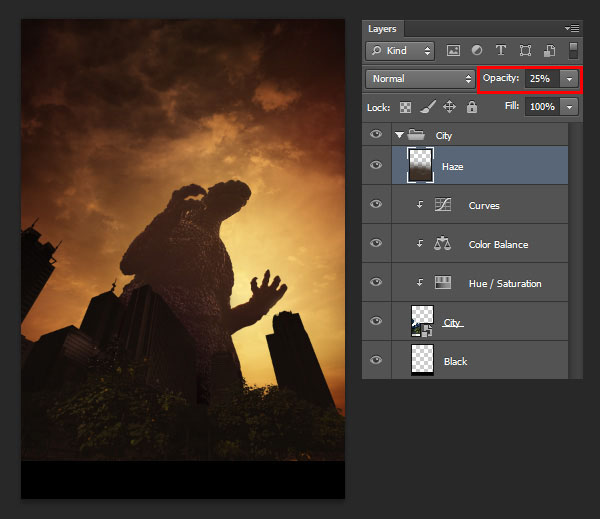
To do so, create a new layer, clip it to Precomp, name it Haze, and paint in with a large soft Brush and the following values.
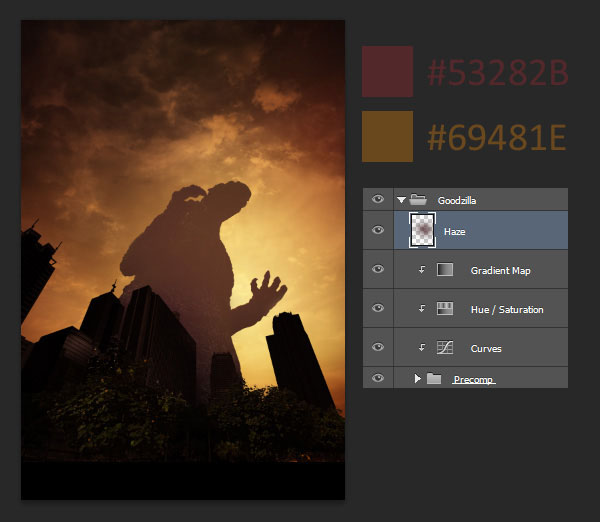
In order to preserve some of the details, bring down the Opacity to 60%.
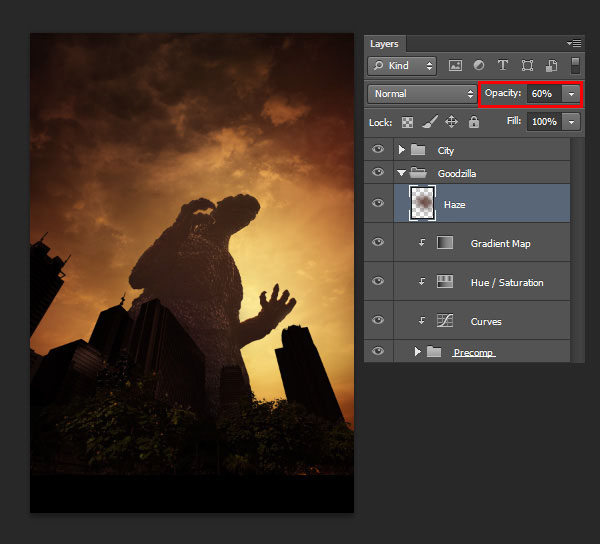
Repeat the process for the city, this time using a more brownish color such as #3D3027.
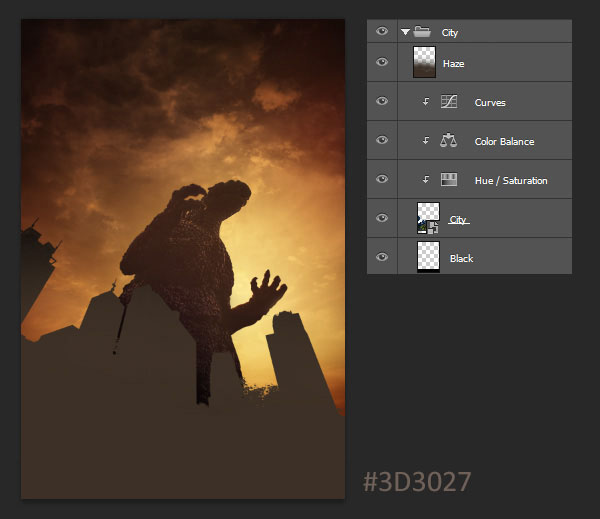
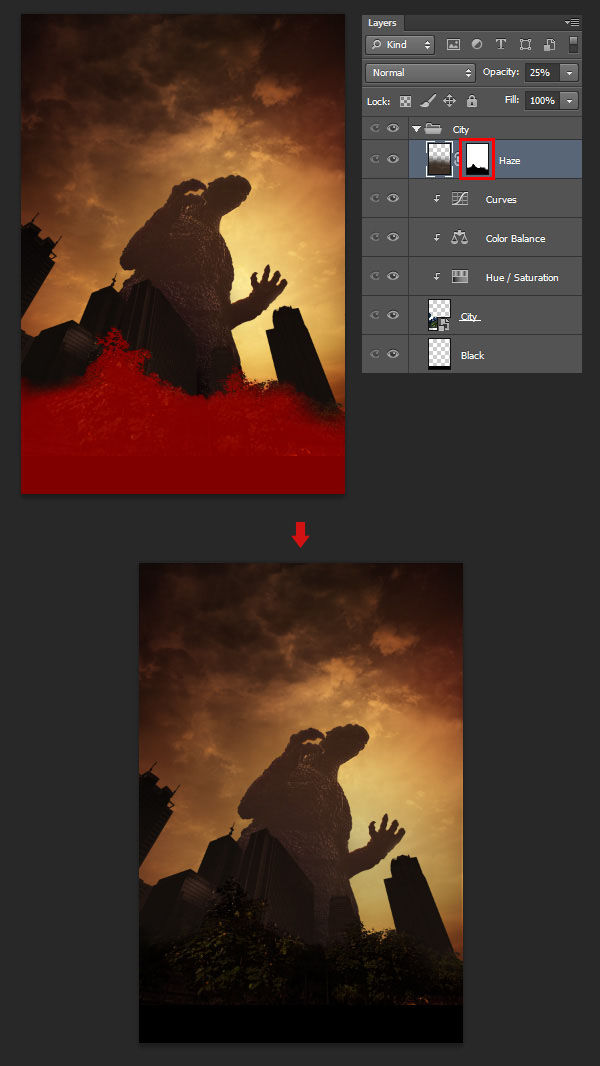
This time, bring the Opacity down to 25%.
Mask out some of the foreground elements, such as the trees.
Step 5
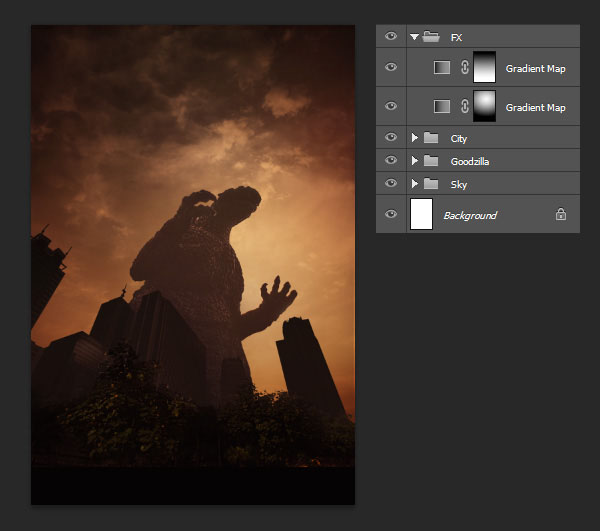
In this step, we'll continue adjusting and bringing together our image. We'll start by creating a new group named FX containing two Gradient Map. Give the first one a gradient ranging from #231812 to white, and set it to 30% Opacity.

Then, give the next Gradient Map the following settings, and set it to 25% Opacity.
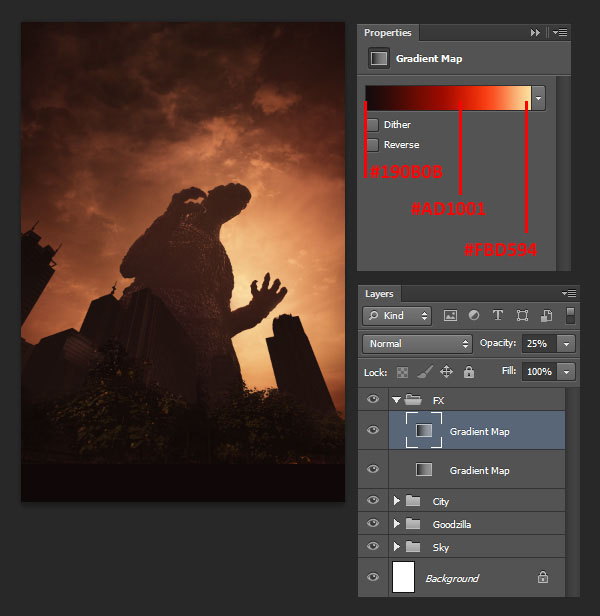
Give both layers the following mask.
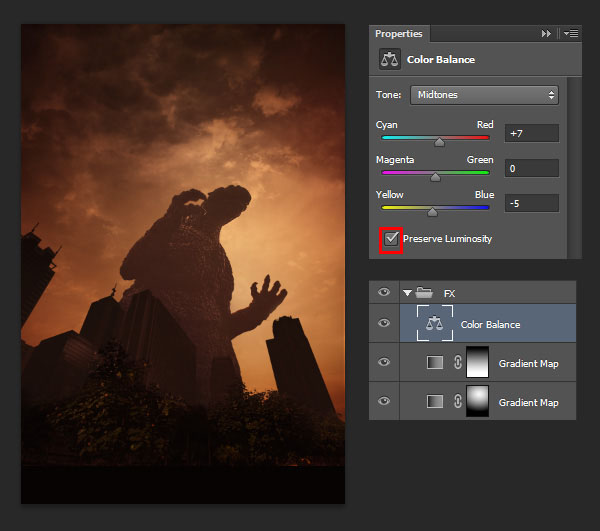
Then, add the following Color Balance.
Step 6
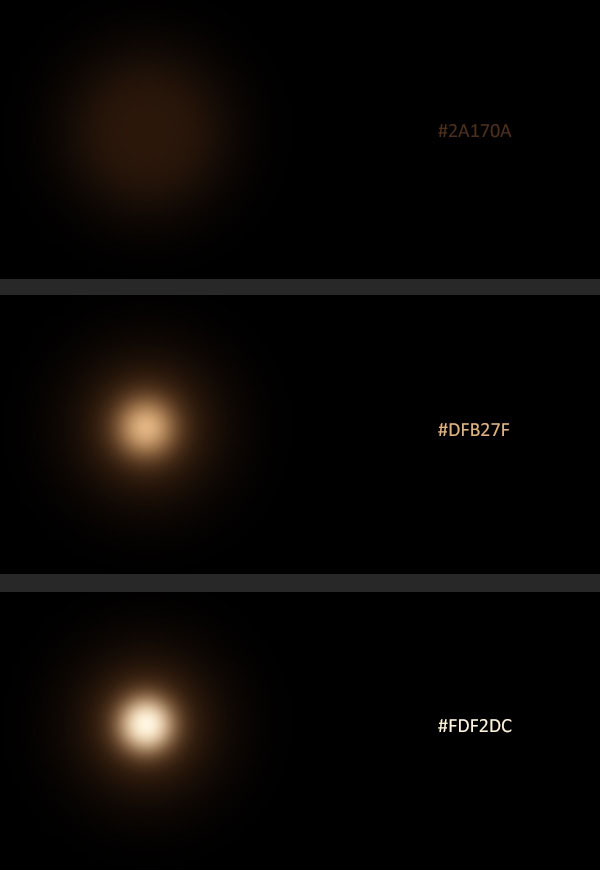
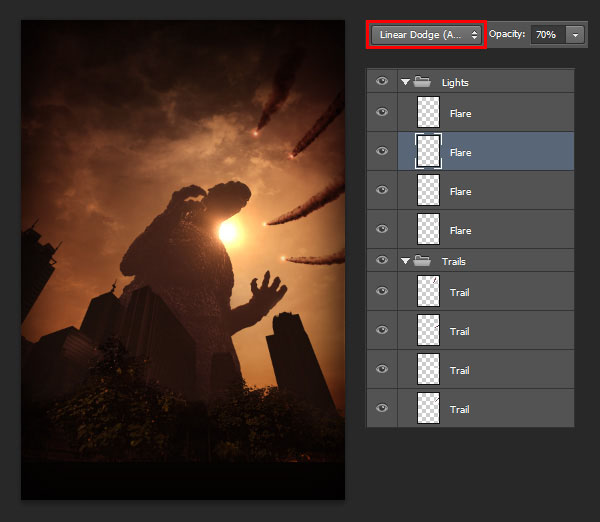
In this step, we'll finalize our backlit setup by adding a bright sun in the sky. This will also serve to create a strong focal point toward the most important part of our image, which is the monster. Start by creating a new layer and fill it with black. With a large and soft round Brush, paint a big brown #2A170A dot in the center of the canvas. Then, paint a smaller and brighter #DFB27F dot in the middle, and then, an even smaller and brighter dot in the middle #FDF2DC.
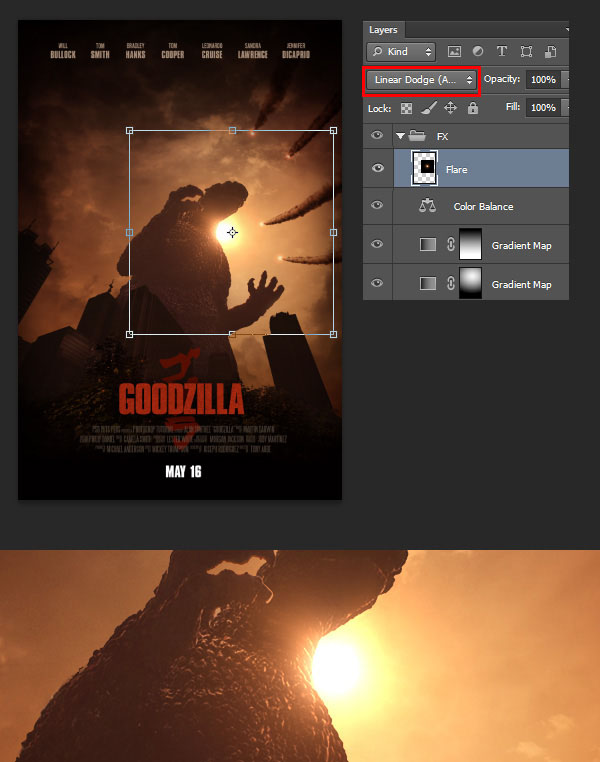
Set the layer to Linear Dodge, then scale and place it according to the example below. The Linear Dodge blending mode will allow us to get a nice flare effect.
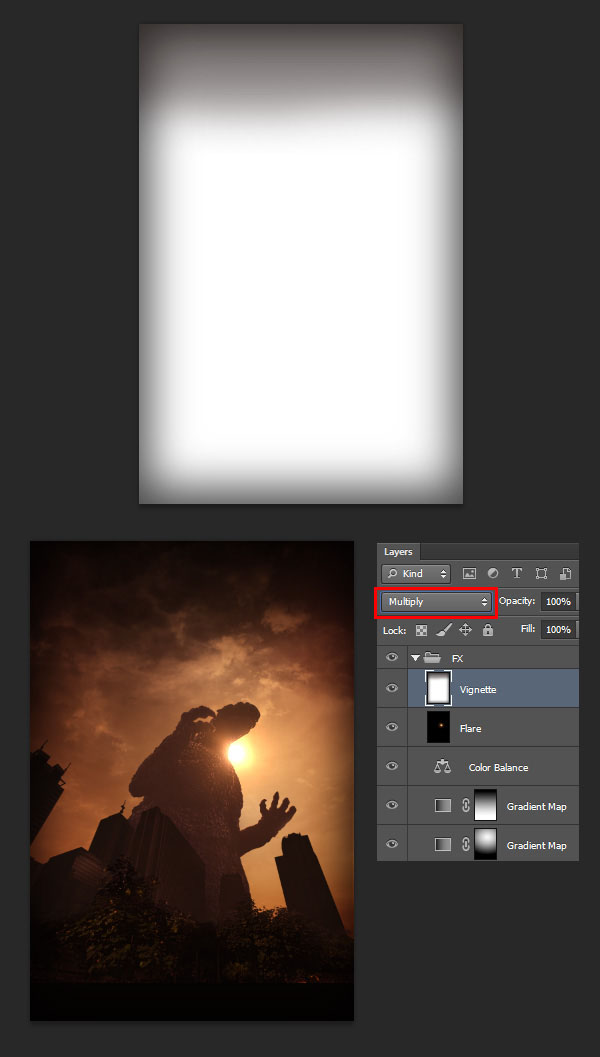
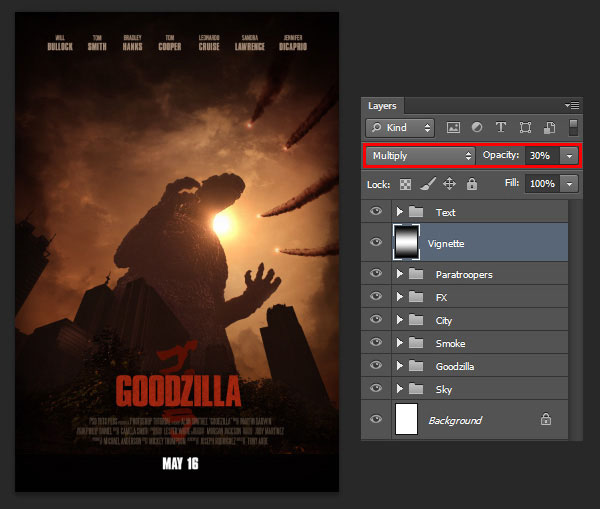
Finally, we'll add a vignette effect in order to focus the viewer even more toward the center of the image. To do so, create a New Layer, Fill it with white and paint with a soft black Brush around the edges of the canvas. Name the layer Vignette and set it to Multiply.
3. Add Details and Refinements
Step 1
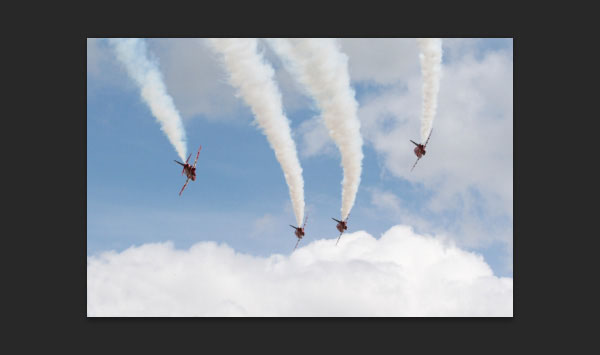
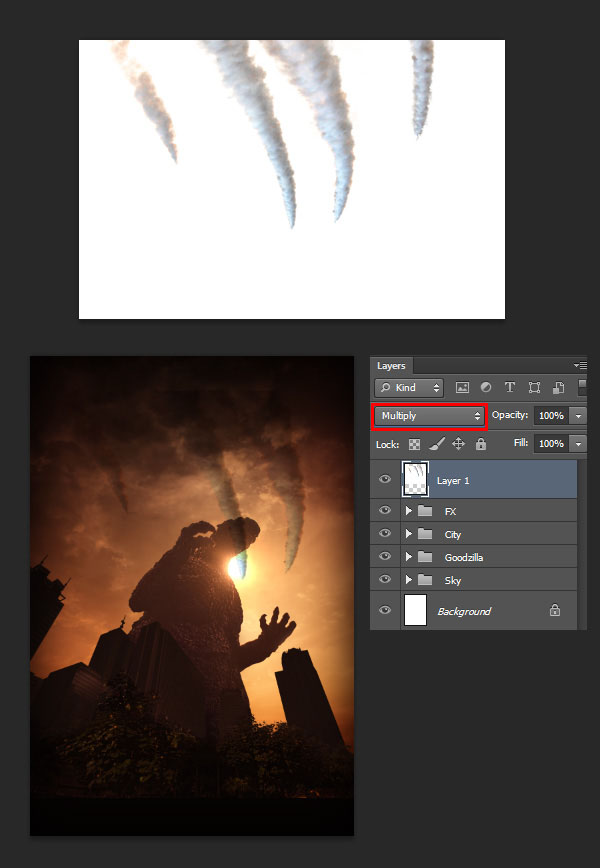
In the original poster, we get to see soldiers parachuting toward the monster. This is a nice touch since the smoke trails they leave behind create visual lines which helps focus the eye toward the center of the image. In order to achieve this effect, we'll use smoke trail from aerobatic airplanes. Let's begin by opening Red Arrows in Photoshop.
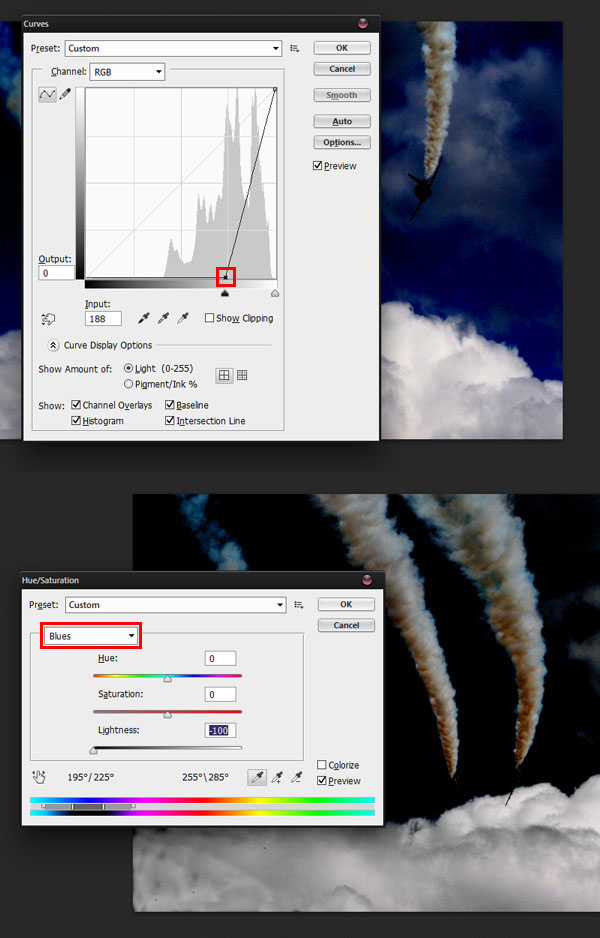
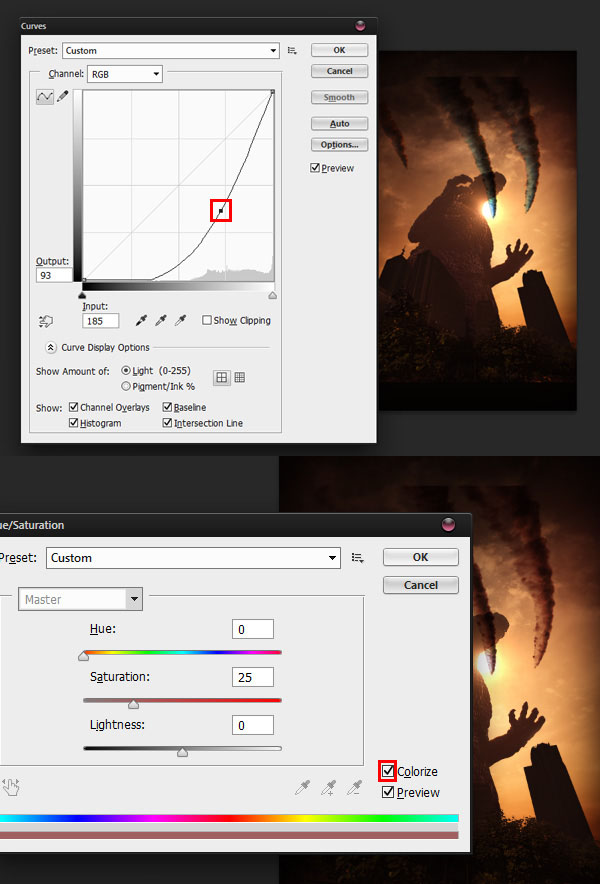
Hit Control-M to bring up the Curves adjustment window, and crunch the darker pixels of the image. Then, hit Control-U to bring up the Hue/Saturation window, target the Blues and bring the Lightness down to -100.
Then, use the Brush Tool (B) with a cloud-like brush and paint in black the clouds that are still visible.
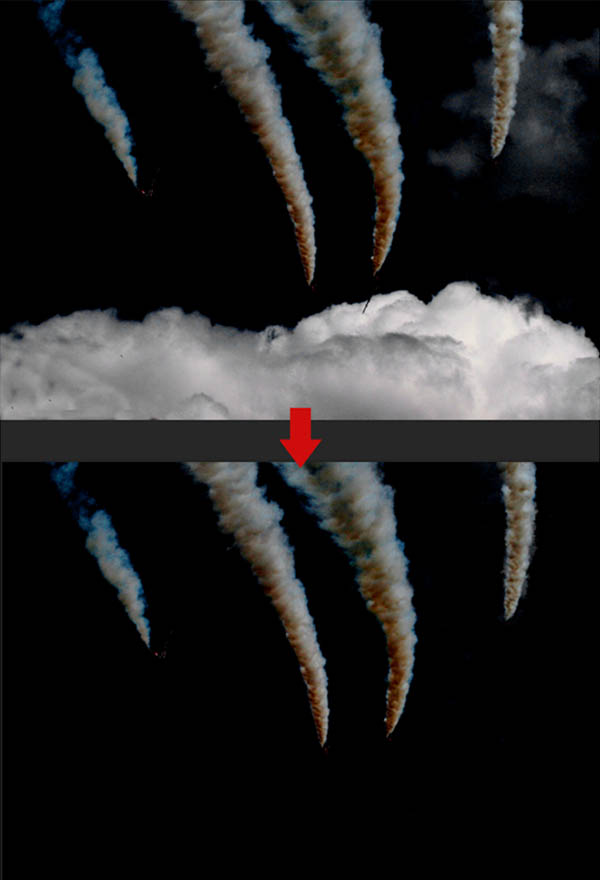
Hit Control-I to Invert the image's color. Then, hit Control-A to create a full Selection of the canvas and then Copy (Control-C) and Paste it (Control-V) back into your main scene. Set the layer to Multiply.
In order to feel more realistic, the trails need to be darker and match the overall hue of the sky. Once again, we'll use the Curves and Hue/Saturation adjustment windows. Don't forget to check the Colorize option.
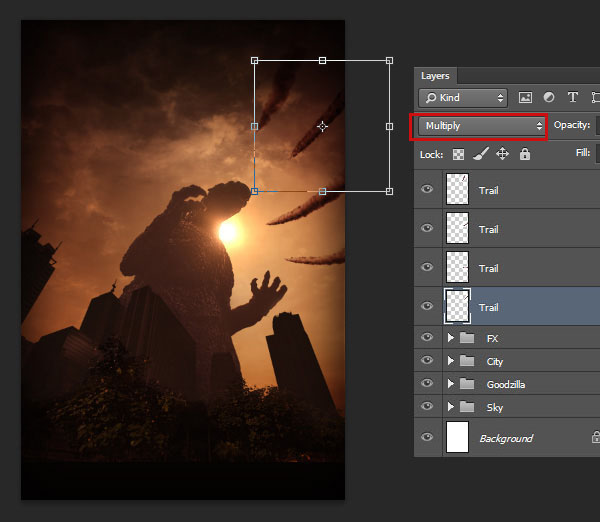
Using the Lasso Tool (L), create a selection around one of the smoke trail, Cut it (Control-X), Paste it (Control-V), and use the Free Transform mode (Control-T) to move and rotate it around.
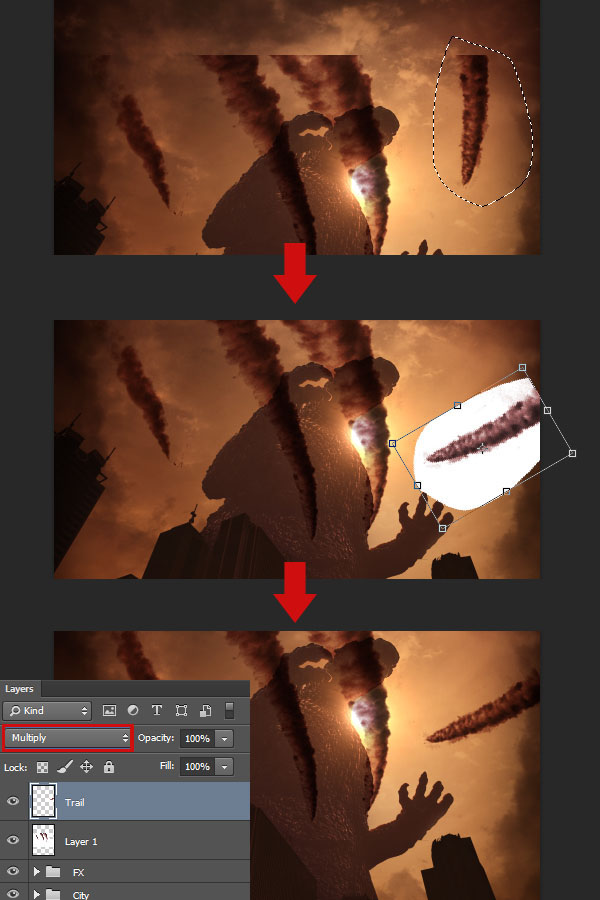
Once you are done placing them, give all the layers the name Trail and set them to Multiply.
You can use the technique shown in the previous step to create flares at the tip of the smoke trails. If you don't want them to be to bright, set them to 70% Opacity and groupthem together.
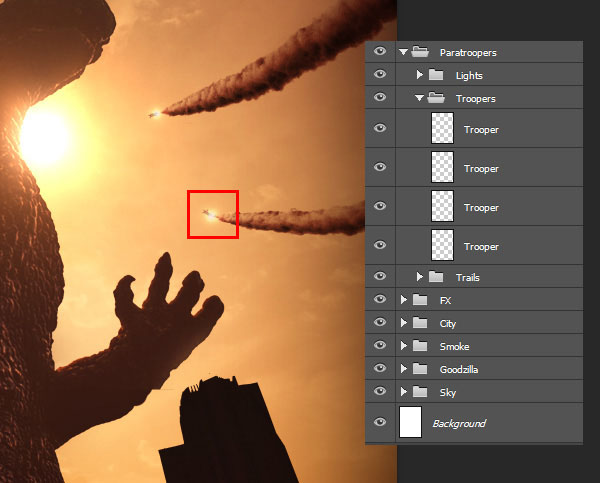
Add yet another four layers, and paint small soldiers at the tip of the smoke trail. Once you are done, group everything together and name the group Paratroopers.
Step 2
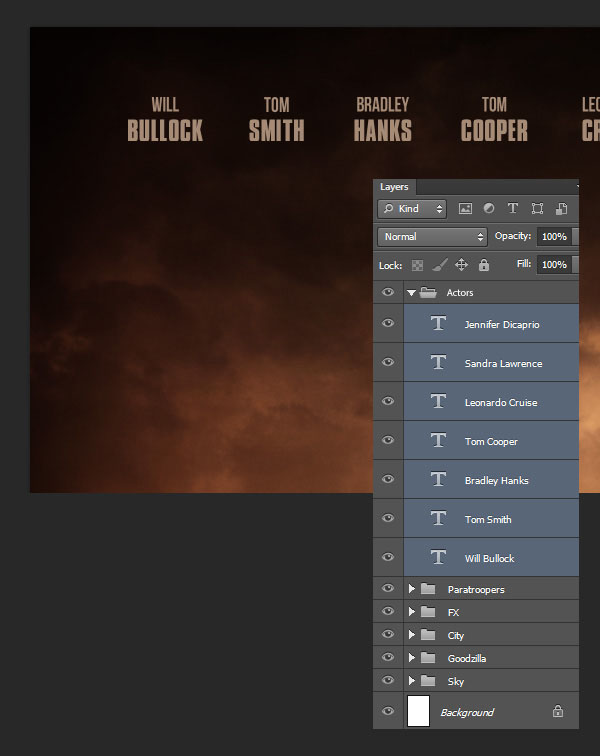
Since this is a movie poster, we're going to add a number of textual informations, such as the movie title, the actors' names, the credits and the release date. Let's start with the actor names. Make sure you have downloaded and installed the free font Bebas Neue. Pick the Horizontal Type Tool (T) and create seven Text Layer. Fill those layers with the actors' names, set the color to #A68B76, the first name to 42 pt, and the family name to 60 pt. Once you are done, place everything in a group named Actors.
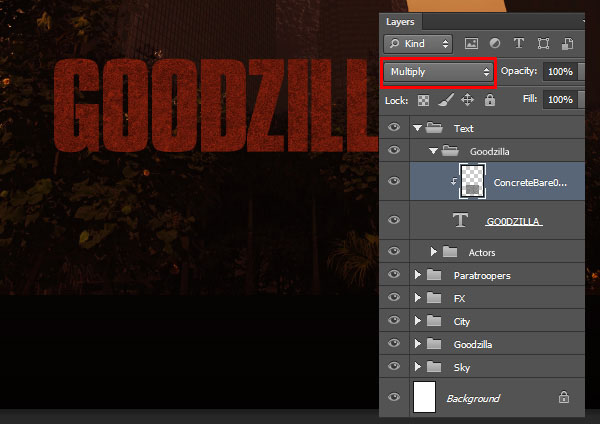
As for the movie title, I used the font Compacta ICG Bold, which is the actual font of the movie poster. If you don't have it, the font Impact can do just fine, although it is slightly less aesthetic. Once again, use the Type Tool (T) and type in the movie title, or in this case, Goodzilla. Set the font size to 250 pt and the color to #C72F13. Then, place and scale ConcreteBare0348 over your text layer, and clip it to it. Group both layer together and name the group Goodzilla. And then, place both Goodzilla and Actors together in a group named Text.
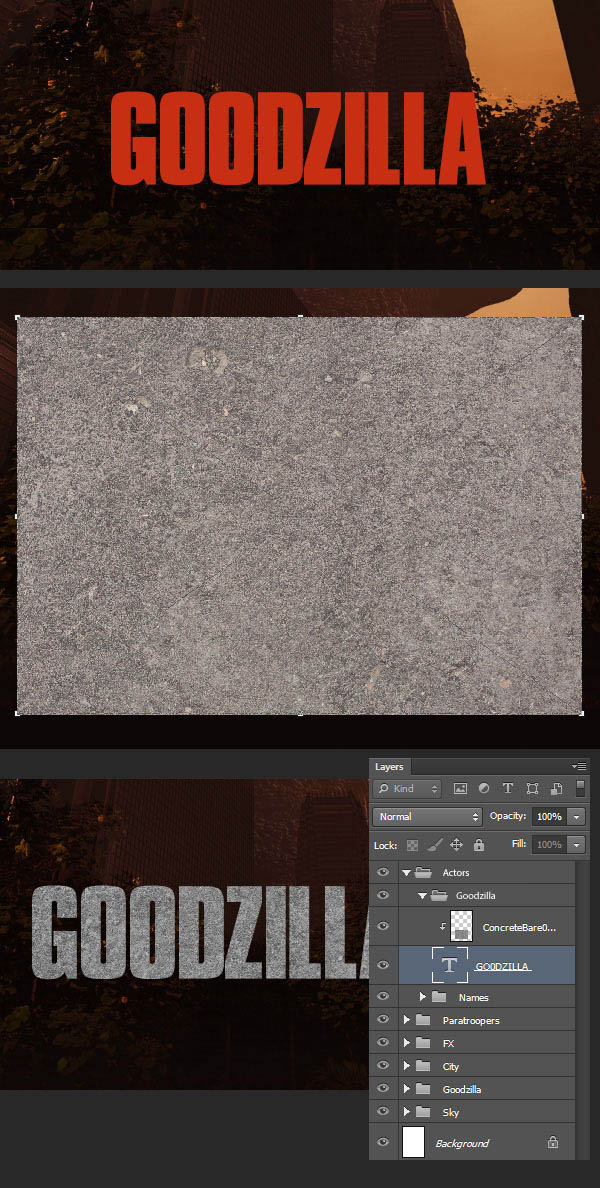
Set ConcreteBare to Multiply.
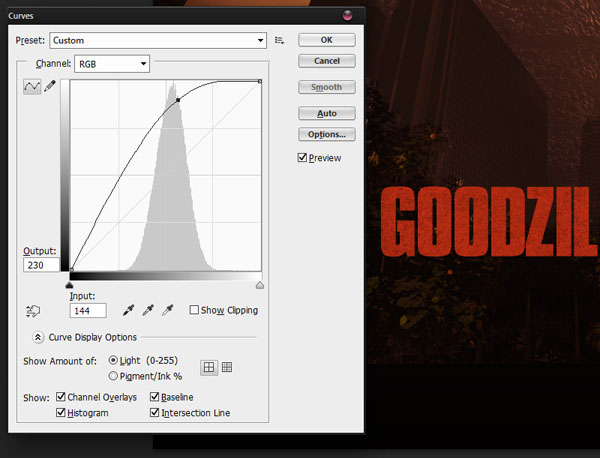
While the texture is nice, it darkened our text a little bit too much. To correct this, make sure you have your texture layer selected, hit Control-M to bring the Curves adjustment window, and bring up the curve.
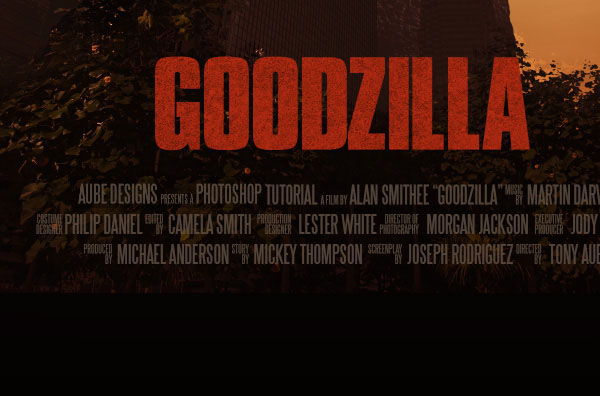
As for the credits, we'll use a font named SteelTongs which has been specifically designed for this use. With the font installed, you can use the lowercase to type the small titles, and the uppercase to type the actual letters. Once you are done, set the font size to 50 pt, and the color to #69584B.
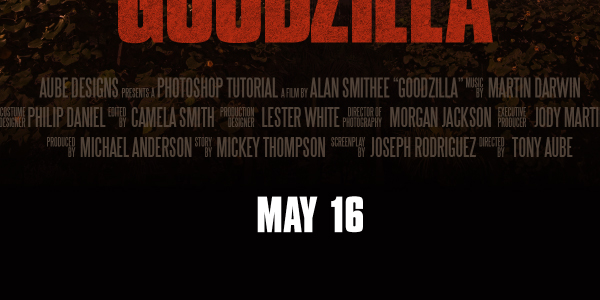
As for the date, you can use the font Compacta ICG Bold (or Impact). Set the size to 100 pt and the color to white.
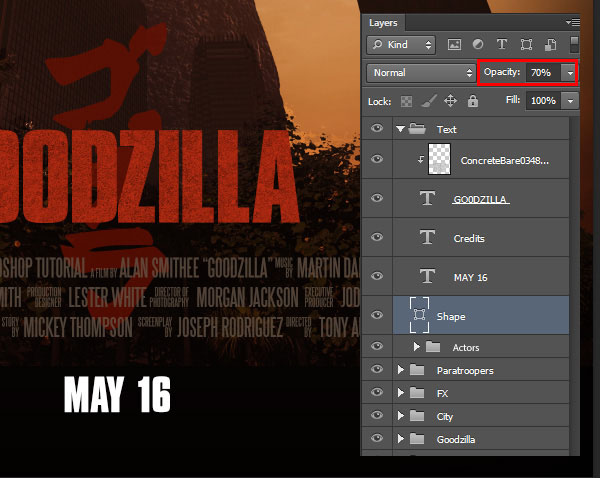
Finally, we'll place in the Godzilla Sign. If you have Illustrator, I suggest you open and copy it inside this program, and Paste it as a Shape Layer to get the best quality. Otherwise, you can just place it as a regular layer.
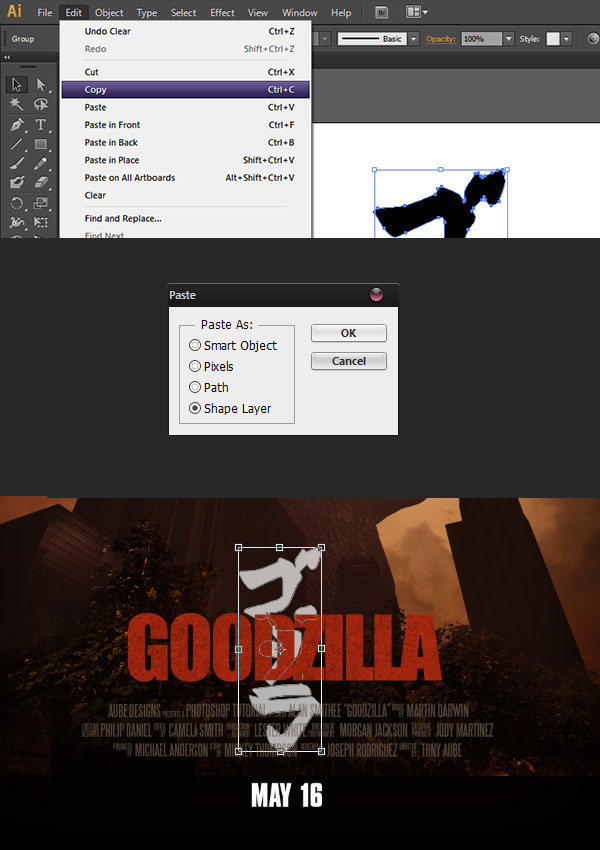
With the layer selected, pick a dark red color #6E0F00 and hit Alt-Backspace to Fill the shape with the color. Then, set it to 70% Opacity.
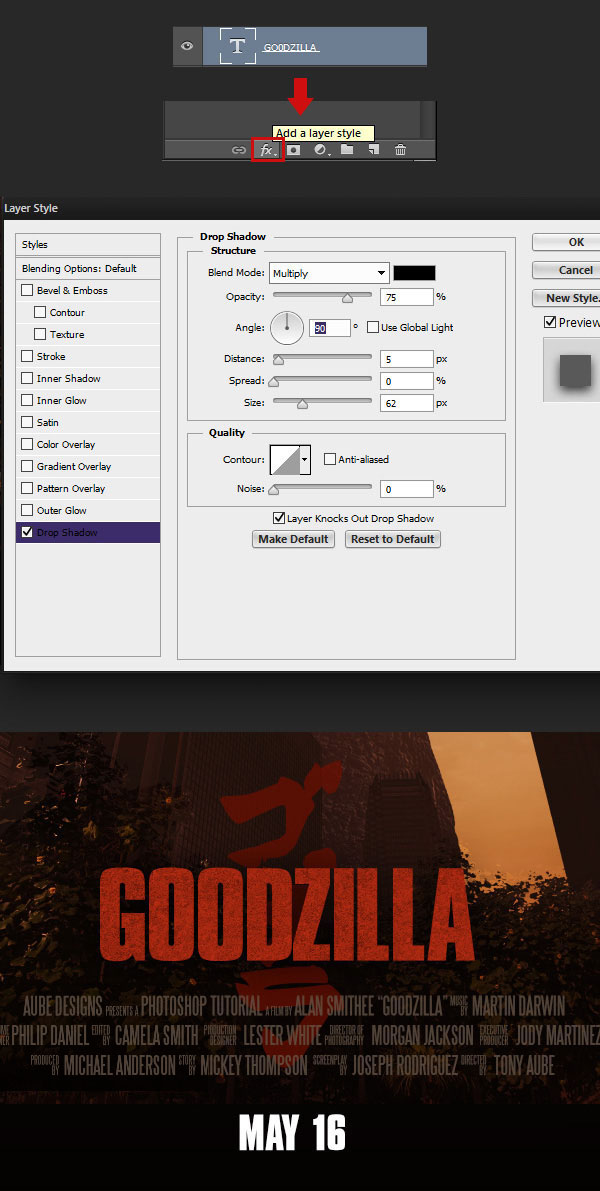
To improve the contrast between the movie title and the background shape, we'll give our movie title layer a Drop Shadow. Make sure your Goodzilla layer is selected, and click on the Add a Layer Style button. Input the following settings.
Step 3
We can make our image more visually interesting by adding some smoke clouding the city. To do so, first start by opening Evening Sky 1 in Photoshop.
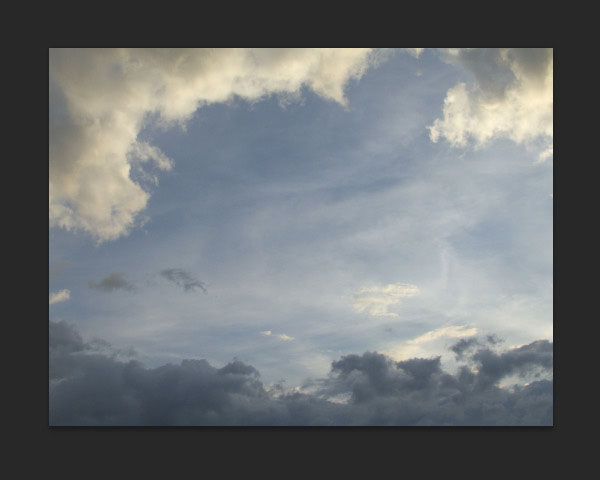
Hit Control-I to Invert the color, and then use the Curves adjustment to brighten up the image.
Now, use a large soft Brush to paint the lower area of the image in white.
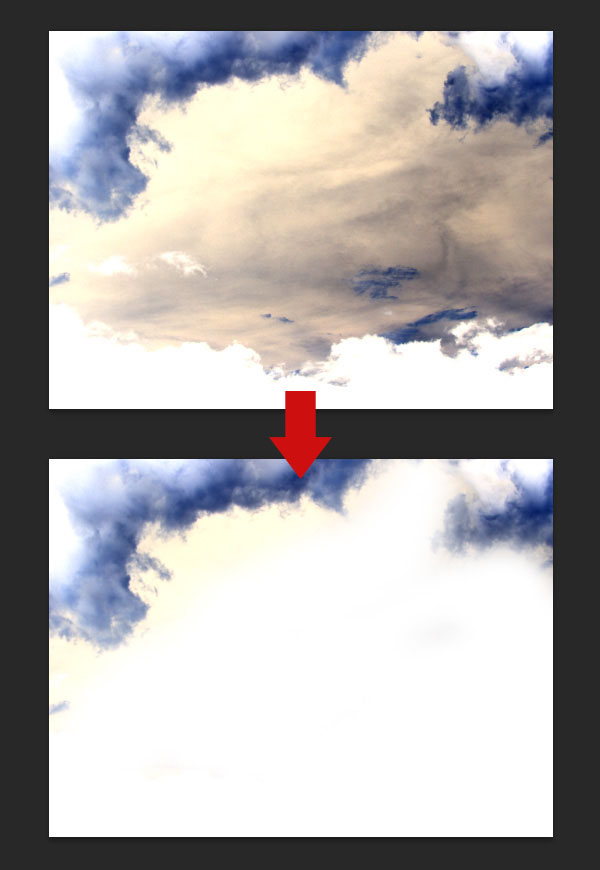
Once you are done, bring the image into your main scene, rotate and place it according to the example below. Use the Hue/Saturation adjustment to Colorize the cloud in red. Name the layer Smoke, set it to Multiply and 70% Opacity. Notice that this layer is placed between the City and the Goodzilla group.
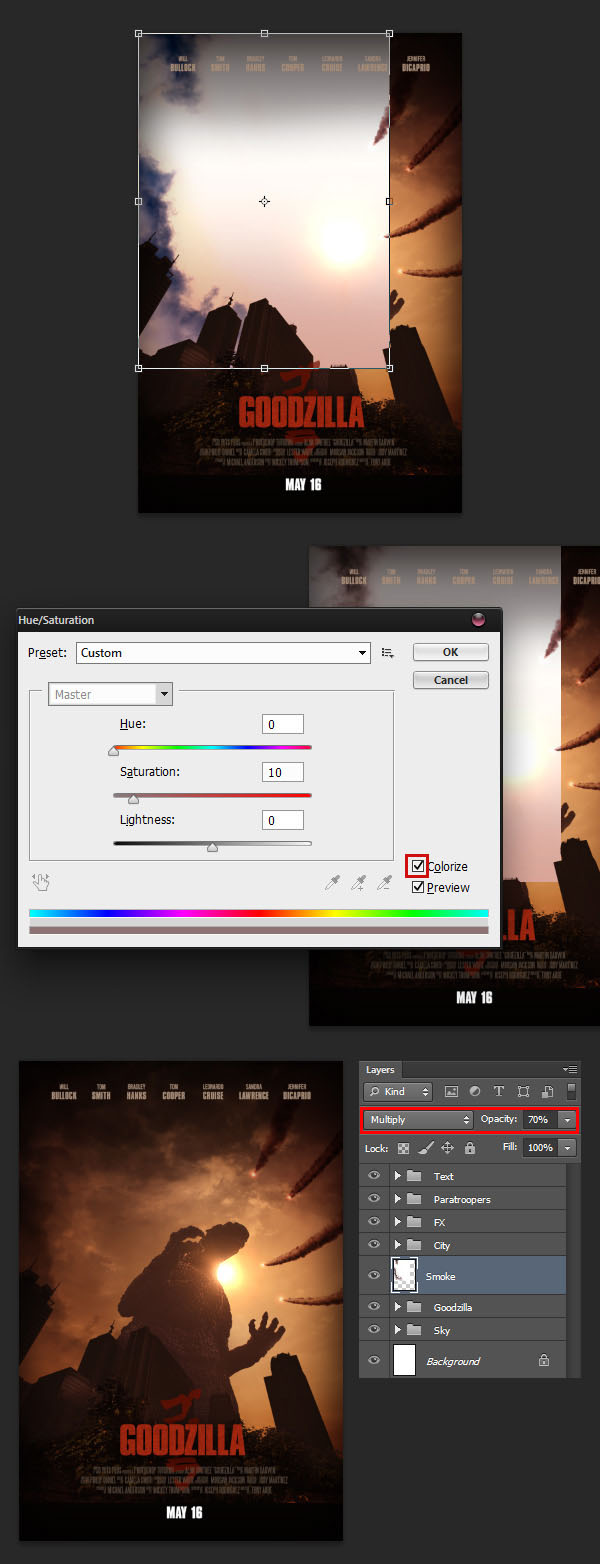
Duplicate (Control-J) the layer, enter the Free Transform mode (Control-T), Flip it horizontally (Edit > Transform > Flip Horizontal) and place it to the right of your canvas. You can then duplicate the layer another time and place it so it fills even more the lower right area of the image. Once you are done, Group everything together in a group named Smoke.

Step 4
The poster is almost completed! For the final touches, we'll start by adding another vignette effect. Create a New Layer, and, using the Gradient Tool, create a gradient going from black to white, and back to black.
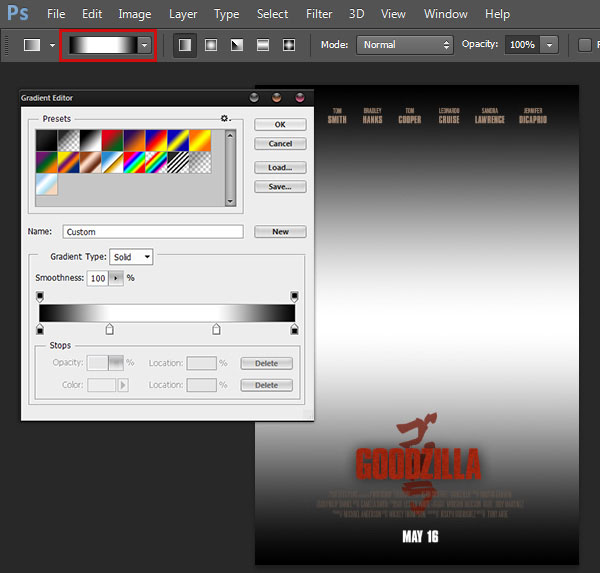
Name the layer Vignette, set it to Multiply and place it between Text and Paratroopers.
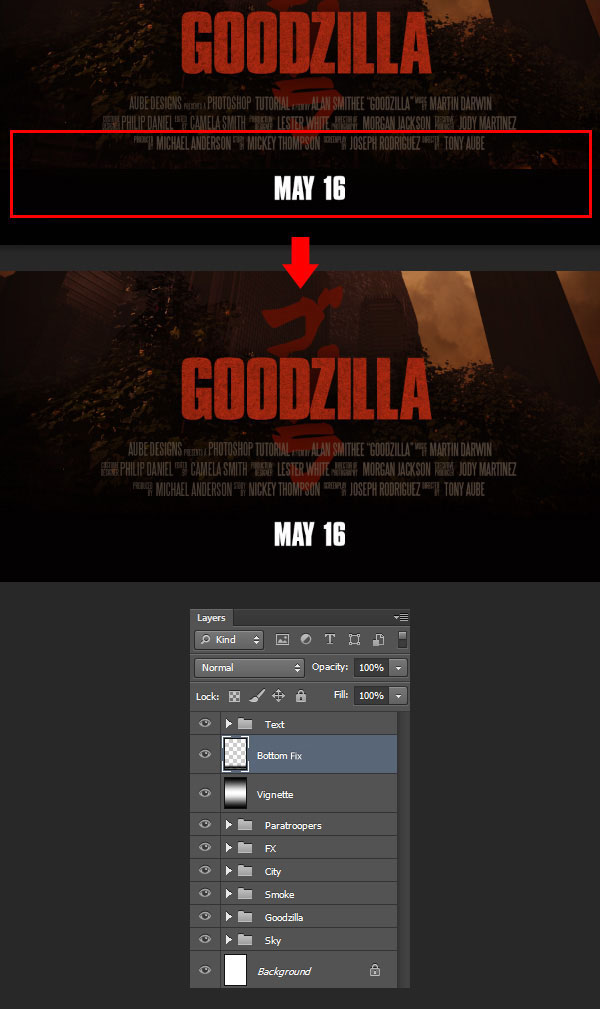
Notice how there is a division between at the bottom of the layer, between the city and the black background. We can fix this by creating yet another New Layer, and using a large soft Brush, paint a straight line with #030101. Place the layer above Vignette, and name it Bottom Fix.
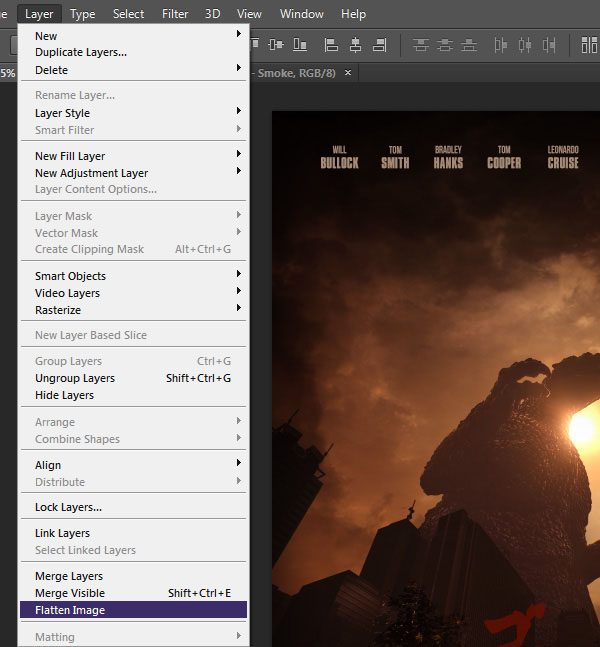
Finally, make sure to Save a copy of your file, and then go to Layer > Flatten Image.
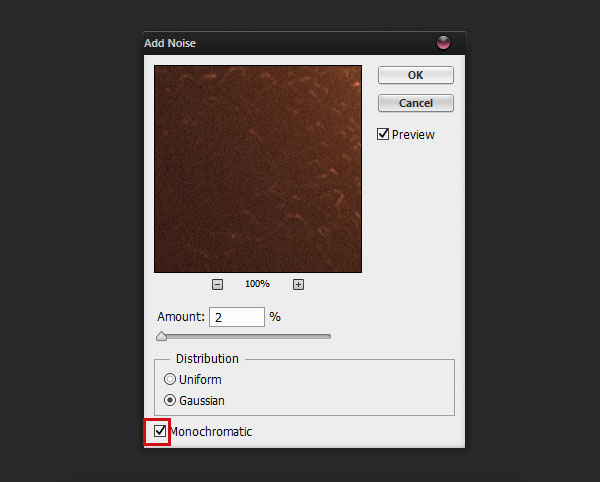
Go to Filter > Noise > Add Noise, set the amount to 2% and make sure to check Monochromatic.
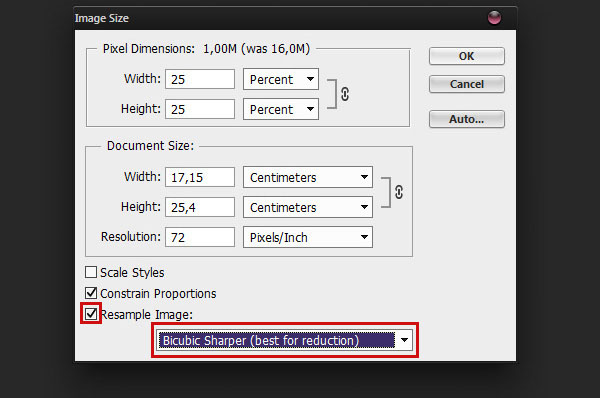
Finally, go to Image > Image Size and resize the image to 25%. Make sure to check Resample Image, and select Bicubic Sharper, to get the best result as you scale down the image.
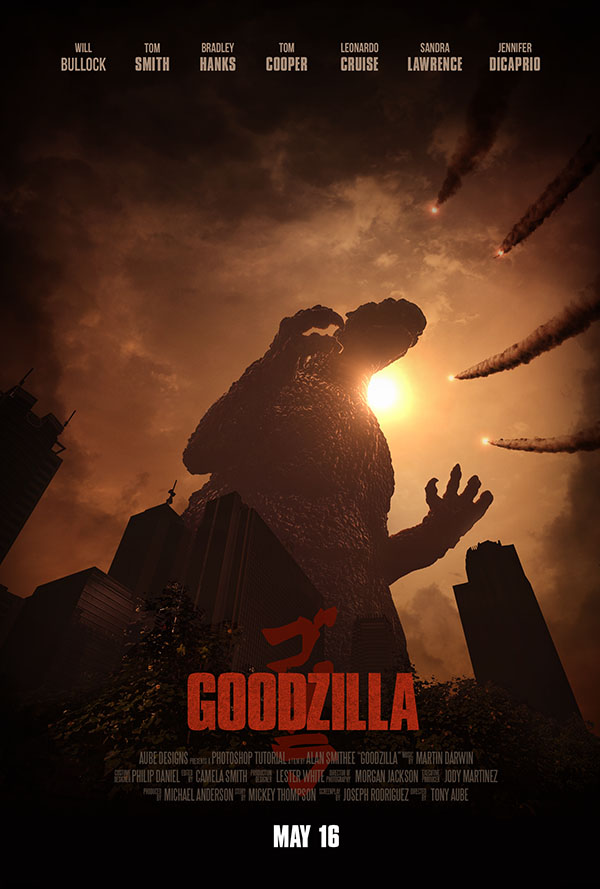
There you go, you've completed the tutorial. Have a look at the final result!
Conclusion
In this tutorial, we covered the process in making a Godzilla-inspired movie poster. Among others, we have seen various techniques allowing you to create a strong mood, to convey a sense of scale and depth, and to keep the viewer focused at the center of our image. Now, you can use these techniques to create your own fan made movie poster!
