InDesign CS5 has arrived with lot of new tools, panels and features. Let’s have a closer look at these changes and discover how they can improve our workflow, productivity and, best of all, our creative process. Time to also think outside of the box, since InDesign is starting to explore new grounds of interactivity and digital publications with growing enthusiasm. So, what’s new?
Live Corners and Corner Options
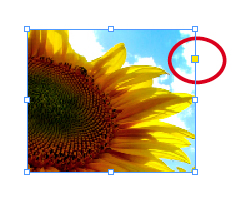
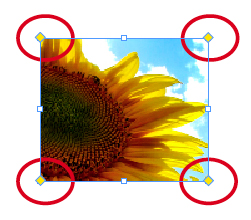
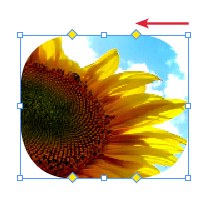
Let’s start with the Live Corners. Remember in InDesign CS4, where you were forced to use scripts if you wanted to make a rounded corner in only one part of a frame? Well, that’s gone. Now all rectangular frames, both for graphic and text, will have a small yellow square at the upper side of its right border. Click on it and the frame will display four yellow squares at all the corners. Click on one yellow square and drag it to create four rounded corners around the frame. You can also press the Shift button while dragging one square to create a rounded corner only where you clicked, ignoring the other three corners. Quick and handy.
However, if you don’t think this feature is useful or you don’t like the sight of that yellow square, just go to View > Extras > Hide Live Corners.
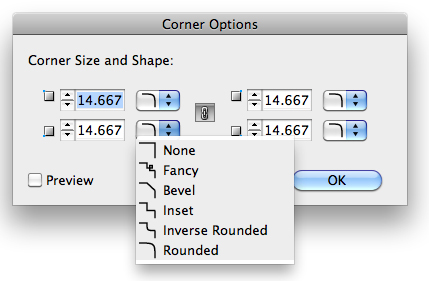
You may prefer to use more precise measures instead of adjusting your corners manually. You may also prefer to use other types of corners instead of the rounded corner. Go to Object > Corner Options, and you will find an improved menu where you can apply different corner sizes and shapes to each individual corner. Good-bye scripts!
Content Grabber
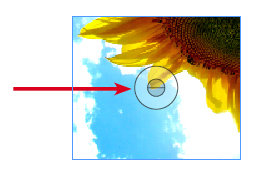
Another easy to spot feature. Now each graphic frame lets you manipulate its content directly by simply clicking on the Content Grabber, the translucent black circle surrounded by a translucent white ring in the middle of the frame (or in the middle of the visible frame, in case you zoomed in so much that part of the frame is outside of your view). The Grabber may not be visible if the frame is too small relative to your actual workspace, in that case you will have to zoom in or make the frame bigger.
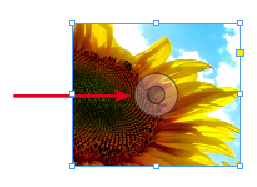
When the Selection Tool is over the Content Grabber, it automatically turns into the Hand icon, letting you move the frame’s content with a single click. No more need to click twice or go for the Direct Selection Tool. It takes half a second to press the A button and use that white arrow but why use two tools for selection if you can optimize production with only one? This is really a time saver.
It also doesn’t matter if objects are grouped, because you can directly select the Content Grabber of each frame individually. Another handy feature is that, when you rotate the content of a frame, the black circle will display an inclined line, indicating that the image has been rotated at the same inclination of the line. So if the line is horizontal, that means the content is upside down, due to a 180° rotation.
By the way, you’re not forced to use the Content Grabber, so if you think it’s more annoying than useful just go to View > Extras > Hide Content Grabber.
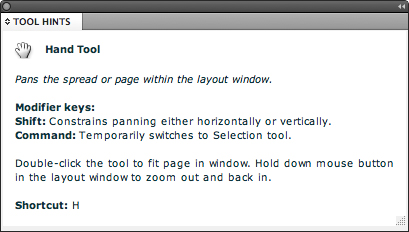
The Tool Hints panel
A really useful panel to explore all the possibilities of your tools. Go to Window > Utilities > Tool Hints and the panel will open. Now all you need to do is click on a tool from the Tools Panel, any tool, from Direct Selection to Zoom, and the Tool Hints panel will display information about the tool you selected. It shows its main functions, all it does when you press modifiers keys and its shortcuts. Good for beginners and for experts too, since you have new tools such as the Gap tool and the Page tool that require some explaining.
Multiple Page Sizes and the Page Tool
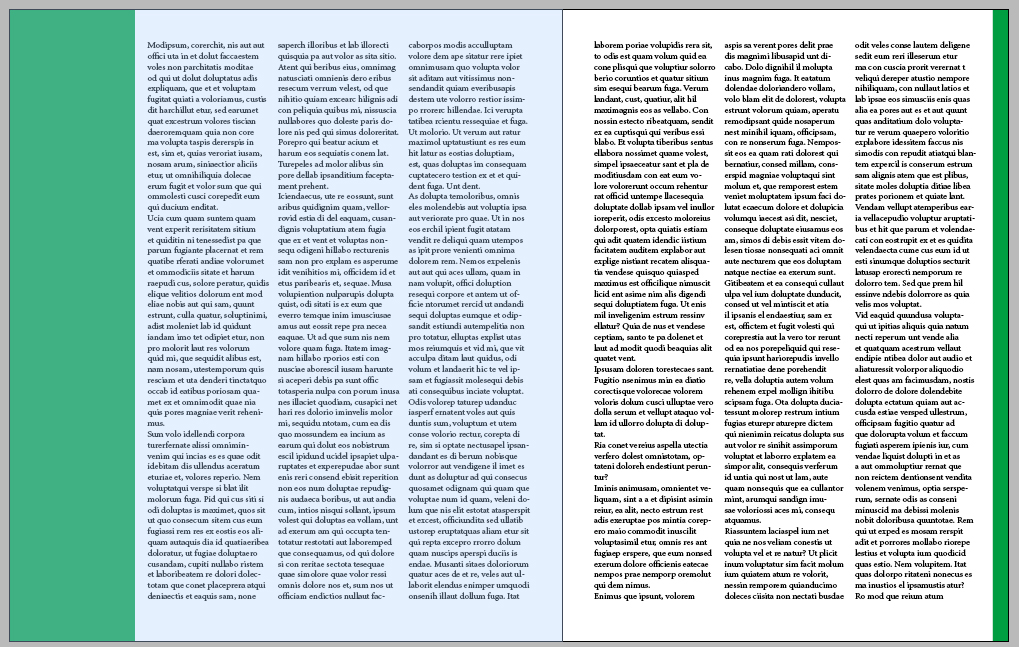
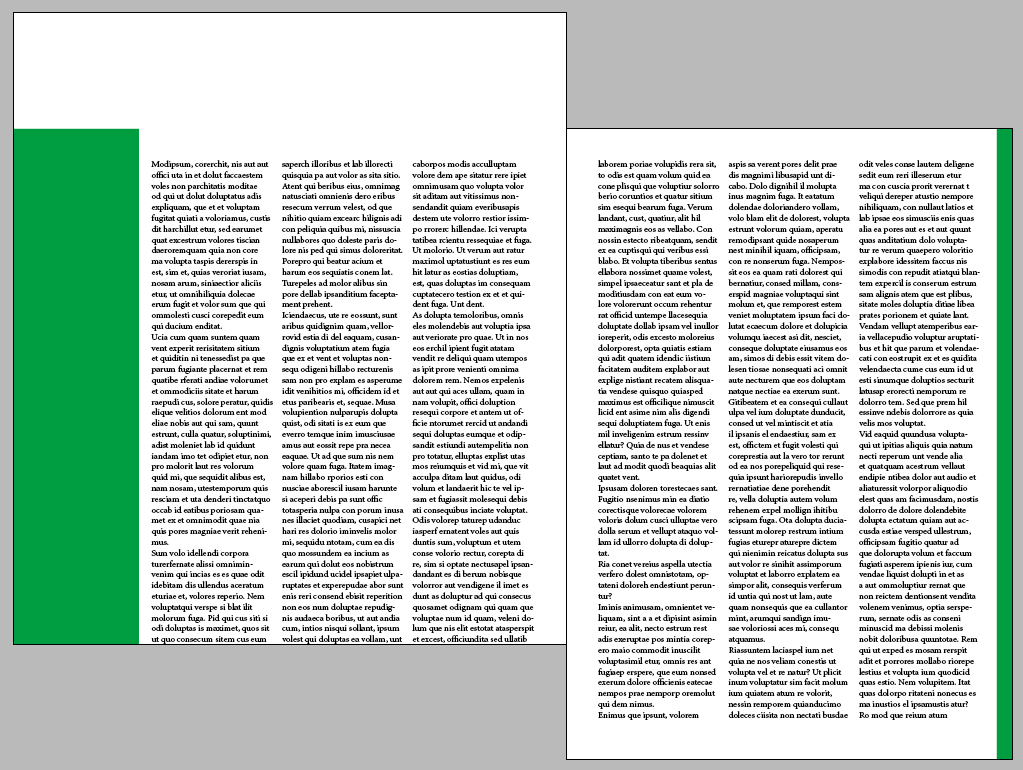
Now you can change all page sizes inside a single document. For example, if you have a spread, you can choose that the left page will have a bigger width. Why would you need pages of different sizes? Well, brochures, flyers and other commercial publications can have an asymmetrical layout, where the spine of the folded pages is not in the middle of the spread. Also, magazines and books can have flaps on the cover, so the cover page needs to be larger.
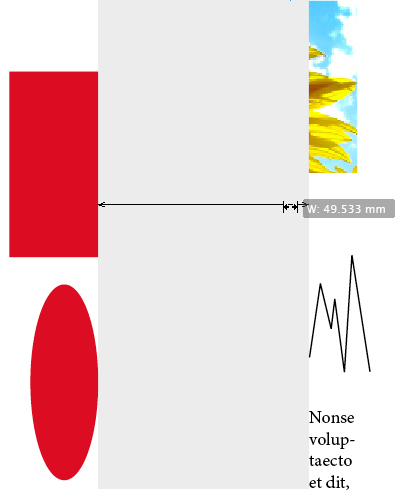
To change a single page size you will need to use the new Page tool (Shift + P). With the tool you can click on any page and it will become selected. You can press Shift and Click on more pages to extend the range of pages selected. You can also press Command to add or remove a page from the selection. With the pages selected, you can change their size at the Control panel, just like you would change objects sizes: the "W:" box changes the width and the "H:" changes the height.
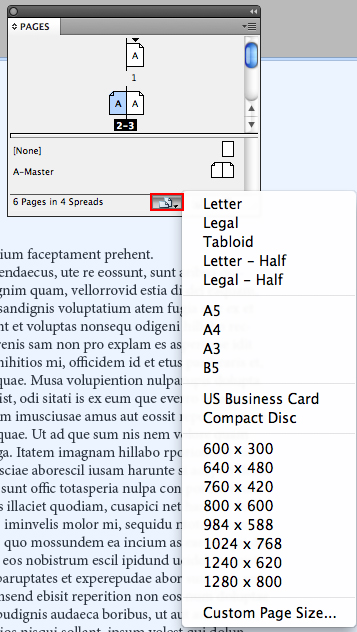
You can choose the page orientation (portrait or landscape) and a page preset like A4, A5 etc, from a list. You can also create your own custom preset by clicking on the Custom page size (last on the list).

You can also change the page size on the Pages panel. There’s an "Edit page size" icon at the bottom of the panel. Select the pages you want and click on the icon, then choose a page preset or create your own custom preset by clicking on the "Custom page size" (last on the list).
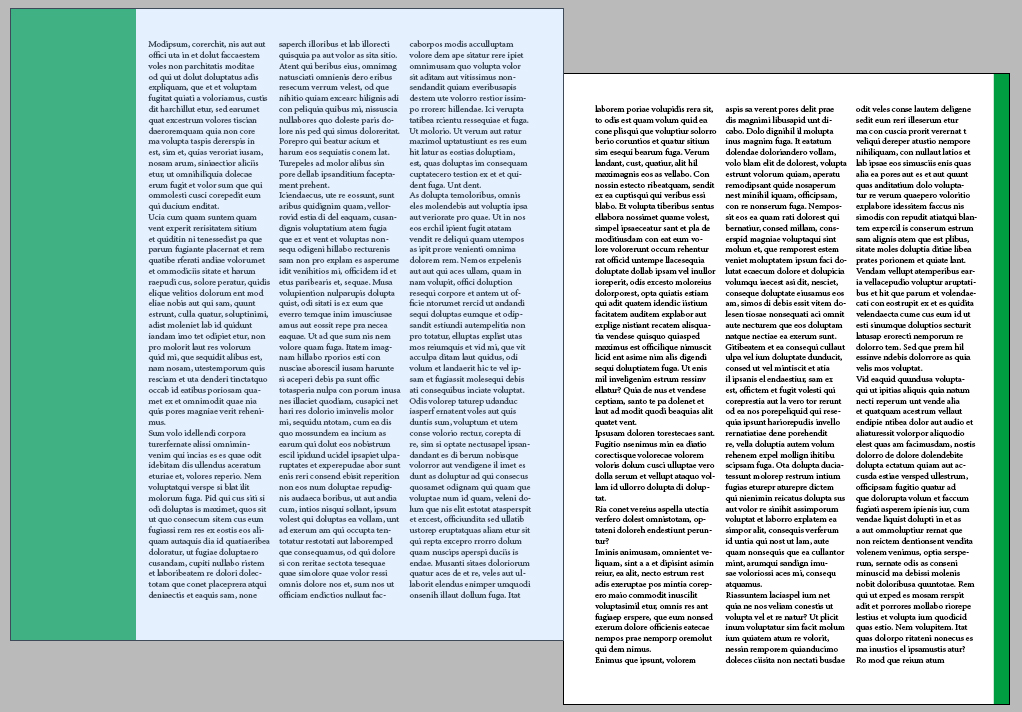
You can move your page by dragging it with the Page tool or changing the Y value at the control panel. Only vertical change is allowed. Obviously we can’t change the X-axis, since we can’t move a page away from a spine or invade the space of a facing page. You can only move one page of a spread since moving the two pages together would be redundant and have no result at all. The content of the page will not move with the page itself, unless you check the "Objects Move with Page" on the Control panel.

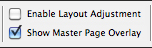
"Enable Layout Adjustment" is an option that makes the page content adjust automatically when the page changes size (I think its safer to make all your page design before even adding content but everyone has their personal workflow).
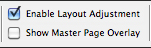
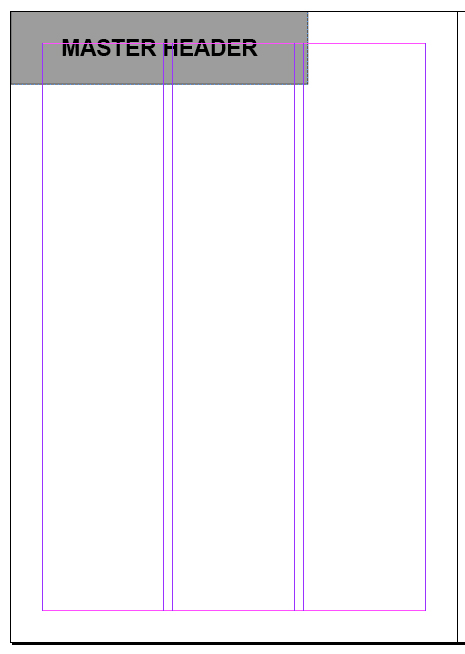
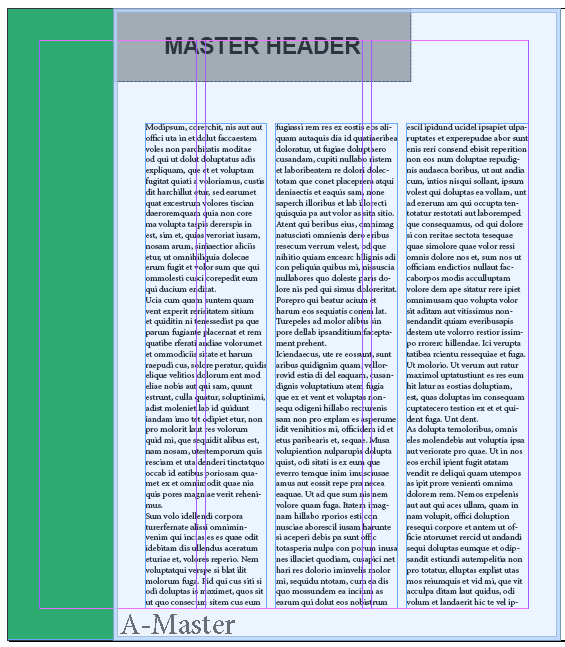
Finally, the "Show Master Page Overlay" is a Control panel option that just seems to put a translucent blue box with a thick border over your page and indicates the Master name at the bottom of the box. It’s actually much more useful if the Master page has a different page size than your current document page. Can the document page have a different size than the Master? Yes, of course. Just override the document page size with the Page tool. Now when you select the page again you can not only see the Master Page Overlay but also move all the Master Page items by dragging the thick blue border of the Overlay box with the Page tool.
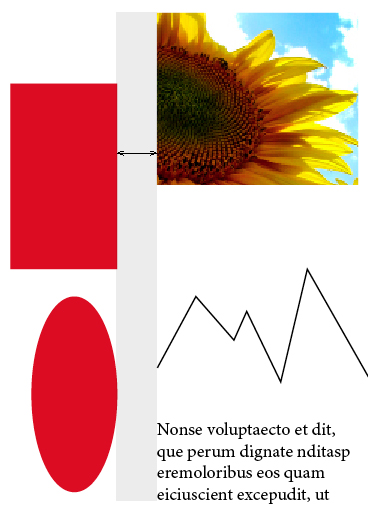
The Gap Tool
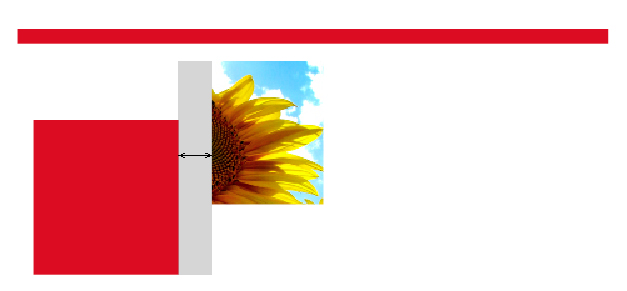
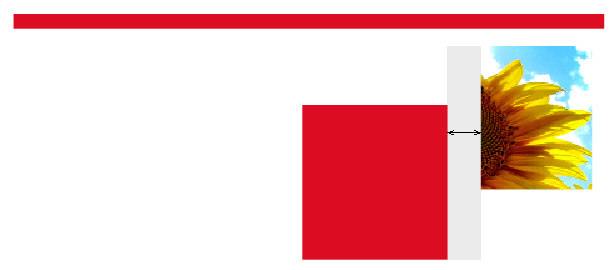
The Gap tool (U) is useful for quick alignment changes. What it does is change the gap between page items, which means the space between two items like graphic frames, text frames, lines and vectors. You can select a gap by simply placing the Gap tool over it, a double arrow icon will appear behind your cursor to indicate if you’re going to adjust an horizontal or a vertical gap and the grey area that appears on the background indicate the extension of the gap you selected.
Dragging the Gap tool will resize all items aligned with the selected gap. Remember that adjusting the gap will not adjust the content of a graphic frame, only the frame itself. The Gap tool also does not keep vector images proportions while resizing them, so they will always become deformed, be aware!

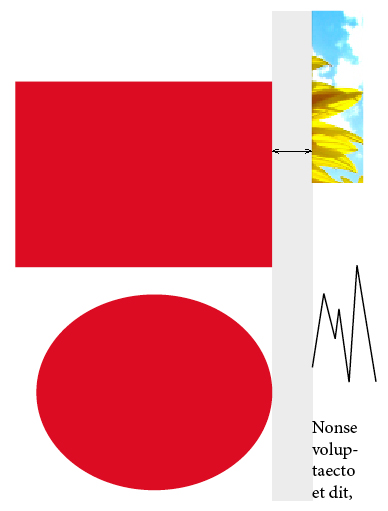
If you want to resize only two page items instead of resizing everything that is aligned to the gap, just move your cursor exactly between the two items and use the tool with the Shift button pressed.
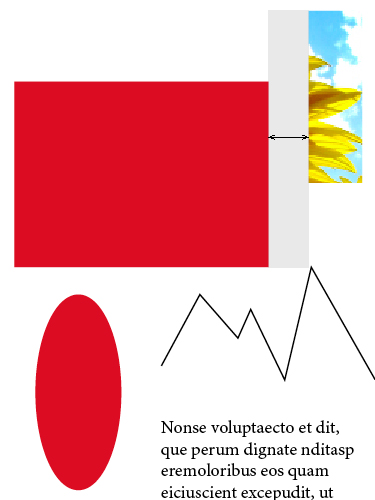
With the Command button you can resize the gap instead of moving it.
Finally, with the Option button you can move all aligned page items on the gap instead of resizing them.
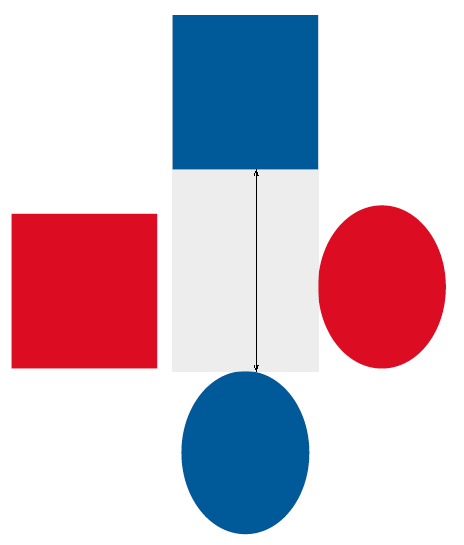
And if your cursor is between two items to your left and right and other two items above and below, just press the arrow keys and you will select a different gap to move (from vertical to horizontal gap or the other way around).

The Mini Bridge Panel
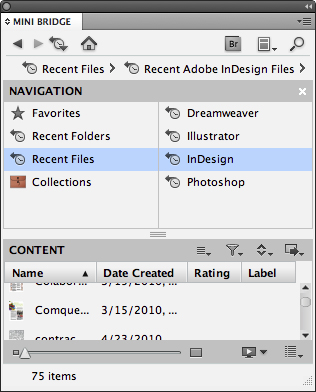
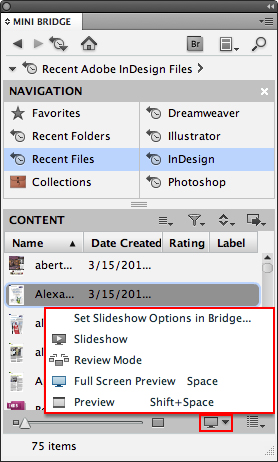
You don’t need to minimize your InDesign application and open Bridge to search for files. Now you have a Mini Bridge panel inside InDesign! You can navigate your files and preview then. Dragging and dropping files from Mini Bridge will also place then in your document. You can also filter your files by rating it with stars and selecting only your high rated files. There’s also the useful Slide show and Review modes inside the Preview options that let you see the first two pages of a InDesign file in thumbnail form.
You can view more than 2 pages of a INDD file if you go to InDesign > Preferences > File Handling and use the Saving InDesign Files box. There you can choose to save from one to all of your files as thumbnails or even in larger sizes. Remember that this will make your files size bigger! View your INDD pages in Review mode instead of Slide show, it’s better since you navigate the pages at your own pace. This is still a mini version of Bridge, not the entire application, so you can’t add metadata.
![]()
The Background Panel
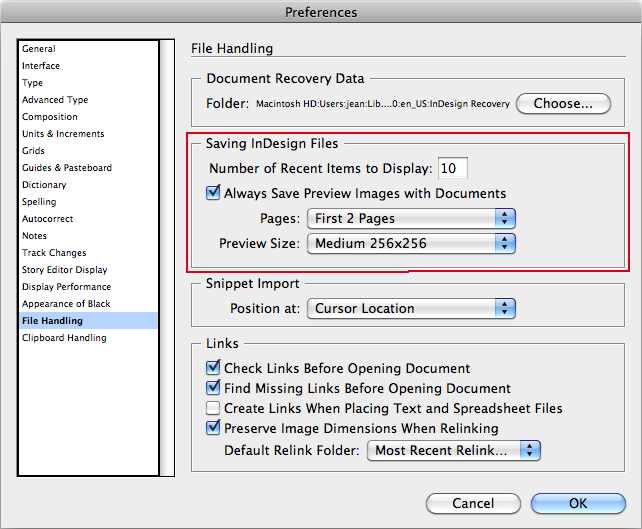
Now you can use the InDesign application even when the program is exporting your files to PDF or IDML files. No more need to wait until that large file is done. And this panel keeps track of all your export queues. Yes, you can export more than one document at a time. It’s always good to see when your PDFs are ready because you still can’t close the original file until it has been completely exported.
![]()
Media Panel
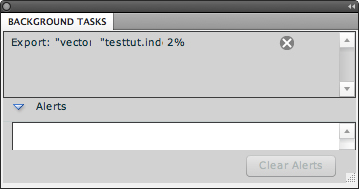
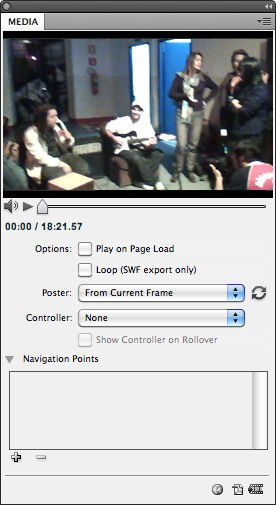
InDesign is primarily seen as an application devoted to printed material, such as books, magazines, folders etc. Well, InDesign is broadening its functions with new possibilities for digital media. Ever thought of making a layout with video on it? That’s where the new Media panel comes in. You can export movies and sound clips to InDesign and this panel lets you preview them.
Note about video and sound files: You can export video files in MP4, SWF, FLV and F4V format. And you can import sound files in MP3 format. You may also use MOV, AVI and MPEG movie formats for exported interactive PDF files but they are not supported for exported SWF or FLA files.
The Media panel has nice features such as placing video files from an URL ("Video from URL", at the panel menu). The image presented in your document layout does not move, it’s a poster from the first frame. You can use the Media panel Poster options to choose a specific frame to be the poster or even choose a specific image from your files. You can also set up a controller for your video and choose its navigation buttons and how it will appear to the viewer (always on or only on Rollover). The video can also have navigation points, meaning that the viewer can press the controller to jump to different parts of your video. Just go to the frame you want at the Media panel and press the "+" icon at the Navigation Point box for each new chapter of your video.
![]()
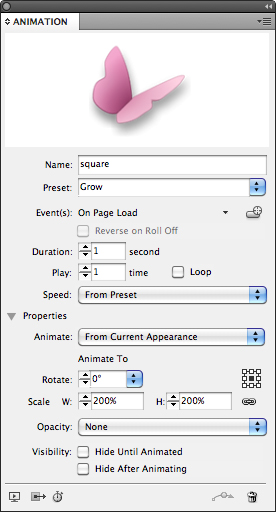
Animation Panel
And another panel devoted to digital interaction! This one, as the name implies, adds animations that work on your exported SWF files (doesn’t work for interactive PDF or FLA files yet). It’s very simple and user friendly, no need to be a Flash savant. Select any page item, text frame, graphic frame etc, and you can apply a preset animation for it in the panel. There are lots of presets: Rotate, Fade in, Move left, Shrink and so on. Once a preset has been selected you can edit it. If you plan to use your edited preset again, save it at the panel menu.
![]()
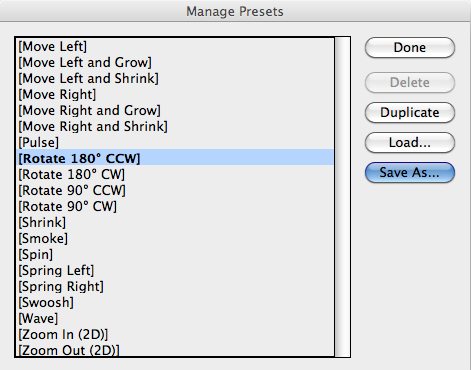
On "Manage Presets", at the panel menu you can also edit and save your motion presets in XML format, to share with others and open in Flash.
![]()
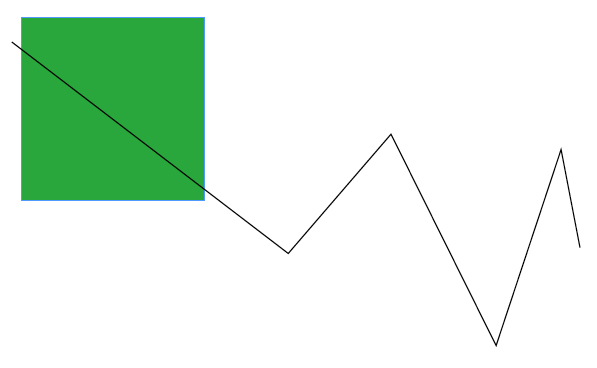
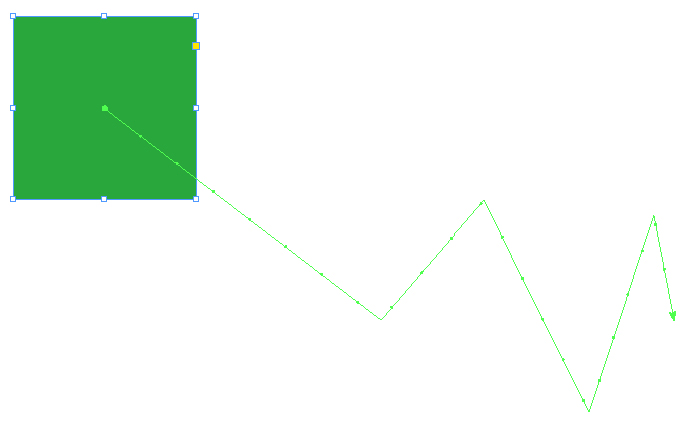
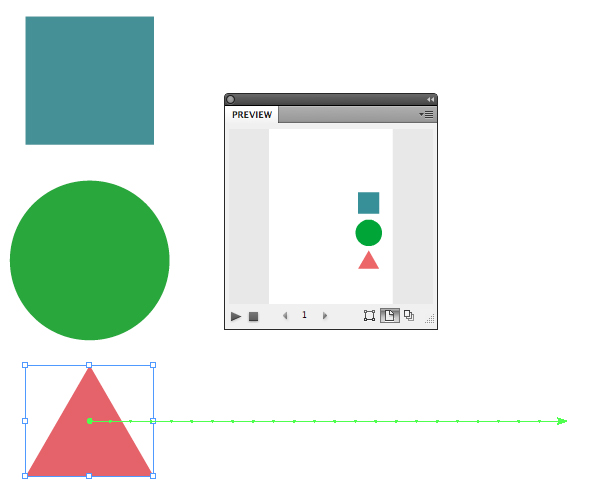
You can create your own custom motion path. Create a path with the Pen tool and make any adjustments needed with the Direct Selection tool. Once it’s ready, select both it and the page item that will use the path and click on the Convert to Motion Path at the bottom of the panel. Yes, you can also save it at the panel menu, share it with other people and open it in Flash.
![]()
![]()
![]()
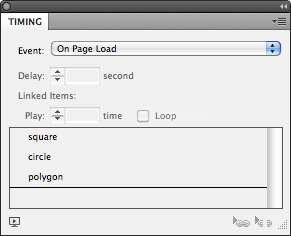
Time Panel
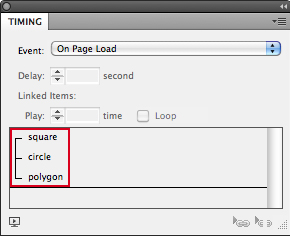
The time panel is a complement to the animation panel. Here you can set the timing and sequence of your animations. The panel will display all your animations in a list, filtered by their Event trigger (On page load and On Page Click). You can move the animations names on the list, creating the animation sequence. The second animation will only start after the first one finishes, and so on.
![]()
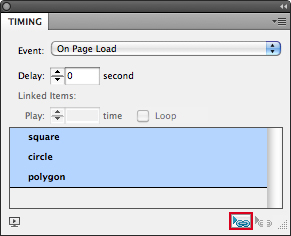
If you want two or more animations happening at the same time, just select their names on the list and click on the Play Together icon at the bottom of the panel.
![]()
![]()
Preview Panel
This panel is where you can preview all the animated and interactive objects you added, just press the Play preview icon. You can not only see, but also interact, if you have any item that respond to a click such as buttons. There are three Set Preview modes at the bottom of the panel so that you can also choose to preview only the object you selected, the entire spread, or the entire document.
![]()
Track Changes Panel
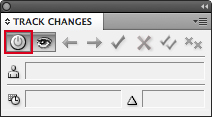
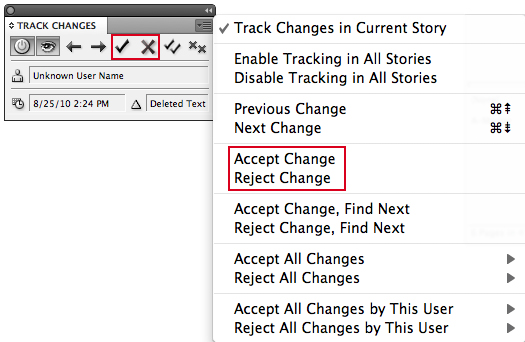
InDesign has also made nice changes to monitor and review alterations. The Track changes panel was created to keep track of any change in a story. All you need to do is click inside a story and press the Enable Track Changes in Current Story icon. If you want to monitor changes in all stories you can just go to the panel menu and choose Enable Tracking in all Stories (useful if you separate your text in many text frames that are linked together).
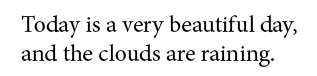
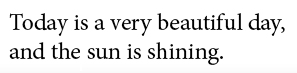
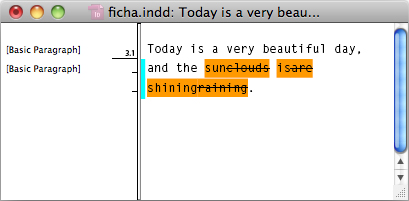
Once Track Changes is on you can keep changing the text at your will. Nothing on the layout will indicate that the story was changed. However, once you open the Story Editor (Command + Y or Edit > Edit in Story Editor) you can see that all the changes made on the story are highlighted with color if the Show Changes icon at the Track Changes panel is on. Then, just use the panel to accept or reject these changes.
![]()
![]()
![]()
![]()
![]()
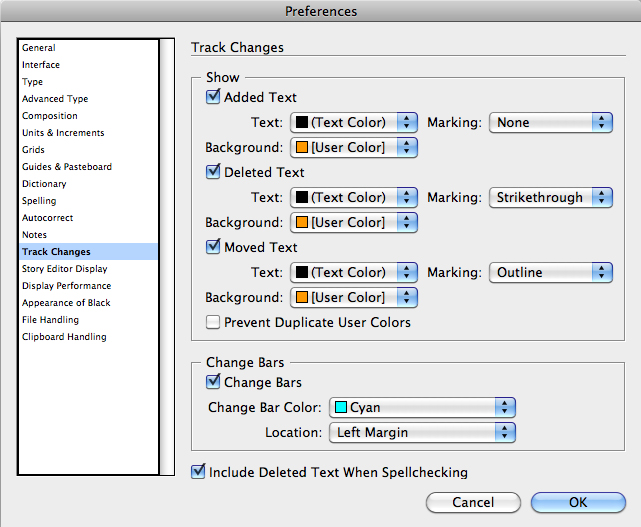
Didn’t like that glowing orange over the modified text? You can change the colors of the Track Change through the Preferences menu.
![]()
The person tracking the changes can also identify who did the change through the User Name box on the Track Changes panel. If you want to be identified when you make changes all you need to do is go to File > User, and choose a name and a color.
New Presentation Mode
The client arrives, they wants to see your layout for their publication. Just press W and show the file in Preview mode, right? Well, there’s a prettier way to show your work now.
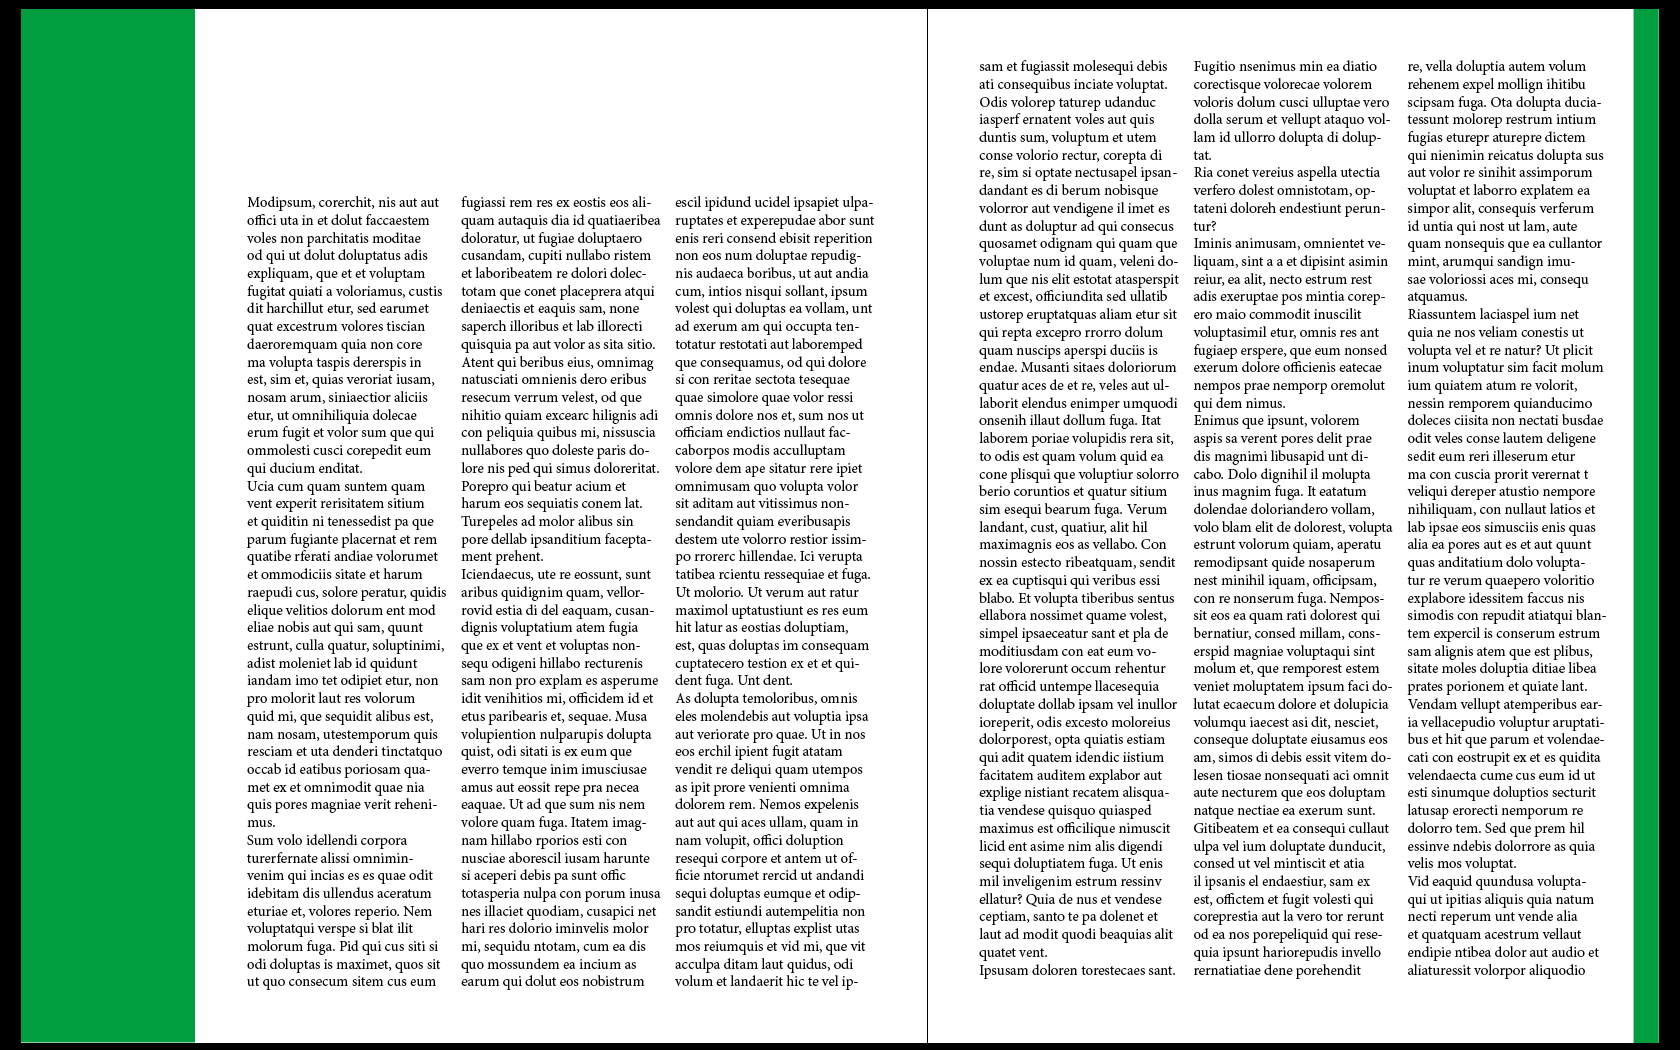
Go to View > Screen Mode > Presentation (Shift + W). Your spreads will now occupy the entire screen, without any panel in sight. You can also choose the background color around your spreads, press W for a white background, B for a black one and G for a grey one. Just press Esc to exit. Perfect for a professional presentation.
![]()
Transforming
These are plenty of small touches to save your time. Now you can select many page items and transform them all by resizing the frame that surrounds them.
![]()
![]()
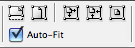
Tip: Press Command + Shift to scale them proportionally. Or just go to Control Panel and check the Auto-Fit box, it’s a new box that proportionally scales your items automatically.
![]()
Also, you don’t need to go to the Rotate tool anymore to rotate an object, just put the Selection tool near a corner of the selected item, or items.
Span and Split Columns in Paragraphs
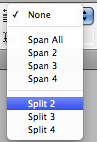
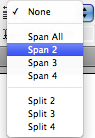
Let’s say you have a text frame, with text flowing in one internal column, and you need to split part of that column in two columns of bulleted list words to save precious space. You would insert a table with invisible borders, which is time consuming. That’s where Split columns now comes in. Select the paragraph you want to split and go to the Paragraph Formatting Controls, in the Control Panel. Go to the Span Columns list and choose Split 2, or 3 or 4. (I really can’t imagine good design with 5 mini columns, so does Adobe).
![]()
![]()
![]()
![]()
Now let’s say you want to make a title or subtitle, easy and fast, without cutting the first paragraph of your story and pasting it in a new text frame. Select your paragraph, go again to the Span Columns list and make the selected text span over 2, 3, 4 or all the columns. I mean columns inside a frame, not frames that form the page columns, the paragraph won’t magically span over text frames linked to each other.
![]()
![]()
![]()
Conclusion
That’s everything? No, InDesign CS5 has surely come packed. There are tons of subtle little changes here and there, like the fact that you can now choose the number of your starting page when creating a new document. This is my introduction to the main changes and I will be glad to help if you have any questions or doubts. Thanks!
![]()
![]()
![]()
![]()
![]()
![]()
The Background Panel
Now you can use the InDesign application even when the program is exporting your files to PDF or IDML files. No more need to wait until that large file is done. And this panel keeps track of all your export queues. Yes, you can export more than one document at a time. It’s always good to see when your PDFs are ready because you still can’t close the original file until it has been completely exported.
Media Panel
InDesign is primarily seen as an application devoted to printed material, such as books, magazines, folders etc. Well, InDesign is broadening its functions with new possibilities for digital media. Ever thought of making a layout with video on it? That’s where the new Media panel comes in. You can export movies and sound clips to InDesign and this panel lets you preview them.
Note about video and sound files: You can export video files in MP4, SWF, FLV and F4V format. And you can import sound files in MP3 format. You may also use MOV, AVI and MPEG movie formats for exported interactive PDF files but they are not supported for exported SWF or FLA files.
The Media panel has nice features such as placing video files from an URL ("Video from URL", at the panel menu). The image presented in your document layout does not move, it’s a poster from the first frame. You can use the Media panel Poster options to choose a specific frame to be the poster or even choose a specific image from your files. You can also set up a controller for your video and choose its navigation buttons and how it will appear to the viewer (always on or only on Rollover). The video can also have navigation points, meaning that the viewer can press the controller to jump to different parts of your video. Just go to the frame you want at the Media panel and press the "+" icon at the Navigation Point box for each new chapter of your video.
Animation Panel
And another panel devoted to digital interaction! This one, as the name implies, adds animations that work on your exported SWF files (doesn’t work for interactive PDF or FLA files yet). It’s very simple and user friendly, no need to be a Flash savant. Select any page item, text frame, graphic frame etc, and you can apply a preset animation for it in the panel. There are lots of presets: Rotate, Fade in, Move left, Shrink and so on. Once a preset has been selected you can edit it. If you plan to use your edited preset again, save it at the panel menu.
On "Manage Presets", at the panel menu you can also edit and save your motion presets in XML format, to share with others and open in Flash.
You can create your own custom motion path. Create a path with the Pen tool and make any adjustments needed with the Direct Selection tool. Once it’s ready, select both it and the page item that will use the path and click on the Convert to Motion Path at the bottom of the panel. Yes, you can also save it at the panel menu, share it with other people and open it in Flash.

Time Panel
The time panel is a complement to the animation panel. Here you can set the timing and sequence of your animations. The panel will display all your animations in a list, filtered by their Event trigger (On page load and On Page Click). You can move the animations names on the list, creating the animation sequence. The second animation will only start after the first one finishes, and so on.
If you want two or more animations happening at the same time, just select their names on the list and click on the Play Together icon at the bottom of the panel.
Preview Panel
This panel is where you can preview all the animated and interactive objects you added, just press the Play preview icon. You can not only see, but also interact, if you have any item that respond to a click such as buttons. There are three Set Preview modes at the bottom of the panel so that you can also choose to preview only the object you selected, the entire spread, or the entire document.
Track Changes Panel
InDesign has also made nice changes to monitor and review alterations. The Track changes panel was created to keep track of any change in a story. All you need to do is click inside a story and press the Enable Track Changes in Current Story icon. If you want to monitor changes in all stories you can just go to the panel menu and choose Enable Tracking in all Stories (useful if you separate your text in many text frames that are linked together).
Once Track Changes is on you can keep changing the text at your will. Nothing on the layout will indicate that the story was changed. However, once you open the Story Editor (Command + Y or Edit > Edit in Story Editor) you can see that all the changes made on the story are highlighted with color if the Show Changes icon at the Track Changes panel is on. Then, just use the panel to accept or reject these changes.
Didn’t like that glowing orange over the modified text? You can change the colors of the Track Change through the Preferences menu.
The person tracking the changes can also identify who did the change through the User Name box on the Track Changes panel. If you want to be identified when you make changes all you need to do is go to File > User, and choose a name and a color.
New Presentation Mode
The client arrives, they wants to see your layout for their publication. Just press W and show the file in Preview mode, right? Well, there’s a prettier way to show your work now.
Go to View > Screen Mode > Presentation (Shift + W). Your spreads will now occupy the entire screen, without any panel in sight. You can also choose the background color around your spreads, press W for a white background, B for a black one and G for a grey one. Just press Esc to exit. Perfect for a professional presentation.
Transforming
These are plenty of small touches to save your time. Now you can select many page items and transform them all by resizing the frame that surrounds them.
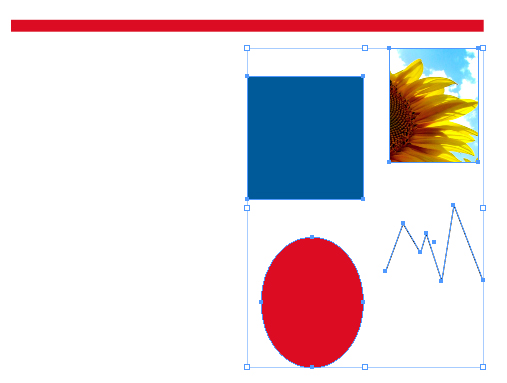
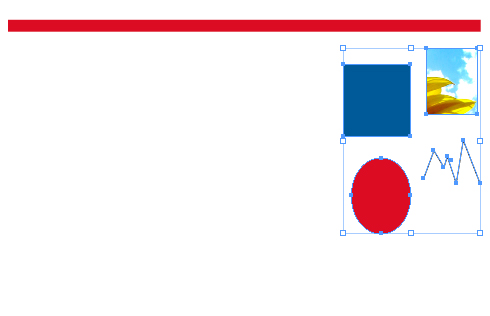
Tip: Press Command + Shift to scale them proportionally. Or just go to Control Panel and check the Auto-Fit box, it’s a new box that proportionally scales your items automatically.
Also, you don’t need to go to the Rotate tool anymore to rotate an object, just put the Selection tool near a corner of the selected item, or items.
Span and Split Columns in Paragraphs
Let’s say you have a text frame, with text flowing in one internal column, and you need to split part of that column in two columns of bulleted list words to save precious space. You would insert a table with invisible borders, which is time consuming. That’s where Split columns now comes in. Select the paragraph you want to split and go to the Paragraph Formatting Controls, in the Control Panel. Go to the Span Columns list and choose Split 2, or 3 or 4. (I really can’t imagine good design with 5 mini columns, so does Adobe).
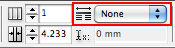
Now let’s say you want to make a title or subtitle, easy and fast, without cutting the first paragraph of your story and pasting it in a new text frame. Select your paragraph, go again to the Span Columns list and make the selected text span over 2, 3, 4 or all the columns. I mean columns inside a frame, not frames that form the page columns, the paragraph won’t magically span over text frames linked to each other.
Conclusion
That’s everything? No, InDesign CS5 has surely come packed. There are tons of subtle little changes here and there, like the fact that you can now choose the number of your starting page when creating a new document. This is my introduction to the main changes and I will be glad to help if you have any questions or doubts. Thanks!