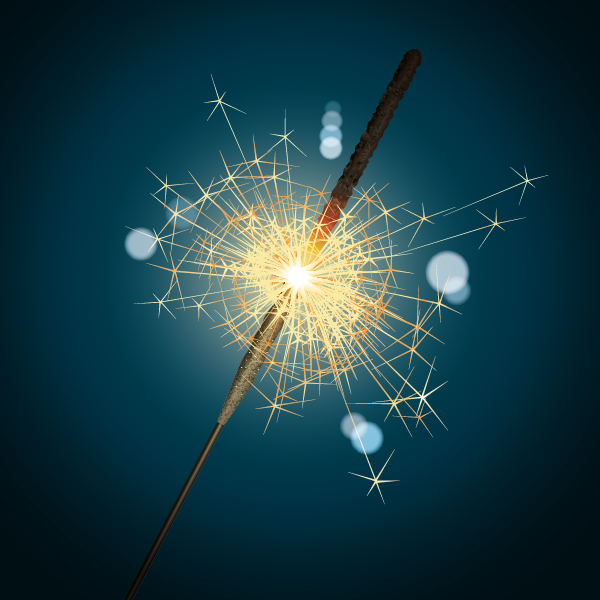
In this tutorial we will create a photorealistic image of a sparkler. We will learn how to create vector textures using the standard bitmap filters. We’ll create complex lighting from two light sources using gradient fills, Blending Modes, and Clipping Masks. Let’s get started!
Step 1: Sparkler Handle
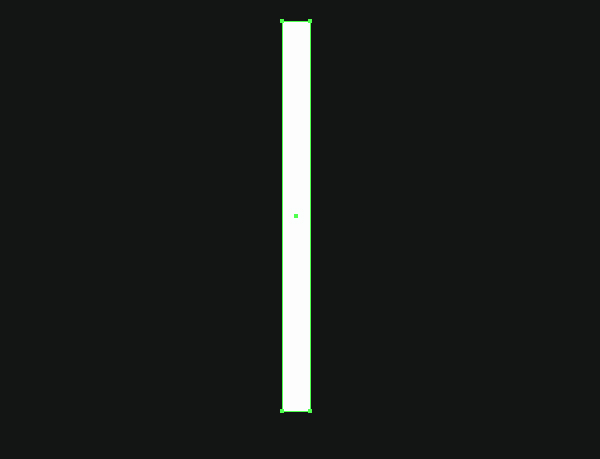
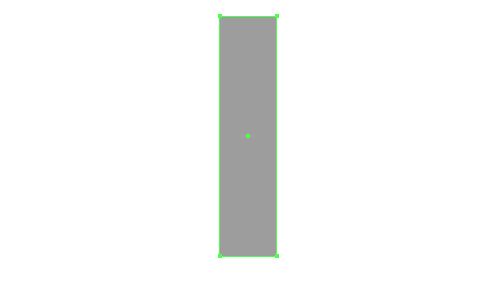
Start by creating the handle of the sparkler. Take the Rectangle Tool (M) and create a rectangle.
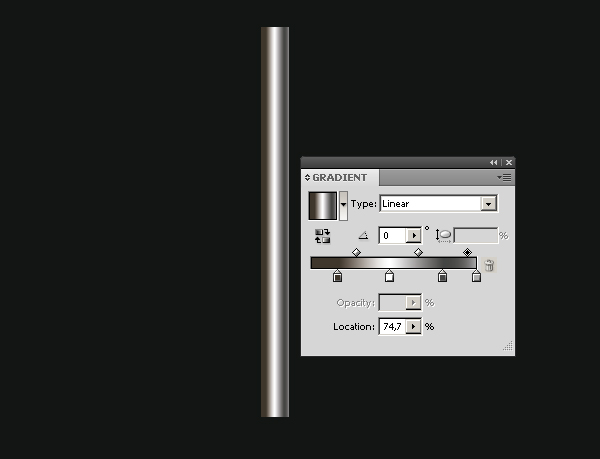
We will create the sparkler on a black background in order to select the best colors right away. The background will be replaced at the end of the tutorial. Fill the shape of the handle with a linear gradient consisting of shades of gray. The main thing at this step is to reproduce the shine of the metal cylindrical surface of the handle.
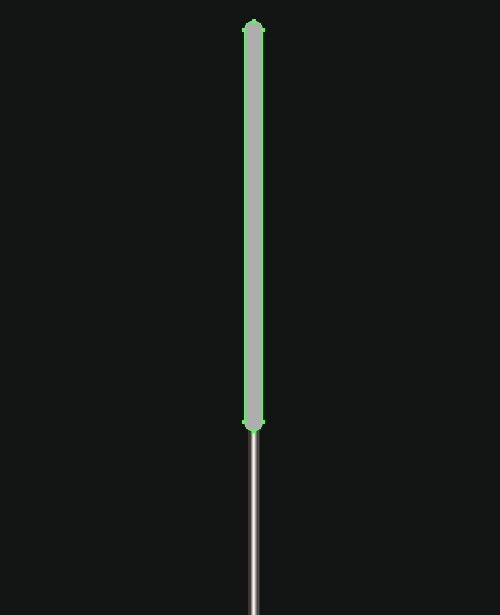
Step 2: Round Sparkler Cap
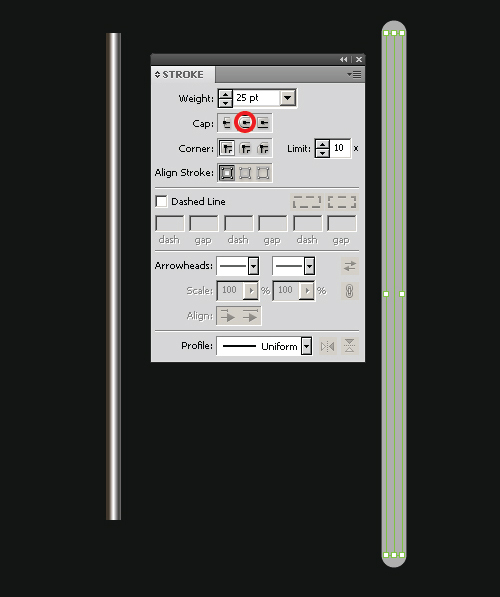
Now create the shape of the burning part of the sparkler. Take the Pen Tool (P) and create a vertical straight line, set 25 pixels width of this line in the Stroke palette and turn on the Round Cap mode.
Combine parts of the burning fire area and align them vertically with the help of the Align palette. Transform a straight line which corresponds to the shape of the burning piece into an object. To do this, select it, and go to Object > Expand.
Step 3: Form the Burn Area
Take the Direct Selection Tool (A) and move the lower point of the upper part of the sparkler straight down. Now take the Scissors Tool (C) and cut apart the upper shape at the points of its intersection with the handle.
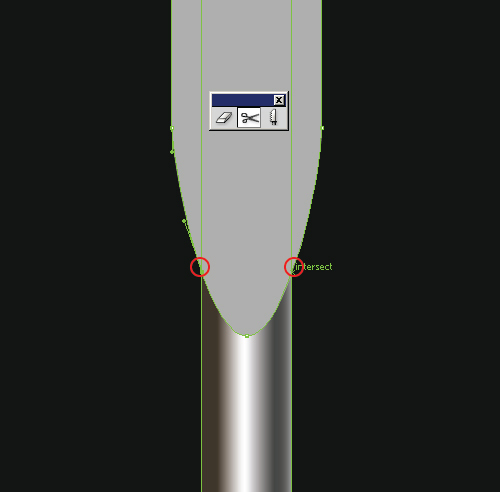
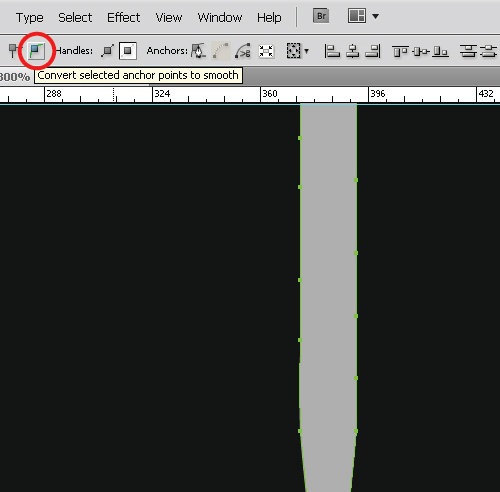
Remove the lower part of the upper shape, select the upper shape, take the Pen Tool (P) and join together the points A and B.

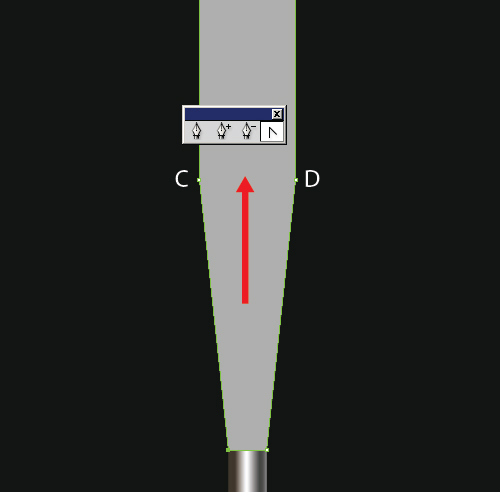
Select the points C and D with the help of the Direct Selection Tool (A) or the Lasso Tool (Q) and move them upward. Convert these points from smooth to angular ones using the Convert Anchor Point Tool.
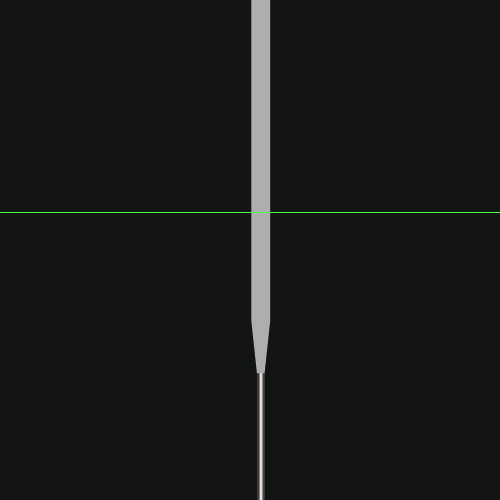
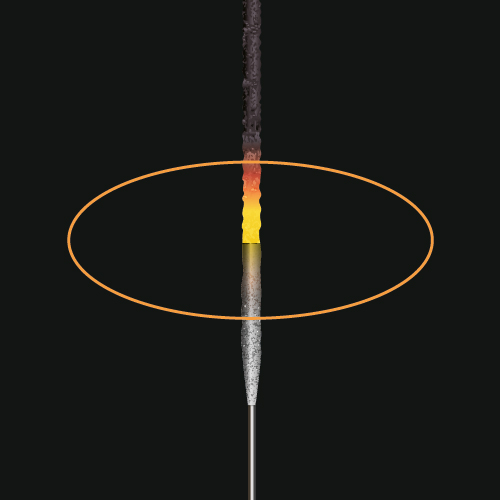
Step 4: Heading Text
Create a vertical guide that will conditionally divide the sparkler on the burnt and unburned pieces.
Select the upper part of the sparkler, take the Pen Tool (P) and add a few anchor points to the unburned piece of the sparkler. Now convert the created points to smooth ones by pressing the corresponding button on the upper panel.
Take the Direct Selection Tool (A) and move the created points to achieve the results shown in the figure below.
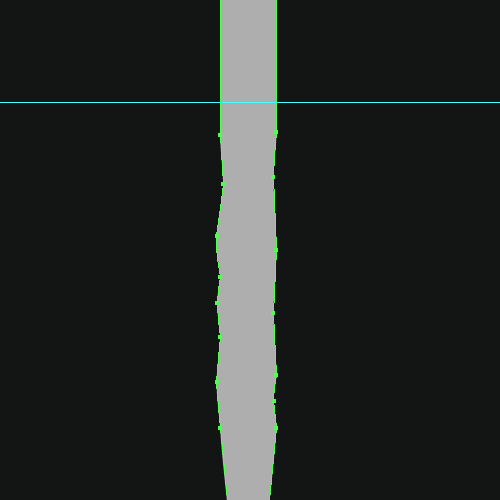
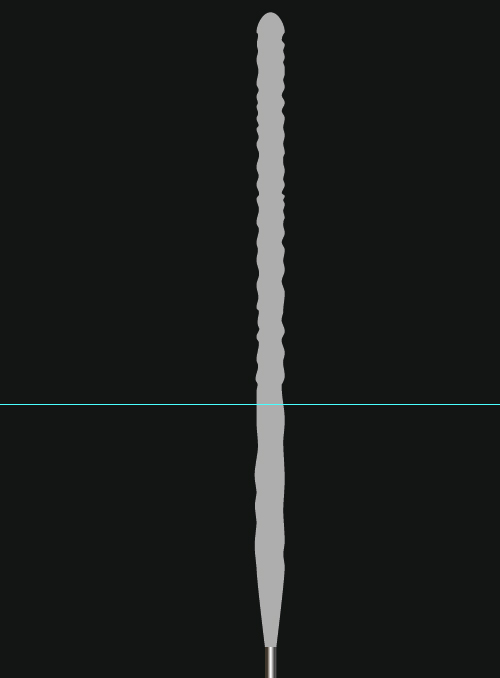
Apply the same technique to the burnt piece of the sparkler. We created more anchor points here and placed them thicker than on the lower part.
Step 5: Color the Burning Part
Fill the shape of the burning part with a linear gradient.
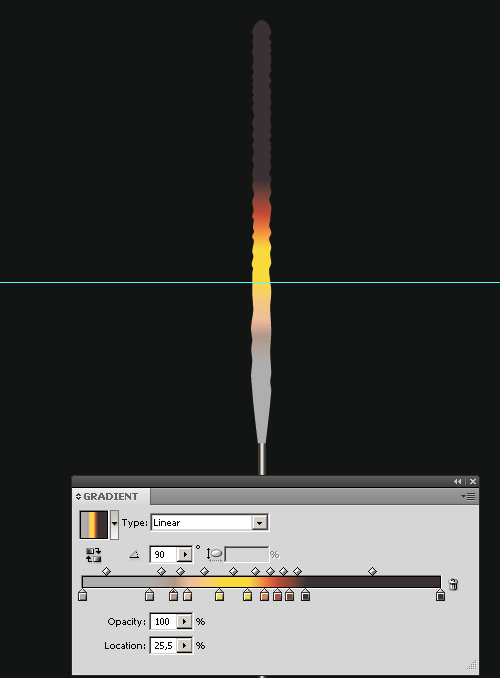
Gradients should reproduce the temperature of the burnt piece of the sparkler. At the burning spot the color of the sparkler is bright yellow, as far as it cools down the color changes to red and finally becomes almost black after cooling down. The color of the sparkler stays gray at the unburned piece.
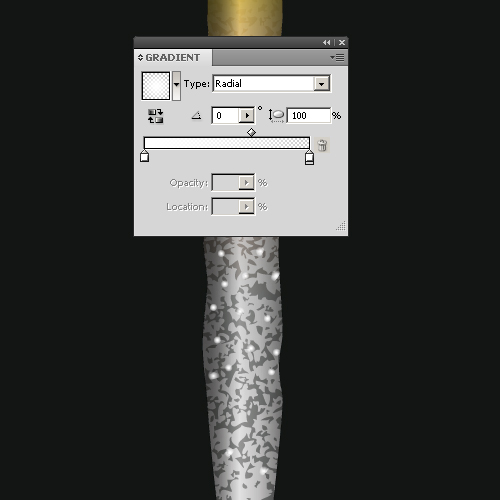
Step 6: Create the Sparkler Texture
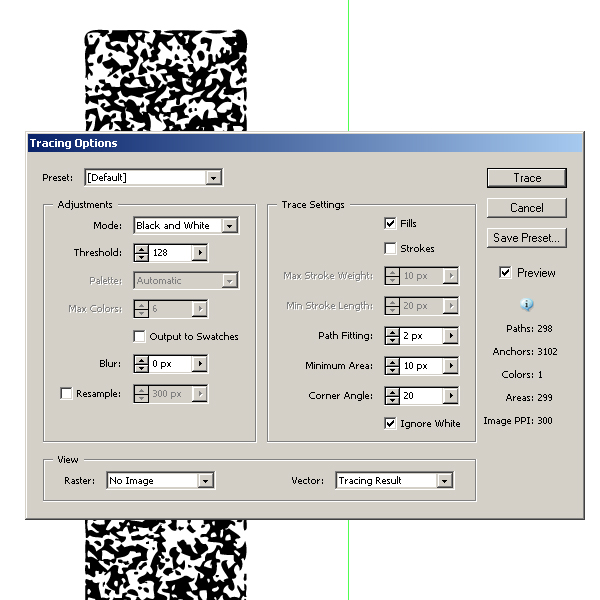
Create the texture on the burnt part of the sparkler. Create a rectangle of gray color.
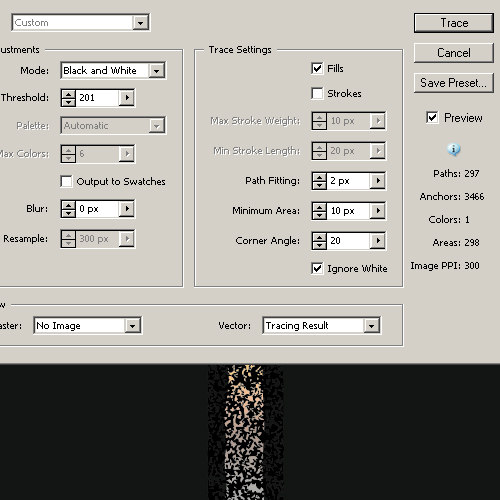
Keep the rectangle selected, go to Effect > Artistic > Sponge and set the following values: Brush Size of 2; Definition at 12; and Smoothness at 5. After this filter is applied, we have a raster object, transform it into a vector one. Select the object, and go to Object > Live Trace > Tracing Options … and set the values shown in the figure below.
Step 7: Placing the Burning Texture
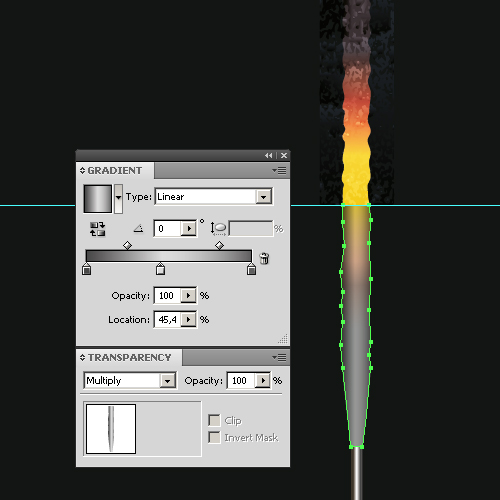
Place the vector texture over the burning part of the sparkler (above the horizontal guide) and change its size so that it covers all the burnt part of the sparkler. Fill the texture with a linear gradient with shades of gray and set the Overlay Blending Mode in the Transparency palette.
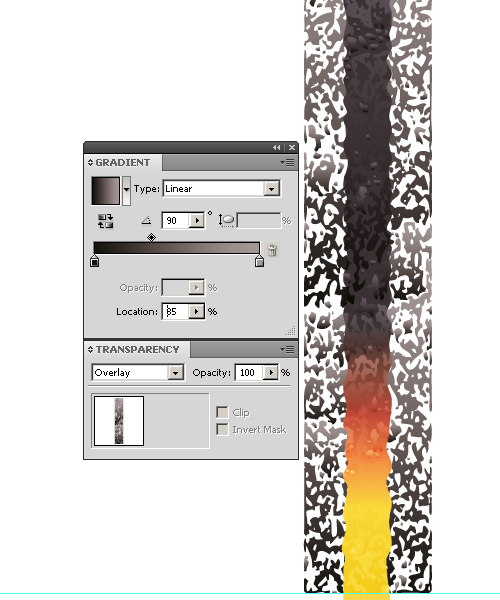
The gradient was applied to each element of the texture, if you are not satisfied with the result, select the necessary elements of texture using the Direct Selection Tool (A), then take the Gradient Tool (G) and adjust the gradient so as you like. The texture is rather large, so it’s not going to be a difficult task.
Step 8: Creating Volume
Now we’ll create the volume on the unburned piece of the sparkler. Copy the shape of the sparkler and paste it in front. Remove the upper part of the shape which is located above the horizontal guide, using the technique described in step 3. Fill the shape with linear a gradient with gray shades and set the Multiply Blending Mode in the Transparency palette.
Step 9: More Texture
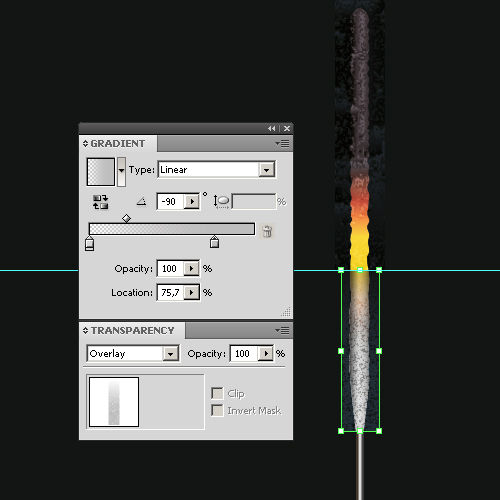
Create another texture that will be located above the unburned part of the sparkler. The technique of its creation is the same as in step 6. The parameters of the Sponge filter will be different: set the Brush Size to 0; Definition to 12; and Smoothness to 2, therefore the texture should have a smaller grain. Tracing parameters are shown in the figure below.
Step 10: Texture Placement
Fill the texture with a vertical linear gradient that goes from gray to gray with a Transparency of 0%. The further the texture of the place of burning is, the sharper it will look. Set the Overlay in the Transparency palette.
Step 11: Texture Masking
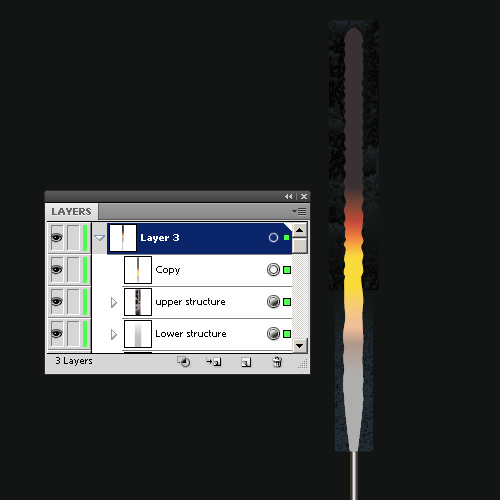
The texture should not overhang over the sparkler shape. Hide protruding parts of the upper and lower textures. Copy the sparkler shape and paste it above all the objects. Select the upper shape of the sparkler and both textures, now go to Object > Clipping Mask > Make.
Step 12: Adding Metallic Shine
The unburned piece of the sparkler shine reflecting the light. Create a few circles on the surface of the unburned side and fill them with radial gradients that go from white to white with an Opacity of 0%.
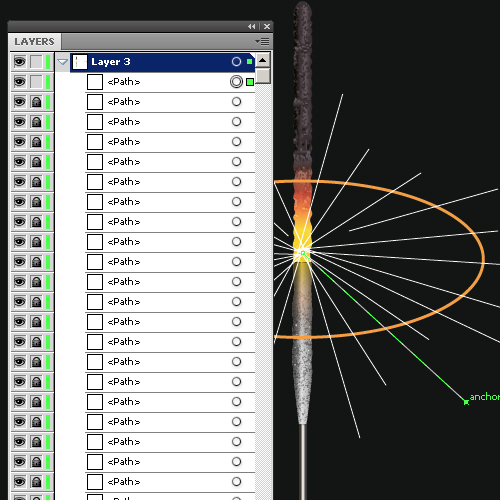
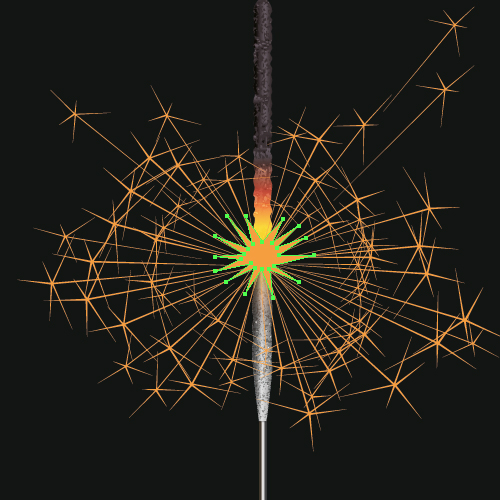
Step 13: Creating Sparks
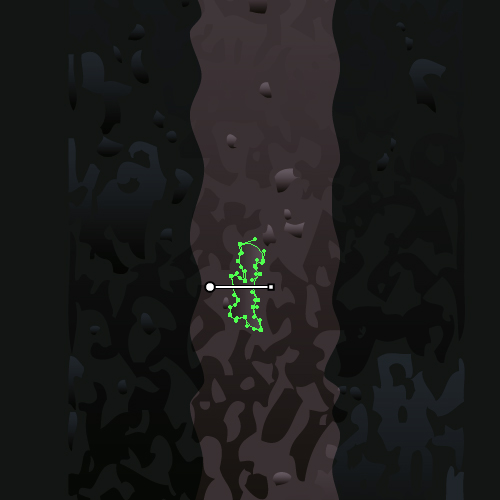
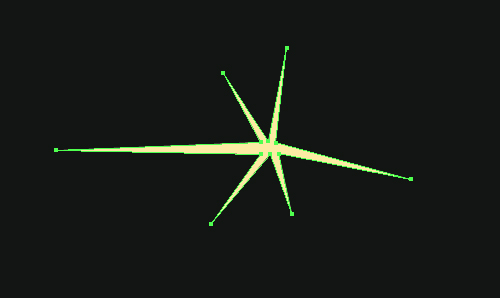
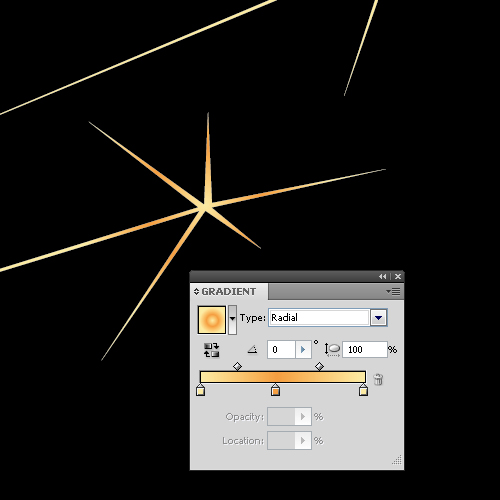
Now we’ll proceed to creating sparks. Take the Pen Tool (P) and create the shape of a spark, fill this shape with an orange color.
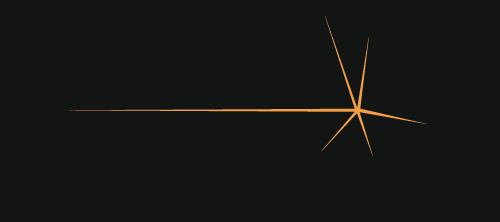
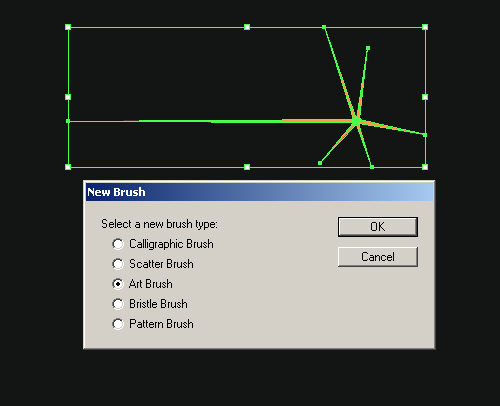
Drag the created shape to the Brushes palette, choose the Art Brush in the open dialogue box.
In the Art Brush Options window, we can see that the central line of the brush does not coincide with the long ray of the spark.
It is not correct. Hit the Cancel button. Change the shape of a spark so that the long ray could pass through the center of the spark.
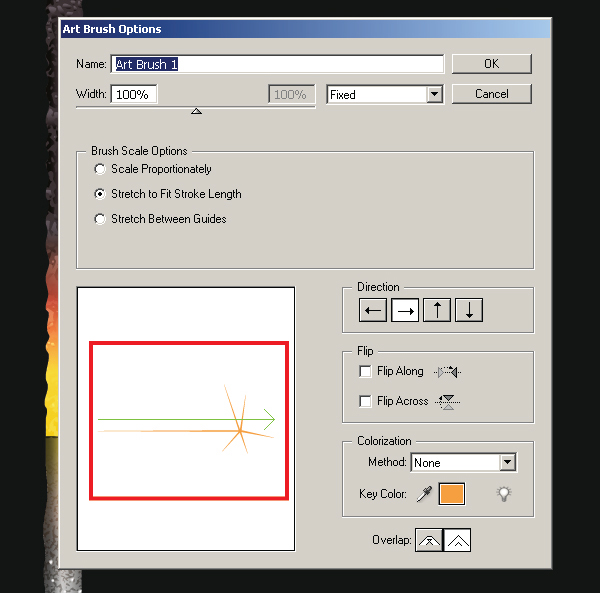
Now create the Art Brush.

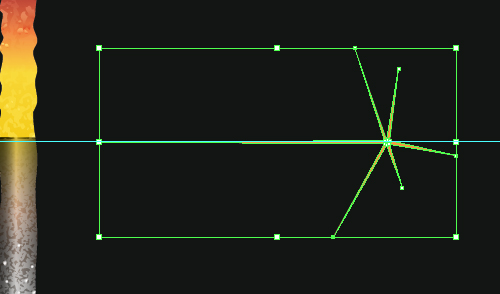
Step 14: Brushing Sparks
Most of the sparks will be located in horizontal plane in regard to the sparkler. I created an additional ellipse which determines this plane. After the bunch of sparks are created, this ellipse must be removed.
Take the Pen Tool (P) and create plenty of straight lines coming from the burning center of the sparkler. Select these lines and apply the created brush to them.
You can vary the size of sparks by changing the line width in the Stroke palette.
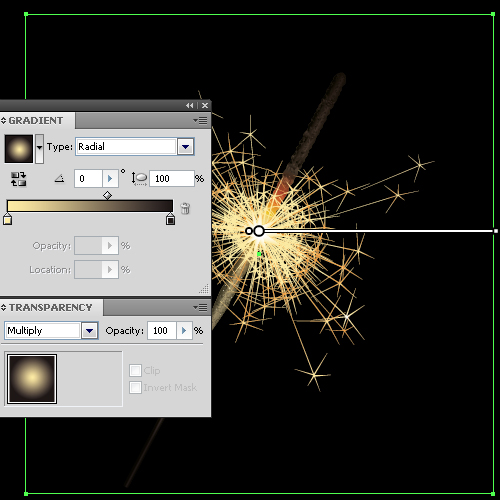
Step 15: Make a Flash Point
Now create a flash at the burning spot. Take the Pen Tool (P) and create the shape shown in the figure below, fill the shape with an orange color.
Create another shape smaller than the former one and fill it with yellow color.
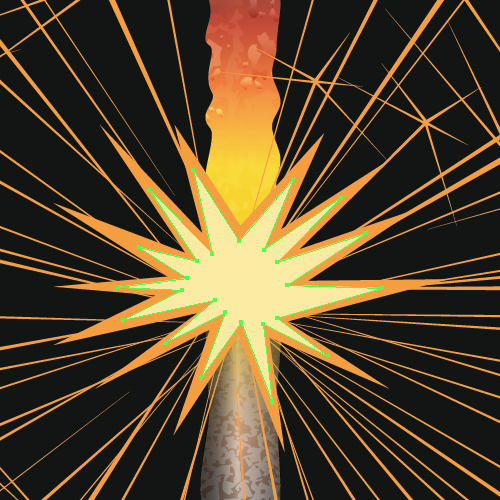
Take the Ellipse Tool (L) and create a circle of white color in the center of burning.
Select the circle and the yellow shape, now go to Object > Blend > Make.
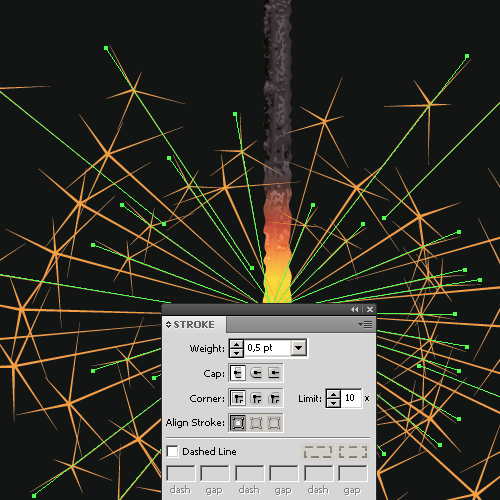
Step 16: Creating a Bunch of Sparks
Using the technique described in steps 13 and 14, create a bunch of sparks of yellow color.

Select the whole bunch of yellow and orange sparks, and go to Object > Expand Appearance. In my opinion, orange sparks look too flat, so I replaced the solid fill with radial gradient.
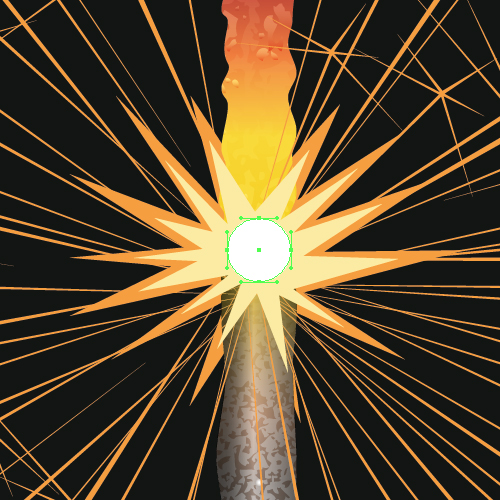
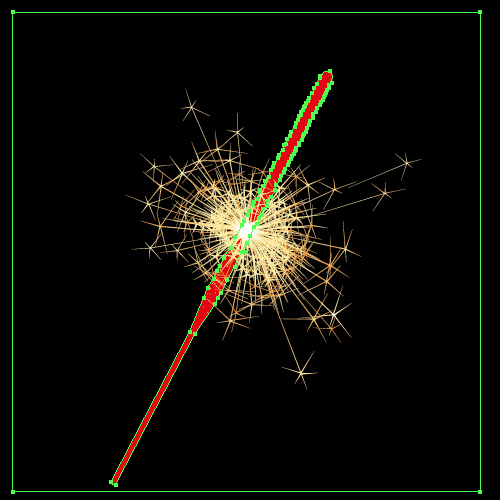
Step 17: Consider the Light Sources
Select all the elements of the sparkler and turn them at a certain angle. Take a critical look at our artwork. What’s wrong here? The fact is that the sparkler is always illuminated by two light sources at least – from the outside one (covers evenly the entire sparkler) and from the flash on the sparkler itself which illuminates it unevenly.
The sparkler is now illuminated only by an external source of light. Create the illumination from the flash on the sparkler. Take the Rectangle Tool (M) and create a rectangle so that it could cover the entire sparkler.
Place the underlayer with a rectangle so that it lies under the bunch of sparks and over the sparkler. Fill this rectangle with a radial gradient that goes from yellow to a black color. Now set the Multiply Blending Mode in the Transparency palette.
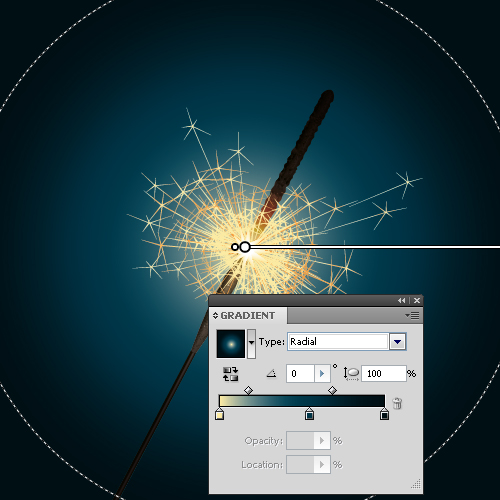
The center of the radial gradient should be located at the burning area. This can be adjusted with the Gradient Tool (G).
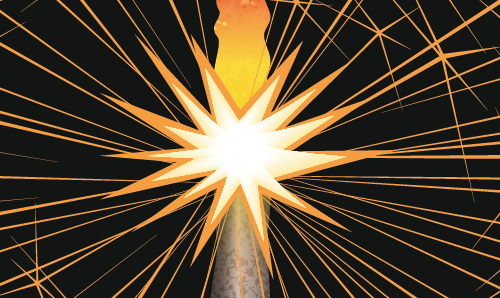
Step 18: Clipping Mask
Copy the shape of the sparkler (handle and burning piece) and paste it in front so that these shapes were located above the rectangle created in the previous step.
Unite the shape of the burning piece and the handle by pressing the Unite button from the Pathfinder palette. Select the rectangle and shape of the sparkler, and go to Object > Clipping Mask > Make.
Step 19: Illumination
The sparkler illuminates not itself only, but also the space around it. So I replaced the black background with a radial gradient, the center of which coincides with the center of burning.
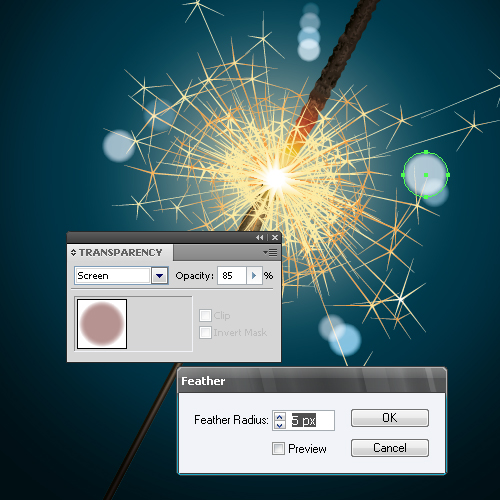
Step 20: Optical Circles
Rays of light passing through the optical system of a camera create plenty of circles. Create a few circles of different colors and set the Screen Blending Mode and another Opacity in the Transparency palette. Select the circles, and go to Effect > Stylize > Feather, set the value of radius – 5 px in the dialog box.
Conclusion
I hope you’ve enjoyed this tut. Now you can decorate greeting cards with sparklers you’ve created yourself.