Nineties grunge was an explosive era in American culture, filled with the sounds of punk rock, heavy metal, and electric guitars. In this tutorial, learn how to create a 90s-inspired grunge photo effect in Adobe Photoshop.
Tutorial Assets
The following assets were used during the production of this tutorial:
1. Create the Background
Step 1
Open the Watercolor stock in Photoshop. Go to Image > Image Rotate > 90 Degrees Clockwise to turn the stock from a landscape to a portrait orientation.

Step 2
This watercolor image will serve as our background, so let's desaturate it a bit. Select the layer and go to Image > Adjustments > Hue and Saturation and lower the Saturation to -100 to turn the photo black and white. Use the Move Tool (V) to lower the stock and show a peek of the white background underneath.

Step 3
Now go to the bottom of your Layers panel and select the New Adjustment Layer for Posterize. Set the Levels to 8 for a nice grunge effect.

Step 4
Now create another New Adjustment Layer, this time for a Gradient. Create a Linear Gradient that goes from a dark red color #901026 to white. When you're finished, set the Layer Blend Mode to Soft Light to apply the gradient to the grunge background.

2. Manipulate the Subject
Step 1
Open the stock of your Rocker into Photoshop and use the Magnetic Lasso Tool (L) to create a rough selection around the person. Copy and Paste the rocker on top of the grunge background layers.

Step 2
Create a New Layer underneath your subject. Use the Polygonal Lasso Tool (L) to create a cutout shape behind him with rough edges. Fill the shape with white using the Paint Bucket Tool (G) when you're finished.

Step 3
To add some grunge to your subject, we'll need a filter. Select the Rocker layer and go to Filter > Filter Gallery > Artistic > Film Grain, and add the following settings:
- Grain: 0
- Highlight Area: 5
- Intensity: 10

The first pass of this filter allowed us to create more contrast and intensity. Now go to the same Film Grain filter again and apply a slight grain with the following settings:
- Grain: 7
- Highlight Area: 3
- Intensity: 3

3. Colorize the Subject
Step 1
Let's add some color. Right-click and select the Blending Options for your subject's layer. Create a shiny copper-like Linear Gradient Overlay with the following settings, making sure to set the Blend Mode to Overlay so that it colorizes your subject.


Step 2
To tie in the red from the background, create a New Layer and set the Layer Blend Mode to Color. Right-click to set the layer as a Clipping Mask to your subject and use a Hard Round Brush to paint bright red #d14456 all over his t-shirt.

Right-click to select the Blending Options for the Red layer. To make the color look better on his shirt, create a transparent to black Linear Gradient Overlay with the following settings.

Step 3
Bump up the intensity of this effect, by setting a New Adjustment Layer of Levels as a Clipping Mask to your subject. Adjust the RGB Channel with the following settings:

4. Finishing Touches
Step 1
Now that the base of our grunge effect is complete, let's add some finishing touches. First open your Splatter Reference in Photoshop. Select it using the Rectangular Marquee Tool (M) and go to Edit > Define Brush Preset to create your own brush. Feel free to also use different splatter brushes from Envato Market.

Step 2
Use the splatter brush you created to add some splatter onto your effect. First select the Red layer and paint some splatter on his hair using the same color from before. Then create a New Layer underneath your subject and paint a white splatter in the bottom left corner.

Step 3
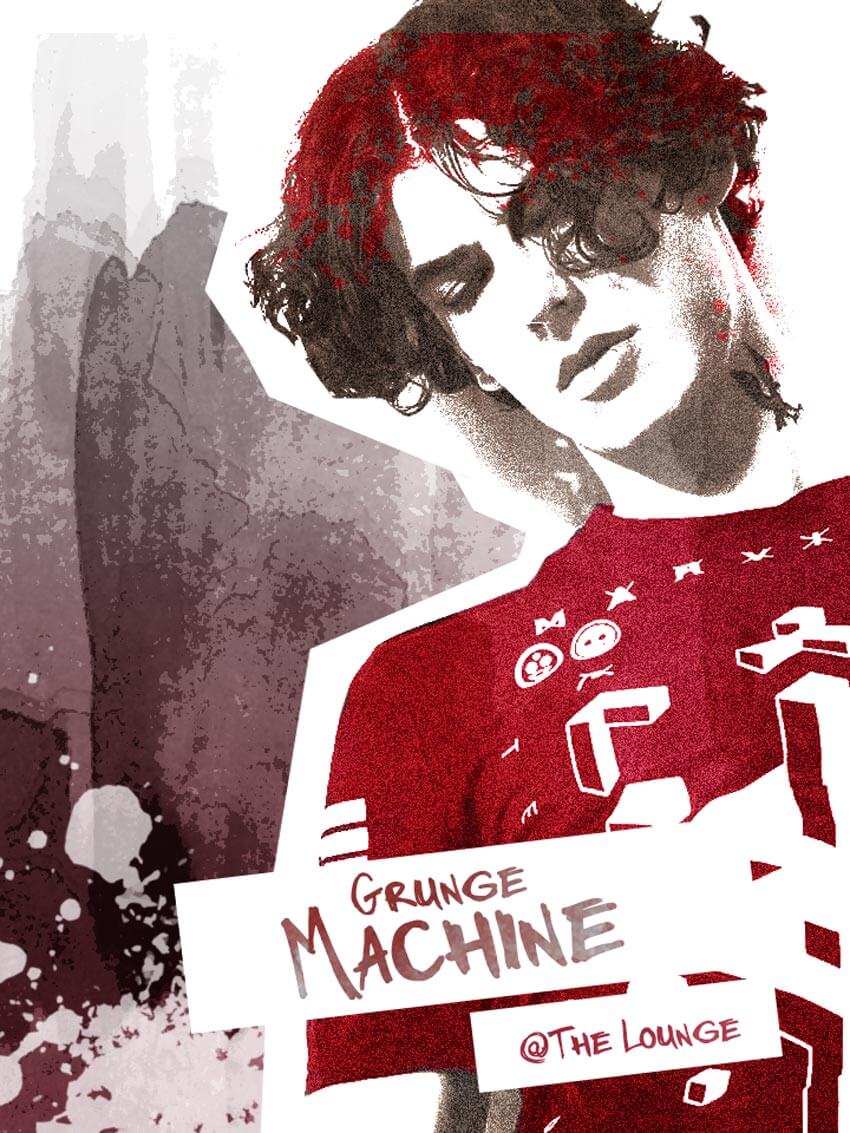
Finish this effect with some text! Use the Rectangle Tool (U) to create two white rectangles in the bottom right corner of the image.

Add whatever text you would like to the rectangles using this free Marker Twins font or by using a selection of great Grunge Fonts from Envato Market.
Duplicate the original black and white watercolor stock twice, and then set one of the copies as a Clipping Mask to the larger text. Set the Layer Blend Mode to Lighten to apply the grunge look.

Finish off the effect by dragging the second copy of the watercolor effect above all the other layers and setting the Layer Blend Mode to Soft Light. This helps to make everything look a little more "grungy."

Conclusion
You can get a lot of inspiration for your designs by looking at different eras in culture. I hope you enjoyed this tutorial. Have fun creating your own unique 90s grunge effect and feel free to show us your results in the comments below!