In this tutorial, I will share a few tips which I use in my drawings
quite frequently. We’ll get to sketch an object first and later add more
details by using a brush to finalize the image.
I’ll be using a
pen tablet in today’s tutorial (if you're curious, I'll be using my
small Wacom Bamboo tablet, which I’ve had for several years). It might
take longer, but you can certainly create this illustration using your
mouse. When outlining the fox, draw a short line and then stretch it out
to the necessary size.
Once you get enough practice, you will get used to this method of drawing, which you can apply in your future projects! So, without further ado, let’s get started!
If you came here because you like the illustration, but don't want to go through the whole tutorial, you can purchase this sleeping fox from my portfolio on GraphicRiver.
1. How to Create a Silhouette of a Fox
Step 1
First, we’ll start by creating a New Document 850 x 850 px Width and Height.
Before we begin sketching, we want to set up a place where our fox will be drawn. Let's draw a big ellipse (body) and smaller ellipse (head). Hit the Ellipse Tool (L), and draw a big ellipse. Set no fill color and any stroke color for this shape. Make another smaller ellipse, rotate it slightly to the left, and align it to the left side of the larger ellipse.
These two shapes are simply placeholders to mark our fox’s body parts: the large ellipse for the body and the small one for the head.

Step 2
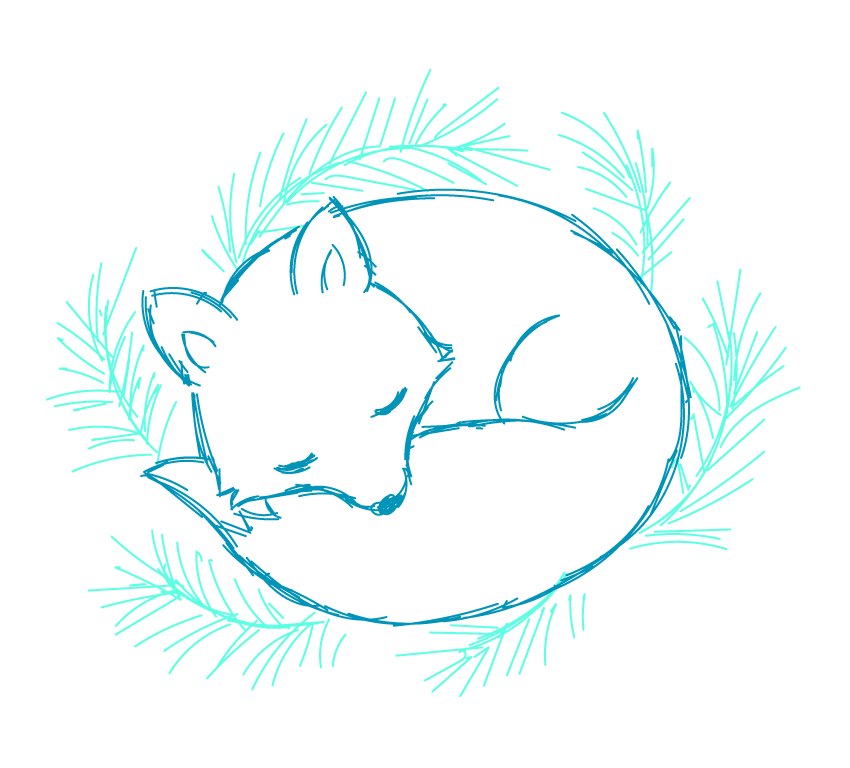
Let’s start drawing our illustration. Grab the Pencil Tool (N) and start drawing the head, body and the tail as shown in the image below. Remember to remove the fill color and choose any stroke color you like.
While drawing, you can always erase any line you don’t like or you’d like to delete. To do this, use the Eraser Tool (Shift-E). If you need to erase a specific line, be sure to select it first, and then erase. This way, you won't erase any neighboring lines.
See, you don't need to draw first on a real piece of paper, and then transfer the drawing to your computer and outline it in Adobe Illustrator. You already have everything you need in Illustrator: a virtual paper, pencil, and eraser!

Step 3
Continue your drawing by adding more details and erasing the lines you don't need anymore.

Step 4
Now you can delete those two ellipses and continue drawing: the ears, hind leg, closed eyes, and the tiny white tip on the fox's tail.

Step 5
Now we’re going to add some spruce branches around our sleeping fox. You can change the stroke color for better visibility, but it's optional. Once you're finished with the branches, our sketch is done.

2. How to Outline the Illustration Using the Brush Tool
Step 1
Now we need to create a new brush.
Take the Ellipse Tool (L), and draw a very long and thin oval shape. Delete the stroke color and set a black fill color for this ellipse. The lower ellipse in the image below is the enlarged view of our brush. The upper ellipse is the actual size of our brush (how it looks on the artboard).

Step 2
Move this ellipse to the Brush panel. A new window will appear. Choose New Art Brush and press OK.

In the second window that pops up, apply the options shown below. Please notice that Colorization Method has to be Tints. Then press OK.

Step 3
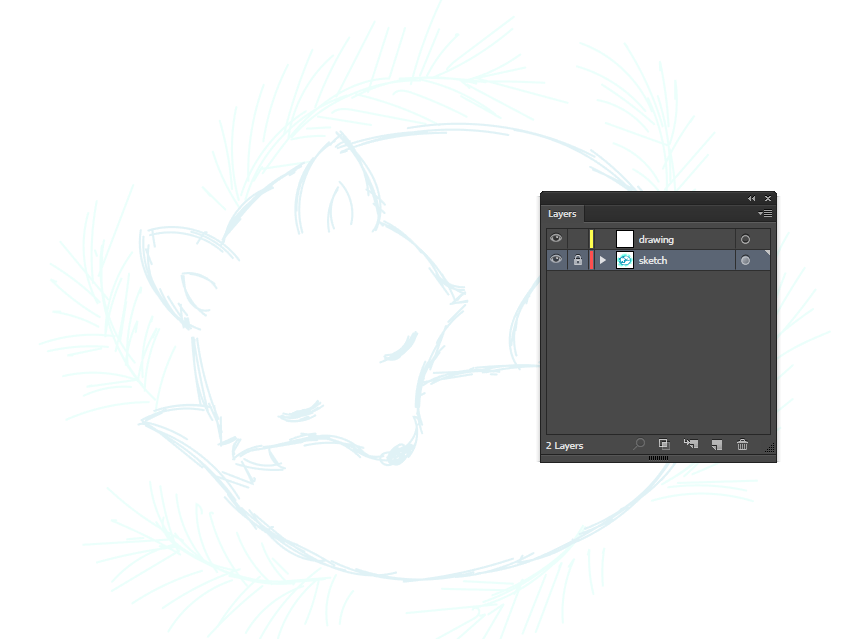
Now, create a new layer; we’ll be outlining our sketch on this layer. Press the Create New Layer button towards the bottom of the panel and name it (I named mine “drawing”).
While working on the “sketch” layer, decrease the Opacity on the Transparency panel and lock it. By locking (when lock symbol appears), you will disable any further changes on this layer.
While lowering the Opacity for the whole layer, click on the tiny circle on the right side of the name of the layer, and then decrease the Opacity value on the Transparency panel.

Step 4
You’ll want to have a full view of the artboard when outlining the fox, so press Control-0 (zero). Now, let's make our new brush draw smoothly. Double-click on the Brush Tool (B) and in the Fidelity section, enter the options presented below. Press OK.

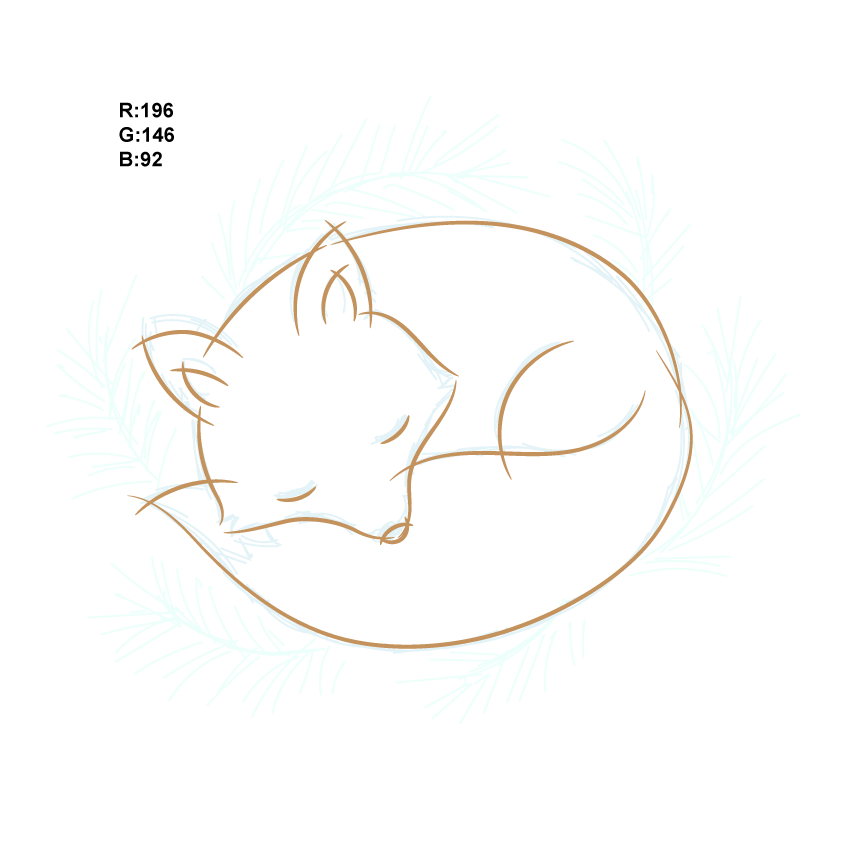
Now that we have our brush ready, let’s start outlining the fox. Delete the fill color, and set the stroke color presented below. Draw the lines quickly so that it makes fewer anchor points along the path and smooth lines. Very important: make sure to have all your lines overlapping each other (we will delete all the access lines later).

Step 5
On the Stroke panel, make the stroke Weight slightly lower and add some tiny lines to show the fur effect.

Step 6
Finally, we need to expand all the lines we created. Select one line and press: Select > Same > Fill color. This should select all the lines you just outlined. Go to Object > Expand Appearance, and all the lines will be expanded.
Time to delete those tiny access lines. Select the entire
fox and in the Pathfinder, press the Divide button. Your fox will be
grouped together; ungroup it (right-click > Ungroup).
The little side effect of this action is that you will have blank shapes which are invisible, but they still exist. So we need this to delete all the blank shapes. On the Tools panel (Window > Tools), make sure that you have deleted the fill color and the stroke color (nothing has to be selected on your artboard). And after that go to Select > Same > Fill color. After all blank shapes on the fox are selected, press the Delete key. Now you have just one fill color: dusty orange expanded lines.

Step 7
Zoom into your artboard and one by one, delete all the tiny access lines from the overlapped lines. See how the corners look nice and neat once I’ve deleted the access lines? Even if you’d selected Miter, Round or Bevel Join on the Stroke panel, your result would not look as clean. That's why I recommend outlining with overlapping lines, and then deleting the access lines.

The result should look like this:

3. How to Color the Fox
Step 1
Create a rectangle covering the entire fox by using the Rectangle Tool (M). Notice that the rectangle has to be under the fox (Control-X, Control-B)!
After that, select everything (Control-A) and hit the Trim button on the Pathfinder panel (Window > Pathfinder). This action covers all fields inside the fox. Then ungroup the whole illustration as it will be grouped, and delete the rectangle frame.

Here is how the colored fox looks:

Step 2
Change the fill color of the ears and the nose. Hit the Eye Dropper Tool (I) and take the same color from any line.

Step 3
Change the fill color on the tip of the tail.

Step 4
Select the Knife (hold the Erase Tool (Shift-E) for three seconds and then select what you need), and cut the parts on the head where you’d like to have the off-white colored fur. Select the head and using the Knife, make a line on one side of the head, and then on the other side of the head as well.
Select one of the cut-outs, and by using the Eye Dropper Tool (I), take the off-white color from the tip of the tail. Select another cut-out, and change its color to off-white as well.

4. How to Create the Spruce Branches
Step 1
First, we will lock the layer with our fox image named
“drawing” and create a new layer below (just drag the new layer down). The spruce branches have to be under the fox because our fox is comfortably
lying on them.
On the newly created layer, we will draw the spruce branches. Select our brush again, change the stroke color, and draw a few spruce branches. Of course, you can draw them any way you want.

Step 2
Lower the stroke Weight on the Stroke panel, make the stroke color lighter, and add a lot of small needles on the branch. Then set an even lighter stroke color and add more needles.

5. How to Create the Background
Step 1
Using the Rectangle Tool (M), create a square 850 x 850 px with no stroke and the fill color presented below.

Step 2
Place this square behind the spruce branches (Control-X, Control-B).

6. How to Create the Snowflakes (Optional)
Step 1
If you are
finally on this step, I must congratulate you—you just accomplished a
huge project! If you are at this point, you can count your artwork
finished!
However, if you want to add some additional final
touches, let’s say to make a more wintry atmosphere, you can spread
snowflakes all over the illustration.
Change the stroke color
and draw three intersecting lines. On the Tools panel, make the fill color the same as you had for the strokes, and add six circles on each
end of the line.
Select all details of the created snowflake and group them together (right-click > Group).

Step 2
Spread the created snowflakes all over the illustration:
while holding down the Alt key, drag the snowflake, and you will notice
that you dragged a copy of the snowflake! Repeat this.
You can resize the copies to your taste.
Awesome Work, You're Done!
What a cozy, snowy illustration we have! I know it was hard, but I hope it was a joyful experience for you to get a such a wonderful illustration. Now you can share your work with me and other people on this tutorial.

