In this Quick Tip tutorial you will learn how to use Illustrator to make a simple web form design. By following a few easy techniques you will have clean and modern register form in no time!
Step 1
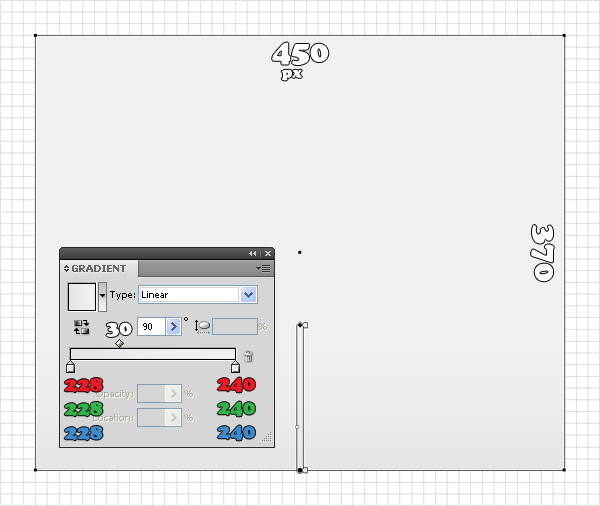
Create a 570 by 370px document. First, turn on the Grid (View > Grid) and the Snap to Grid (View > Snap to Grid). Next, you’ll need a grid every 10px. Go to Edit > Preferences > Guides & Grid, enter 10 in the Gridline every box and 1 in the Subdivisions box.
You can also open the Info panel (Window > Info) for a live preview with the size and position of your shapes. Do not forget to replace the unit of measurement to pixels from Edit > Preferences > Unit > General. All these options will significantly increase your work speed.

Step 2
With the Rectangle Tool (M), create a 450 by 370px shape and fill it with the linear gradient shown below.
Step 3
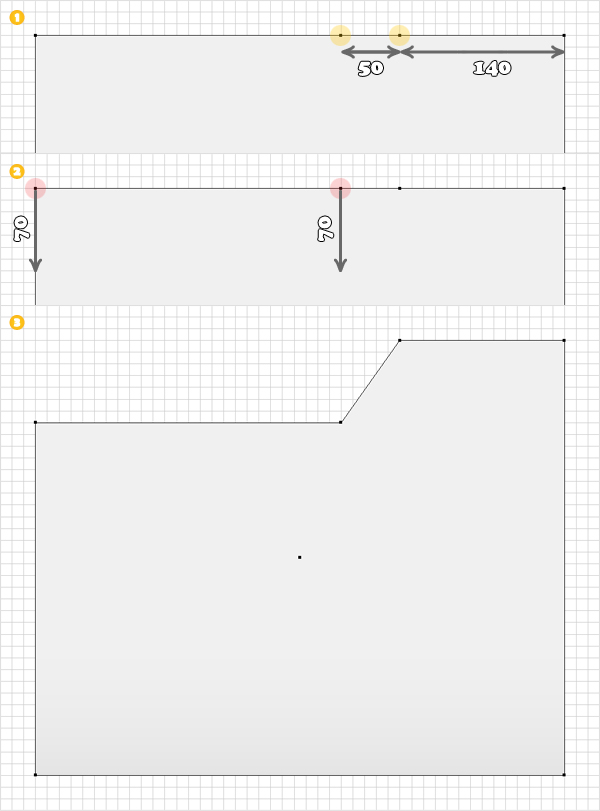
Focus on the top side of the shape. Pick the Add Anchor Point Tool (Plus) and add two anchor points in the points highlighted with yellow in the first image. Next, pick the Direct Selection Tool (A), select the anchor points highlighted with red and drag them 70px down. In the end your shape should look like the final image.
Step 4
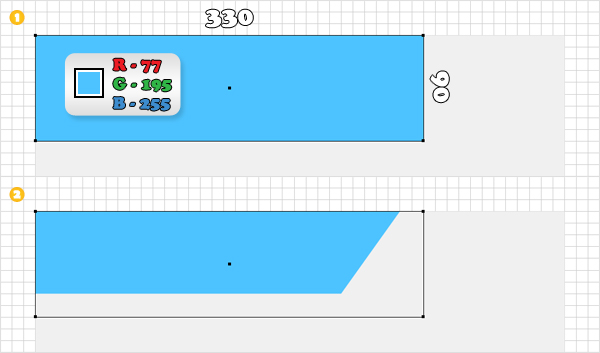
Re-select the Rectangle Tool (M) and create a 330 by 90px shape and place it as shown in the first image. Fill it with R=77 G=195 B=255 then send it to the back (Shift + Control + Left Bracket ).
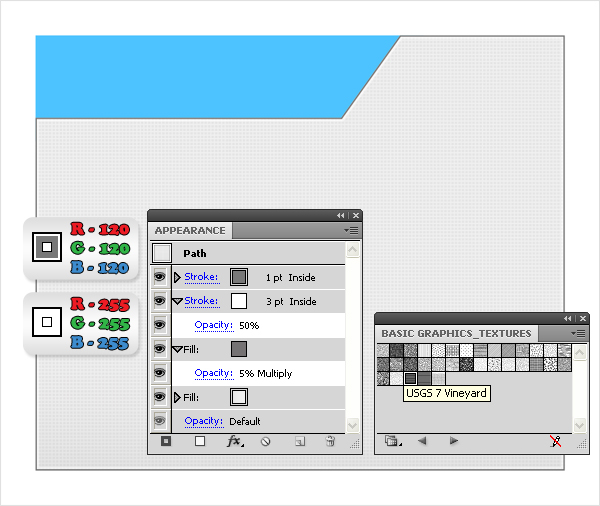
Step 5
Return to the grey shape. Select it, go to the Appearance panel, open the fly-out menu and click on Add New Fill. This will add a second fill for your shape. Now, you need a pattern for this new fill. Go the Swathes panel, open the fly-out menu and go to Open Swatch Library > Patterns > Basic Graphics > Basic Graphics_Textures. Reselect that new fill, click on the "USGS 7 Vineyars" pattern then change its blending mode to Multiply and lower its opacity to 5%.
Continue by adding a white stroke. Make it 3px wide, align it to the inside and lower its opacity to 50%. With the shape still selected, open the fly-out menu of the Appearance. This time click on Add New Stroke. Select this fresh stroke, replace the color with R=120 G=120 B=120 and make it 1px wide.
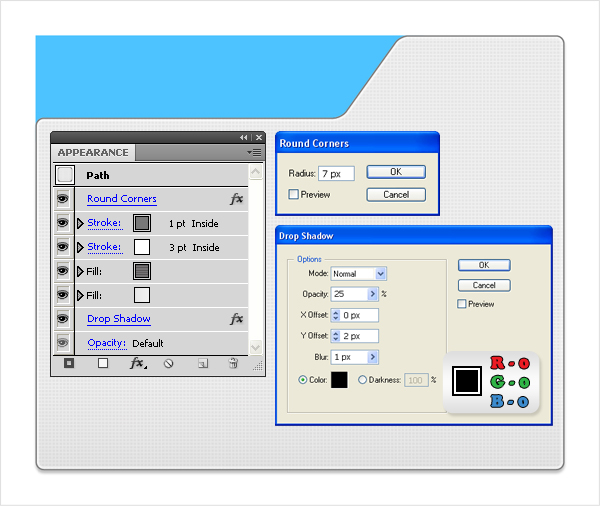
Step 6
Reselect the entire path. First, go to Effect > Stylize > Drop Shadow. Enter the data shown below and click OK. With the shape still selected go to Effect > Stylize > Rounded Corners. Enter a 7px Radius and click OK. Make sure that this effect is located above the strokes in the Appearance panel. You can simply click and drag it.
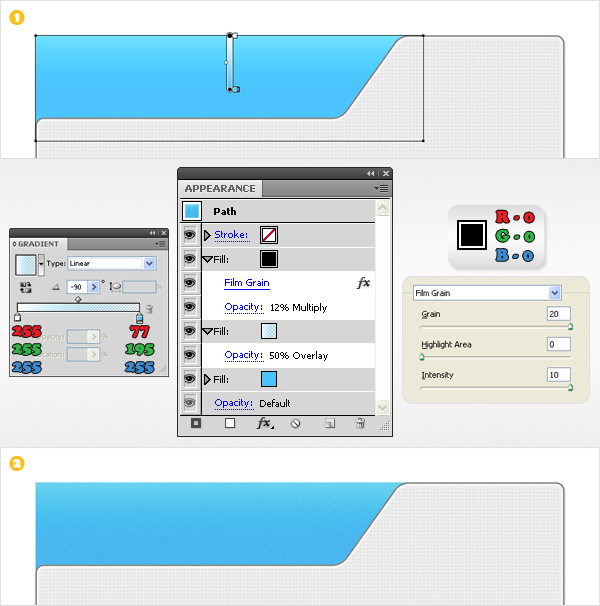
Step 7
Let’s move to the blue shape. First, add a new fill. Select it and use the linear gradient shown below. Change its blending mode to Overlay and lower its opacity to 50%. Add a third fill. Make it black, change its blending mode to Multiply, lower its opacity to 12% then go to Effect > Artistic > Film Grain. Enter the data shown below then click OK.
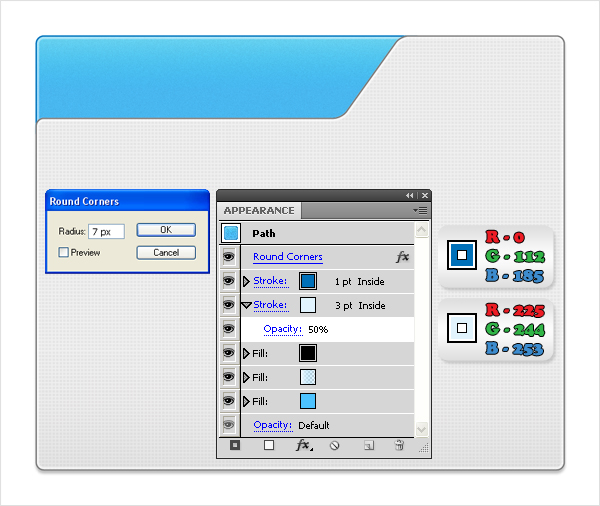
Step 8
Continue with the blue shape. Add a 3px, aligned to inside stroke (R=225 G=244 B=253) and lower its opacity to 50%. Add a second stroke, resize it to 1px and change its color to R=0 G=112 B=185. Reselect the entire path and go to Effect > Stylize > Rounded Corners. Enter a 7px Radius and click OK.
Step 9
Pick the Rectangle Tool (M) and create a 270 by 40px shape. Fill it with the linear gradient and place it as shown below.

Step 10
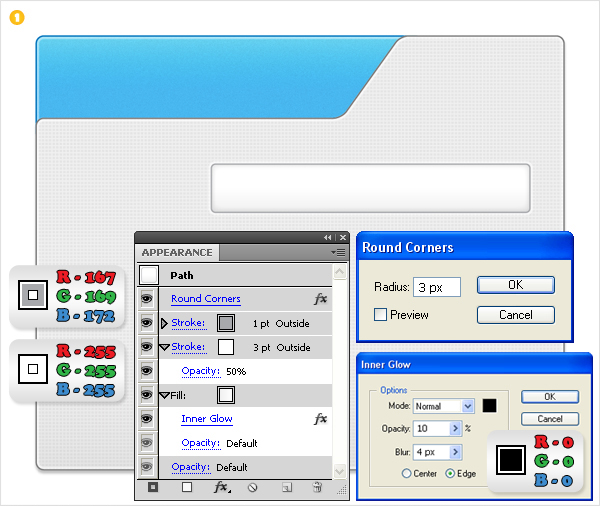
Focus on the shape made in the previous step. Select the fill from the Appearance panel and go to Effect > Stylize > Inner Glow. Enter the data shown below and click OK. Add a white stroke. Make it 3px wide, align it to outside and lower its opacity to 50%. Add a second stroke, resize it to 1px and change its color to R=167 G=169 B=172. Reselect the entire path and go to Effect > Stylize > Rounded Corners. Enter a 3px Radius and click OK.
Step 11
Select the shape made in the previous step and make two copies (Control + C > Control + V > Control + V). Place them as shown in the following image.
Step 12
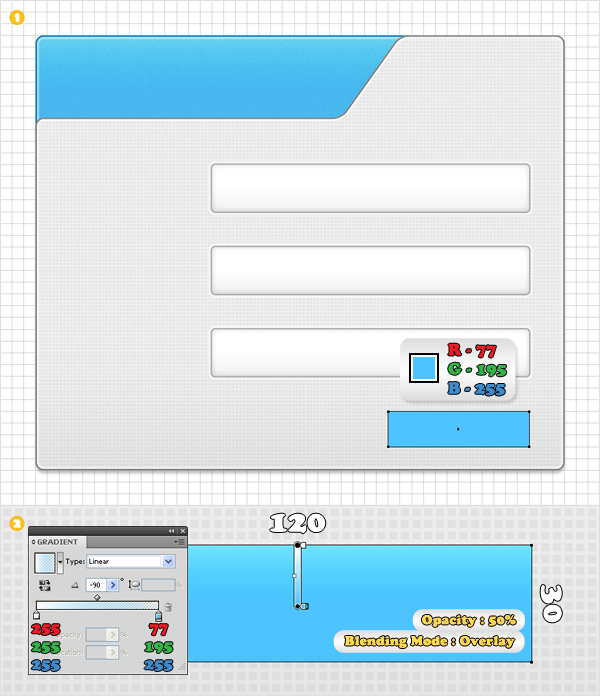
Reselect the Rectangle Tool (M) and create an 120 by 30px shape. Fill it with R=77 G=195 B=255 and place it as shown in the following image. Add a second fill for this shape and use the linear gradient shown in the following image. Select this new fill, change its blending mode to Overlay and lower its opacity to 50%.
Step 13
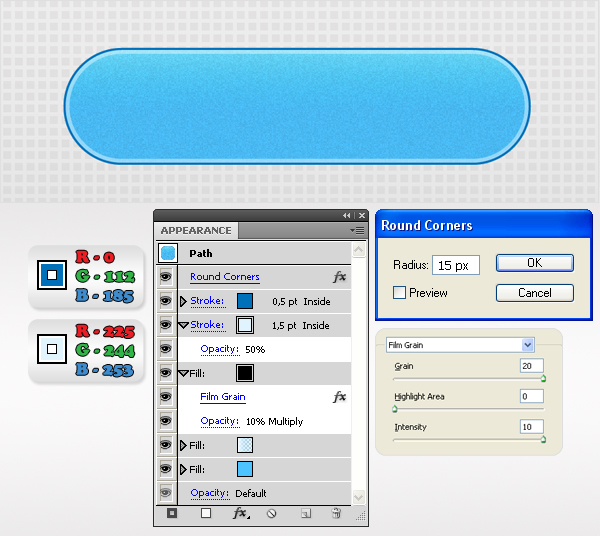
Add a third fill for the shape made in the previous step. Make it black, change its blending mode to Multiply, lower its opacity to 10% then go to Effect > Artistic > Film Grain. Enter the data shown below then click OK. Add a 1,5px, aligned to inside stroke (R=225 G=244 B=253) and lower its opacity to 50%. Add a second stroke, resize it to 1px and change its color to R=0 G=112 B=185. Reselect the entire path and go to Effect > Stylize > Rounded Corners. Enter a 15px Radius and click OK.
Step 14
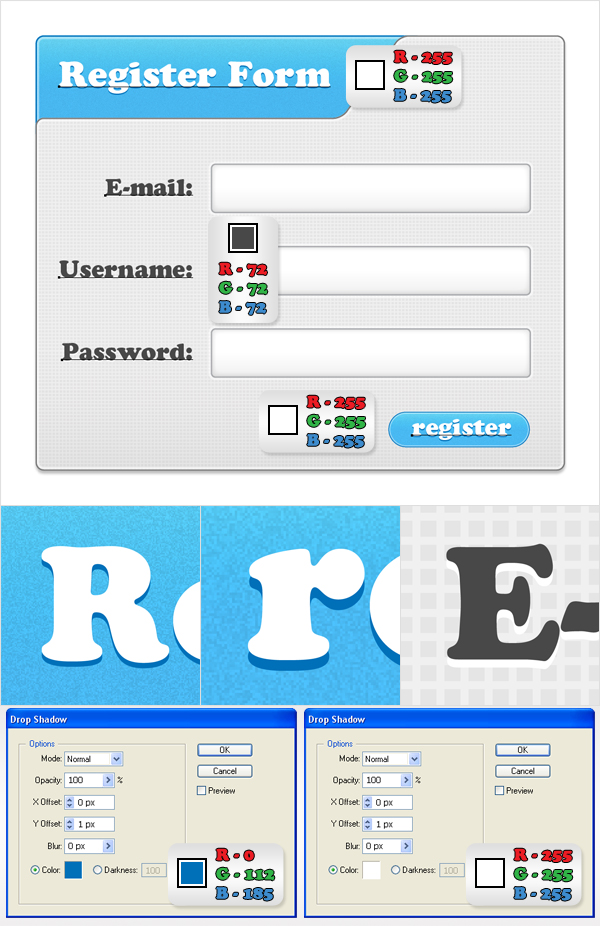
Finally, let’s add the text. I’ve used Copper Std font with a size of 30pt for the “Register Form” and 20pt for the rest of the text. Follow the colors shown below then add the discrete Drop Shadow effect for each text.
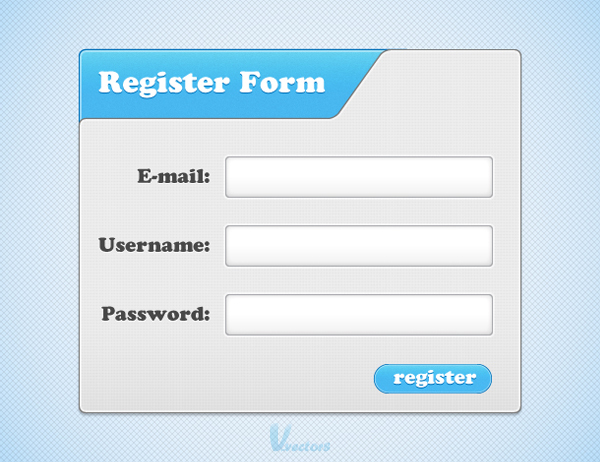
Conclusion
There you have it, a simple and slick looking register form. You can use the techniques you’ve learnt in this tutorial to make additional web elements and designs.