In this Video Quick Tip you will learn how to use a digital drawing tablet in conjunction with the Blob Brush and Eraser tools to create character outlines. If you don’t own a tablet, don’t worry, you can still follow along with this tut and achieve a great looking result. Let’s begin!
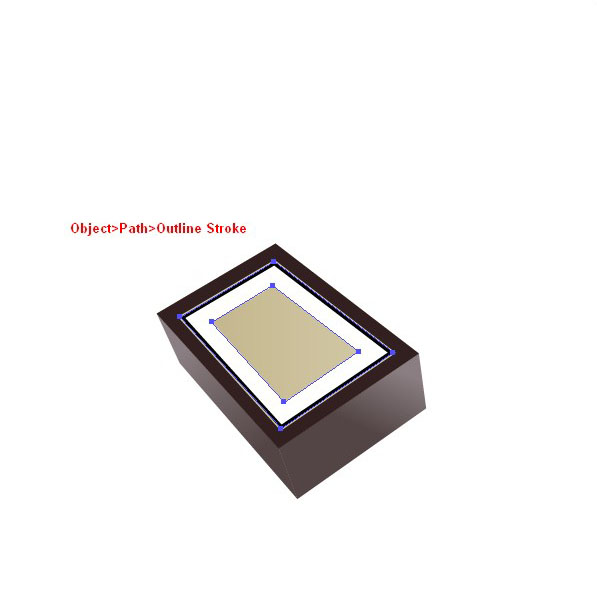
Step 11
With the shape still selected, outline the stroke, Object > Path > Outline Stroke.
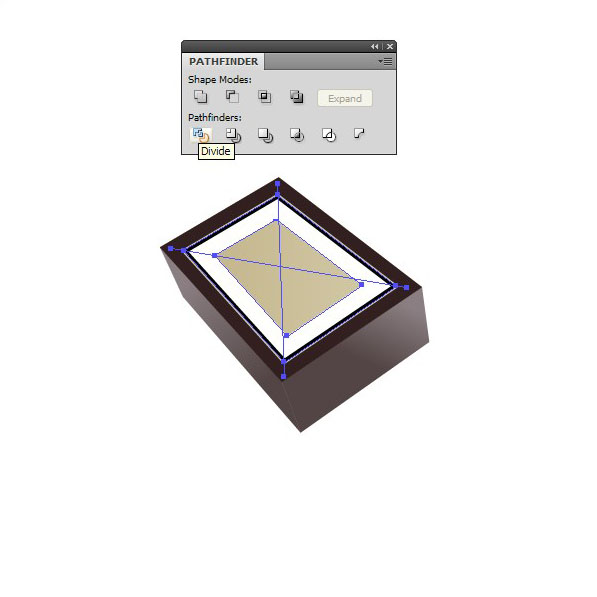
Step 12
Select the Pen tool (P) and draw two lines over the shape from the previous step, then select the two lines and the shape, open the Pathfinder Panel and click on the Divide button.
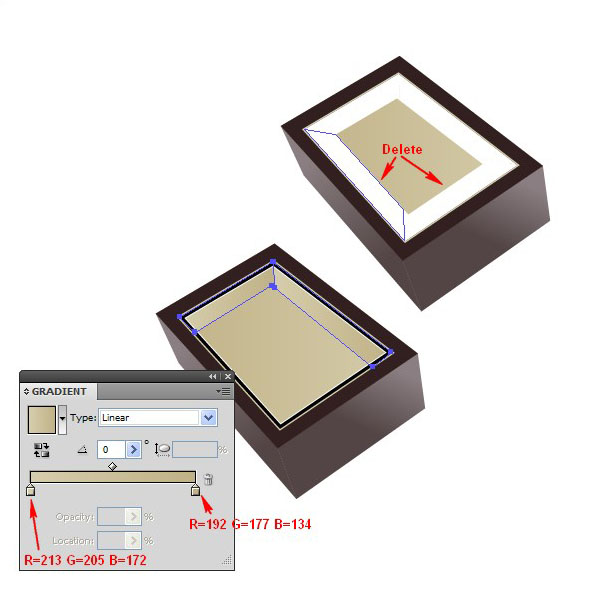
Step 13
Delete the bottom two shapes created after applying Divide and correct the bottom corner points of the top two shapes as shown in the picture below. Fill with Linear Gradient, to do this go to Gradient Panel, in the first Gradient Slider apply the color: R=213 G=205 B=172 and in the second one R=192 G=177 B=134.
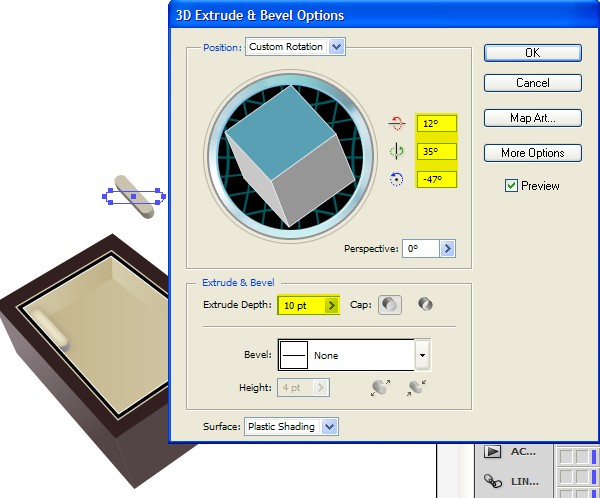
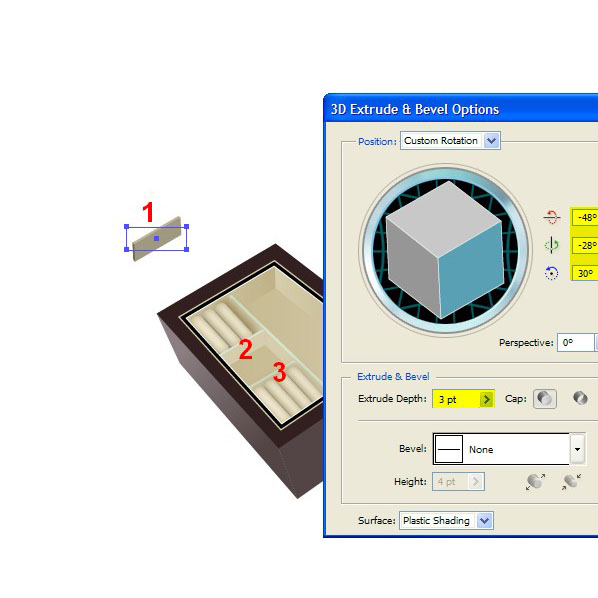
Step 14
Pick the Rounded Rectangle tool (R) and create a rectangle with the size W:59px H:12px, Corner Radius: 10px and color R=236 G=229 B=204, with the new created rectangle selected, go to Effect > 3D > Extrude & Bevel, enter the settings in the new window as shown in the picture below. Click OK and position the newly created shape under the shapes from Step 9.
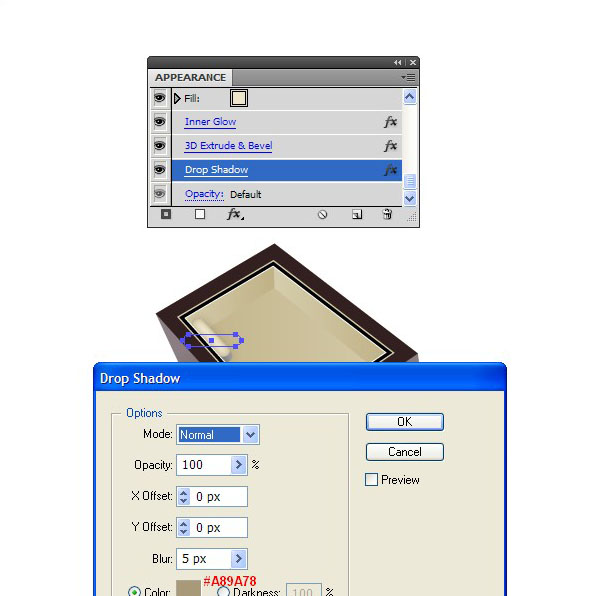
Step 15
With the shape from the previous step selected, apply an Inner Glow with the settings: Mode: Normal, Opacity: 75 Blur: 5px and color #C0B186, apply a Drop Shadow with settings as shown in the picture below.
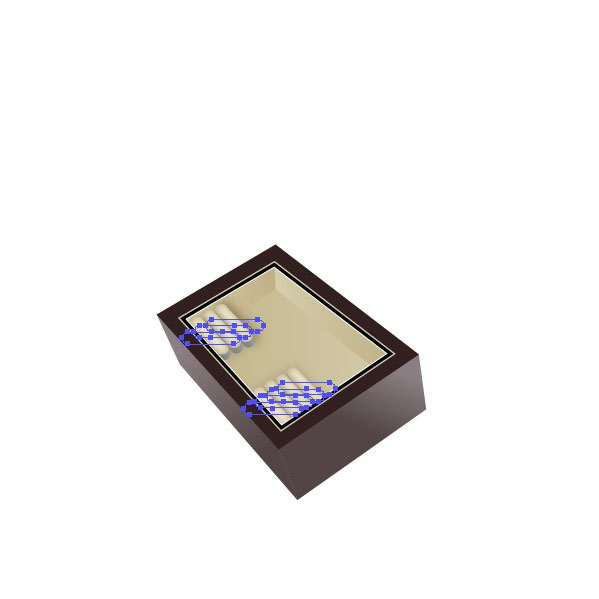
Step 16
Copy the shape a few times and position them as shown in the picture below.
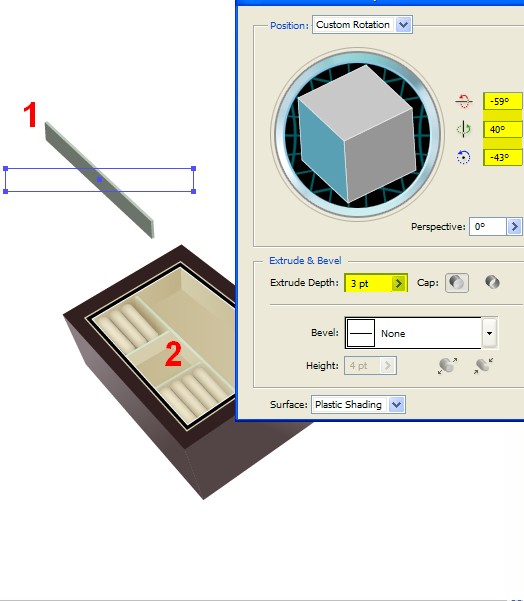
Step 17
Pick the Rectangle tool (M) and create a rectangle with the size 188-23px. With the rectangle selected, go to Effect > 3D > Extrude & Bevel and enter the settings as shown in the picture below. Move the shape under the shape from Step 9 and over the shapes from Step 14.
Step 18
Create another rectangle with the size 60px by 23px and go to Effect > 3D > Extrude & Bevel and enter the settings as shown in the picture below, move the rectangle into position as shown below. Copy the shape using Command + C followed by Command + F and move the copy to the other side as shown in the picture below.
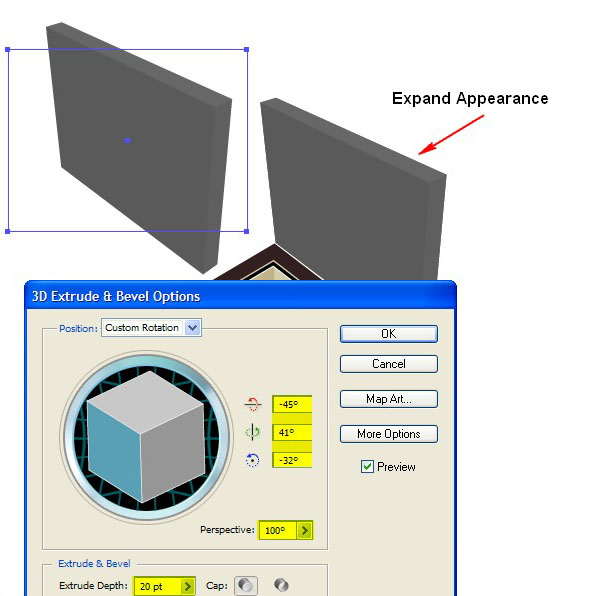
Step 19
Now it’s time to create the lid of the box, to do this pick the Rectangle tool (M) and create a rectangle with the size W: 239px H: 182px and go to Effect > 3D > Extrude & Bevel. In the new window enter the following settings: Specify rotation around the X axis: -45, Specify rotation around the Y axis: 41, Specify rotation around the Z axis: -32, Perspective: 100, Extrude Depth: 20pt. Click OK then go to Object > Expand Appearance.
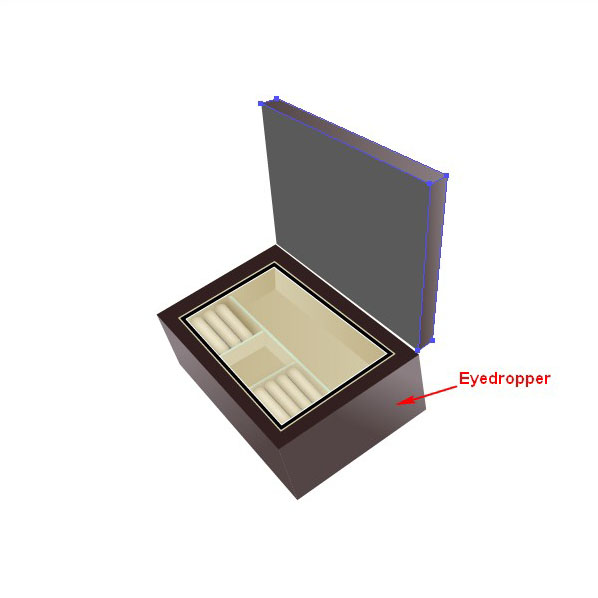
Step 20
Now select the two side shapes using the Direct Selection tool (A) and fill with the same gradient from Step 4, to do this select the two side shapes, pick the Eyedropper tool (I) and click on the shape from Step 4 as shown in the picture below.
Step 21
Now select the inner shape using the Direct Selection tool (A) and go to Object > Path > Offset Path, enter Offset: -10px, click OK. Now select the two shapes, open the Pathfinder Panel and click on the Minus Front button.

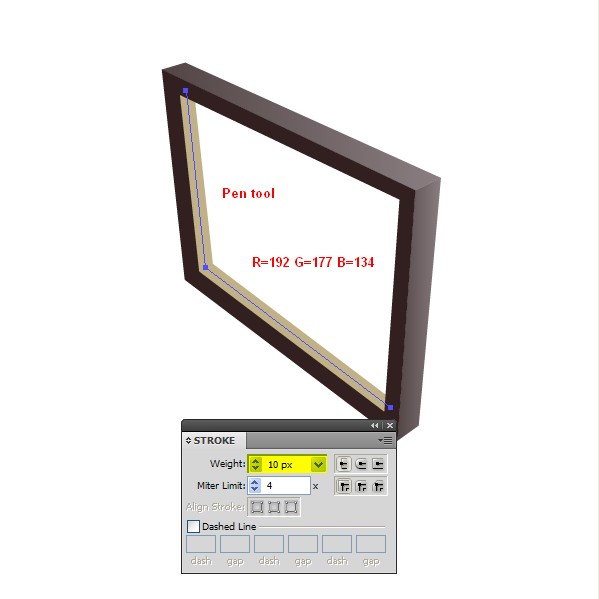
Step 22
As shown in the picture below, take the Pen tool (P) and create a shape under all the other shapes of the lid, turn off the Fill color and apply a 10px Stroke with the color R=192 G=177 B=134.
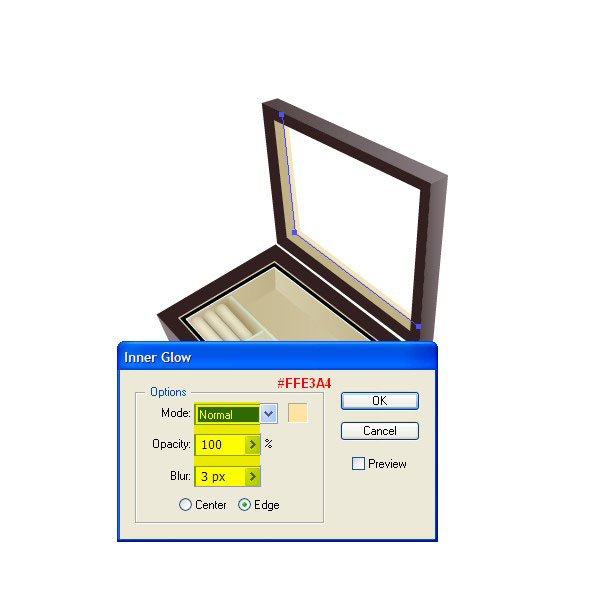
Step 23
Copy the shape from the previous step using Command + C followed by Command + B, move it a few pixels to the upper right, change the Stroke color: R=236 G=229 B=204 and go to Effect > Stylize > Inner Glow. Enter the following settings: Mode: Normal, Opacity: 100%, Blur: 3px and Color: #FFE3A4
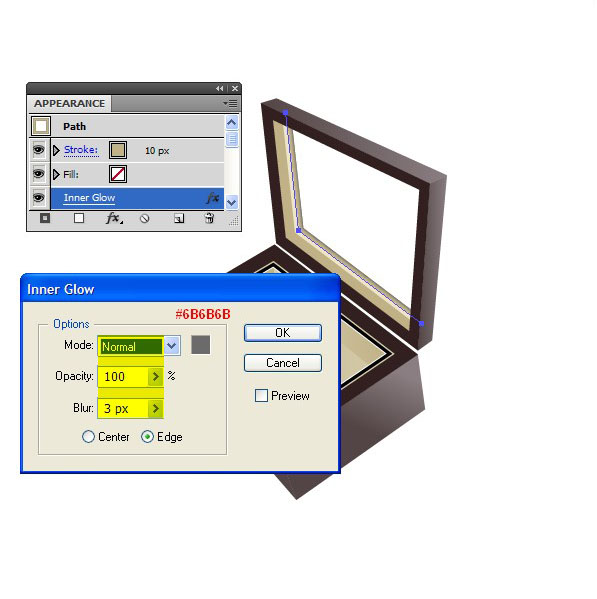
Step 24
Copy the shape from the previous step using Command + C followed by Command + B, move it a few pixels to the top right, change the Stroke Color: R=192 G=177 B=134 then open the Appearance panel and click on the Inner Glow layer and change the color to #6B6B6B.
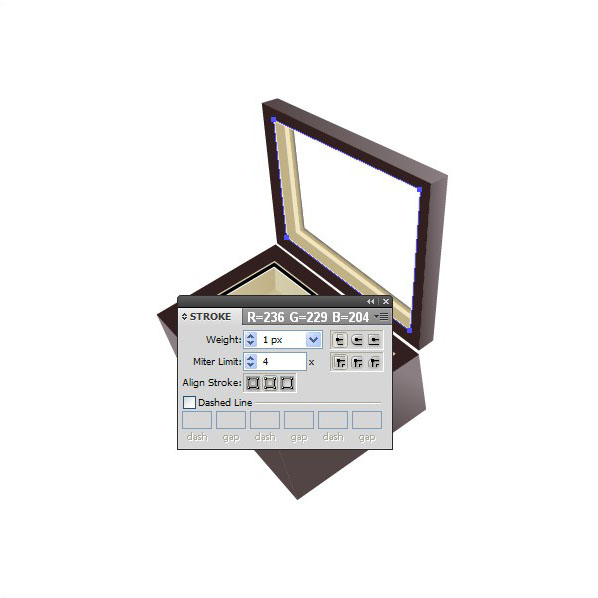
Step 25
Now copy the shape from Step 21 using Command + C followed by Command + F and delete the four outer corner points, turn off the Fill Color and apply a 1px Stroke with the color: R=236 G=229 B=204.
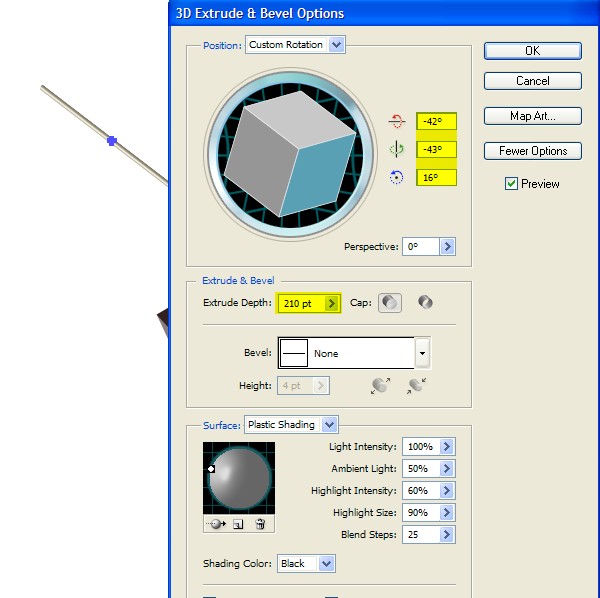
Step 26
Pick the Ellipse tool (L), create a circle with the dimensions W: 5px H: 5px and go to Effect > 3D > Extrude & Bevel, enter the settings as shown in the picture below, click OK and send the shape behind all remaining shapes by going to Object > Arrange > Send to Back. Move the shape into position as shown below.
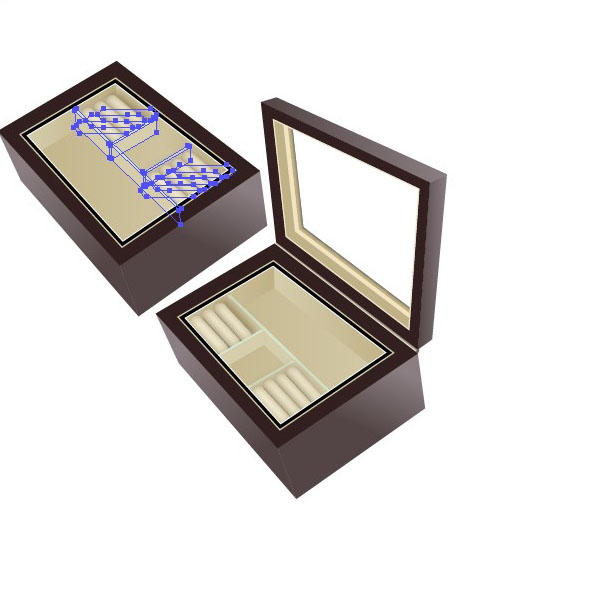
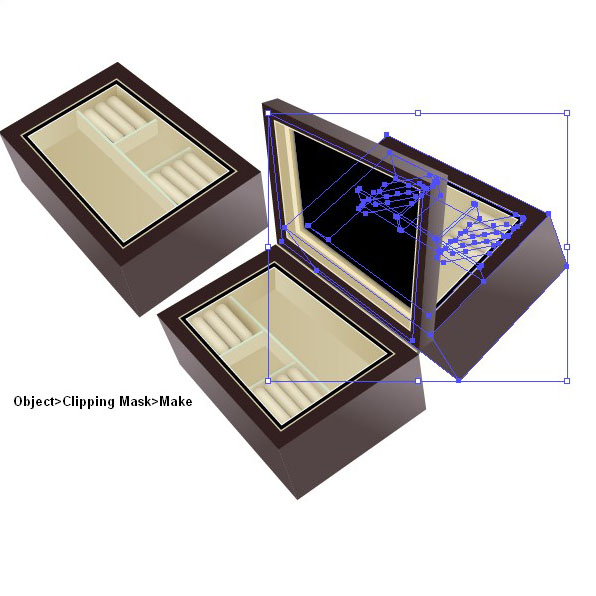
Step 27
Select all the shapes of the box, except the lid and copy them using Command + C followed by Command + F. Move the shapes from the copy to the other side of the box and position the box as shown in the picture below. Create a shape using the Pen tool (P), select the box and the shape you just created and go to Object > Clipping Mask > Make (Command + 7).
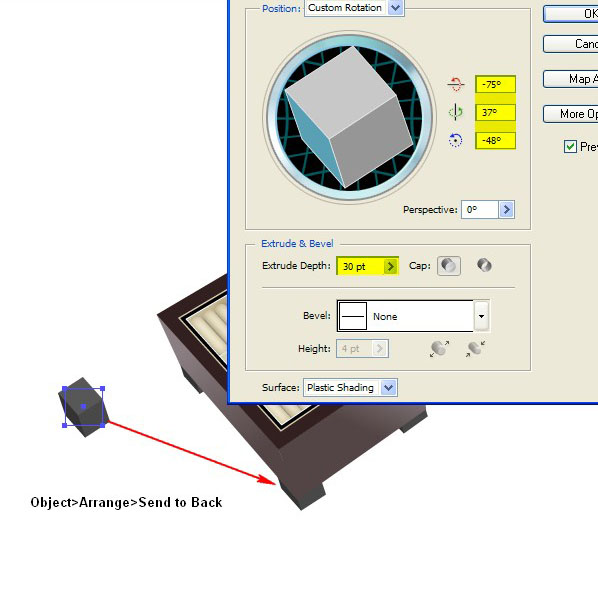
Step 28
Select the Rectangle tool (R), create a square with size W: 37px H: 37px, then go to Effect > 3D > Extrude & Bevel and enter the settings as shown in the picture below. Click OK and send the shape behind all others by going to Object > Arrange > Send to Back, move the shape into position as shown below, then copy the leg of the box twice and move them to the two corners of the box. Now we are finished.
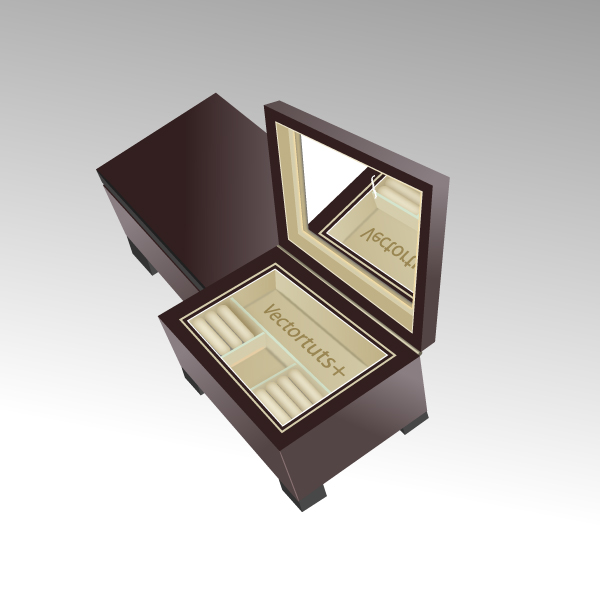
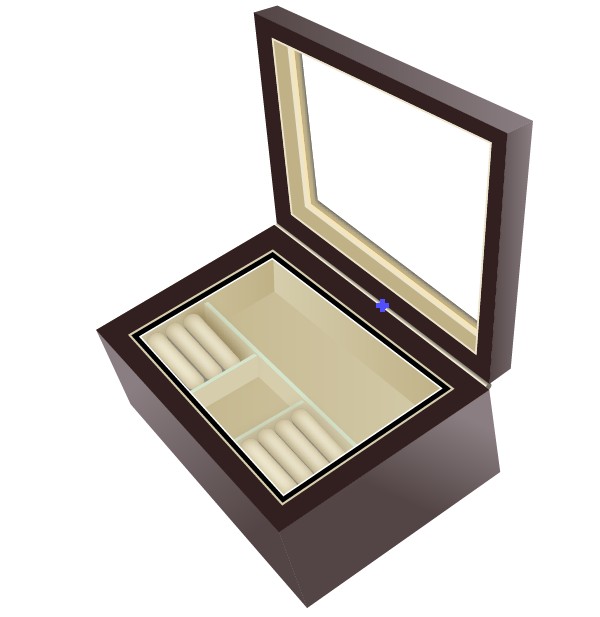
Conclusion
Here is the final result. To take this image further you could try adding some rings and necklaces, or for the more advanced user, you could try adding in a ballerina and key to make this into a music box.