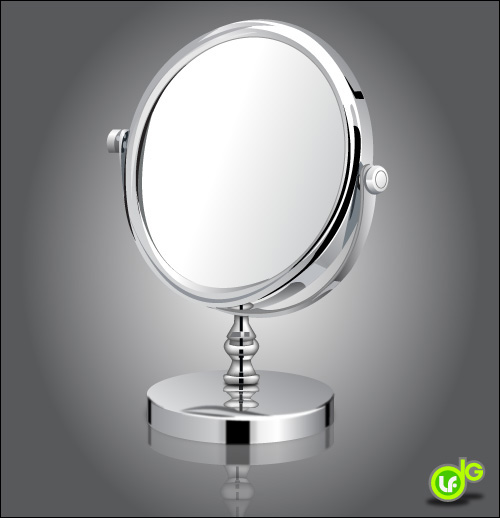
In this tutorial we’ll create a pretty make-up mirror using mostly grayscale and hard shapes to achieve a shiny metallic effect, also we’ll be using gaussian blur effects and the mesh tool for a better result.
Step 1
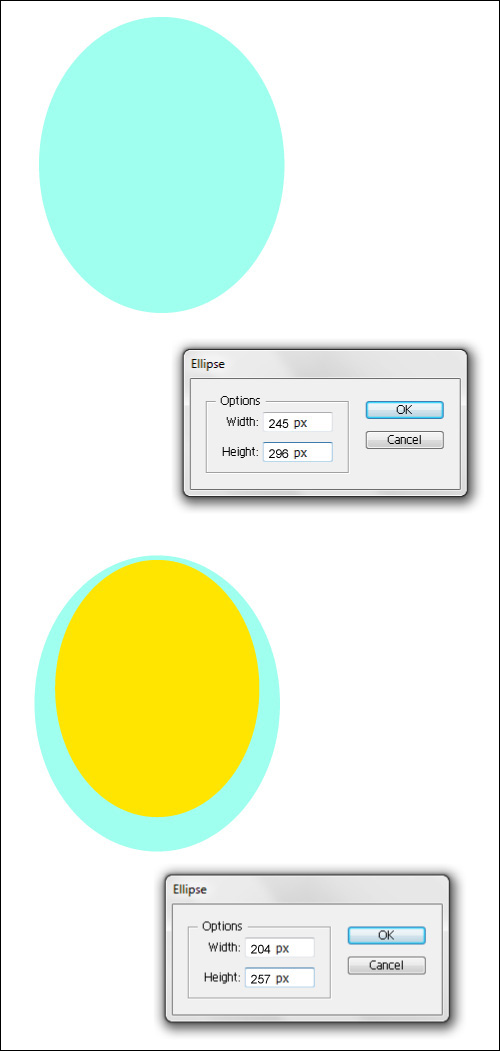
We’ll begin by creating a 245 by 296 pixel and 204 by 257 pixel ovals using the Ellipse Tool (L).
Step 2
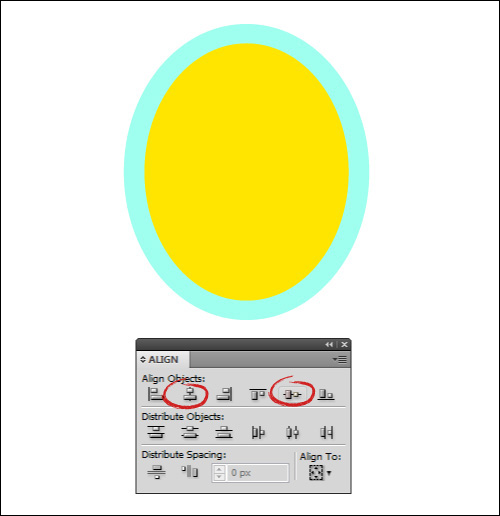
Select both ovals and use the Align palette (Shift + F7) to center vertically and horizontally.
Step 3
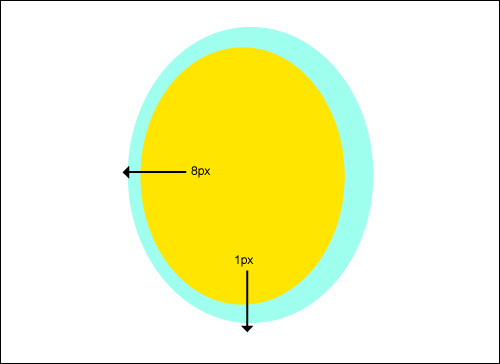
Move the smaller oval 1px down and 8px to the left.
Step 4
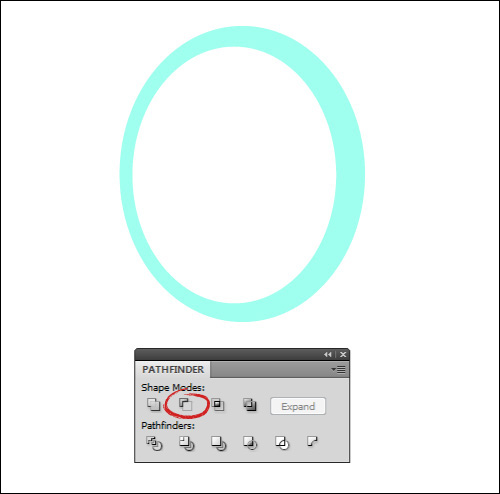
Select both ovals and in the Pathfinder palette (Shift + Command + F9) click on Minus Front.
Step 5
Use the Rotate Tool (R) to rotate the shape -17 degrees.

Step 6
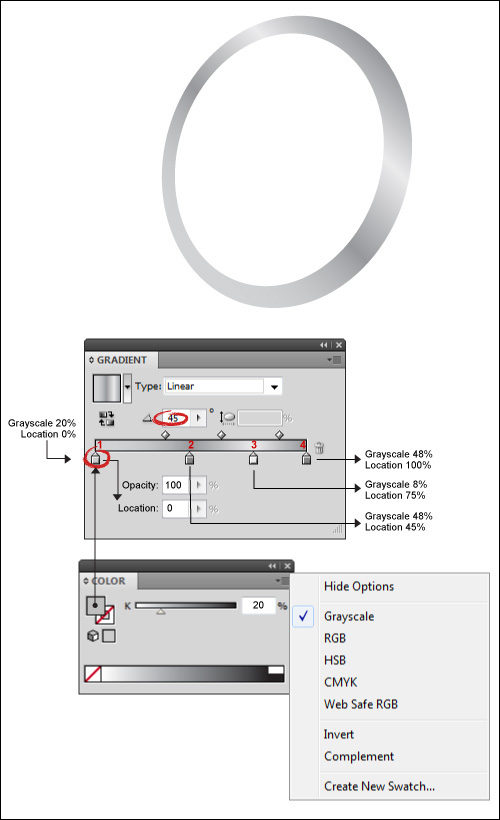
With the shape selected, open the Gradient panel (Command + F9). Click on the default grayscale gradient and add two sliders in the middle of the gradient by clicking twice anywhere between the two sliders on the color strip.
Open the color panel (F6) too and click on the panel option (in the top right corner of the panel) to verify that Grayscale is selected from the list. Assign the sliders color and locations: Slide1 Grayscale 20% with Location 0%. Slide2 Grayscale 48% with Location 45%. Slide3 Grayscale 8% with Location 75%. Slide4 Grayscale 48% with Location 100%. The angle must be 45º with a Type of Linear.
Step 7
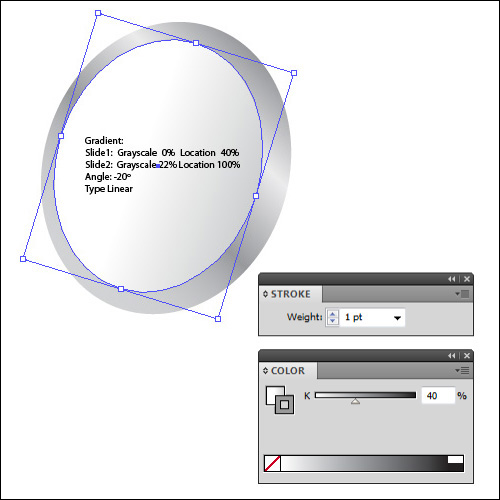
Create inside the shape a 204px by 257px oval and rotate it -17 degrees. Fill it with a gradient (grayscale): Slide1 Grayscale 0% with Location 40%. Slide2 Grayscale 22% with Location 100%. The angle must be -20º. Add a stroke to the oval (Command + F10) with a Weight of 1pt and Stroke color of grayscale 40%.
Step 8
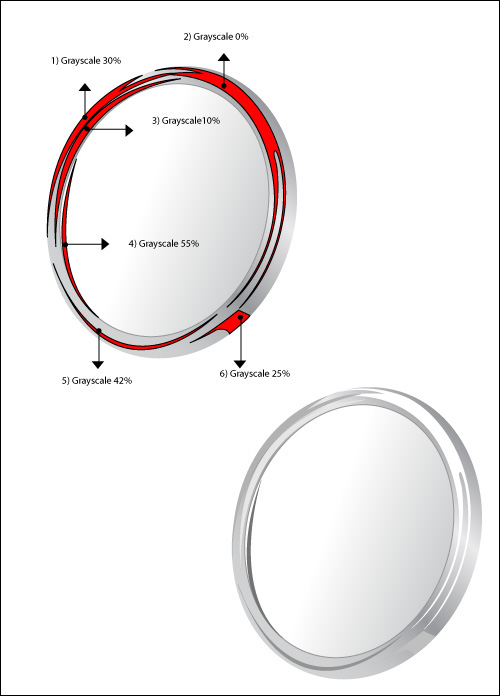
Use the Pen Tool (P) to draw the red shapes as in the picture. Fill them with the indicated colors, then Erase the strokes.
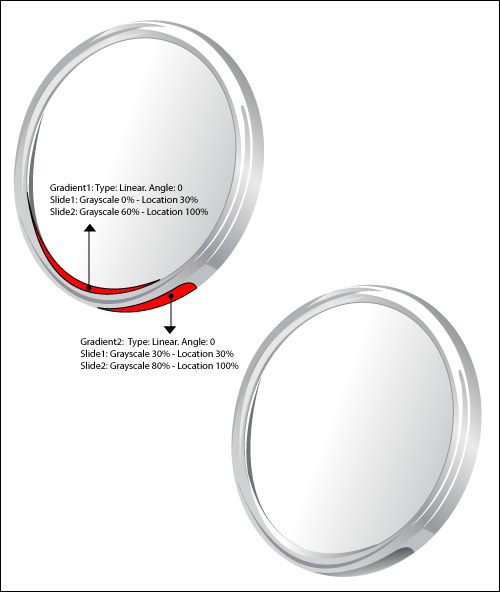
Step 9
Use the Pen Tool (P) again to draw the red shapes as in the picture. Fill it with the indicated gradients, then Erase the strokes.
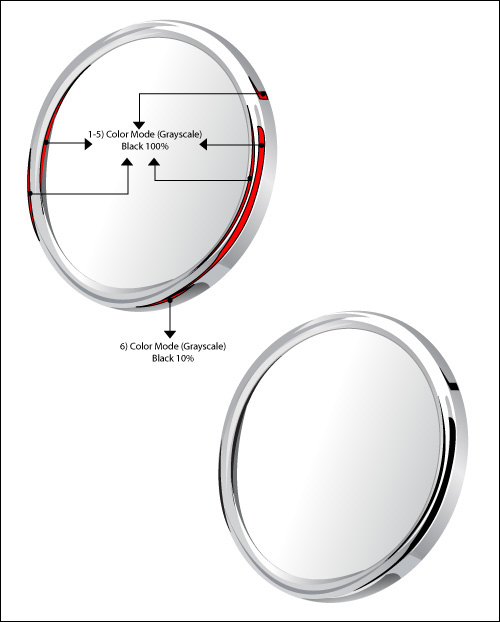
Step 10
Let’s add hard shadows. Draw the red shapes as in the picture and fill it with a grayscale of 100%, except the shape 6 that should be filled with a grayscale of 10%.
Step 11
Draw the red shapes as in the picture. Fill the biggest shape with a grayscale of 50% and the narrow shape with a grayscale of 78%. Create a 11px by 17px oval and fill it with a grayscale of 90%. Copy and paste it in the same place (Command + C and Command + F). Select the top oval and fill it with a grayscale of 20%, move it 3 pixels to the right and 2 pixels up. Select both ovals and group them.
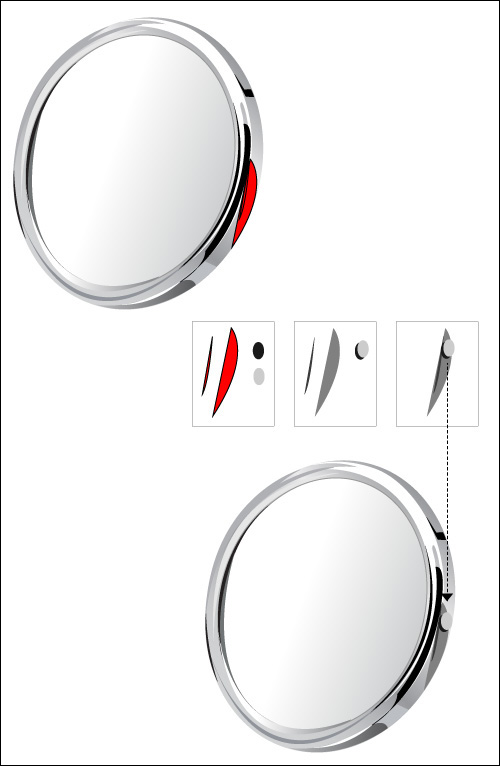
Step 12
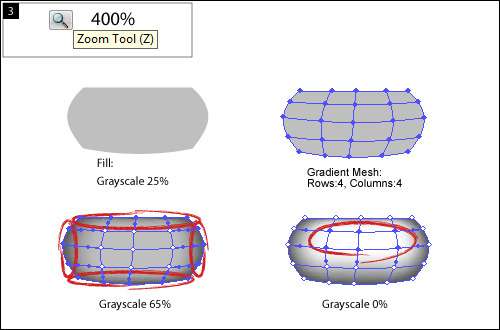
Use the Pen Tool (P) and draw a shape as in the picture (1), fill it with a grayscale of 65%. With the shape selected, create a gradient mesh (Menu > Object > Create Gradient Mesh) with 2 rows and 2 columns (2). Fill the central anchor point with a grayscale of 10% (3). Create on the central anchor point a 3px by 5px rectangle and fill it with a grayscale of 100% (4). Group the two created shapes and be sure that they are placed in the bottom of the mirror.
Step 13
Use the Pen Tool (P) to draw the red shapes as in the bottom picture. Fill it with the gradients and colors indicated in the box.

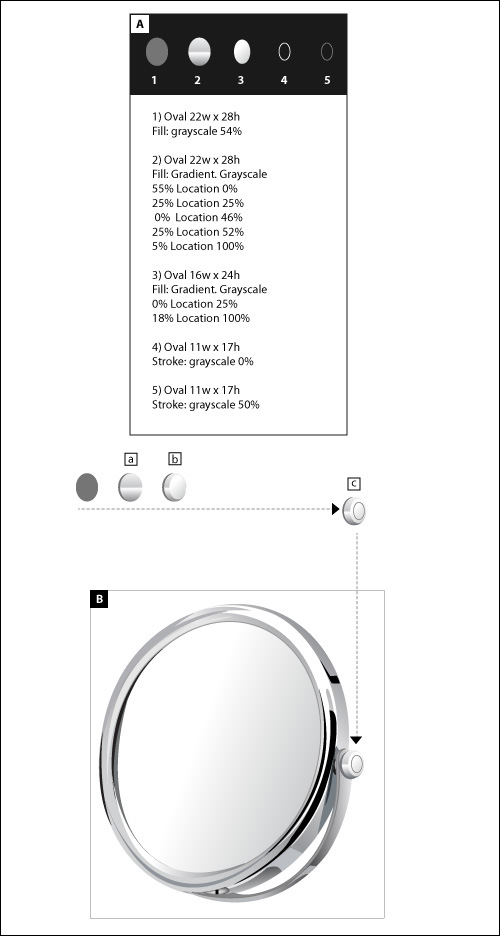
Step 14
Use the Ellipse Tool (L) to create five ovals and set the values as shown in image A. Place the 2nd oval on the 1st oval, align them vertically and horizontally, then move the 2nd oval 2 pixels to the right (a). Place the 3rd oval on the 2nd oval, then align them to the right horizontally and to the center vertically (b). Place the 4th and 5th ovals exactly at the center of the 3rd oval. Move the 4th oval 1 pixel to the right (c). Select and group them all.
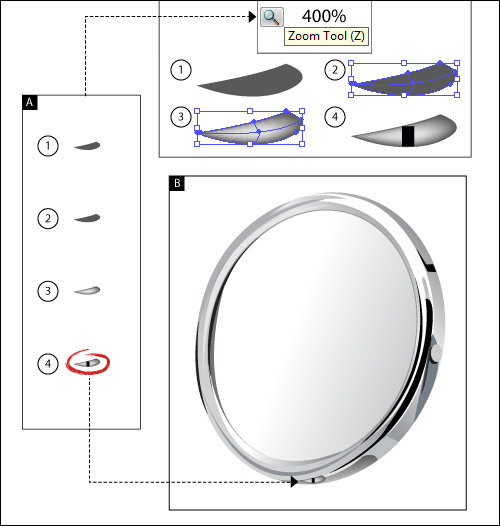
Step 15
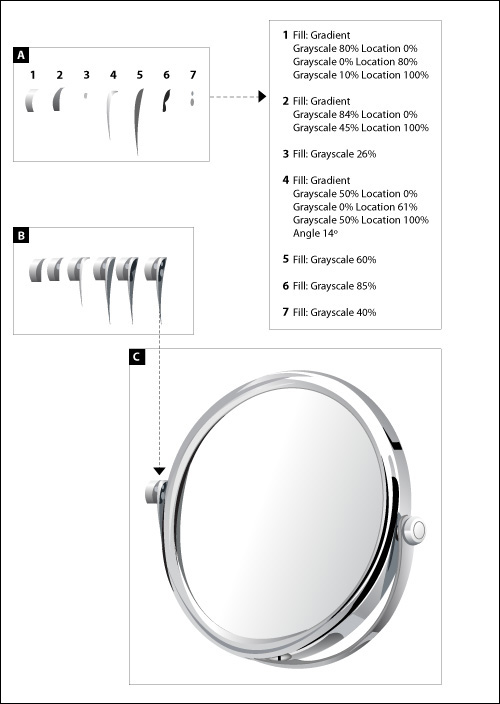
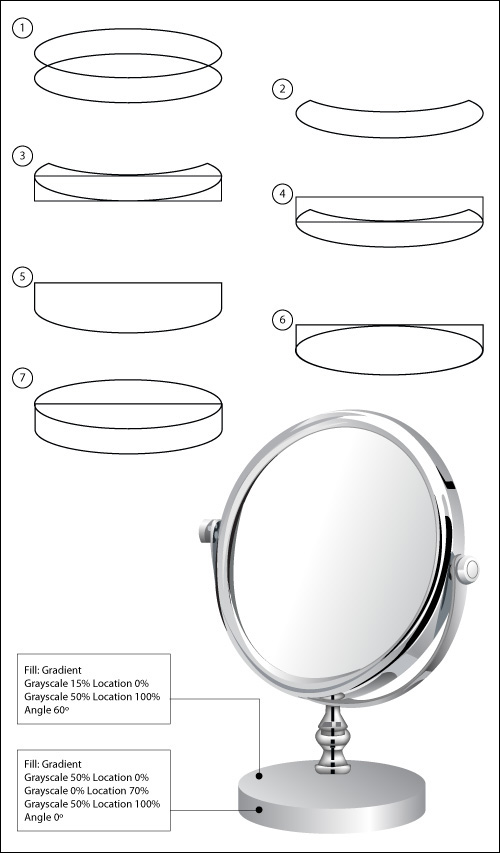
Create seven shapes as shown in table A. Apply the corresponding fills. Place the parts following the pattern shown in table B and group them all. Place it at the left of the mirror (C).
Step 16
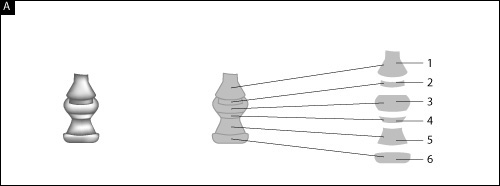
In this step we are going to work with the Mesh Tool (Menu > Object > Create Gradient Mesh). Now we need to create different shapes that compound the base of the mirror. We are going to divide the base in parts and work on each shape as shown in table A, separately.

Use the Pen Tool (P) to draw half of each shape in step 17.

Use the Reflect Tool (O) to create a copy in vertical reflex, place it next to the other shape.
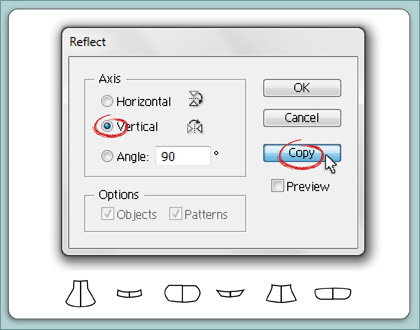
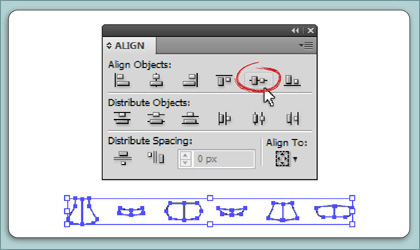
Select both shapes and open the Align panel (Shift + F7), then click on Vertical Align Center.
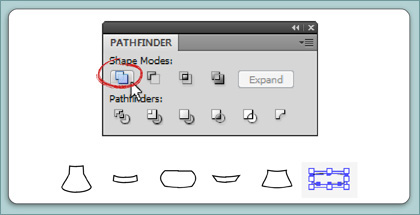
Join both shapes. Open the Pathfinder panel (Shift + Command + F9) and click on Shape Modes: Unite.
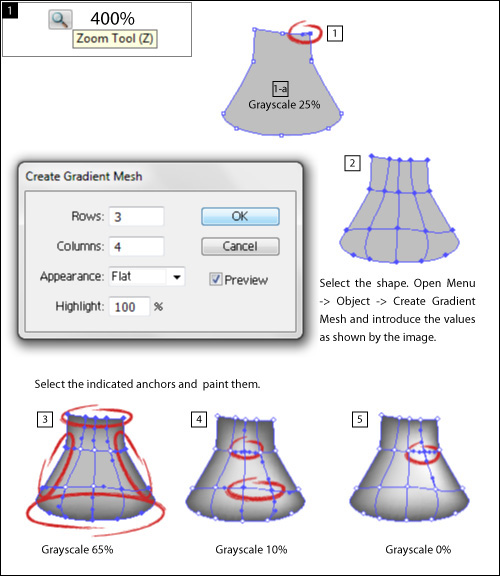
1. Use the Direct Selection Tool (A) to select the anchor point as shown by the image. Move it 3 pixels down. You’ll have to repeat the following process with all shapes, changing the values.
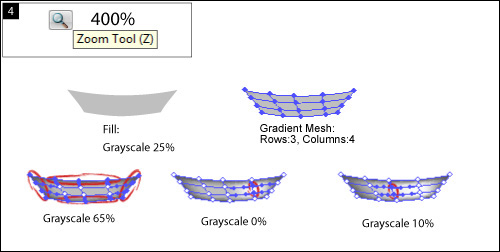
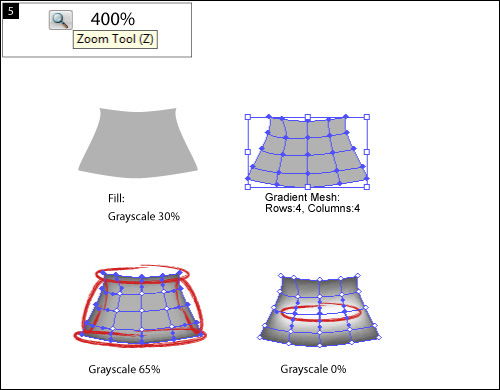
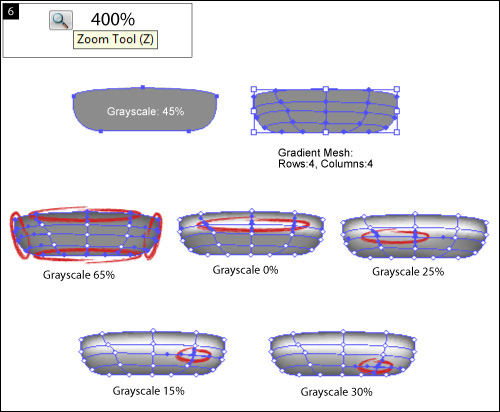
1-a. Select all the shapes and paint them with a 25% grayscale.
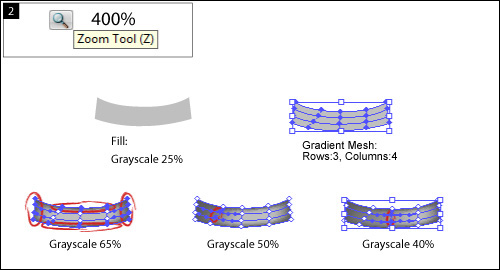
2. With the shape selected, open the Gradient Mesh Tool panel (Menu > Object > Create Gradient Mesh) and introduce the following values: Rows = 3 – Columns = 4. The other values always stay the same (Appearance: Flat – Highlight: 100%).
Then select the indicated anchors points as shown by the images and paint them with established colors: 3. Grayscale 65%, 4. Grayscale 10%, and 5. Grayscale 0% respectively.
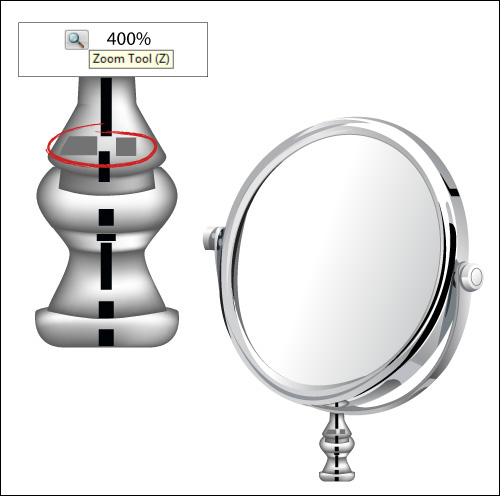
Step 17
Use the Rectangle Tool (T) to draw black rectangles as shown by the image. Draw too similar shapes as those selected in the image, and fill them with a grayscale of 55%.
Step 18
1. Draw a 187px by 49 px oval. Copy and paste it in the same place (Command + C and Command + F) and move the top oval 26 pixels up.
2. Select both ovals, open the Pathfinder panel (Shift + Command + F9) and click on Minus Front.
3. Create a 187px by 25px rectangle, select both shapes, open the Align panel (Shift + F7) and center them vertically and horizontally.
4. Move the rectangle 25 pixels up.
5. Select both shapes, open the Pathfinder panel and click on Shape Modes: Unite.
6. Draw a 187px by 49px oval. Select both shapes, open the Align panel again and center them vertically and horizontally.
7. Move the oval 25 pixels up. Assign the fills as shown in the bottom image. The Oval is a Gradient: Slider1 Grayscale 15% with Location 0%, Slider2 is Grayscale 50% with Location 100% and Angle 60º. Bottom shape Gradient has and Angle 0º with a Linear Type. Slider1 Grayscale 50% with Location 0%, and Slider2 with Grayscale 0% and Location 70%, and Slider3 Grayscale 50% with Location 100%.
Step 19
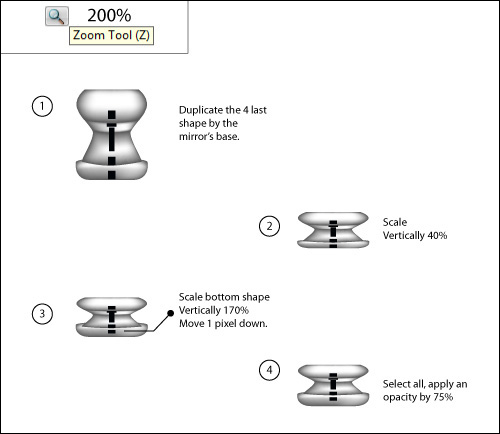
1. To create the base reflex, duplicate the 4th to last shape.
2. Use the Scale Tool (S) and scale it 40% vertically.
3. Select only the bottom shape, apply a scale of 170% vertically and move it 1 pixel down.
4. Select all, open the Transparency panel (Shift + Command + F10), then click on Opacity and introduce a value of 75%.
Step 20
Now, let’s add a shape and the last details for the base reflex.
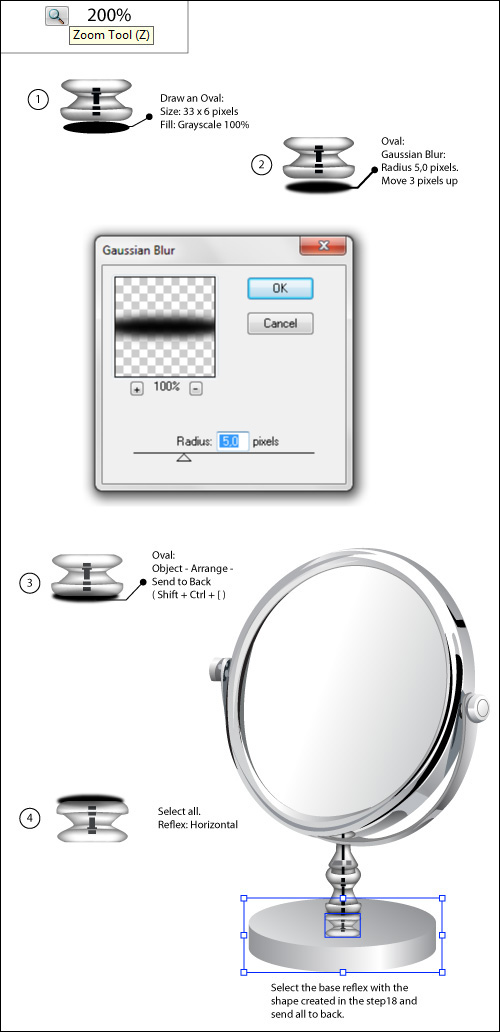
1. Create a 33px by 6px oval, fill it with a Grayscale of 100%. Place it under the base and align them vertically.
2. With the oval selected, open Menu > Effect > (Photoshop Effects) Blur > Gaussian Blur, and apply a Radius of 5 pixels. Move the oval 3 pixels up.
3. Place the oval at the back of the base: open Menu > Object > Arrange and click on Send to Back ( Shift + Command + [ ).
4. Select all. With the Reflect Tool (O) apply reflex: horizontal. Put it in the same place as shown by the bottom image. Select the base reflex with the shape created in step 18 and send all to back.
Step 21
Use the Pen Tool (P) and the Rectangle Tool (R) to create the shapes shown selected by the bottom image. All shapes will be filled with a grayscale of 100%, but shape 3 has a transparency with an Opacity of 15%.

Step 22
Use the Pen Tool (P) to draw 5 red shapes, as shown by the bottom image. You can see a zoom of shapes 1 and 5 as a reference. Apply the colors and gradients indicated by the table. The white shape must go in front because it is a shine.
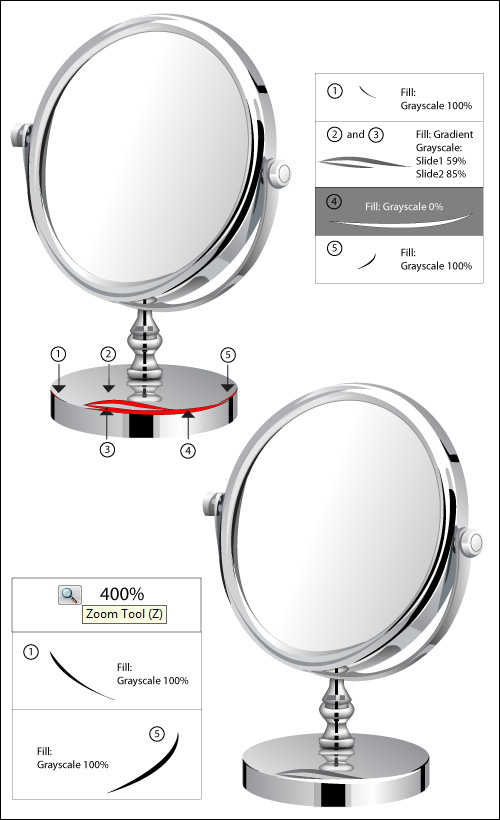
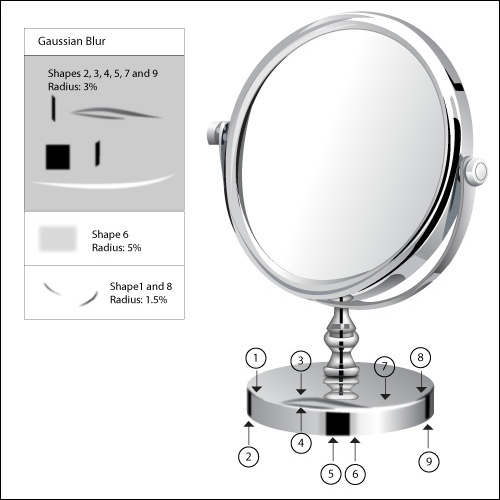
Step 23
In this step we’re going to apply a Gaussian Blur to the shapes. Use the Group Selection Tool and select the shapes: 2, 3, 4, 5, 7 and 9. Open the Gaussian Blur panel: Menu > Effect > (Photoshop Effects) Blur > Gaussian Blur.
Apply a Radius of 3,0 pixels. Now select the shape 6 and apply a Gaussian Blur with a Radius of 5,0 pixels. Finally, select the shapes 1 and 8 and apply a Gaussian Blur with a Radius of 1,5 pixels.
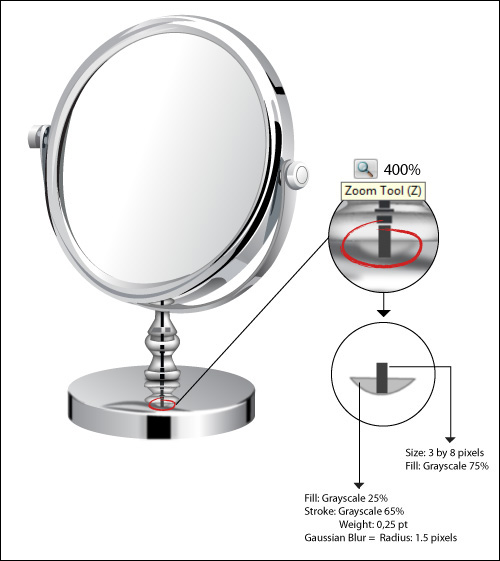
Step 24
Finally, let’s add a little detail. Create a shape as shown by the image with the corresponding values and put it in the same place shown in the image.
Final Image
This is the final result. I hope you enjoyed it.