If you ever worked with a text processor you should be familiar of "Tabs". When you press the Tab (Tabulator) key the cursor is displaced to the next tab stop; this is particularly useful when you need to organize content in a document. This Quick Tip is an introduction to working with Tabs in InDesign and is perfect for beginners.
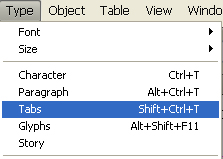
Open the Tabs Palette
To open the Tabs palette go to "Type > Tabs" (Option + T).
You should be able to see the following in your workspace:

The palette units will be the same as the documents, in this case millimeters (mm). Suppose you want to change the document units while working on your file or just change it momentarily, you can do it without any worry since the units from the tab window will update automatically conserving the positions of the tabs.
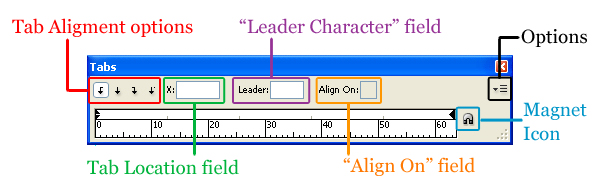
Tabs palette overview
The following picture shows a brief explanation of the palettes options and parts. I will explain each of these in the following Quick Tip.
Insert Tabs
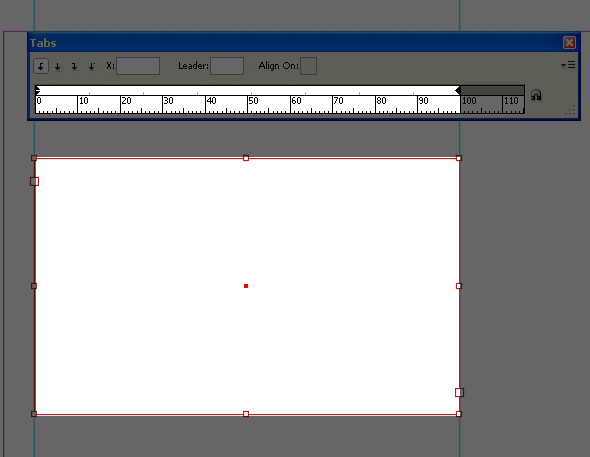
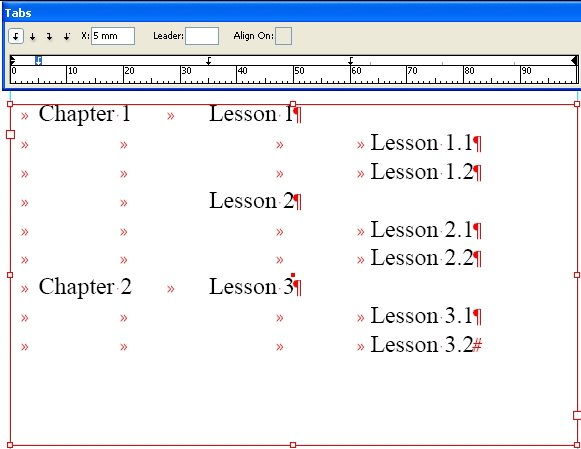
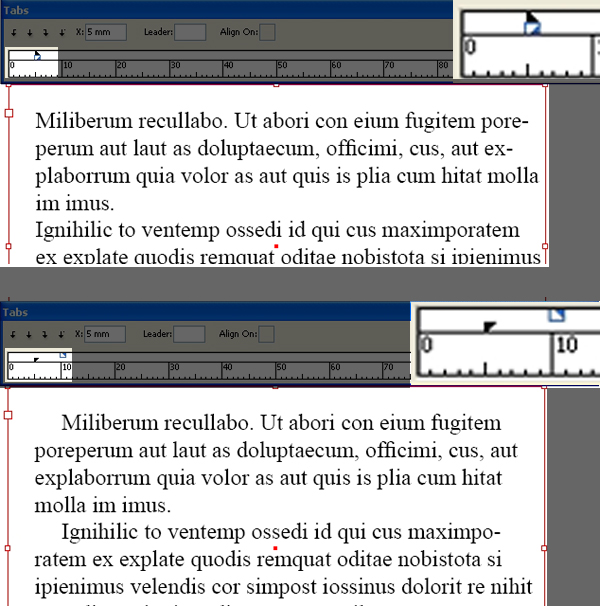
Select the Text frame and take a look at the Tabs palette; the width of the frame is measured and shows the available workspace for inserting tabs. If you change the frame size this workspace is updated automatically. Obviously if the frame is compressed and compromises the content, these will be displaced down and require some editing.
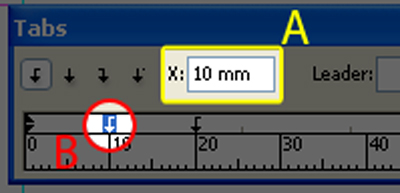
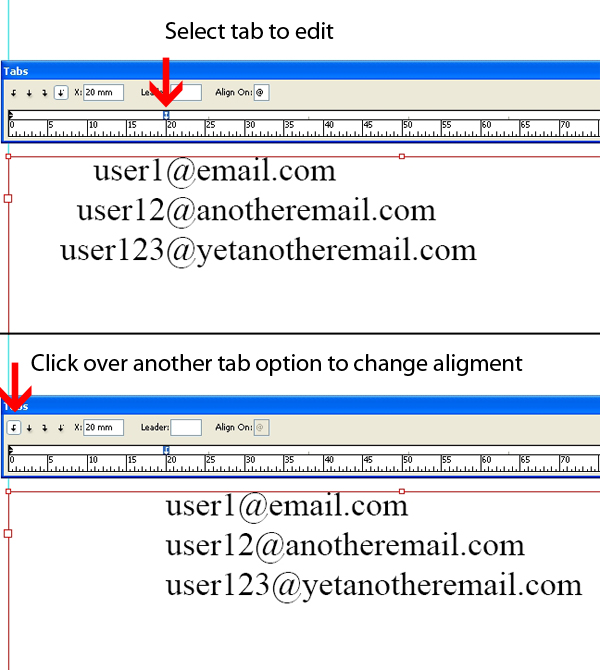
To place a Tab simply click the desired distance on the ruler (in the following picture there are Tabs at 10 and 20 mm); if you want to change its position, select the tab by clicking over it and input a new X value in the first field (A). When you select a Tab its background gets highlighted (B).
The ruler displayed in the Tab palette measures the distances from the text frame only; not for the whole document. For example if you set up a tab at a distance of 10 mm this will be situated at 10mm to the right from the border of the text frame; so if you move the frame its content will maintain all of its properties.
Types of Tabs
There are four options to choose from:
- Left Justified (A)
- Center Justified (B)
- Right Justified ( D)
- Align to decimal (Or other specified character) (D)
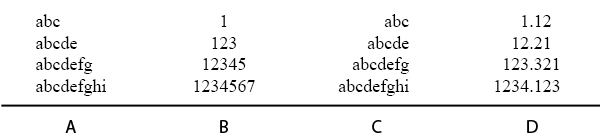
Align to decimal (or other specified character) is very useful when you need alignment to a specific character. Select that option and insert the desired character at the last field of the tabs palette – the Align on field). For example let’s use "@" as our alignment criteria.

You can change the type of a tab selecting it and then click over another tab icon. All content using that tab will be reformatted.
Text Frames with Content
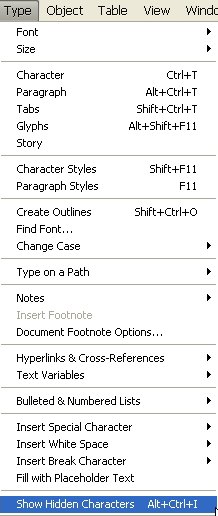
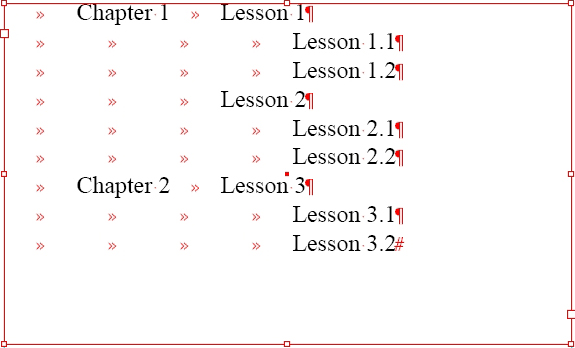
You can also setup tabs after you’ve entered text in the frame; the only requirement for doing this is to use the tab key to displace content and not the space bar. For this example let’s activate the hidden character display at: "Type > Show hidden characters" (Option + Command + I). As you can see in the following picture, the text has already been formatted with Tabs but the distance between content is very short and thus it looks too compressed.
Select the paragraph(s) you’d like to edit and insert the desired tab(s) option(s) in the ruler as done in the previous examples. Now the position of the content will be under the format you just entered, making further editing easy.
Leader Field
Here you can define a character which will precede the content from a tab. Look at the picture below, I used single dot (.) as the leader character and it automatically fits the space between text. With this feature you can move tabs without worrying about adding or subtracting dots (or whatever character you are using) because it’s updated automatically. A much easier method rather than adding dots manually.
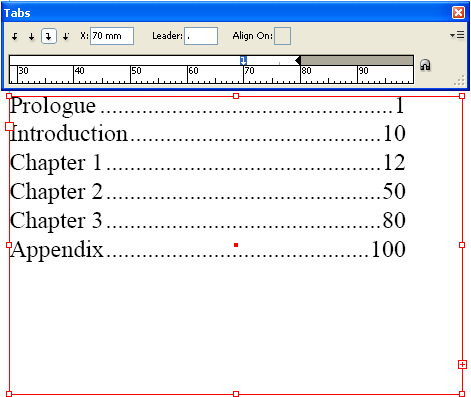
In the picture above Titles are at X= 0mm and page numbers at X = 70mm; the procedure was:
- Select text / paragraph
- Select the tab at X= 70mm
- Insert the dot (.) at the leader field and press enter
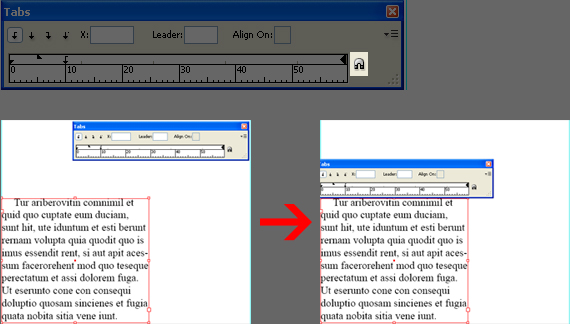
Magnet Icon
The magnet button aligns the Tab palette to the top of the text frame you are currently working on and auto size to its width. With this you can achieve a better layout distribution because your tabs will be lined up between the palette and the text frame.
Paragraph Indents
As a text processor you can also indent the first line or the left margin which will affect the whole paragraph. Indent is the space between text and the border of its text frame. To indent the first line only click over the small triangle at the top left corner of the Tabs palette ruler and move to the desired distance or enter an X value in the first field.
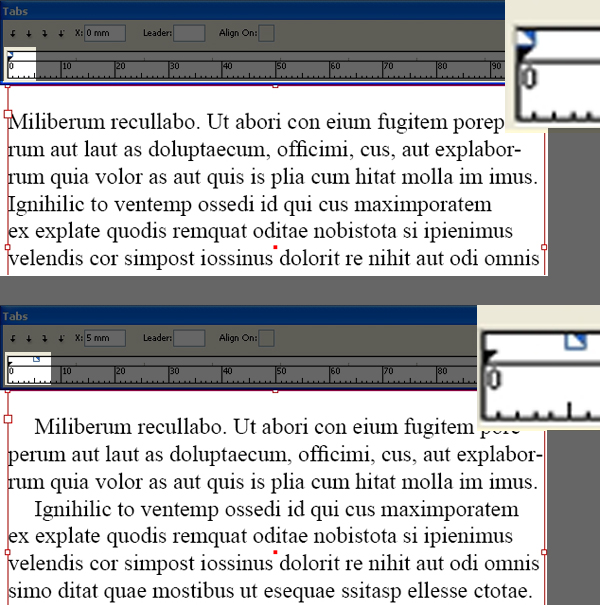
To indent the left margin click over the small triangle at the low corner of the tabs palette ruler and place it where needed. You can also make a combination of both indent first line and left margin.
For the Closure
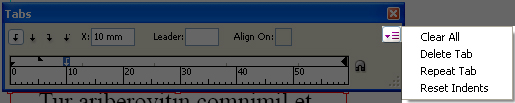
Finally, the tabs palette has some additional options you can add by clicking over the small menu at the right. You can clear all tabs, delete or repeat a specific tab and reset Indents. By the way, you can also eliminate a tab by selecting it and drag away from the ruler.
Conclusion
I hope this quick tip was useful for you and you’ve enjoyed reading it. Good luck with your work!