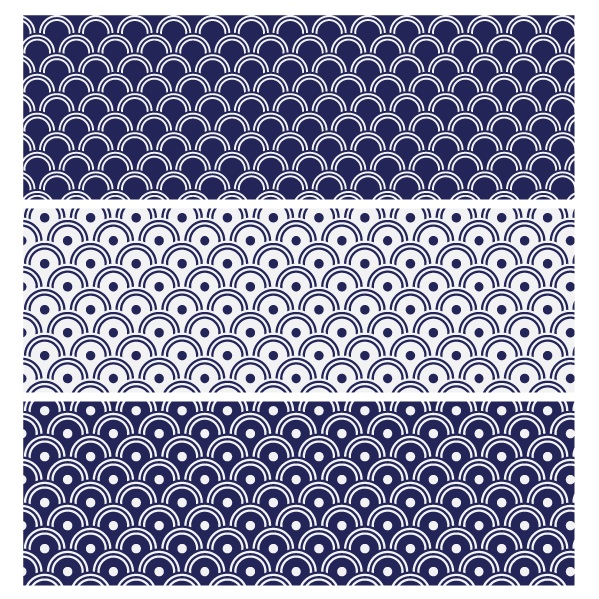
Repeating patterns can be confusing to make and sometimes creating a quick and easy pattern will leave you with a result that is less than professional. In this basic Quick Tip tutorial you will learn how easy it is to use the Appearance Panel and an arch shape to create a harmonious Japanese Wave Pattern. Let’s get started!
Step 1
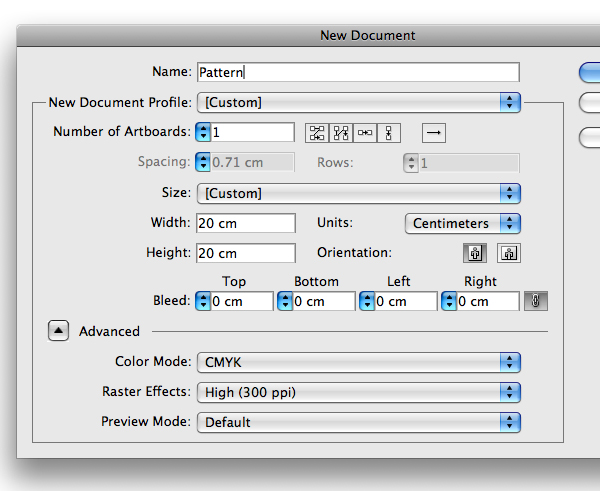
First, create a square document. I’m making my file for print so it will be 20cm x 20cm in CMYK and 300dpi.
Step 2
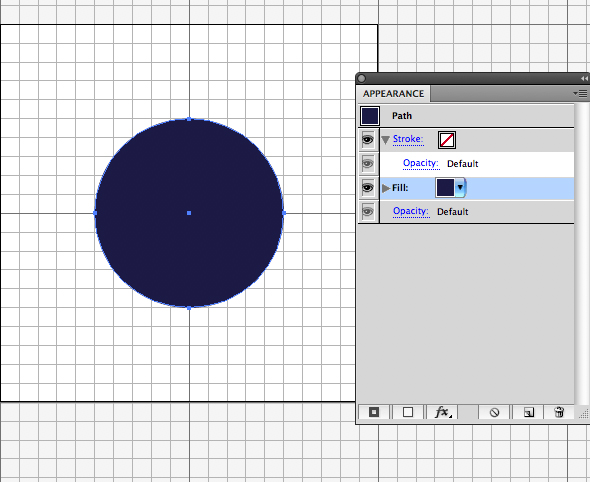
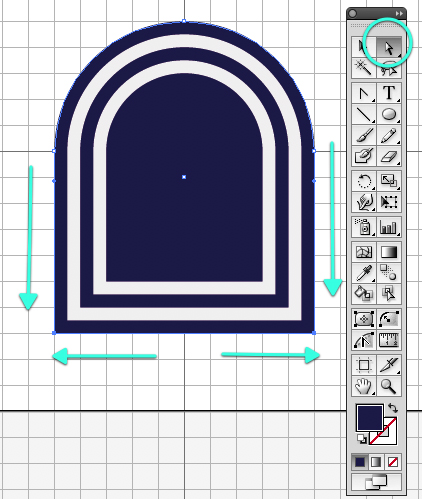
Using the Ellipse Tool (L) Option + Click onto the artboard and create a 10 x 10cm circle. Open the Appearance Panel and fill the circle with dark blue.
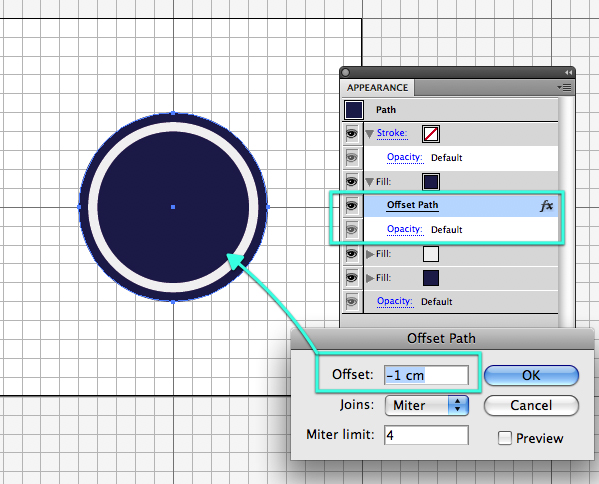
Step 3
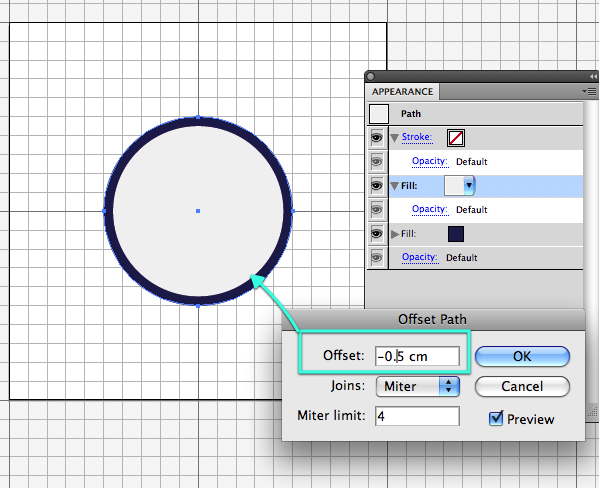
Click the Add New Fill button at the bottom of the Appearance Panel to add a new fill in white and then click the Add New Effect button and navigate to Path > Offset Path. Set the Offset to -0.5cm and click OK.
Step 4
Once again, click the Add New Fill button at the bottom of the Appearance Panel to add a new fill in the same dark blue as before and then click the Add New Effect button and navigate to Path > Offset Path. Set the Offset to -1cm and click OK.
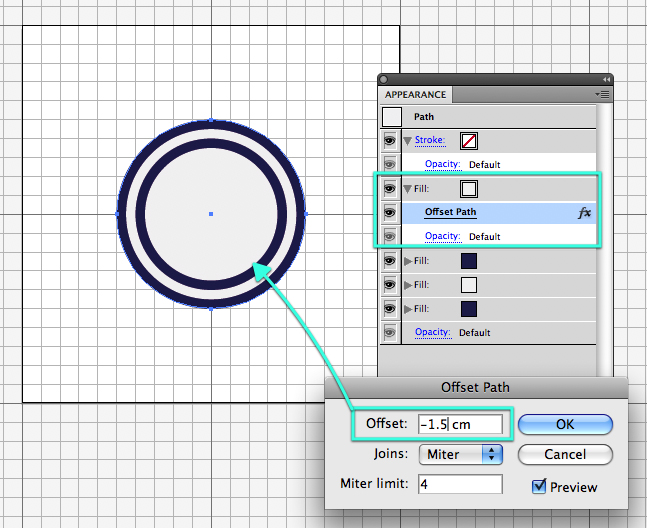
Step 5
Then one more time, click the Add New Fill button at the bottom of the Appearance Panel to add a new fill in white and then click the Add New Effect button and navigate to Path > Offset Path. Set the Offset to -1.5cm and click OK.
Step 6
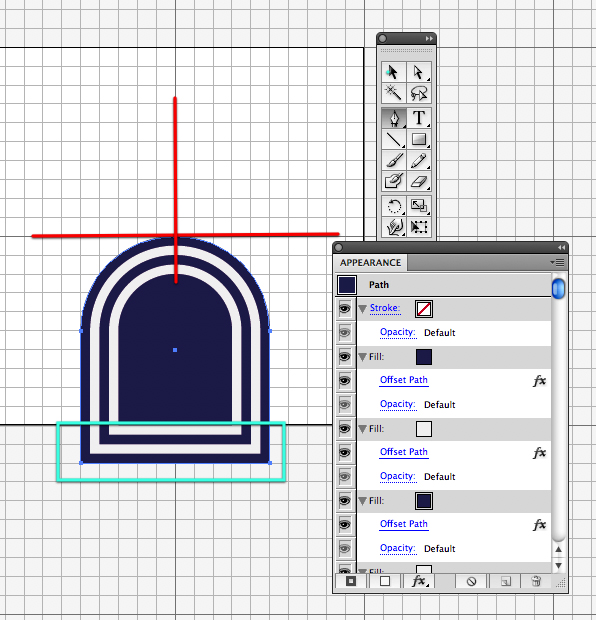
Take the Pen Tool (P) and add two points at the bottom left and right side of the circle and delete the point from the bottom middle.
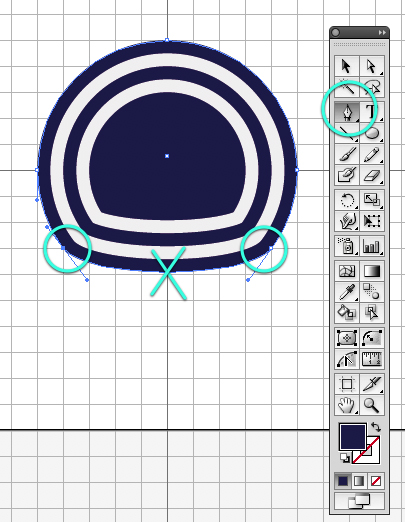
Step 7
Click on the two new points with the Convert Anchor Point Tool (Shift + C) to create corners.
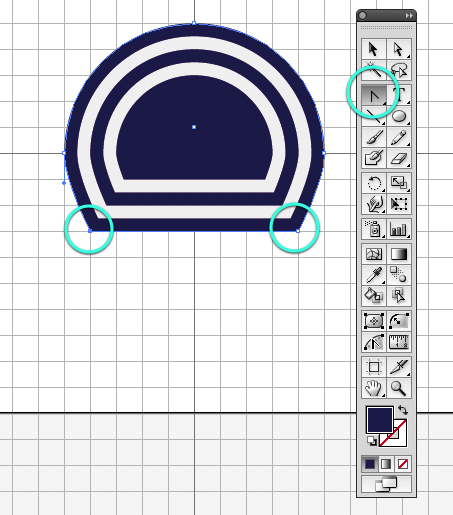
Step 8
Using the Direct Selection Tool (A), drag the corners down to create an arch shape.
Step 9
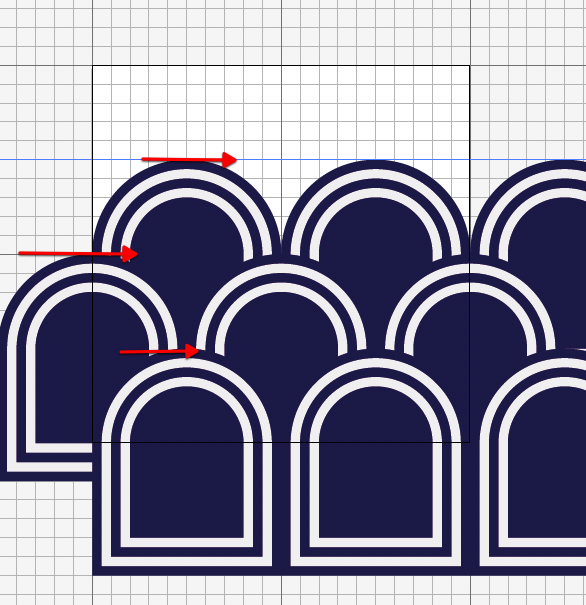
Align the top of the arch shape with the middle of the Art Board and position the bottom points so that the top of the offset lines are aligned with the bottom of the Art Board (This is about 2cm away from the artboard for my pattern)
Step 10
With the Selection Tool (V) Select the arch and Option + Drag the arch to make a copy on each side of the middle arch. Go to View > Show Rulers and drag a guide down from the ruler to where the shapes meet at the sides.
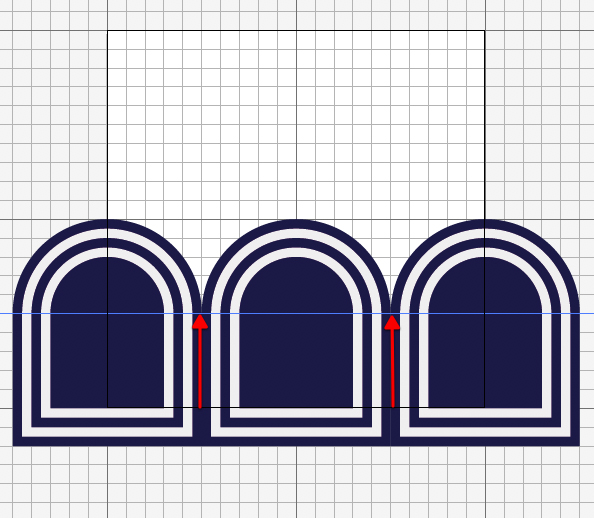
Step 11
Select the three arches and Option + Drag them to make a copy at the front. Align the top of the new shapes to the guideline and position them the same as in the example image. It should look a bit like fish scales.
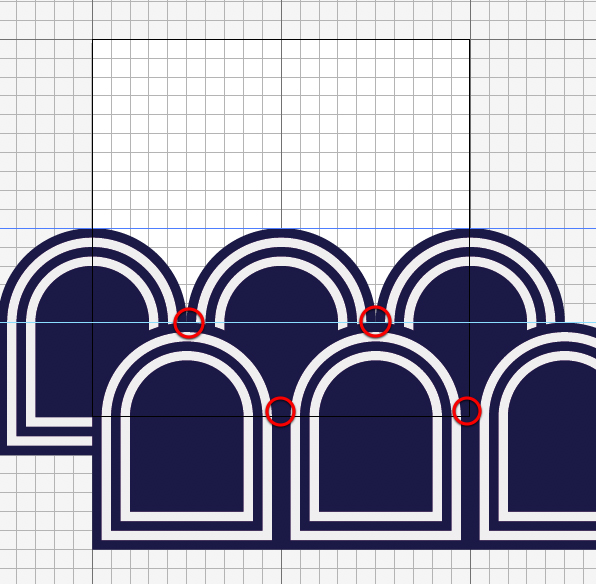
Step 12
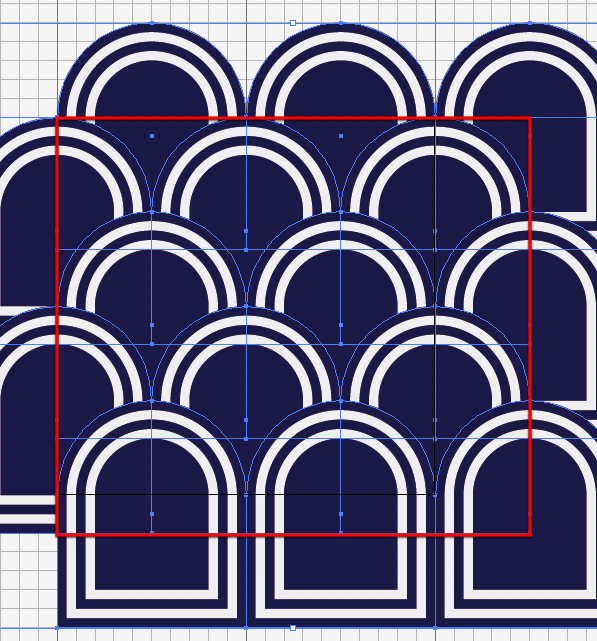
Copy and paste the three arches at the front by selecting them and pressing Command + C then Command + V. Move them to align the side joins with the top of the first line of arches. Position them at the back with Shift + Command + Left Square Bracket.
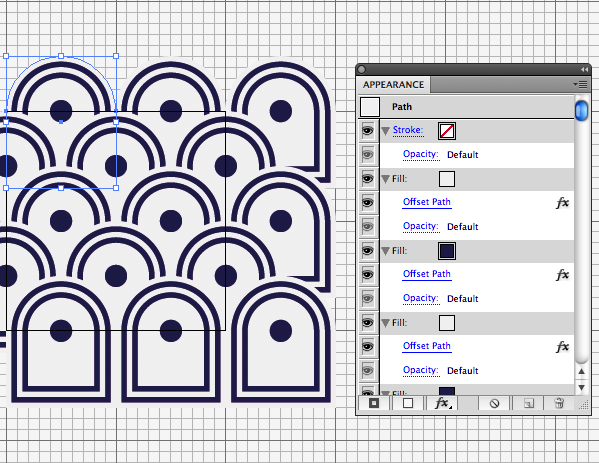
Step 13
Make one last copy of the arches, position them at the back with Shift + Command + Left Square Bracket. You should have an arrangement that looks like the example image below. Note that the shapes all align at the sides, top and bottom of the square so it will repeat when you make the pattern.
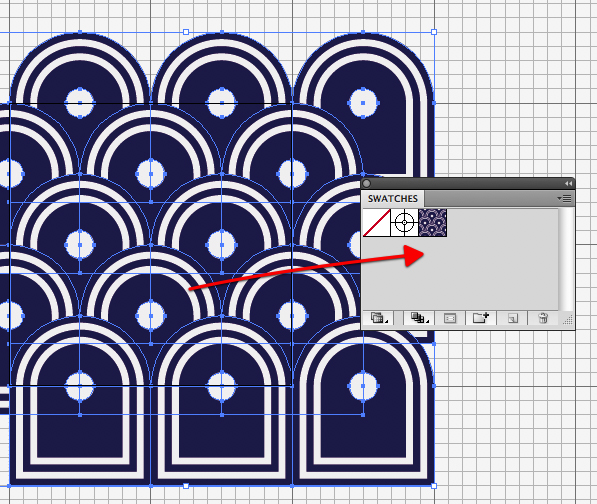
I’ve decided to add some circles to balance the pattern a bit, it’s pretty easy to line them up using Smart guides (Command + U). Just make a circle on the first shape and Option + Drag copies into place.
To make the pattern swatch, draw a square over the artboard and set the fill and line color to none. Move the un-filled square to the back with Shift + Command + Left Square Bracket. Select all of the objects and drag them into the Swatches Panel.
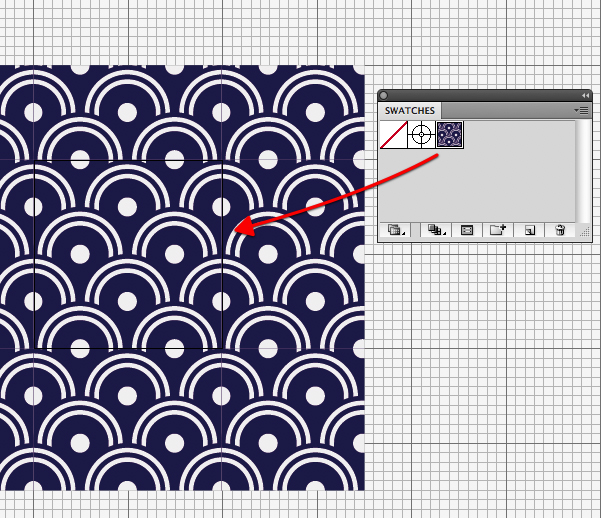
If the pattern is successful you will now have a seamless repeating pattern.
Step 14
To make color variations, simply select the arch shapes and change the values in the Appearance Panel then drag the shapes into the Swatches Panel.
Conclusion
There you have it. A really simple way to make a repeating pattern that doesn’t look simple at all. I hope you’ve enjoyed this tut. If you would like to know about more complex repeating patterns leave a message in the comments section below.