Live captions are perfect for adding descriptions to images placed within an InDesign document. InDesign uses the metadata from an imported file and generates a text frame. For example, if you have a contact sheet set up from an image library you can use Live Caption to automatically add descriptions to each frame. If you are interested in saving time, read on.
Step 1
For the purposes of the tut I am using a contact page set up from my image library. You can either use an existing file or create one from scratch by following one of my previous tutorials: Importing Multiple Graphics using InDesign CS5

Step 2
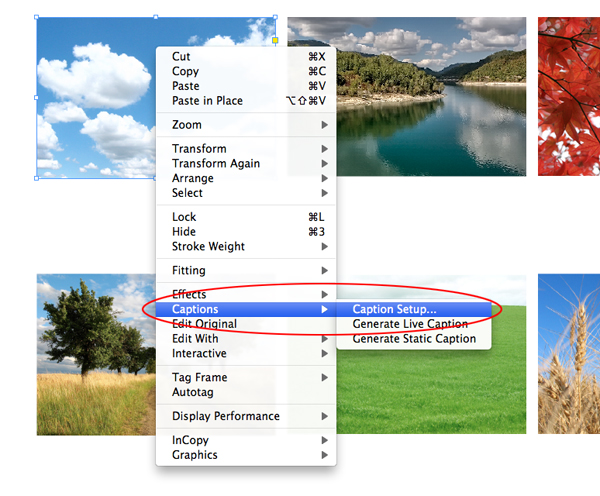
To activate the Caption feature we first need to set up some options. Do this by selecting any image with the Selection Tool and right clicking. A floating panel will appear, scroll down to Captions and select Caption Setup.
Step 3
The Caption Setup is divided into two main parts. The upper division is where you define what metadata is to be used to name the images. You can also choose to place text before and after the Caption.

Step 4
The lower division gives the user control over the position and alignment of the Caption. You will find options for adding an existing Paragraph style and which layer you want the caption to sit on. Finally you can also Group the Caption with the frame by ticking the Group Caption with Image box. Click OK to apply the choices you just made.

Step 5
Visually nothing will have changed within InDesign, this is fine. We are now going to add a caption to one of the images. Select the image and right click, scroll to Captions and this time select Generate Live Caption. Once activated a caption will be generated based on the earlier selections that were made within the setup. Note, you can select a number of images at the same time to add captions to.

Here is an image of the Captions added to my contact sheet.

Step 6
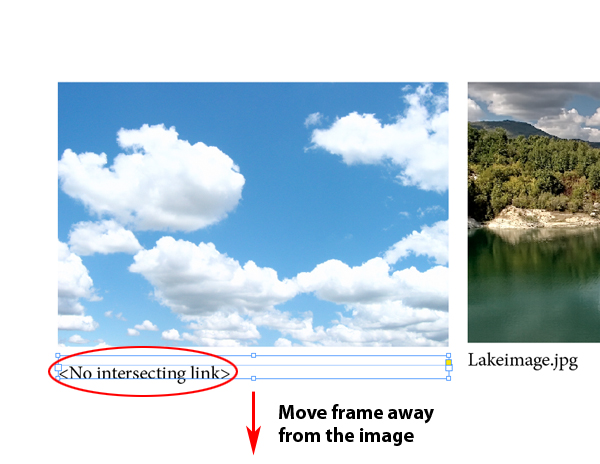
Now let’s have a look at how the Captions behave around frames and how they are anchored. Select one of the Caption text frames you just created and slowly drag it away from the the image it is attached to. You will notice that the Caption drops out when moved away and default text appears.
Step 7
Now take the same caption and move it below a different image. You will notice that the Caption has now picked up the metadata from this image frame.
Step 8
To avoid mixing Live Captions up you can follow two possible methods. Firstly, refer back to Step 4, here you could have ticked the Group Caption with Image box and this will automatically attach the caption to the image frame. Secondly, you can manually group a caption to a frame by selecting both the frame and Caption, go to Object > Group, or press Command + G. Below is an image of a grouped Caption and image.

Step 9
Final tip, it is also possible to copy Live Captions and paste them. To do this, select the caption, copy it by going to Edit > Copy, then go to Edit > Paste. Now move the the new text frame next the image you want to add a caption to and position to suit.
Conclusion
Start introducing Live Captions to your projects and discover how you can save time by not adding Captions manually. If you require further information on Metadata please follow this link: Work with metadata: Adobe Help. Images used in this tut are downloaded from morguefile.com