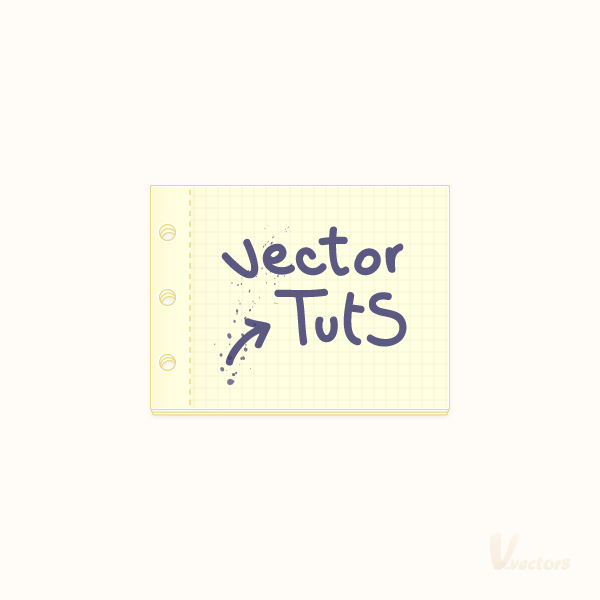
In the following steps you will learn how to create a simple piece of paper. This tutorial will introduce you to the Appearance panel. First, you will need two basic tools and some Pathfinder options to create the starting shape. Next, using some fills and strokes, several effects, a built-in pattern and some nice blending techniques you will create your own simple piece of paper. Let’s get started.
Step 1
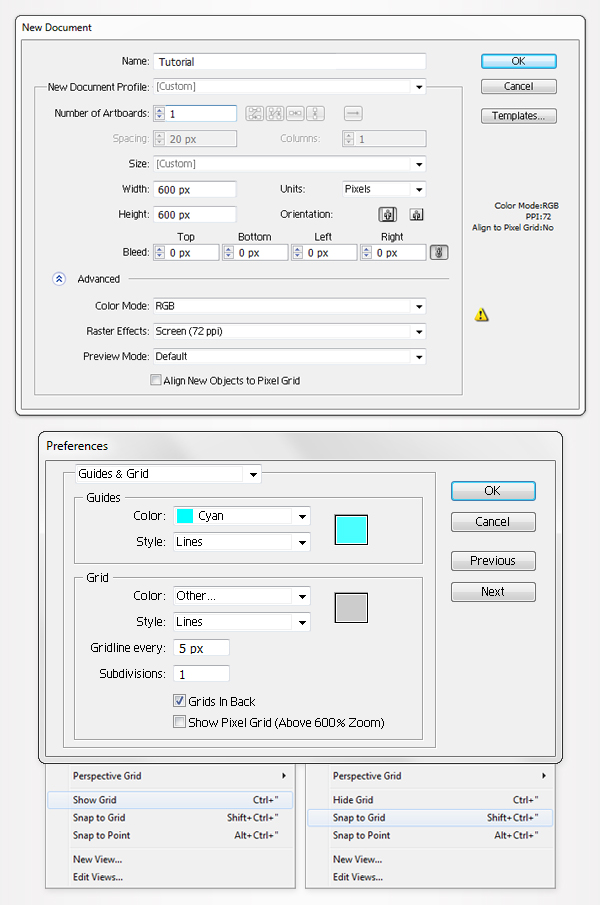
Create a 600 by 600px, RGB document. First, enable the Grid (View > Show Grid) and the Snap to Grid (View > Snap to Grid). Next, you’ll need a grid every 5px. Go to Edit > Preferences > Guides > Grid, enter 5 in the Gridline every box and 1 in the Subdivisions box. You can also open the Info panel (Window > Info) for a live preview with the size and position of your shapes. Do not forget to replace the unit of measurement to pixels from Edit > Preferences > Unit > General. Al these options will significantly increase your work speed.
Step 2
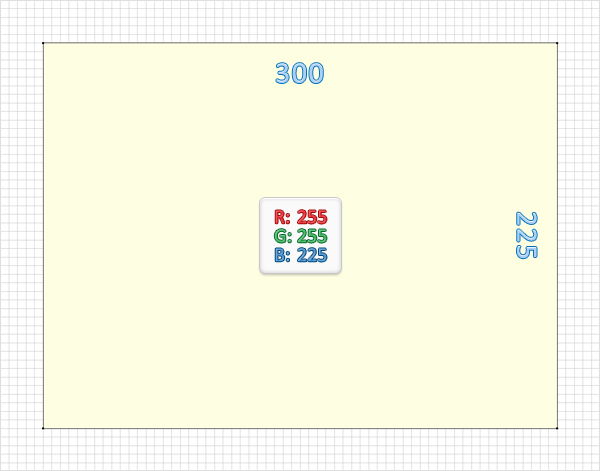
Pick the Rectangle Tool (M) and create a 300 by 225px shape. Fill it with R=255 G=255 B=225 and remove the color from the stroke.
Step 3
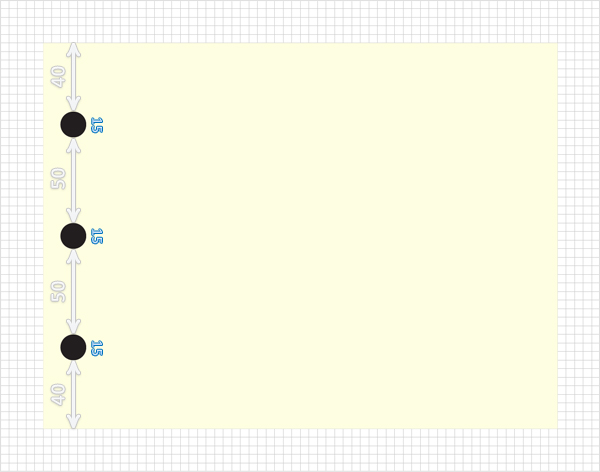
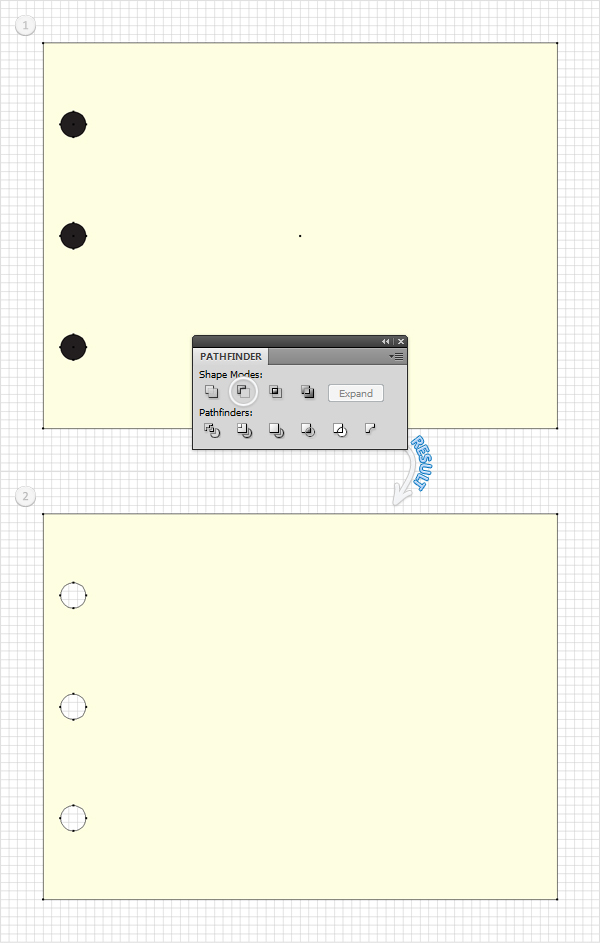
Pick the Ellipse Tool (L) and create three perfect circles (15 by 15px). Fill them with a random color and place them as shown in the following image. The Snap to Grid should ease your work.
Step 4
Select all the shapes created so far, open the Pathfinder panel (Window > Pathfinder) and click on the Minus Front button. The resulting shape should look similar to the second image. Move to the Layers panel, double click on this fresh shape and name it "Paper".
Step 5
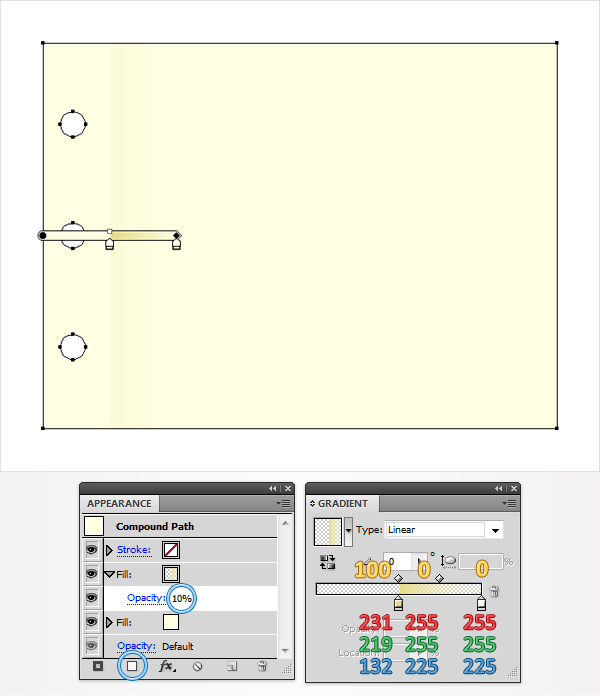
Select "Paper", move to the Appearance panel and click on the Add New Fill button. It’s the little white square from the bottom of the Appearance panel. Obviously, this will add a new fill for your shapes. Select it from the Appearance panel, lower its opacity to 10% and use the linear gradient shown below. The yellow numbers from the gradient image stand for opacity percentage. Notice that this gradient has two overlapping sliders at 50% (Location).
Step 6
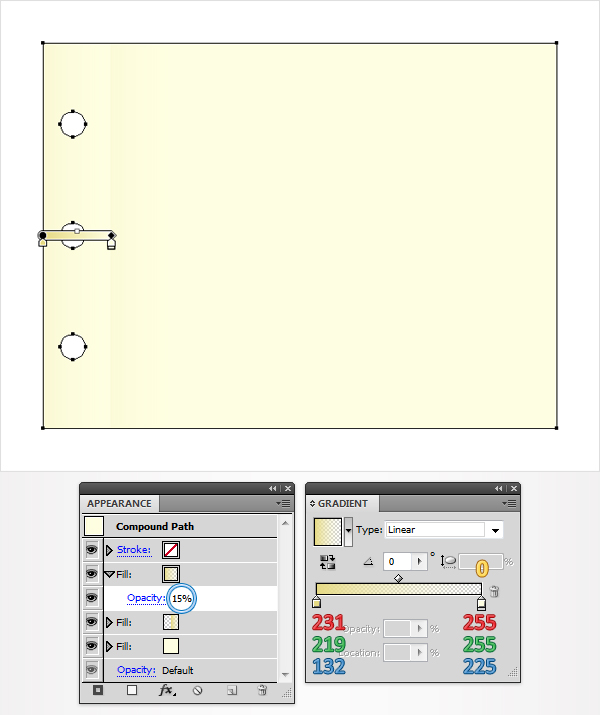
Reselect "Paper" and add a third fill for your shape. Select it from the Appearance panel, lower its opacity to 15% and use the linear gradient shown below.
Step 7
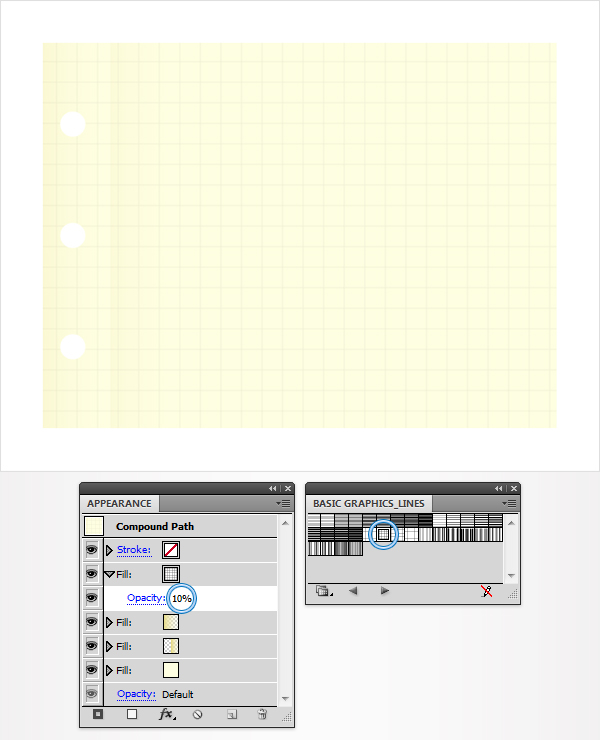
Reselect "Paper" and add a fourth fill. Select it from the Appearance panel and lower its opacity to 10%. Next, you will need a built-in pattern for this new fill. Go to Swathes panel (Window > Swatches). Open the fly-out menu and go to Open Swatch Library > Patterns > Basic Graphics > Basic Graphics_Line. A new window with a bunch of nice pattern should open. Look for the "Grid 1 pica Lines" pattern. Reselect that fourth fill and add that pattern.
Step 8
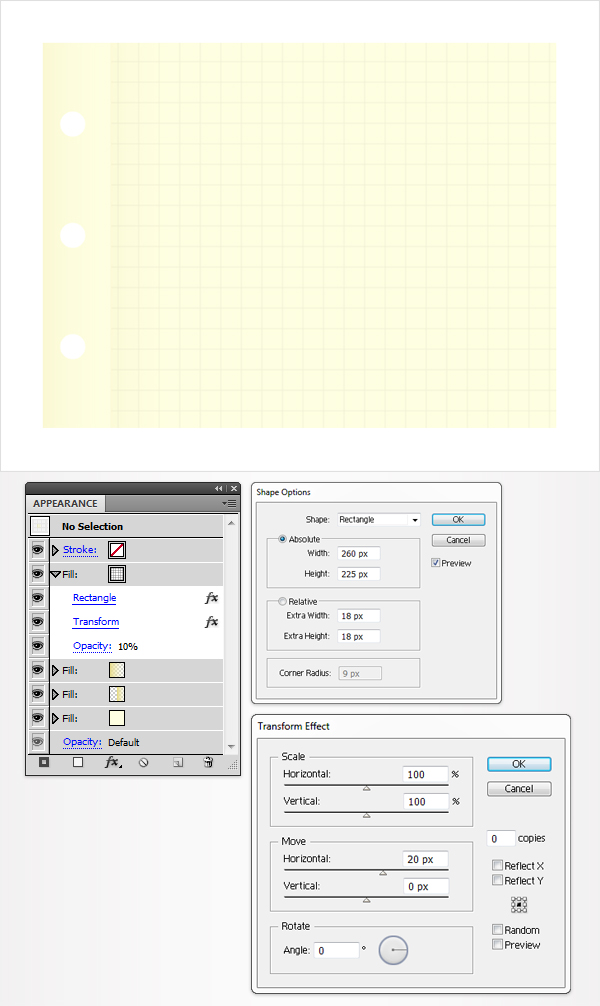
Reselect "Paper" and focus on the Appearance panel. Select the fill added in the previous step and go to Effect > Convert to Shape > Rectangle. Enter the data shown below, click OK and go to Effect > Distort & Transform > Transform. Again, enter the data shown below and click OK.
Step 9
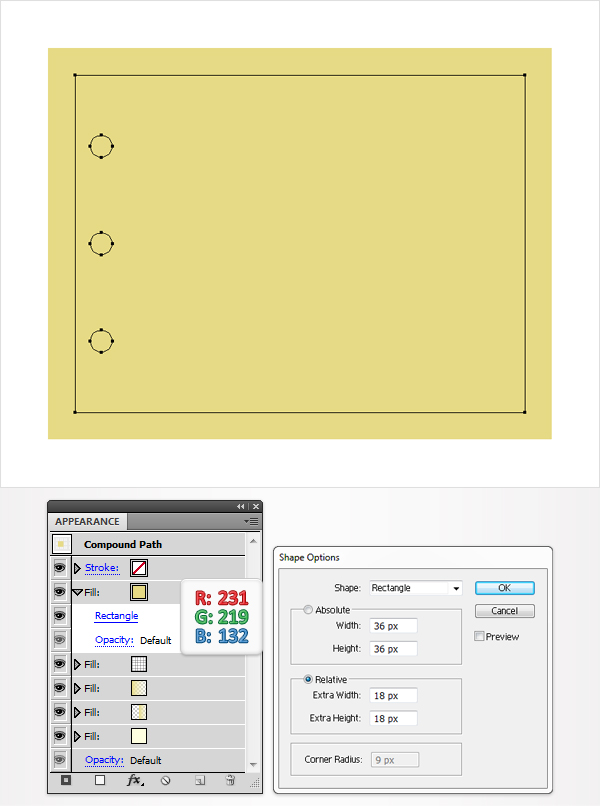
Reselect "Paper" and add a new fill. Select it from the Appearance panel, set its color at R=231 G=219 B=132 and go to Effect > Convert to Shape > Rectangle. Enter the data shown below and click OK.
Step 10
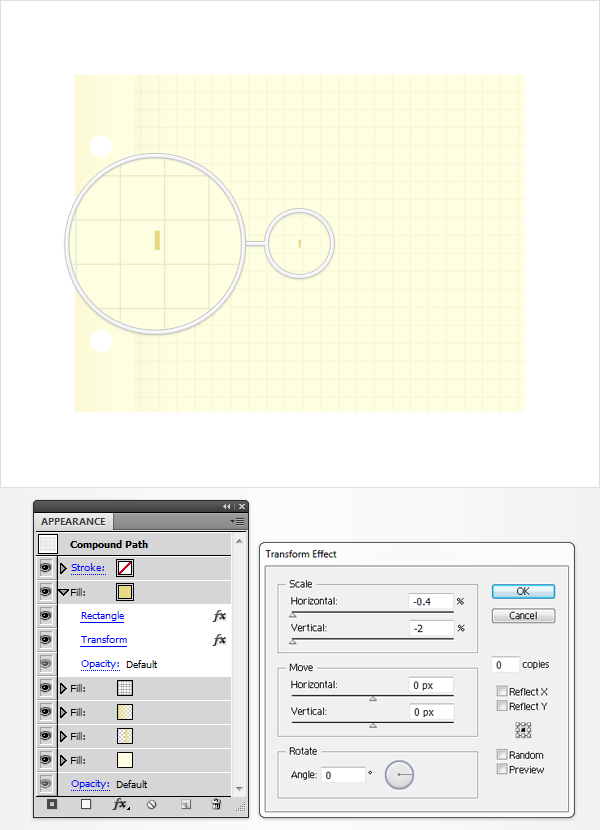
Make sure that "Paper" is still selected and move to the Appearance panel. Select the fill add in the previous step and go to Effect > Distort & Transform > Transform. Enter the data shown below and click OK.
Step 11
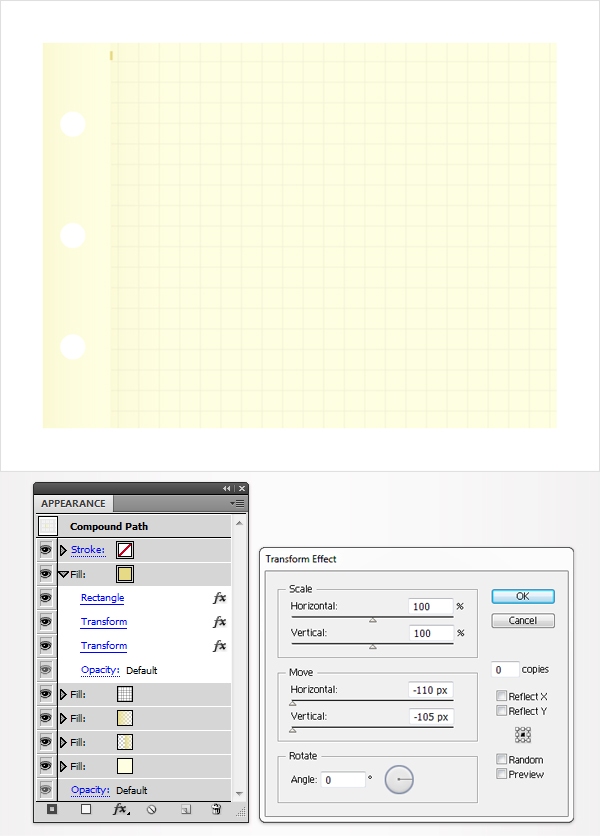
Reselect "Paper" and focus on the Appearance panel. Again, select the fill edited in the previous step and go to Effect > Distort & Transform > Transform. Enter the data shown below and click OK.
Step 12
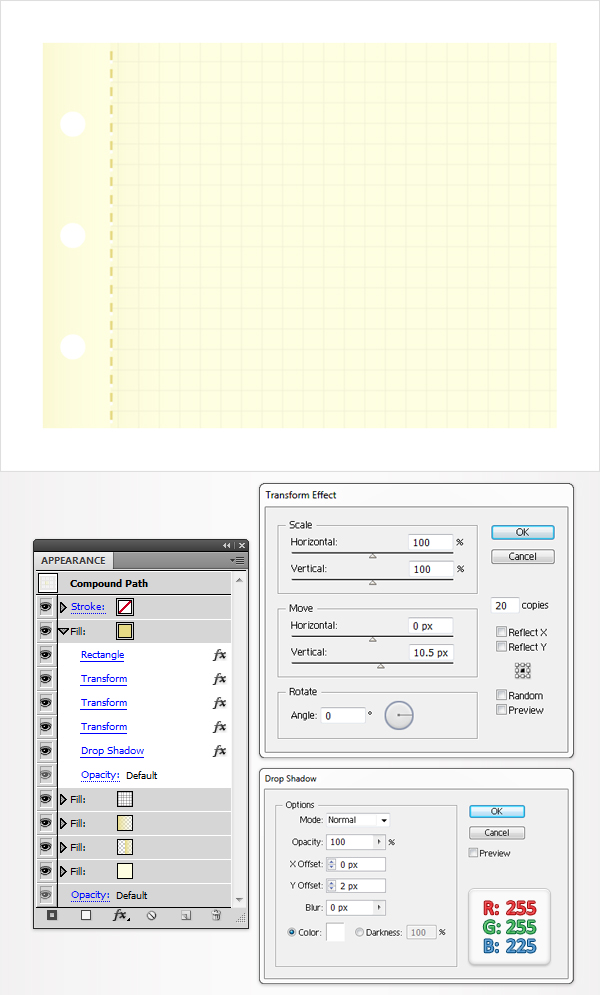
Reselect "Paper" and focus on the Appearance panel. Once again, select the fill edited in the previous step and go to Effect > Distort & Transform > Transform. Enter the data shown below, click OK and go to Effect > Stylize > Drop Shadow. Enter the data shown below and click OK.
Step 13
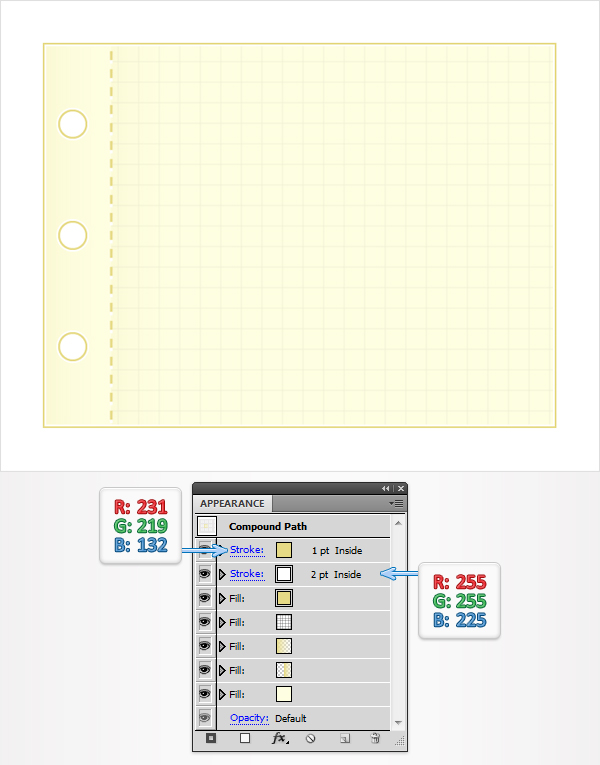
Reselect "Paper", focus on the Appearance panel and add a white stroke. Make it 2pt wide and align it to inside. Select this stroke from the Appearance panel and click on the Duplicate Selected Item button. It’s the little file icon from the bottom of the Appearance panel. Obviously, this will add a new stroke for your shape. Select it from the Appearance panel, set the color at R=231 G=219 B=132 and decrease the width to 1pt.
Step 14
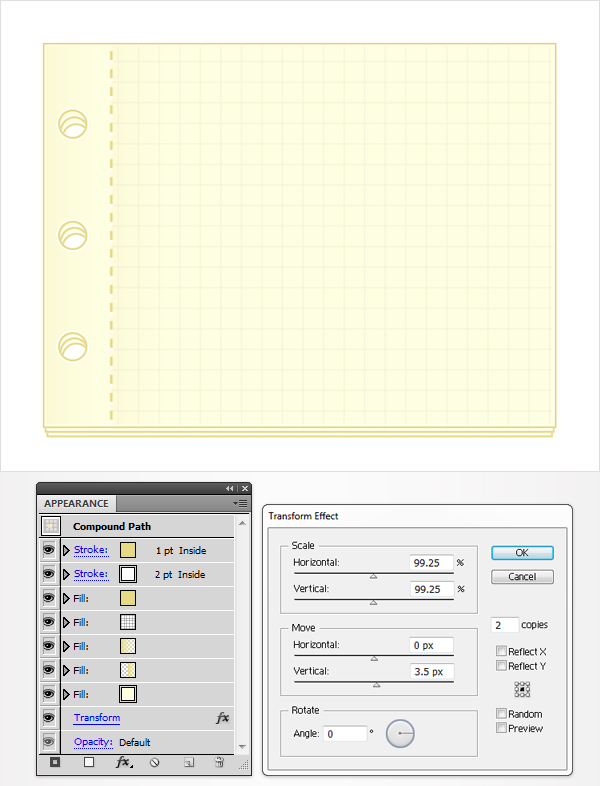
Reselect "Paper" and make sure that no fill or stroke is selected. Now, go to Effect > Distort & Transform > Transform > Enter the data shown below and click OK.
Step 15
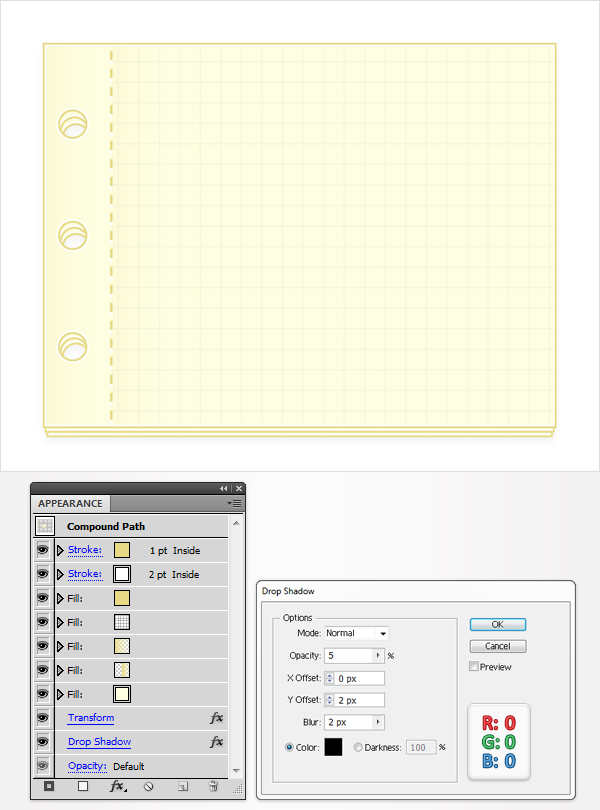
Make sure that "Paper" is still selected and go to Effect > Stylize > Drop Shadow. Enter the data shown below and click OK.
Step 16
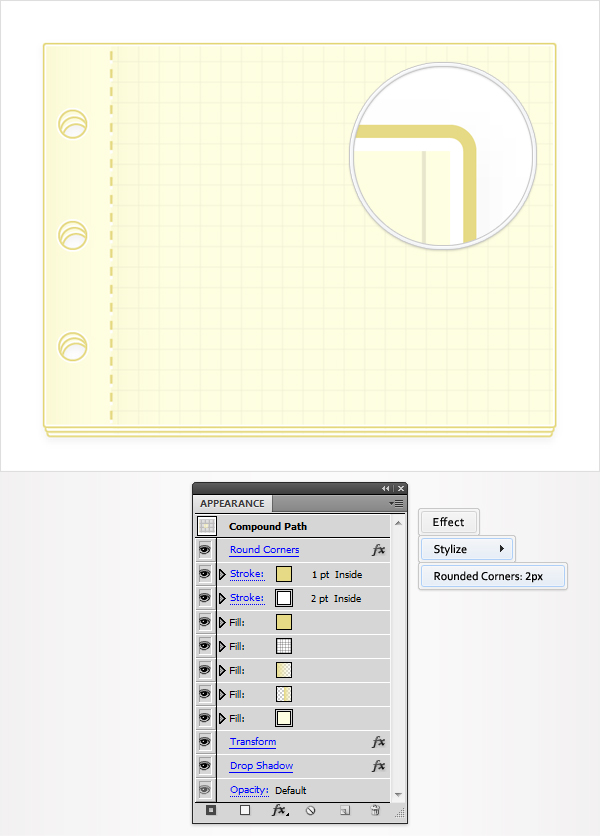
Reselect "Paper", make sure that no fill or stroke is selected and go to Effect > Stylize > Rounded Corners. Enter a 2px radius and click OK. In the end make sure that the Rounded Corners effect is in the top of the Appearance panel.
Step 17
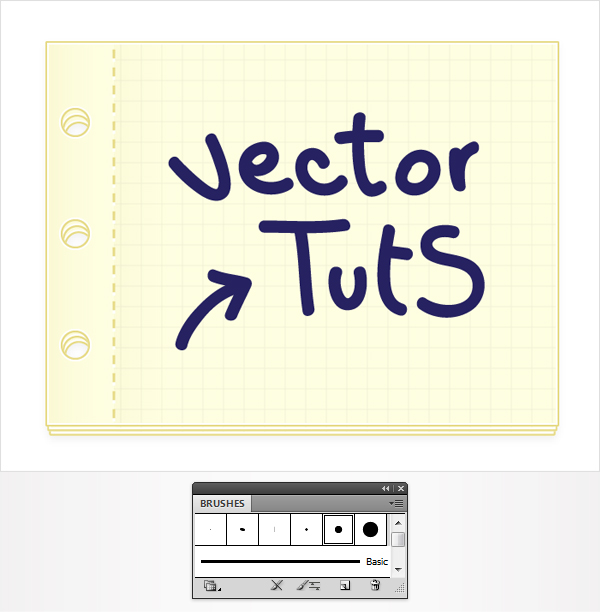
Go to your Toolbar and set the fill color at none and the stroke color at R=38 G=34 B=98. Open the Brushes panel (Window > Brushes) and grab the Brush Tool(B). Select the "7pt. Round" brush and draw some simple text path as shown in the following image.
Step 18
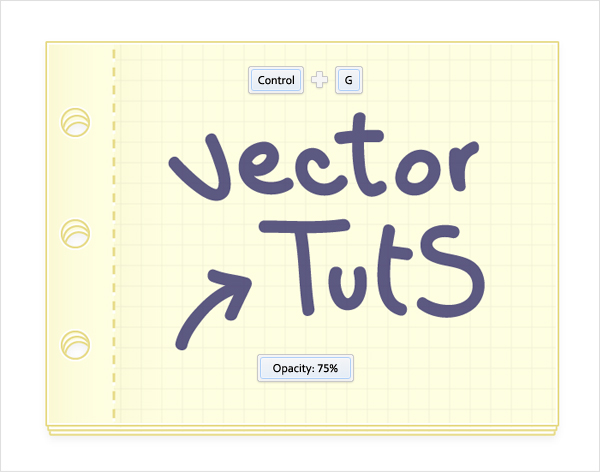
Select all the paths created in the previous step and group them (Control + G). Select this fresh group and lower its opacity to 75%.
Step 19
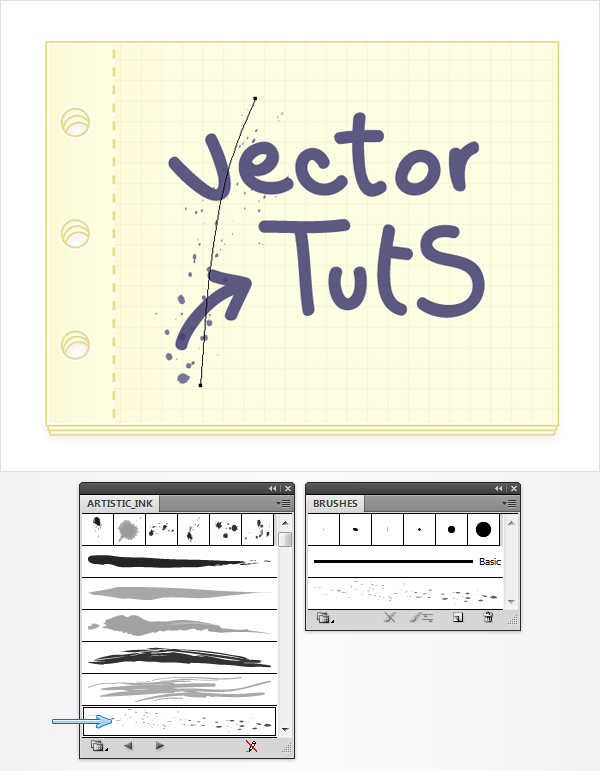
Finally, you will need a simple, built-in brush. Open the fly-out menu of the Brushes panel and go to Open Brush Library > Artistic > Artistic_Ink. A new window with a bunch of nice brushes will open. Grab the Brush Tool (B), select the "Fire Ash" brush from this new window and draw a simple path as shown in the following image.
Conclusion
Now your work is done. Play around with different brushes and colors to make your own creations. I hope you’ve enjoyed this tut.
