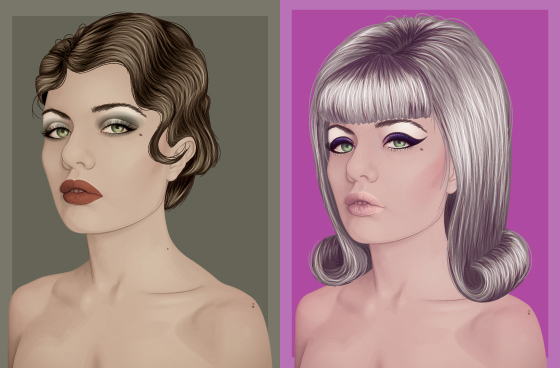
By making simple changes to hair and make up, you can alter a vector portrait to create a retro or vintage style. In today’s tutorial I show you how to recreate a 20s and 60s style on a vector portrait.
Introduction
If you’ve been a reader of Vectortuts+ for a while, you may notice that every so often I do a tutorial based on a portrait. Truth be told, it’s the area I have the most fun and have most experience with. Also, those getting into vector often go to portraits first, as it’s such a popular thing to illustrate.
In today’s tutorial, I’m going to be revisiting a previous portrait I created for a tutorial, with stock provided by Claire Jones, and showing you how changing the hair, make up and overlaying a color can change the time period of the portrait. Specifically, I’m going to show you retro styles from the 1920s and 1960s. They have very similar processes in creating them, with a couple of tweaks.
Without further ado, let’s start with the 1920s…
1920s Look
Step 1
Before starting adding these elements to a portrait, it’s always best to do some research. By doing a simple Google Image search and entering in “1920s Makeup” or “1920s hairstyles” you’ll be presented with several ideas to inspire you. You can also try looking at icons of those eras to get some inspiration there. Try to stick with the most common themes as chances are people will recognize them quicker and you’ll have less explaining to do! For the 1920s, I’ve been influenced by the movie “Chicago” for the bold red lips and soft, wavy, cropped hair.
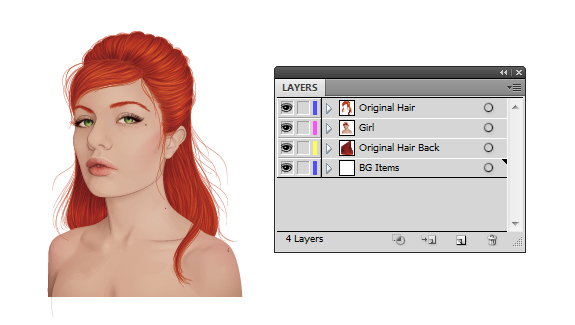
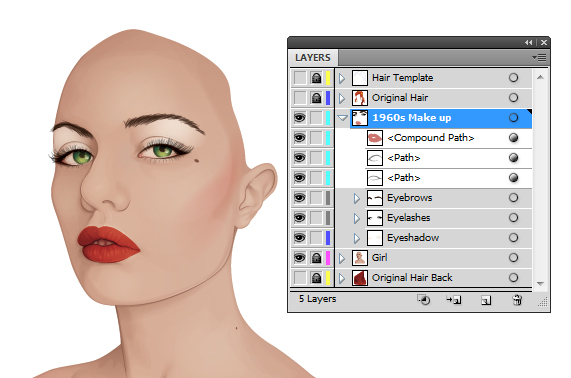
First to do is prepare the original vector file by organizing the layers so they are easy to hide and access should you need to.
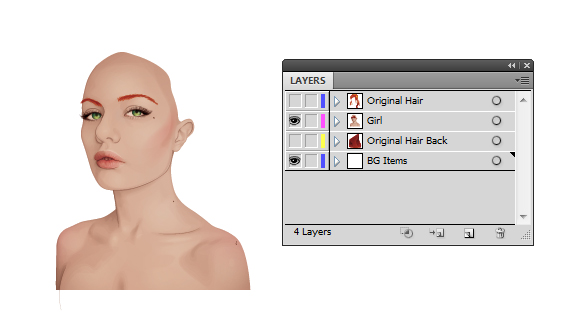
I’m not going to be using the original hair in this style, so for now I’m just going to hide them and there we have our bald girl as a template.
Step 2
I’m going to start easy by duplicating the eyelashes and eyebrows from the original vector and placing them in a new layer folder. I’m wanting to change the hair coloring from a lovely red to more of a brunette. I’ll just need to alter the eyelashes to a shade of dark brown/black but not change any other of the attributes of the strokes.
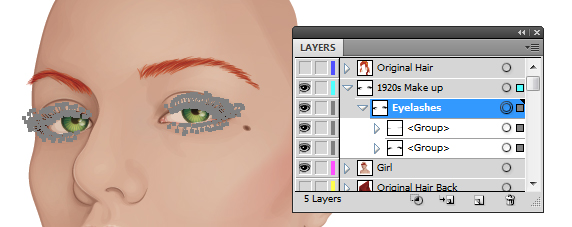
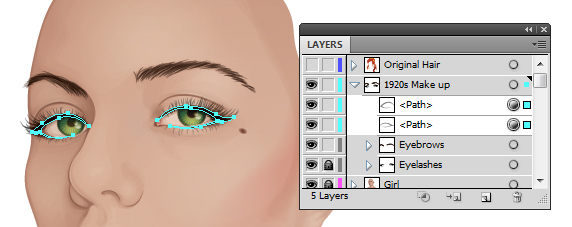
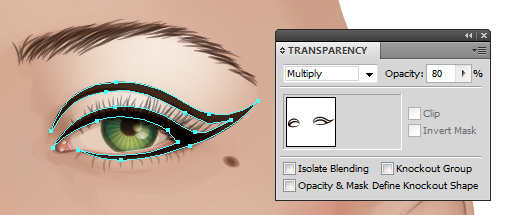
I’ve done the same with the eyebrows. Now with the Pen Tool (P), I’ve added a subtle eyeliner effect around the eyes and set it to Blending Mode Multiply with Opacity 50%.
Step 3
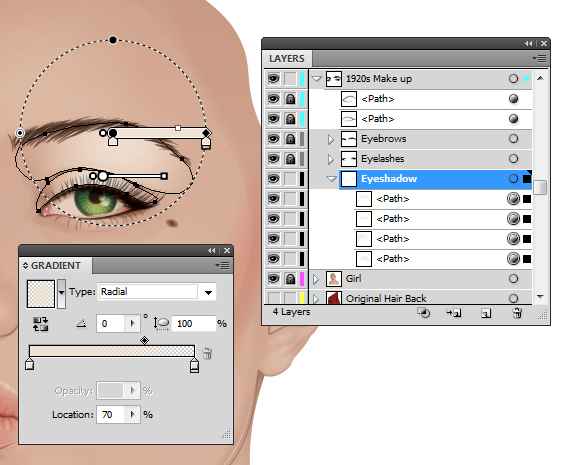
The majority of styles, regards to the decade, you’ll find there is some base to the eyeshadow. I always use the lightest shade from the skin shading (often used for highlights on cheeks and nose) within a transparent radial gradient.
Create shapes over the eye area, brow bone and one for the eyelid. Now apply the gradient to Blending Mode Screen. Depending on how bold you want this base will be your Opacity value. In this case, I don’t want it to be bold so I’ve opted for Opacity 60%.
Step 4
When creating the eyeshadow, I mainly use transparent radial gradients. If you’re using an older version of Adobe Illustrator, you can get around this by using blends by checking out this tutorial.
The color scheme I’ve opted for is a muted earth tone, which you can find in the AI default palettes by going into the drop down menu in the Swatch panel then going to Open Swatch Library > Earthtone > Earthtone 7. With the 1920s, there weren’t so many pigments around for the make up, so a lot of the colors were muted and this should be reflected in the style.
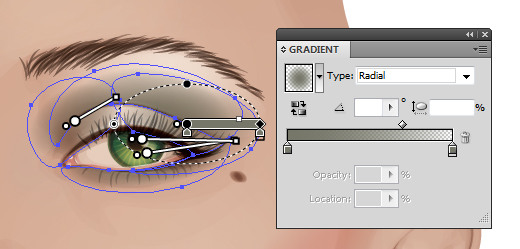
To start, I’ve added four gradients around the eyes. One on the top and bottom and one on either side of the top gradient. The top and bottom gradients are set to Opacity 100% with the side gradients at 50%. I’ve then Grouped them together (Command + G) and set the Group Blending Mode to Multiply.
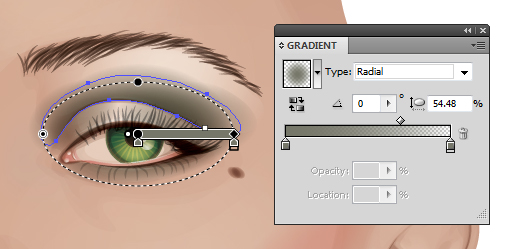
I’ve then added another gradient above the crease of the eyelid and set this to Blending Mode Multiply.
Step 5
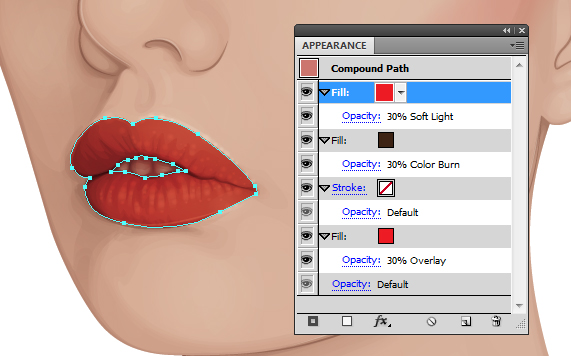
For the lips, I’ve duplicated the initial lips shape, which I use as a base. Yet if you’ve not done this method, you can easily draw one with the Pen Tool (P). As the lips are going to be a bold shade, I’m going to apply red underneath the lips shading (within the original vector shapes). This is going to be a dark red (C=15, M=100, Y=90, K=25) and set to Blending Mode to Multiply at Opacity 50%.
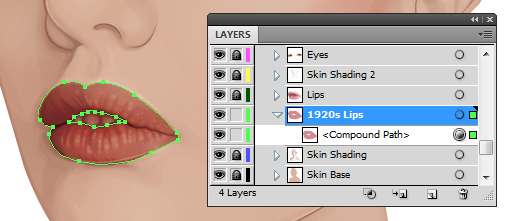
I’ve then duplicated the lips shape again and brought it into the “1920s Makeup” layer folder and applied the below attributes in the Appearance panel.
Step 6
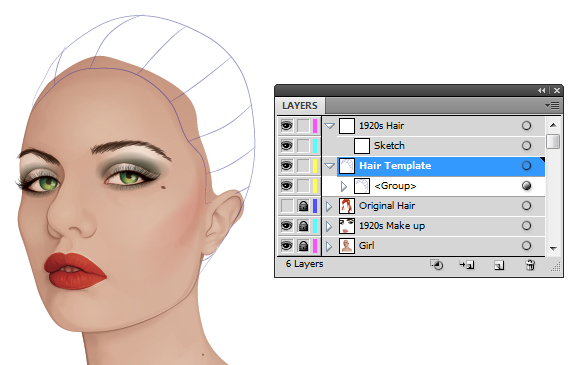
As well as altering the make up, a change in hairstyle will also set the mood for the decade you want to give the impression of. However before we start, I’m going to show you a helpful hint before constructing the hair.
Create a New Layer and put a sketch of the rest of the head, as well as center and side partings. This can be used as a guide and help you recognize where the head is, where the hair must cover, and angles of the hair partings. If you’re unsure how to do this, use your original reference image to try and estimate where the scalp is.
Step 7
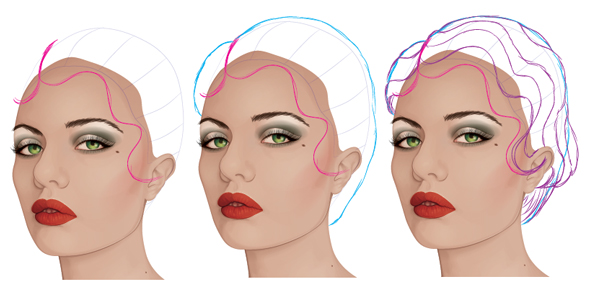
Now that I have my template, I’m going to do a sketch of the hair style I wish to do. First, I like to draw where the parting in the hair is and the line where the hair is going to be along the forehead.
Second, I estimate where the hair covers the rest of the scalp and the level of volume it has. Finally, a sketch of patterns in the hair, such as waves or any other notable elements in the hair. If you’re unsure of the hair style, use multiple references to get it right.
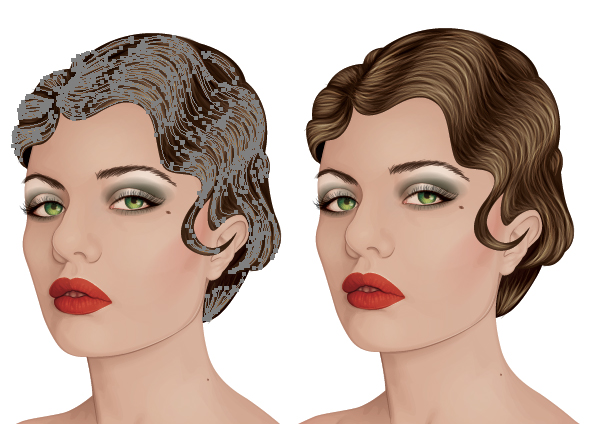
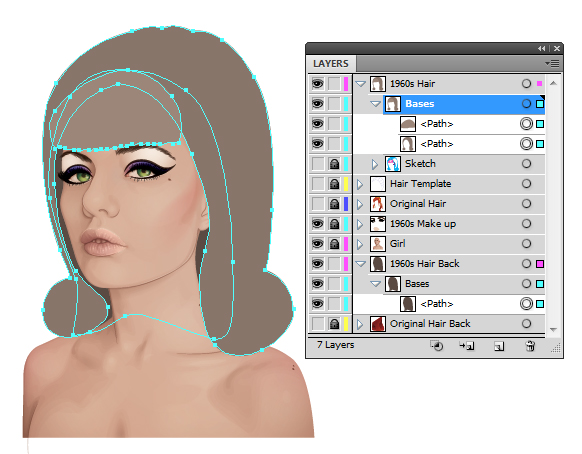
Step 8
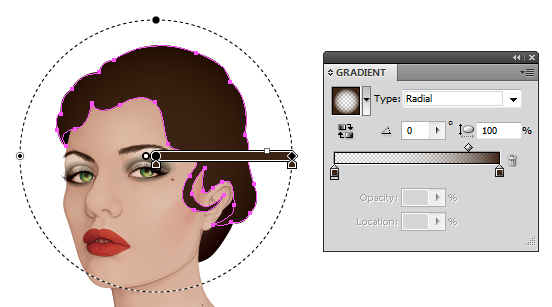
Use the sketch you’ve created and the Pen Tool (P) to then draw the bases for the hair. Some shapes around the ear and neck will be behind the original vector and the main shape will be on top. The shapes in the back I’ve changed the color very slightly by increasing the Key value by 5-10.

Step 9
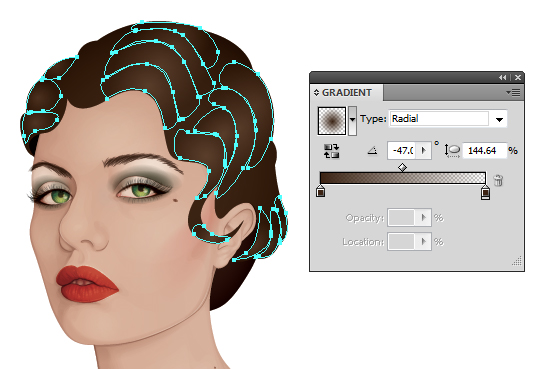
I’m going to add gradients to the hair to help prevent it from looking too flat. The first ones will be inverted transparent radial gradients with the same brown used for the base shapes. Set these shapes to Blending Mode Multiply and use the Gradient Tool (G) to position the gradient so it’s fading around the edges.
Using the same gradient, add shapes to where the wave peaks are and set these to Blending Mode Screen and Opacity 60%.
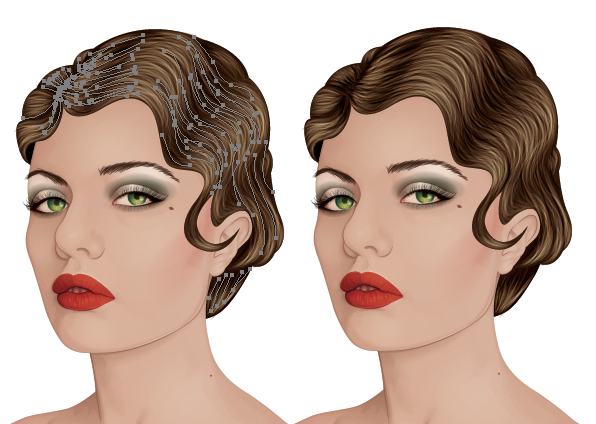
Step 10
I’m going to begin drawing in the strands of hair. I use a graphics tablet and the Paintbrush Tool (B), but you can do it with a mouse if you’ve got the patience. I also use my “Width Profile 1″ brush which you can learn how to create via this tutorial.
Usually, I add a lot more depth to hair, however I’m going to go over the basics of giving the impression of detailed hair. It follows the same sort of principals of adding light strokes, for adding dark strokes. The strokes are always the same color as the base layer (only blonde and more detailed hair will be different) and use Blending Modes to alter the light/dark appearance of the strokes.
The first are going to be light strokes set to Blending Mode Screen, with Opacity 35%, and have a Stroke Weight of 3pt. Start drawing strokes on the peaks of the waves and then integrate them in with longer strokes covering the entire scalp.
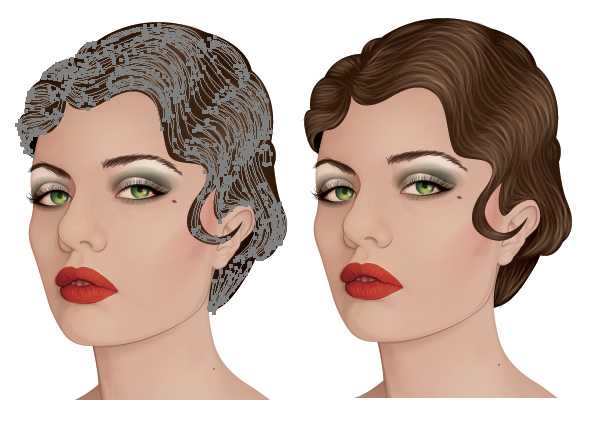
Now add darker strokes with Blending Mode Multiply, Opacity 20%, and focus on the troughs of the waves to integrate those in.
Step 11
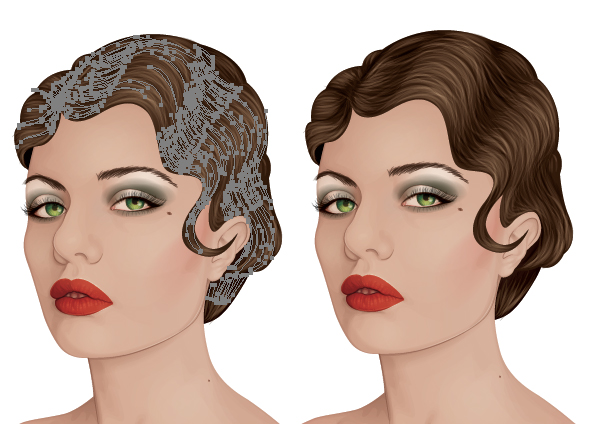
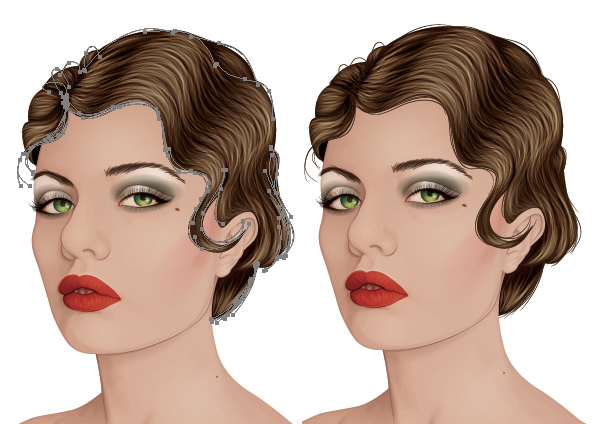
I’m going to add highlights to the hair using Blending Mode Color Dodge, Opacity 20%, with a lower Stroke Weight of 2pt. To avoid overly red/golden tones in these strokes, use a brown/gray stroke color (C=50, M=60, Y=60, K=25).
Now add depth to the troughs with Blending Mode Color Burn and Opacity 40%.
Step 12
As hair is never perfectly smooth, add fly away strands of hair around the edges of the hair using the original hair base color as the stroke, and with a Stroke Weight of 1pt.
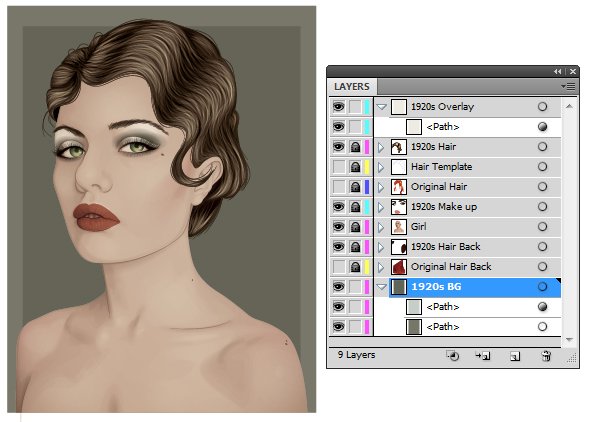
Step 13
Finally, I’ve added a muted background using the same colors from the “Earthtones” palette. I added a shape over the entire portrait set to Blending Mode Color with Opacity 50%. This helps mute the overall colors of the portrait to help emphasize the vintage look.
1960s Look
Step 1
For the 1960s look, I’m going to duplicate the file I’ve done for the 1920s and remove the hair, earthtone eyeshadow (keeping the base) and the background/overlay. Increase the Opacity of the eyeshadow base to 80%. So below is what I have:
Step 2
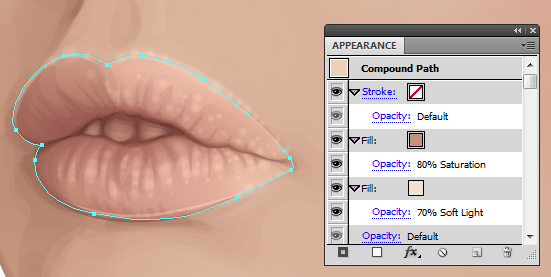
With the 60s look, especially in the UK, a nude lipstick was popular. It’s not about the absence of lipstick, but an actual nude matt color on top of the lips. So I’m going to remove the original red shape from underneath the lips and then modify the lips on top.
I’ve removed the center parting in the lips as I want to neutralize all the coloring. I’ve used the below Appearance panel settings to color the lips, but still give definition, which is important when removing the color.
Step 3
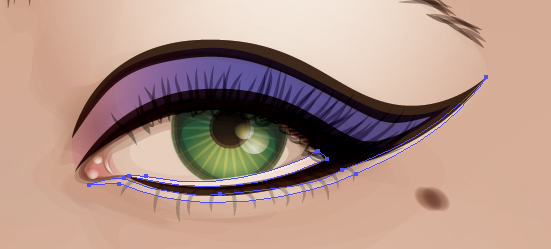
The 1960s style make up is very graphic and bold. The eyeliner for this style is thicker and much more prominent. So create a cat eyeliner shape with a black fill. Include a thick line along the eyelid crease as part of the style. If you’re using a female model with a smaller eyelid, add this additional line higher up from the crease to emphasize this line.
Step 4
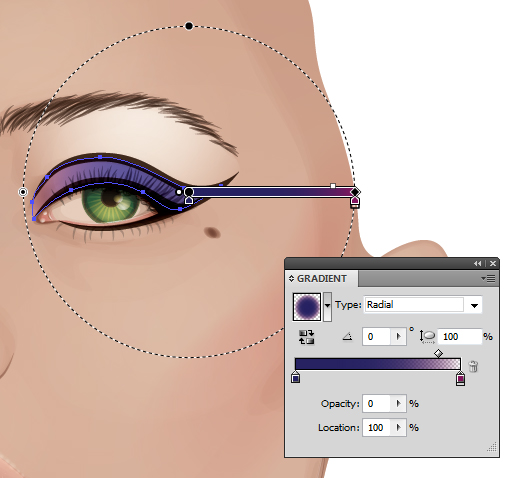
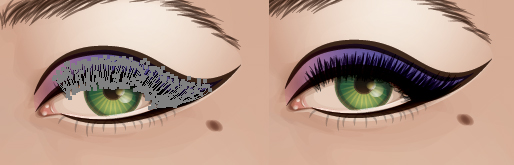
With more pigments available, the eyeshadow shades were a lot more colorful. I’m going to add a violet to pink/purple transparent radial gradient to the eyelid. These shapes are then set to Blending Mode Hard Light with Opacity 75%.
White eyeliner pencil was often used on the waterline and around eyeliner to help emphasize the bold graphic look and to make the eyes look bigger. So using the highlighting skin tone shade, I’ve drawn shapes along the waterline (Opacity 80%), and then along the bottom eyeliner (Opacity 40%), and both are set to Blending Mode Screen.
Step 5
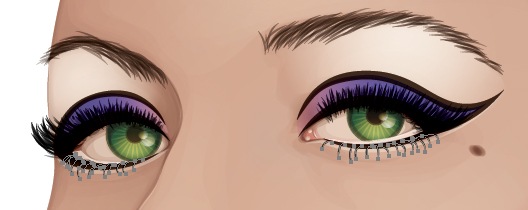
Although people may often think of the iconic Twiggy look of segmented eyelashes, I much prefer the fuller thick eyelashes of the 60s. So I’ve added many black strokes along the top line to thicken them up. The more false they look, the better!
With the bottom lashes, I’m just going to increase the Opacity of the original lashes to Opacity 80%. All lashes should be set to Blending Mode Multiply.
Step 6
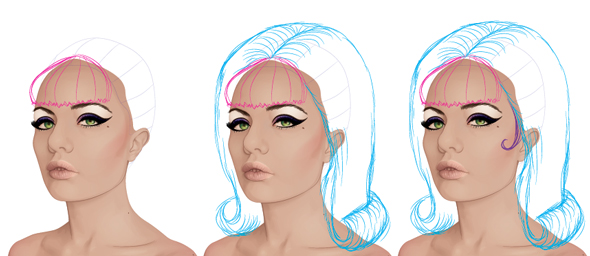
Moving onto the hair, I’m using the guide for the scalp again and drawing my initial sketch of the hair. The original vector portrait I did had a bit of a beehive effect, which you would associate with the 60s, but I’m going to do another big look which is a shoulder bob cut with the end curled. Again it’s a very graphic look.
Step 7
Now to create the bases. I’ve added on specifically for the bangs/fringe as it will help you define this section of the hair easier. I’ve opted for an ash blonde.
Step 8
We’re going for the same process of doing the hair again, adding Multiply gradients on the duplicated bases to first add depth:

I then added Multiply gradients to emphasize the roots of the hair and the shadow cast by the curves.
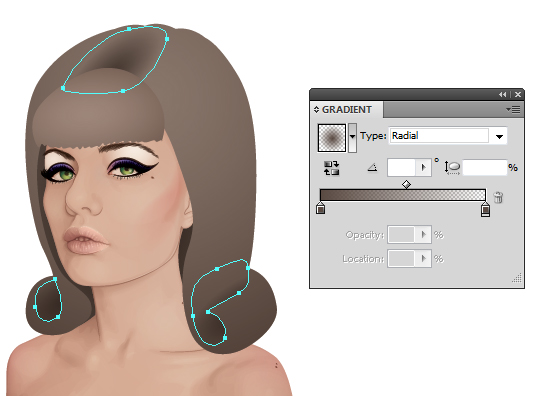
Finally, add Screen gradients across the hair that help bring out the shine, but also act as a guide to where to place your highlighting strokes.
Step 9
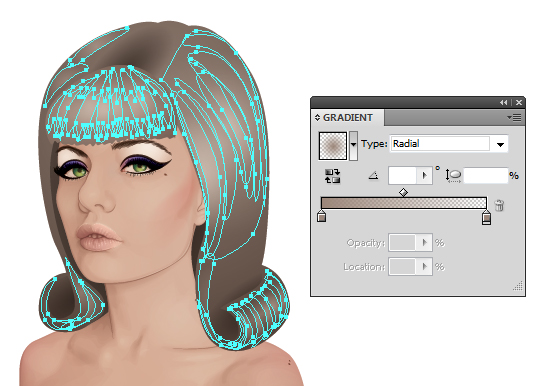
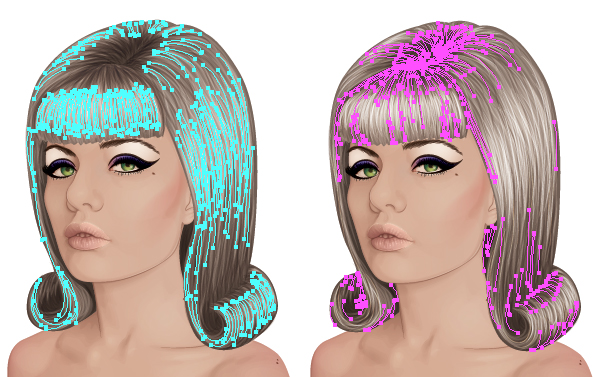
Sticking to the process, now we’ll add highlight strokes, set to Blending Mode Screen, then darker strokes with Blending Mode Multiply. Remember to keep the same base color as your stroke with thicker lines of Stroke Weight 4pt.
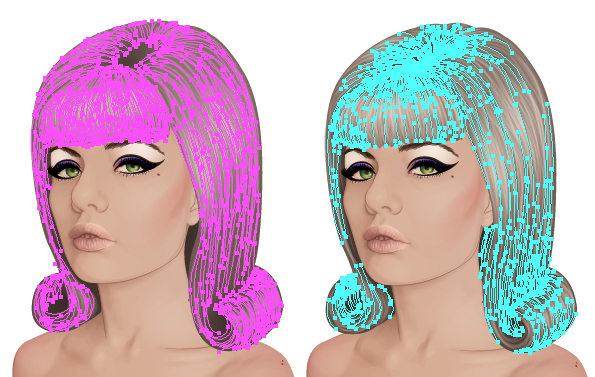
Now add strokes with a smaller Stroke Weight, set to Blending Mode Color Dodge for the highlights, and then Blending Mode Color Burn for the shaded areas. Focus some of the darker strokes around the roots, tips of the hair and around the bangs/fringe to help define the area.
Step 10
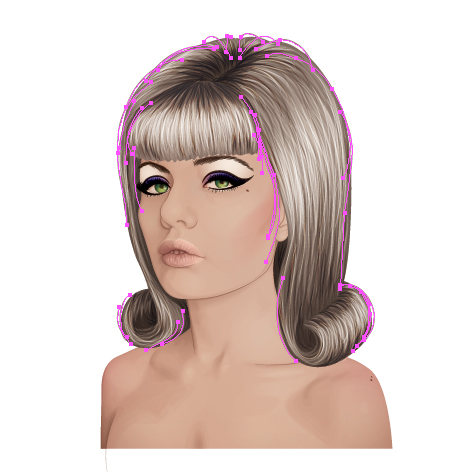
Now we’ll add strokes around the hair bases, because as we know hair is never that smooth!
Step 11
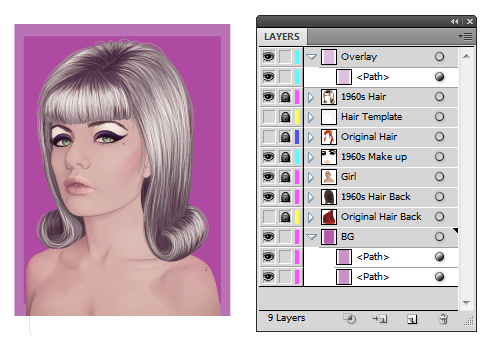
Finally, I’ve added a purple/pink overlay on top and underneath to give a dreamy 60s feel to it. I’ve set the Overlay to Blending Mode Lighten with Opacity 30%.
Conclusion
You could go even further with adding accessories to help emphasize an era. For example why not add earrings and a necklace in a style common to the decade.
Get inspiration from checking out fashions from the era by looking into Google Images and advertising for those times. If all else fails, a good overlaying color to help mute your portrait will give the impression you’re going for a vintage or retro look.
What are your favorite decades and styles? Is there a style you’d like to see created on Vectortuts+?