In this tutorial we will learn how to create a beautiful lily pad in Adobe Illustrator. We will use basic drawing tools: like the Rectangle Tool, Ellipse Tool, and Pen Tool for drawing. For coloring we will use the Gradient Mesh and Blend extensively. So let’s begin!
Step 1
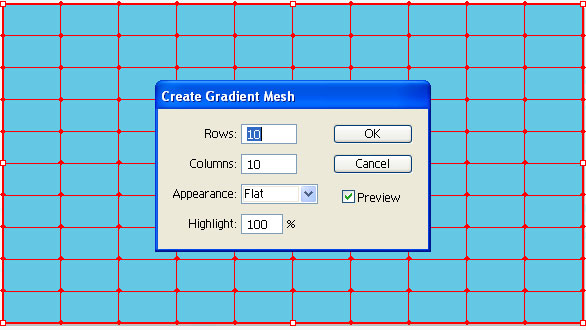
Create a new RGB document with a width of 1000px and height 550px. Using the Rectangle Tool (M) to create a rectangle that covers the entire artboard. Fill it with a shade of blue #63C8E4. Select the rectangle and go to Object > Create Gradient Mesh. In the resulting dialogue box enter the values as shown and click OK.
Step 2
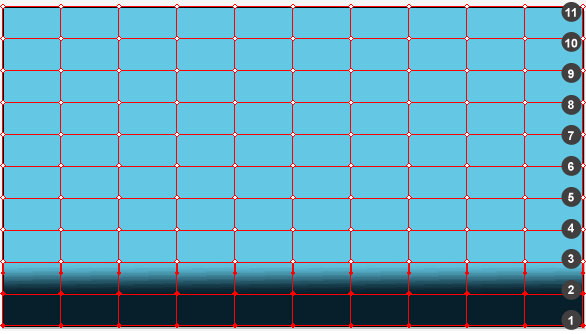
Now we’ll create a water effect by coloring nodes of the mesh in different shades of blue. I have numbered the rows for ease of explaining. Use the Direct Selection Tool (A) to select all the nodes in the first and second row and color them in a deep blue. I have used #071F2B.
Step 3
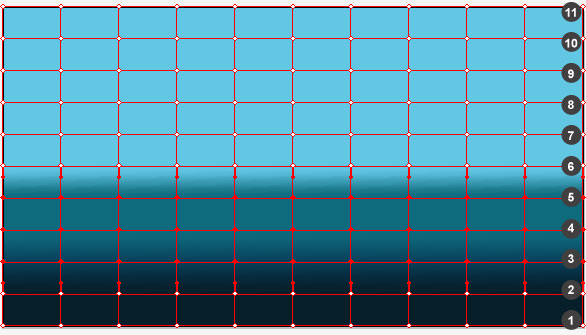
Select all the nodes in the third row and fill them with #093F58, which is a lighter blue than before. For some color variation in the water fill a greenish blue (#0E6B7D) in the fourth and fifth row.
Step 4
Fill #1E9CCF, #219FD0 and #50C0E0 in the sixth, seventh and eighth row respectively. To add a whitish tinge at the top, fill the ninth row with a light blue #94D8EE. This is how our background should look at this stage.
While this effect can also be achieved using the Gradient Tool (G), we have used a gradient mesh so we can make color changes to nodes later on to create shadows and lighter tones in the water.
Now lock the background layer and turn off its visibility for some time.

Step 5
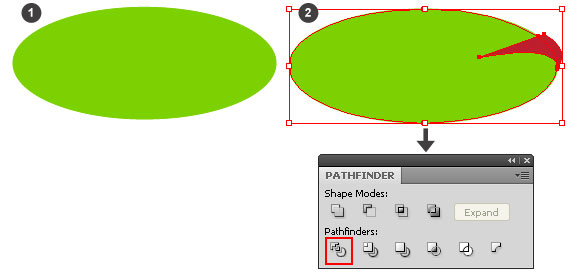
Create a new layer for the lily leaf. It is a always a good idea to create all the main elements in a separate layer. Using the Ellipse Tool (L) draw an oval shape as shown in step 1 and fill it with a bright green #7CD102. Make sure there is no stroke applied to this shape.
With the Pen Tool (P) draw a shape over the oval as shown in number 2, select both the shapes and go to Window > Pathfinder and click Divide. Delete the red parts and the basic shape of our leaf will be ready.
Step 6
Copy the leaf shape and paste it in front of the original shape by going to Edit > Paste in Front (Command + F). Select the copy and fill it with a darker green #0D3F04.
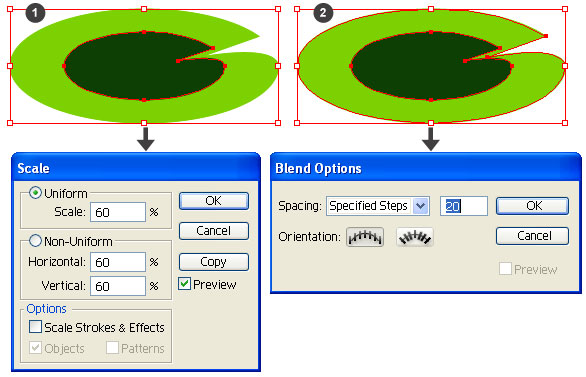
Now go to Object > Transform > Scale and enter values for scaling as per the dialogue box shown in number 1 below. Click OK. Now go to Object > Blend > Blend Options and enter values in the dialogue box, as shown below in number 2. Click OK. With the two shapes selected go to Object > Blend > Make (Alt + Command + B). The approximate width of this leaf should be 500px.
Step 7
Arrange the first leaf as shown below and duplicate once. Select the copy and go to Object > Transform > Reflect. In the resulting dialogue box select the “Vertical” radio button and click OK. Scale the leaf to 75% and arrange it as shown. Use the Direct Selection Tool (A) to select the outermost shape of the new leaf and change its color to #62B202. This will make our new leaf a bit darker than the first one.

Step 8
Use a similar process to make two more variations of the leaf and arrange them at the back. The leaf at the farthest end must be the smallest (approximately 170px in width). Don’t forget to change the color of the leaves and make them slightly darker than the first one.
The aim is to keep the biggest leaf in focus. We will now use the Warp Tool (Shift + R) to make the slight folds of the leaves. Select the Warp Tool and slightly drag it from the outside edge of the leaf towards its inside as shown below. Repeat it at different parts of the leaf edge for all leaves. Now our leaves are ready!

Step 9
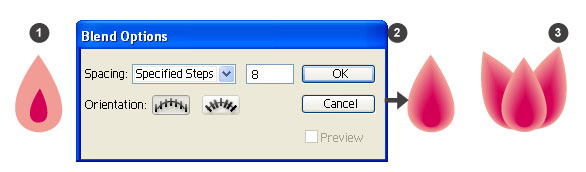
For the lily, use the Pen Tool (P) to draw a drop like shape and fill it with a light pink (#F19D95). Duplicate this shape, scale it to make it smaller and fill it with a darker pink (#D30056). Arrange the copy in front of the first shape as shown in step one.
In the Blend Options dialogue box keep the settings as per step two below. Select both the shapes and Go to Object > Blend > Make. The first petal is done and looks pretty! Simply duplicate this petal twice, tilt each copy a bit outward and arrange as shown in part three below. Group these petals together.
Step 10
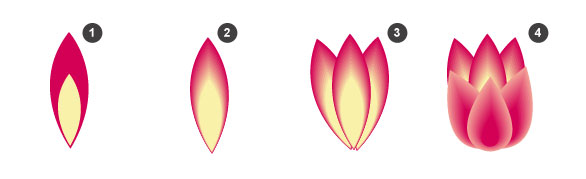
For the petals at the back follow the same steps as before. Draw a petal shape with the Pen Tool (P) as shown in part one below. As the petals at the back are darker we will fill them with a darker pink (#D30056). Duplicate, scale and arrange the copy of this shape, then color it with a yellowish tinge (#F9F1AA), as in part one below.
Select both the shapes and go to Object > Blend > Make. The result should look something like part two below. Duplicate the petal two times and arrange as shown in part three. Group these three petals together and arrange them behind the first group of petals we created. Refer to part 4.
Step 11
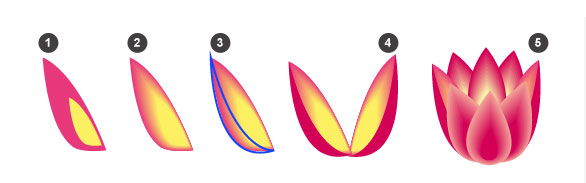
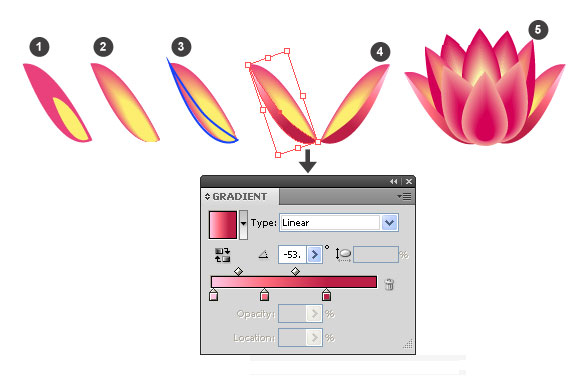
We will now create two more petals for the sides. Follow the steps below to create the side petals. In part 1; I have used #E8387C for the outer shape and a yellow (#FCF063) for the inner shape. For part 2 select the petals and use the same Blend Options we used previously.
After the petal is ready, use the Pen Tool (P) to draw a shape over the petal, as shown in part 3 below. This is the side of the petal. Fill this shape with #D30056. Duplicate and flip the petal (part 4) and arrange it as shown with the other petals as in item 5 below.
Step 12
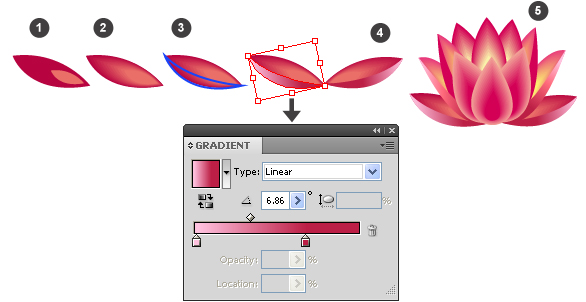
We will need to create a few more petals as the lily is opening up. Follow the steps below to create two more petals. Notice how the shapes are more tilted than the petals we created before. I have used #E9417B for the outer shape and a yellow (#FCEE6F) for the inner shape in part 1 below.
Part 2 and 3 are similar to the ones we have done before. In number 4, I have used a gradient to fill the side of the petal to give it a dimension. The gradient colors from left to right are #ffc2df, #ff6b7c and #bc1f45. Arrange the petals as shown in number 5.
Step 13
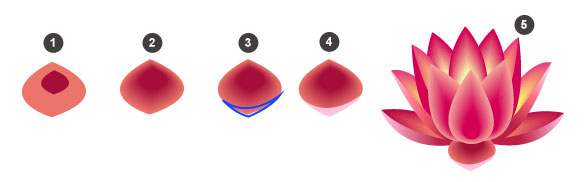
Now we will create the completely opened up petals using the same steps as above. The fill I have used in item 1 for the bigger petal shape is a dark pink (#B70440) and the smaller petal shape is a pinkish (#EA6F68). This makes the petal look a bit darker than the others. In part 4 the gradient colors go from left to right, they are #ffc2df and #bc1f45. Arrange the petals as shown in part 5 below.
Step 14
Our last petal is created more or less in the same way. Follow the steps below to complete the last petal. In part 1, I used #EA756A for the bigger petal shape and #A50E39 for the smaller petal shape. In part 4 I used a very light pink (#FFC2DF) for the fold of the petal. Arrange all the petals we created up to this point to form a flower, as shown in part 5 below. Now group them together. Our water lily is ready and it sure looks pretty!
Step 15
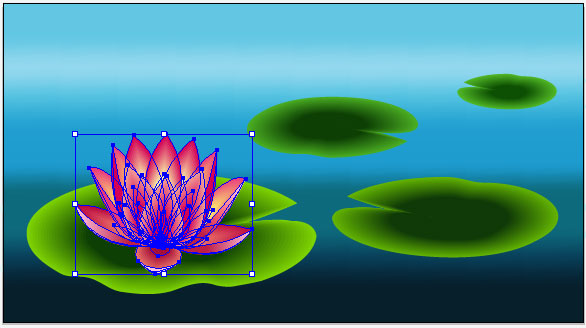
Turn on the visibility of the layers with the background and leaves. Arrange the lily we just created on the biggest leaf as shown. The width of the lily should be approximately 300px.
Step 16
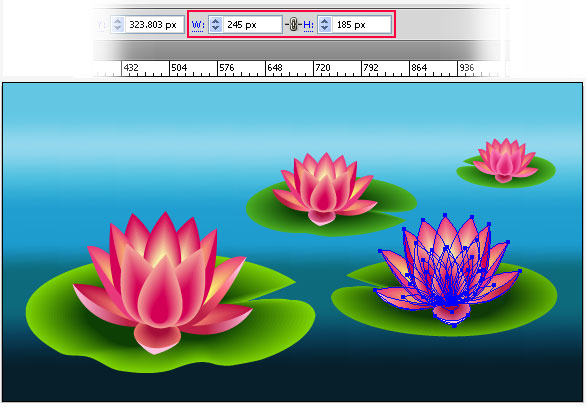
We will now place all the other lilies on our canvas. Duplicate the lily three times. Select one copy, and using the control panel at the top make the width 245px. Now place it on the second leaf. Make sure you turn on Constrain Width and Height Proportions in the control panel when resizing the lily.
Similarly scale the other two lilies to make the width 180px and 110px respectively. Now place them on the remaining two leaves. I have made slight changes to the color of the lilies at the back and made them a bit darker so they don’t stand out too much. Flip and tilt the lilies a bit for interesting effects.
Step 17
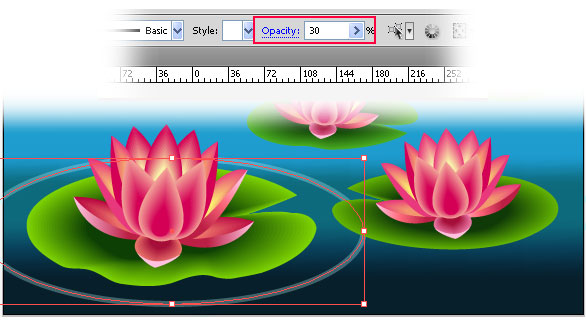
Our lily pad is more or less done. Now let’s enhance it by adding the circular waves around the leaves. Create a new layer at the bottom of the layers panel just above the background layer. With the Ellipse Tool (L) draw an ellipse as shown. Keep the stroke thickness 8pts and stroke color #C0FCFC. Remove any fill color. Select the stroke and in the top control panel reduce the stroke’s Opacity to 30% as shown.
Step 18
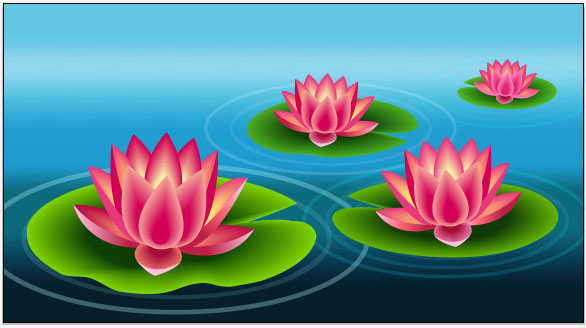
Copy the ellipse and paste the copy in front of the original (Command + F). Scale the new ellipse by 80%. This will create the inside circle. You can reduce the Opacity of this ellipse further to 20%. If you want more concentric circles you can also use a blend. Group the ellipses together and duplicate them, scale them to make them smaller and place them behind the other leaves. This is how the lily pad should look at this stage.
Step 19
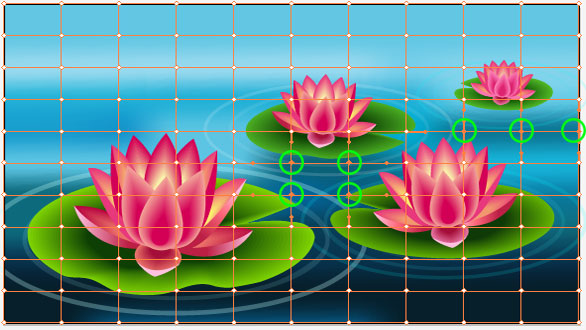
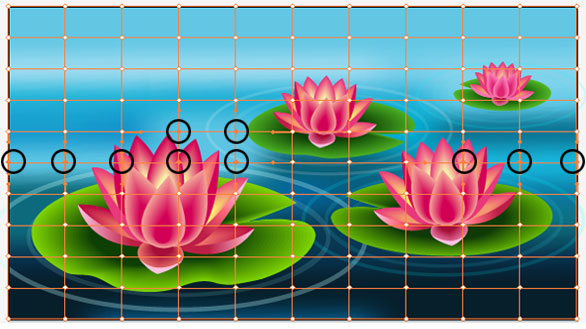
At this stage we’ll work on the background mesh again. Select a few nodes and fill variations with blue in them. With the Direct Selection Tool (A) select nodes marked by green circles below and fill them with a darker blue (#0C637B).
Step 20
Similarly, select nodes marked with black circles below and fill them with a lighter blue (#5CC5E3). Keep experimenting by selecting different nodes and coloring them in shades of blue until you get the desired effect.
Step 21
We are almost there now! We need to add the transparent oval shapes to the water and we will be done! Create a new layer and with the Ellipse Tool (L) draw ellipses of various sizes as shown. Generally, the ellipses at the back should be smaller than the ones at the front. Select all the ellipses and fill them with a light blue (#68C9D6). Change the opacity of all the ovals to 20% or less.
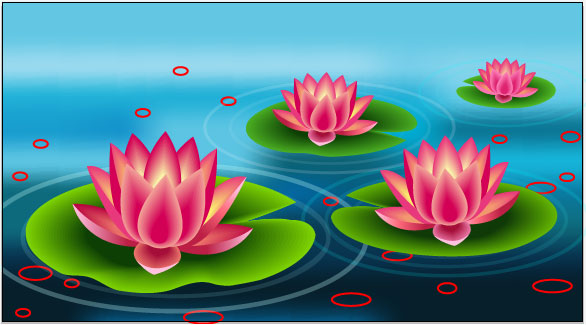
Final Image
The only task left is to delete any extra parts of our vector that have come out of the artboard by trimming them using the pathfinder tool.
Our beautiful lily pad is ready.