Do you want to illustrate a vector vacuum cleaner? You’ll learn some excellent vector illustration techniques in this tutorial, as well as use powerful Illustrator tools, such as: 3D tools, Opacity Masks, and Blends. Follow along, while creating your own impressive artwork.
Step 1
Sketch a vertical elongated rectangle, shown below. You will make a cleaner’s tube from it.

Rotate and fill it with an angled linear gradient.

Illustrate a bent path in the lower part of the tube. Pay attention to the rounded form of the top of this path. You should represent your vacuum cleaner carefully, so keep in your mind the angle of view to it.

Step 2
The tilted part is volumetric. In order to represent its volume you need to make the light distribution. You may use meshes for doing that, but I advise you to create Art brushes and apply them to this path. Let us see those brushes in work. Take the Ellipse Tool (L) and draw an elongated ellipse. Fill it with black.

Copy it and paste in front (Command + C then Command + F). Go to Object > Transform > Scale and set there the values which you can see in the diagram below.

Go to Object > Blend > Blend Options and set the Spacing to Specified Steps and the quantity of steps to about 100.

Change the Opacity of the biggest ellipse to 0.

Select both ellipses and go to Object > Blend > Make (Command + Option + B).

Step 3
Drag and drop this blend into the Brushes palette. Select the Art Brush option in the dialog box.

Set the items for the brush as shown in the diagram below. Name this brush “Black brush.”

Step 4
Produce the “White brush” with the ellipses filled with white the same way. Then grab the Pen Tool (P), draw a path in the leaned part of the tube (shown in the diagram below) and apply the “Black brush” to it.

Illustrate the next paths, apply the brushes to them, and change the Stroke weights and the Opacity of the paths if necessary. Follow your feeling of beauty.

Surely, this result does not seem to be beautiful, but you may improve it. Select the leaned gray path, copy it and paste in front (Command + C then Command + F). Then select both: all the paths over the gray part, and the copy of the gray part itself, and go to Object > Clipping Mask > Make (Command + 7). This detail looks better.

Step 5
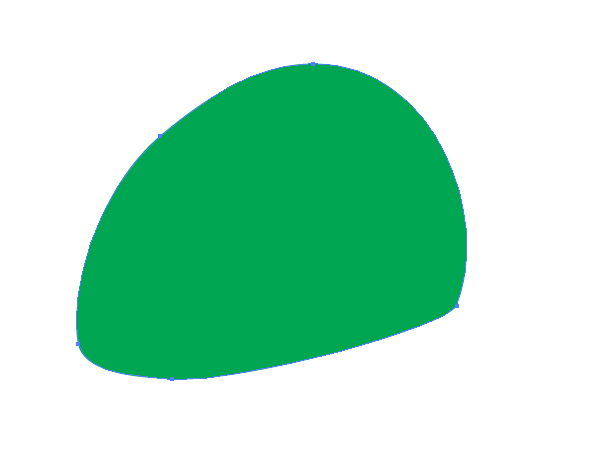
Let’s now illustrate the lowest part of the tube. First create the path shown below. Fill it with any color.

Then go to Effect > 3D > Extrude & Bevel, and set there the values which will allow you to connect the detail to the tube. See the diagram below for reference.

Step 6
Go to the Appearance palette and click there the link “3D Extrude & Bevel” to edit the effect. Set the rendering style to “No shading” as shown. You need to do this in order to decrease the quantity of paths after expanding.

After that go to Object > Expand Appearance. Then go to Object > Ungroup three times.

Now select the top parts of the detail and click the Unite button in the Pathfinder palette.

And you will have two paths.

Step 7
Select the green path and expand it slightly, as shown in the diagram below.

Fill it with an angled linear gradient.

And fill the yellow path with a radial gradient.

Step 8
Illustrate now the connecting detail using the Pen Tool (P).

Sketch the top part of this detail as shown.

Now fill the blue path with an angled linear gradient.

After that select the yellow path and go to Object > Create Gradient Mesh. Set the items for the mesh as shown in the diagram below.

Change the colors of the nodes using the Mesh Tool (U). Besides, you may use this tool for adding and deleting the mesh nodes in your artwork. Follow the image below for creating your own meshes.

Apply the “White brush” to the following paths in order to emphasize the light distribution.

Step 9
Produce a narrow path filled with the darker linear gradient in the left side of the detail.

Do the same in the right side of the detail.

Apply the “White brush” to the following path and crop it with a clipping mask.

Step 10
In accordance with the light distribution principle the pixels pointed by the arrow in the diagram below must be brighter than their surroundings.

In order to realize this, take the Rounded Rectangle Tool and sketch the next form filled with white.

Then illustrate the smaller path over it as shown.

Change the Opacity of the biggest path to 0, and go to Object > Blend > Make (Command + Option + B). And create the “White Brush 2″ from this blend.

And apply this brush to the following path cropped with a corresponding clipping mask.

Step 11
Let’s now produce the rectangular path in the top part of the metallic tube filled with the same gradient.

Expand now this gradient to gradient mesh by going to Object > Expand. Delete the clipping path in the mesh.

Take the Mesh Tool (U) and add the new orthogonal mesh line.

Take the Lasso Tool (Q) and select the shown mesh nodes.

Scale the mesh by going to Object > Transform > Scale.

And apply the new clipping mask to it.

Step 12
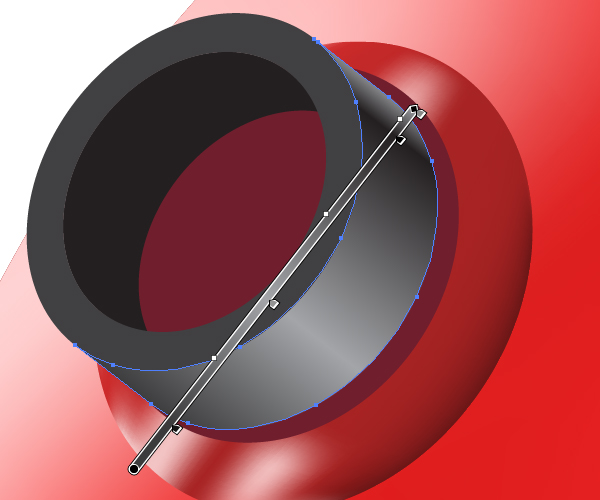
Create a usual ellipse and make an Art brush from it. Name it “the Elliptical brush.”

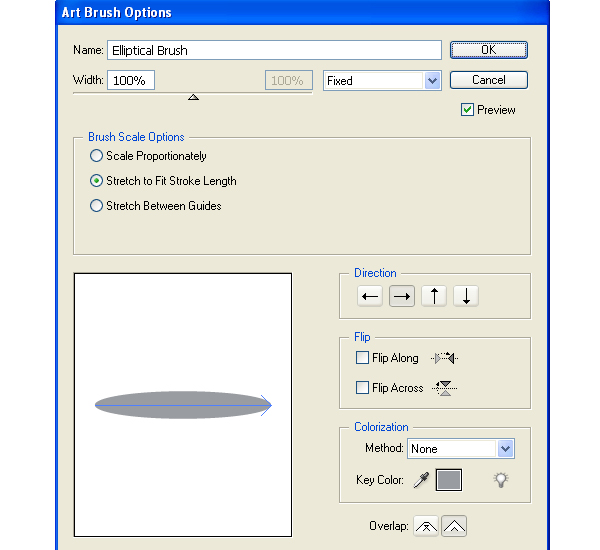
Apply this brush to the following path. Pay attention to the width of it. It must be located under the metallic tube because it will represent a stencil for the hose beginning.

Then expand it,…

…and apply the clipping mask to it. Do you remember the angle of view and consequently that the paths ends must have rounded forms?

Step 13
Change the flat gray form to a volumetric one by using the “Black brush.” Apply them to the next paths.


And crop the result with a clipping path.

Step 14
Illustrate the white ring using the 3D Extrude & Bevel effect. Place the ring over the tube as shown.

Change the rendering style to “No shading” and expand the received path.

You need to receive two following paths.

Fill the red path with black,…

…and the green path with a linear gradient as shown.

Step 15
Let’s illustrate the main part of the vacuum cleaner. First draw the green shape shown.
Then draw a red ellipse over it.

And create another ellipse on top.

After that delete the unnecessary parts of the paths in order to achieve the following result.

You may use both: the Pathfinder palette and the Shape Builder Tool (Shift + M) for creating the presented paths. Illustrate the blue path over the result.

Delete the superfluous parts from the blue contour too.

Step 16
Illustrate the handle over the blue path by using the 3D Extrude & Bevel effect.

Select the blue path and fill it with the radial gradient shown below.

Expand now the vacuum cleaner handle in order to receive the following three paths.

Select the violet path of the handle and fill it with an angled linear gradient.

The brown path should be filled with a linear gradient too.

Fill the the blue path as shown below.

Step 17
Now select the darkest part of the handle, copy it and paste in front (Command + C then Command + F). Fill the copy with another angled linear gradient.

Then go to the Transparency palette and change the blending mode to Overlay in order to make the light distribution more beautiful.

Step 18
Apply the “Black brush” to the following path, which is located under the lateral surface of the handle.

Crop it with clipping path and decrease the Opacity of the path.

Apply now the “Black brushes” to the following paths.


The last path should be cropped.

Apply the “Elliptical brush” to the top corner of the lateral surface of the handle, expand it, and fill it with black. Follow the helpful diagram below for reference.

Step 19
Apply the “White brush” to the following path,…

…and crop it with a clipping mask.

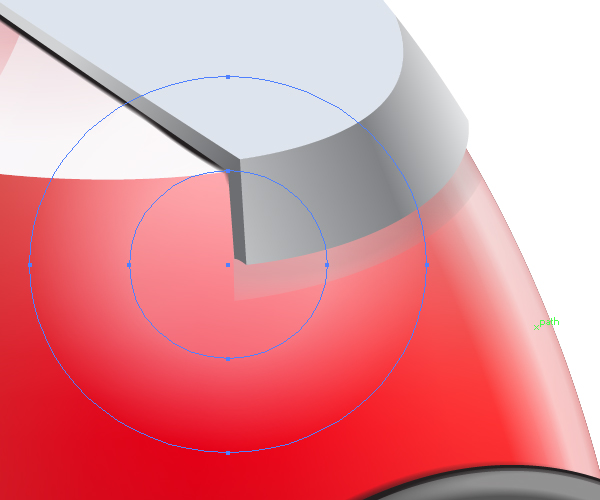
Draw two concentric circles filled with pink.

Change the Opacity of the biggest circle to 0, and then create a blend from these circles (Command + Option + B).

Place this blend under the handle,…

…and crop it with a clipping path.

Step 20
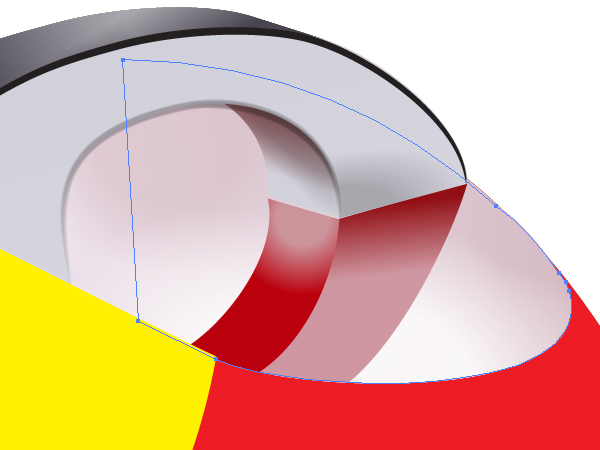
The vacuum cleaner cavity surface, filled with the shades of pink, has a reflection property. So, let’s create a handle reflection. First draw the path shown and fill it with an angled linear gradient.

Now draw the next path filled with a radial gradient, as shown in the diagram below.

Crop both paths.
After that produce the new path from these three paths (filled with linear and radial gradients and the clipping path). Use the Pathfinder palette or the Shape Builder Tool (Shift + M) for this.

Bring this path to the front and fill it with the radial gradient that goes from black to white in color.

You may change the Opacity of this new path.

Now select both: this path and the group formed with two cropped paths,…

…go to the Transparency palette and click the “Make Opacity Mask” command in the fly-out menu.

Step 21
Illustrate a mesh over the yellow path of the vacuum cleaner. Use the red hues for the mesh nodes.

Crop the mesh.

Use the similar mesh for coloring the red part of the vacuum cleaner.

Step 22
Apply the “White brush” to the following path in order to reproduce the light distribution of the back of the vacuum cleaner.


Now we’ll create holes in the lateral surface of the vacuum cleaner. First we need to represent a true surface form. I advise you to use a blend for this representation. See the image below for reference.

Now you may expand this blend by going to Object > Expand. Then cut the lines by using the Scissors Tool (C). Delete the unnecessary parts, and go to the Stroke palette. Select the “Dashed Line” option there. Change the Cap to a round one, and specify the dimensions of the dashed line. You should achieve the following result.

Copy the holes and paste them in back (Command + C then Command + B), change the color of the stroke from black to pink, and move the pink holes slightly.

Step 23
Fill the green path of the cleaner with an angled linear gradient.

And apply the “White brush” to the following path.

Step 24
Let’s now create a wheel. Illustrate the path shown below.

Then apply the “Black brush” to the following path.

Draw the next path filled with a radial gradient. It is not located in the center of the gray ellipse because of the angle of view. Do you remember it?

Apply the “Black and White brushes” to the paths on the rubber tire of the wheel.

Step 25
Illustrate the next path in the center of the wheel and fill it with a radial gradient.

Change the Stroke by applying the “Black brush” to it, and decrease the Stroke Weight.


Let’s see the full view of the wheel.

Do you know how to make it better? Go ahead and decrease the Opacity of the last path to about 10%.

What do you think now about the wheel? It’s important to develop your artistic eye as you work through tutorials.
Step 26
The power-button is shown below. If you know how to achieve this result, do it by yourself without assistance. Otherwise read carefully the following steps.

First draw the following violet path.

Then draw the green path,…

…and the yellow path.

Step 27
Fill the violet path with an angled linear gradient as shown.

Fill the yellow path with a light slate gray.

Fill the green path with an angled linear gradient.

Apply the “Black brushes” to the following paths.


Step 28
Apply the “Black brush” to the following path, and decrease the Opacity of it.


Then apply the “White brush” to the path shown in the diagram below, and decrease the Opacity of it too.


Crop the paths with the clipping mask.

Step 29
Illustrate the blend from two white circles as you did it before.
And crop this blend also.

Step 30
Sketch the paths which you can see in the pictures below and apply the “Black and White brushes” to them, then crop the paths with the aid of the clipping mask.


Step 31
The top surface of the button needs the reflection. So, we need to reflect the vacuum cleaner handle on it. Illustrate the path shown below and fill it with an angled linear gradient.

Crop it with a clipping path.

And change the Opacity and the blending mode of it in the Transparency palette.

Do the same with the second path.

Step 32
Illustrate the power symbol on the button.

And apply the “White and Black brushes” to the contours of it.

Step 33
Use the “Black brush” in order to emphasize the following path.


Use the blend in order to highlight the lateral surface of the button.


Step 34
Illustrate now the following path on the top part of the cleaner, which will represent a guide-line going along the top part of the cleaner.

Now illustrate an elliptical path. Pay attention to the location of its center.

Illustrate the blue path over it.

And delete the guideline.

Step 35
Fill the blue path with a cherry color.

Now convert the yellow path to a mesh, and change the colors of the mesh nodes. Your results should look like the following image:

Step 36
Produce now a 3D ring using the “3D Extrude & Bevel” effect. See the helpful diagram below.

After expanding you should have three paths. The back path should be filled with black.

Fill the top part of the ring with dark gray.

The crimson path should be filled with an angled linear gradient.
Step 37
In order to produce a connecting hose, take the Pen Tool (P), and draw the following path.

Then take the Scissors Tool (C) and click in the shown point in order to divide the path.

After that illustrate the following compound path filled with a radial gradient at the first end of the path.

And draw another compound path filled with a radial gradient at the second end of the path, a shown below.

You should receive the following picture.

And then create a blend from these compound paths.

Repeat these manipulations with another path.

Step 38
Sketch a gray path,…

…and send it backward.

Crop the hose with a clipping compound path.

Step 39
Illustrate the shadows from two parts of the vacuum cleaner using the blends.

Conclusion
The final image is below. You may illustrate your own vacuum cleaners using the described techniques and link to your results in the comments below.
