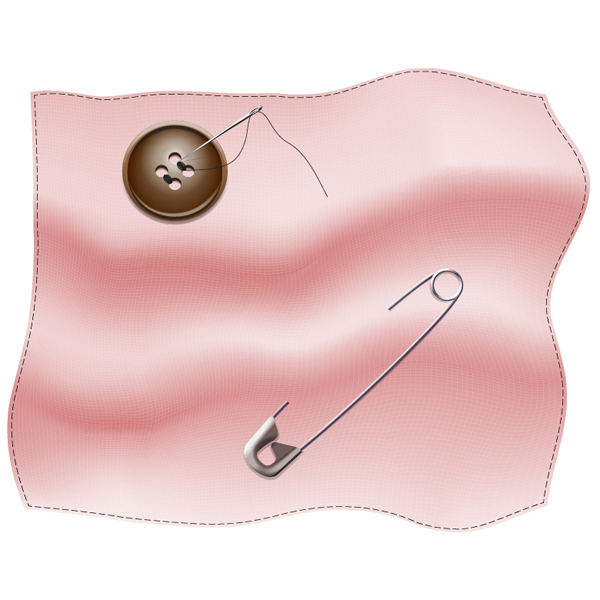
While reading this tutorial and creating your own artwork, you will learn the important techniques of Adobe Illustrator. It will undoubtedly lead you to improving your skills in making illustrations and designs. Here you’ll learn how to create a button sewed into a piece of cloth. Let’s get started!
Step 1
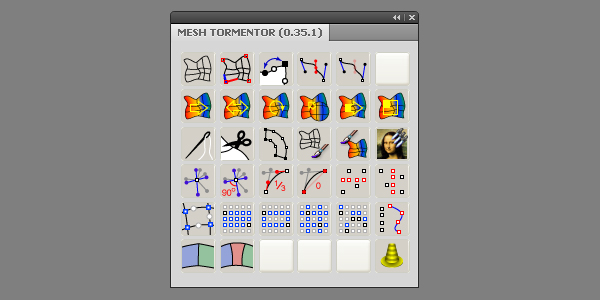
First of all, you need to go to the personal site of Iaroslav Lazunov, and download the free Mesh Tormentor plug-in. We’ll be using one function from this Illustrator plug-in when we get to step 4. Of course, you may try to go without it, and use the usual tools of Adobe Illustrator for completing step 4, but the simplest way is to use that plug-in.
After downloading, unzip the received archive, close Adobe Illustrator, and copy “YemZMeshTormentorEng.aip” file into the folder “Extensions” on your local installation disk. (For example, it is the C:\Program Files\Adobe\Adobe Illustrator CS5\Plug-ins\Extensions folder on my computer.) Open Adobe Illustrator again. Go to Window > Mesh Tormentor.
Step 2
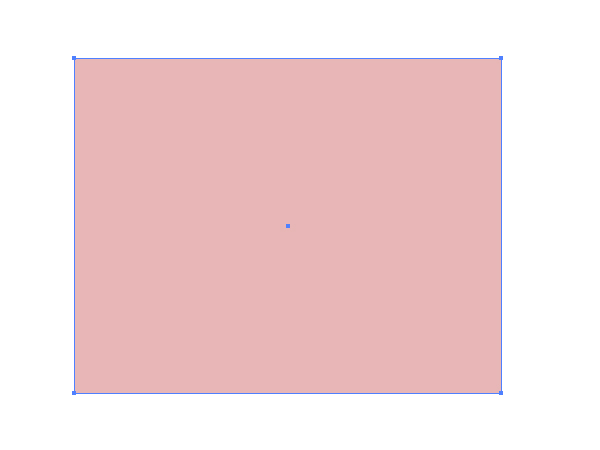
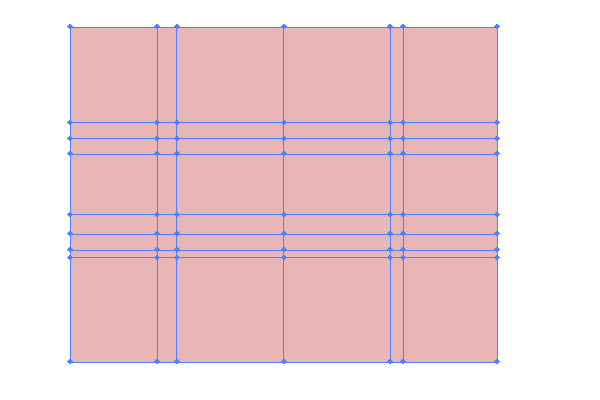
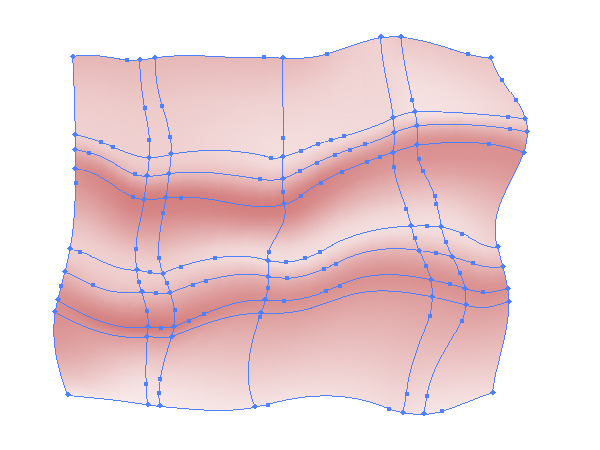
Take the Rectangle Tool (M) and sketch a path as a basis for creating a piece of cloth. Fill it with any color, and set the Stroke to None.
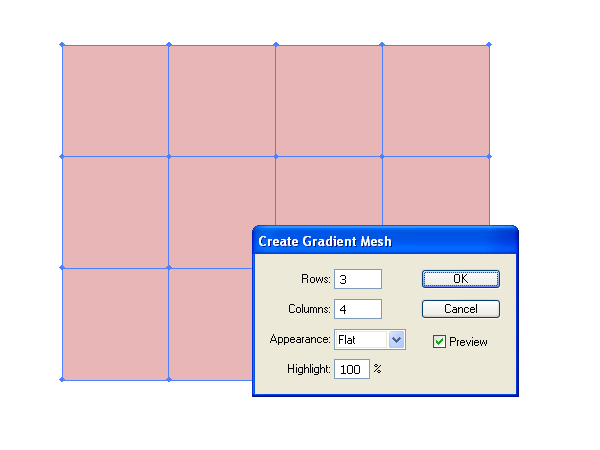
Go to Object > Create gradient mesh and set the values of the mesh options as shown below.
Take the Mesh Tool (U), and add mesh lines, which will represent the bends of your cloth further.
Step 3
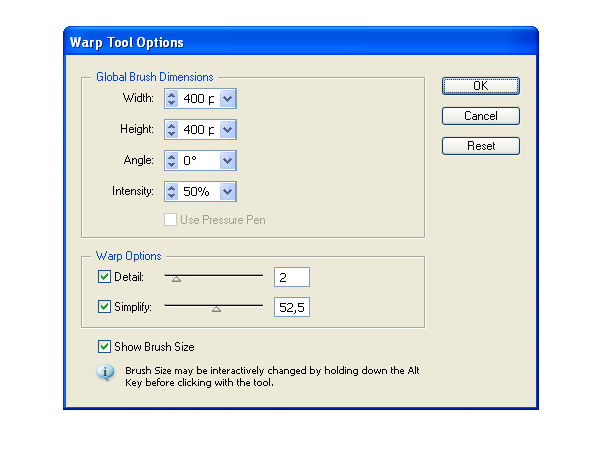
Double-click on the Warp Tool icon in the Tools palette in order to open the dialog box of the tool’s options and set there the following values shown below:
Grab the Warp Tool (Shift + R), and drag the mouse over the mesh, while holding the mouse key down.
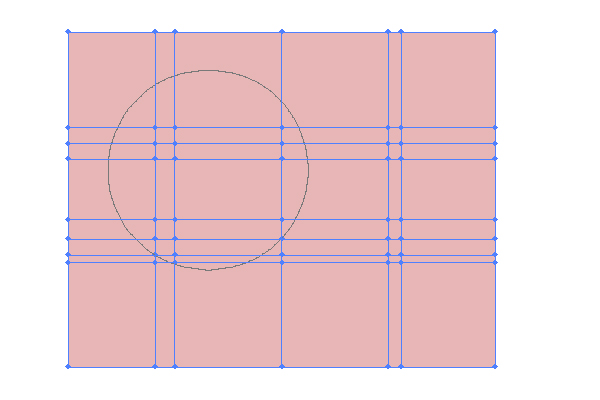
After that change the colors of the Mesh nodes.
Step 4
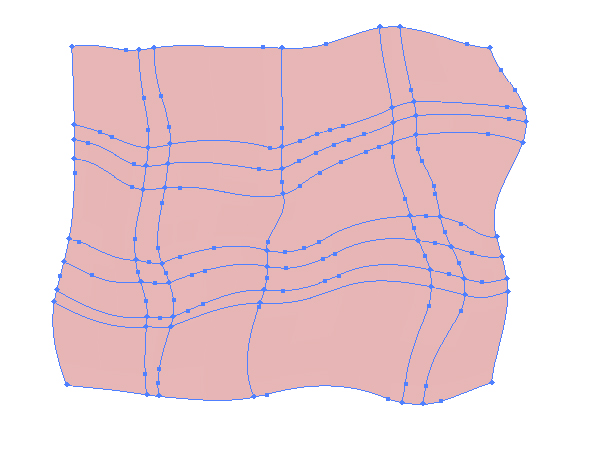
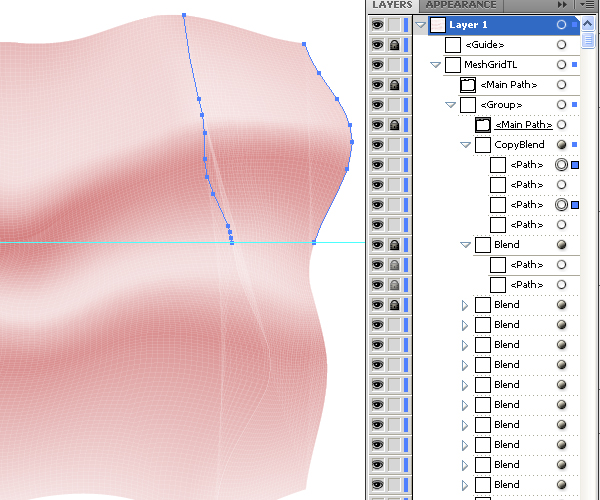
Pay attention here that the mesh lines show not only the light distribution, but also the form of your piece of cloth. In order to use this form and to create a net-like pattern further in this tutorial, you should convert the mesh lines into a set of the usual paths.
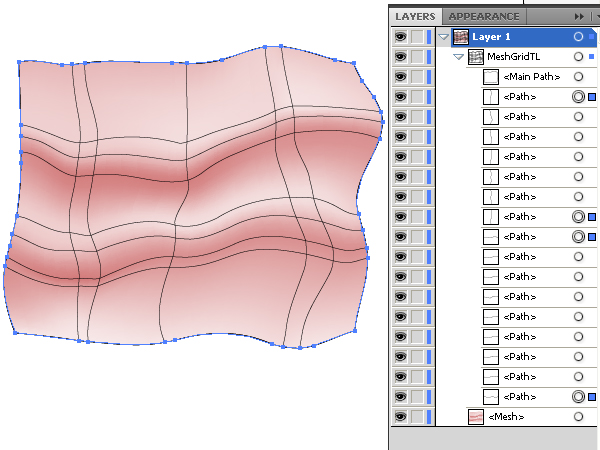
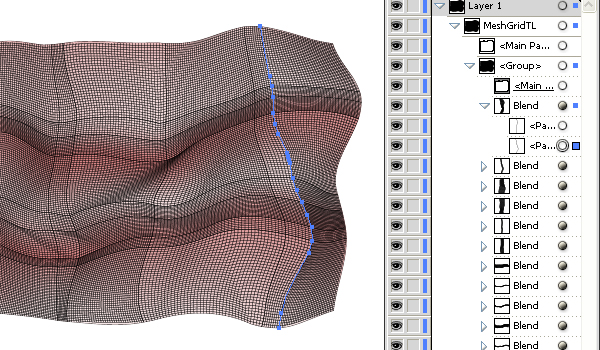
The simplest way for doing this is to use the Mesh Tormentor plug-in. Select your mesh, go to the Mesh Tormentor palette and click the first button there “Convert mesh into set of paths.” See the diagram below for reference.
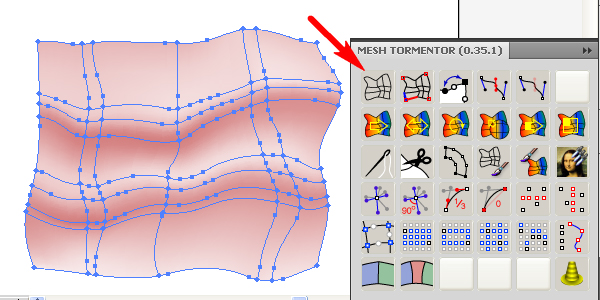
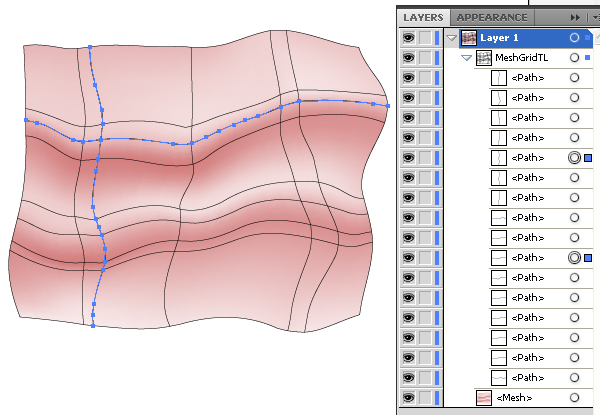
This is all your work with the Mesh Tormentor plug-in in this tutorial. But after this simple operation you will receive the group named “MeshGridTL” in the Layers palette.
Step 5
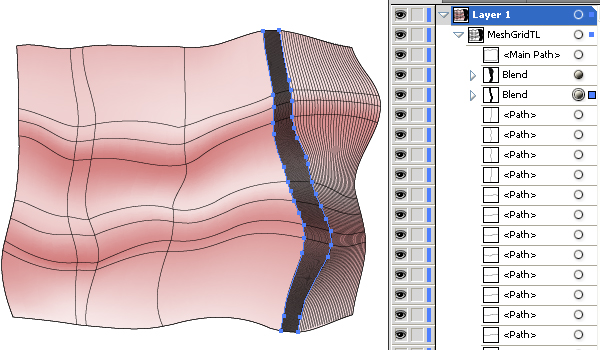
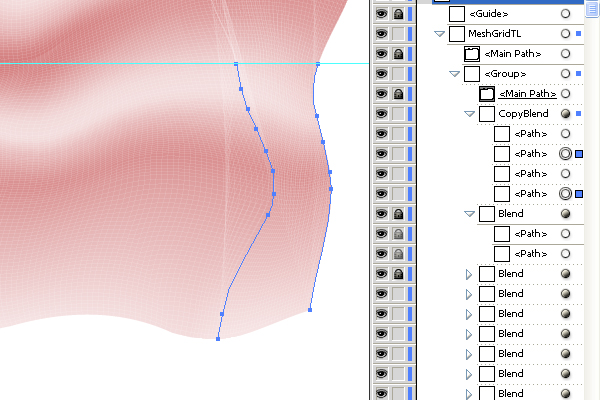
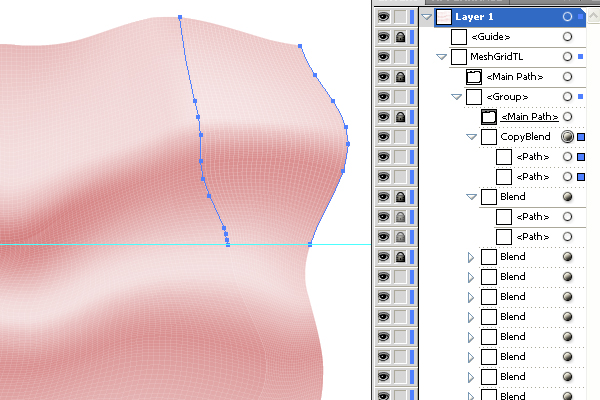
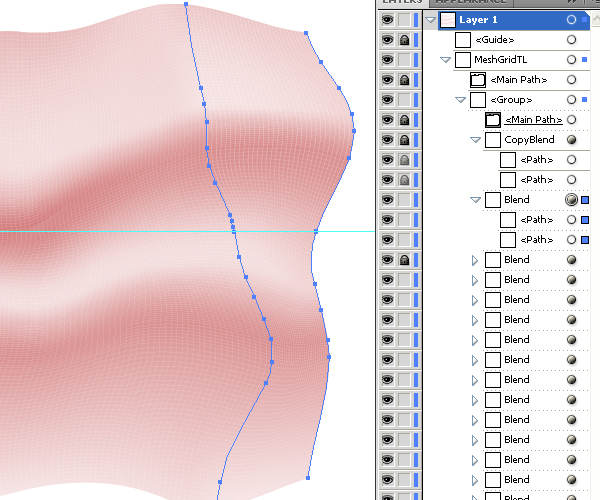
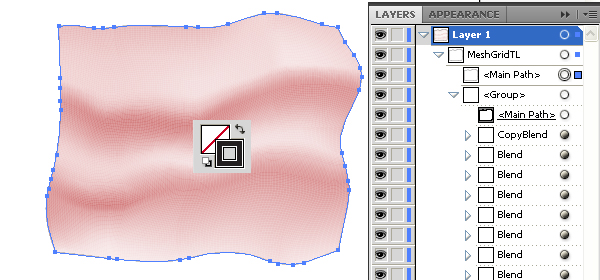
Select the boundary paths in the “MeshGridTL” group, copy them and paste in front (Command + C then Command + F), and create one boundary path by going to Object > Path > Join (Command + J). Name this path “Main path.”
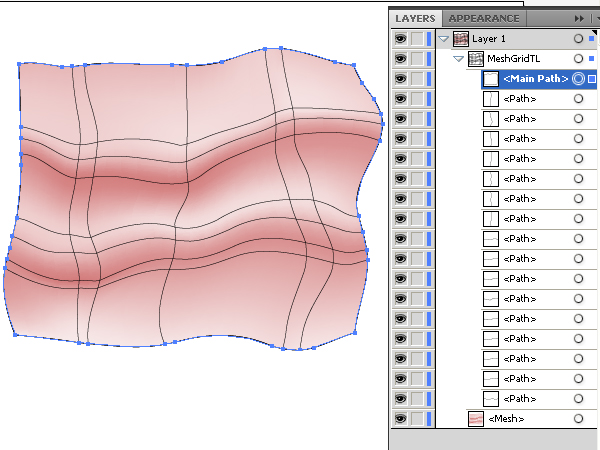
Focus your attention on saving the initial boundary paths in the “MeshGridTL” group.
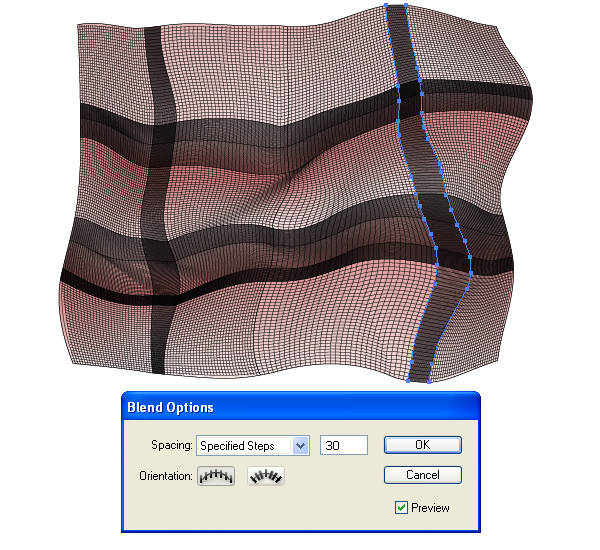
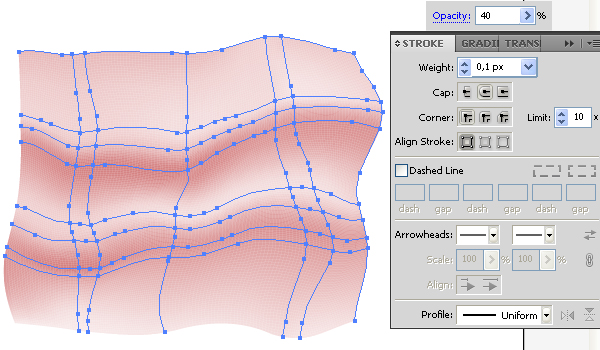
Step 6
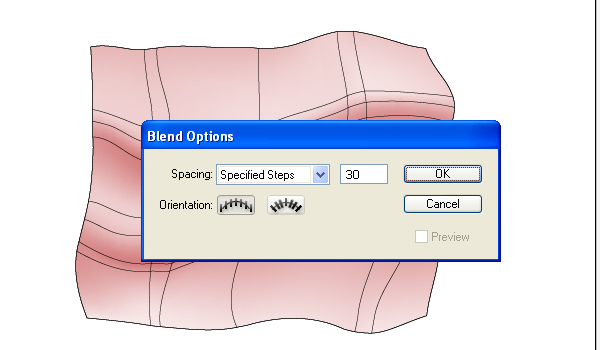
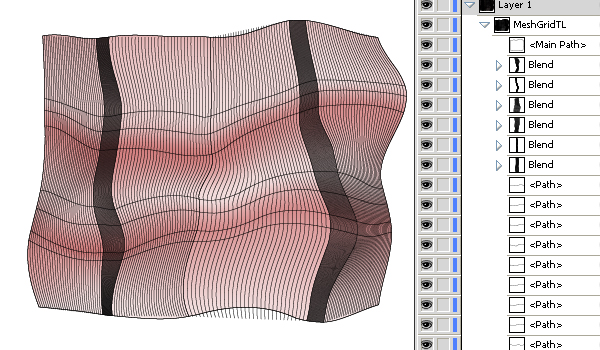
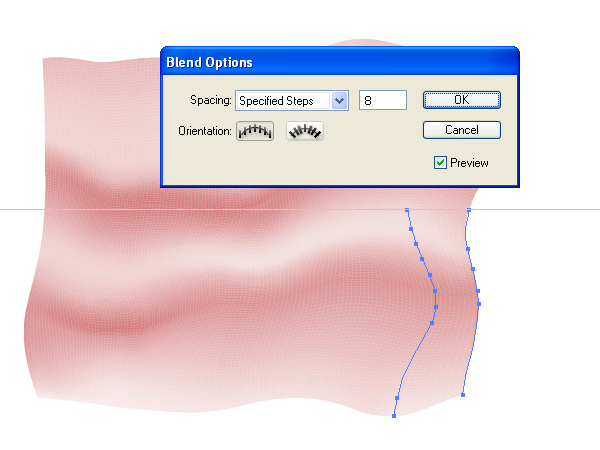
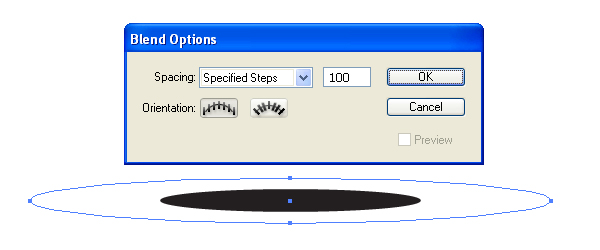
Let’s now create a net-like pattern over your piece of cloth. Go to Object > Blend > Blend Options and set there the values which you can see in the diagram below.
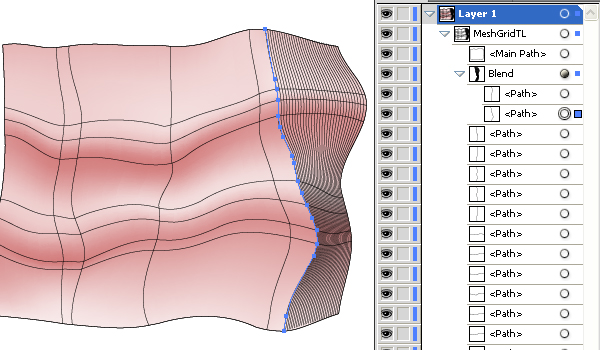
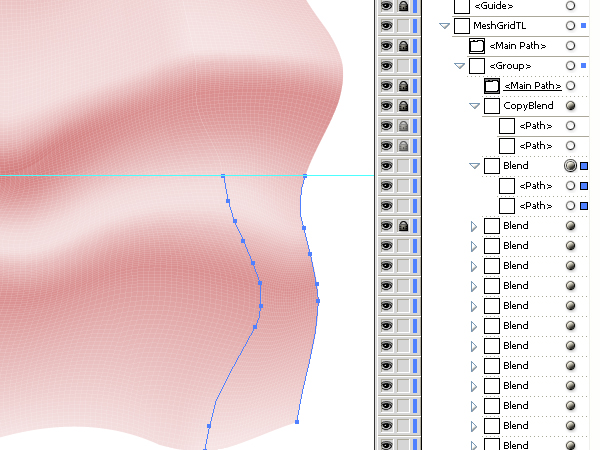
Select the first two paths in the “MeshGridTL” group,…
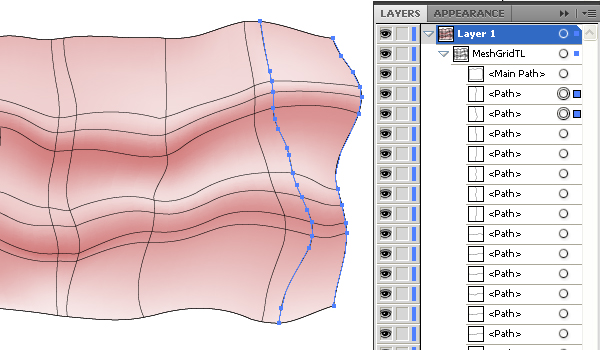
…and go to Object > Blend > Make (Command + Alt + B).
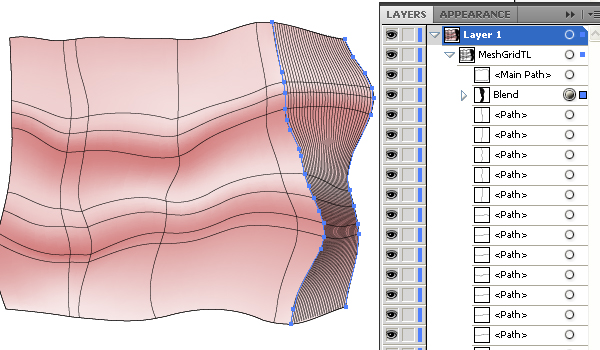
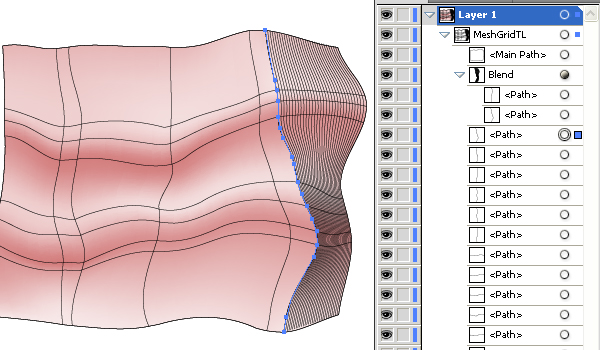
Then select the second path in the blend,…
…copy it and paste in front (Command + C then Command + F),…
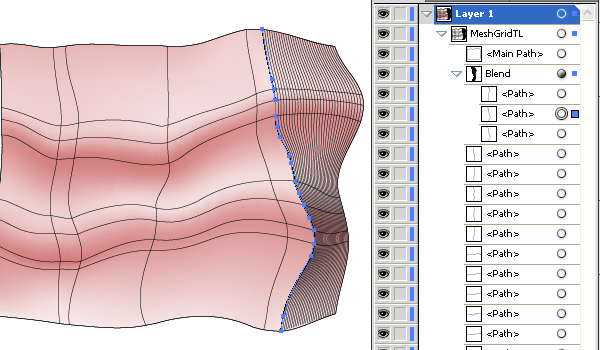
…and drag the path copy under the blend itself in the Layers palette.
Step 7
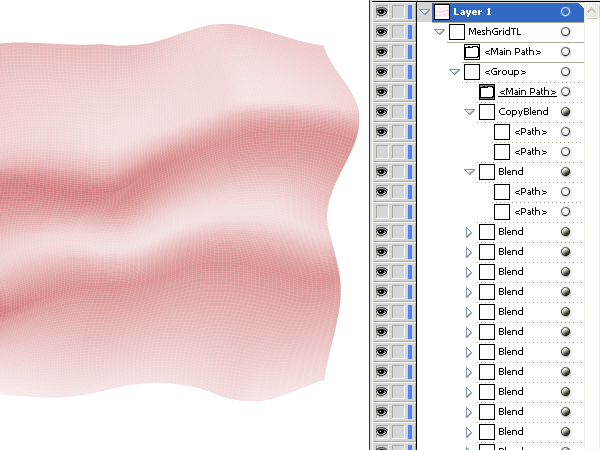
Repeat these manipulations with the next two paths.
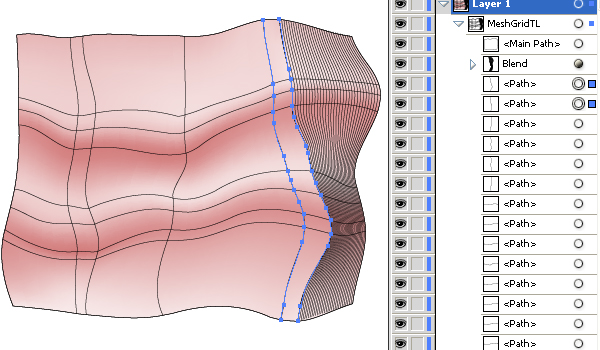
Do the same with the other paths.
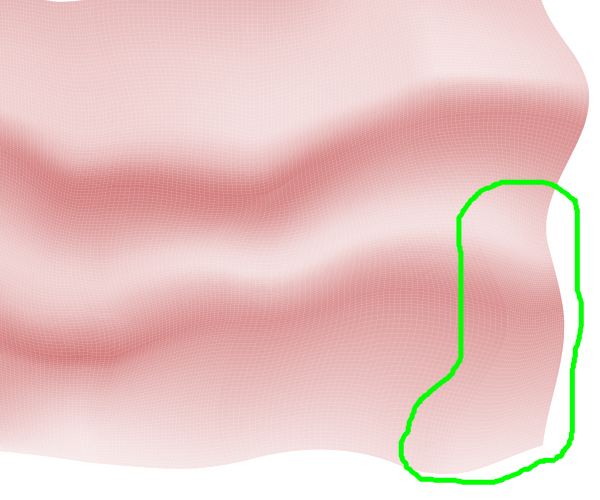
Step 8
Do the same with the horizontal paths.
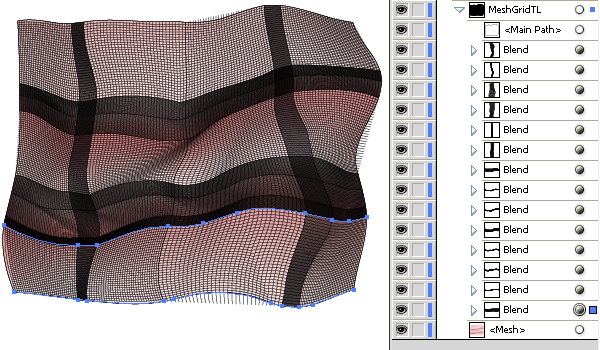
Here we have the unnecessary parts of the blends shown with green in the diagram below.
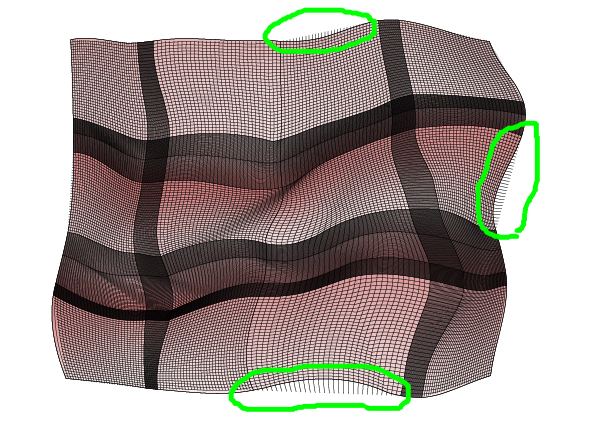
In order to crop them, create a copy of the “Main path” and make a clipping path from it by going to Object > Clipping Mask > Make (Command + 7).

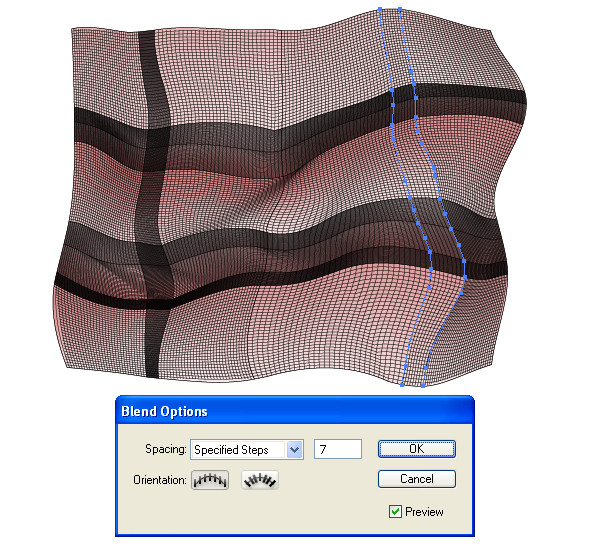
Step 9
Do you like your cloth result so far? If not, then let’s continue to improve it. The crossings between blends must be soft in color. In order to reach such a result, select the second blend, and go to Object > Blend > Blend Options.
Change the quantity of the Specified steps to the approximate merging the blends.
Repeat these actions for the other blends.

Step 10
The paths of the blends selected in the image below are too thick.

In order to make them thinner, make invisible every second path in the blends. Do not delete the paths! Make them invisible only. See the images below for reference.


Do the same with the other blends.
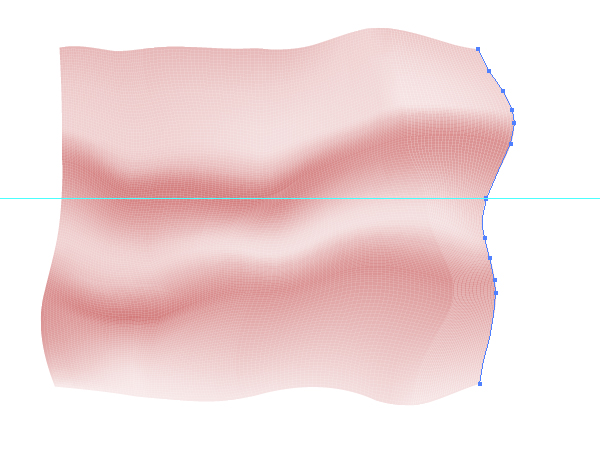
Step 11
Now select all the blends, change the Stroke Weight, the Stroke color, and the Opacity of the blends if you want.
The pattern lines are merged with each other in the scaled image below (shown with green).
We need to fix this problem. Select the first blend (in the top of the Layers palette), then copy it and paste in front (Command + C then Command + F).

Drag the horizontal guideline from the Rulers of your artwork and drop it as shown below. Lock the guideline in the Layers palette.
Step 12
Temporarily make visible the second paths of the first two blends, then lock the third blend. Now lock both “Main paths”: the usual and clipping ones. Follow the helpful diagram below.
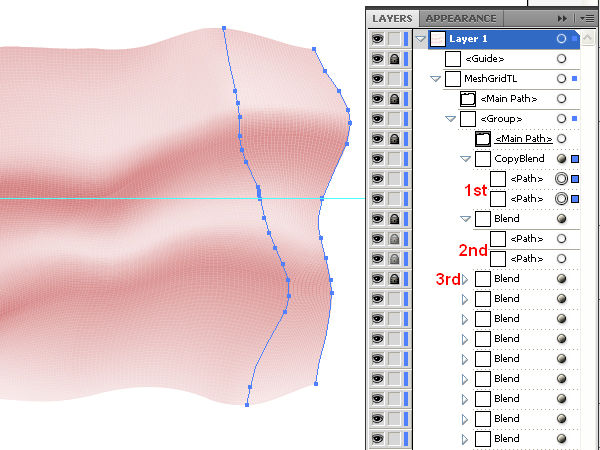
Take the Scissors Tool (C) and click on two points as shown
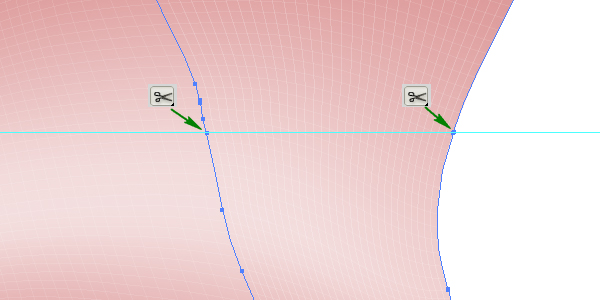
Keep the top selected paths in the first blend only.
The other two paths…
…should be deleted.
Repeat the manipulations by cutting with the second blend.
Step 13
With the second blend selected, go to Object > Blend > Blend Options, and change the quantity of Specified steps.
After that delete the guideline, make invisible the second paths of the first two blends, and unlock all the objects.
Step 14
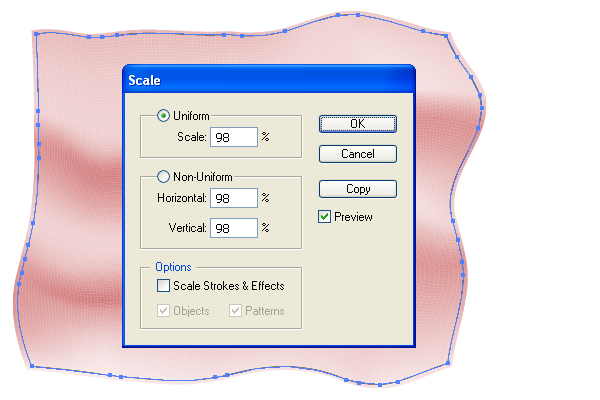
Select the “Main path” (not the clipping one) and change the Stroke color to black,…
Now go to Object > Transform > Scale and and set there the values shown.
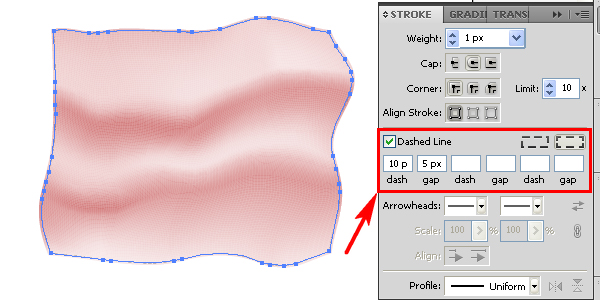
Go to the Stroke palette and create a dashed line from this path.
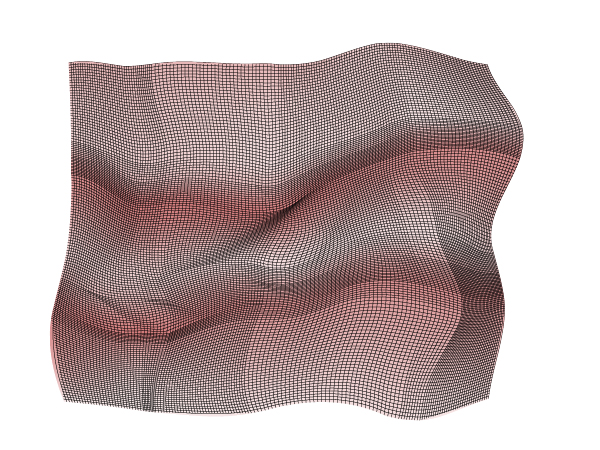
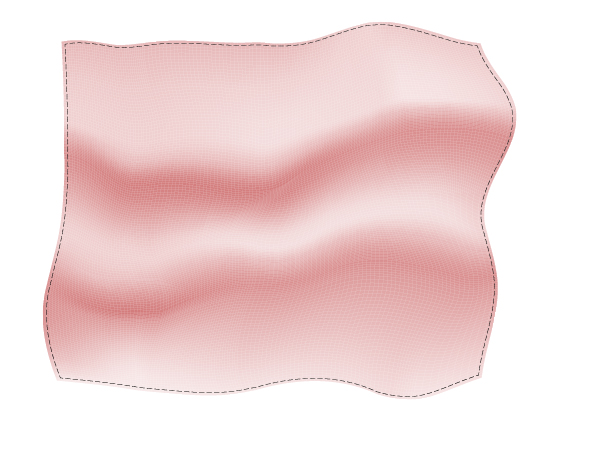
You should achieve the result representing a stitched piece of cloth.
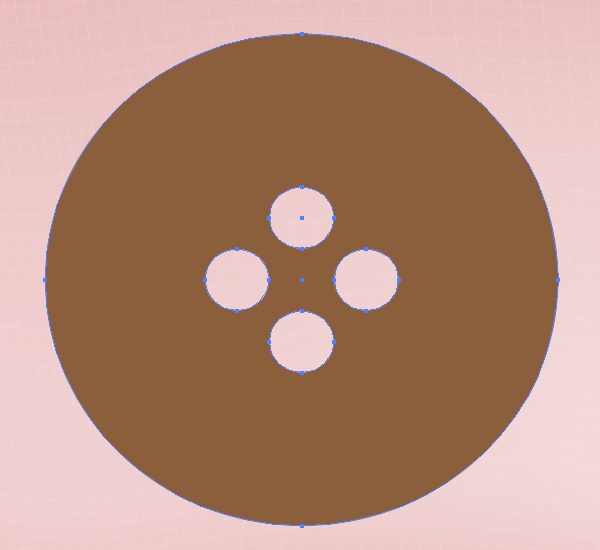
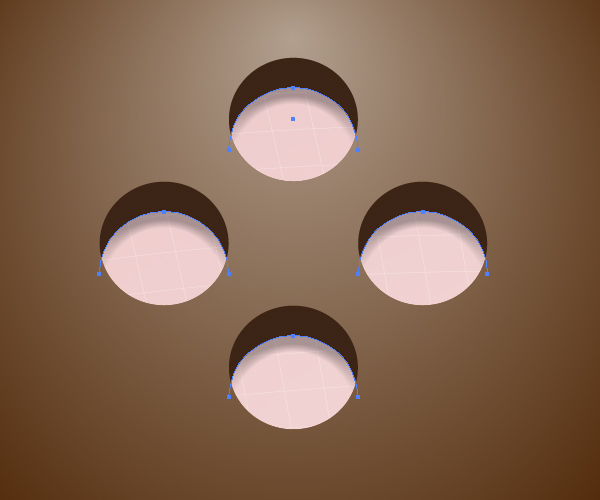
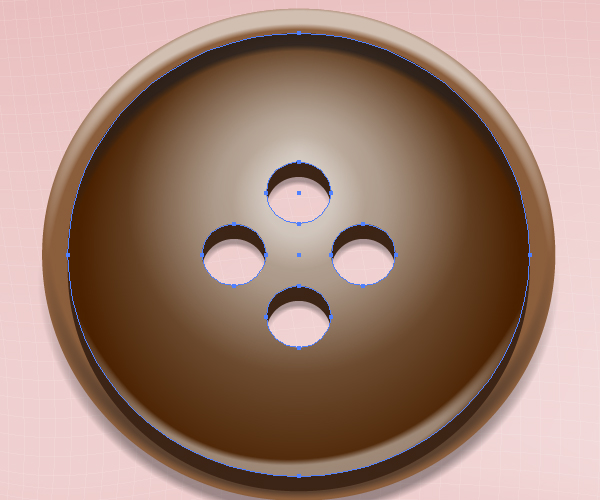
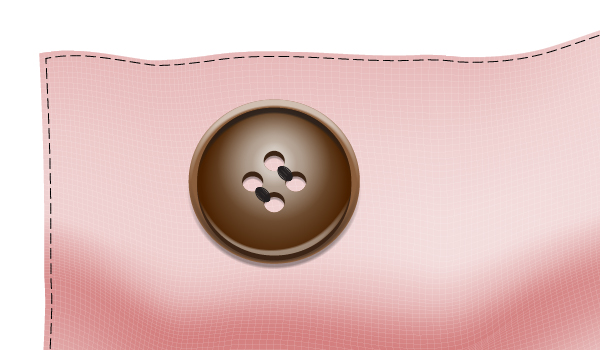
Step 15
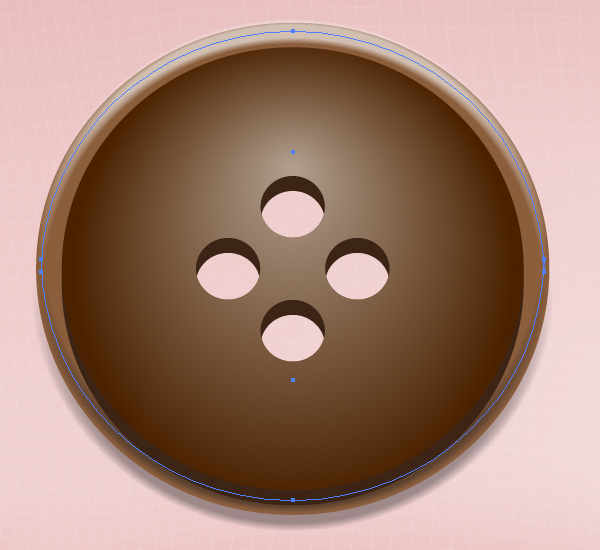
Let’s draw a button in the top left corner of the cloth. First illustrate a compound path that represents a circle with holes, as shown in the picture below. Now fill it with brown. You may create it by using the Ellipse Tool (L).
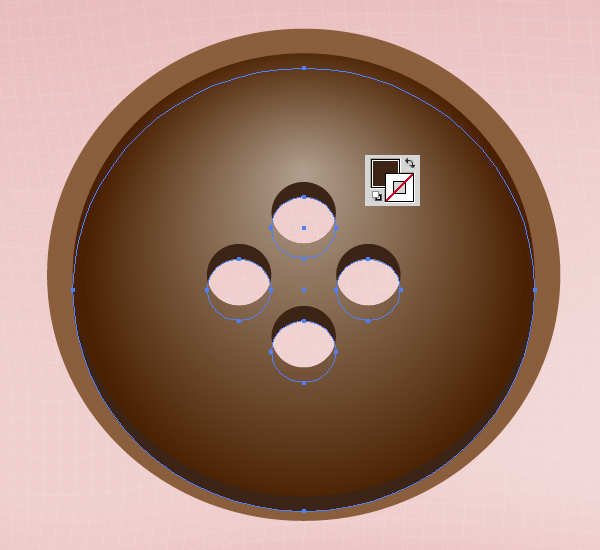
After that illustrate the next compound path, and fill it with a radial gradient. The holes of the second compound path must coincide with the corresponding holes of the first compound path.
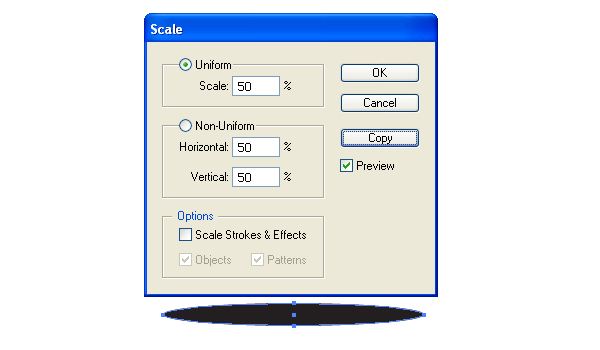
In order to reach such an effect, you may release the copy of the first compound path by going to Object > Compound Path > Release (Command + Shift + Alt + 8), Object > Transform > Scale, and then Object > Compound Path > Make (Command + 8).
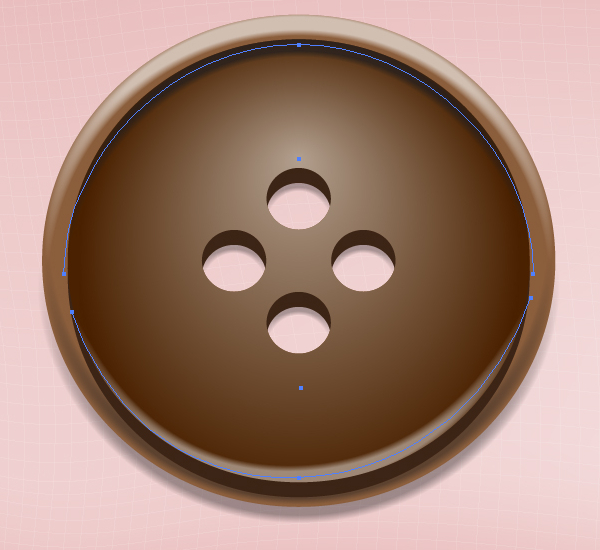
Copy the second compound path and paste it in back (Command + C then Command + B). Move it slightly downward and fill it with dark brown. This will add a volume to our button. See the image below.
Step 16
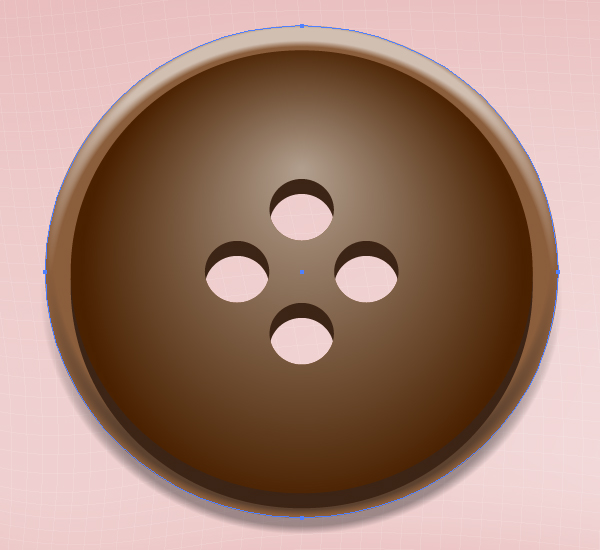
Create a play of light on the button. Use the Art brushes and blends for this. In the beginning take the Ellipse Tool (L) and illustrate an elongated elliptical path filled with black.

Go to Object > Transform > Scale, and click the Copy button in the dialog box, after decreasing the scale value.
Change the Opacity of the biggest ellipse to zero.

Go to Object > Blend > Blend Options and set there the values shown.
Now create a blend between those two ellipses, by going to Object > Blend > Make (Command + Alt + B).

Step 17
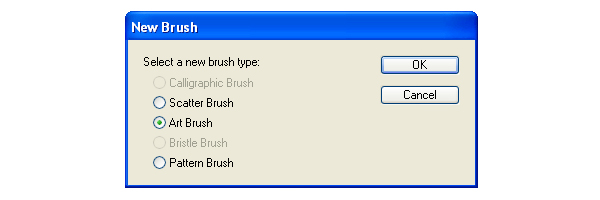
Now drag and drop this blend into the Brushes palette. Select the Art brush option in the dialog box.
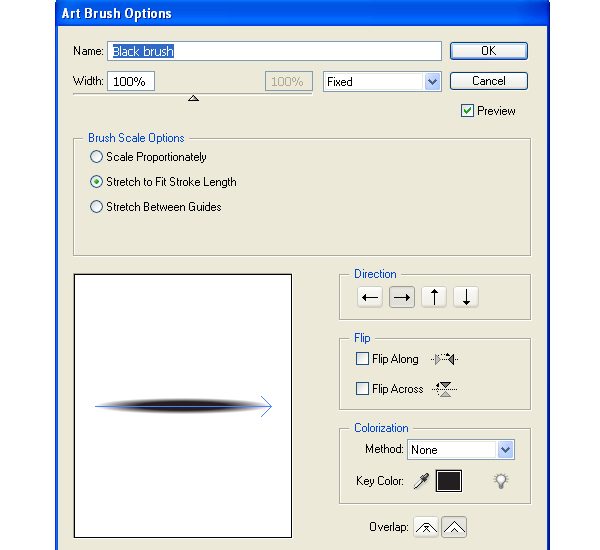
Name the brush as “Black brush.”
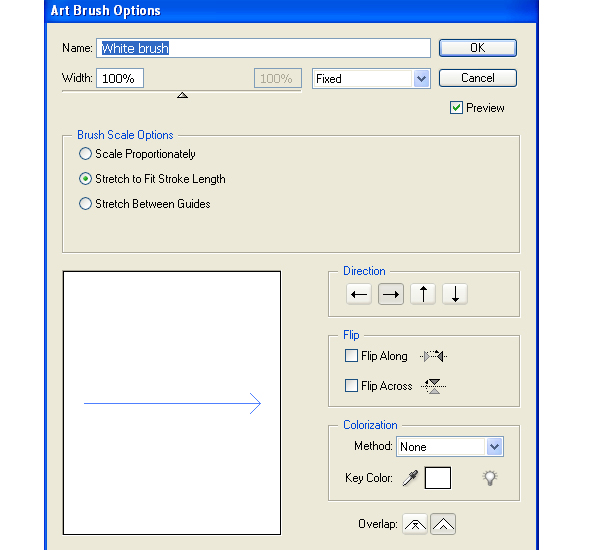
Produce a “White brush” the same way.
Step 18
Let’s produce a shadow from the button. Draw the path shown below, and apply the “Black brush” to it. After that send this path backward in order to locate it under the button.
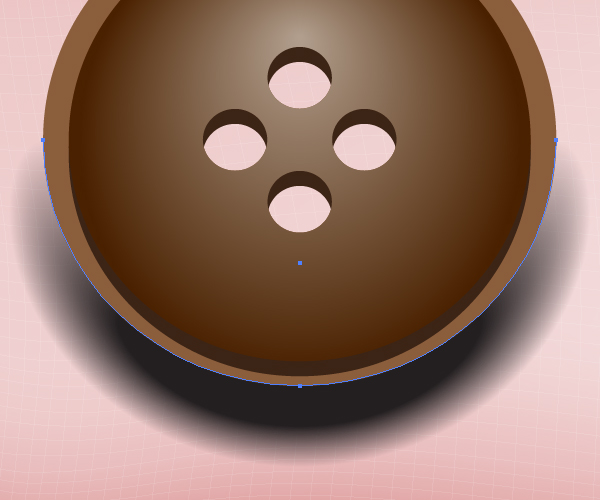
Make the shadow softer by decreasing the Stroke Weight and the Opacity of the path.
Step 19
Apply the “White and Black brushes” to the borders of the button.
And crop them with a clipping path.
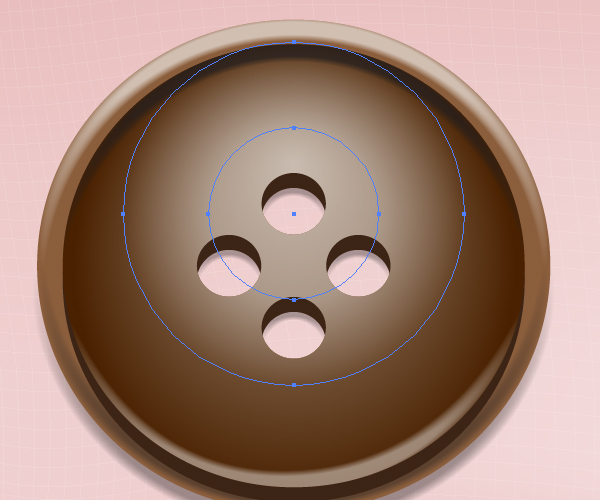
Create the shadows under the button holes.
Step 20
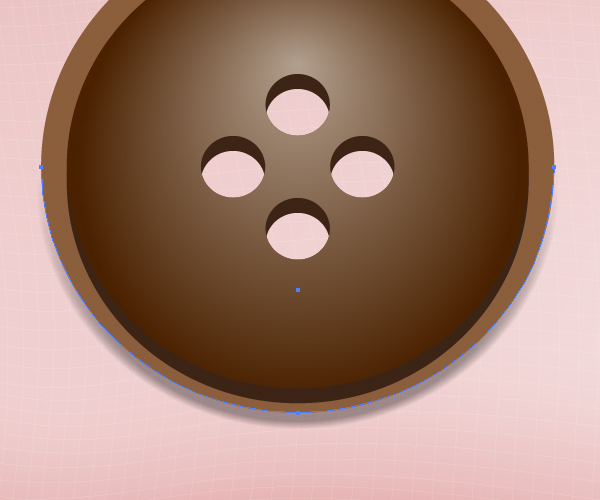
Add light and shadow created with the button borders on the button itself.
Produce a blend from white circles, as shown below.

Decrease the Opacity of it.
Copy this blend and paste in front (Command + C then Command + F), then change the dimensions of it by going to Object > Transform > Scale.
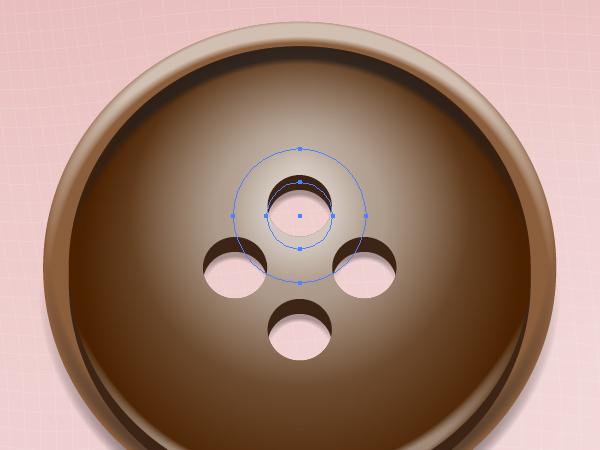
Pay attention that the blends must be cropped with a clipping compound path shown in the helpful image below.
Step 21
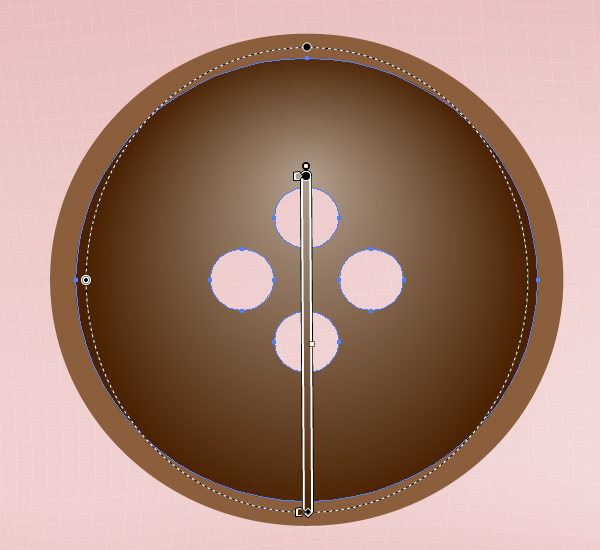
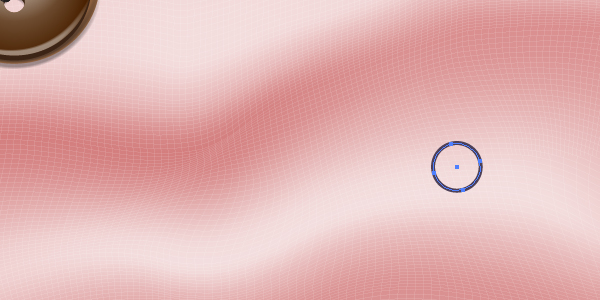
In order to sew the button to the cloth, first we need to draw a usual ellipse with a black stroke located between two holes.
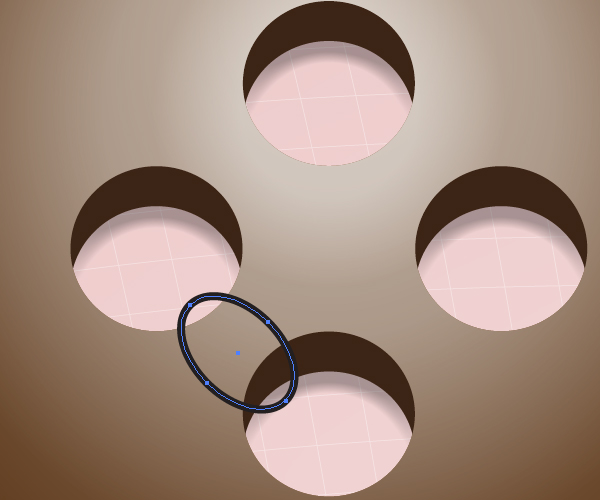
Then illustrate a smaller copy of this ellipse as shown.
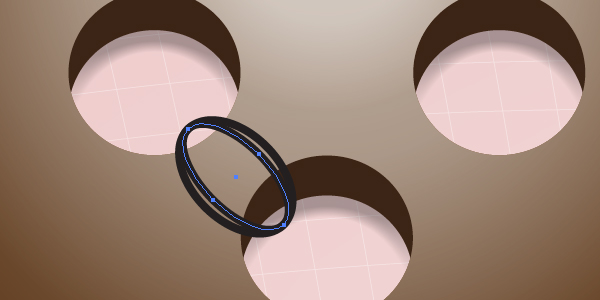
Repeat these manipulations as many times as you like.
Copy these paths and paste them on the other two button’s holes.
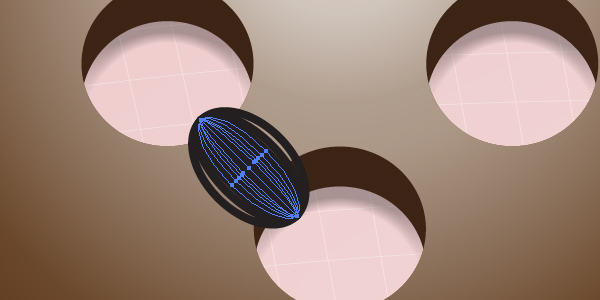
Do these sets of ellipses look like the threads in the blow up to 1200% image? No?
You know that every vector image may be scaled as much as you desire. But nevertheless every graphic designer prepares the images to one specific dimension. I have prepared mine to 100% scaling. And you can see in the 100% image below that our ellipses resemble threads.
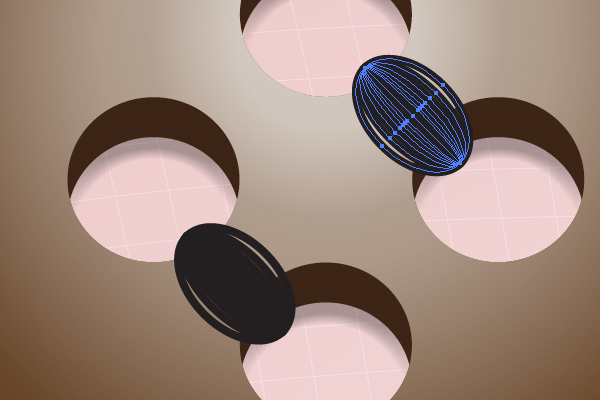
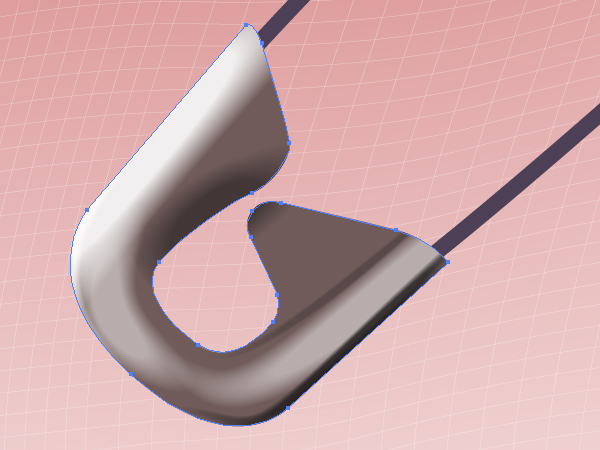
Step 22
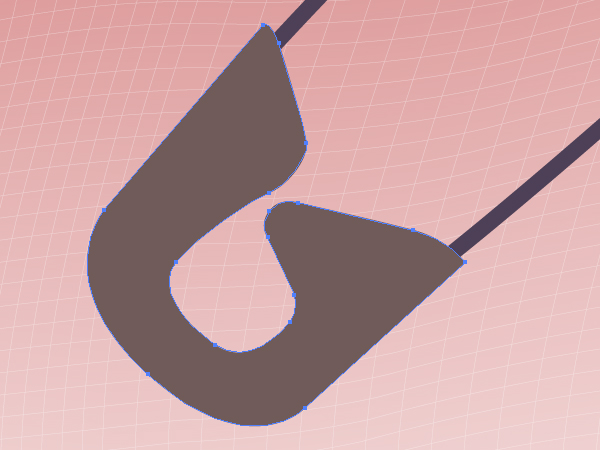
Now let’s illustrate a pin. First sketch a circle.
Then add two paths to it.
And produce the following path at the lower end of the pin.
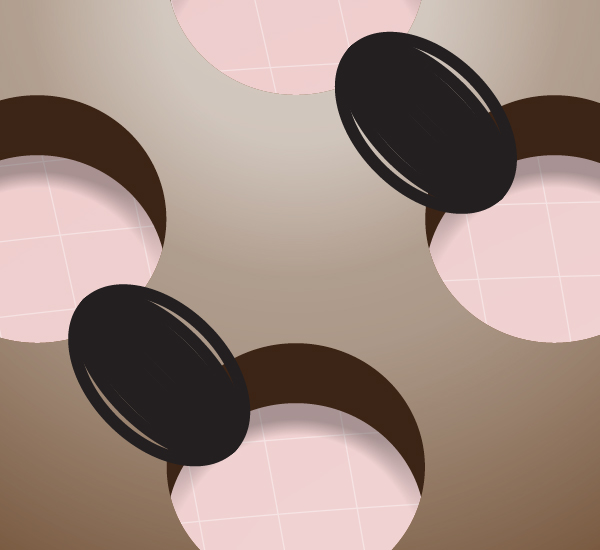
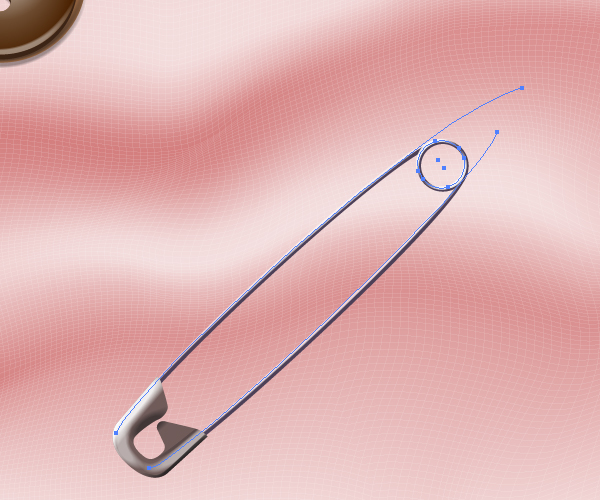
Step 23
Apply the “Black brush” to the following paths as shown.
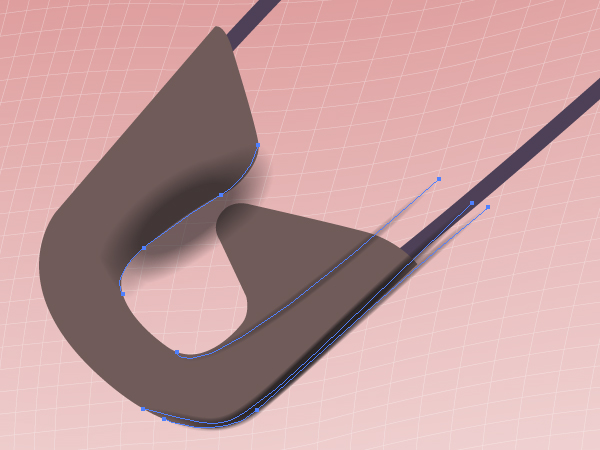
Then apply the “White brush” to the next paths.
And crop the paths with a clipping path.
Step 24
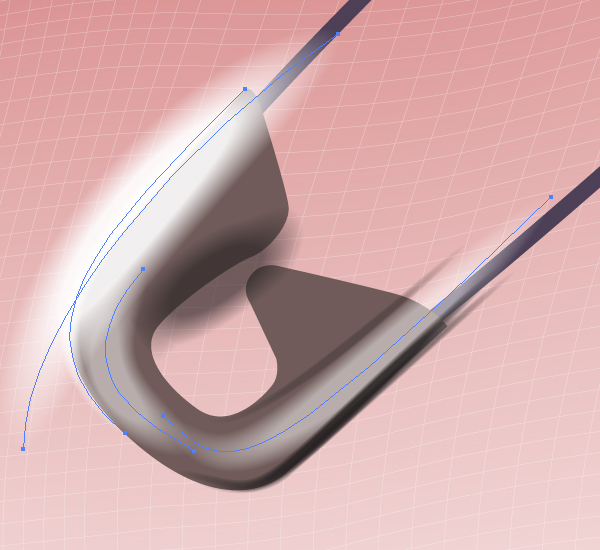
Apply the “White brush” to the thin metallic parts of the pin, and crop the paths with a clipping path too.
Create shadows from the pin by using the “Black brush” following the diagram below.
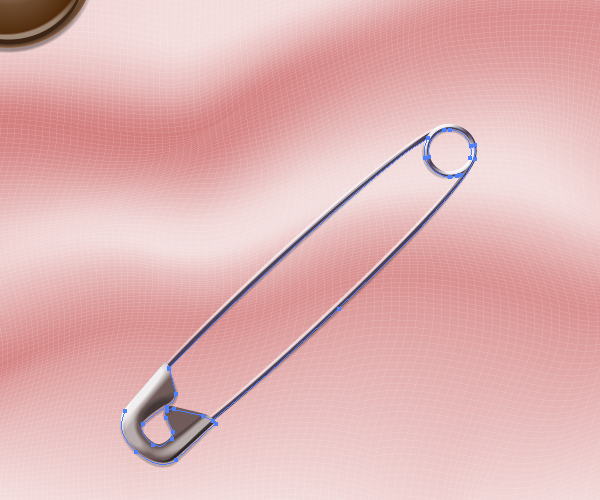
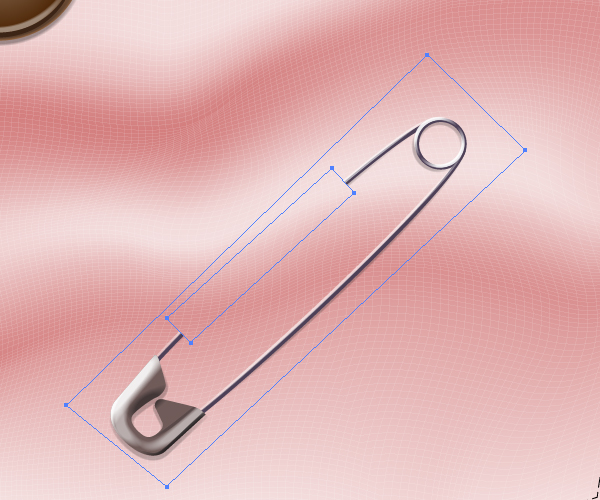
Put the pin on the piece of cloth by using the compound clipping path shown below.
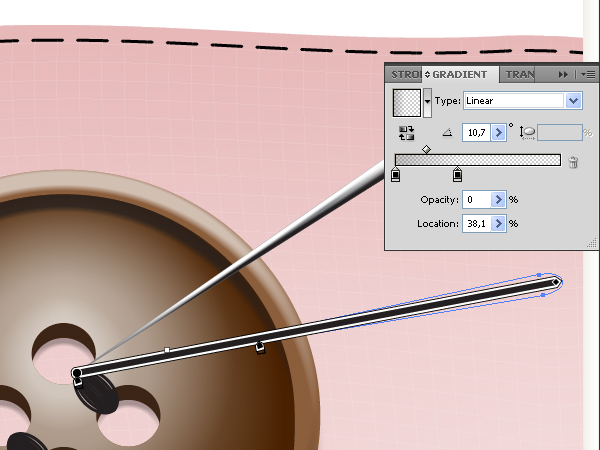
Step 25
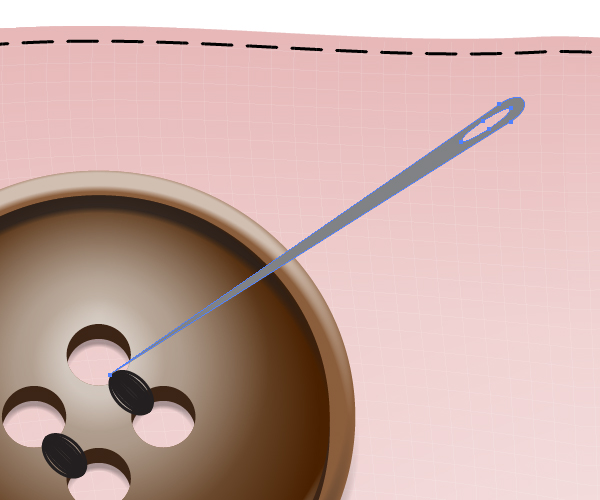
The needle is illustrated the same way as the pin. First draw a basis for a needle – the shown compound path with a hole and fill it with gray.
Now apply the “Black brush” to the paths cropped with a compound clipping mask.
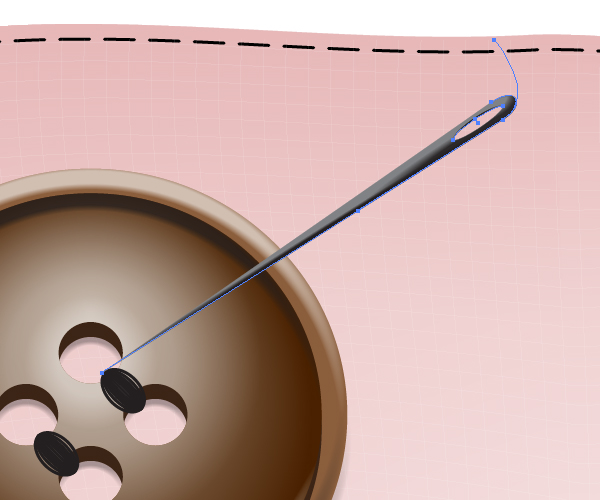
Repeat these manipulations for the “White brush.”
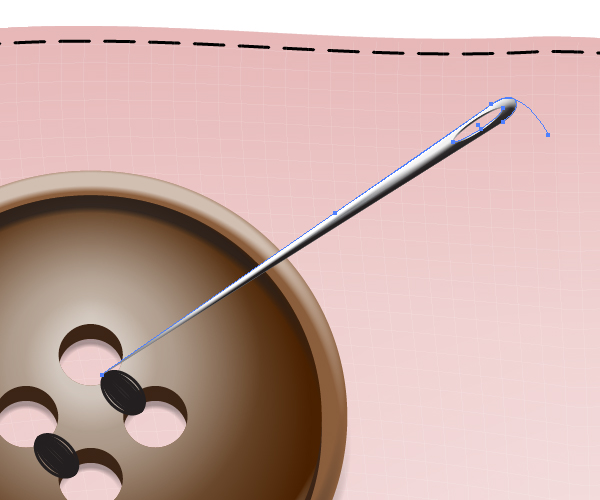
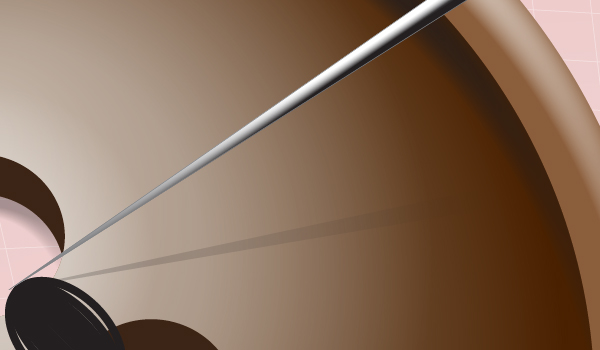
In order to illustrate a shadow from the needle, sketch the path shown below.
And fill it with the following linear gradient.
You should receive the following shadow.
Step 26
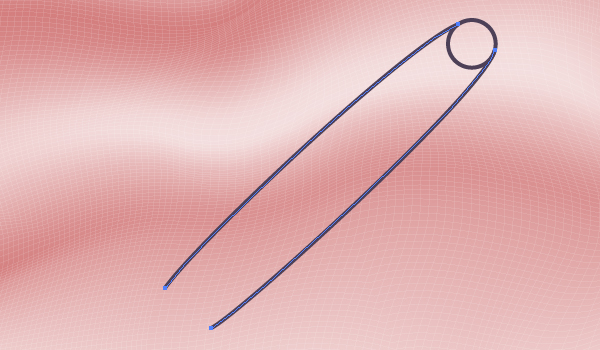
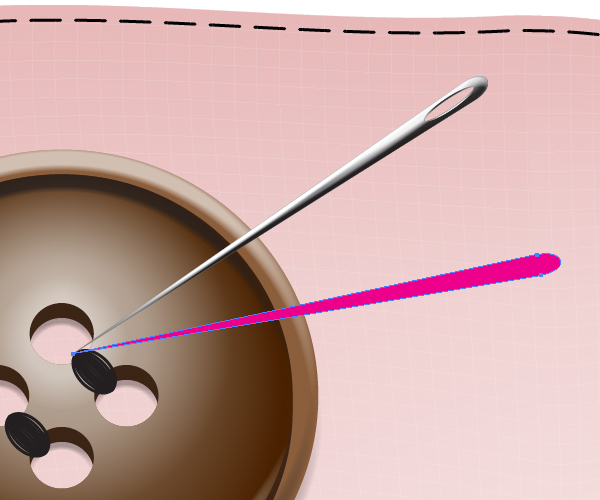
Take the Pencil Tool (N) and draw a path which will represent a thread.
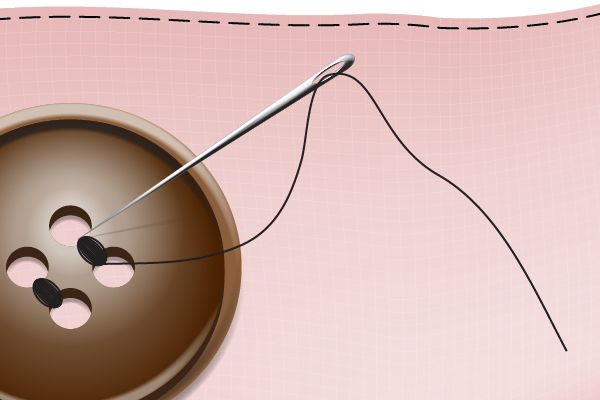
Illustrate the shadow from the thread using an angled linear gradient.
Step 27
Let’s blow up our artwork. Pay attention to the next diagram.
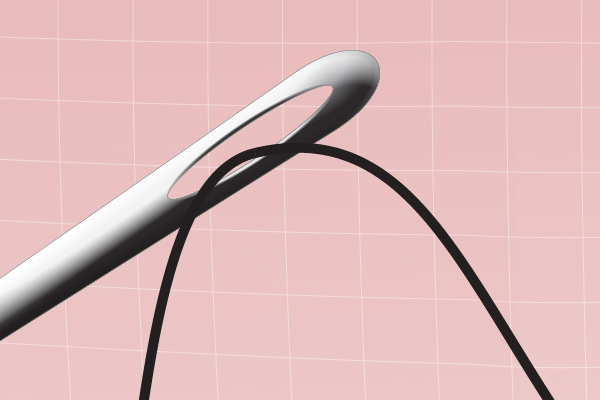
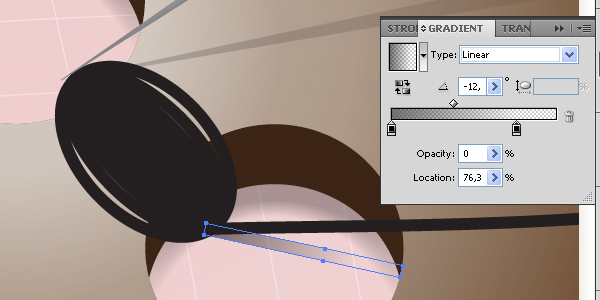
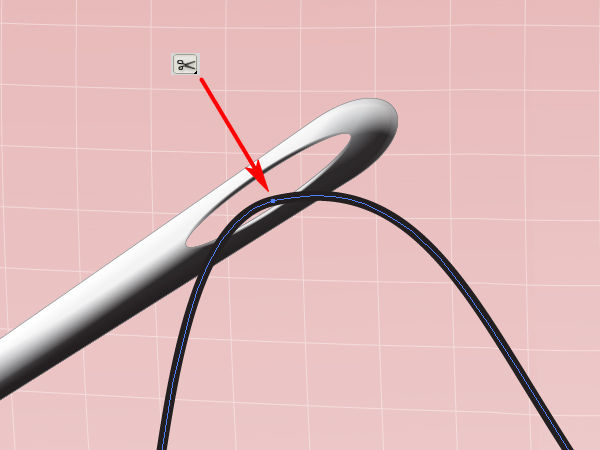
Something is wrong here. Do you know what? Our thread must go through the needle hole. To achieve this you could use a clipping path. But I think that using the Scissors Tool (C) is a more interesting and effective way. Take the Scissors Tool (C) and click with it in the point shown below.
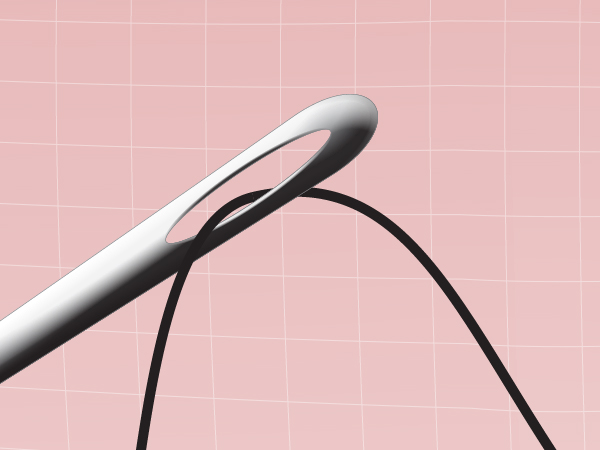
And send the second part of the thread backward.
Conclusion
The final image is below. You may illustrate your own artwork using the described techniques and link to your results in the comments below, or post the results in our Facebook group.