In this quick tip you will learn how to create a simple set of map pins. It all starts with a simple circle, some pixel perfect vector shape building techniques and the Rounded Corners effect. Next, using the Pathfinder options along with a bunch of simple effects we’ll create the extra paths. Finally, we’ll use some basic masking and blending techniques. Let’s begin!
Step 1
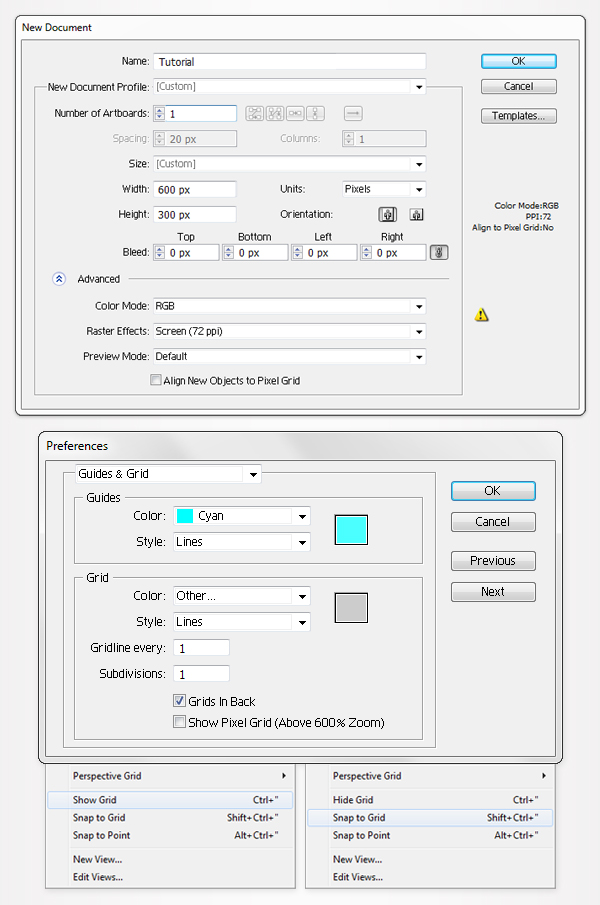
Create a 600 by 300px, RGB document. First, enable the Grid (View > Show Grid) and the Snap to Grid (View > Snap to Grid). Next, you’ll need a grid every 1px. Go to Edit > Preferences > Guides > Grid, enter 1 in the Gridline every box and 1 in the Subdivisions box. You can also open the Info panel (Window > Info) for a live preview with the size and position of your shapes. Do not forget to replace the unit of measurement to pixels from Edit > Preferences > Unit > General. Al these options will significantly increase your work speed.
Step 2
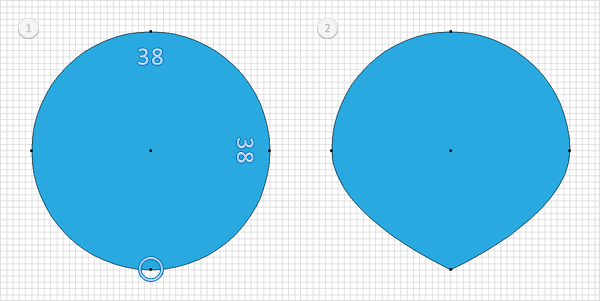
Pick the Rectangle Tool (M) and create a 38px circle. Fill it with a random color and remove the color from the stroke. Select this circle, pick the Convert Anchor Point Tool (Shift + C) and click on the bottom anchor points. In the end your shape should look like in the second image.
Step 3
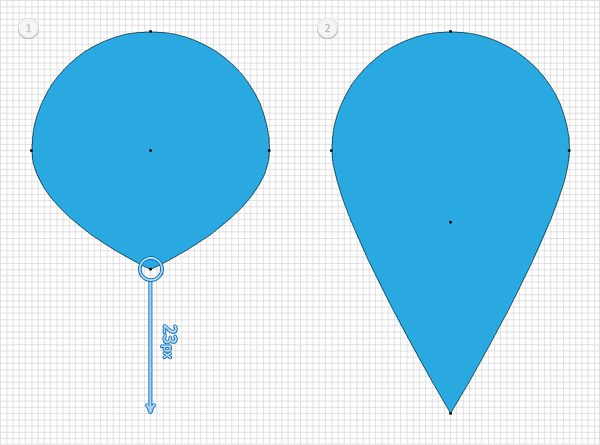
Reselect the shape created in the previous step, pick the Direct Selection Tool (A), select the bottom anchor points and drag it 23px down. The Snap to Grid will ease your work. In the end your shape should look like in the second image.
Step 4
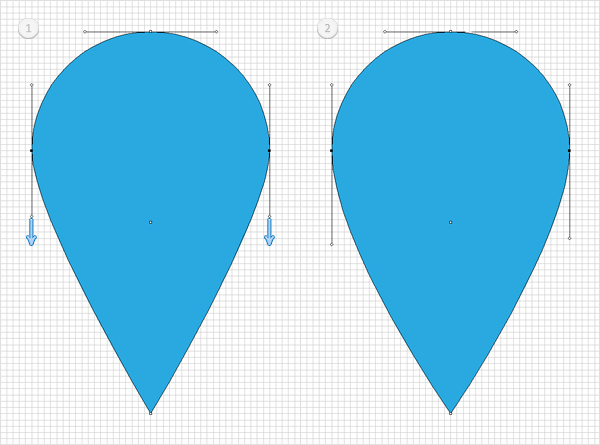
Reselect the shape edited in the previous step. Pick the Direct Selection Tool (A), select the left anchor points and drag the bottom handle a few pixels down as shown in the second image. Again, the Snap to Grid will ease your work. Continue with the Direct Selection Tool, select the right anchor points and drag the bottom handle a few pixels down like you did with the left anchor point. Make sure that these two anchor points and their handles are symmetrical.
Step 5
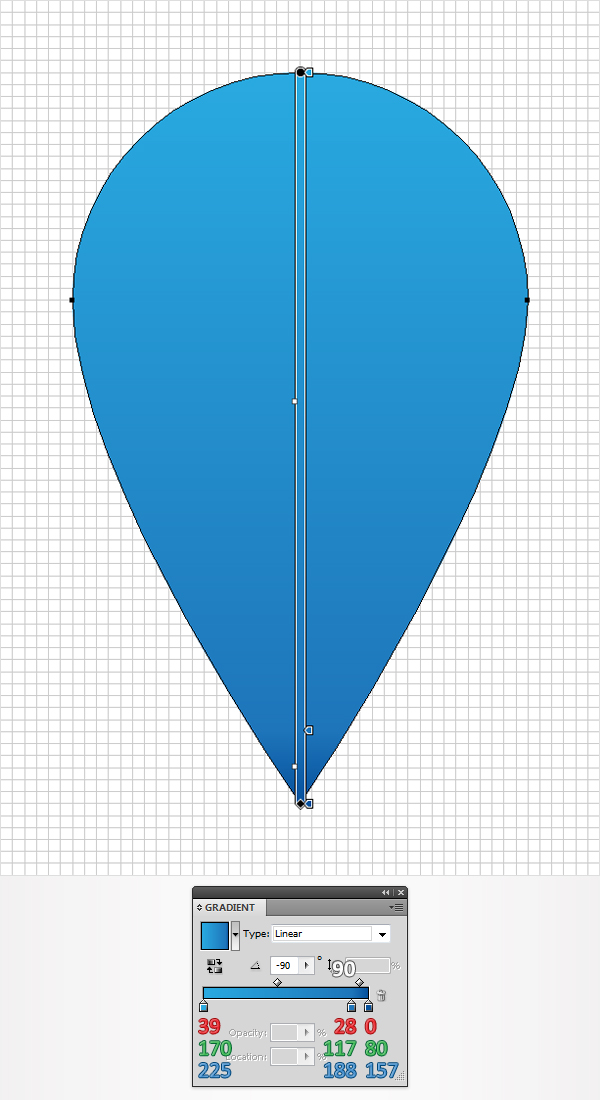
Reselect the shape edited in the last steps and three steps and replace the flat color used for the fill with the linear gradient shown below. The white number from the gradient image stands for location percentage.
Step 6
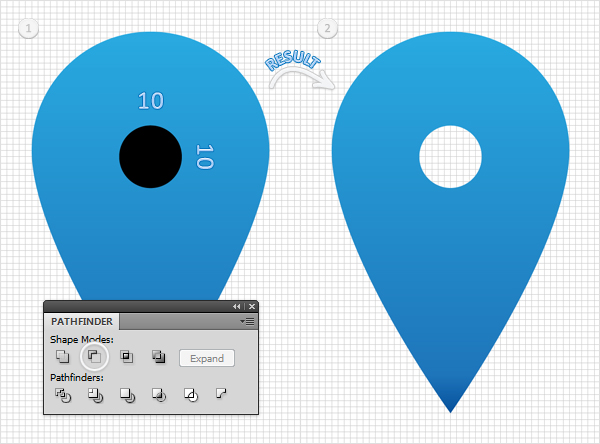
Pick the Ellipse Tool (L), create a 10px circle and place it as shown in the first image. Select it along with the shape created in the previous step, open the Pathfinder panel (Window > Pathfinder) and click on the Minus Front button.
Step 7
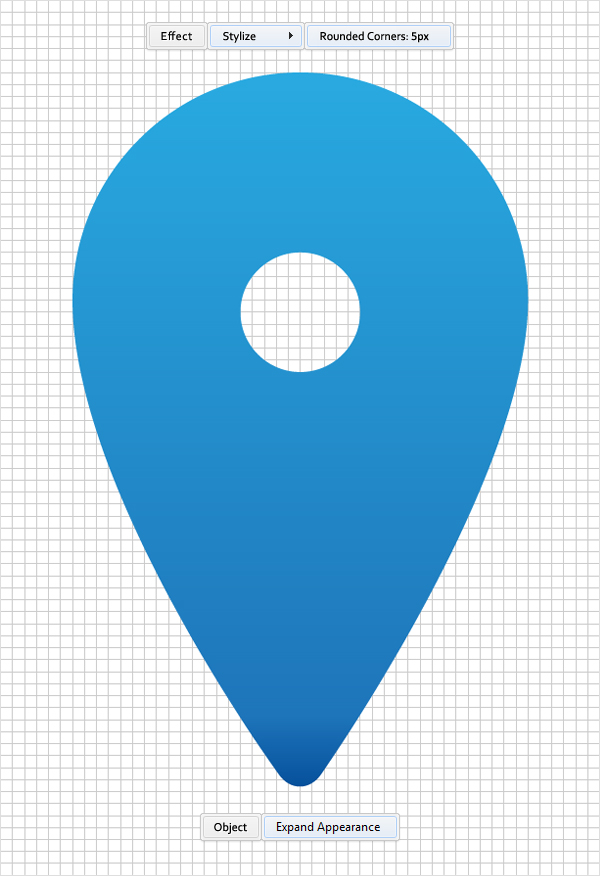
Reselect the compound path created in the previous step and go to Effect > Stylize > Rounded Corners. Enter a 5px radius, click OK and go to Object > Expand Appearance.
Step 8
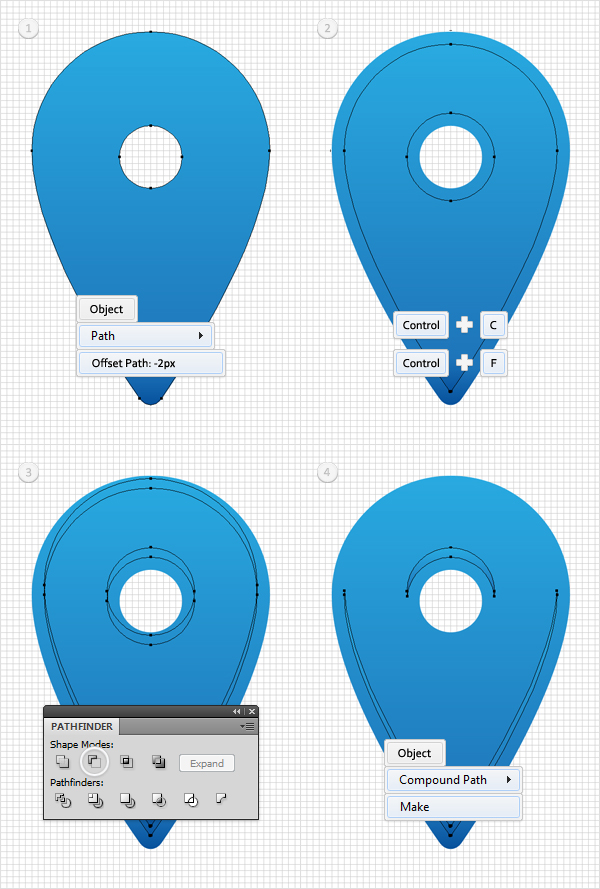
Reselect the compound path edited in the previous step and go to Object > Path > Offset Path. Enter a -2px Offset and click OK. Duplicate the resulting shape (Control + C > Control + F). Move this copy 1px up. Select it along with the original shape created in the beginning of this step and click on the Minus Front button from the Pathfinder panel. Turn the resulting group of shapes into a compound path (Object > Compound Path > Make).
Step 9
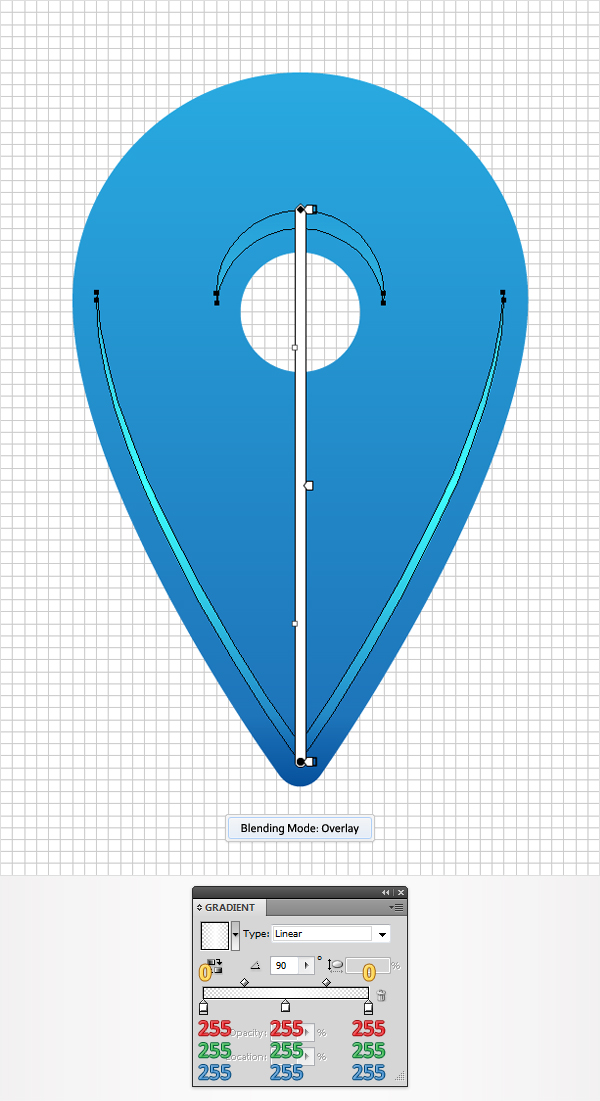
Reselect the compound path created in the previous step, change its blending mode to Overlay and fill it with the linear gradient shown in the following image. The yellow zeros from the gradient image stand for opacity percentage.
Step 10
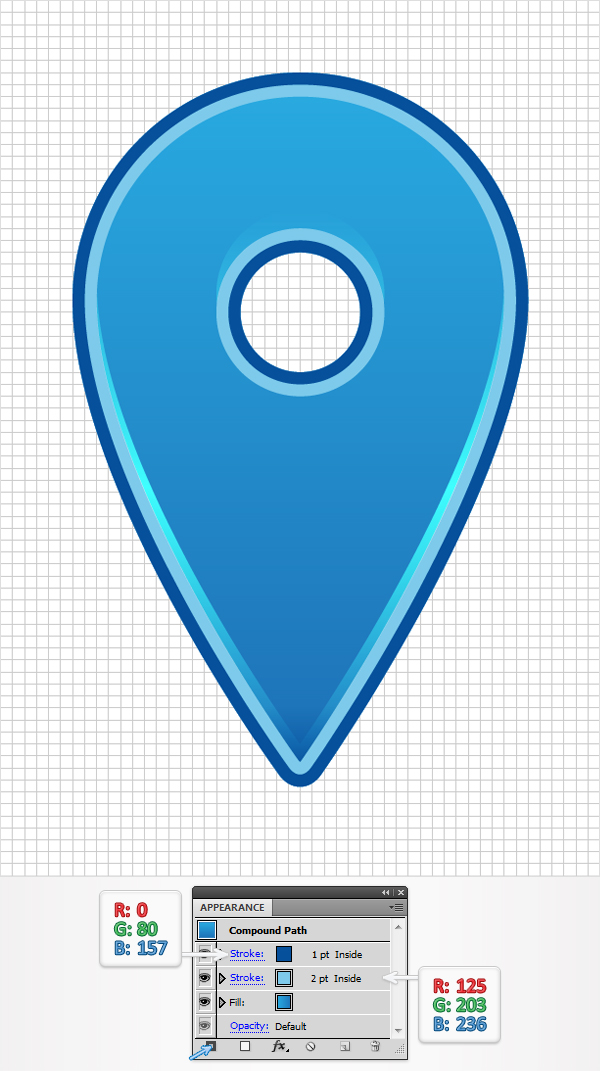
Reselect the main compound path, open the Appearance panel (Window > Appearance) and add a stroke. Make it 2pt wide, set its color at R=125 G=203 B=236 and align it to inside. Make that your shape is still selected and add a second stroke using the Add New Stroke button. It’s the little, black square icon from the bottom, left corner of the Appearance panel. Select this new stroke from the Appearance panel, make it 1pt wide, set its color at R=0 G=80 B=157 and align it to inside.
Step 11
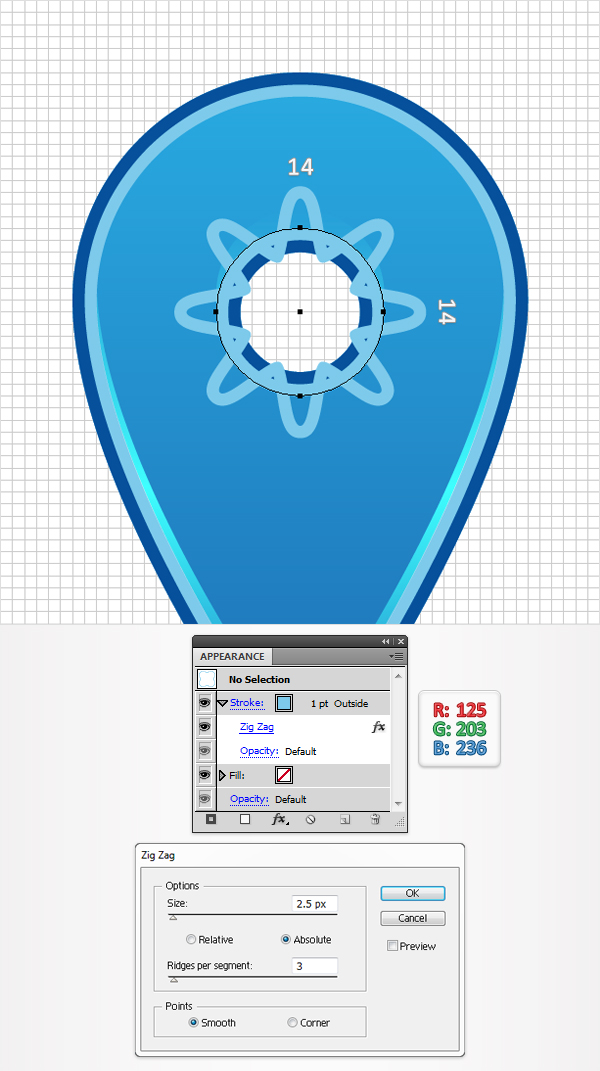
Pick the Ellipse Tool (L), create a 14px circle and place it as shown in the following image. Fill it with none and add a 1pt stroke. Select it from the Appearance panel, set its color at R=125 G=203 B=236 (also the color used for the 2pt stroke from the main compound path), align it to outside and go to Effect > Distort&Transform > Zig Zag. Enter the data shown below and click OK.
Step 12
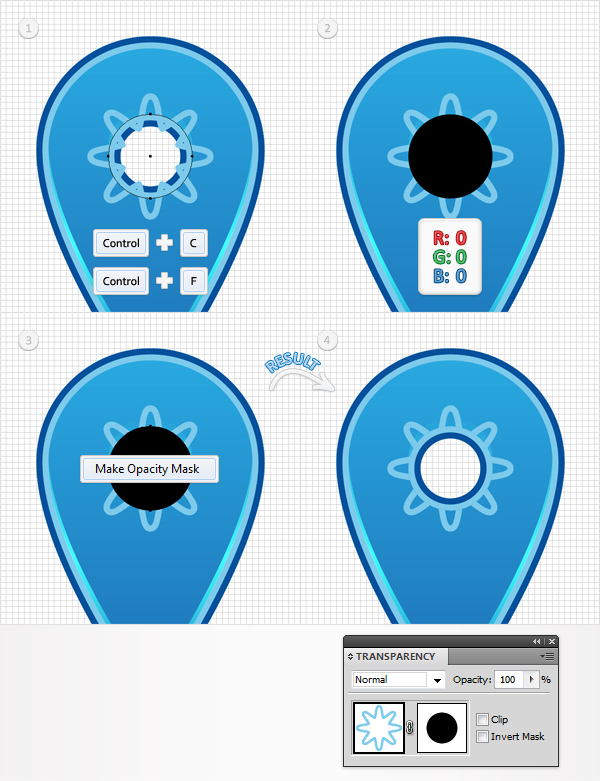
Open the Transparency panel. Reselect the circle created in the previous step and make a copy in front (Control + C > Control + F). Select this copy, remove the stroke and the Zig Zag effect from the Appearance panel and add a black fill. Select this black circle along with the circle created in the previous step, open the fly-out menu of the Transparency panel, click on Make Opacity Mask and uncheck the Clip box. In the the stroke with the zig zag effect should look like in the fourth image.
Step 13
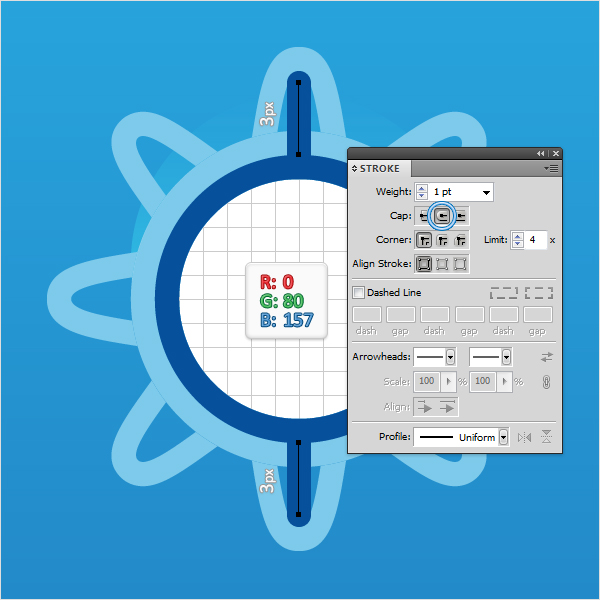
Pick the Pen Tool (P) and draw a 3pt, vertical path. Add a 1pt stroke for this path and set its color at R=0 G=80 B=157 (also the color used for the 1pt stroke from the main compound path). Make sure that this blue stroke is selected (in the Appearance panel), open the Stroke panel (Window > Stroke) and check the Round Cap button. Duplicate this vertical path then place the two paths as shown in the following image. Once again, the Snap to Grid should ease your work.
Step 14
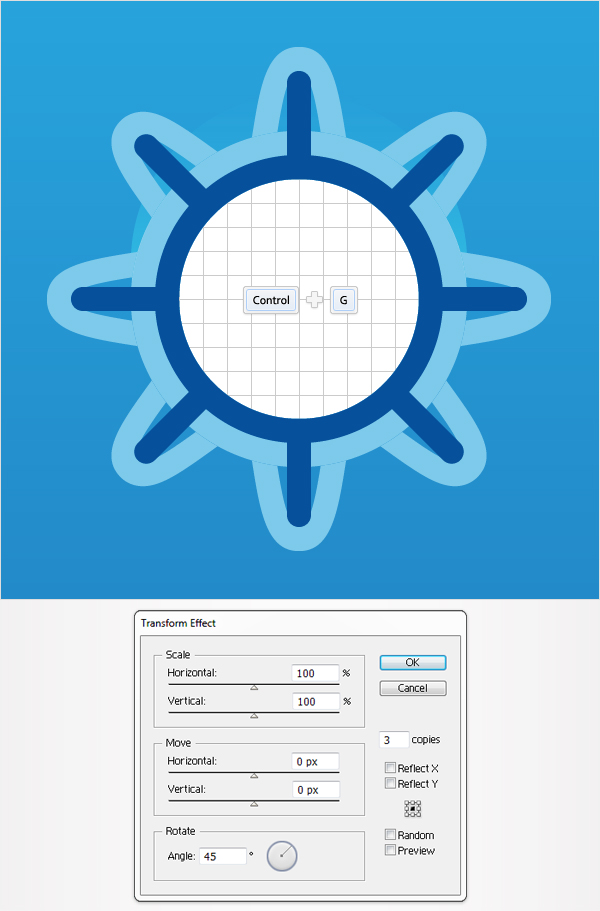
Reselect the two paths created in the previous step, group them (Control + G) and go to Effect > Distort&Transform > Transform. Enter the data shown below and click OK.
Step 15
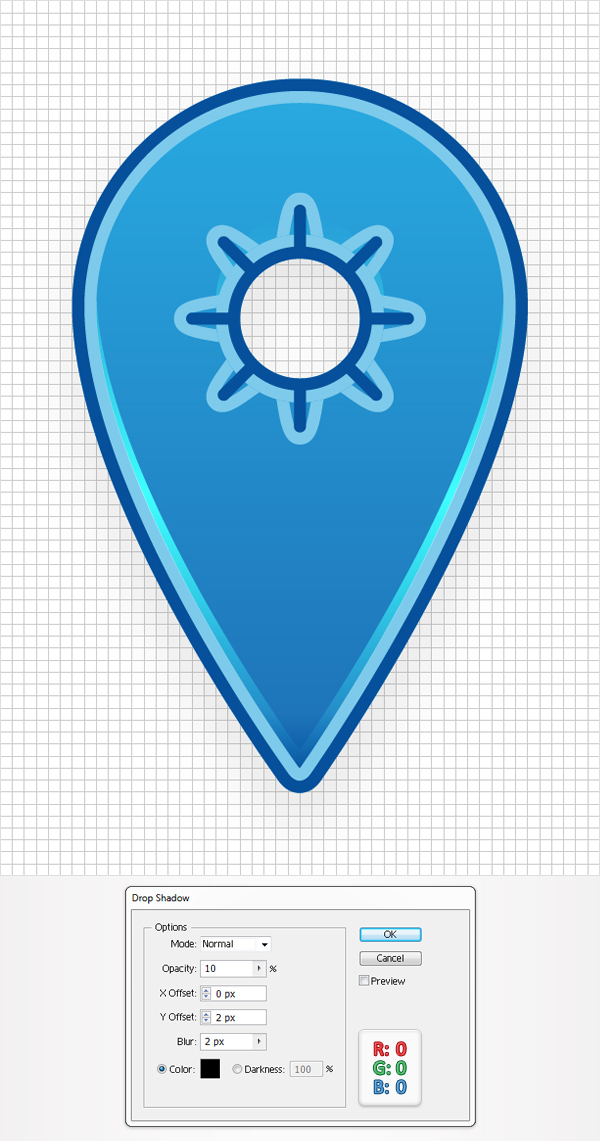
Reselect the main blue compound path, make sure that no fill or stroke is selected (in the Appearance panel) and go to Effect > Stylize > Drop Shadow. Enter the data shown below and click OK.
Step 16
Finally, you can use different sets of colors for your map pin.

Conclusion
Now your work is done you can add a nice looking background. Here is how it should look. I hope you’ve enjoyed this tut.