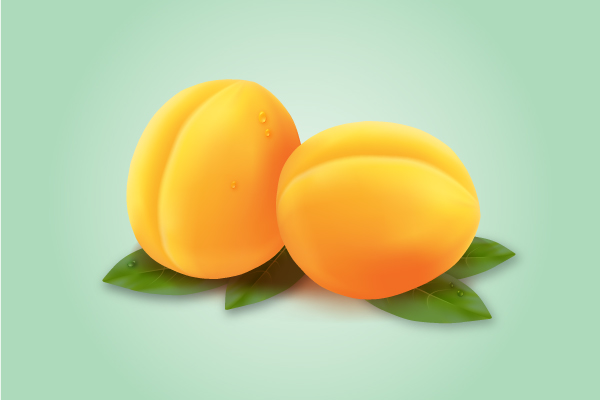
Follow this simple but detailed quick tip and learn how to draw an apricot using the Mesh Tool. It includes step by step instructions about how to create all the mesh points and lines plus all the color shades used so you can draw a realistic apricot from scratch. Let’s begin!
Step 1
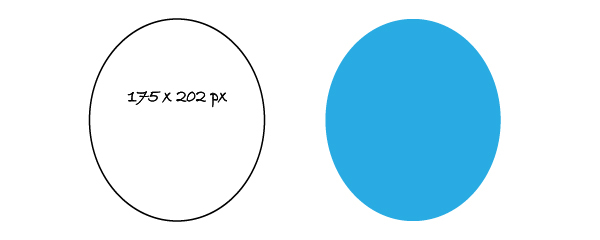
First open a new web document. Use the Ellipse Tool (L) to draw an oval shape and select any fill color for the moment. Now let’s start with the first part of the tutorial in which we will create all the mesh lines step by step.
Step 2
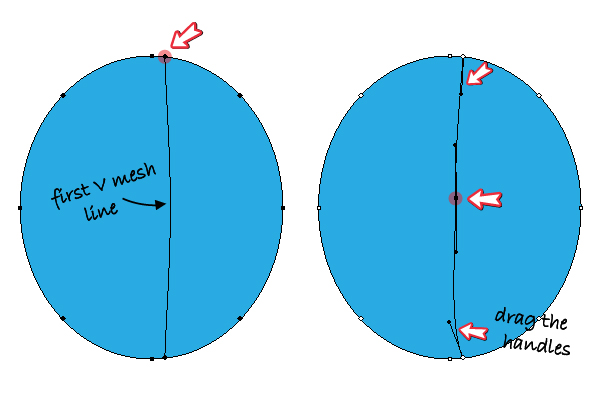
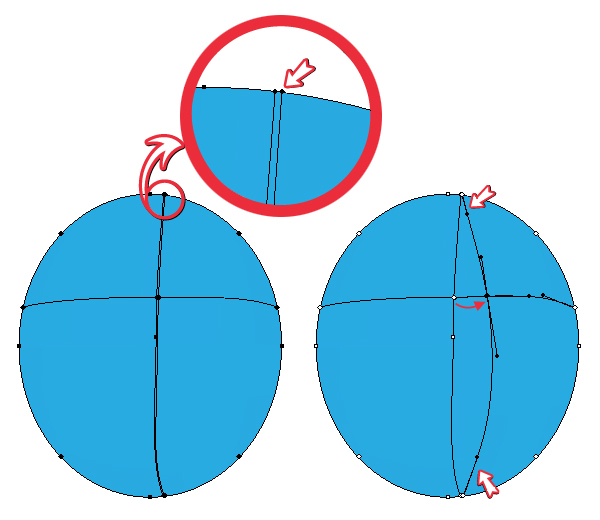
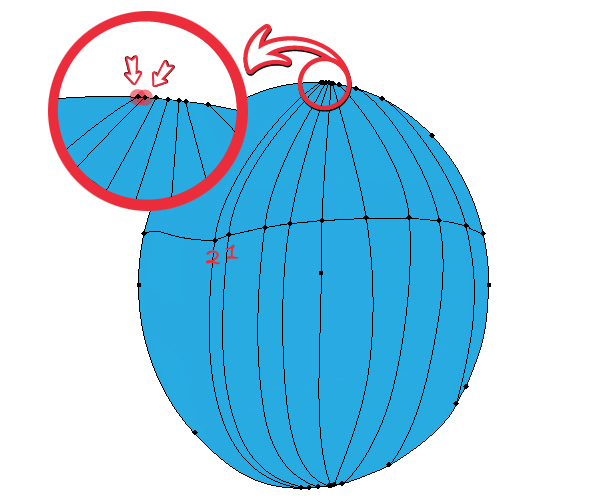
Take the Mesh Tool (U) and click on the spot indicated at the top of the ellipse. This way you will obtain the first vertical mesh line. To move the mesh point from the center in the desired spot just select it with the Direct Selection Tool (A) and drag it to the left then also move the handles as shown below.
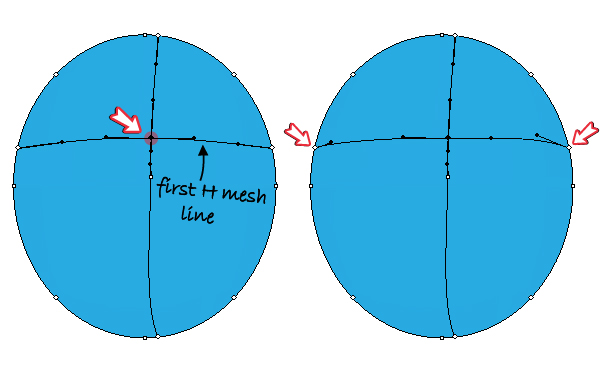
Next, click with the Mesh Tool (U) in the spot indicated above the center point to create the first horizontal mesh line. Adjust the handles if needed.
Step 3
Let’s add more lines in the right side of the first vertical mesh line. Take again the Mesh Tool (U) and click on the ellipse path very close to the point from the top as shown in the close-up. You will obtain a new mesh line as in the image. The top and bottom points are in the desired spot and you only need to move the middle point. Use the Direct Selection Tool (A) to select it and drag it to the right as indicated then also move the handles.
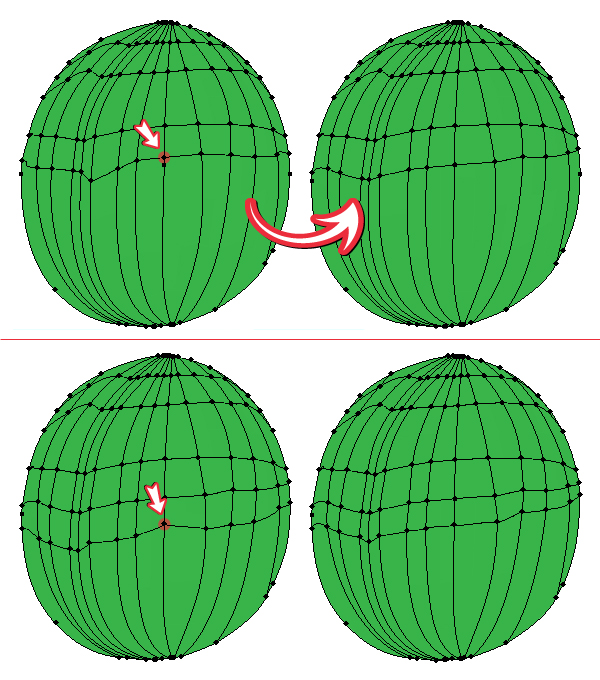
Step 4
Create the third mesh line by clicking in the spot indicated below then move the middle mesh point and adjust the handles as you did earlier.
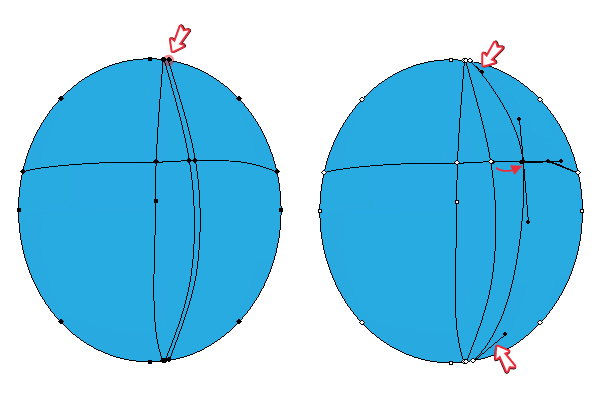
Continue with the next two lines. This time after you move the middle points also move the two new mesh points from the bottom as shown below then adjust the handles if needed.
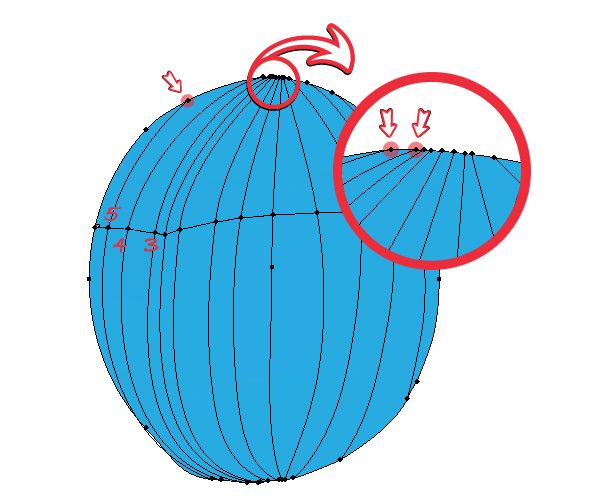
Step 5
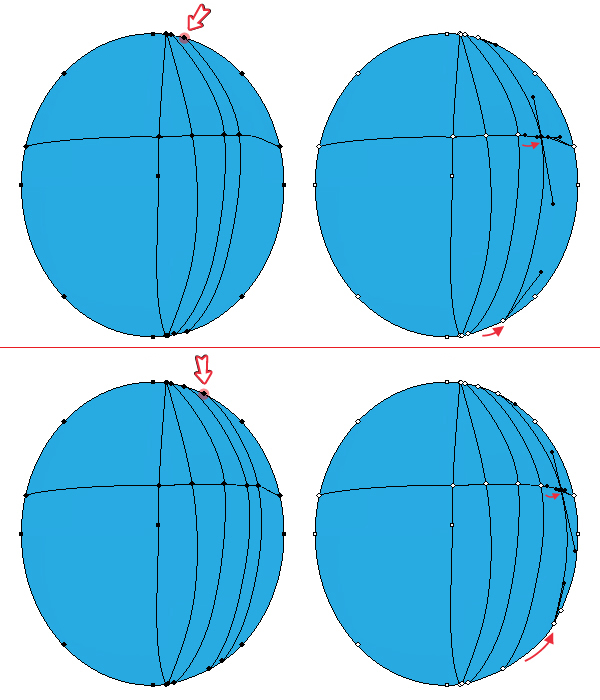
The process is the same for the left side of the ellipse. Add the first mesh point very close to the others from the top then move the middle point using the Direct Selection Tool (A) as before. Also move the handles as shown.
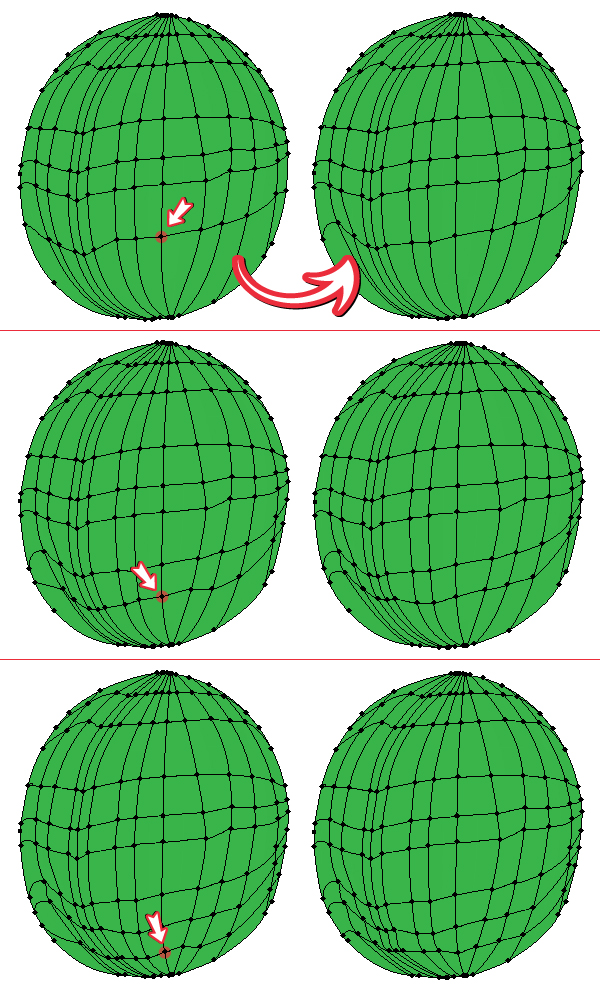
Step 6
Add other two points very close to each other as shown in the close-up to obtain the next two lines.
In the same way add other two points at the top to create the lines no. 3 then 4. Finally, add the other point indicated to create the line no.5. With this, all the vertical mesh lines are ready and they should look like in the image.
Step 7
If in this process the ellipse has been distorted, now is the time to correct this by selecting with the Direct Selection Tool (A) the desired point or handle and move it.
Step 8
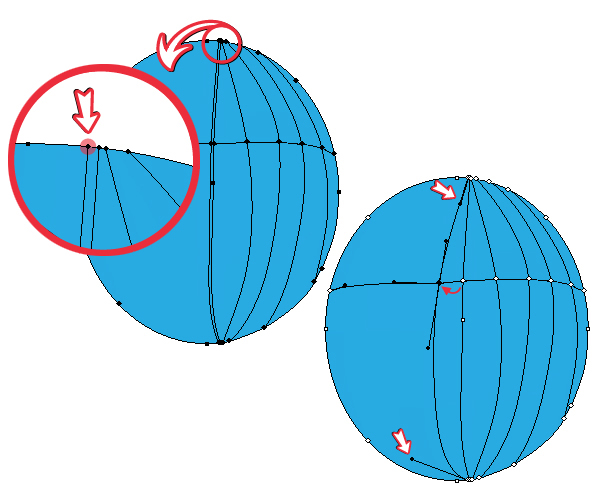
Let’s continue with the horizontal lines. Take the Mesh Tool (U) and click in the spot indicated to obtain a new line above the first horizontal mesh line (step 2). If the resulting line is too crooked, move some of the points and handles with the Direct Selection Tool (A). When you are done, click in the other spot indicated to create another mesh line above.
Step 9
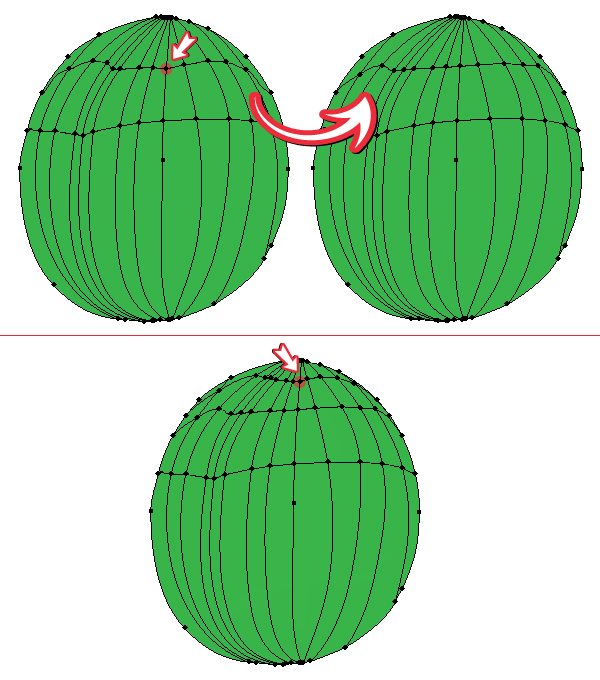
Now focus on the area below the first horizontal mesh line and add other two lines using the Mesh Tool (U) as shown in the image below.
Continue with the last three mesh lines and create them by clicking in the spots indicated. Always adjust the lines if they don’t look good.
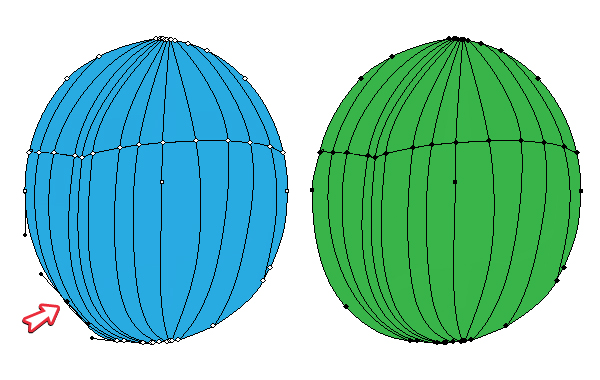
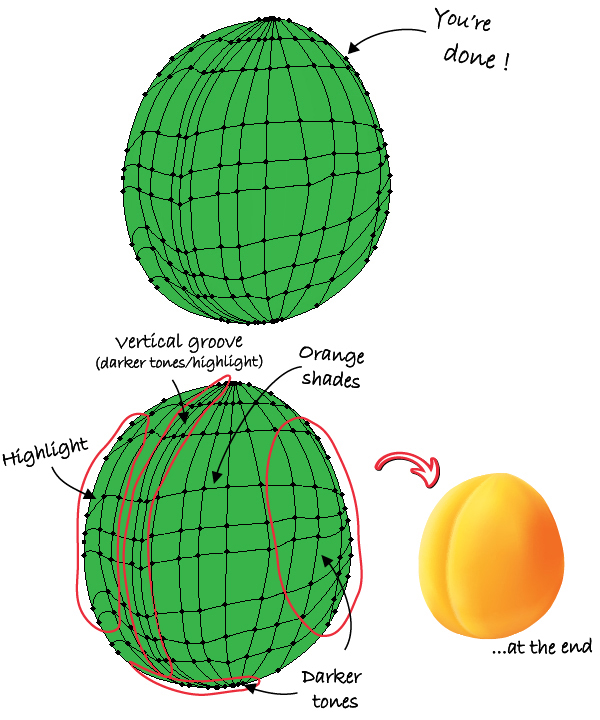
Step 10
At this point you are done with all the mesh lines and they should look like below. Now begins the second part of the quick tip in which we will color this apricot and bring it to life. In the image below you can see the main areas according to the color shades used and also the final result.
Step 11
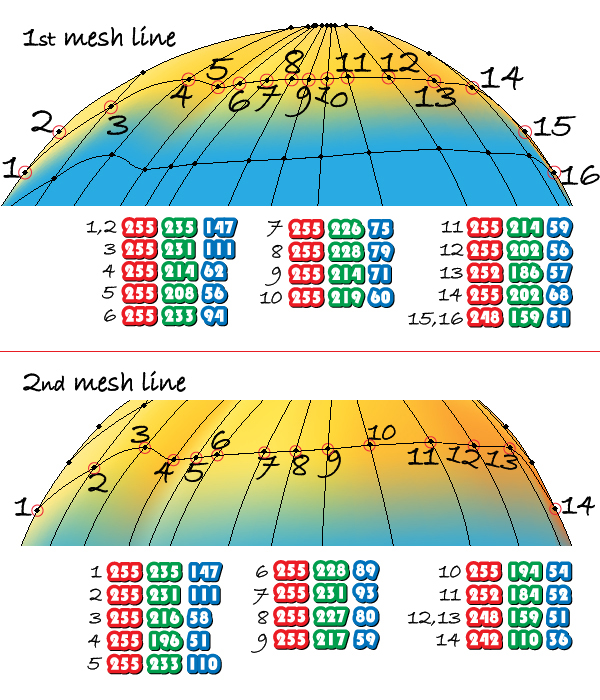
I want you guys to make this apricot therefore in the following images I took each mesh line and I’ve written the colors used for each point separately. This may sound boring but without all the colors the work so far is in vain.
Start from the top and use the Direct Selection Tool (A) to select each mesh point then change the colors as indicated.
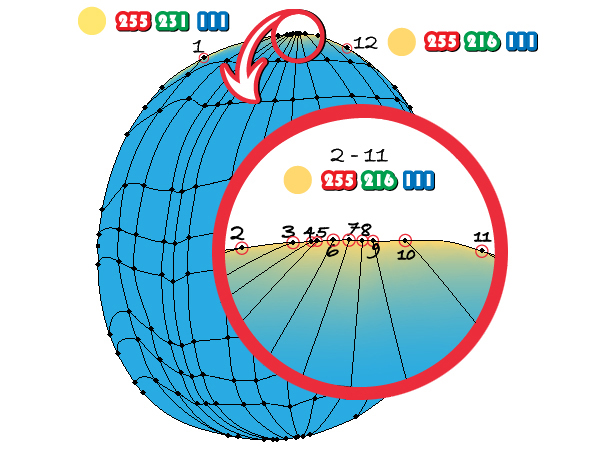
Step 12
Move on to the first mesh line and change all the colors as shown then do the same thing for the second line.
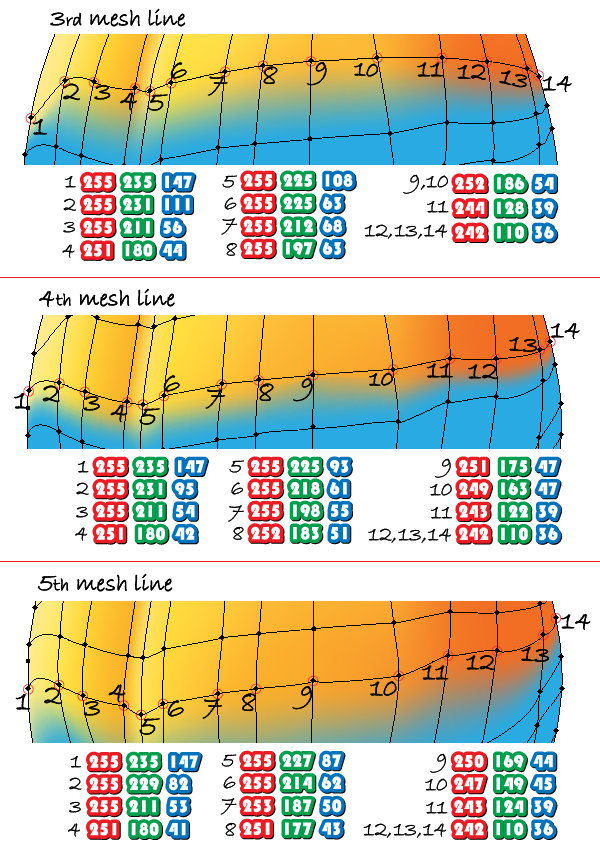
Here are the next three lines:
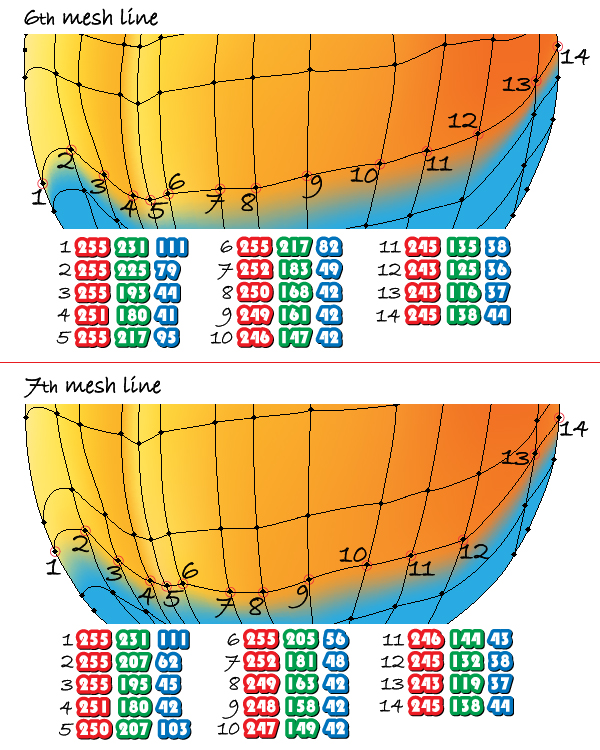
… and the next two:
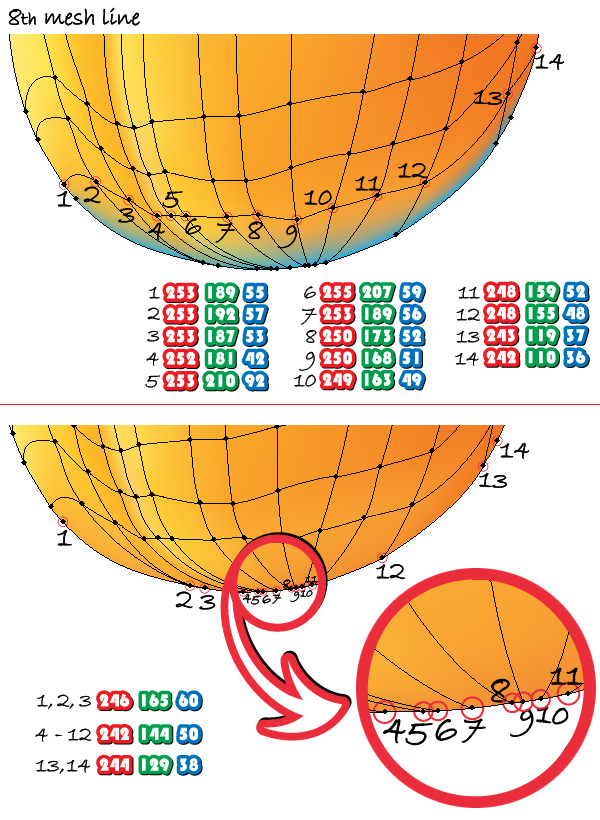
… finally the last mesh line and the bottom of the apricot:
Step 13
The apricot is ready and this is the final result:
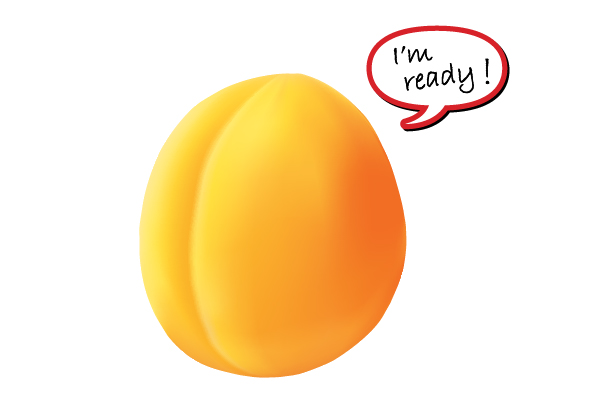
Final Image
Here is the final image. I just duplicated the apricot made then I arranged some leaves under them. Also, a few water drops will make them look tastier. I hope you’ve enjoyed this tut!