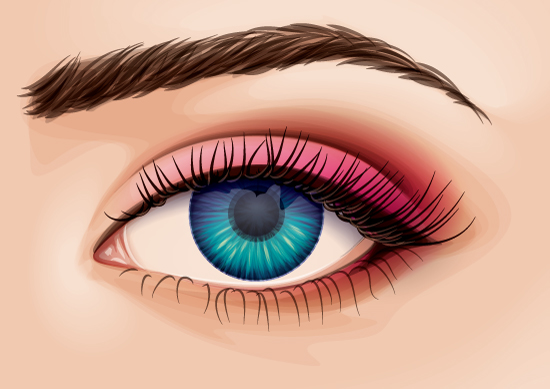
In today’s tutorial I’m going to show you how to create a detailed eye from a stock image in Adobe Illustrator. We’ll work from some basic skin shading around the eye, to eyelashes, then a detailed iris and even eyebrows in this vector workflow.
Introduction
When I’m creating a portrait in my free time, I often go beyond what is required in terms of detailing for key features… that aren’t visible at 100% resolution. I do this more for my own pleasure of vectoring rather than visual purposes, but it also helps me work on learning how to create features without the need of stock as a reference.
In today’s tutorial I’m going to show you how to create a detailed eye from a stock image. I got this stock image from an Envato Bundle last year (keep your eyes open for those from time to time, they are a bargain!), however you can still get this stock image by itself from Photodune.
A quick tip before we start: if you’re working on two eyes rather than a close up which I’m doing today, then I’d suggest working on both at the same time, rather than completing them individually. The reason being is that you’ll shade and treat them both the same in terms of effects, colors and Blending Modes. So with that in mind, let’s get started!
Step 1
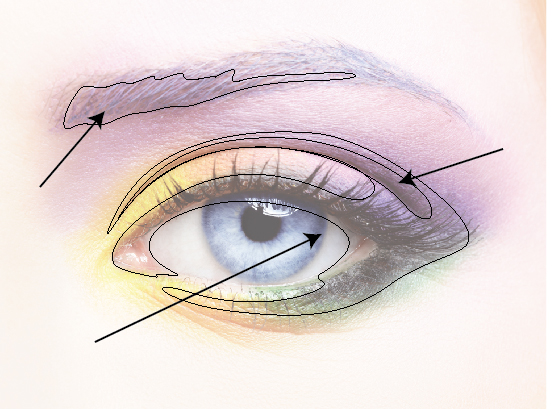
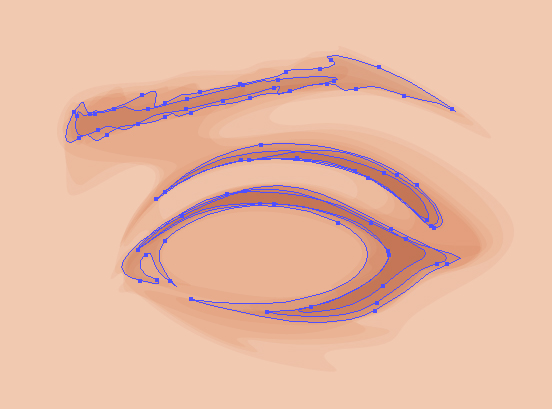
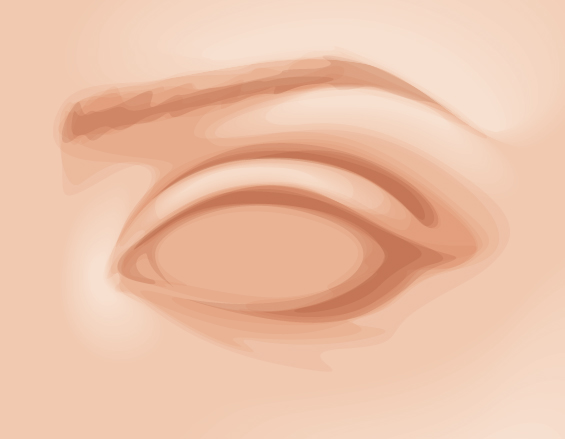
Although everyone has their own method of skin shading, I’m going to go through the first couple of steps with you for how I do it. For the dark/shadowed areas of the skin, I tend to use shapes of solid color reduced to low opacities. These initial shapes I’ll be drawing are on top of the base of the same shade (C=0, M=20, Y=25, K=5), however they will be set to Blending Mode Multiply with Opacity 20%.
The initial shapes will include a base shape for the eyebrows, a crease for the eyelid, and a crease around the eye. You’ll notice that I’ve allowed a gap for the eyelid at the top and at the bottom. Also note the shapes for the eyebrow base aren’t smooth, as I’m compensating for strokes of hair that will be applied later on.
A quick note about creases of the eyes and wrinkles. You may be following each shape you see on a stock image, however the aim is flatter with the portrait you’re doing. So try to avoid paying too much attention to any creases/wrinkles around the lower and corner of the eyes.

I then added a darker shade (C=5, M=0, Y=35, K=15) set to Blending Mode Multiply with Opacity 25%. This is done to darken the top of the eyebrow, crease of the eyelid, and around the outside of the eyes, leaving space for the corner of the eyes where it is much lighter.
Step 2
Now to add highlights to the skin. I use gradients or Blends (Command + Alt + B) for the highlights in the skin. In this case, I’m using Blends, as you’re getting a close up of the eye, and a Blend will appear much smoother due to more tailored shaping.
I’ll be using a lighter skin shade for the shapes (C=0, M=10, Y=14, K=5). The Blends have a large shape set to 0% Opacity and a smaller one set to 100% to give the impression of a shaped transparent gradient. These are set to Spacing at Specific and Steps at 15. The key areas to highlight are the brow bone, the corner of the eyes, and the eyelid.
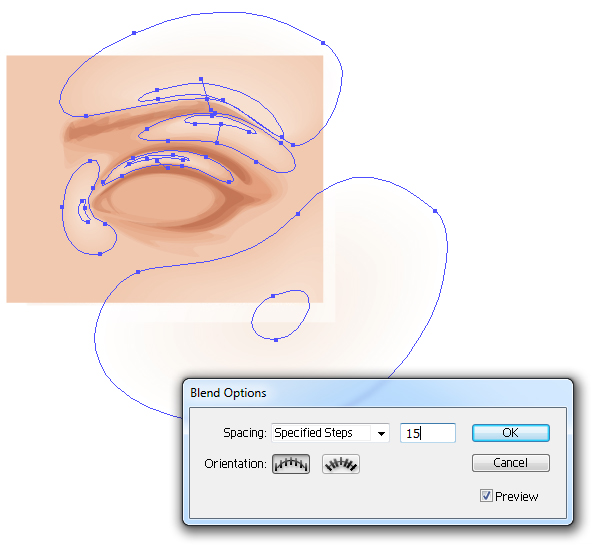
Once done, I’ve set the Blends (Command + Alt + B) to Blending Mode Screen with Opacity 50%.
Step 3
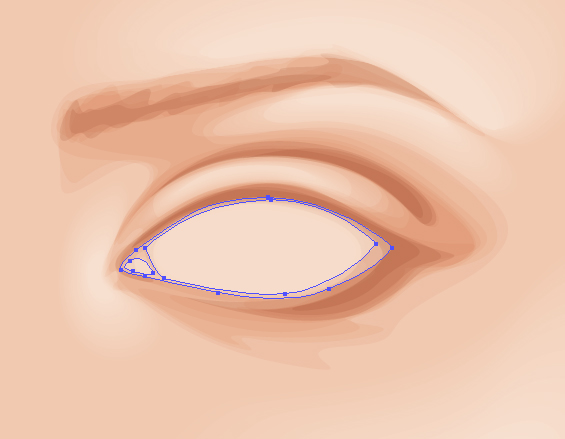
With the shade used for the skin highlights (C=0, M=10, Y=14, K=5), I’m going to draw shapes for the eyeball and the corner of the eye as a much larger shape, which will cover the whole area including the waterline. Always avoid using pure white and black, as nothing is naturally those colors, especially the “whites” of ones eyes! These shapes will be set to Blending Mode Screen with Opacity 40%.
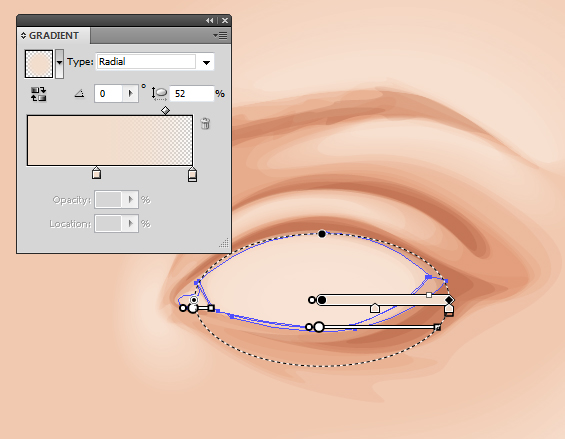
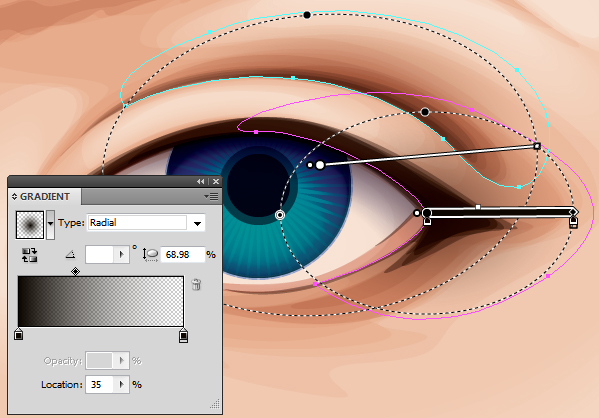
I’ve then used a transparent radial gradient with the same shade for the inside of the eye, the eyeball and corner of the eye set to Blending Mode Screen with Opacity 20%.
Step 4
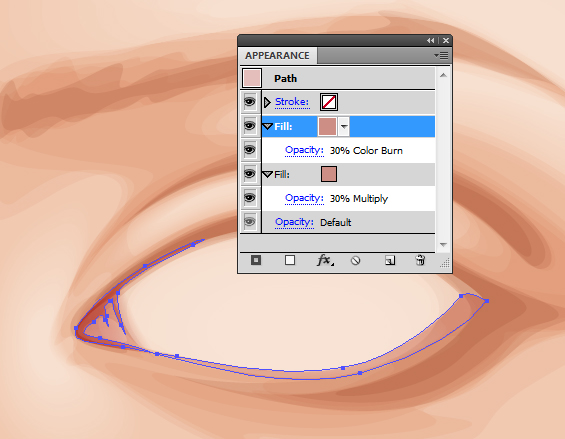
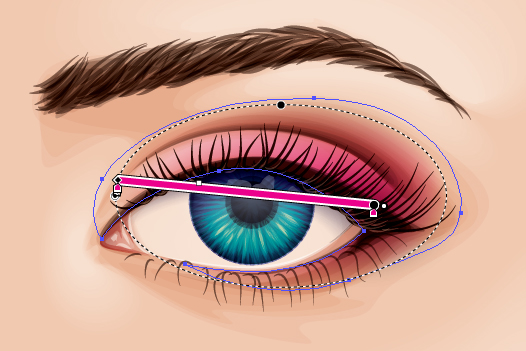
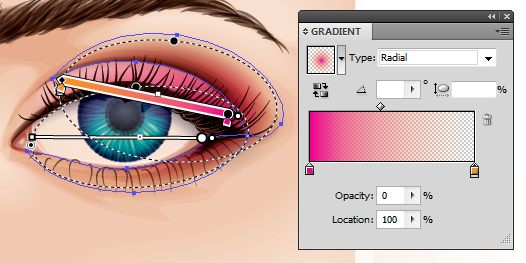
Now to add gradients at the corner of the eye to create a slight pink shade. This is done with a rose inverted transparent radial gradient (C=11, M=46, Y=37, K=9) with the below Appearance panel settings.
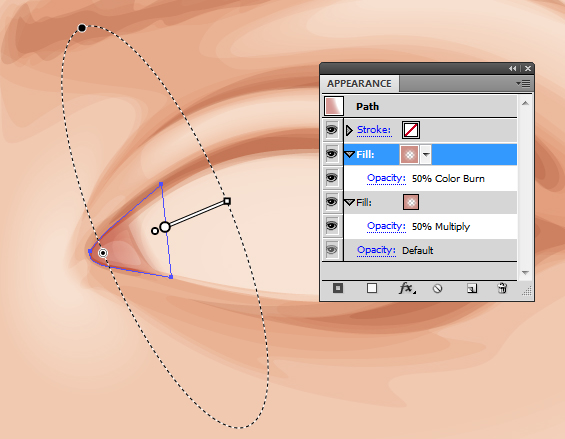
Similar settings are applied around the inside of the eye and the corner of the eye with the same rose shade, but with solid color rather than gradients as shown below.
Step 5
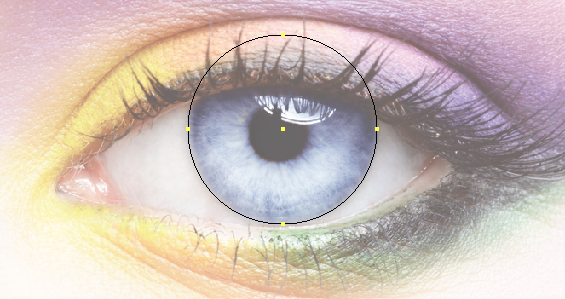
For the iris, I’ll be using even circles which are created by using the Ellipse Tool (L) while holding Shift + Alt.
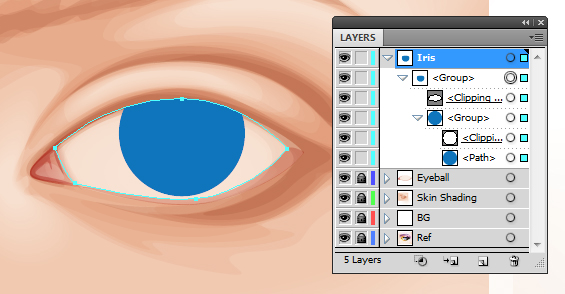
Duplicate the shape for the eyeball and duplicate the circle. Use these to produce a Clipping Mask (Command + 7) within a Clipping Mask. Although you can see (below) why you’d use a Clipping Mask with a duplicate of the eyeball. You won’t see for another few steps why you would do this for the circle, so bear with me.
Step 6
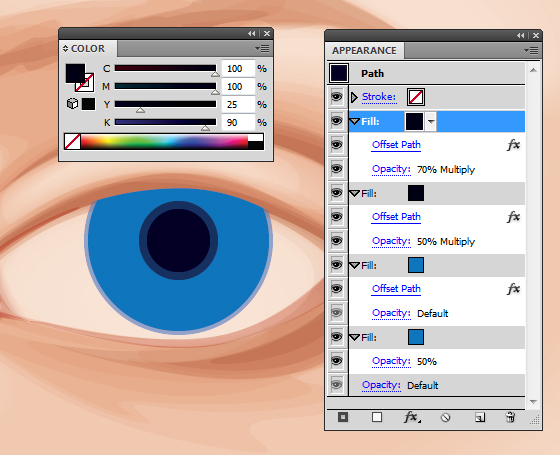
For the basic shading of the iris, I’m going to be taking advantage of the Appearance panel. You’ll need to familiarize yourself with Add New Fill and Duplicate Item for adding each element. I’ll take you through each of the elements. Pay attention to the screenshots for placement of gradients, as well as Blending Modes and Opacities.
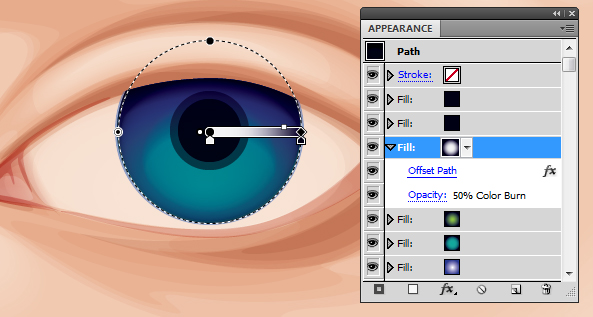
The first elements will be to use the Effects > Path > Offset Path option for the pupil and the iris. The first blue (C=85, M=50, Y=0, K=0) circles using Offset Path are shown below.
For the pupil, I’m going to use a dark blue (C=100, M=100, Y=25, K=90) set to Offset Path -55pt and -63pt.
Step 7
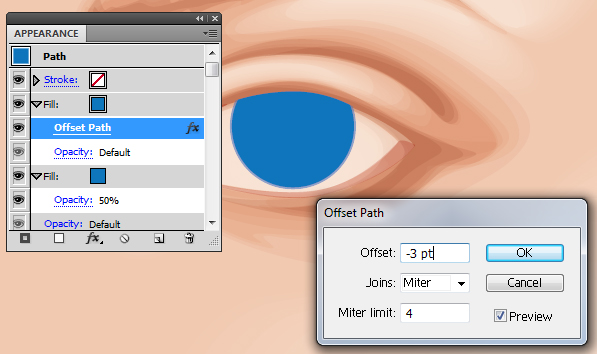
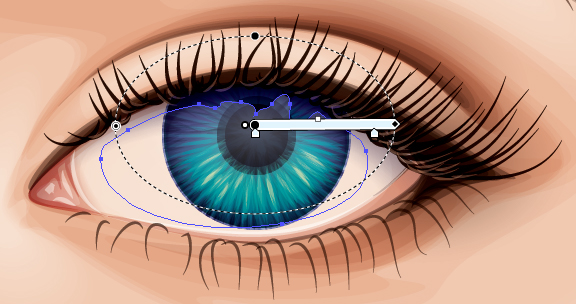
Now to add radial gradients to the iris. The first is white to blue (C=100, M=95, Y=5, K=0) and Offset Path of -3pt.
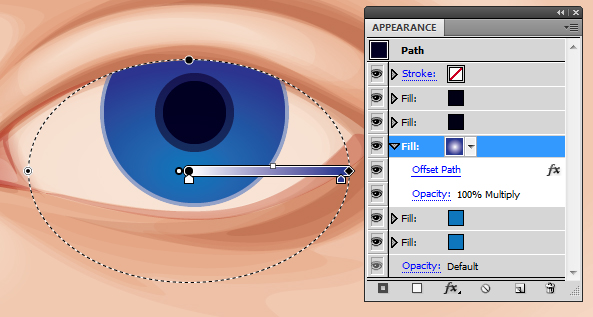
The next, green/blue (C=80, M=10, Y=45, K=0) to dark blue (C=100, M=100, Y=25, K=90) and Offset Path of -2pt.
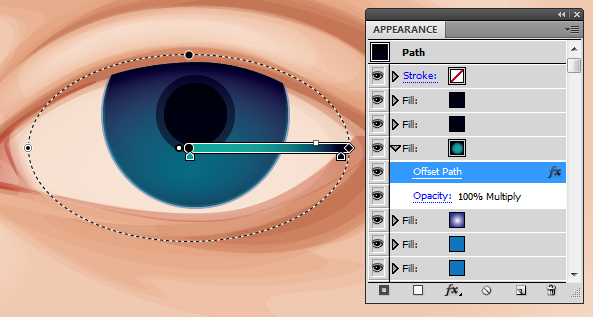
The next, green (C=50, M=0, Y=100, K=0) to dark blue (C=100, M=100, Y=25, K=90) and Offset Path of -2pt.
And then finally, white to dark blue (C=100, M=100, Y=25, K=90) and Offset Path of -2pt to darken the edges around the iris.
Step 8
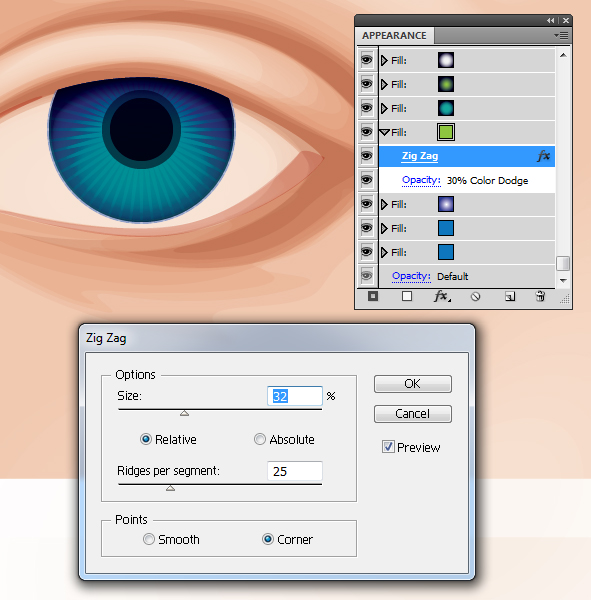
I’m going to use another effect now, which is Effect > Transform & Distort > Zig Zag. This is one of the reasons why I’ve used a Clipping Mask within a Clipping Mask. Without the circle Clipping Mask, the Zig Zag effect would not be contained within the iris.
Step 9
I’m going to duplicate the two large shapes for the eyeball and add a dark blue (C=100, M=100, Y=25, K=90) inverted transparent radial gradient to create shading on the eyeball. This is important as eyeballs aren’t flat. You’ll need to overlap these shapes on top of your iris. I’ve set them to Blending Mode Multiply and Opacity 40%.
Step 10
Now to add shapes for the eyeliner. This will be along the top of the lash line and in the corner of the eyes. I’ll also use one of the shapes to go along the inside of the eye to help add more definition. These will have a dark brown fill (C=50, M=70, Y=80, K=95) and be set to Blending Mode Multiply with Opacity 30%. I’ve also used the same color to add further definition to the eyelid crease, however these shapes are set to Blending Mode Multiply with Opacity 10%.
Step 11
I’m going to use the same dark brown to create a transparent radial gradient for the corner of the eye and additional shading on the eyelid crease. The corner of the eye will be set to Blending Mode Multiply with Opacity 50%. The one for the eyelid crease will be set to Blending Mode Color Burn with Opacity 100%.
Step 12
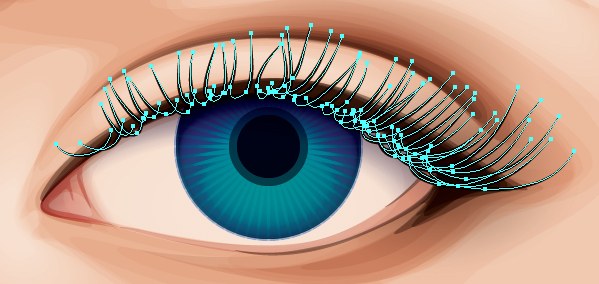
I’m going to be using Profile’s within CS5, however if you have an earlier version of Illustrator you can use the art brushes from my Width Profile inspired brush tutorial. I’ll be using Width Profile 5.
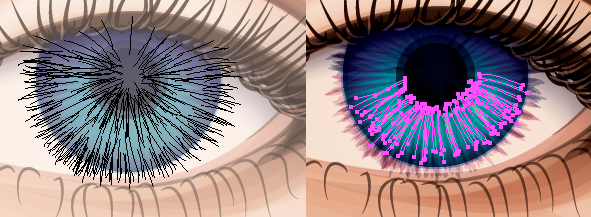
When you draw the eyelashes, look at them as more J and C shapes coming from the lash line. The thickest part of the brush will come from the lash line with the thinnest towards the tip of the lash. I’m going to be using the dark brown as a stroke and have a 5pt Stroke Weight. The lashes are set to Blending Mode Multiply, Opacity 90%, and then Grouped once done (Command + G).
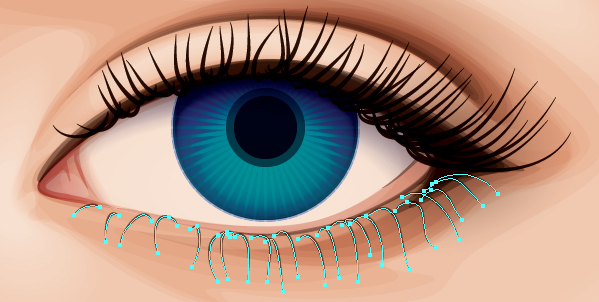
The lower lashes use the same Width Profile and the same J and C shapes. However they have a 3pt Stroke Weight and are set to Blending Mode Multiply and Opacity 50%.
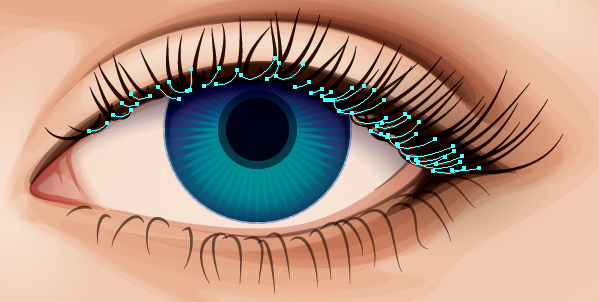
I’m going to add highlights to the eyelashes with a medium/light brown (C=50, M=70, Y=80, K=0), 3pt Stroke Weight set to Blending Mode Screen with Opacity 50%.
Step 13
The eyebrows use a similar method but are strokes layered upon a base. The base in this case are three dark brown shapes set to Blending Mode Multiply with Opacity 15%. Then using Width Profile 5 with a 6pt Stroke Weight set to Blending Mode Multiply and Opacity 50% for the initial strands. Then apply the same with 10pt Stroke Weight across the brow to darken it further with the same settings.
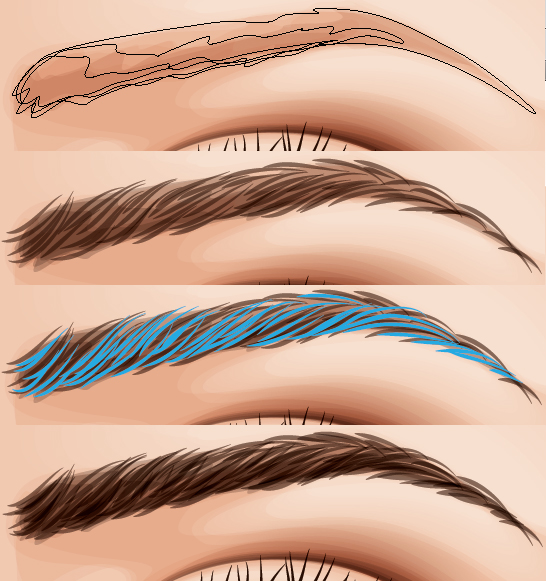
Step 14
Now we have the basics of the eye, I’m going to add some further detailing to it. The first step is to add more detail into the iris. Using the “Width Profile 5″ brush, add some dark blue (C=100, M=100, Y=25, K=50) strokes with a 5pt Stroke Weight around the edge of the iris and pupil. These will have a Blending Mode of Color Burn and Opacity 20%. Group them once done (Command + G).
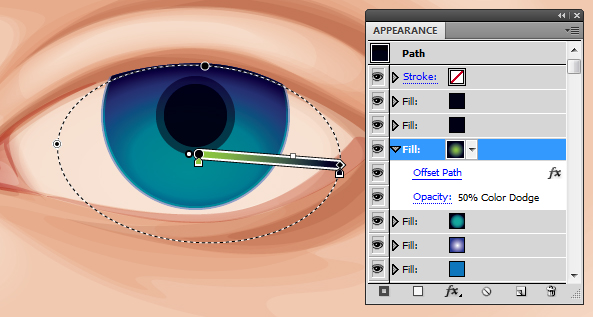
Then add some highlight to the bottom of the iris with the “Width Profile 1″ brush using a light green (C=20, M=0, Y=100, K=0), 5pt stroke. These will be set to Blending Mode Color Dodge and Opacity 30%.
Once everything is Grouped up (Command + G), drag and drop them into the circle Clipping Mask group.

Step 15
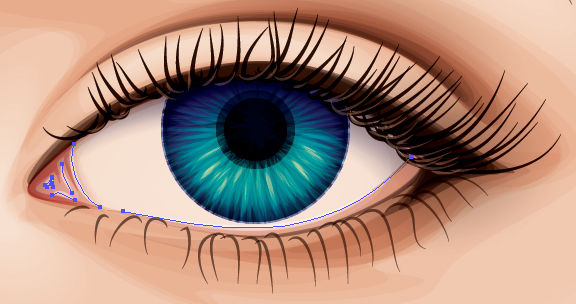
I’ve added some blue (C=70, M=15, Y=0, K=0) lines along the waterline and to help define the corner of the eye and the shines within. This is done with the “Width Profile 1″ brush with a 5pt Stroke Weight set to Blending Mode Color Dodge and Opacity 50%.
Step 16
I’m going to add a shine to the eyes with a light blue transparent radial gradient (C=10, M=0, Y=0, K=0). Do a basic round shape across the eyeball with the top edge of it rough. This is because the highlight in the eye would be distorted by the eyelashes ever so slightly.
Step 17
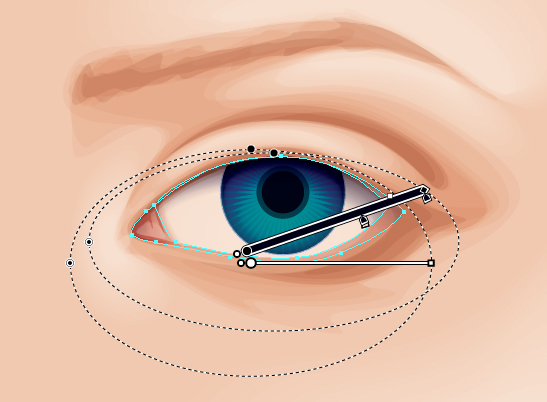
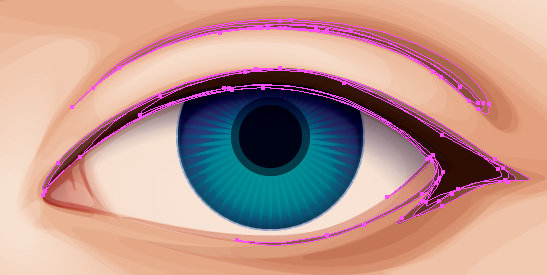
Finally, I’m going to add some magenta transparent radial gradients around the eye set to Blending Mode Color Burn. The first is focused around the corner of the eye.
Then I’ve added two further gradients with an orange outer shade to the eyelid crease and under eye.
Conclusion
This is just one of many ways you could illustrate an eye in vector. Is there a way you would change the process? When following a stock image, try not to change it shape by shape, color by color… add some of your own elements to make it much more unique looking.
If you’d like to try out more eyeshadow styles, check out my Retro Styling tutorial.