Image may be NSFW.
Clik here to view.
Image may be NSFW.
Clik here to view.
Clik here to view.
In today’s tutorial you’ll learn how to create a gold trophy cup icon using two stages of design: 3-D modeling, creating of elements of the icons and coloring with creating glare and shadows on the surface. Let’s get started!
3-D modeling
Step 1
Using the pen Tool (P), create a shape of the cup bowl. At this stage, do not pay too much attention to creating shapes, as it may be edited later in the process of 3D modeling.
Clik here to view.
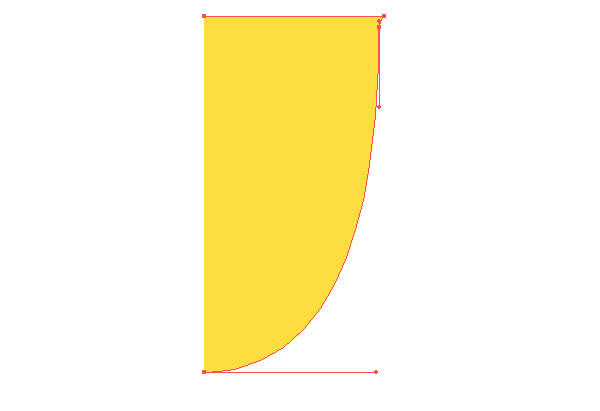
I fill the shape with colors that will reproduce the real color of the cup. Although this is not necessary, it just will be easier to perceive the created model.
Step 2
Create a vertical guide which will pass through the leftmost points of the shape created in the step 1. This guide will help us in further construction. Take the Ellipse Tool (L) and create a circle. Center of the circle must lie on the vertical guide. Now take the Scissors Tool (C) and cut the circle in the lower and upper points, and then remove its left side.
Clik here to view.
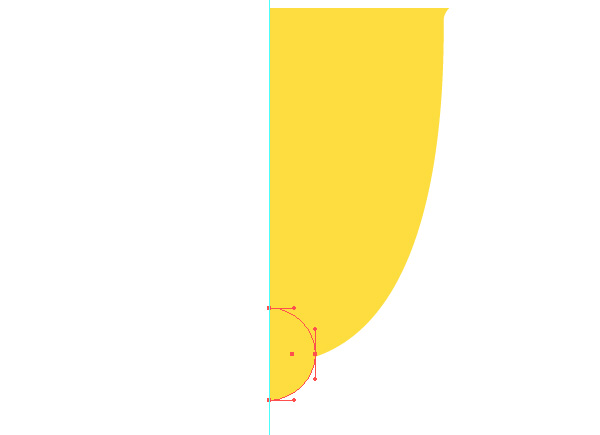
Using the Rectangle Tool (L), create five rectangles that will represent the leg and stand of the cup.
Clik here to view.
Step 3
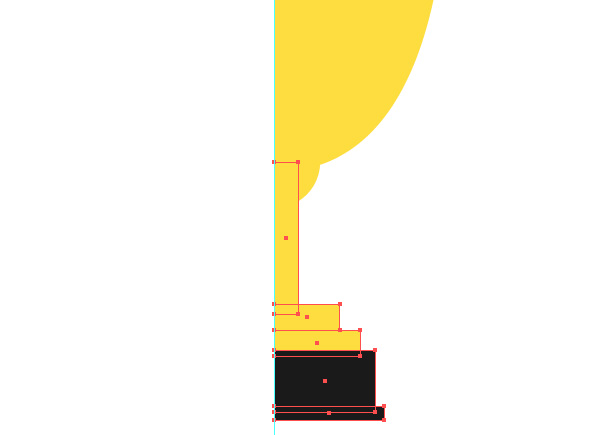
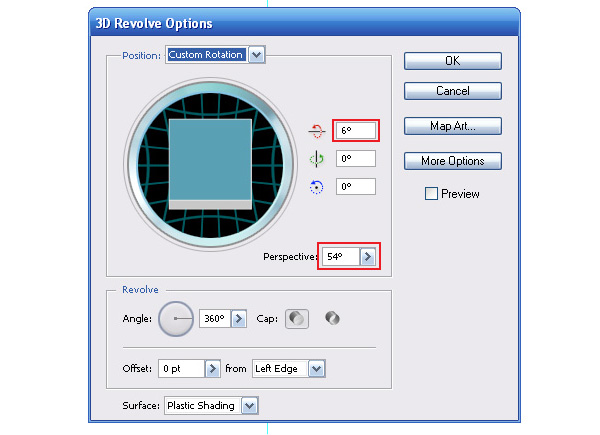
Group up all the created objects (Command + G), then go to Effect > 3D > Revolve and set the effect parameters shown in the picture below.
Clik here to view.
Now we can estimate the shape of the elements of our 3D model.
Clik here to view.
Step 4
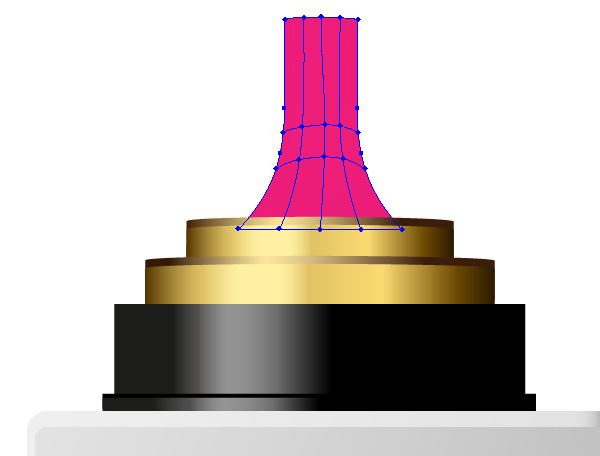
You can add new points to the shape of 3D model using the Pen Tool (P), and manage their position with the help of the Direct Selection Tool (A). All changes will immediately reflect in the shape of 3D model. This is a very exciting process that resembles turner’s or potter’s work. Using this technique, I changed the shape of cup’s leg.
Clik here to view.

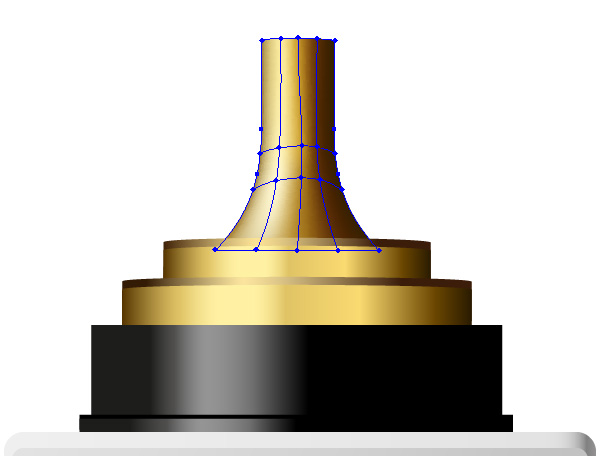
3D modeling usage in Adobe Illustrator allows you to get not only the right shapes of the objects, but also right intersection lines between their surfaces and to understand how the light will be distributed on these surfaces.
Clik here to view.

Please note that all the objects in the group must be in the correct sequence in the Layers panel.
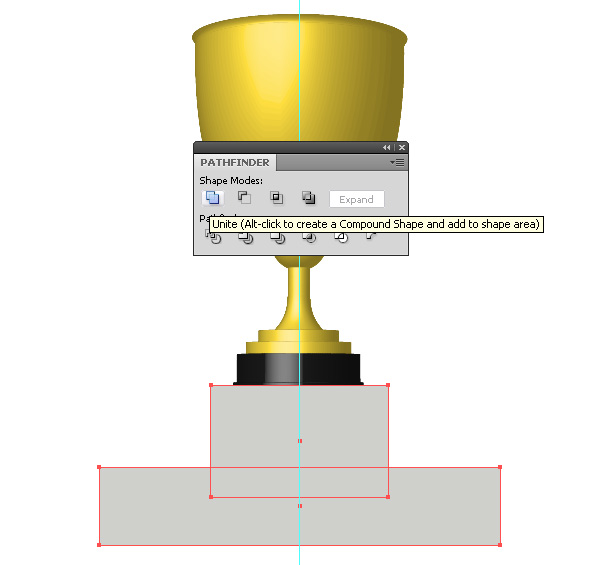
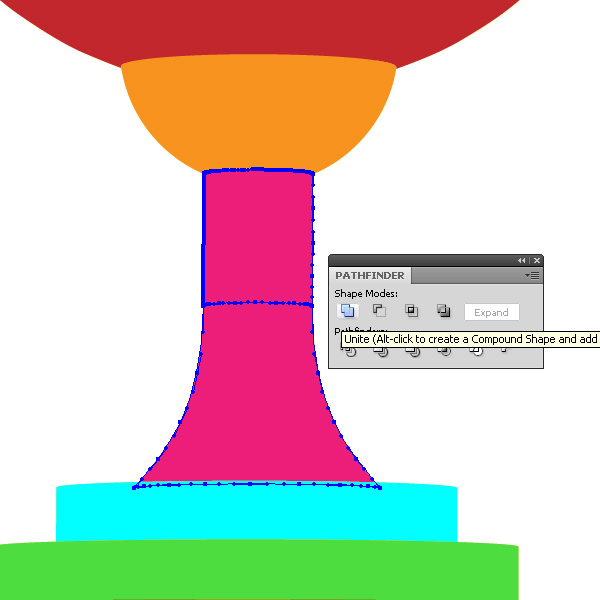
Step 5
With the help of two rectangles create the shape of a podium. Unite the rectangles into one shape by clicking on the Unite icon in the Pathfinder panel.
Clik here to view.
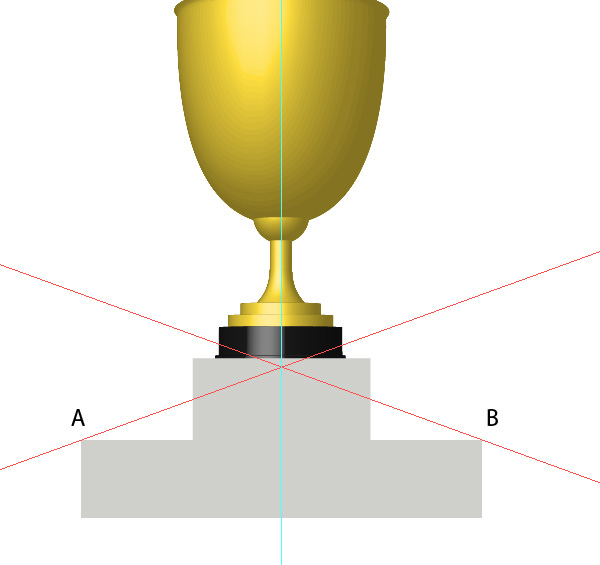
To create the shape of the upper surfaces of the podium build two inclined guides that pass through the points A and B and intersect at the point which is located on the central vertical guide. The point of intersection of the guides is called a vanishing point.
Clik here to view.
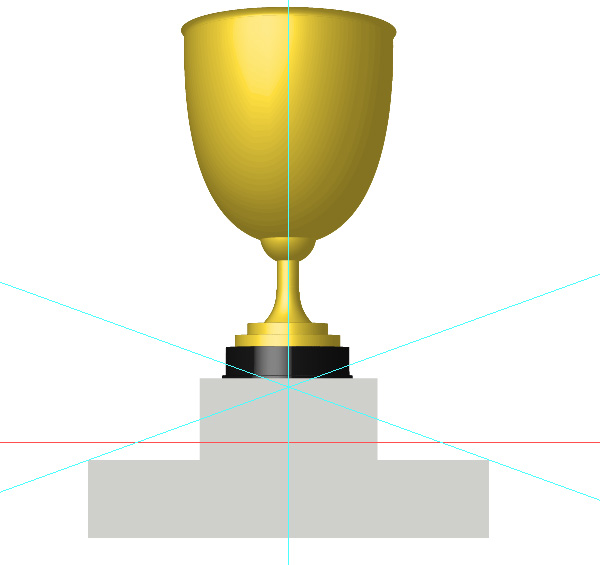
Use the Rotate Tool (R) to rotate the guides.
Step 6
Create a horizontal guide that will limit the upper surface of the podium across the width.
Clik here to view.
Take the Pen Tool (P) and connect the points of intersection of the guides as shown in the picture below.
Clik here to view.

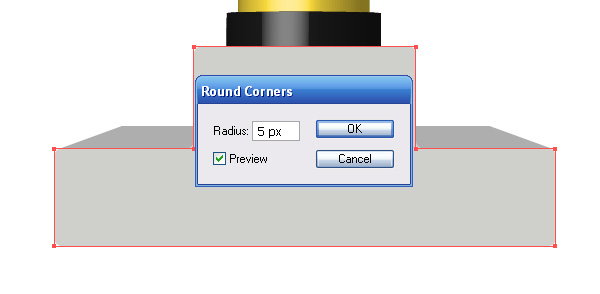
The surface of the top step of the podium will not be visible to the viewer as it is above the vanishing point. Select the front of the podium and go to Effect > Stylized > Round Corners and set the radius of the rounding in the dialog window.
Clik here to view.
Go to Object > Expand Appearance.
Step 7
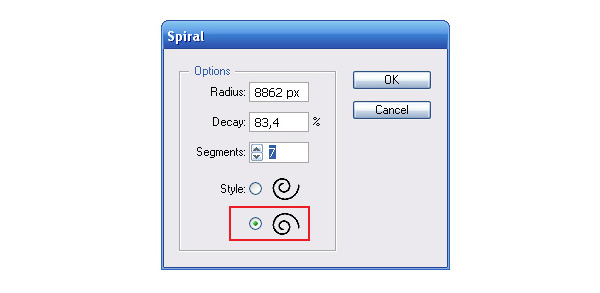
Let’s create shapes of the cup handles. Take the Spiral Tool and create a shape shown in the picture below.
Clik here to view.

You may find it difficult to control this tool, so I’ll give you some useful tips. Before you begin, click on blank area with the tool and set the required direction of spiraling in the dialog window.
Clik here to view.
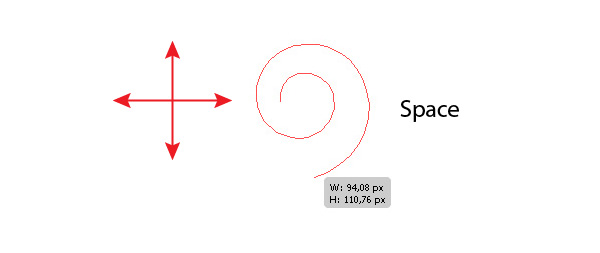
Click on OK, and then delete the resulting spiral. When you create a new spiral, use the following shortcuts:
- Space – to change the position of the created spiral
Clik here to view.
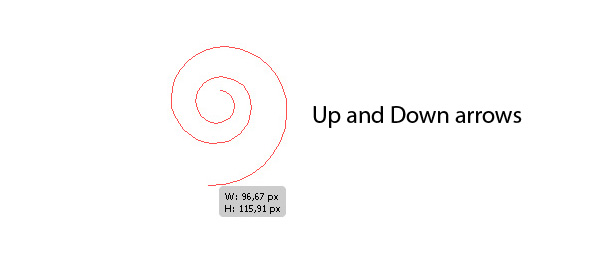
- Up and Down arrows – to change the number of segments of the created spiral
Clik here to view.
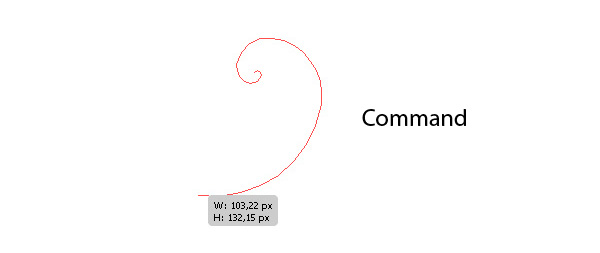
- Command – to control the spacing between the wreaths of the spiral, this parameter is called the Decay
Clik here to view.
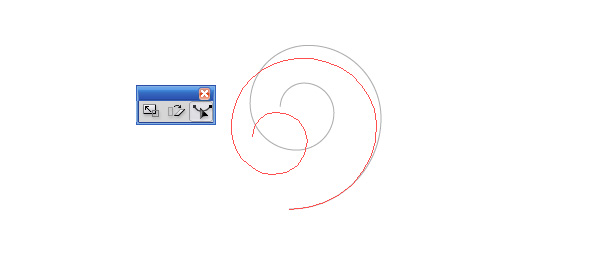
To change the shape of the current spiral, you can also use the Reshape Tool
Clik here to view.
Step 8
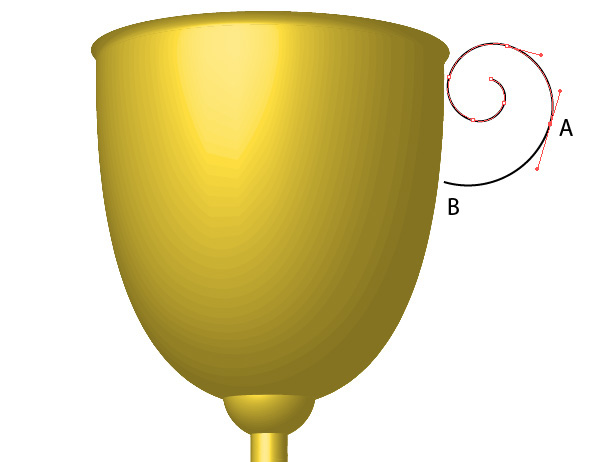
Take the Scissors Tool (C) and cut the spiral at point A, then remove the curved segment AB.
Clik here to view.
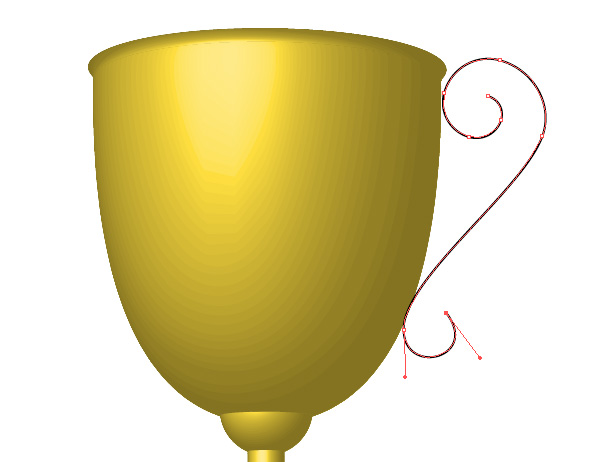
Using the Pen Tool (P), create the bottom part of the handle.
Clik here to view.
Step 9
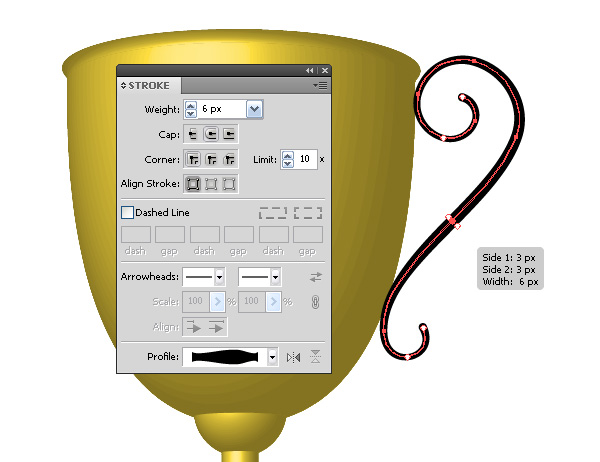
Set the stroke width and round cap it the Stroke panel and then take Width Tool and change the width of the stroke as it is shown in the picture below.
Clik here to view.
Keep the handle selected, go to Object > Path > Outline Stroke.
Clik here to view.

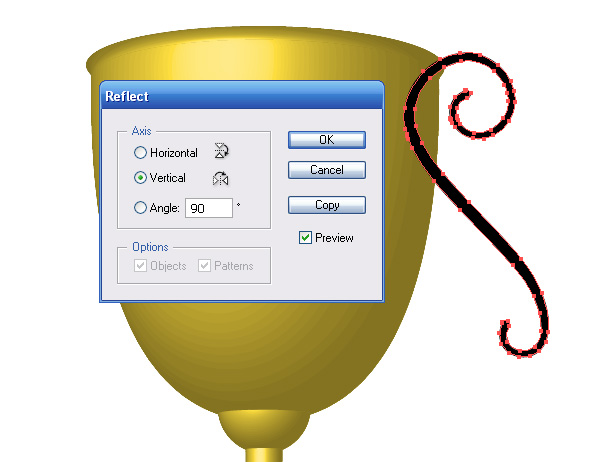
Now go to Object > Transform > Reflect, select the Vertical Axis in the dialog window and click on the Copy button.
Clik here to view.
Place the created handle on the left side of the cup.
Clik here to view.

Coloring (this artwork is done in the RGB color mode)
Step 10
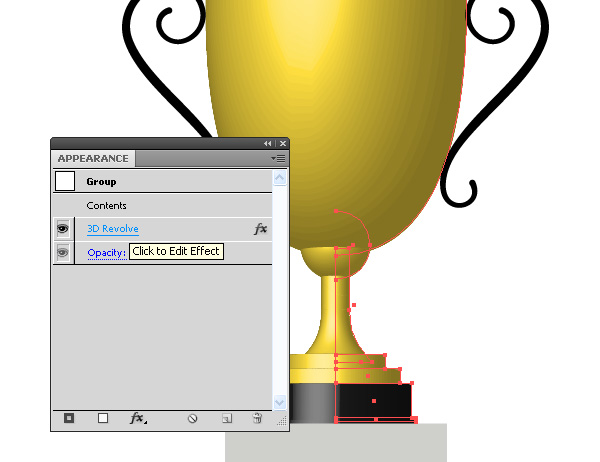
Before coloring convert 3D model into regular vector objects. Select the 3D model and open the dialog window with the effect settings by clicking on the appropriate item in the Appearance panel.
Clik here to view.
Set No Shading for the Surface type.
Clik here to view.
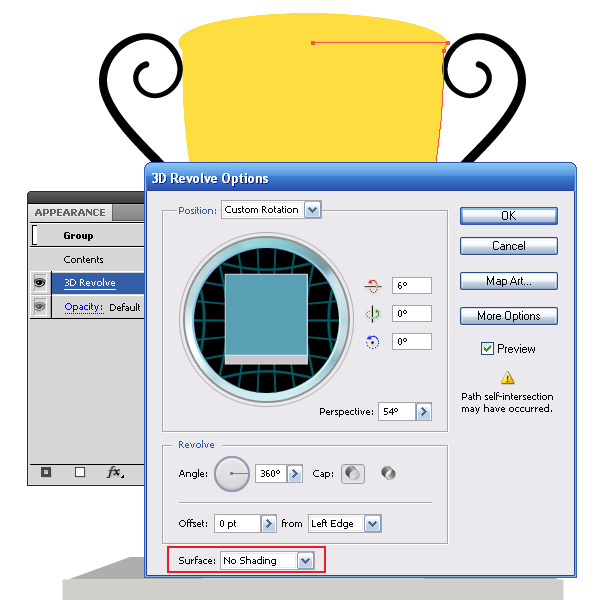
Now go to Object > Expand Appearance.
Clik here to view.

Step 11
Color the cup surface with different colors for clarity.
Clik here to view.
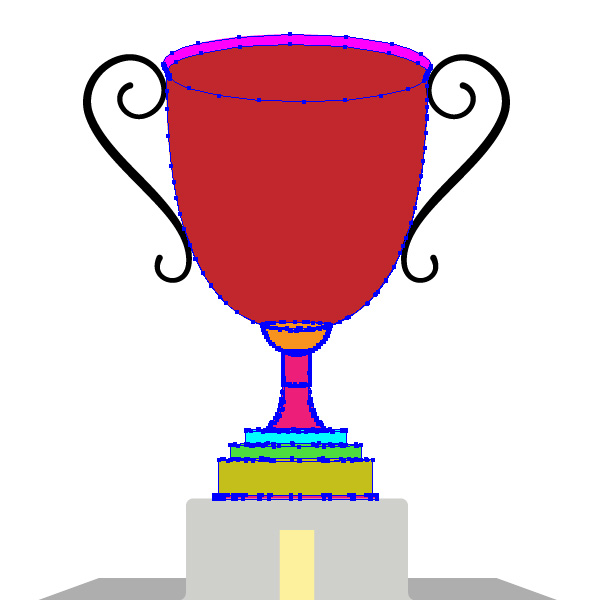
To unite different parts of the surface, use the Pathfinder panel.
Clik here to view.
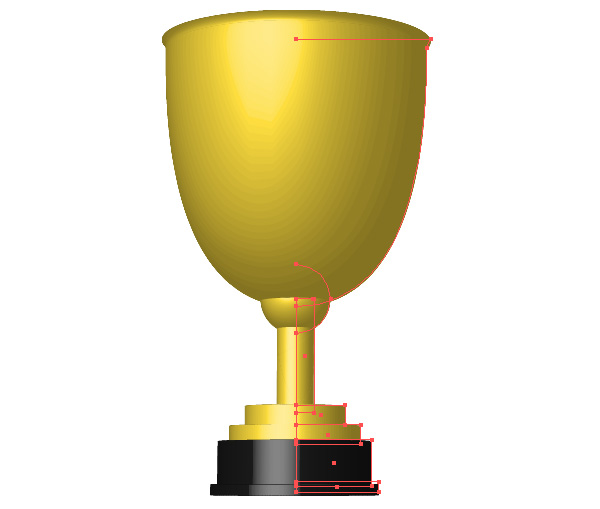
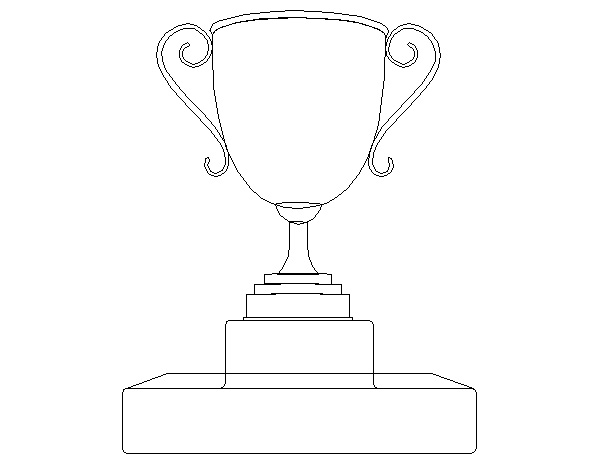
Delete unnecessary objects that will still not be visible. It is convenient to do so in the Outline view mode (View > Outline). As a result, there should only be left the objects that are shown in the picture below.
Clik here to view.
Step 12
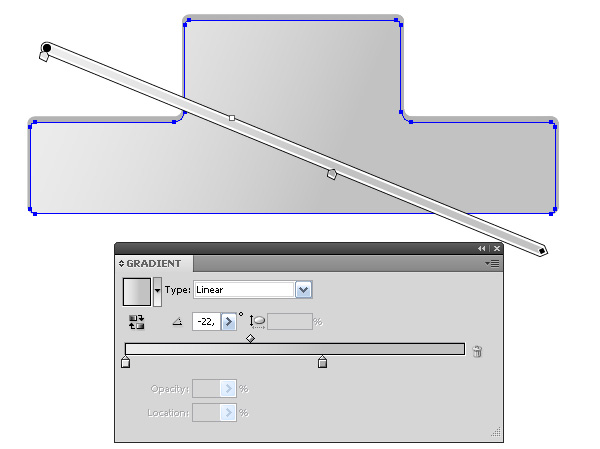
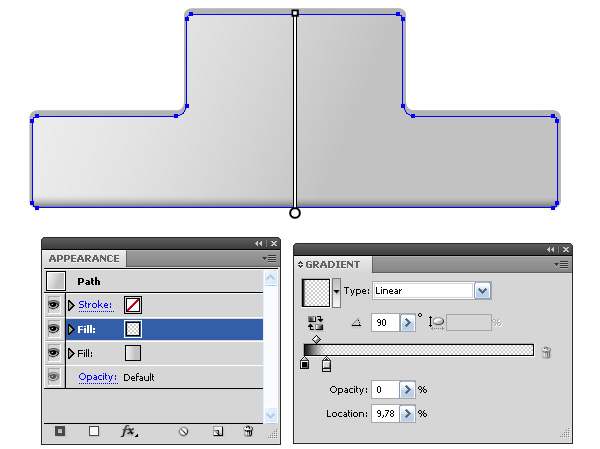
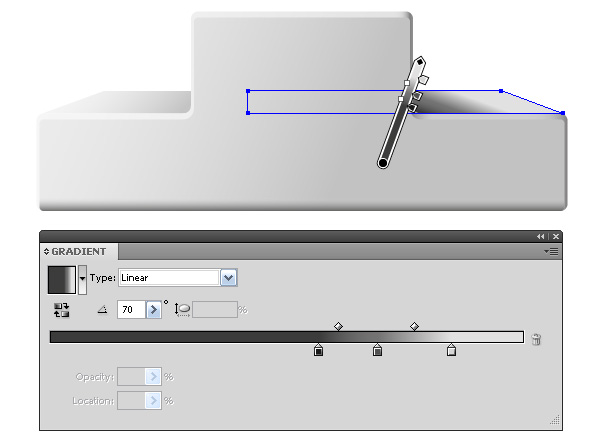
Select the front of the podium and go to Object > Path > Offset Path and set the offset value in the dialog window.
Clik here to view.

Move the upper shape down and fill it with a linear gradient which consists of two shades of gray.
Clik here to view.
Step 13
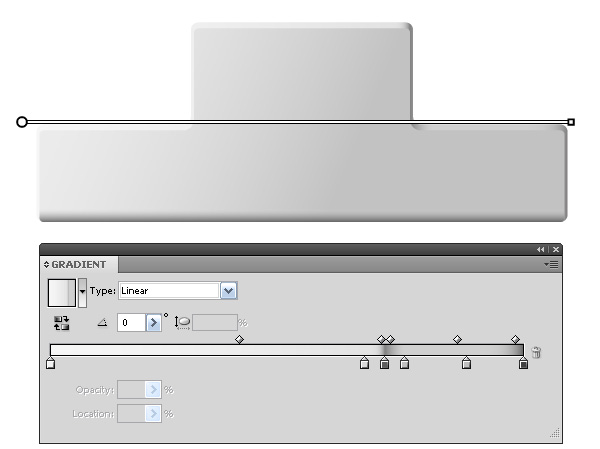
Add a new shape to the Appearance panel, and apply to it the linear gradient from black to gray color. Grey slider of the gradient has 0% opacity.
Clik here to view.
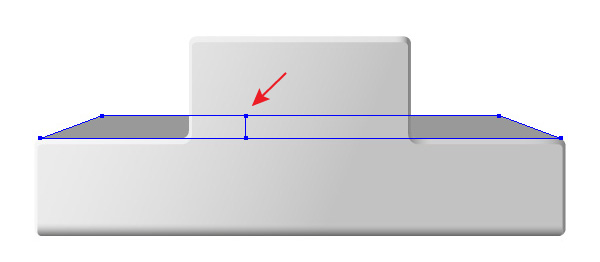
Fill the bottom shape of the podium with a linear gradient which consists of various shades of gray. Darker sliders of the gradient should be located to create a shadow on the right side edges of the steps of the podium.
Clik here to view.
Step 14
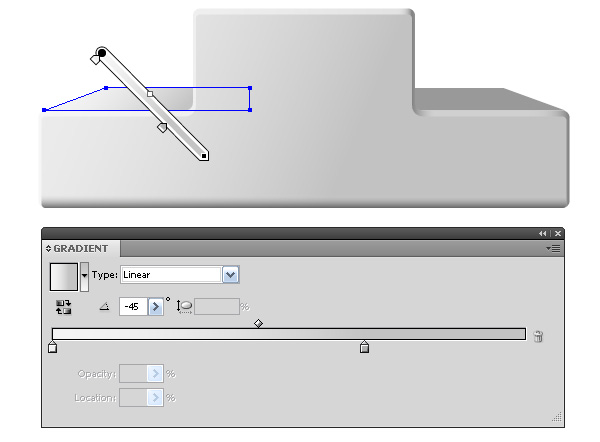
Take the Knife Tool and cut the upper shape of the steps in two pieces.
Clik here to view.
In order to cut with the Knife Tool along a straight line, hold down the Option key. Fill the steps with oppositely directed linear gradients, reproducing the light distribution on them.
Clik here to view.
Clik here to view.
Step 15
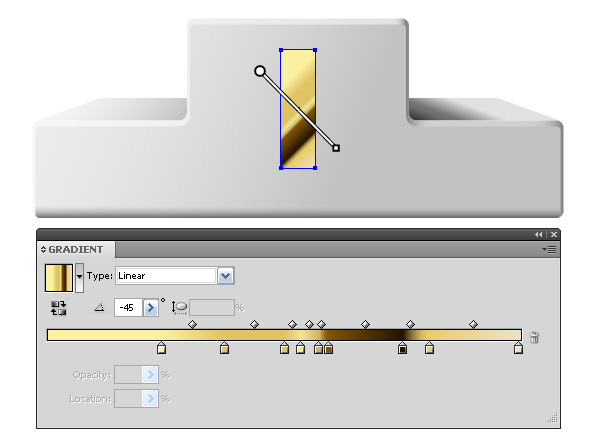
Using the Rectangle Tool (M), create the number 1 on the front of the stand. Fill the rectangle with a complex linear gradient that consists of the shades of brown and yellow colors.
Clik here to view.
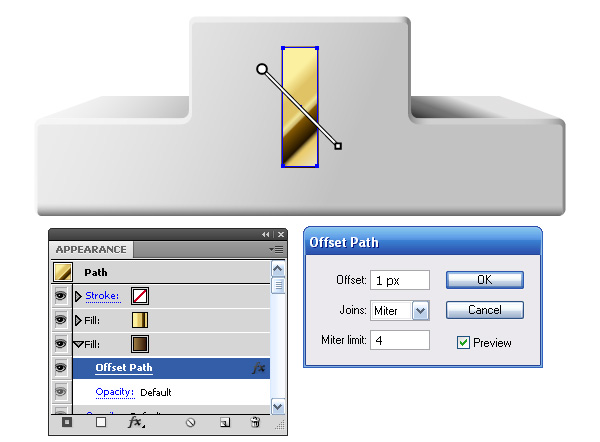
Add a new fill in the Appearance panel and apply a gradient to it that consists of two shades of brown color.
Clik here to view.

Step 16
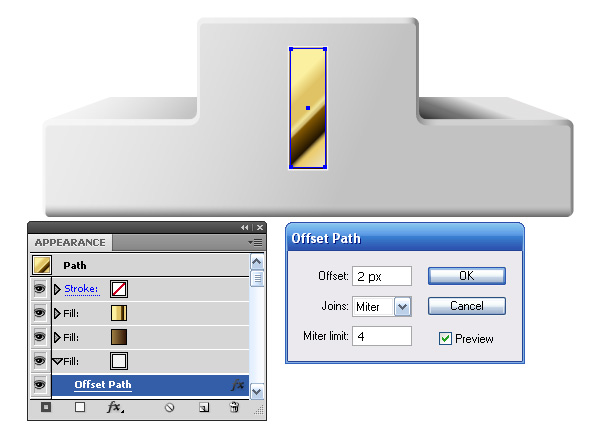
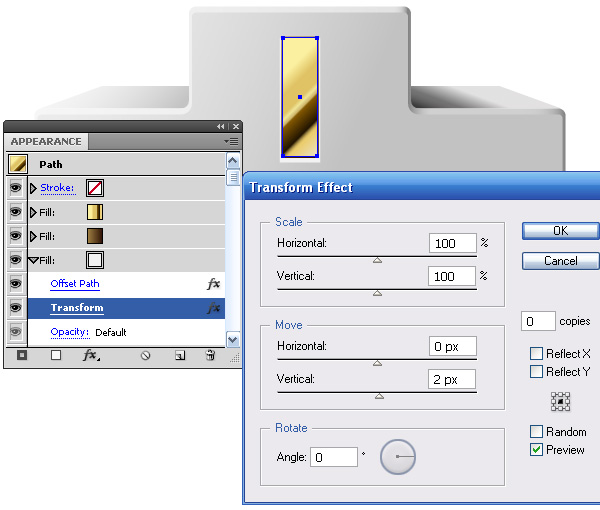
Move the brown fill down in the Appearance panel, and keeping the object and fill selected go to Effect > Path > Offset path, then set the offset value in the dialog window.
Clik here to view.
Create another fill in the Appearance panel, apply light-gray color and the Offset path effect to it.
Clik here to view.
Now go to Effect > Transform > Transform & Distort and set vertical offset value in the dialog window of the effect.
Clik here to view.
Step 17
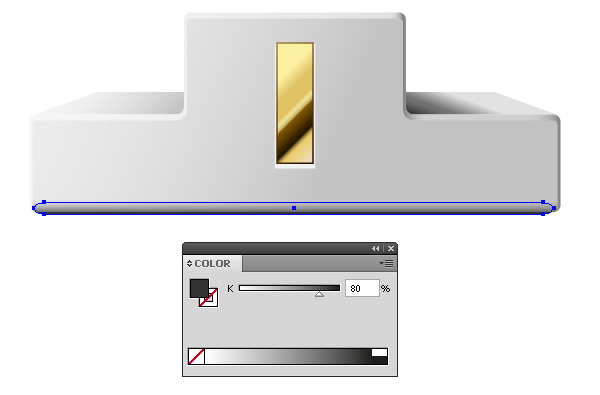
With the help of the Rounded Rectangle Tool create a shape with a dark gray fill. Place it below the objects of the podium.
Clik here to view.
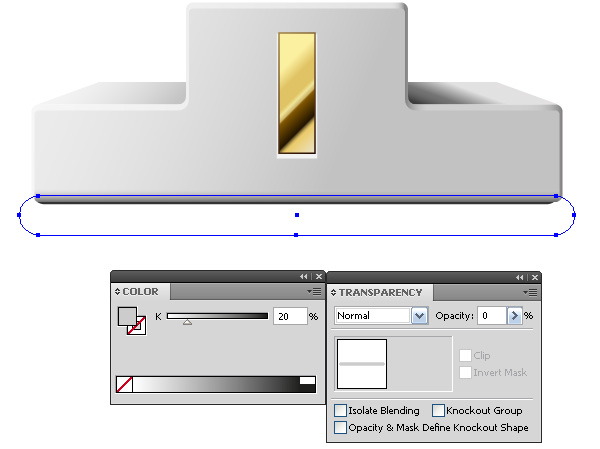
Create another rounded rectangle and place it below the first one in the Layers panel. Fill this object with light gray color and set 0% opacity in the Transparency panel.
Clik here to view.
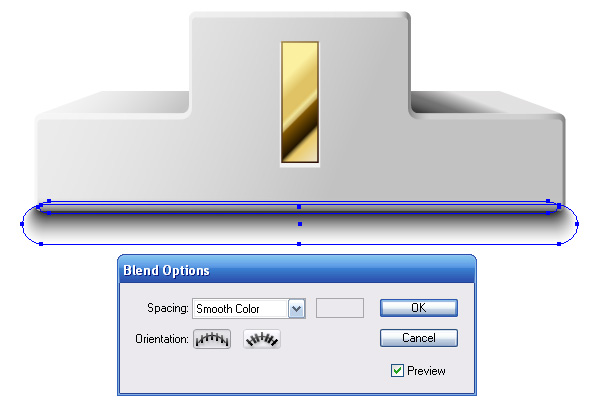
Select both rectangles and go to Object > Blend > Make.
Clik here to view.
Step 18
Fill the cup holder with linear gradient that consists of black and gray sliders.
Clik here to view.
Copy the bottom rectangle and paste it back (Command + C then Command + B). Fill the copy with black and move at a few pixels up. Thus, we have created a boundary between the surfaces of the holder.
Clik here to view.
Step 19
Fill the metal part of the stand with a linear gradient that consists of brown and yellow shades.
Clik here to view.
Copy and paste back the metal parts. Move the copies a little bit up and fill it with a new linear gradient which contains two brown and one yellow slider.
Clik here to view.
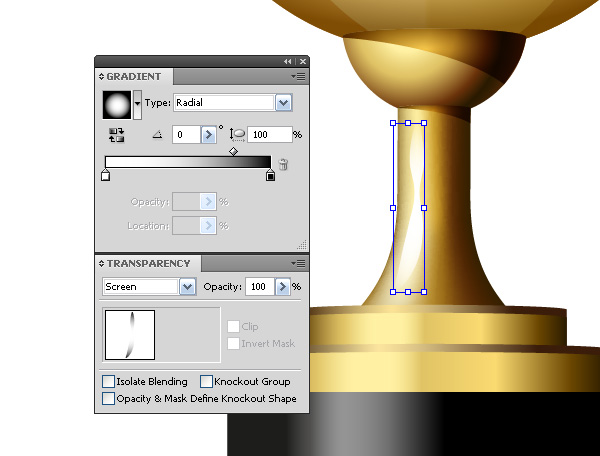
Step 20
Using the Gradient Tool (U) create a simple gradient mesh on the cup’s leg.
Clik here to view.
Color the gradient mesh nodes with brown and yellow colors. You can use the Eyedropper Tool (I) for coloring nodes, taking the colors from the gradient of the metal surfaces of the holder. When picking the color, hold down Shift key.
Clik here to view.
Fill the spherical part of the leg with a radial gradient, which consists of the same colors as the metal parts of the holder.
Clik here to view.
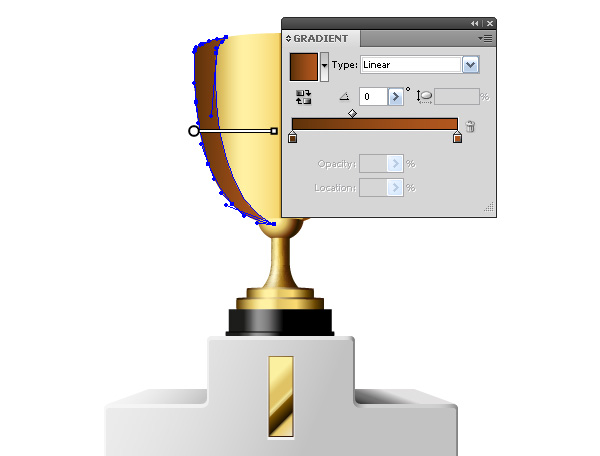
Step 21
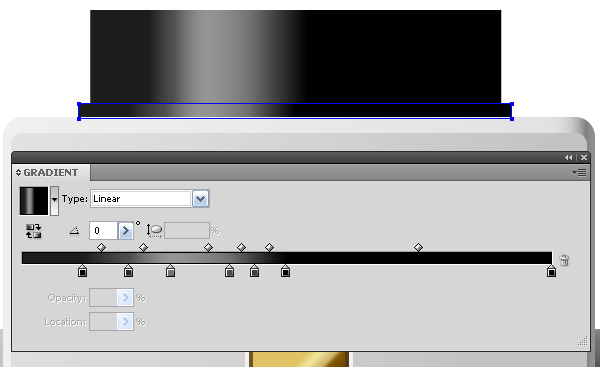
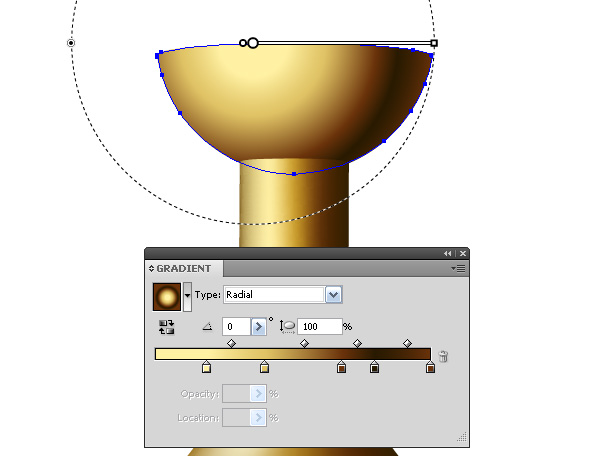
Fill the bowl of the cup with a linear gradient as shown in the picture below.
Clik here to view.
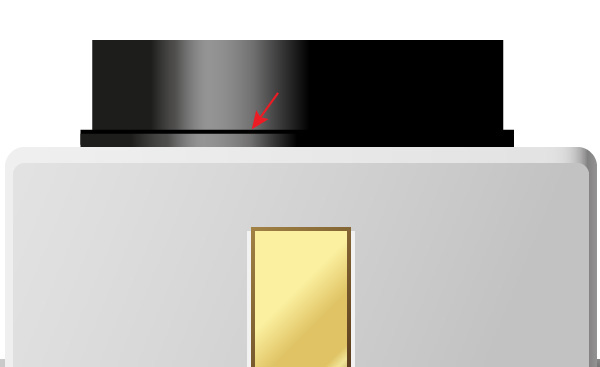
Using the Pen Tool (P) create shapes of the shadows.
Clik here to view.
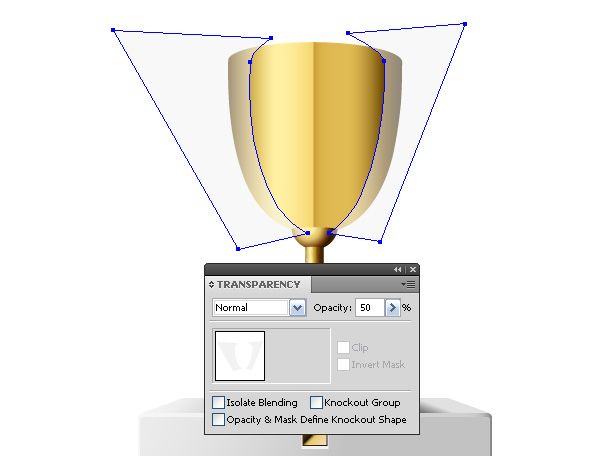
In order to properly assess their position, I apply 50% opacity to this shape. Select the shape of the bowl and shape of the shadows, and then using the Shape Builder Tool delete the parts of the shadow that go beyond the cup shape.
Clik here to view.
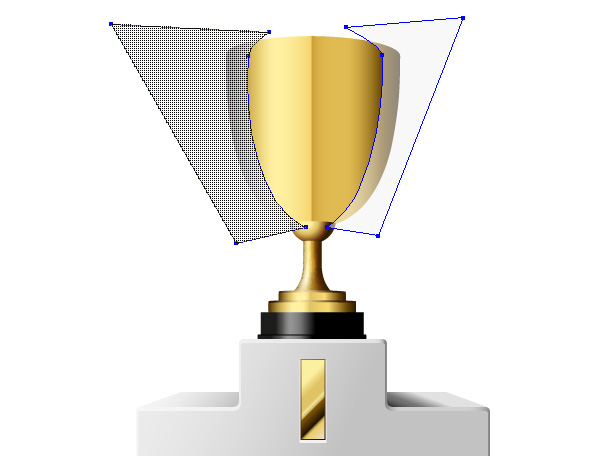
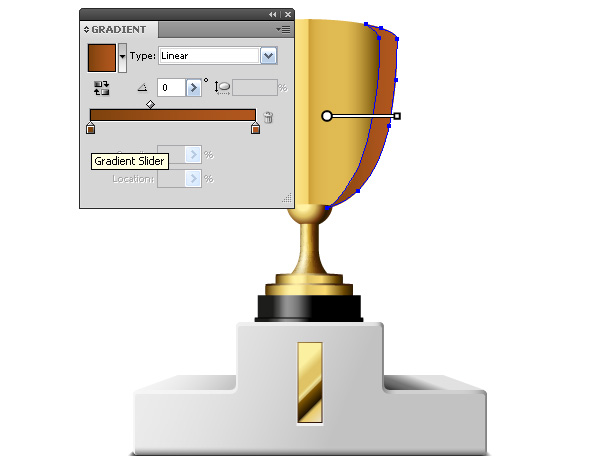
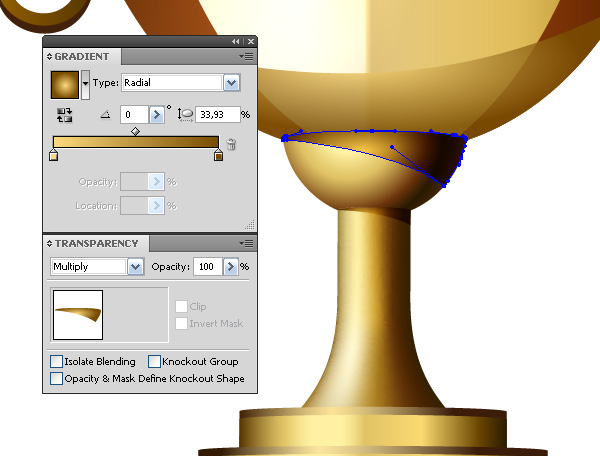
Step 22
Reapply 100% opacity to the shadow shapes and fill them with linear gradients that consist of two shades of brown color.
Clik here to view.
Clik here to view.
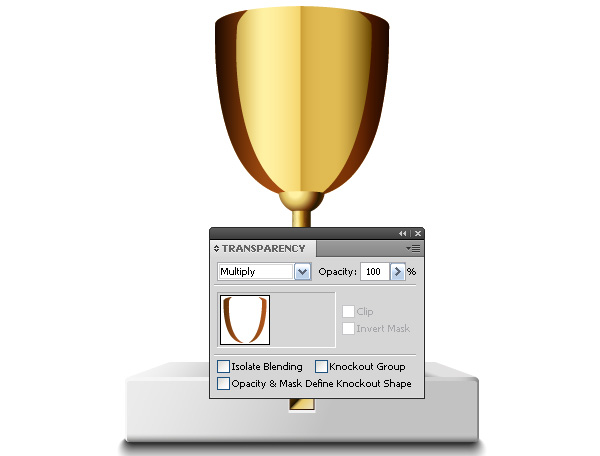
Apply the Multiply Blending mode to these shapes.
Clik here to view.
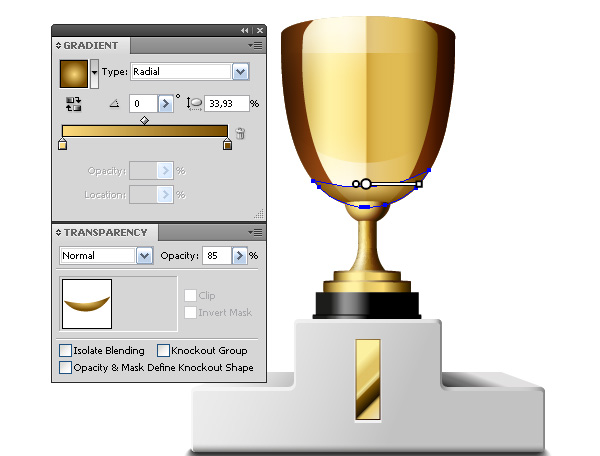
Step 23
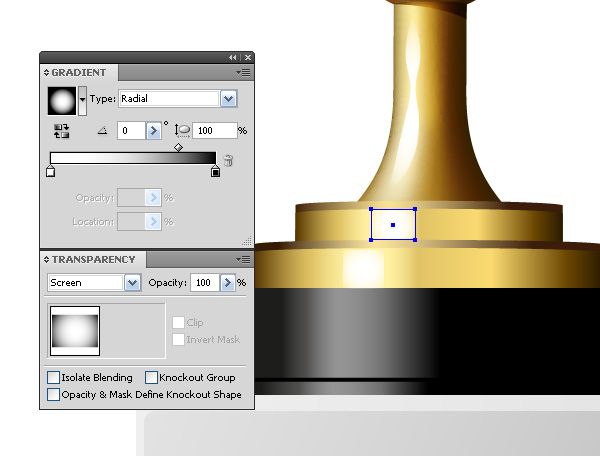
Create reflections on the surface of the cup. To create these shapes, I used the Pen Tool (P) and Shape Builder Tool. Shapes of the reflections are filled with black and white gradients, after what the Screen Blending mode is applied to them.
Clik here to view.
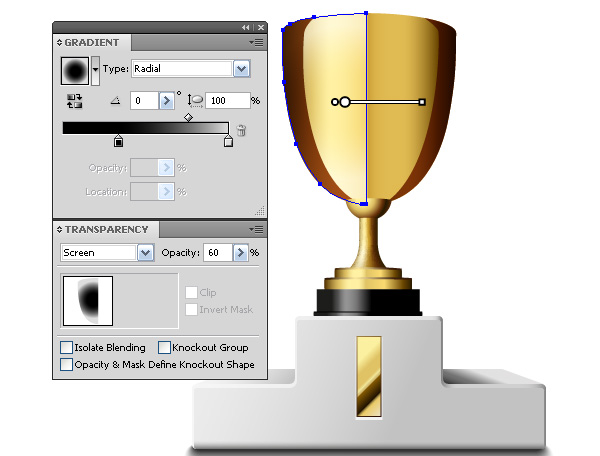
Clik here to view.
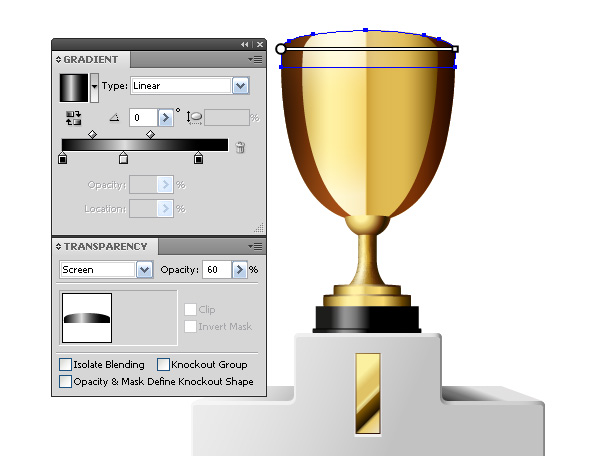
Clik here to view.
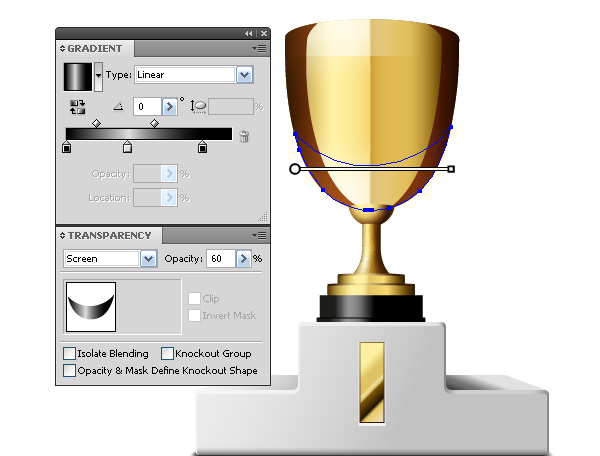
I decided to make the reflection in the bottom of the cup more vivid. Fill it with an elliptical radial gradient from yellow to light brown color, and reduce the opacity in the Transparency panel.
Clik here to view.
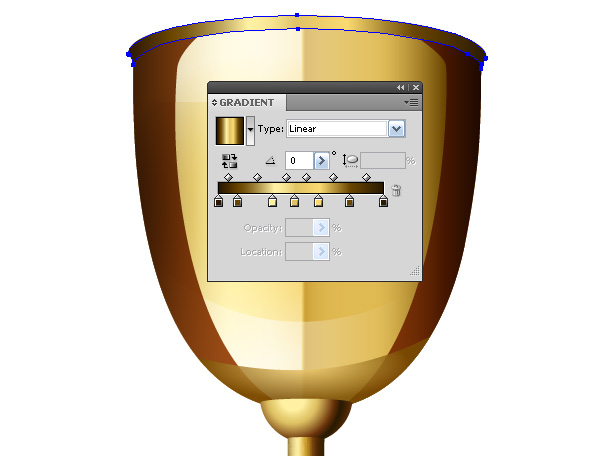
Step 24
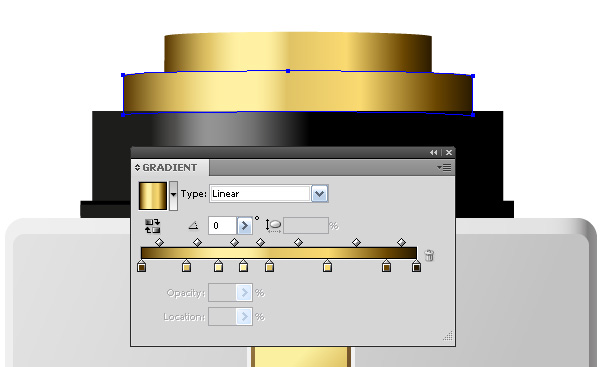
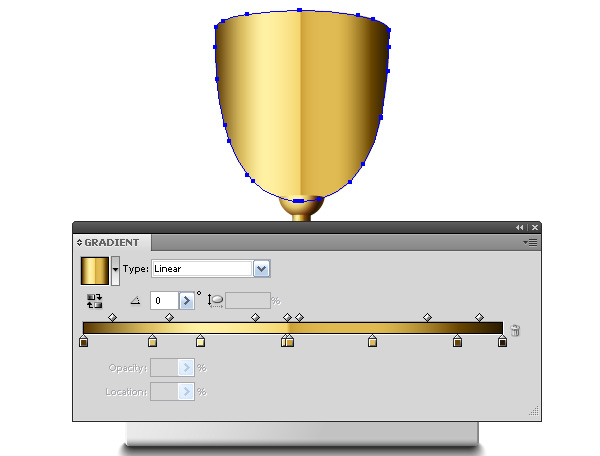
Fill the shape of the upper side of the cup with a linear gradient, which consists of yellow and brown shades.
Clik here to view.
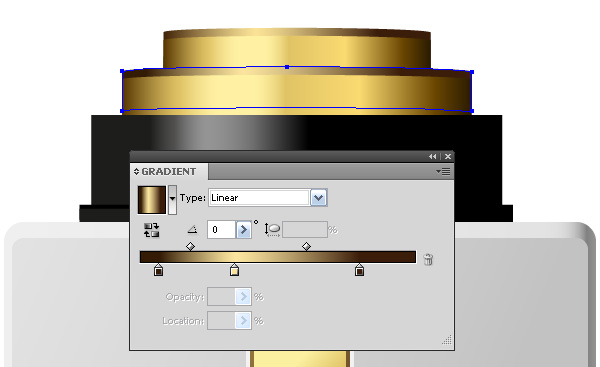
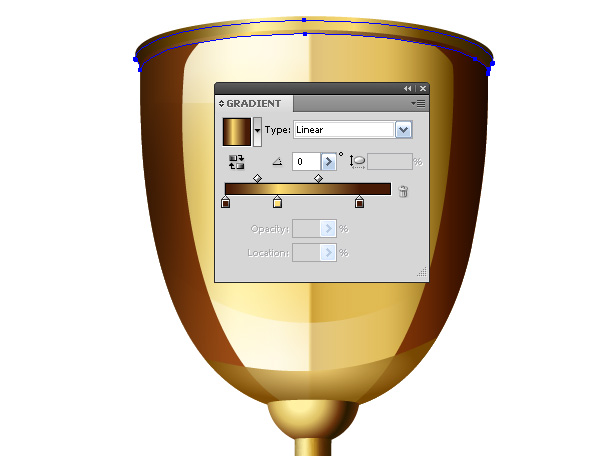
Copy this shape and paste it back. Move the copy a few pixels down and fill it with a new linear gradient consisting of two brown and one yellow sliders.
Clik here to view.
Step 25
Fill the shape of handles with linear gradient. This gradient contains the colors that we have repeatedly used in this tutorial.
Clik here to view.
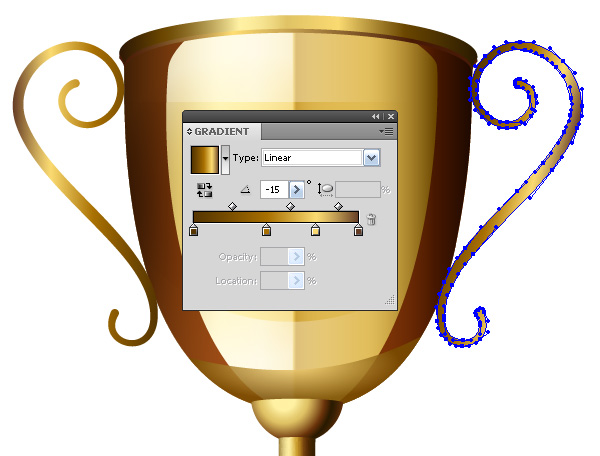
Copy the shapes of the handles and paste them back. Fill the copies with brown color and move them a few pixels down.
Clik here to view.

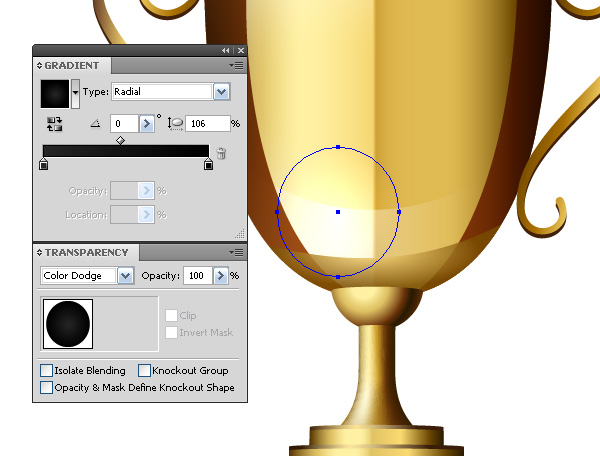
Step 26
Create a circle using the Ellipse Tool (L) and fill it with a radial gradient that contains of black and very dark shade of gray. Apply the Color Dodge blending mode to this circle. Thus, we can create additional light spots on the cup.
Clik here to view.
Clik here to view.
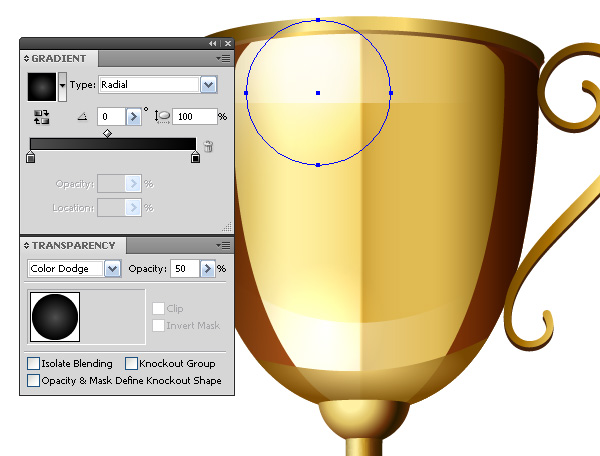
Using the technique described above, create more shadows and glares.
Clik here to view.
Clik here to view.
Clik here to view.
Conclusion
Now your work is done. Here is how it should look
Clik here to view.

Clik here to view.
Clik here to view.
Clik here to view.
Clik here to view.
Clik here to view.
Clik here to view.