In this quick tip tutorial we are going to create a geometric "F" in the shape of a flower with Adobe Illustrator. To do it we are going to use some geometry, basic shapes and the Pathfinder panel. This tutorial is inspired by our recent Tuts+ Workshop: Alphabet Design Challenge. So let’s begin!
Step 1
First we start with a quick sketch of our drawing. To do it we are going to use the Blob Brush Tool (shift+B). Draw your sketch with freedom but thinking which geometric shapes we will use later on. Such as octagons, squares, rounded rectangle, etc…

Step 2
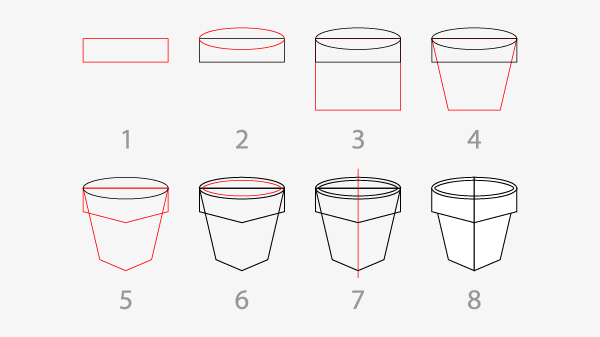
The first figure we are going to draw is the pot. To do it first draw a Rectangle (M) (1) then add a circle with the Ellipse Tool (L) (2) now Copy the rectangle and Paste in Back (Cmnd + B) (3), then select the bottom nodes and press "S" an scale them like in the image (4). Now select the rectangles and add some anchor points in Object / Path / Add Anchor Points and adjust them like in the image (5). Select the circle and Copy and Paste in Front (Cmnd + F) and scale it (6). Add a vertical line and align it to the center of the pot (7), select the line and go to Object / Path / Divide Objects Below and now our pot its done. Finally press "D" to put the basic white fill with a black stroke.
Step 3
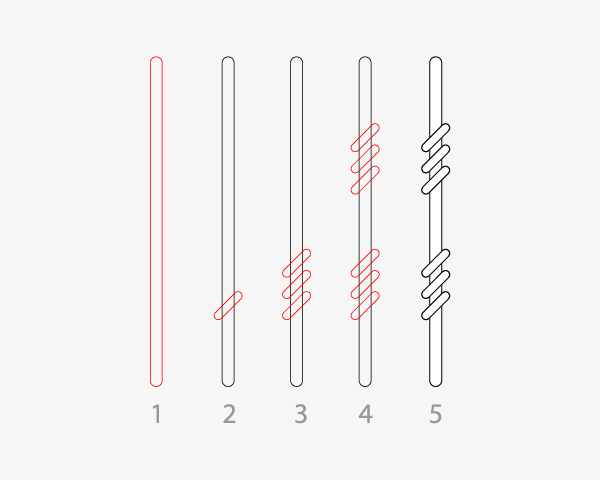
Now it’s time to add the stem of the plant. First we draw a Rounded Rectangle (1), then we add a smaller Rounded Rectangle and rotate it like in the image (2). Drag it by pressing Alt + Shift to duplicate it one at time and then press Cmnd + D to duplicate it one more time at the same distance (3) (this command repeats the last action you do, in this case the duplication of an object). Group those three shapes and duplicate them like in the image (4), finally our stem is done.
Step 4
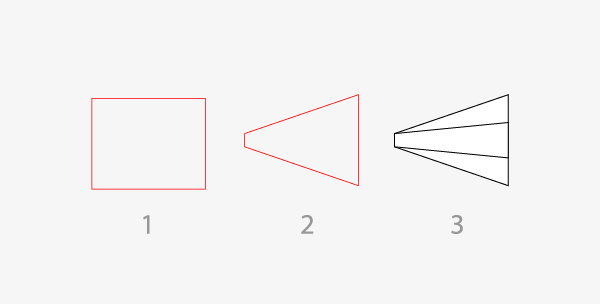
To create the leaf it’s easy! First draw a square with the Rectangle Tool (L) (1) and rotate it (2). Adjust the nodes like in the image (3), now duplicate the figure and scale it like in the image (4). Finally add a vertical stroke (5), select it and apply Object / Path / Divide Objects Below.

Step 5
The flower its pretty simple first start with a square created with the Rectangle Tool (M) (1) and then scale the anchor points like in the image (2). Finally duplicate the figure and adjust it like the image (3).
Step 6
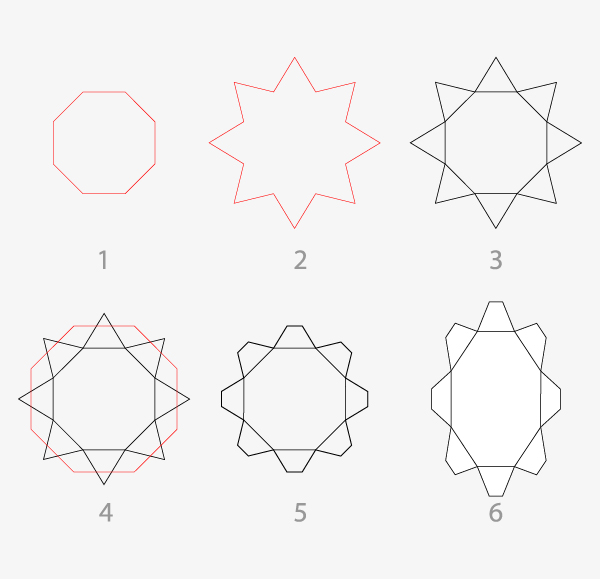
For the other part of the flower you can begin by drawing an octagon (1) and a 8 point star (2). Align them to center and make sure they fit together like in the image (3). Then duplicate the octagon and adjust it like in the image (4), select it and the star and press Intersection in the Pathfinder (5). Finally adjust the object like in the drawing (6).
Step 7
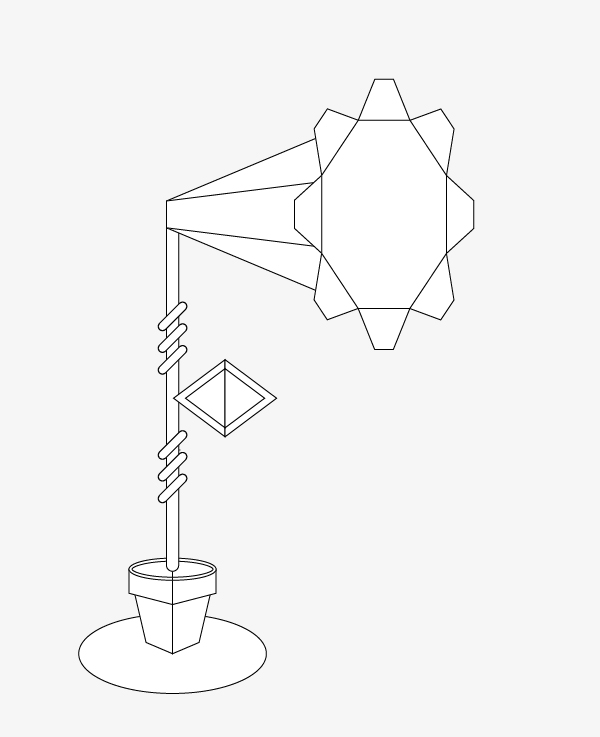
Bringing all the elements together, our letter should look something like this. Now lets start with colors.
Step 8
This is the color palette that we are going to use. You can generate it like in my previous tutorial on How to Create a Colorful, Fun Vampire!

Step 9
Apply the color by having your palette close to your illustration and with the Eyedropper Tool (I) you can select a color and then by pressing "alt" use it to paint. The flower would look something like this.

Step 10
Add more geometry and details like in the image below. This is to give more life to the design.

Conclusion
I have finished out design by first Selecting All (Cmnd + A), then Copy and Paste in Back and Ungroup everything. Then apply Unite in the Pathfinder panel. Apply a purple stroke, this to add an underline to the drawing. Now our flower its done. I hope you have enjoyed this tutorial, Saludos!