InDesign’s GREP styles are the magic of automatic formatting. In this Quick Tip we will explain how to set up GREP styles and how you can use them to for a consistent and efficient design.
Step 1: Understanding Regular Expressions
GREP styles are character styles that InDesign applies to a specific part of the text in a document. This part can be a single character, word or a pattern of characters. To specify the part a language called regular expressions is used.
With this language you can describe patterns in the text that need to have special formatting applied. You can do this in InDesign using the GREP Style option in the Paragraph Style Options dialog.
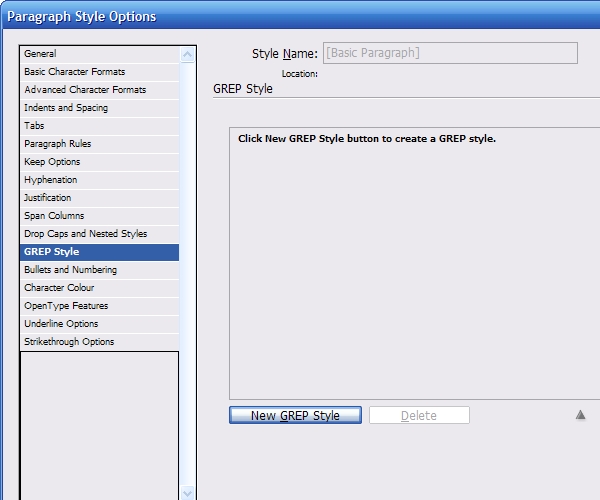
Step 2: Creating a New GREP Style
You can use GREP styles for a lot of things. To start simple, I’m going to use a GREP style to format image captions. Click the button New GREP Style. You’ll see a new style rule appear. First, we need to create a new character style. Click the option menu and choose New Character Style.

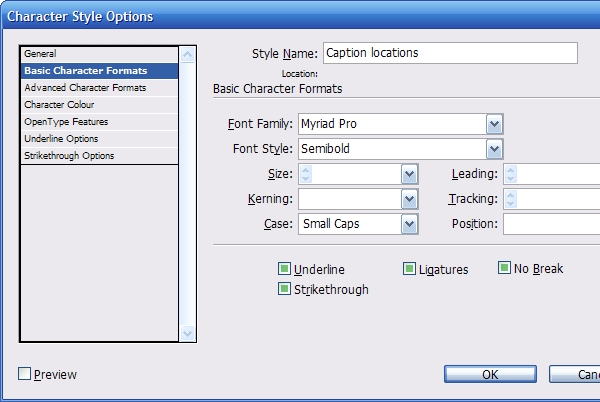
Step 3: Setting up the Character Style
For the captions, I’m using Myriad Pro Semibold in Small Caps as my new character style.
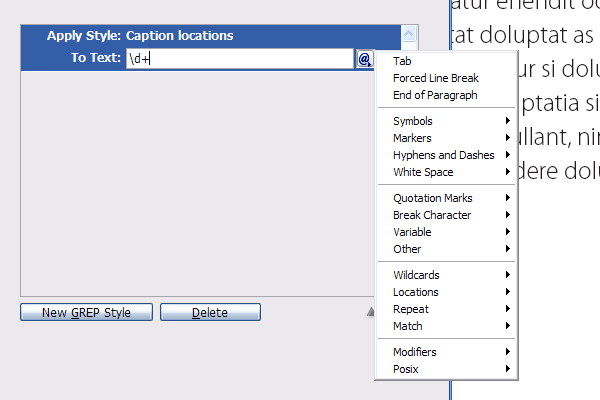
Step 4: GREP options
InDesign automatically puts the regular expression \d+ in the To Text field. \d is a wildcard which stands for Any digit and the plus symbol means repeat one or more times. So, as default, InDesign will apply your character style to digits as 14, 001 or 2010.
To see all the options available to construct a regular expression, click on the @ button.
Step 5: Setting up the Regular Expression
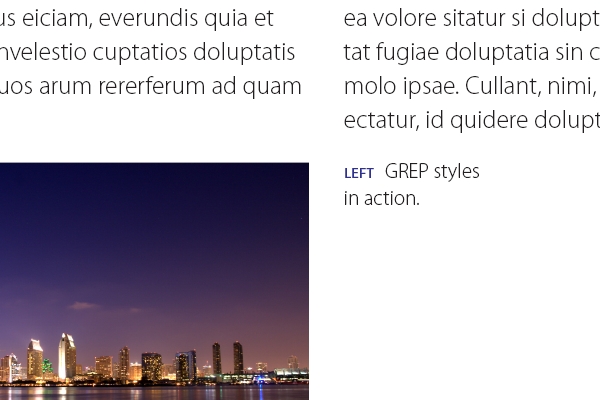
I’m going to delete the default regular expression and construct a new one for the image captions. The words I want to format with the new character style are top, left, right, bottom and middle. The expression I’m using is:
^(top|left|right|bottom|middle)\s
You should read this as: paragraph begins (^) with the words top or (|) left or right or bottom or middle, followed by a whitespace character (\s). In this way, only if the words appear at the beginning of a paragraph and are followed by whitespace get the character style applied. You can see the final result below:
Step 6: Preventing Orphans
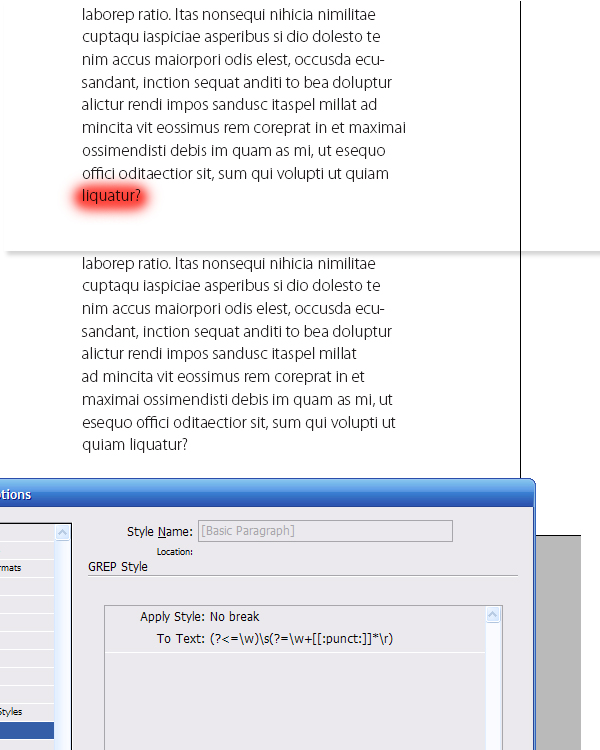
One of the most useful things you can do with GREP styles is preventing orphans in your layout. An orphan is a single word that appears at the last line of a paragraph. With GREP you can apply a character style with No break checked to the last whitespace character in a paragraph. This will ensure the last line of a paragraph has at least two words on it. The expression for this is:
(?<=\w)\s(?=\w+[[:punct:]]*\r)
This expression uses positive lookbehind (?<=) to check if there is a word character (\w) before the whitespace (\s), and positive lookahead (?=) to check if there are one or more word characters (\w+) and zero or more punctuation characters ([[:punct:]]*) before the end of a paragraph (\r). As you can see, GREP styles can become somewhat complex.
Conclusion
GREP takes some time to master but when you do, you can save a lot of time with automatically applying formatting depending on the text. Various examples of other expressions can be found on the web. Please tell us in the comments which GREP styles you're using!