In this tutorial I’ll show you how to create your own subwoofer and a CD/MP3 player for a car by using Ellipse Tool, Rectangle Tool, Pen Tool and Gradients.
Step 1
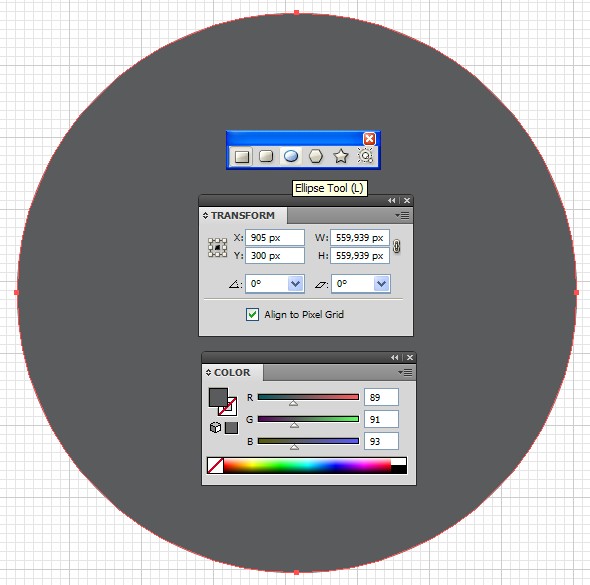
Open a new document, pick the Ellipse Tool (L), draw a circle with dimensions 560px by 560px and fill it with color R:89, G:91, and B:93.
Step 2
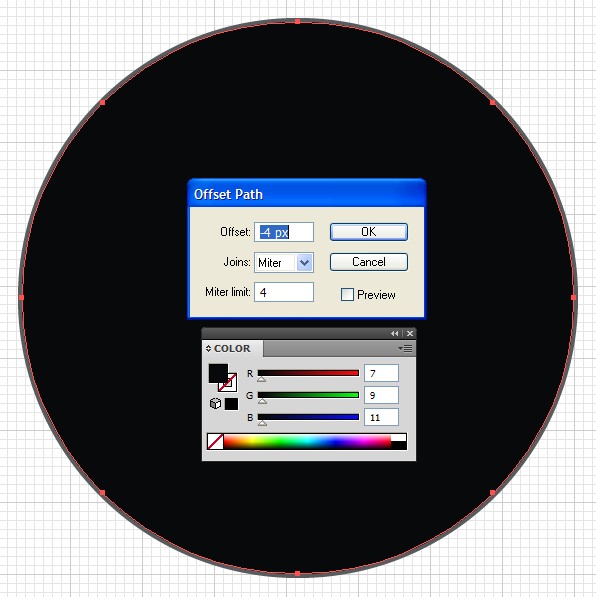
With the circle from the previous step is selected, go to Object > Path > Offset Path. In the new opening window set Offset: -4px, click OK and fill the new created shape with color: R:7, G:9, B:11.
Step 3
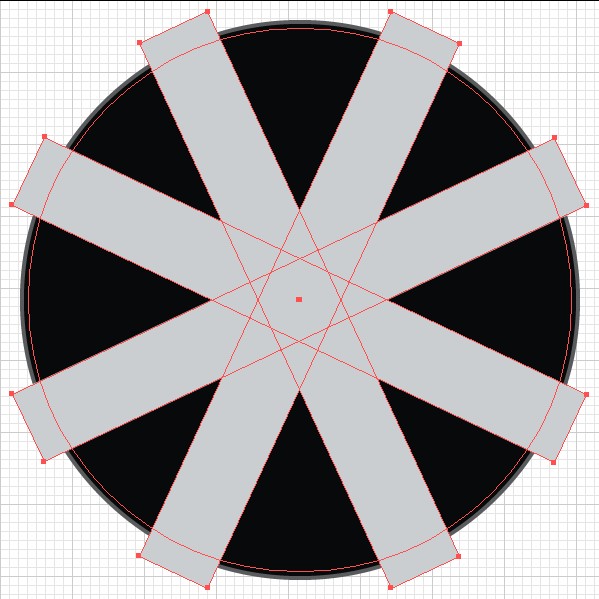
With the new shape that appeared after applying Offset to in the previous step is selected, again go to Object > Path > Offset Path. In the new opening window set Offset: -4px, click OK, then pick the Rectangle tool (M). Draw a rectangle with a width of 75px and a height which is enough to cover the bottom and top part of the shape that just appeared after applying the Offset, take a look at the picture below.

Step 4
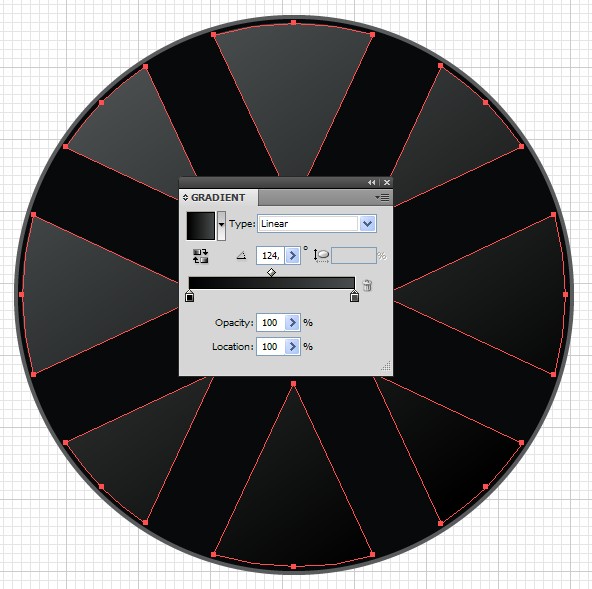
Now duplicate the rectangle you created in the previous step three times, then rotate the rectangles until you put them into the positions shown.
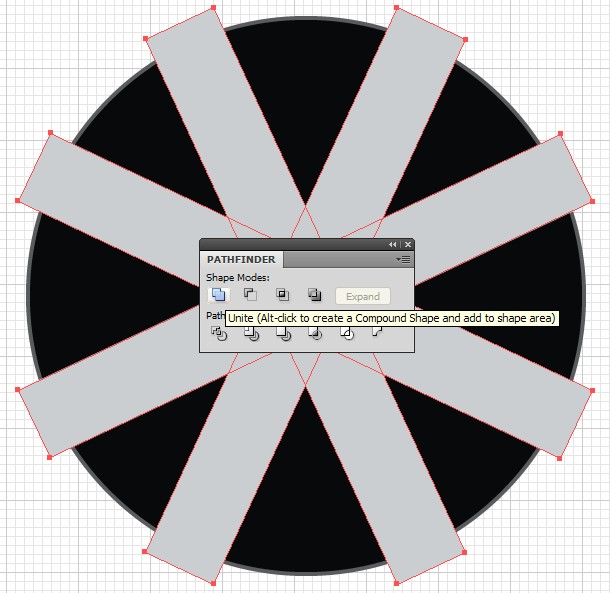
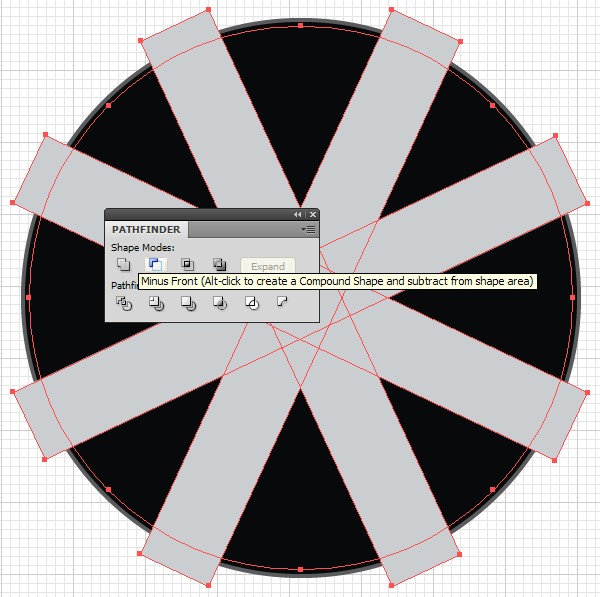
Now select the four rectangles, open the Pathfinder Panel, click on the Add To Shape Area button, then select the circle that appeared in Step 3 and the shape that just appeared, open the Pathfinder Panel if you’ve closed it, click the Minus Front button and fill the new shapes with a Linear Gradient (with colors black to dark gray and an Angle of 124 degrees).
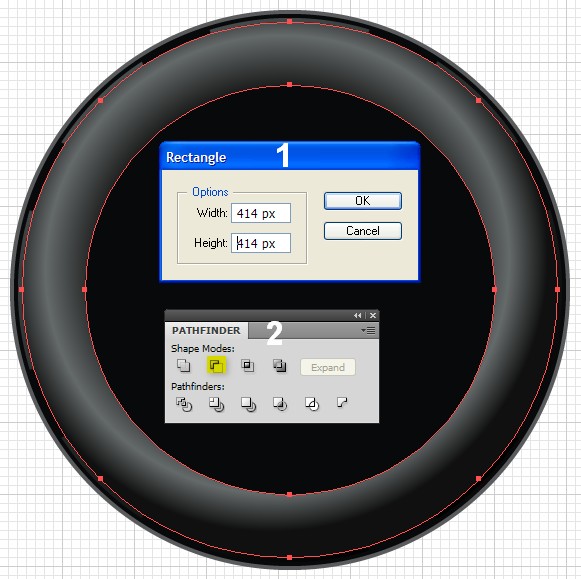
Step 5
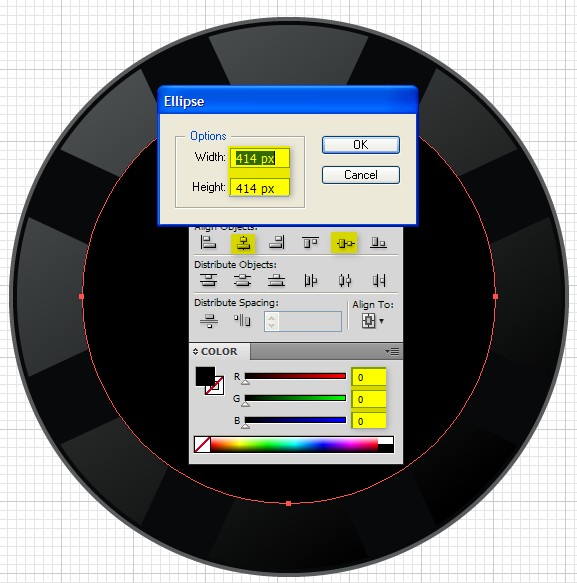
Pick the Ellipse Tool (L), draw a circle in the center on top of all other shapes with the dimensions 414px by 414px, and fill it with a black color.
Step 6
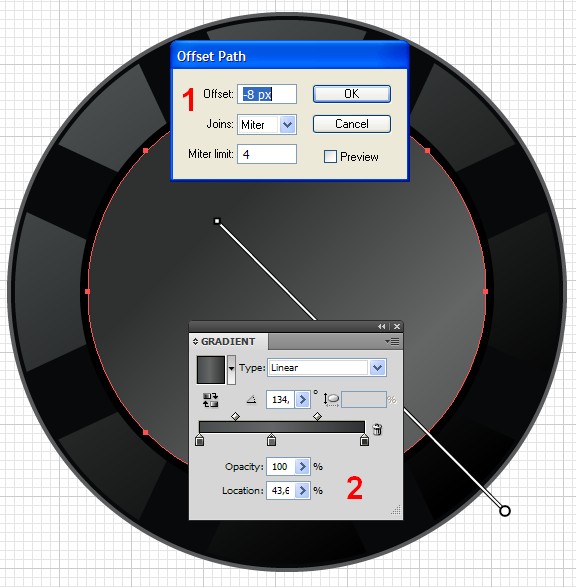
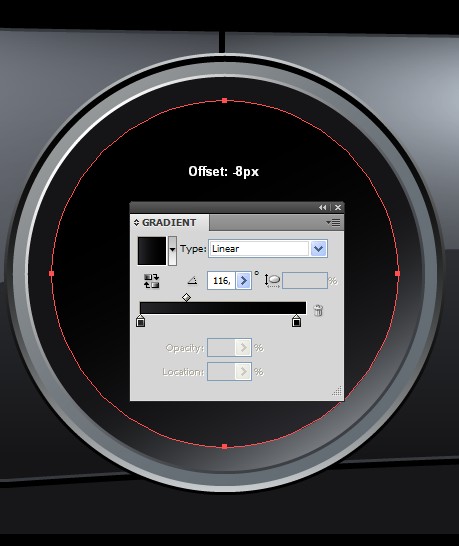
Now, with the circle from the previous step selected, go to Object > Path > Offset Path. In the new window set the Offset to -8px, click OK and fill the new created shape with a Linear Gradient. To do this, open the gradient panel by going to Window > Gradient (Command + F9).
For type select Linear, add another Gradient Slider so there’s three Gradient Sliders all together and apply colors for the first Gradient Slider from left to right: R:73, G:77, B:77, for the second one: R:100, G:102, B:102, Location: 43%, for the third one R:47, G:48, B:48 and Angle: 134 degrees.
Step 7
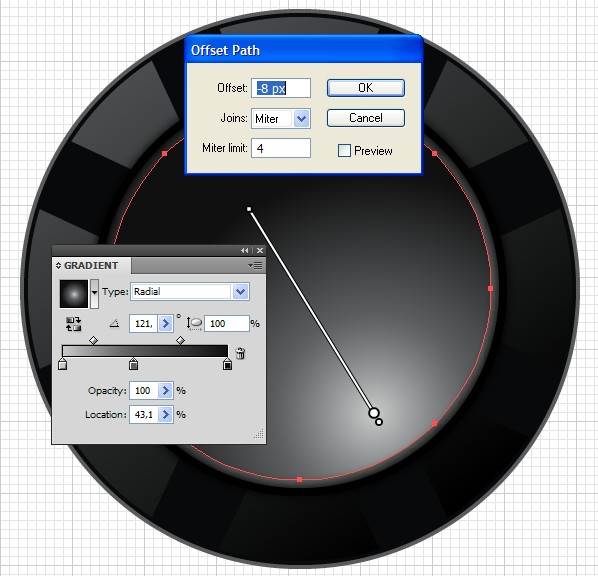
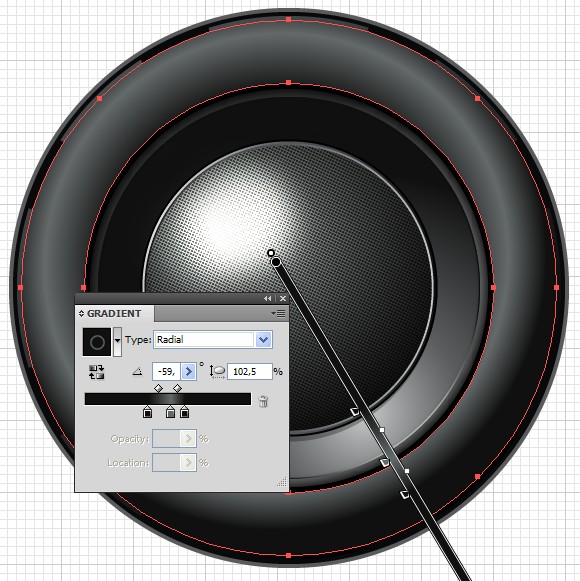
Now select the shape you created in Step 6 after applying Offset and again go to Object > Path > Offset Path. In the new window set the Offset to -8px and click OK.
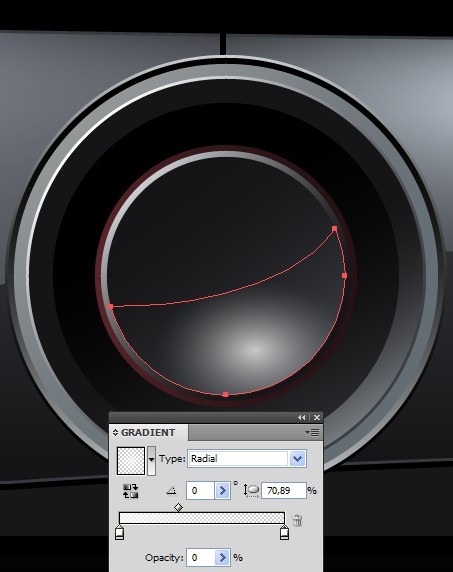
Now change the gradient to Radial and also change the colors so for the first Gradient Slider you set color as R:200, G:203, B:202, for the second one R:89, G:91, B:93 and for the third one R:16, G:16, B:16.
Step 8
Copy the shape from the previous step that you filled with a Radial Gradient by using Command + C, followed by Command + F, turn off the Fill color, apply a Stroke color with a Weight of 1px Inside. Straight after that go to Object > Expand Appearance and fill with a Linear Gradient using the same colors from the previous step.
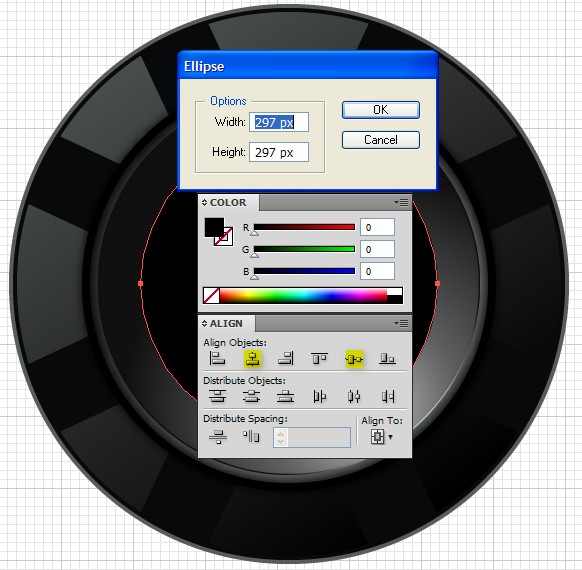
Step 9
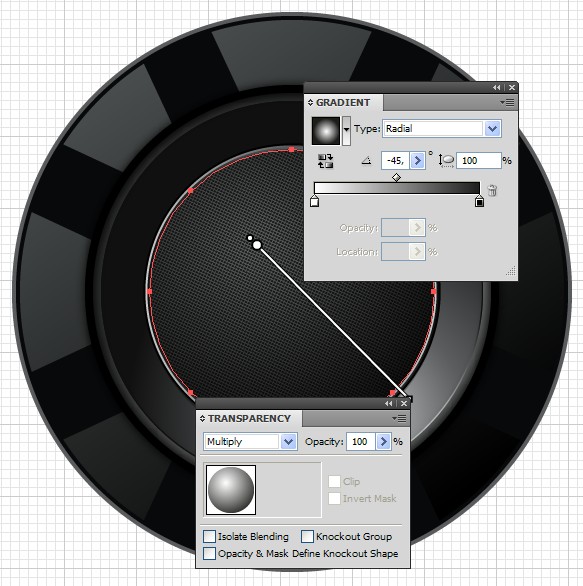
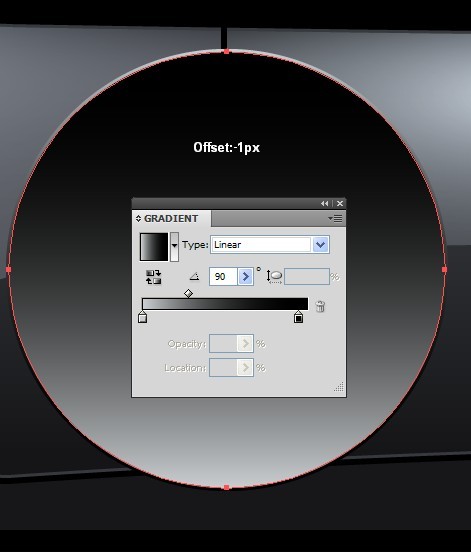
Pick the Ellipse Tool (L), draw a circle with dimensions 497px by 497px, fill the circle with a black color and put it in the center by opening the Align Panel. Click on Horizontal Align Center and Vertical Align Center.
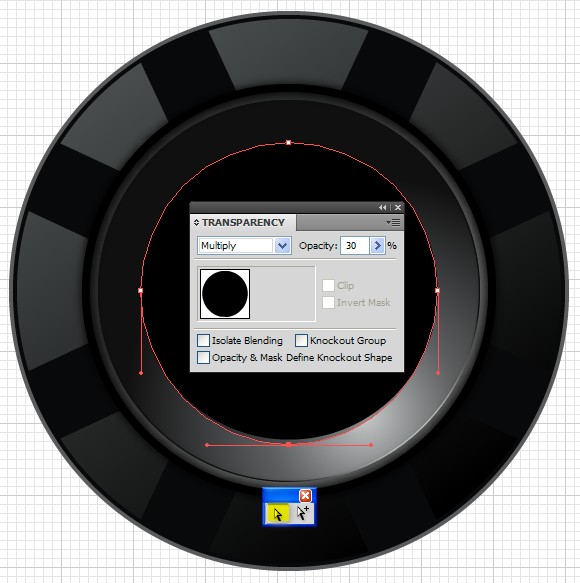
Step 10
Copy the shape from the previous step using Command + C, followed by Command + B, then pick the Direct Selection Tool (A), slide the copy’s bottom point a few pixels down, change the Blending Mode from Normal to Multiply and reduce the Opacity to 30%.
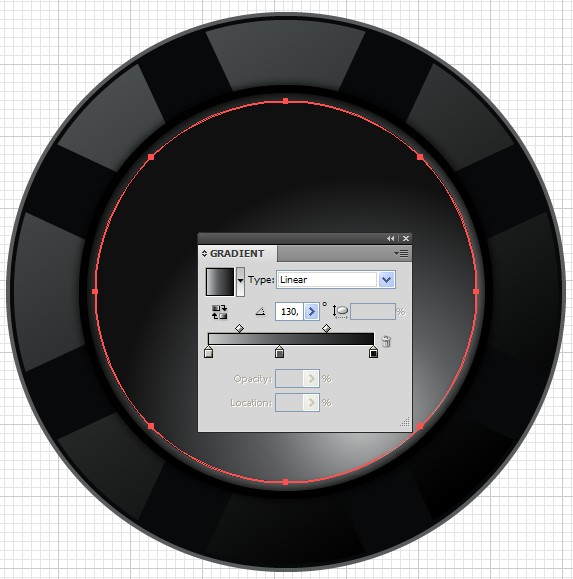
Step 11
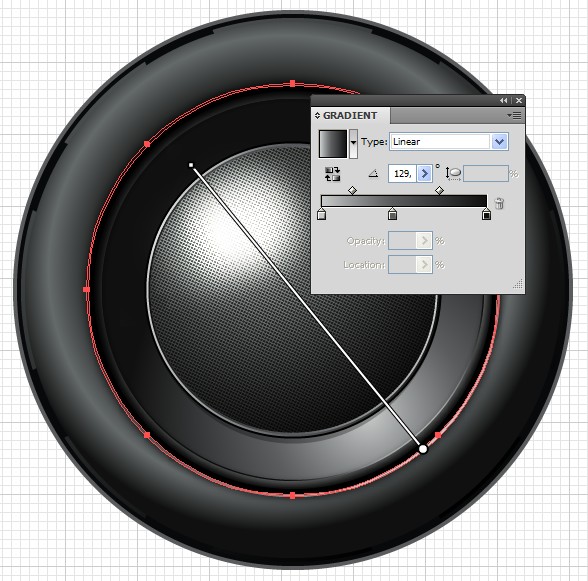
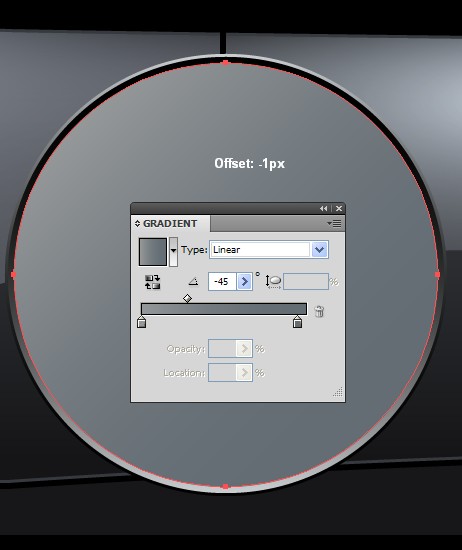
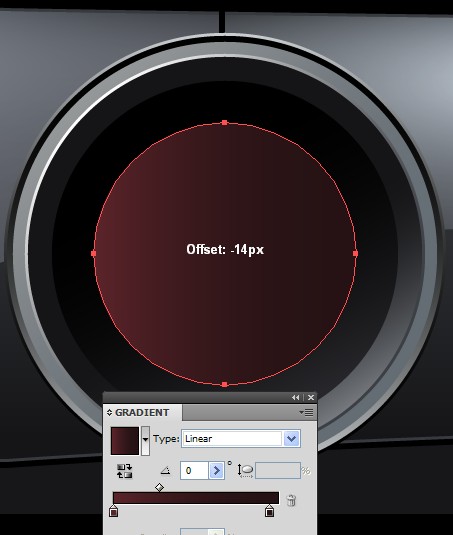
Select the shape from Step 10, go to Object > Path > Offset Path, set the Offset to -2px, click OK. Now fill the shape that appeared after applying Offset with Linear Gradient, as shown below.
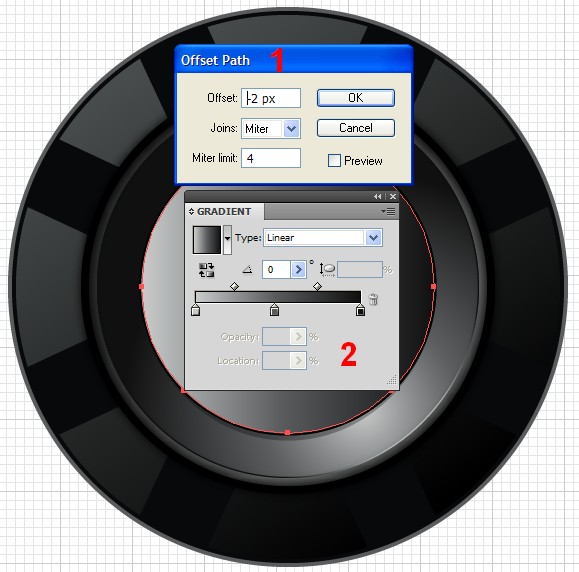
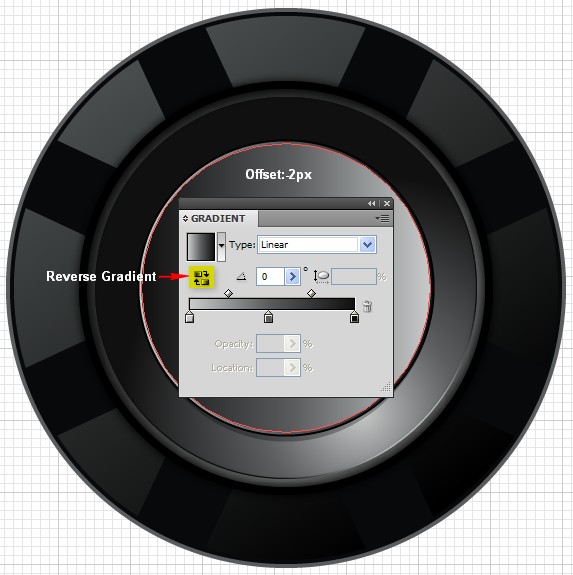
Step 12
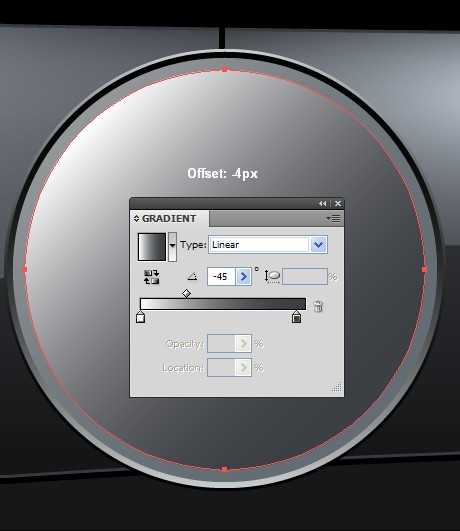
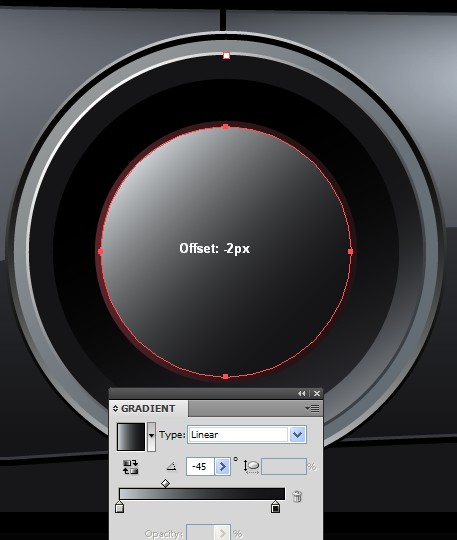
With the shape from the previous step that you filled with a Linear Gradient selected, again go to Object > Path > Offset Path, set the Offset to -2px, and click OK. Open the Pathfinder Panel, if you’ve closed it and click on the Reverse Gradient button.
Step 13
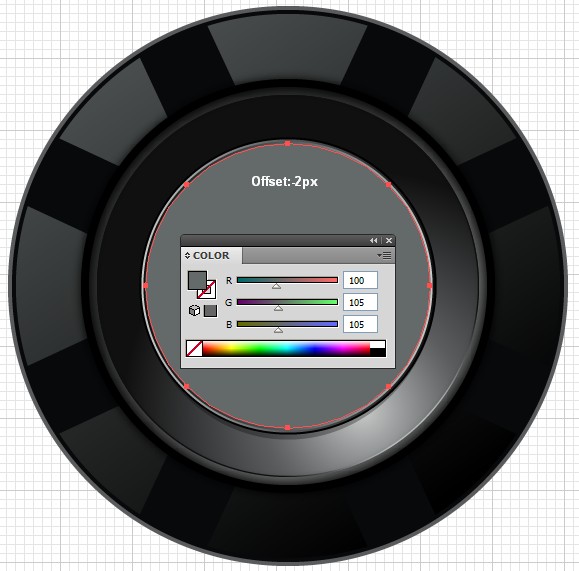
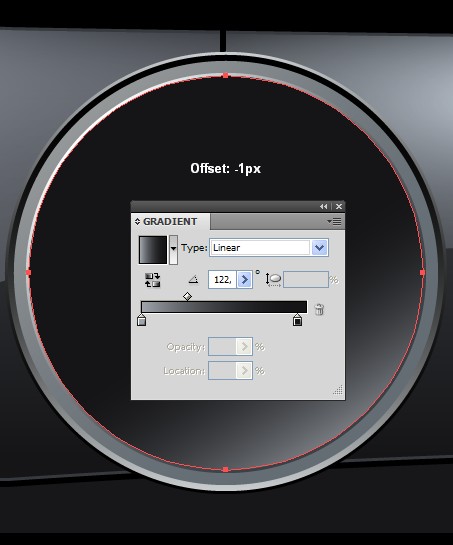
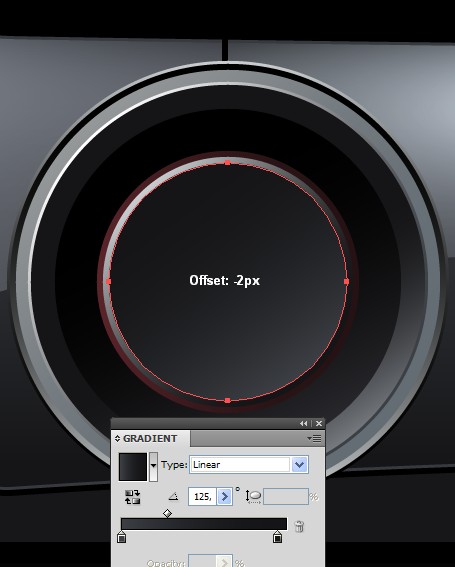
Now as the shape from the previous step is selected, again go to Object > Path > Offset Path, set the Offset to -2px and change the new shape’s color to R:100, G:105, B:105.
Step 14
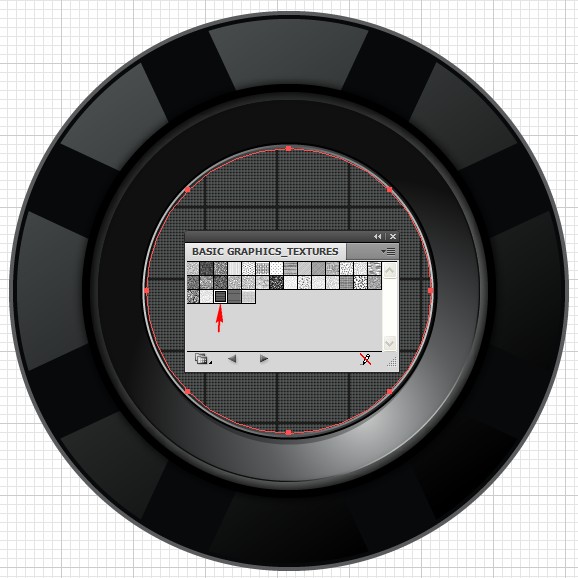
Copy the shape from the previous step using Command + C, followed by Command + F and fill the copy with a Pattern by going to Window > Swatch Libraries > Patterns > Basic Graphics > Basic Graphic Textures and choose USGS 7 Vineyard.
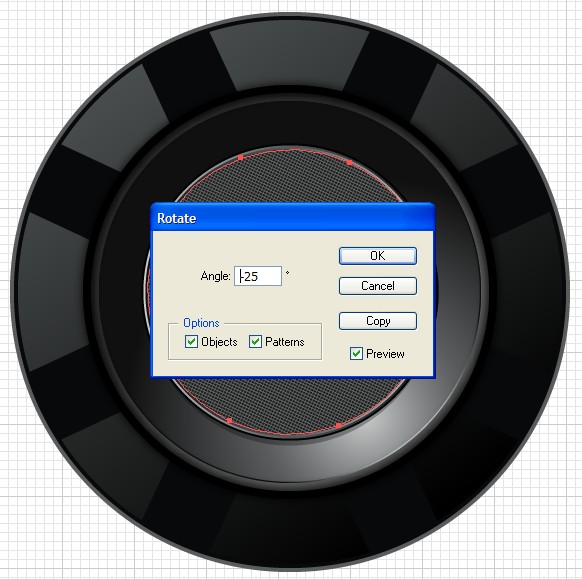
By doing this, you’ll fill the shape with the necessary pattern. The result won’t be very good, of course, you’ll be able to see redundant black lines. To remove them, go to Object > Expand, then rotate the shape to -25 degrees.
Step 15
Now copy the shape from Step 14 using Command + C, followed by Command + F, move the copy on top of all the others by going to Object > Arrange > Bring To Front. Now fill with a Radial Gradient, colors white to black, and change the Blending mode from Normal to Multiply, as demonstrated below.
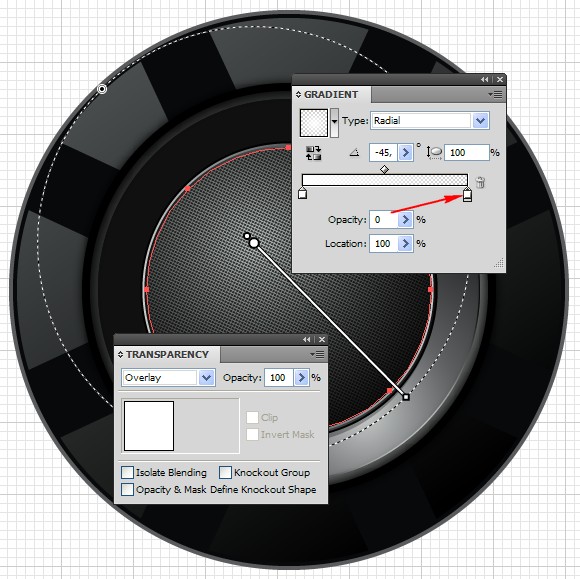
Step 16
Copy the shape from the previous step that you filled with a Radial Gradient using Command + C, followed by Command + F, open the Gradient Panel if you’ve closed it. Change the color for the second Gradient Slider to white with an Opacity of 0% and change the Blending Mode from Multiply to Overlay.
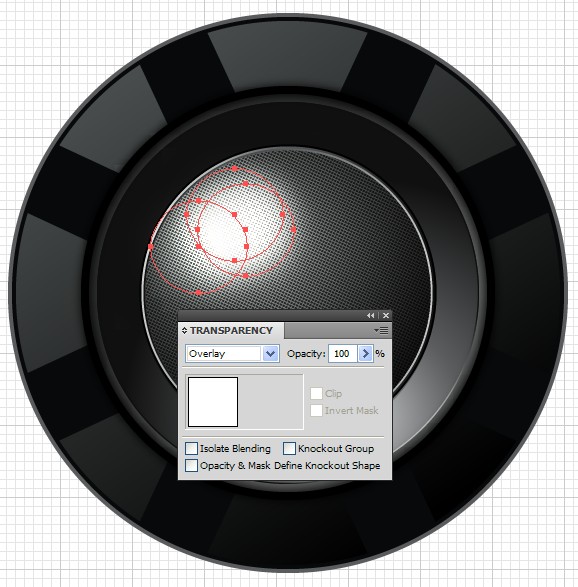
Step 17
Draw three ellipses in position as shown in the picture below, fill them with a white color and apply Gaussian Blur by going to Effects > Blur > Gaussian Blur, set the Radius to 60px, click OK and after that change the Blending Mode to Overlay.

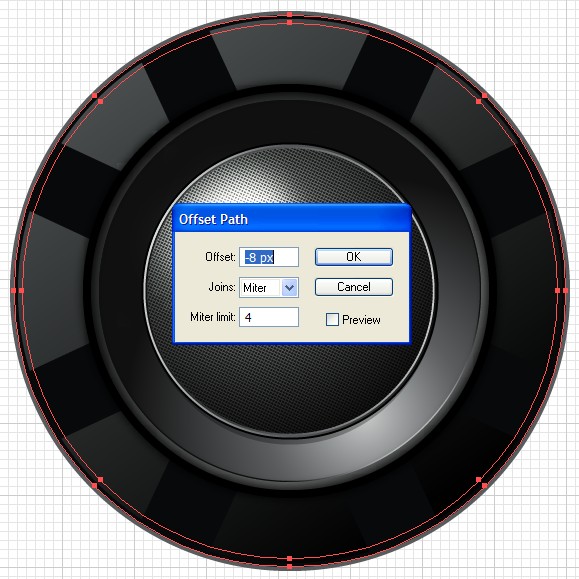
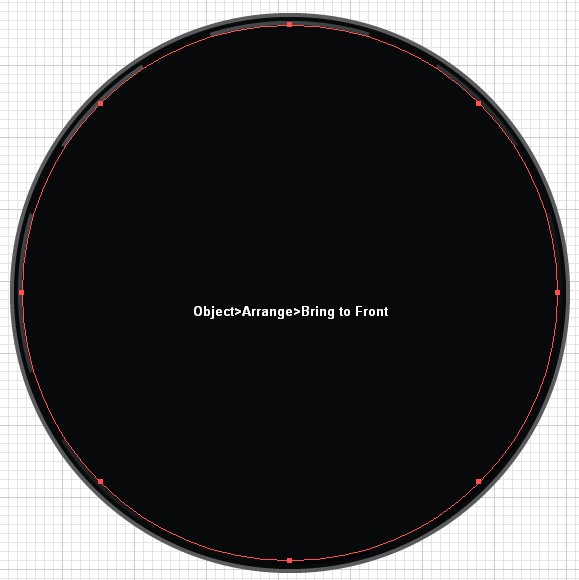
Step 18
Select the shape from Step 2 that appeared after applying Offset and again go to Object > Path > Offset Path. In the new window set the Offset to -8px and click OK. Now move the newly created shape on top of all others by going to Object > Arrange > Bring To Front.
Step 19
Grab the Ellipse Tool (L), draw a circle in the center over the previous circle with dimensions 414px by 414px, then select the shape from the previous step and the shape you just created, open the Pathfinder Panel, click on the Minus Front button and fill the newly created shape with a Radial Gradient.
Step 20
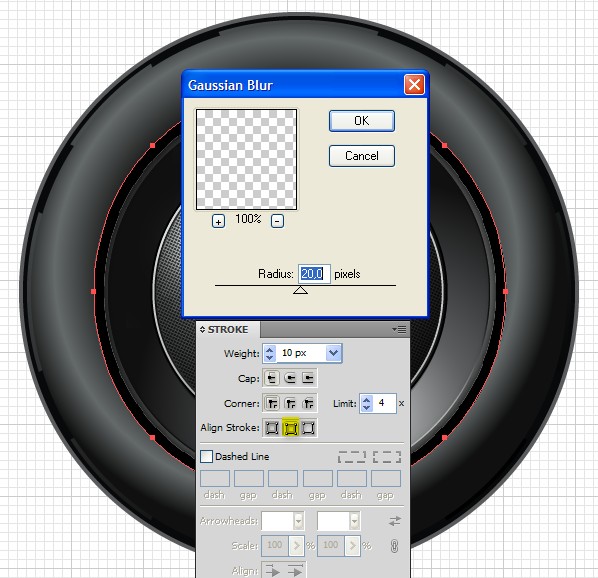
Draw another circle in the center on top of all others with dimensions 414px by 414px, turn off the Fill color and apply a Stroke Weight of 10px Inside with a black color. Apply Gaussian Blur by going to Effect > Blur > Gaussian Blur, set the Radius to 20px and click OK.
Step 21
Draw another circle in the center on top of all others with dimensions 414px by 414px, turn off the Fill color and apply a Stroke Weight of 2px.
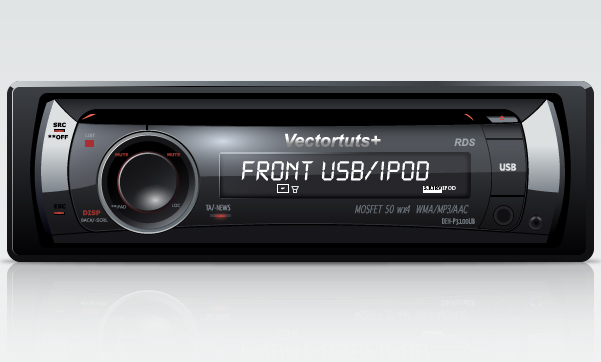
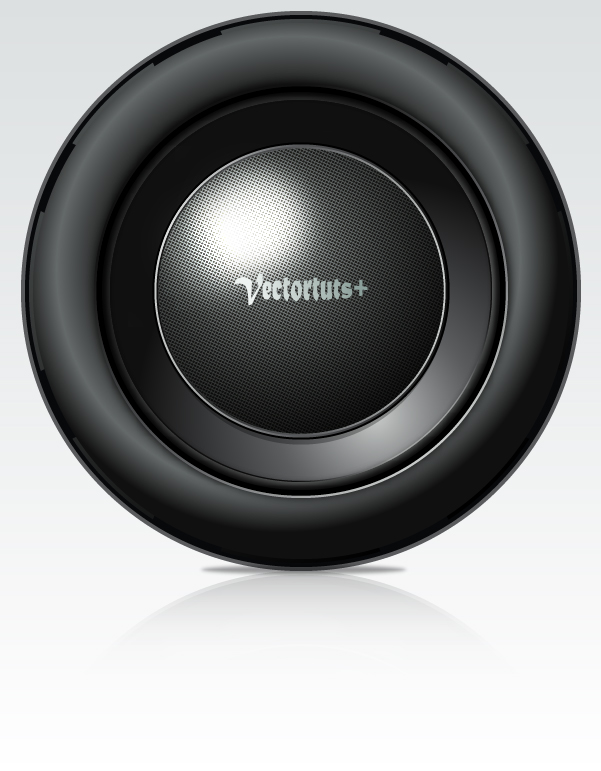
Straight after that, go to Object > Expand Appearance and fill the shape with a Linear Gradient as shown. Now we are done with the Subwoofer.
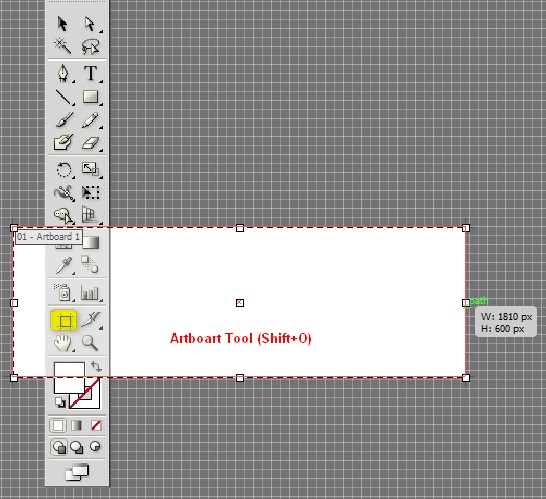
In the next steps, we’ll create the CD/MP3 player. Until now I worked in a document area with dimensions 600px by 600px, but now we’ll need a document with a bigger width. To do this, pick the Artboard Tool (Shift + O), click on one of the side points and slide until you have the necessary size for the document’s width.
After you’ve increased the document’s width we can start the creating of the CD/MP3 player.
Step 22
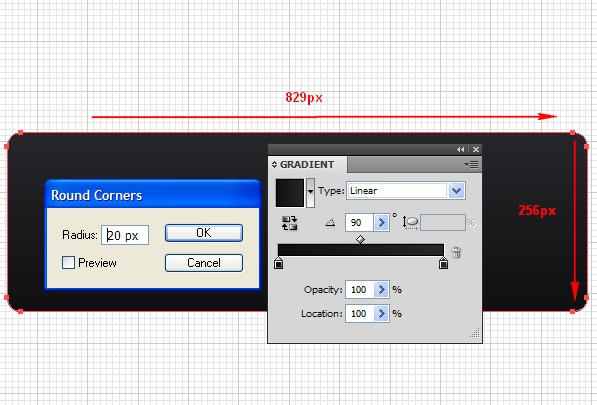
Pick the Rectangle Tool (M), draw a rectangle with dimensions 829px by 256px, then round the corners by going to Effect > Stylize > Round Corners. In the new opening window set the Radius to 20px, click OK and straight after that go to Object > Expand Appearance and fill the rectangle with Linear Gradient colors: R:15, G:15, B:17 to R:39, G:38, B:42, and set the Angle to 90 degrees.
Step 23
Copy the shape from the previous step using Command + C, followed by Command + F. Fix the bottom corner points by sliding them inwards to hide the bottom part, because in the next steps the bottom part will not be visible. Fill the shape with a Linear Gradient as shown.
Step 24
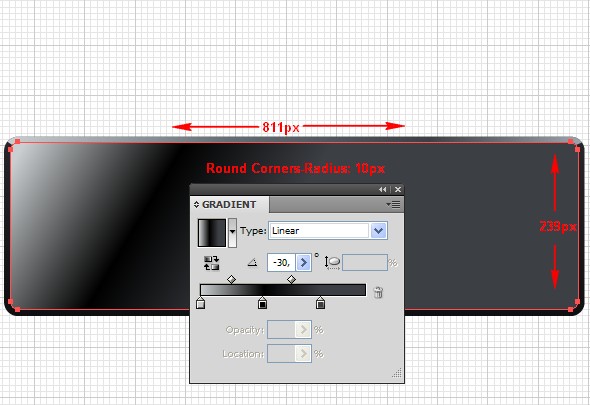
Draw a rectangle with dimensions 811px by 239px with rounded corners 10px. Position the rectangle you just created in the center and fill it with a Linear Gradient, take a look at the picture below to get a better idea.
Step 25
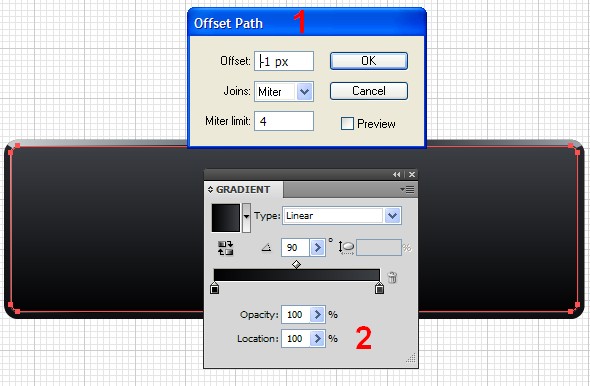
With the shape from the previous step selected, go to Object > Path > Offset Path. Set the Offset to -1px and click OK. Fill the newly created shape with a Linear Gradient with colors from black to dark gray, and set the Angle to 90 degrees.
Step 26
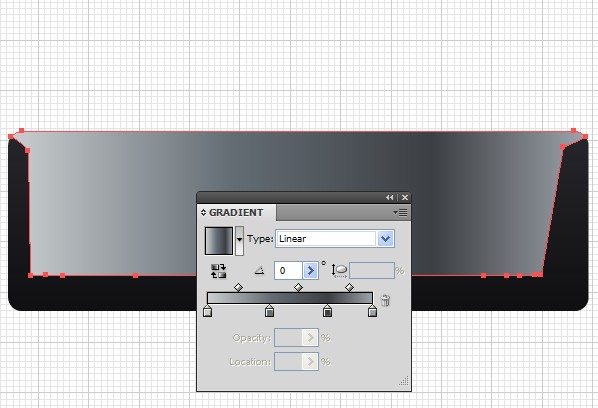
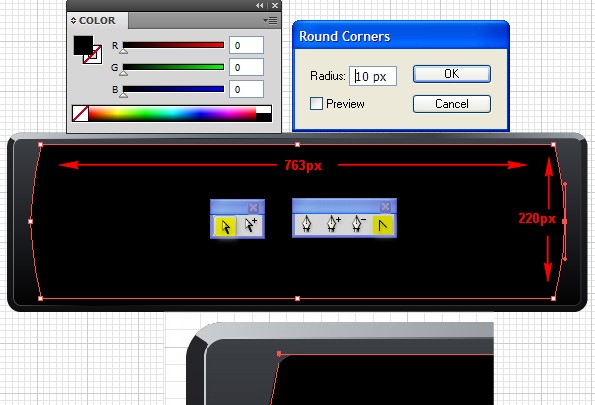
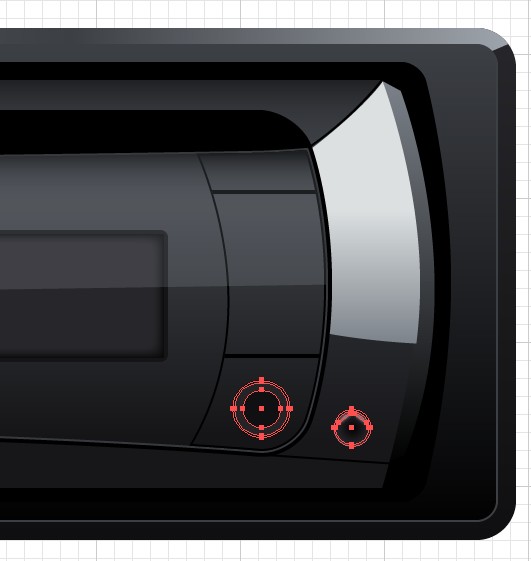
Draw another rectangle with the dimensions 763px by 220px with a black color on top of all the others. Now we’ll add the key points. To do this, go to Object > Path > Add Anchor Points.
After you’ve added the necessary key points pick the Direct Selection Tool (A), click on the right middle point, slide it a few pixels to the right and then do the same with the left middle point. Fix the points you slid to the right and to the left using the Convert Anchor Points tool (Shift + C). After you’ve fixed the key points, round the shape’s corners by going to Effect > Stylize > Round Corners.
Step 27
Pick the Pen tool (P) and and create shapes on both sides of the previous rectangle in the position as shown. Fill them with a Linear Gradient with colors from black to gray, and an Angle of 90 degrees.
Step 28
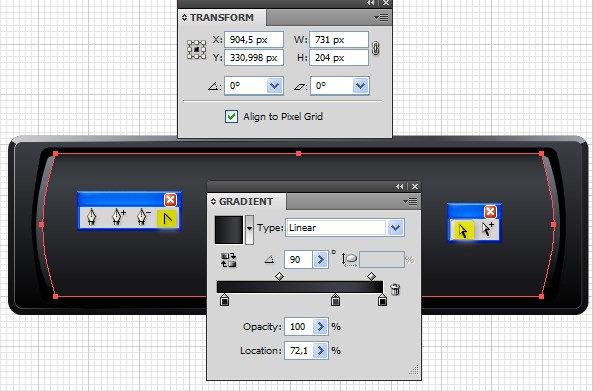
Draw another rectangle with dimensions 731px by 204px, add key points and fix the right and left middle points like we did in Step 27 without rounding the corners here. After you’ve created the rectangle and fixed the right and left middle point, fill with Linear Gradient as showed in the picture below.
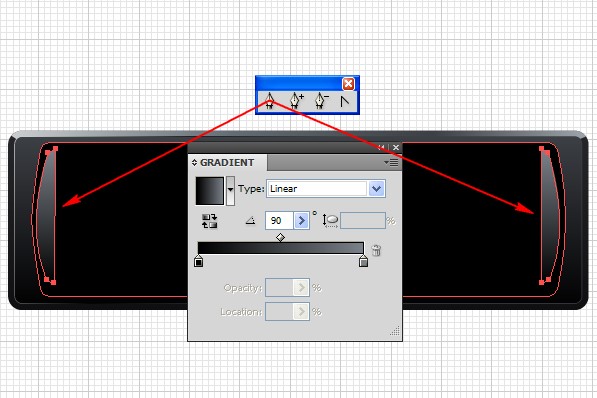
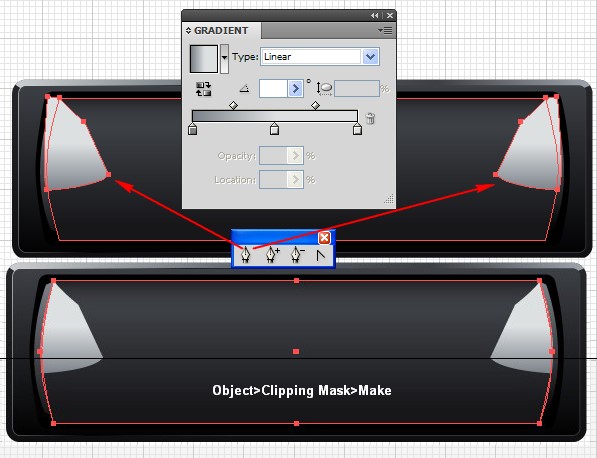
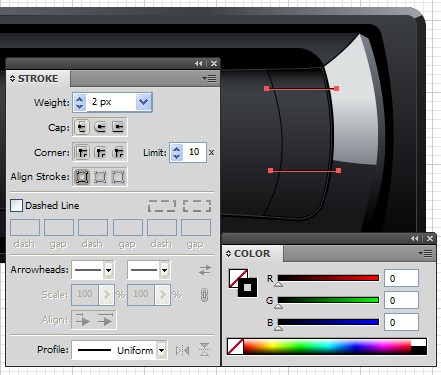
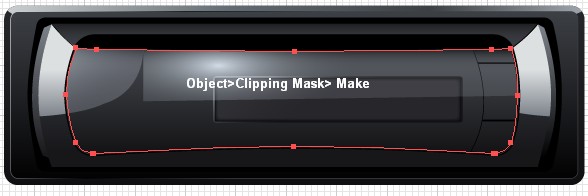
Step 29
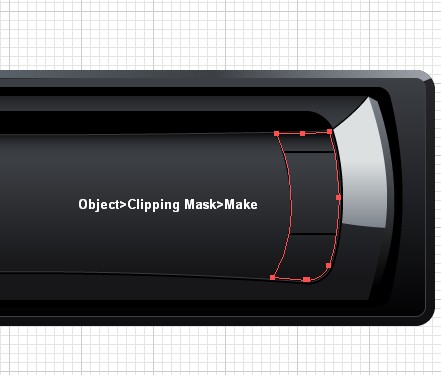
Use the Pen Tool (P) to add shapes in the position shown, and fill them with a Linear Gradient. Copy the shape from the previous step using Command + C, followed by Command + F.
Now move the copy on top of all others, then select the copy and the shapes you just created and go to Object > Clipping Mask > Make.
Step 30
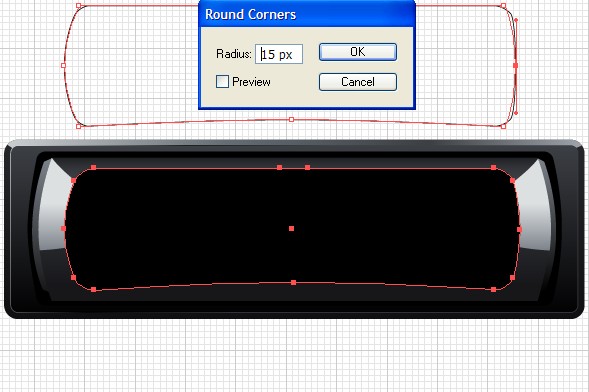
Grab the Rectangle Tool (M), draw a rectangle in the center on top of all the others with a black color, add key points by going to Object > Path > Add Anchor Point.
After that fix the right and left middle point and also slide the bottom middle point a few pixels up, then round the corners with a Radius of 15px and go to Object > Expand Appearance.
Step 31
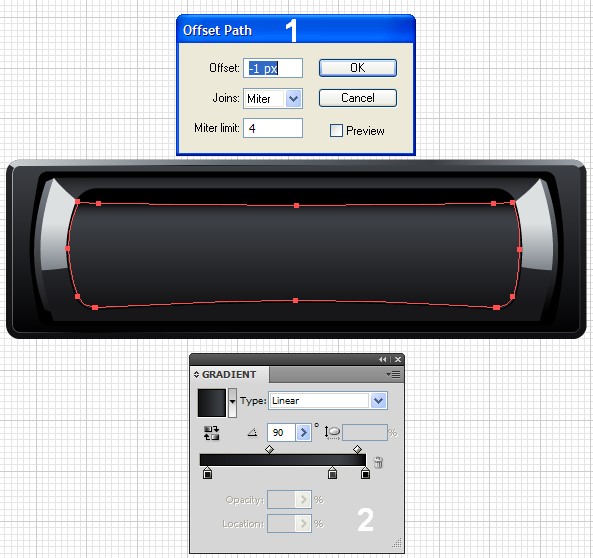
With the shape from the previous step selected, go to Object > Path > Offset Path. In the new window set the Offset to -2px, click OK.
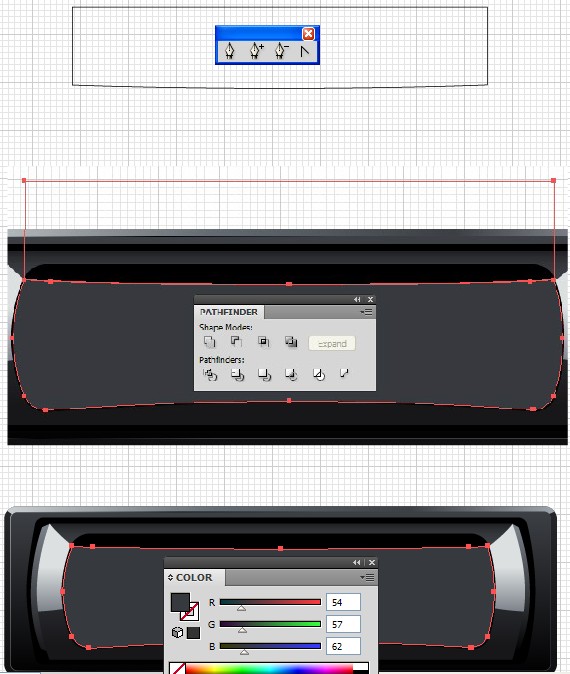
Now use the Pen Tool to create a shape on top of the previous one. Select both shapes, open the Pathfinder Panel, click on the Minus Front button and fill the newly created shape with color: R:54, G:57, B:62.
Step 32
With the shape from the previous step selected, go to Object > Path > Offset Path. In the window set the Offset to -1px and click OK. Now fill the shape with a Linear Gradient as shown.
Step 33
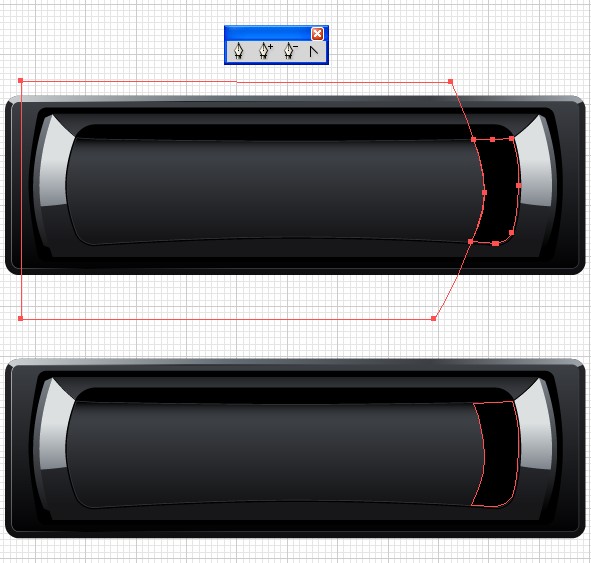
Copy the shape from the previous step using Command + C, followed by Command + F. Use the Pen Tool (P) to create a shape that will cover the left side of the copy, take a look at the picture below. Then select both shapes, open the Pathfinder Panel, click on the Minus Front button and change the color to black.
Step 34
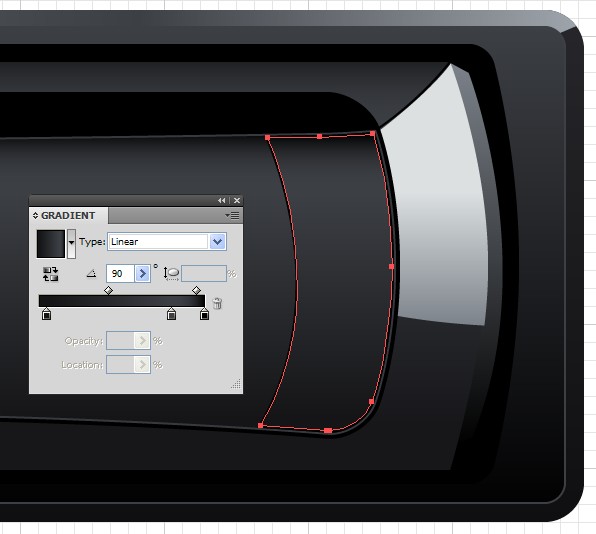
With the shape that appeared in the previous step is selected, go to Object > Path > Offset Path, set the Offset to -1px and click OK. Fill the shape with a Linear Gradient.
Step 35
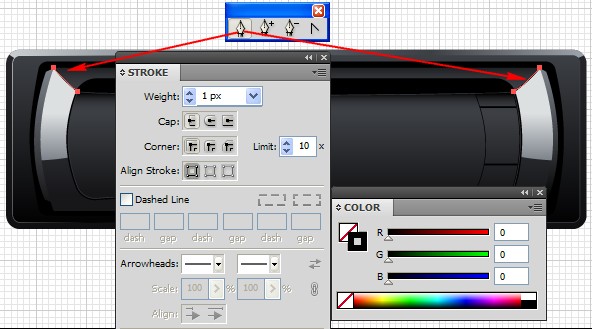
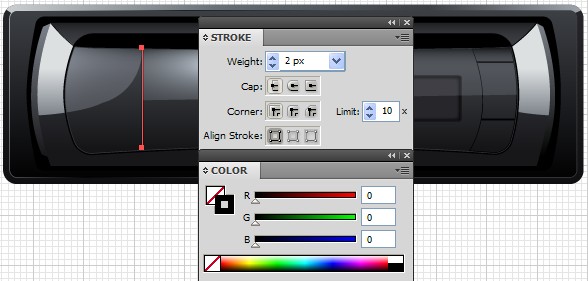
Grab the Pen Tool (P) and draw two straight lines over the shape from the previous step with a black Stroke color and Width of 2px.
Now copy the shape from the previous step that you filled with a Linear Gradient, position it on top of the shapes you just created, then select the copy and the two lines and go to Object > Clipping Mask > Make.
Step 36
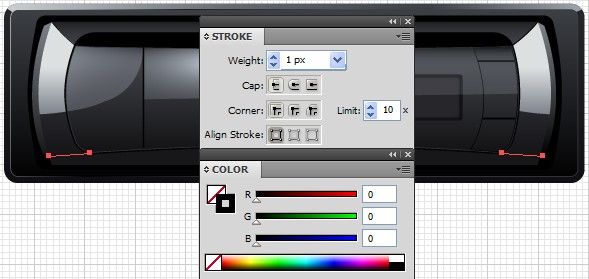
Add two more shapes using the Pen Tool (P) with a Stroke color of black and Weight of 1px.
Step 37
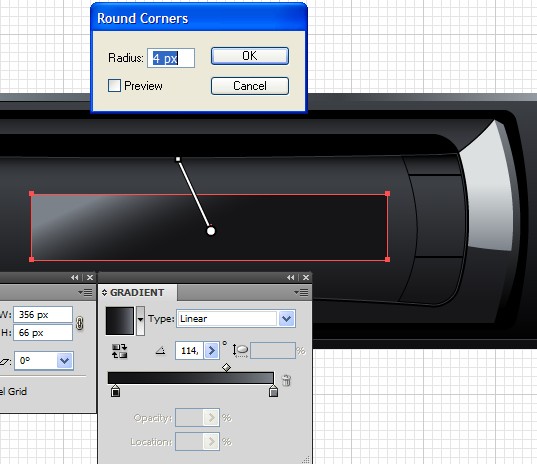
Now it’s time to add the player’s display. To do this, draw a rectangle with rounded corners and a Radius of 4px. Position it where the display should be and fill the Linear Gradient as shown.
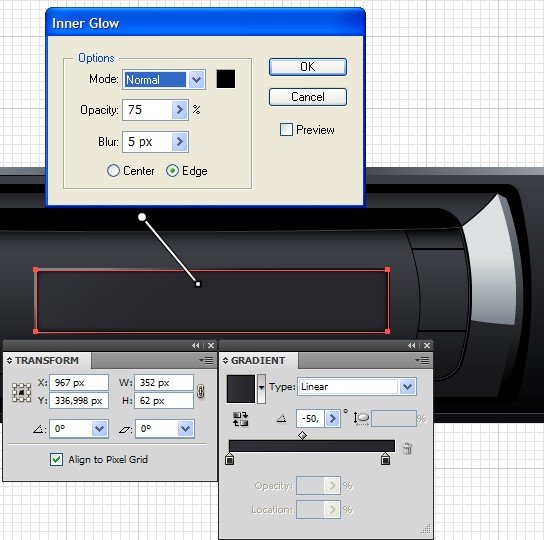
Step 38
Draw another rectangle in the center of the previous one, fill it with a Linear Gradient and apply Inner Glow by going to Effect > Stylize > Inner Glow, set the values as shown and click OK.
Step 39
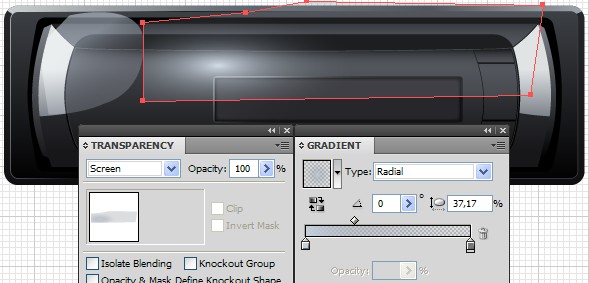
Grab the Pen Tool (P), create a shape and position it as shown. Fill it with a Linear Gradient and change the Blending Mode from Normal to Screen.

Step 40
Create another shape in the position shown in the picture below, fill it with a Radial Gradient and change the Blending Mode from Normal to Screen.
Step 41
Select the last two shapes you created and group them by going to Object > Group (Command + G).
Step 42
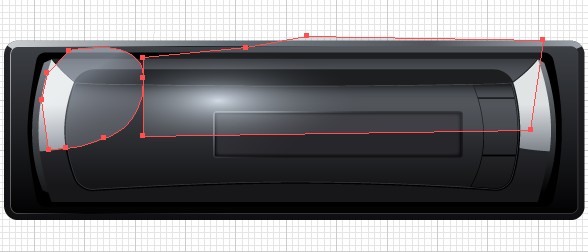
Copy the shape from Step 32 and position it over the group you created in the previous step, then select the group and the copy you positioned over the group and go to Object > Clipping Mask > Make.
Step 43
Add shapes as shown below.
Step 44
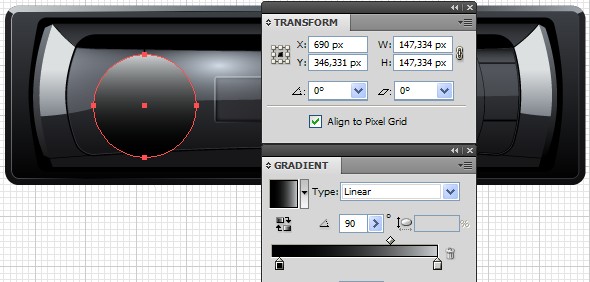
Pick the Ellipse Tool (L), draw a circle in position as shown and fill it with a Linear Gradient.
Step 45
Continue adding circles over the previous one and filling them with a Linear Gradient, you can use the Offset option.
Step 46
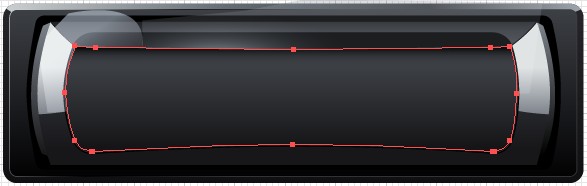
Also add the shapes in the positions shown.
Step 47
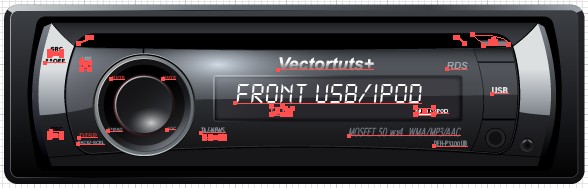
Add the necessary text on the necessary places shown.
Conclusion
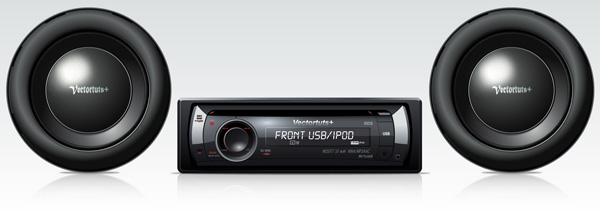
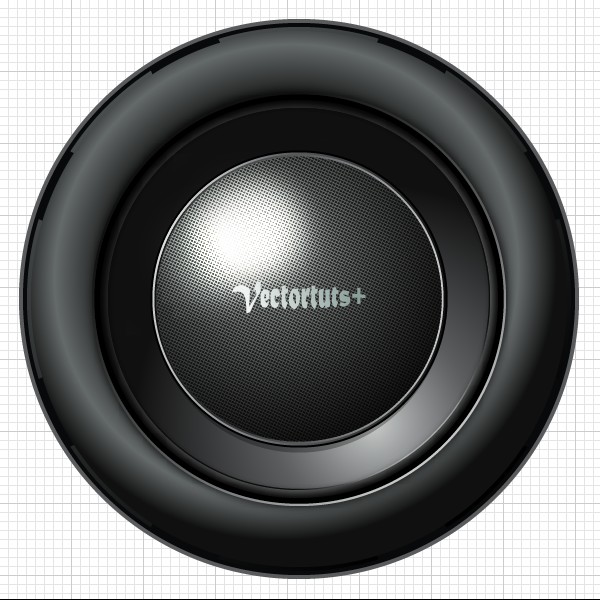
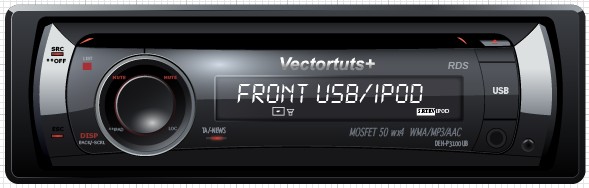
In the end you can position the subwoofer on the appropriate place next to the player. Now add reflections, shadows, and background in the way you want and with this we are finished. Here’s the final result you need to have.