Image may be NSFW.
Clik here to view.
Image may be NSFW.
Clik here to view.
Clik here to view.
In this tutorial you’ll learn how to create a realistic, vector abacus icon, using 3D Renders, Brushes, Blends and other tools of Adobe Illustrator. The skills you will learn can easily be transferred to creating various objects. So let’s get started!
Step 1
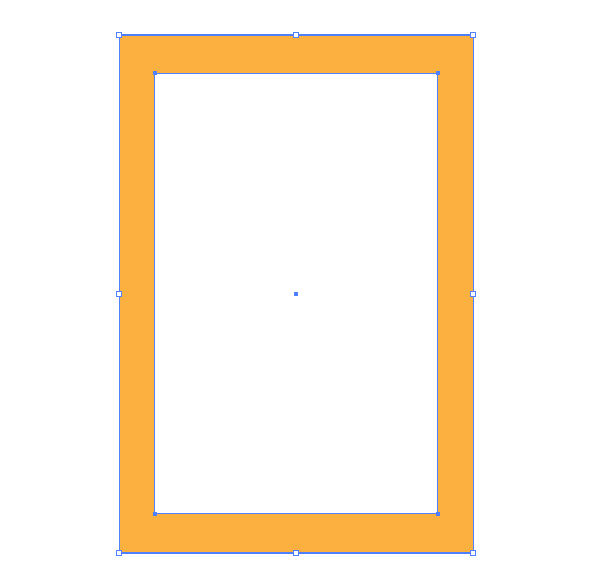
Illustrate a rectangle by using the Rectangle Tool (M). Copy it and paste in front (Command + C then Command + F). Go to the Object > Transform > Scale and decrease the rectangle copy. Then go to Object > Compound Path > Make (Command + 8). Fill it with orange and set the Stroke of it to None.
Clik here to view.
Step 2
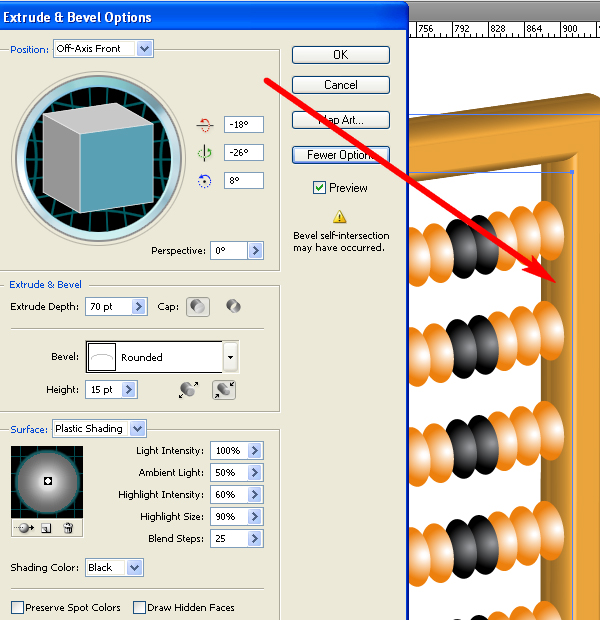
Go to Effect > 3D > Extrude & Bevel. Set there the angles of the rotation, the extrude depth, the shape of the bevel, and the height of it. Choosing the values of these items will allow you to reproduce a wooden texture.
Clik here to view.
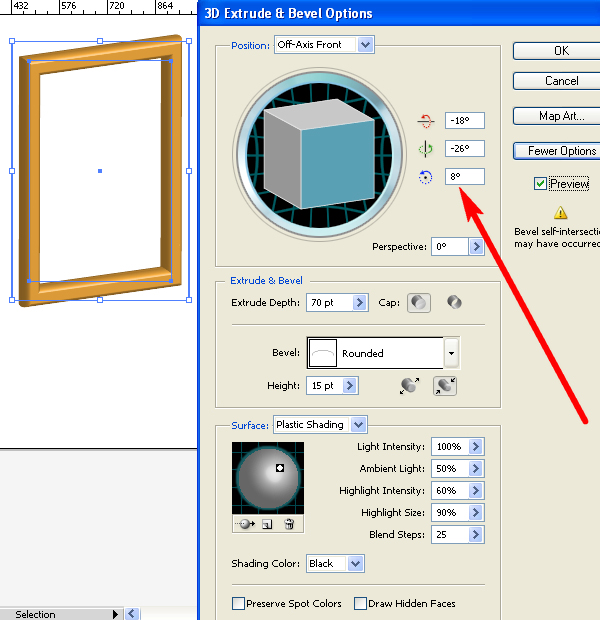
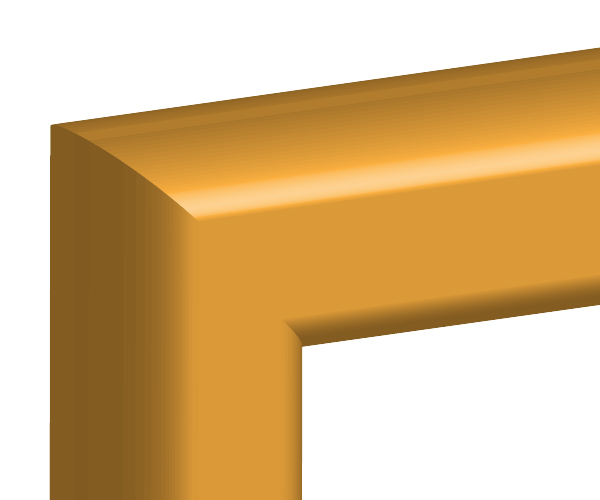
Pay attention to the angle of rotation around the Z axis. Let’s name it “Main value.” Memorize it. I use in this tutorial 8 degrees for the “Main value.” But, of course, you may set this value as you like. The result should look like the image below. Change the above-mentioned values to achieve it.
Clik here to view.
Step 3
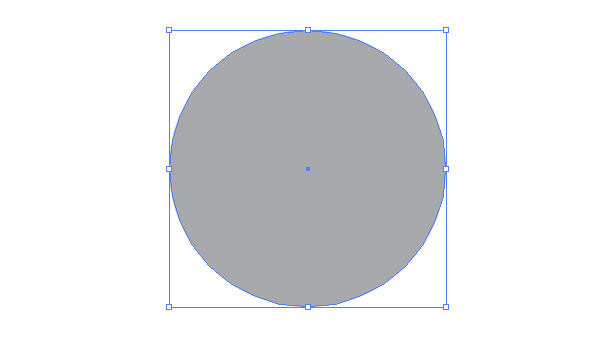
Grab the Ellipse Tool (L) and create a circle. Fill it with gray and set the Stroke to None.
Clik here to view.
Go to Effect > 3D > Extrude & Bevel. Set there the “Main value” for the rotation angle around the Z axis, extrude depth and lights in order to reproduce a metal texture.
Clik here to view.
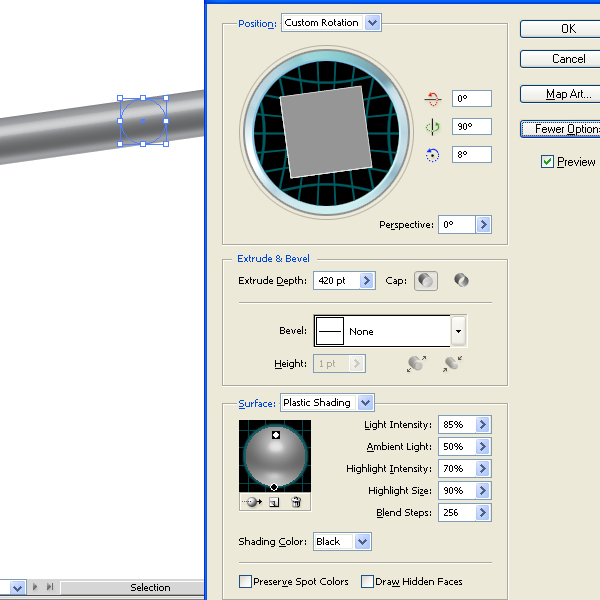
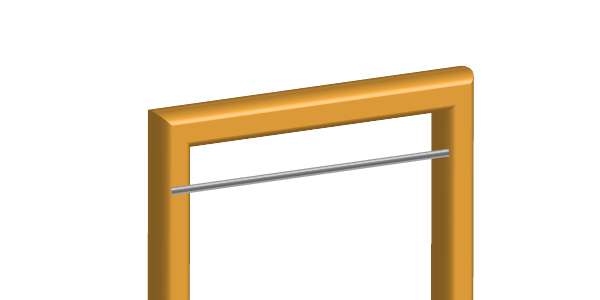
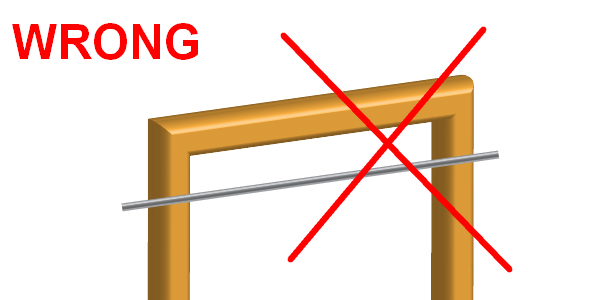
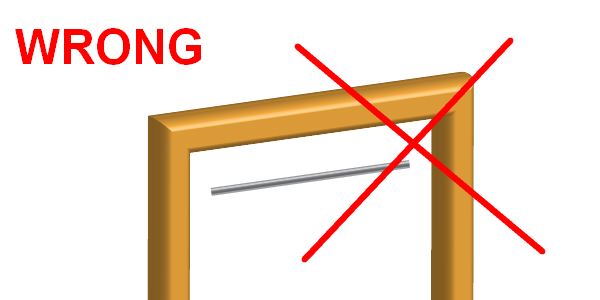
Set a value for the extrude depth of the metal spindle, which keeps the spindle in the bounds of the wooden frame. See the images below for reference.
Clik here to view.
Clik here to view.
Clik here to view.
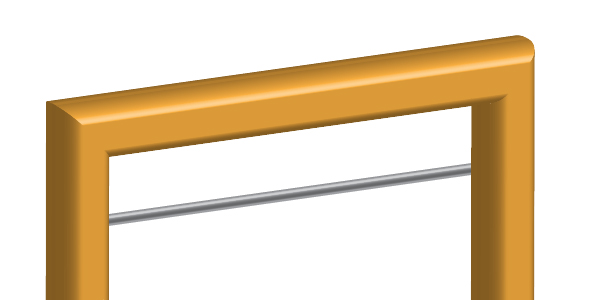
Step 4
Place the spindle under the frame.
Clik here to view.
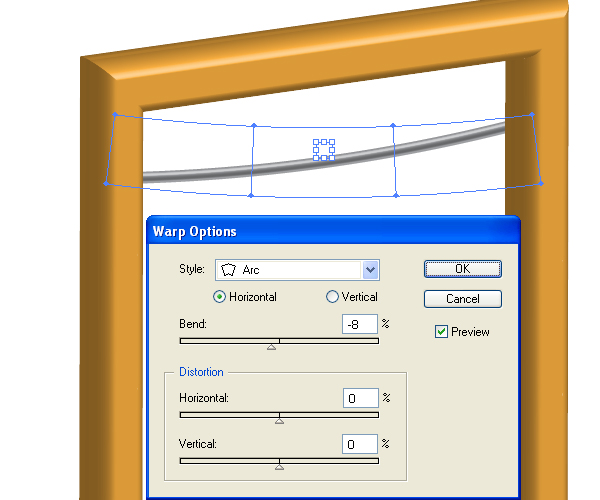
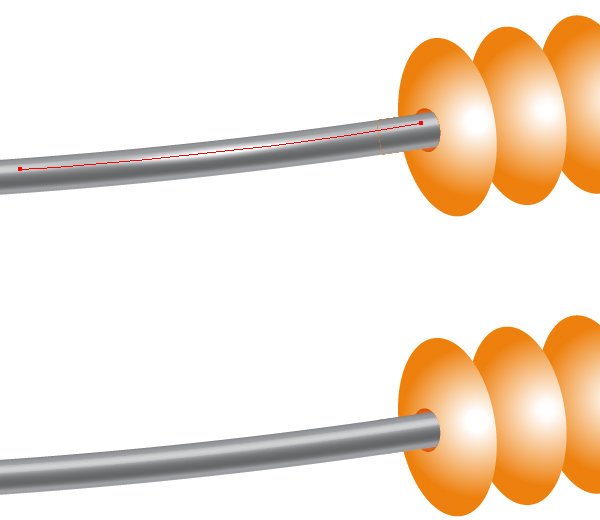
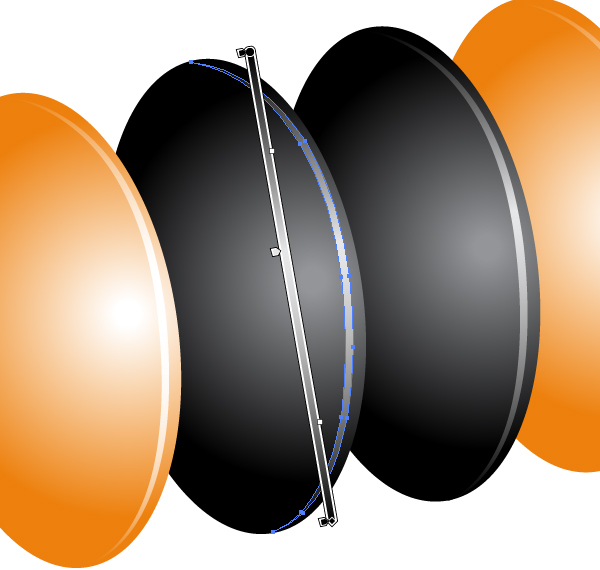
Step 5
Now we need to bend this 3D spindle. Go to Object > Envelope Distort > Make with Warp. Set the items as shown below.
Clik here to view.
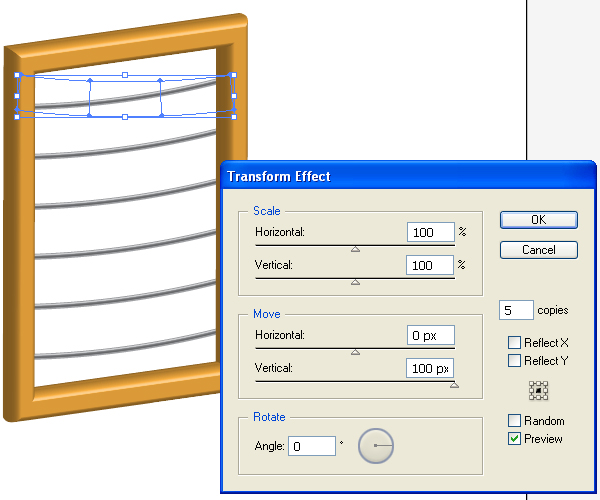
Go to Effect > Distort & Transform > Transform, and set there the acceptable options. You must fill the inner part of the frame with spindles. So, you are free to choose both: the number of copies and the space between the spindles.
Clik here to view.
Step 6
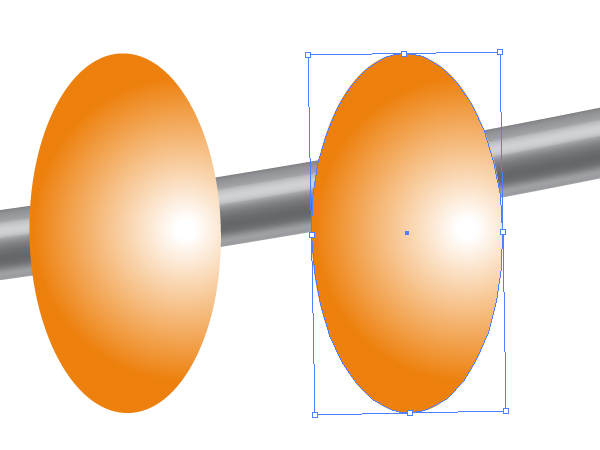
Take the Ellipse Tool (L) and create the following figure filled with the Radial gradient that goes from white to orange. This will be a bead of the abacus.
Clik here to view.
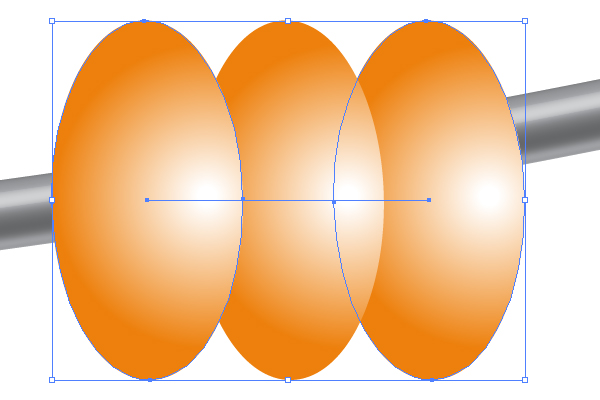
Copy it and paste in back (Command + C then Command + B). Move it some pixels to the right.
Clik here to view.
Then go to Object > Blend > Blend Options and set there the Spacing to “Specified steps” and the number of steps to 1. Select both ellipses and go to Object > Blend > Make (Command + Alt + B).
Clik here to view.
Step 7
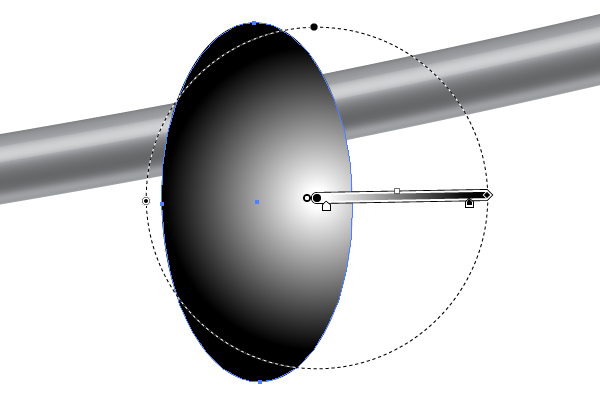
Create another elliptical figure filled with the Radial gradient that goes from white to black in color. This will be a central black bead of the abacus.
Clik here to view.
Copy it and paste in back (Command + C then Command + B). Move it some pixels to the right. And place both black beads under the orange ones.
Clik here to view.
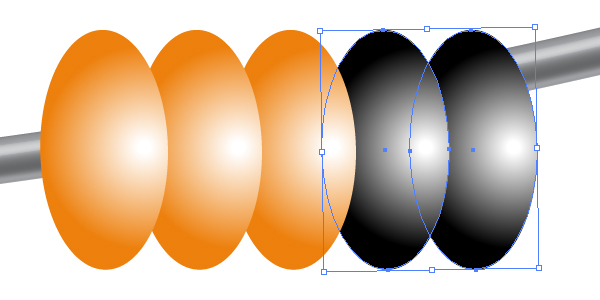
Create another orange blend and place it under the black beads.
Clik here to view.
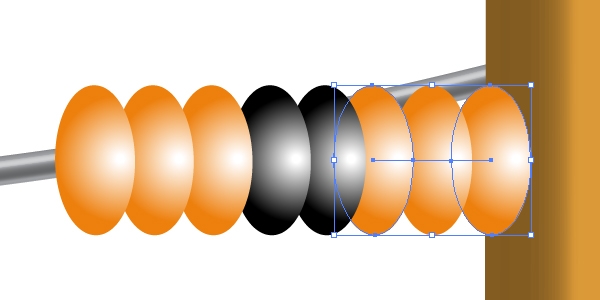
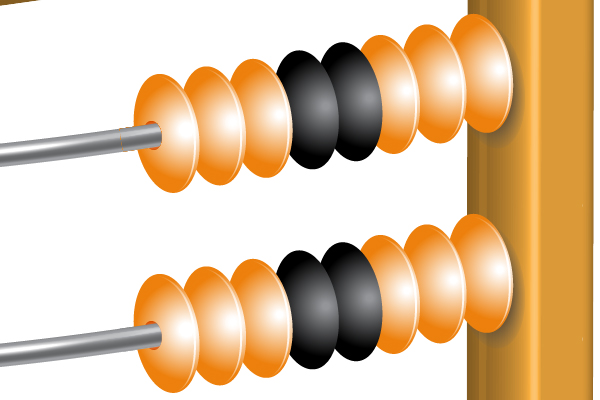
As you see from the diagrams above, all the beads are located horizontally, whereas they must be bent along the axis of a spindle. It is right in this step.
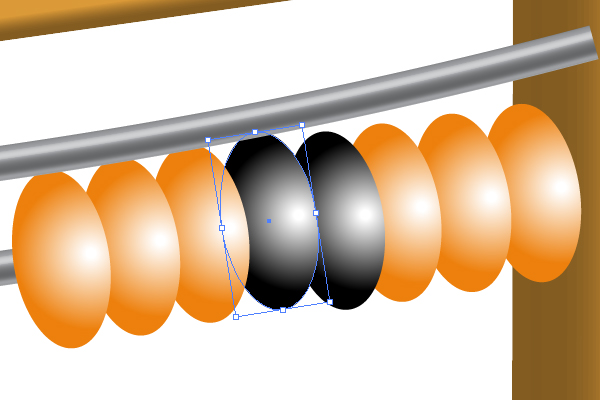
Step 8
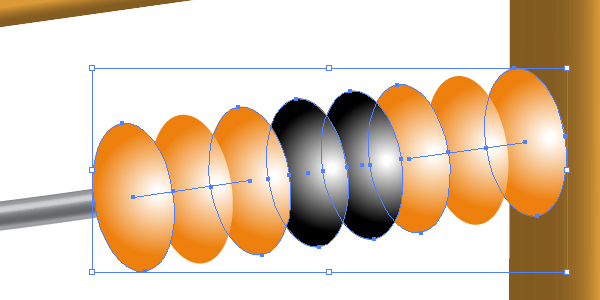
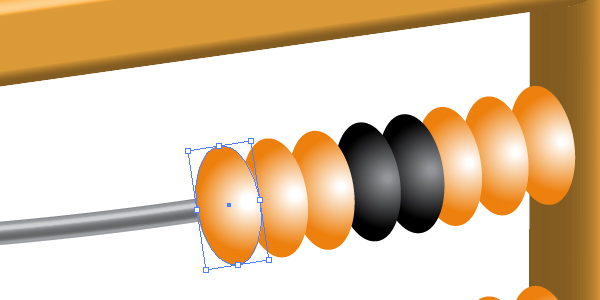
Now select all the beads and rotate them slightly by going to Object > Transform > Rotate.
Clik here to view.
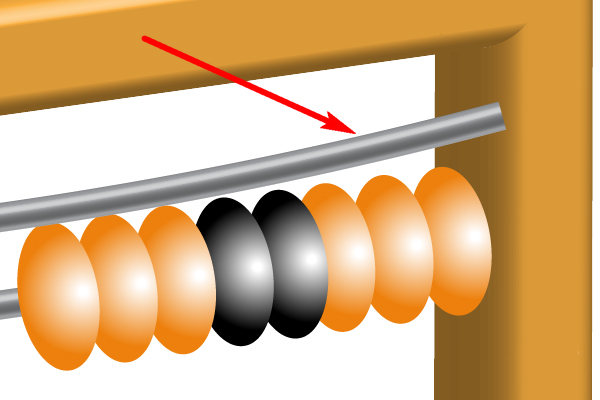
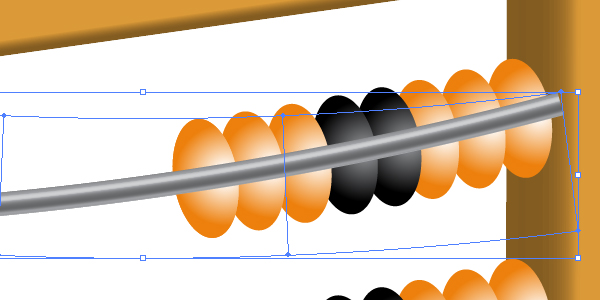
Step 9
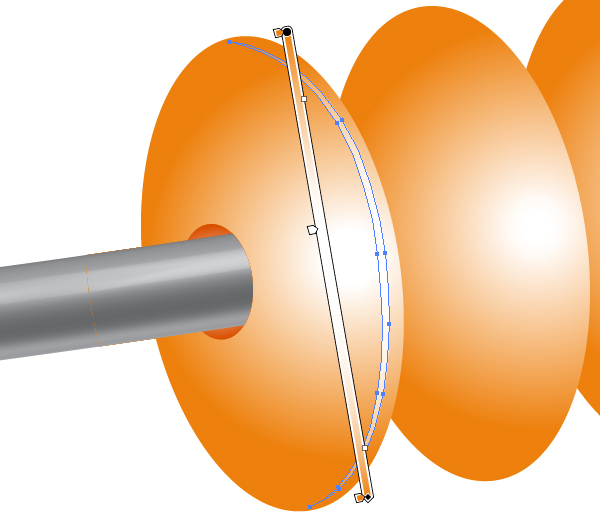
Select the top spindle, copy it and paste in front (Command + C then Command + F). Name it “Auxiliary spindle.” Move it somewhat up (pointed by an arrow on the diagram). Place it over the wooden frame itself in the Layers palette.
Clik here to view.
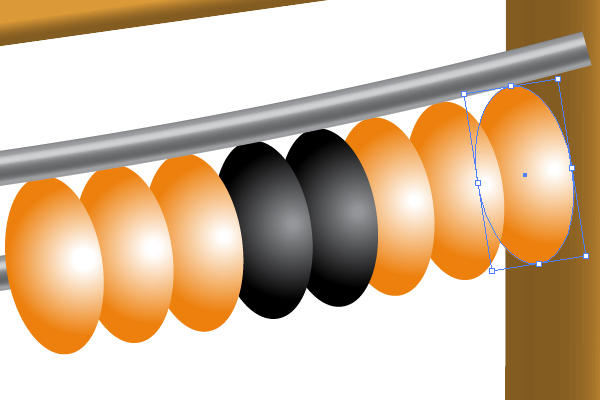
The “auxiliary spindle” shows the right view of bending, so you need to place the abacus beads touching with it. Select the right orange bead of the first left blend and move it somewhat up.
Clik here to view.
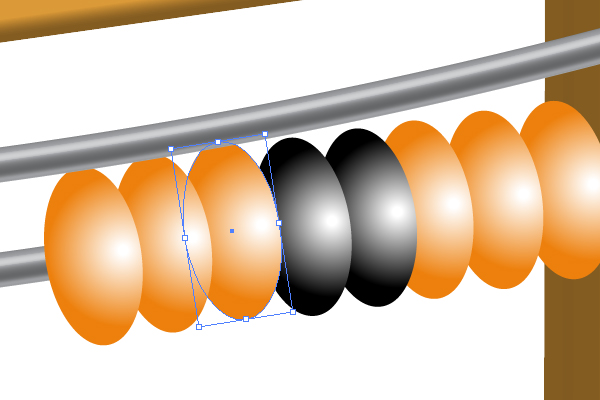
Select the left black bead and move it up too.
Clik here to view.
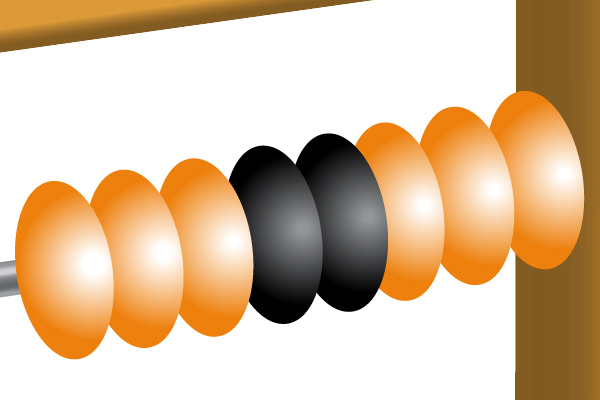
Repeat these actions for the remaining beads of the abacus.
Clik here to view.
After that delete the “Auxiliary spindle.”
Clik here to view.
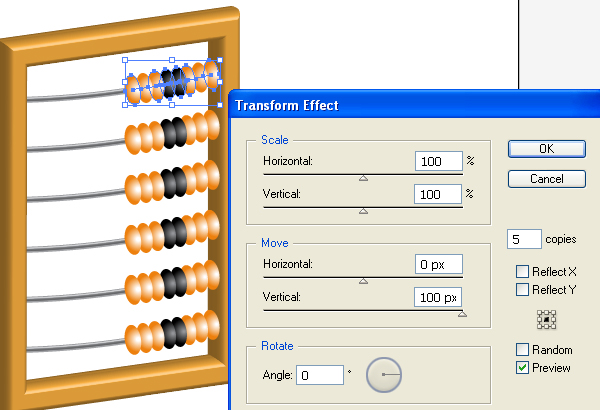
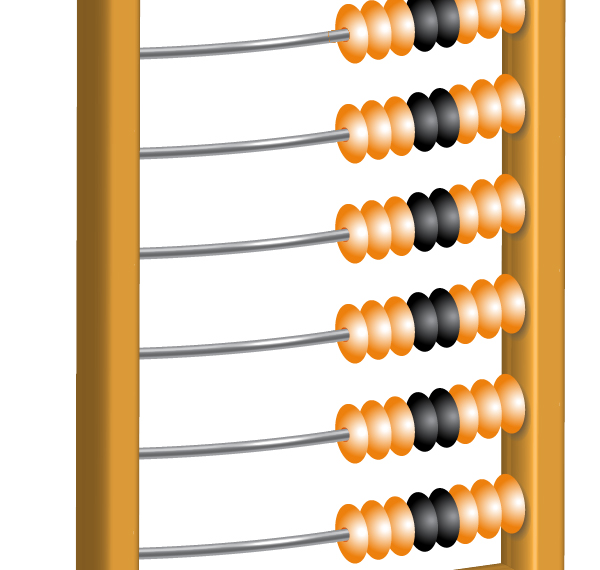
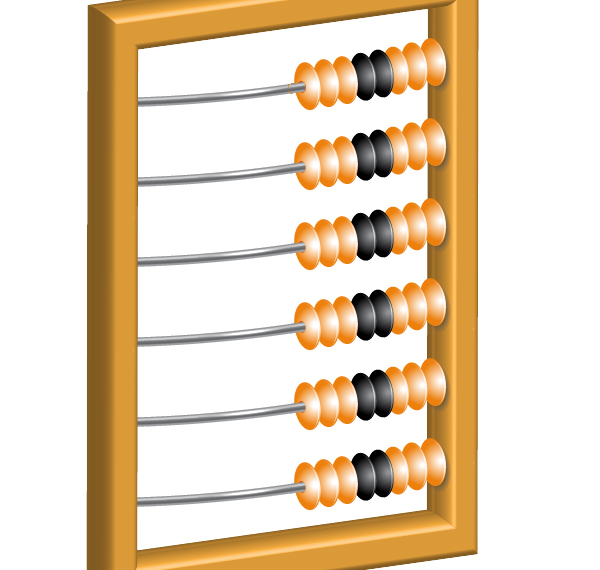
Step 10
Now select all the beads. And go to Effect > Distort & Transform > Transform. Set there for both: the number of copies and the interval of vertical movement, as you set them in Step 5. You need to achieve the following result.
Clik here to view.
Step 11
Select the leftmost bead, copy it and paste in front (Command + C then Command + F). Place it over the blend itself in the Layers palette.
Clik here to view.
Select the corresponding spindle, copy it and paste in front (Command + C then Command + F). Place it on the top in the Layers palette.
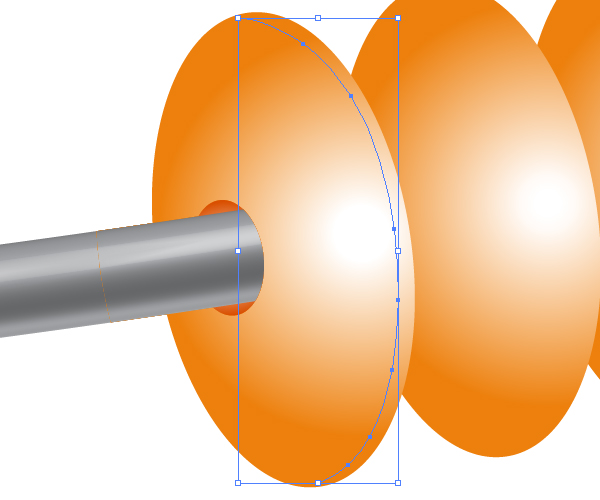
Clik here to view.
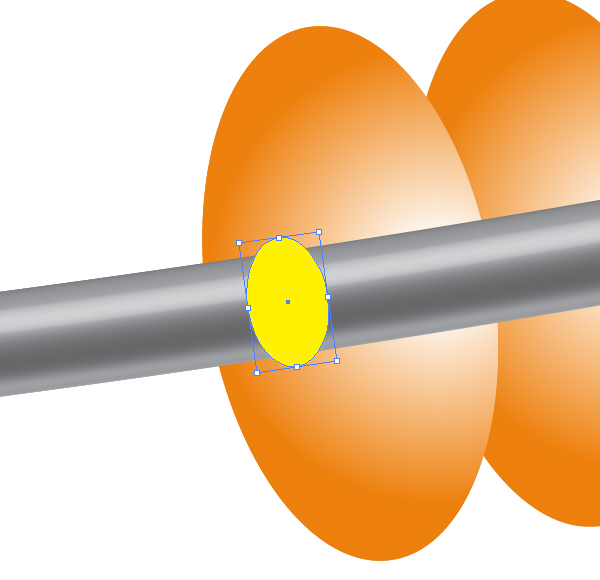
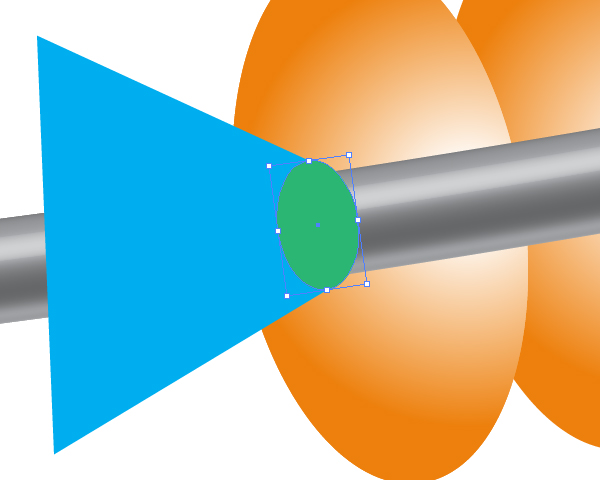
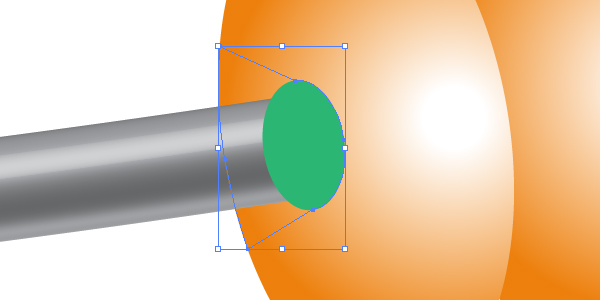
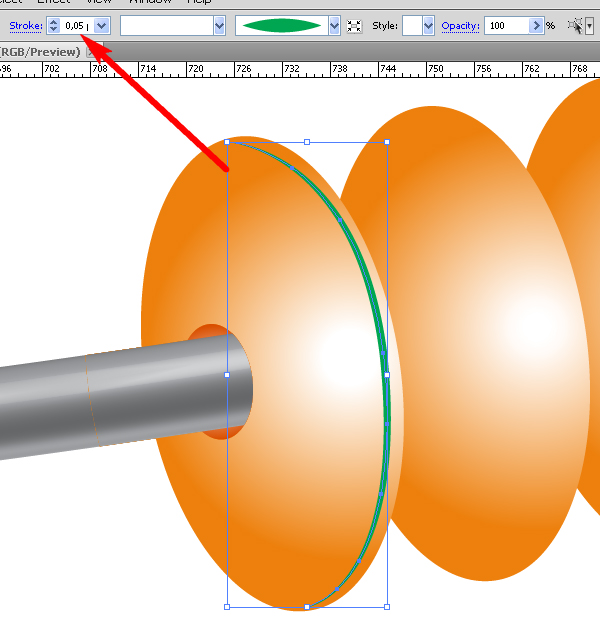
Grab the Ellipse Tool (L) and create an elliptical path filled with yellow. Rotate it by going to Object > Transform > Rotate to achieve the concentricity with the corresponding orange bead. In other words, both ellipses: yellow and orange must be inclined with the same mathematical degree value. Also, the big semi-axis of the yellow ellipse must be longer than the diameter of the spindle.
Clik here to view.
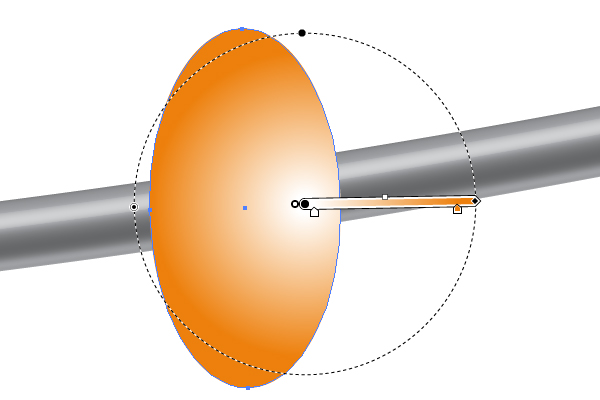
Step 12
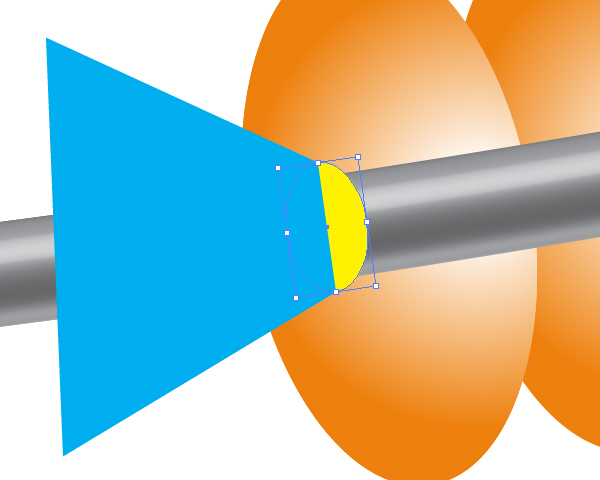
Take the Pen Tool (P) and draw a blue trapezium where the short base coincides with the big semi-axis of the yellow ellipse.
Clik here to view.
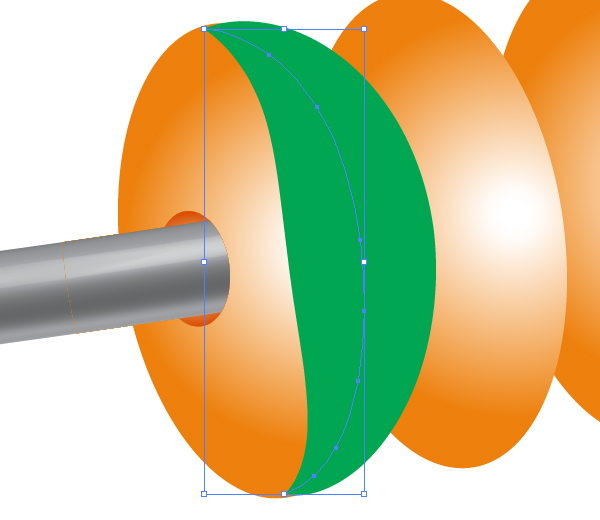
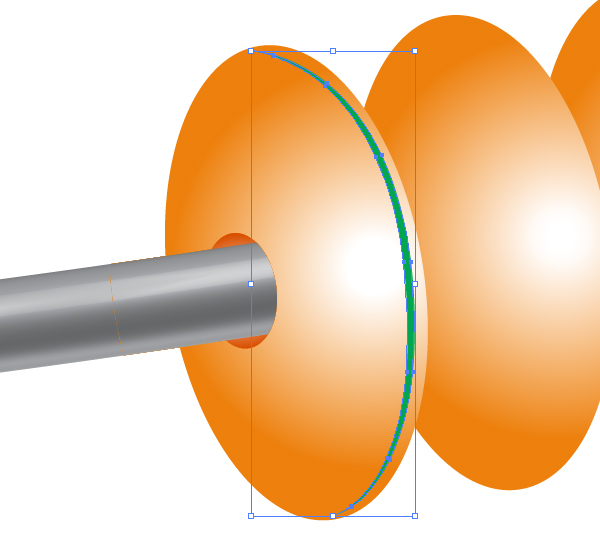
Select the yellow ellipse, copy it and paste in front (Command + C then Command + F). Place it on the top in the Layers palette. Fill it with green.
Clik here to view.
Step 13
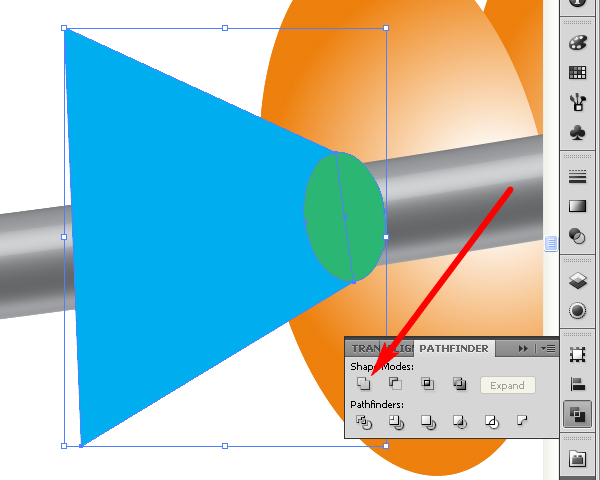
Select both the yellow ellipse and the blue trapezium, and go to the Pathfinder palette. Now click there the Unite button.
Clik here to view.
Step 14
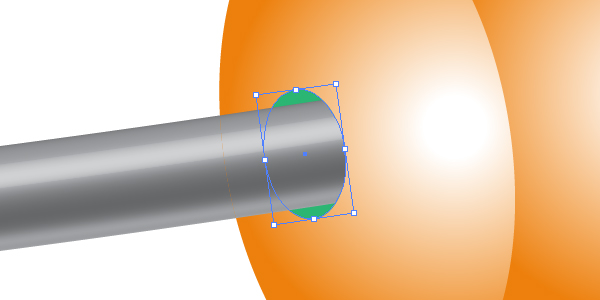
Now select both: the blue figure and the copy of the orange bead made in the eleventh step, and go to the Pathfinder palette. Click there the Intersect button.
Clik here to view.
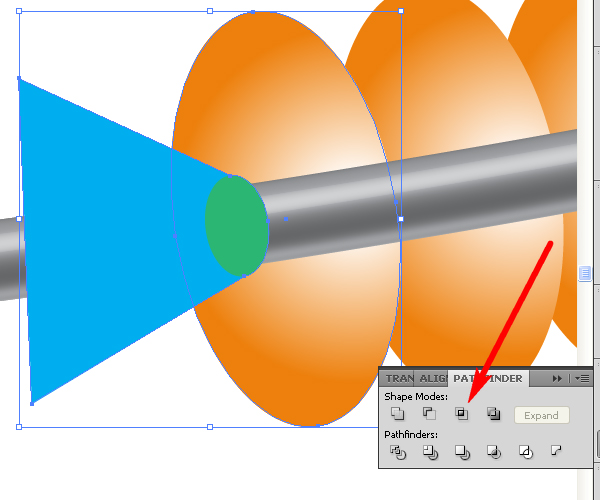
Clik here to view.
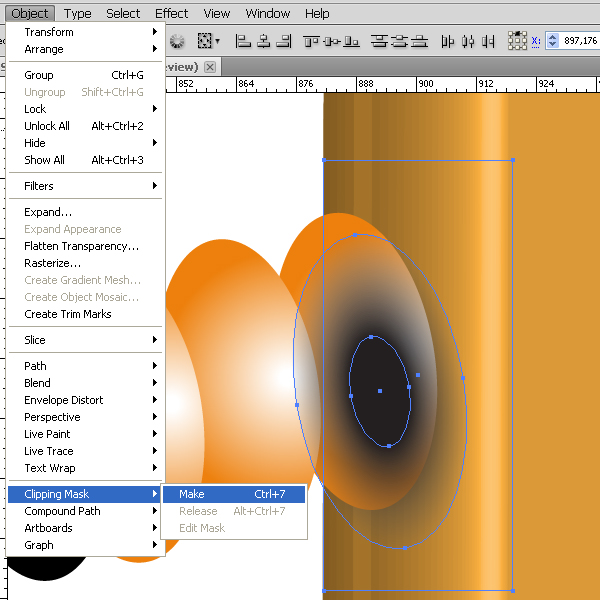
Step 15
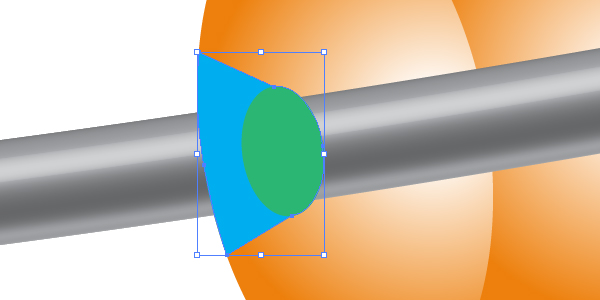
Select this blue figure and the copy of the spindle made in the eleventh step, and go to Object > Clipping Mask > Make (Command + 7).
Clik here to view.
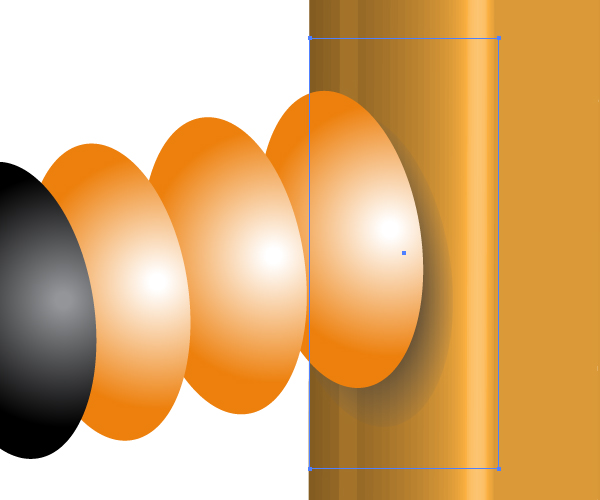
Send the green ellipse backward.
Clik here to view.
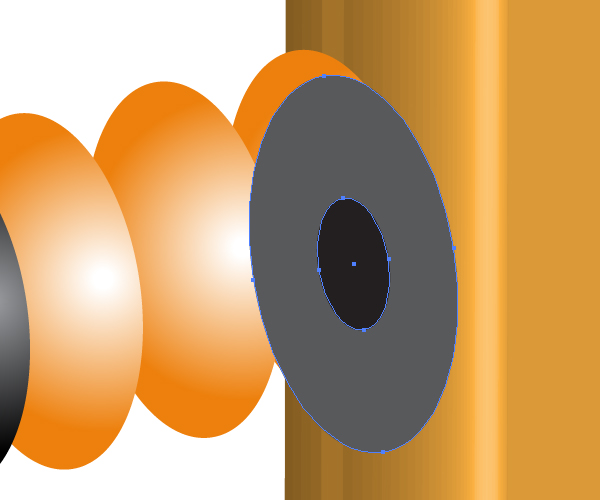
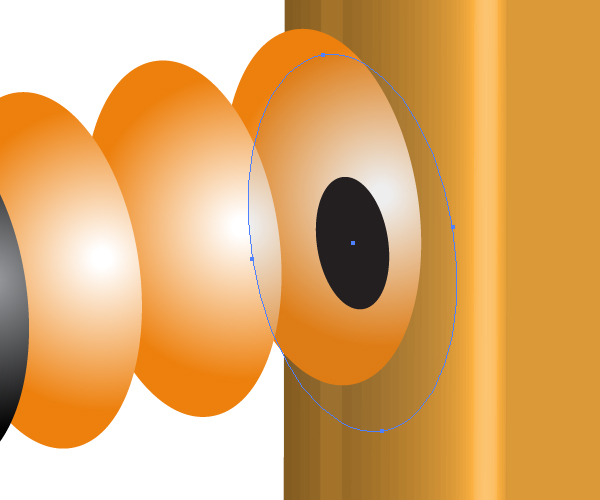
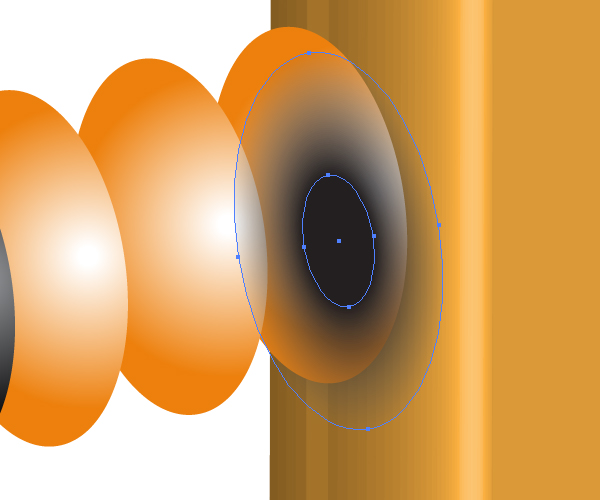
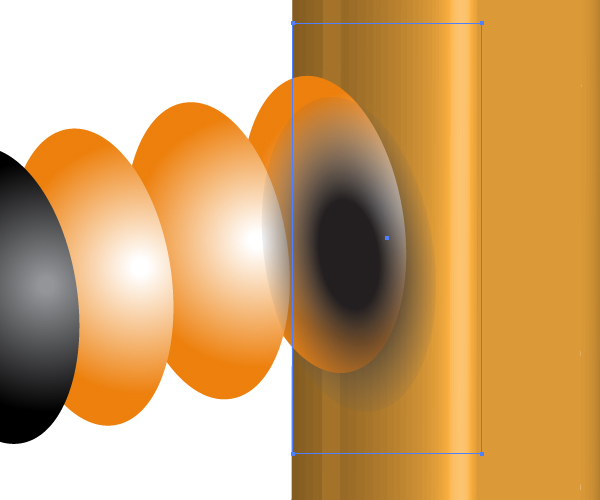
Step 16
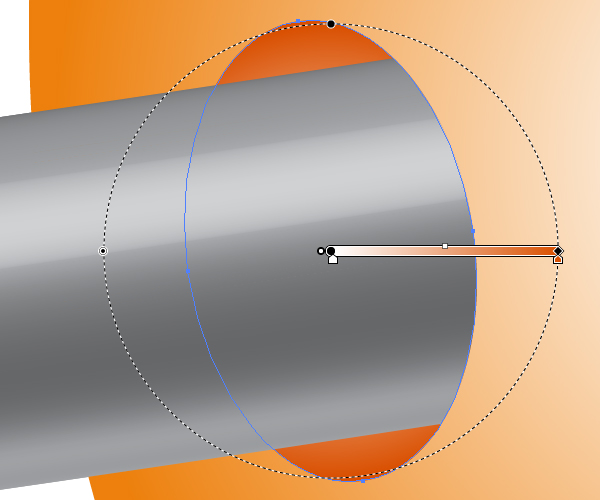
After that fill the green ellipse with the Radial gradient filling to represent a hole in a bead. Follow the diagram below.
Clik here to view.
Distribute the holes on every leftmost abacus bead.
Clik here to view.
Step 17
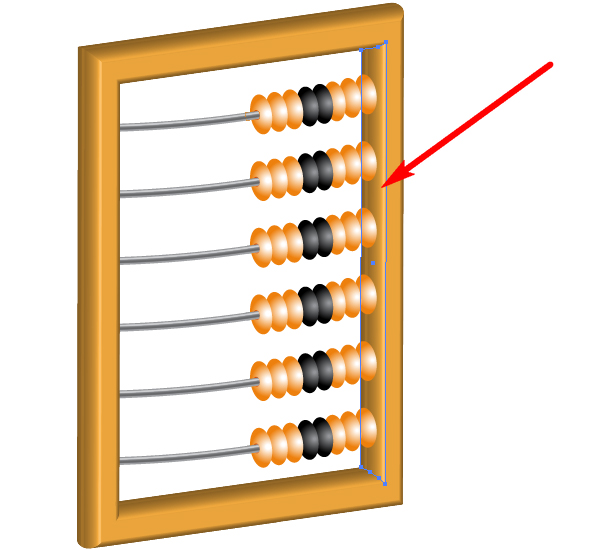
Let’s make the right lateral wooden surface of the frame brighter. Select the frame. Copy it and paste in front (Command + C then Command + F). Then go to the Appearance palette and click there “3D Extrude & Bevel” command to edit effect.
Change the lighting of the frame copy. I have moved the light source into the center of the shaded sphere. You may do the same or vary the light intensity. Pay attention to the changes of the surface pointed by an arrow only in the diagram below.
Clik here to view.
Step 18
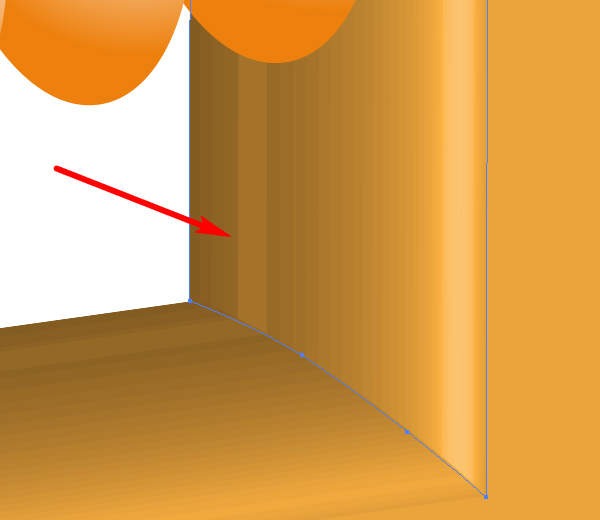
Take the Pen Tool (P) and create a path that bounds the right lateral wooden surface of the frame (see the images below for reference).
Clik here to view.
Clik here to view.
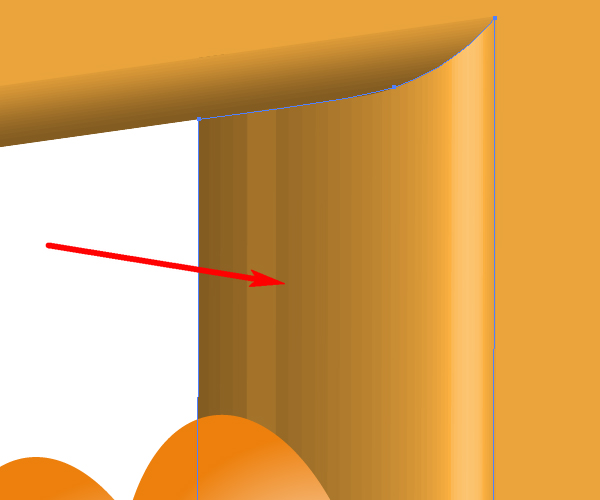
Clik here to view.
Then select this path and the copy of the 3D frame and apply Object > Clipping Mask > Make (Command + 7).
Clik here to view.

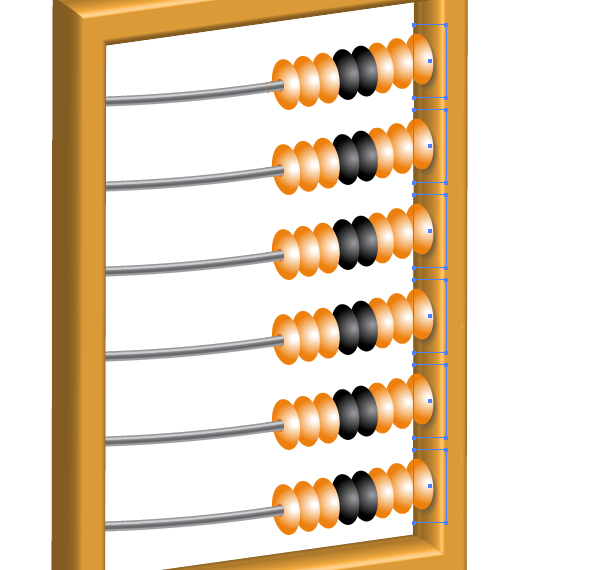
Step 19
Let’s draw shadows from beads. First, draw two ellipses on the right lateral wooden surface of the frame near the rightmost bead as you can see them in the diagram below.
Clik here to view.
Decrease the opacity of the big ellipse.
Clik here to view.
Go to Object > Blend > Blend options and set the Spacing to “Smooth color.” Then select both ellipses and go to Object > Blend > Make (Command + Alt + B).
Clik here to view.
Now you need to cut away the unwanted part of the shade, because as you know, shadows cannot fall on limpid air. Illustrate a rectangle by using the Rectangle Tool (M).
Clik here to view.
Select both: this rectangle and blend, then apply Object > Clipping Mask > Make (Command + 7).
Clik here to view.
Send the shade backward.
Clik here to view.
Repeat these actions for all the rightmost beads. You can do it by going to Effect > Distort & Transform > Transform.
Clik here to view.
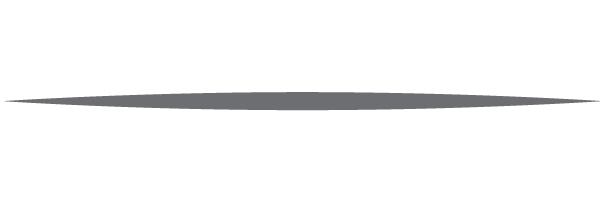
Step 20
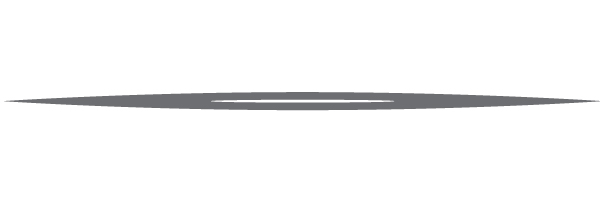
Draw an elongated ellipse filled with a dark gray color. Select the leftmost and the rightmost anchor points of it with the Direct Selection Tool (A) and convert them to corner anchor points.
Clik here to view.
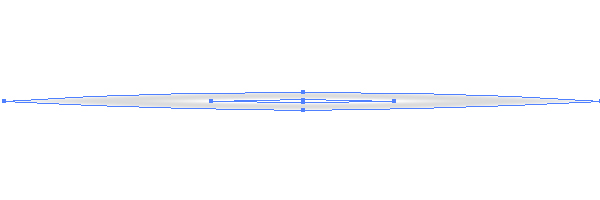
Copy it and paste in front (Command + C then Command + F). Scale the copy by going to Object > Transform > Scale, and fill it with white.
Clik here to view.
Decrease the opacity of the big ellipse to zero and create a blend from these two ellipses.
Clik here to view.
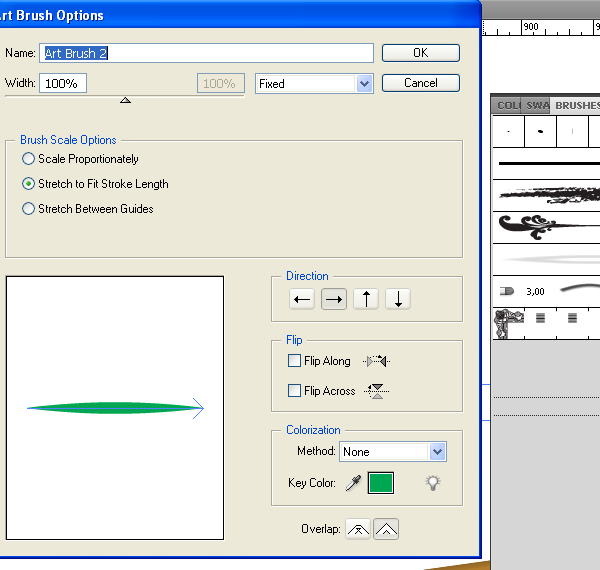
Then drag and drop it into the Brushes palette. Select the Art Brush option in the dialog box. Set the items for the brush as shown.
Clik here to view.

Step 21
Create another elongated ellipse filled with any color. Select the outermost anchor points and convert them to corner too.
Clik here to view.
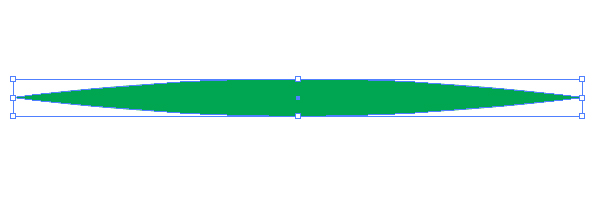
Create another Art brush from this ellipse.
Clik here to view.
Step 22
Take the Pen Tool (P), draw the following path and apply the first art brush, made from the blend, to it. It will represent a light spot on the spindle.
Clik here to view.
Do the same with the other spindles.
Clik here to view.
Step 23
Take the Pen Tool (P) and illustrate a path on the leftmost bead.
Clik here to view.
Apply the second Art brush to it.
Clik here to view.
Decrease the Stroke Weight.
Clik here to view.
Then go to Object > Expand Appearance. Then go to Object > Ungroup.
Clik here to view.
Fill it with an angled linear gradient with orange hues of color and with white middle color-stop.
Clik here to view.
Repeat these actions for the other orange beads.
Clik here to view.
Step 24
The light spot on a black bead is being illustrated the same way.
Clik here to view.
Repeat these actions for all the beads.
Clik here to view.
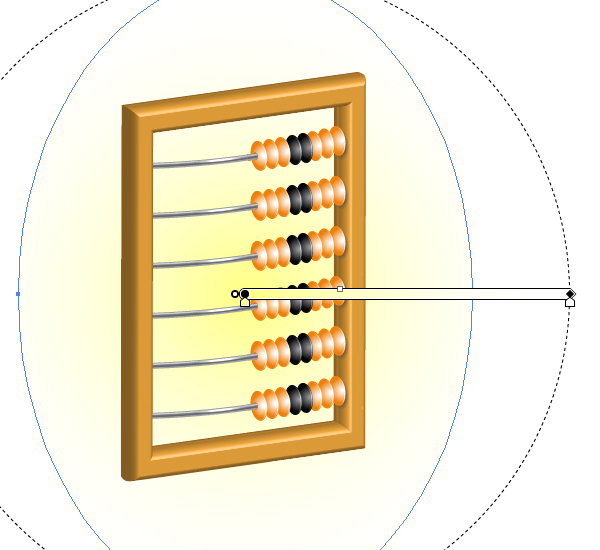
Step 25
Create an ellipse and fill it with a Radial gradient filling from yellow to white. Place it under the abacus.
Clik here to view.
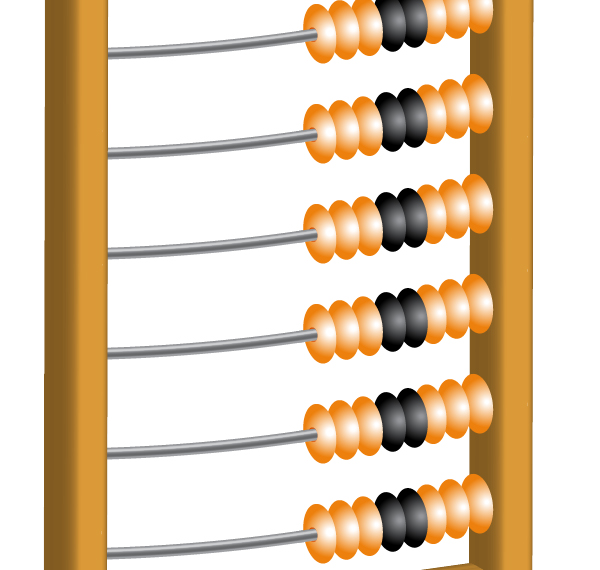
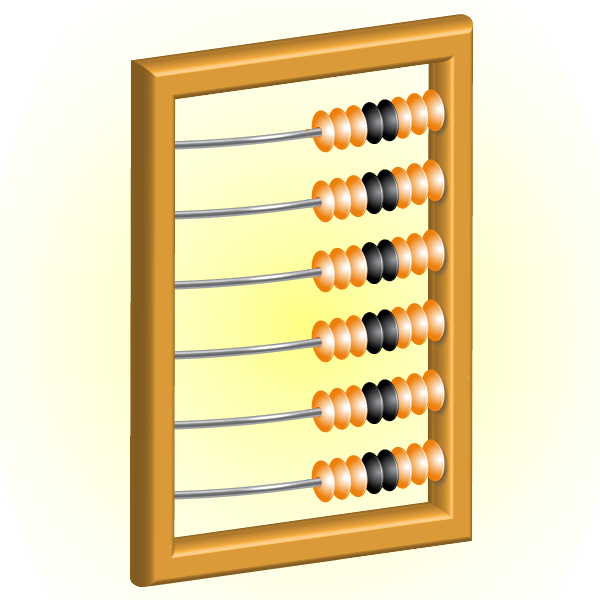
Conclusion
The first abacus came into the world more than 43 centuries ago in ancient Sumer. Much water has flowed under the bridges since then. But it was the first step of humanity toward the era of cosmic technologies and the computer industry.
Clik here to view.
Clik here to view.
Clik here to view.
Clik here to view.
Clik here to view.
Clik here to view.
Clik here to view.