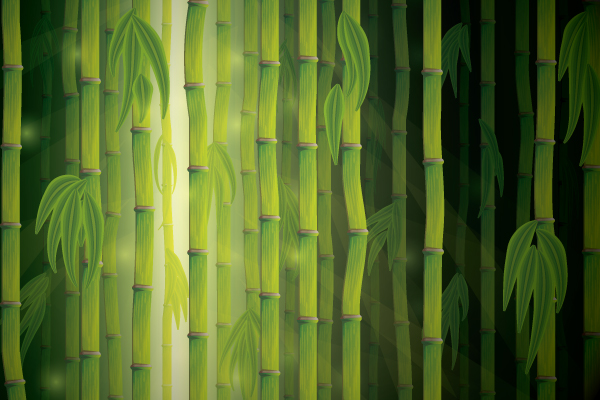
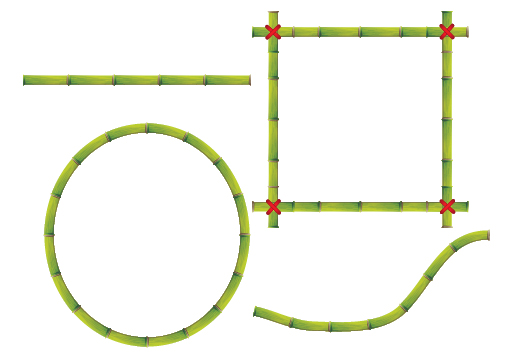
In today’s tutorial you’ll learn how to create a bamboo vector illustration with the help of custom art and pattern brushes, blends and profiles on strokes in Adobe Illustrator CS5. Vector bamboo is an excellent element to use in your work to give a classic Japanese fine art print feel, for use as bamboo forest art background in a larger illustration, and to make your vector pictures stand out with stylish bamboo art. So let’s jump straight into it!
Introduction
Of recent I’ve been getting engrossed by Oriental influenced art and I thought I’d try my hand at creating something quick. This may or may not have anything to do with a recent MMORPG announcing a new expansion!
In today’s tutorial I’m going to show you how to create a bamboo vector illustration with the help of custom art and pattern brushes, blends and profiles with strokes in Adobe Illustrator CS5.
Step 1
In the Swatch panel, go into the drill down menu and select Open Swatch Library > Nature > Foliage. Click on the folder for “Foliage 3″ and this will add four colors to your Swatch. We’ll call them green, light green, yellow and olive when referencing them in this tutorial.
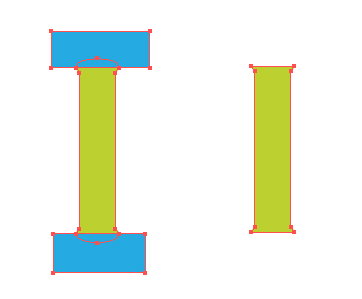
With a light green fill, use the Rectangle Tool (M) to draw a slim rectangle and then use the Ellipse Tool (L) to draw a flattened circle on one of the ends of the rectangle. Duplicate the circle and place it at the bottom of the rectangle. Use Smart Guides (Command + U) to ensure the centers of the circles are aligned to the top and bottom of the rectangle.

Use Pathfinder > Unite to combine all the shapes. Then remove half of the circles using the Pathfinder > Minus Front option and the Rectangle Tool (M). You should be left with something similar to the letter “I”.
Step 2
With Art and Pattern Brushes, you aren’t able to include gradients, so to get around this you’ll need to use Blends.
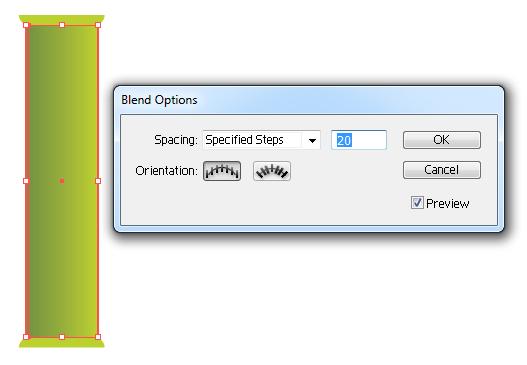
To add shading to our basic bamboo shape, I’m going to create two Rectangles (M). One will cover the whole of the center section of the shape set to 0% Opacity, the other will be a slim version at 100% Opacity.
Now make a Blend (Command + Alt + B) from the shapes. Go to Object > Blend > Blend Options and select Specified Steps and the value “20″. Click on OK once done, then set the Blending Mode to Multiply and the Opacity to 70%.
I’m going to create another two blends. The first is made using Rectangles (M) coming from the top of the basic shape set to Blending Mode Color Burn, Opacity 50%. The second I’ve draw a D shape with the Pen Tool (P) and duplicated it for the section shape. This Blend will be set to Blending Mode Multiply and Opacity 25%.
Step 3
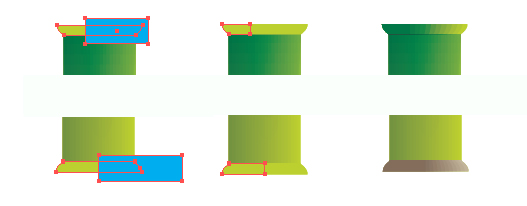
Duplicate the basic bamboo shape and then draw a Rectangle (M) over it. Use Pathfinder > Minus Front to leave you with the two caps of the shape. I’ll be applying a blend to the top and bottom. Duplicate the shape first of all and use a Rectangle (M) to Pathfinder > Minus Front from one of the shapes so you can create a Blend.
For the top, we’ll use an olive set to Blending Mode Multiply, with Opacity at 100%. Now duplicate the Blend and set it to Blending Mode Color Burn with Opacity 50%.
With the bottom cap, I’ll be using another duplicate and filling it with a light brown (C=25, M=25, Y=40, K=0). The Blend however will use a darker brown (C=40, M=45, Y=50, K=0) and it’s set to Blending Mode Multiply with Opacity 100%.
Step 4
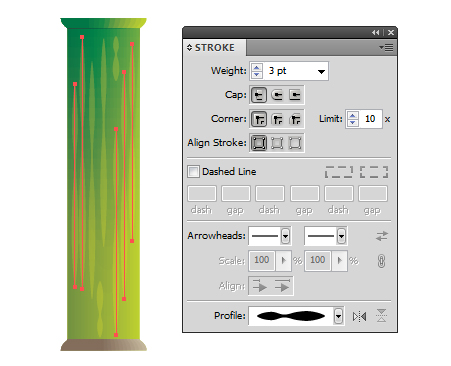
I’m going to add a subtle texture to the bamboo by using the Line Segment Tool (\) and with a Profile attached to it via the strokes panel. These lines have an olive stroke color set to Blending Mode Screen and Opacity 40%. They are 3pt’s in width and use the “Width Profile 2″ option from the Profile drop down menu.
Step 5
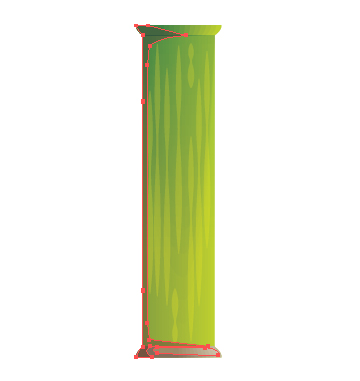
I’m going to use a golden brown (C=25, M=40, Y=65, K=0) to add a highlight at the bottom of the shape, which will be set to Blending Mode Color Dodge with Opacity 25%. Now use the same color to add a dark shadow along the side of the shape, set to Blending Mode Multiply with Opacity 100%.
Step 6
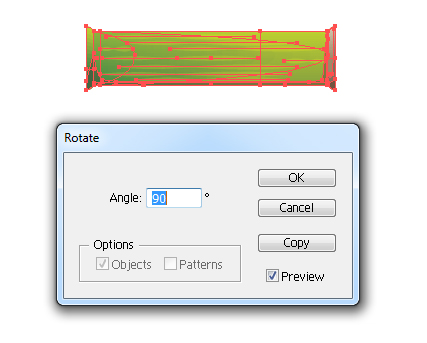
Group all the elements together (Command + G) and then go to Object > Transform > Rotate and enter in the value “90″ degrees.
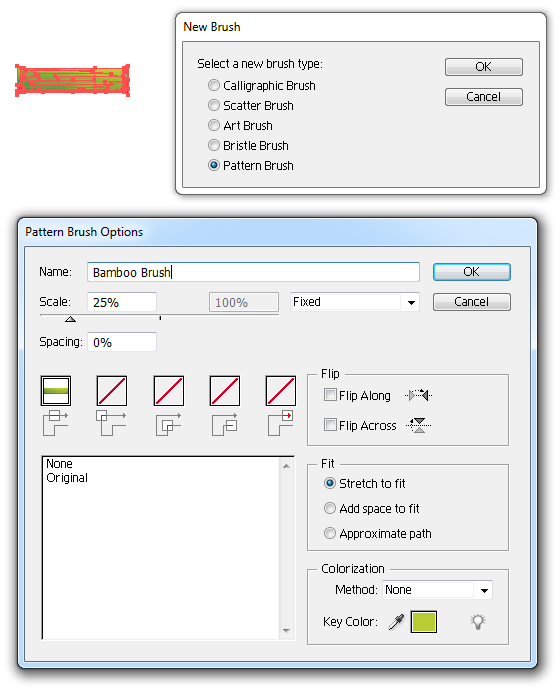
Now in the Brush panel, click on New Brush and select Pattern Brush. This will make up the stroke of our bamboo. I’ve changed the Scale of the stroke to 25%. All other options are left as default.
Step 7
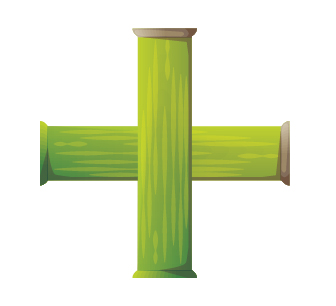
Duplicate the Group which contains the stroke and then Rotate this 90 degrees so you now have a bamboo cross.
Step 8
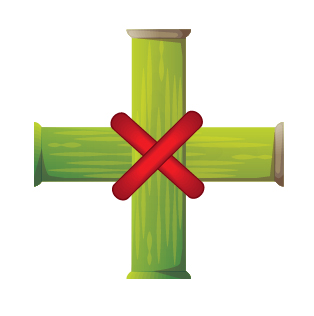
I’m going to create a contrasting tie over the bamboo corners and I’ll be doing this by creating a simple Blend. Using the Rounded Rectangle Tool create two shapes. The smaller shape will be red (C=0, M=100, Y=100, K=0) and the larger will be a dark red (C=15, M=100, Y=90, K=30) with a 1pt stroke with a darker red (C=15, M=100, Y=90, K=50). The Blend (Command + Alt + B) will have the same 20 Specified Steps spacing.

Then duplicate it and rotate using the Free Transform Tool (E) to create a tie over the bamboo cross.
Step 9
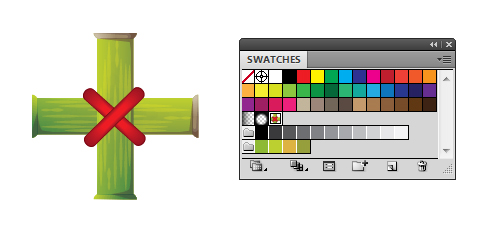
Group all of the elements for the cross (Command + G) and then drag and drop it into the Swatch panel. If you Double-click on this, you can rename it “Bamboo Corner” although it’s not really necessary.
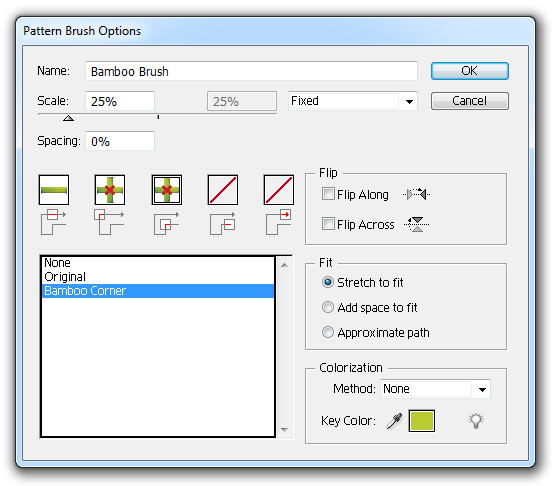
With nothing selected, Double-click on your Bamboo Brush in the Brush palette to get the Pattern Brush Options dialog box up. For the corners, select the Bamboo Corner from the box below and then click on OK once done.
Pattern & Brush Preview
You’ll now have the basics of your bamboo brush. Although I won’t be taking advantage of shapes with corners, it’s nice to have should you use it in any future project.
In addition you’ll also have a bamboo cross seamless pattern in your swatch. I’ve drawn this square below at 100%, and as you can see it’s much bigger than required.
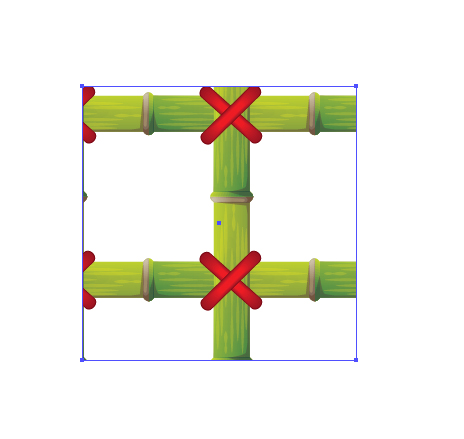
This is easy to get around by selecting your shape and going to Object > Transform > Scale. I’ve decreased the scale of the pattern by 25% and then in the Options box ticked “Patterns”. Leave all the other options unticked. This will rescale your pattern to the size you wish.

Let’s get back to the tutorial…
Step 10
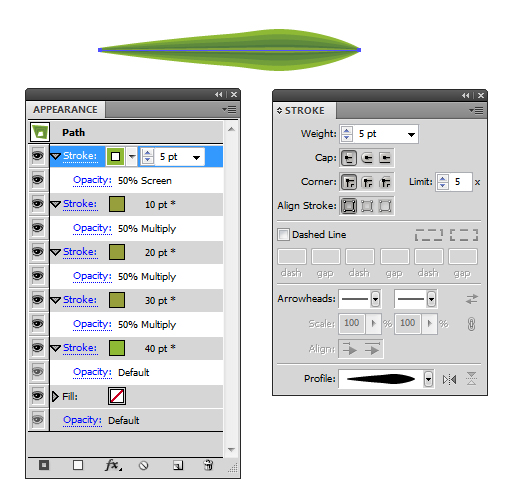
Bamboo leaves are surprisingly less complex and can be created with an Art Brush and some fancy work with the Appearance panel. While creating this shape, I’ve had the bamboo cross visible so I can compare the size of my leaf to the stroke. This will help when it comes to scaling.
Using the green and olive colors for stroke colors and applying “Width Profile 5″ from the Profile drop down for each of the strokes, you can create the following leaf.
Step 11
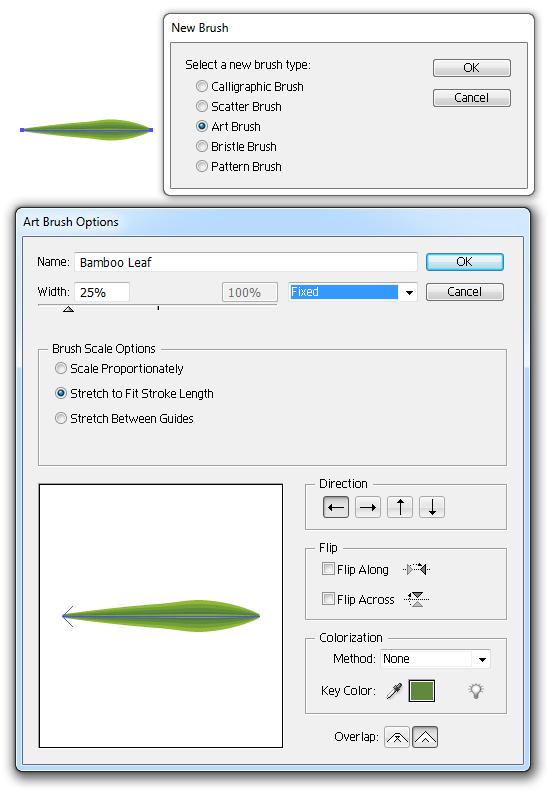
Then once your leaf is created, you can click New Brush in the Brush panel and create an “Art Brush”. I’ve changed to the Direction of the brush to go from right to left as it’s more natural for me to draw like that.
One thing to note is changing the Width of the brush to 25%. As you’ve created the brush the same size as the bamboo stalk, you’ll need to reduce the size of its width to match the size you reduced the bamboo to, which was also 25%. Click on OK once done.
Step 12
Now to start putting together our bamboo scene. I’m using a canvas which is 600 by 400 pixels.
Using the Line Segment Tool (\) draw some 1pt vertical lines over the canvas with the Bamboo brush.
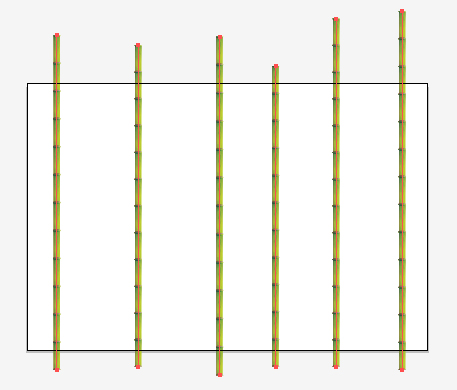
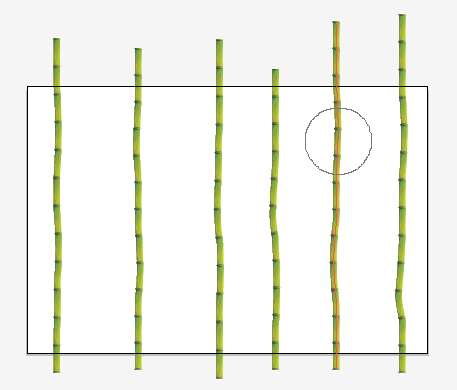
Use the Warp Tool (Shift + R) to add slight indentations in the lines, as bamboo is never completely straight. Group the 1pt lines once done (Command + G).
Step 13
Repeat the same process for some 1.5pt lines…
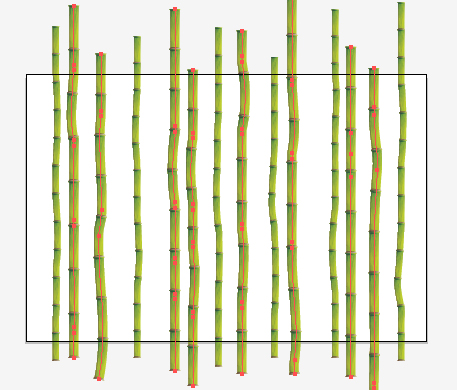
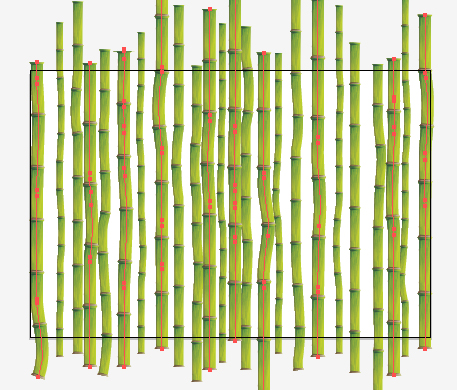
…and again for some 2pt lines. This is to create an impression of perspective.
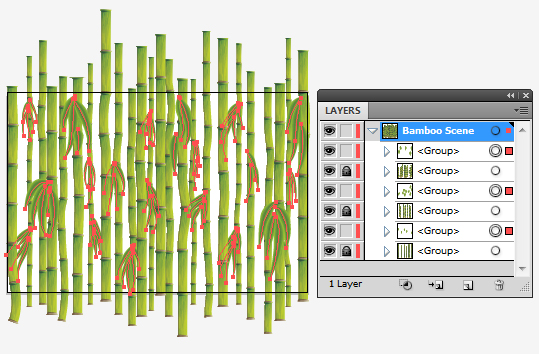
Step 14
Create some leaves on the bamboo and Group them (Command + G). Now place them in order of their stroke Weight. So the 2pt leaves will be grouped, overlapping the 2pt bamboo strokes, and so on.
Step 15
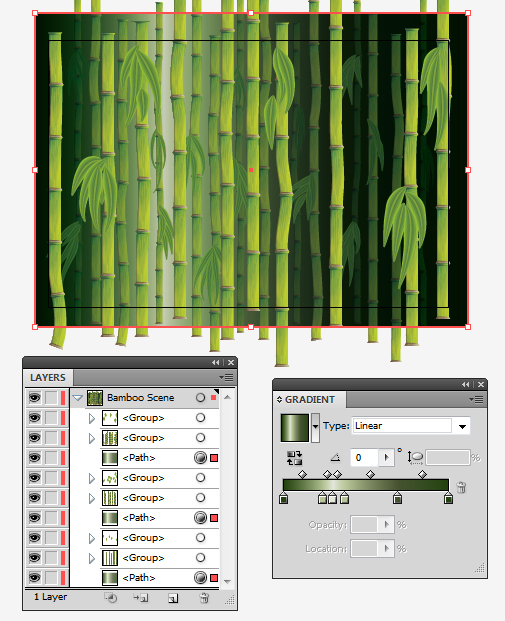
Using colors from the Nature > Foliage > Foliage 2 & Foliage 10 swatches, I’ve created a linear gradient. This is filled in Rectangles (M) that are placed under each group of bamboo strokes. These gradients are set to Blending Mode Multiply and Opacity 80%.
Step 16
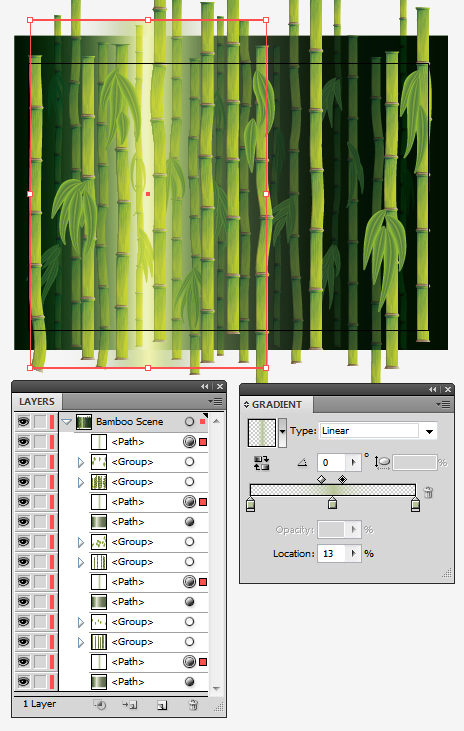
Using the lightest green, create a transparent linear gradient to be overlapped over the lightest portion of the gradient. I’ve placed these over the darker gradients, as well as one at the top. Set these to Blending Mode Hard Light and Opacity 100%. This gives the impression of light coming through the bamboo forest.
Step 17
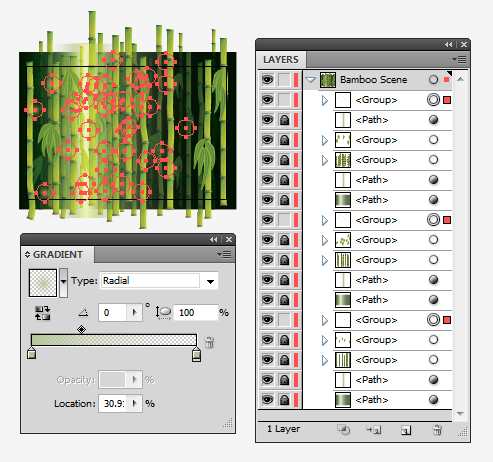
I’ve created a transparent radial gradient using the same lightest green. This is the fill for some Ellipses (L) which I’ll layered over the areas where the light is coming from. Put these in groups and layer them between the bamboo layers. This will give a magical, fantasy style to the scene. Set the circles to Blending Mode Hard Light with Opacity 100%.
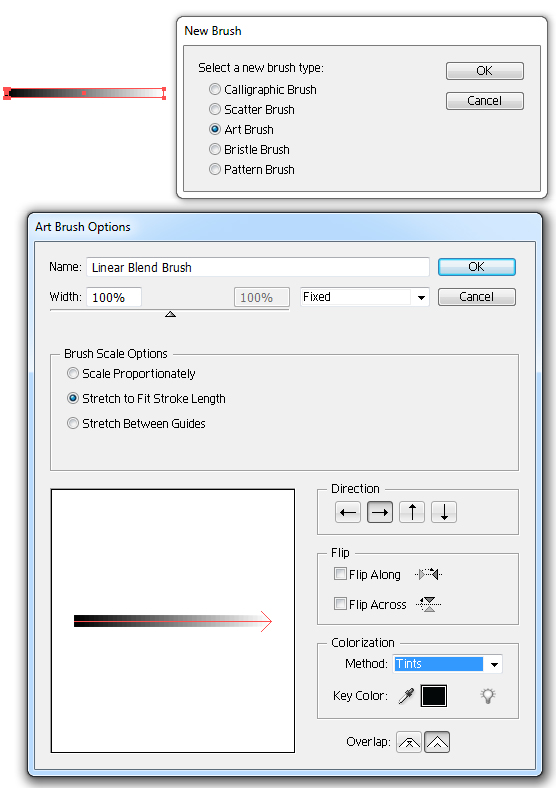
Step 18
I’m going to create an art brush just from a blend. This will work similar to a transparent linear gradient when applied to a line. The Blend (Command + Alt + B) itself is made from a long, slim Rectangle (M). It is set to 0% Opacity, then a much smaller one set to 0% Opacity, both with a black fill and set to Specified Steps, 40.
When you create a new Art Brush with it, remember to change the Colorization to “Tints”. Then you can use it with any color to create a transparent linear gradient on a line.
Step 19
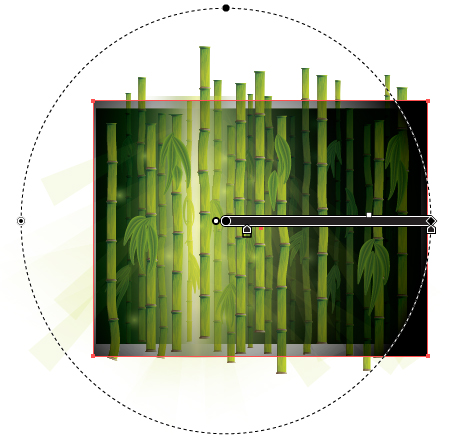
What I’m wanting to achieve with this blend brush is the impression of rays of sunlight peering through the bamboo. So I’ve used the Line Segment Brush (\) to draw several lines and then applied the brush with a 40pt stroke Weight, with the light green stroke color set to Blending Mode Screen with Opacity 10%. The key however to using this is to set the Profile to “Width Profile 4″ with the point at the source of the light and then expanding out into the foreground.

Step 20
Finally, to balance out the shadow in the scene, I’ve drawn a Rectangle (M) over the canvas and filled it with a black inverted transparent radial gradient set to Blending Mode Multiply. I’ve used the Gradient Tool (G) to position the center of the gradient near to where the light is coming from.
Conclusion
I hope you’ve enjoyed today’s tutorial. Keep an eye out for a future Premium tutorial on creating a character that will integrate well into a bamboo scene and might have been inspired by a certain MMORPG… any guesses?