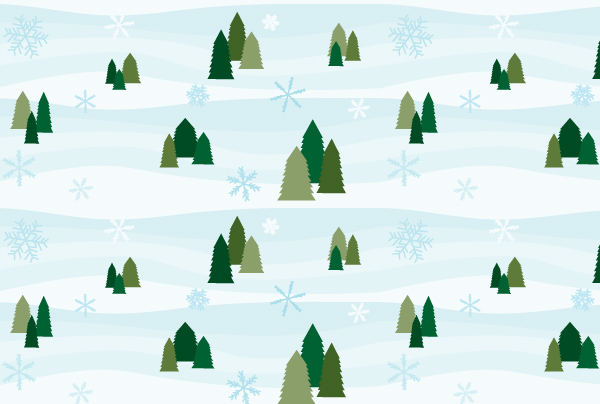
If you’re in the north of the northern hemisphere as I am, it’s coming towards winter. With the holidays coming up, we’re hoping for a white holiday! In today’s tutorial, I’m going to show you how to create a very basic snowy seamless pattern. It is aimed at those who are new to Adobe Illustrator and goes over some great tools that you can benefit from in future projects.
Step 1
You’ll need to enable Smart Guides for this tutorial, as it will make things a lot easier. You can do this by going to View > Smart Guides (Command + U).
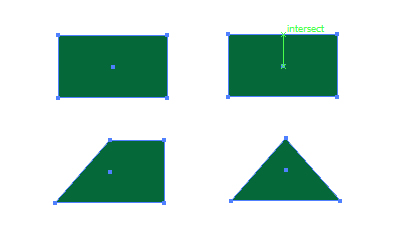
Use the Rectangle Tool (M) to draw a long rectangle. With the Pen Tool (P), grace the mouse around the center of the top line of the rectangle until it highlights the center point and says “intersect”. This is where you can add a new point exactly in the center of this line.
Then use the Pen Tool (P) to click on the top corners to remove the points so you’re left with a triangle.
Step 2
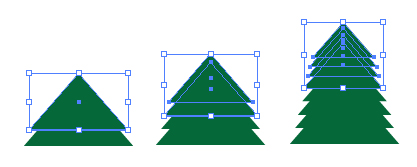
I’m going to use the triangle to create a pine tree shape. So select the triangle and Copy (Command + C) and Paste in Front (Command + F). Using the Free Transform Tool (E), move the shape on top of the other and while holding Shift + Alt, grab the corner of the boundary box and reduce the size.
Duplicate both shapes and do the same and then duplicate all four shapes and repeat until you have a pine tree shape, as shown below.
Step 3
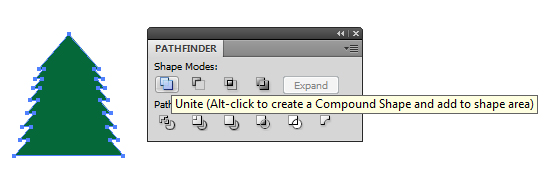
Select All (Command + A) of your shapes and using the Align panel (go to Windows > Align if not visible) and select Horizontal Align Center.
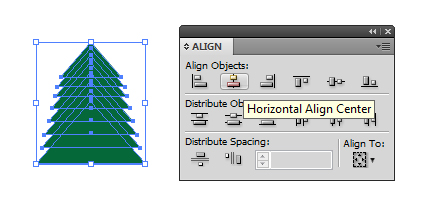
To combine the shapes to make them one, use the Pathfinder panel (go to Windows > Pathfinder if not visible) and select Unite.
Step 4
Adobe Illustrator comes with a variety of options in terms of color if you’re not so great at picking colors out of thin air. One of the options are it’s many Swatch Libraries. You can access these from going into the drill down menu in the top right of the Swatch panel, then Open Swatch Library > Nature > Foliage.
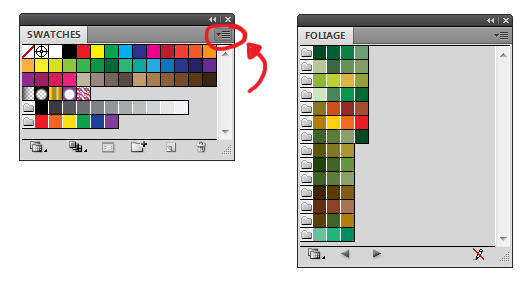
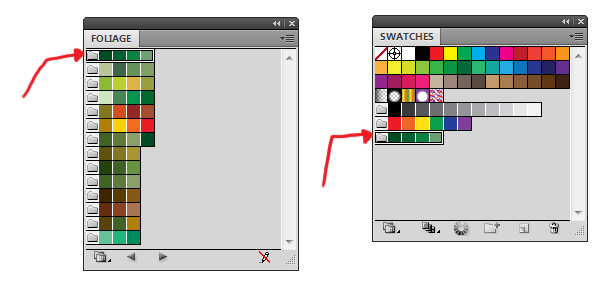
By clicking on the folder at the beginning of the groups of color, it will add the collection to your Swatch panel. I’ve selected “Foliage 1″ and “Foliage 7″. You can then close the Library with the X in the corner to give you more space.
Step 5
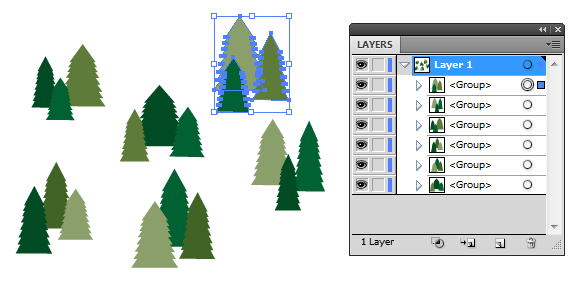
I’m going to create groups of three trees with varied colors. So Copy (Command + C) and Paste (Command + V) the shape and use the Free Transform Tool (E) to alter it’s width and height. Alter the colors of the trees to whatever you desire and then you’ve got one set of trees, Group them (Command + G).
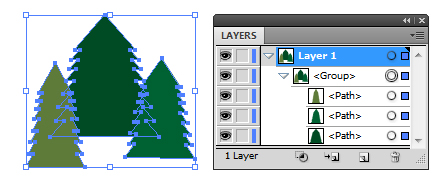
As you can see, I’ve created a variety of Groups here, but only used about 4-5 different shades of green.
Step 6
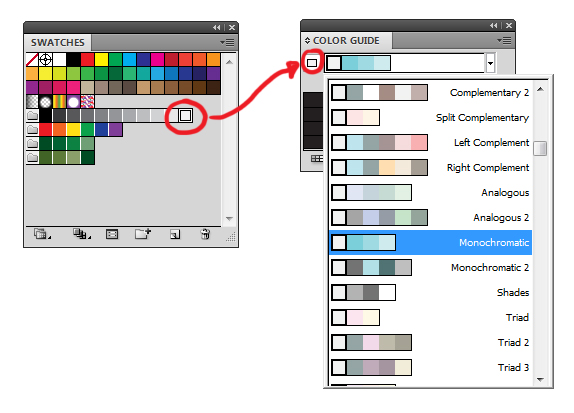
Another way of accessing further color options is using the Color Guide panel. To use this, first select a color from your Swatch panel. I’m going to be using a light gray as I’m wanting to create the snow in this scene. This will be your starting color.
Use the drop-down menu in Color Guides to then select the set of colors you’re aiming for. In this case, I’ve opted for Monochromatic, as I’d like to maintain similar shades of gray/blue.
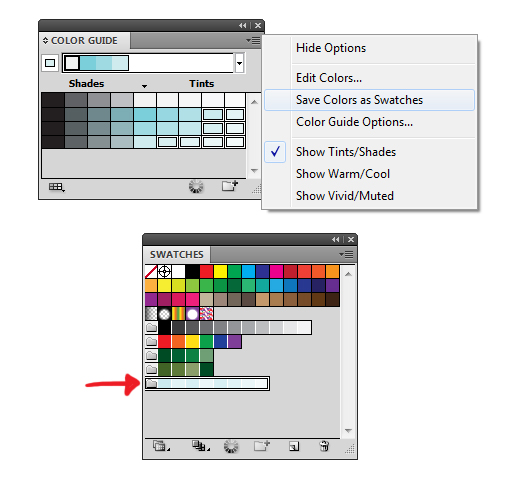
Once selected, you can see a variety of shades and tints. You can alter this view and range by going into the drill down menu and ticking “Show Warm/Cool” or even “Show Vivid/Muted”. What this will do is give you a different selection of colors similar to the “Monochromatic” color guide you’ve selected. Yet, in this instance, I’m going to keep it on the default of “Show Tints/Shades”.
Hold down Command and select the colors you feel will fit into your scene and then go into the drill down menu and select Save Colors as Swatches. This will add your selected colors into a folder in your Swatch panel.
Step 7
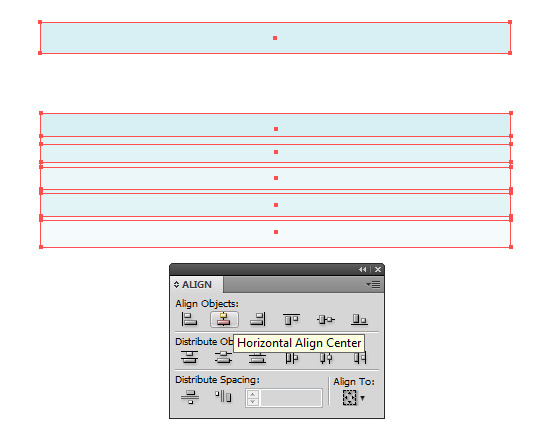
Using the Rectangle Tool (M) again, I’m going to draw a much longer, slim rectangle. Duplicate it and change the color, duplicate again until you’ve got five rectangles with varying colors.
Select all of your rectangles and use the Align > Horizontal Align Center option to centralize them all and then Group them (Command + G).
Step 8
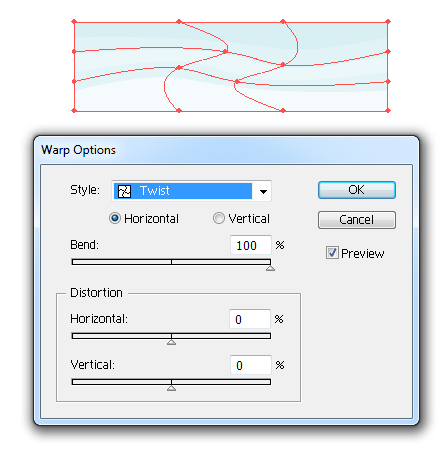
I’m wanting to give the impression of rolling hills and as you can see, our rectangles are not so rolling! So to do this, I’m going to use Warp Options to assist me. Select the Group of rectangles and go to Object > Envelope Distort > Make with Warp (Alt + Shift + Command + W). From the drop down Style menu, select Twist and I’ve used the options shown below.
Step 9
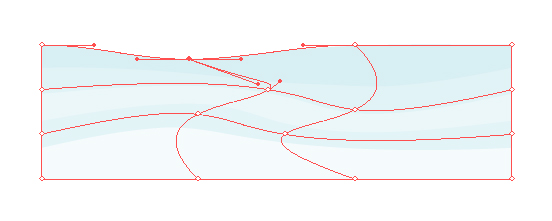
As I’ve got hard edges on the top and bottom, which aren’t looking so “rolling”, I’m going to use the Direct Selection Tool (V) to select one of the points and drag it down a little to create a slight curve in the top of the warped shape.
Step 10
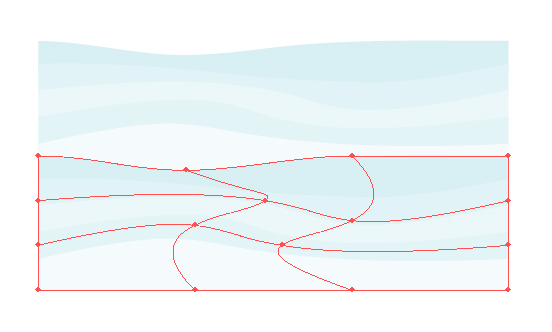
Duplicate your Envelope shape and move it towards the bottom. Remember to use Align > Horizontal Align Center to ensure it’s all flush at the sides.
Step 11
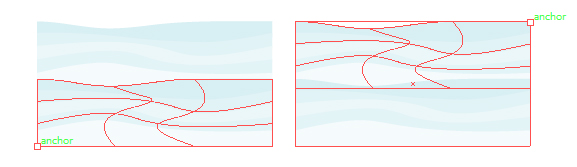
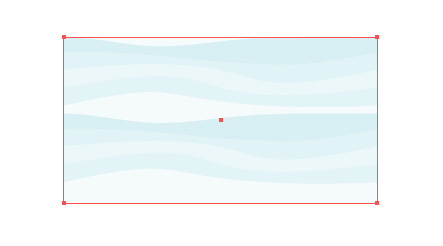
There will be a gap between the two envelope shapes, so I’m going to add a Rectangle (M) in the background with the fill color of the rolling hill in the bottom of the shape. If you’ve forgotten which color it is, use the Eyedropper Tool (I) to get the color.
As you’ve got Smart Guides enabled (Command + U), you can hover over the bottom left corner until it says anchor, and has a hollow square on your cursor, then draw your rectangle accurately over the area, finishing in the top right corner.
Put this shape behind your envelope shapes and then Group them (Command + G).
Step 12
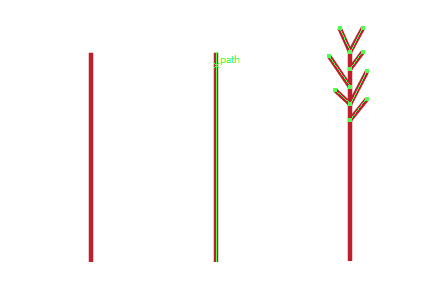
Now to create a simple snowflake. Using the Line Segment Tool (\), hold down Alt + Shift and drag down to create a perfectly vertical line.
Hover over the line until it’s highlighted and your cursor says “path” and add some additional lines at the top of the line. As you’ve used Smart Guides and started the lines on the “path”, all lines should be flush on the main line.
Step 13
Select the decorative lines from the top of your snowflake and duplicate them. Then we’re going to reflect them and put them at the bottom of the line. Go to Object > Transform > Reflect and select it on the Horizontal Axis and click on OK.
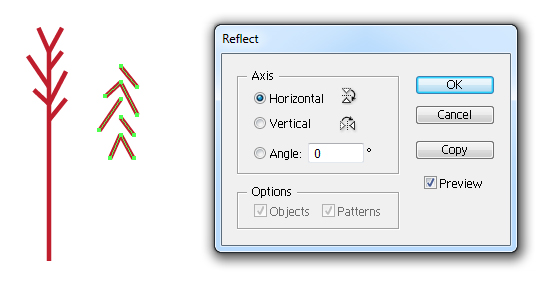
While your decorative element is selected, move them over to the bottom of your snowflake shape. If you grab the lines at the “V” shape, which is aligned at the top of the snowflake, you can use Smart Guides to find the end point of the stem.
Once done, Group up all the lines (Command + G).

Step 14
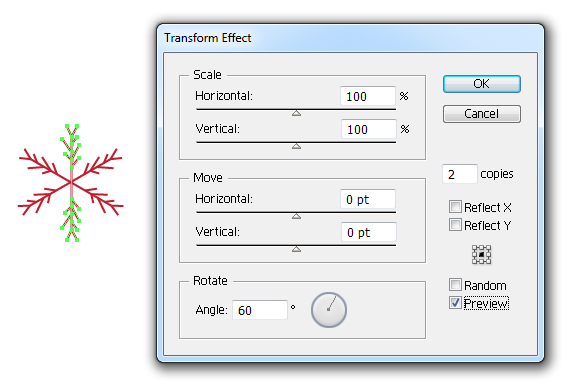
Now to make the actual snowflake. In order to do this, I’m going to need to rotate and duplicate the lines we have. However we can do this without drawing any additional lines by using the Transform Effect.
Select your snowflake group and go to Effects > Distort & Transform > Transform. I’ll explain the figures I’ve placed and why.
There are 360 degrees in a circle and a snowflake has 6 prongs to them. Therefore the Rotate Angle will be 360/6 = 60 degrees.
As stated, a snowflake as 6 prongs; our initial shape has 2 prongs already. Therefore the copies value will be 6/2 = 3, then minus 1 (which is our initial shape) which leaves us with 2. We’ll only need it duplicated twice.
Step 15
Place your tree groups around the rolling hills and duplicate the snowflake design across the area. By using the Free Transform Tool (E) to alter the length and even the width, you can create a variety of different styled snowflakes. Remember to rotate some of them with the Free Transform Tool (E) and alter the colors as shown below.
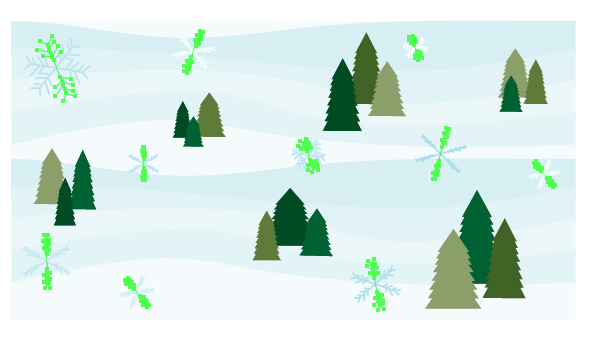
Step 16
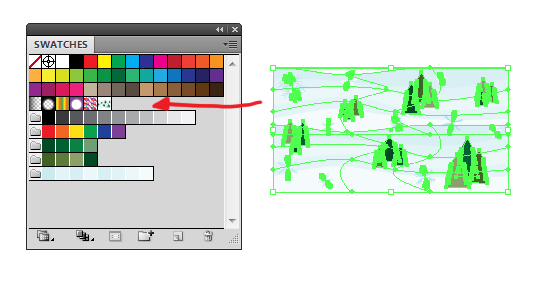
Group up all of the elements of the design (Command + G) and then drag and drop them into the Swatch panel. This will make it a seamless pattern you can then use!
Conclusion
You’ve now created a simple snowy seamless pattern, using some basic tools and effects. I hope you’ve enjoyed today’s tutorial and I wish you all the very best for the holiday season!