Image may be NSFW.
Clik here to view.
Image may be NSFW.
Clik here to view.
Clik here to view.
Traditionally designers would check their layouts manually for errors by using a host of different menus or panels. Commonly known as Preflight, this process has now been turned on its head by the introduction of Live Preflight to InDesign. This feature checks for errors as you work displaying errors in real time, enabling the designer to fix problems throughout the design process. The following tut will serve as an introduction to Live Preflight and detail how to set up and save a Profile for future use.
Step 1
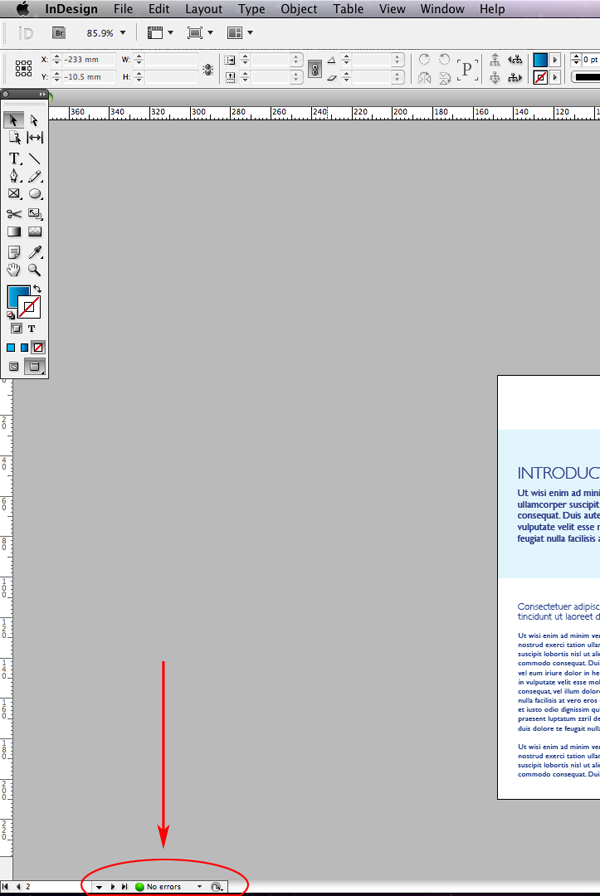
There are two common ways to access the Preflight panel. The first and quickest way is to double click on the Preflight display near the bottom of the document.
Clik here to view.
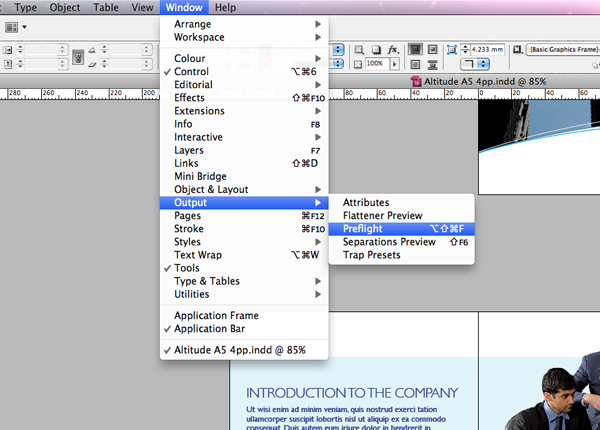
Secondly you can access it by going to Window > Output > Preflight.
Clik here to view.
Step 2
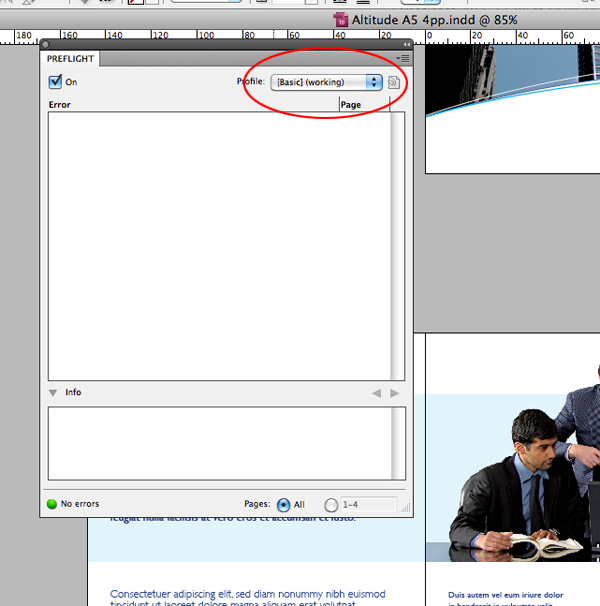
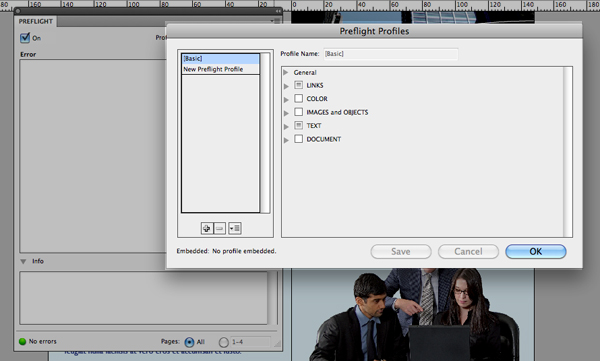
The preflight panel should now be visible. Depending on what document you have open the panel shouldn’t be displaying any errors. To the top of the panel there is a drop down menu, by default the Basic profile will be selected.
Clik here to view.
Step 3
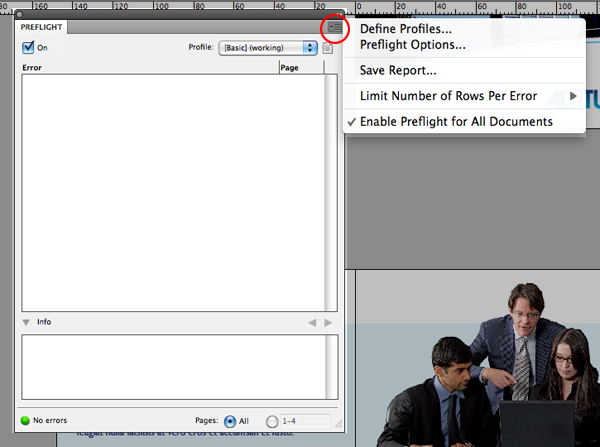
Click and open the fly out menu from the top right hand corner of the panel and select Define Profiles.
Clik here to view.
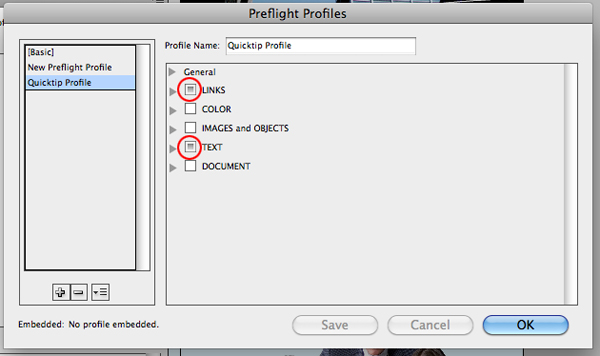
The Basic profile will be highlighted on the left side and a list of profile options will be visible.
Clik here to view.
Step 4
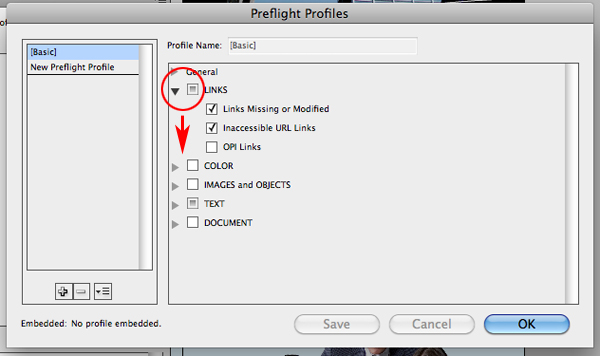
Click on the profile triangle button to the left of a filled box and a list of conditions will collapse into view.
Clik here to view.
Step 5
These conditions can be turned on and off to suit the user. Feel free to explore these conditions within the Basic Profile.
Clik here to view.
Step 6
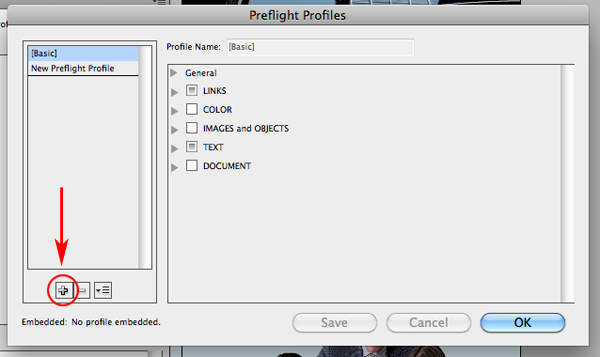
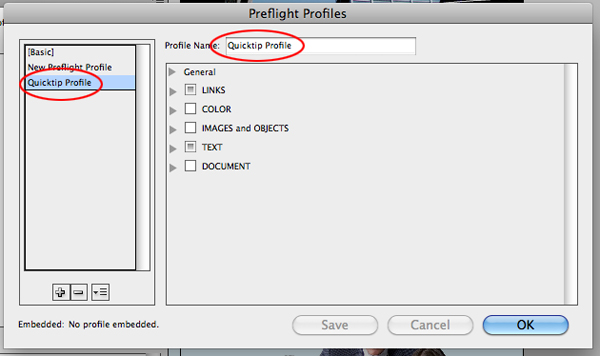
Ok let’s create a profile of our own and add a few conditions to cover some important errors. Click once on the New preflight profile button located near the bottom left hand corner of the panel.
Clik here to view.
A new profile will appear in the profile list. You can choose to rename it by typing new text within Profile Name space at the top of the panel.
Clik here to view.
Note, that your new profile will mimic the Basic profile’s conditions and add them to your new profile.
Clik here to view.
Step 7
Within the Color option I am going to activate ‘Color Spaces and Modes not allowed’ with the following condition:
Clik here to view.

Once finished I am going to collapse the triangle button to keep the panel clutter free.
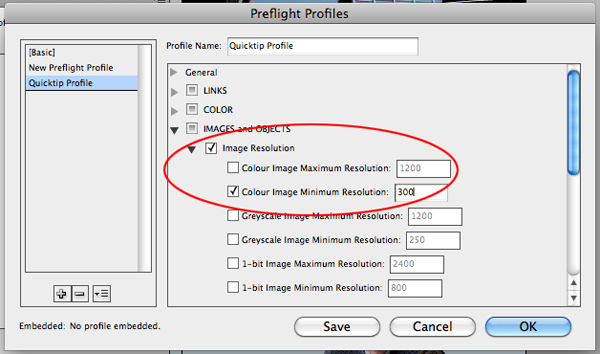
Step 8
As my design contains a number of color images I am also going to activate the Image Resolution condition with the following settings:
Clik here to view.
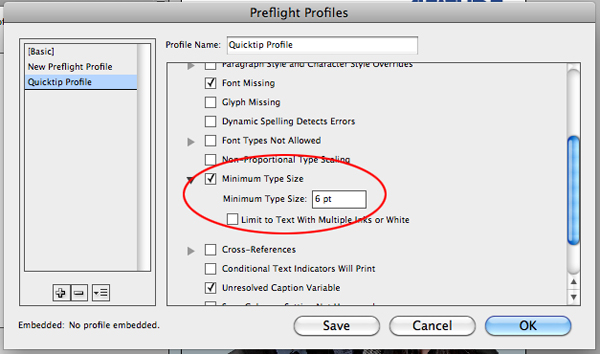
Step 9
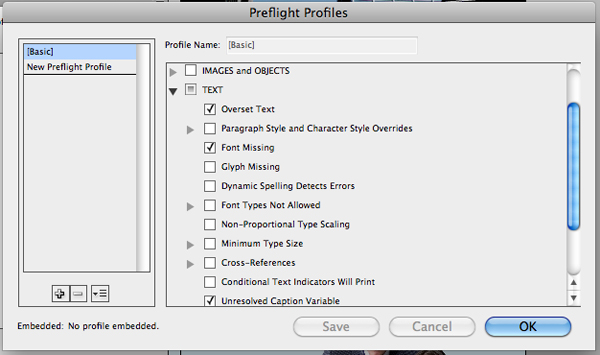
Finally I am going to go into the Text conditions and use the following settings:
Clik here to view.
Step 10
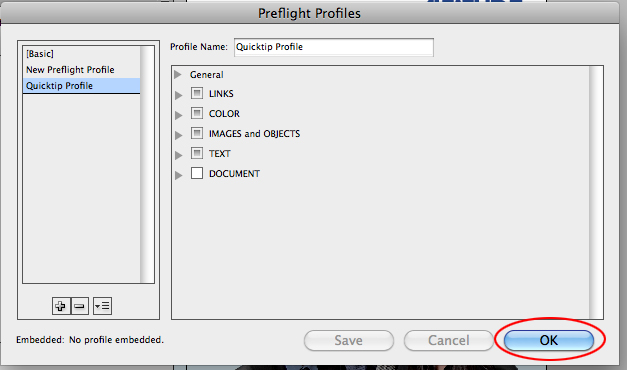
Once you have activated all the conditions you need, press OK to save the changes to the Profile.
Clik here to view.
Step 11
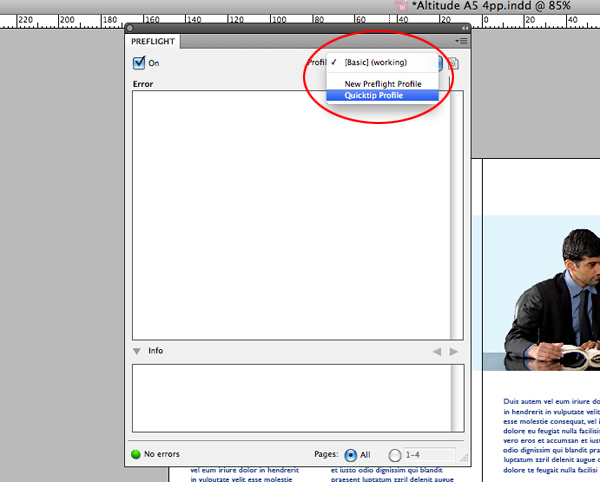
Now from the drop down menu, select the Profile you just created.
Clik here to view.
Step 12
After selecting my profile I have noticed that an error has been listed within the panel. To view the details click on the drop down triangle buttons until there is no more.
Clik here to view.
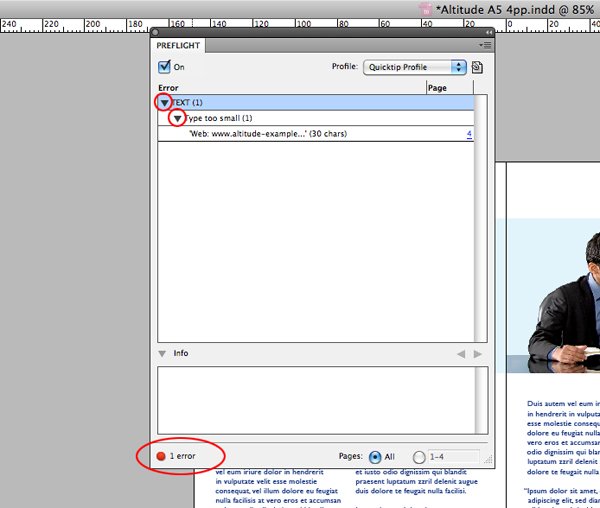
Click once on the error at the bottom of the list, circled below.
Clik here to view.
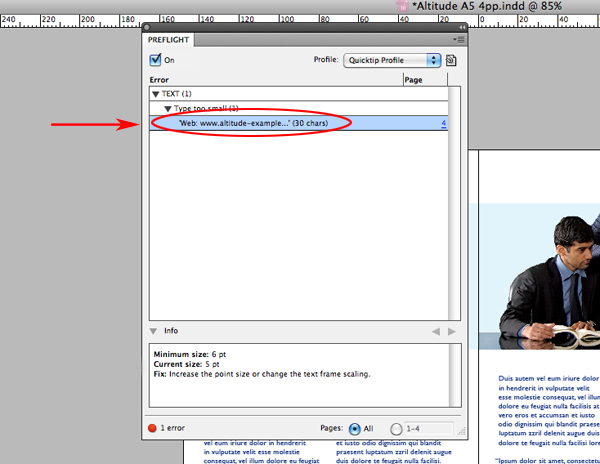
Step 13
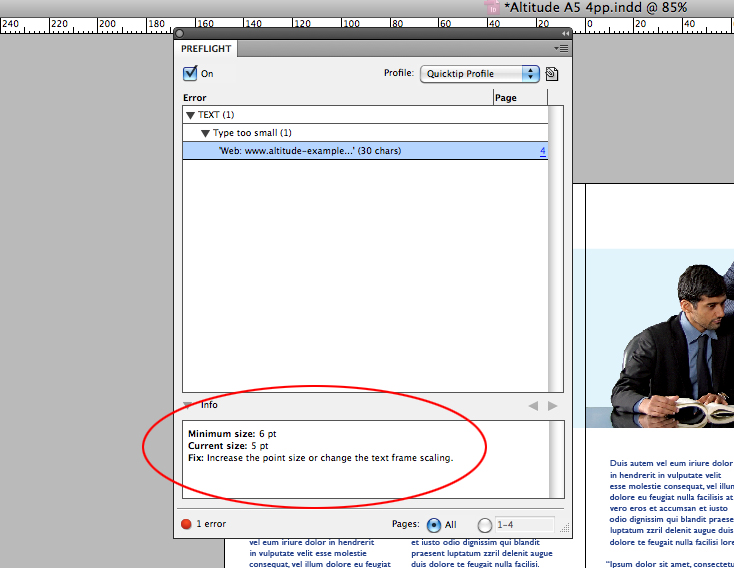
The info box at the bottom of the panel will detail the error and even offer a solution to fix it. In this case Live Preflight has found that the Type is too small.
Clik here to view.
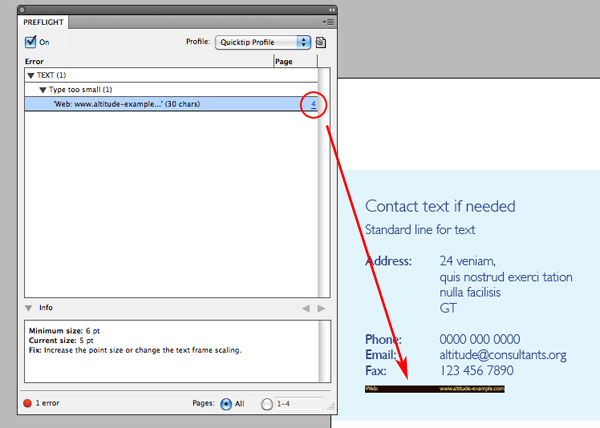
Click on the hyperlink to right of the description and if possible Live Preflight will take you to the error.
Clik here to view.
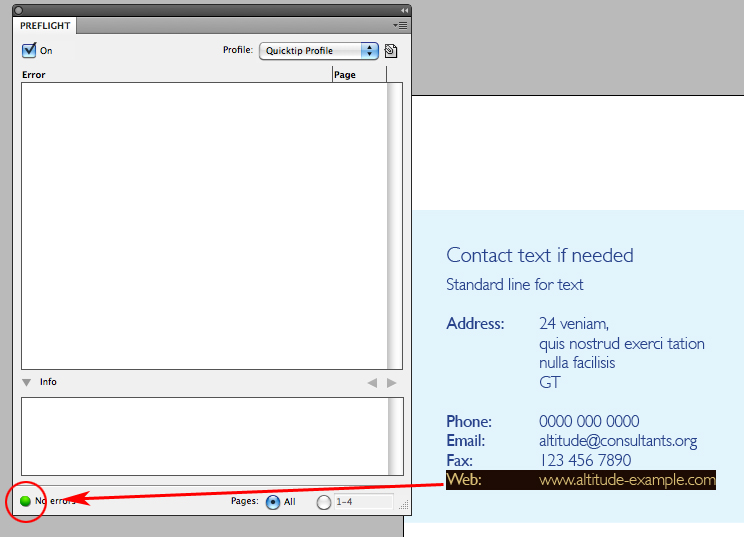
With the Preflight panel still open I have increased the point size. The Preflight panel picked up on my amendments and in real time took the error away from the panel.
Clik here to view.
Conclusion
Take some time to note down some errors that you keep experiencing within your work and use them to build a Live Preflight profile that will automatically spot problems on future layouts.
Clik here to view.
Clik here to view.
Clik here to view.
Clik here to view.
Clik here to view.
Clik here to view.