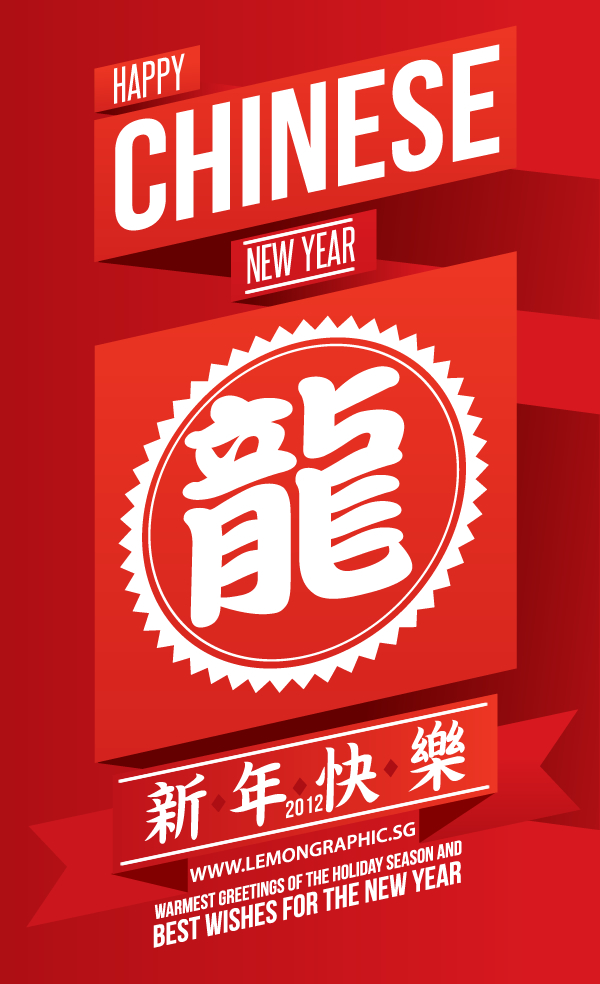
Lunar New Year is here! This red card was chosen as a Lunar New Year E-card because in Chinese culture the color red is auspicious and represents happiness or good luck. During Chinese New Year red packets are given out for luck and prosperity in the coming year. In this quick tip you will learn how to use typography, gradients and the shear tool to make a striking card design.
Step 1
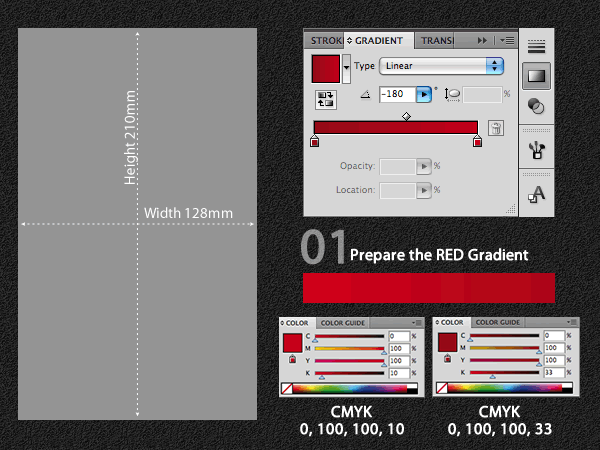
Open a New Document with size 128mm x 210mm. Use the Rectangle Tool (M) to draw a 128 x 210mm background and open the Gradient Panel (Window > Gradient). Set the gradient Type to Linear with a color 0,100,100,33 for the dark red and 0,100,100,10 for the lighter red. This will be the gradient for the background.
Step 2
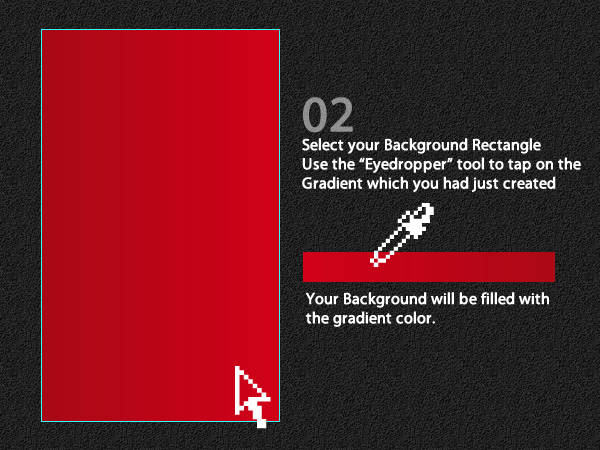
To fill the background select the background rectangle and use the eyedropper tool to tap on the created gradient. This will change your background to the gradient color.
Step 3
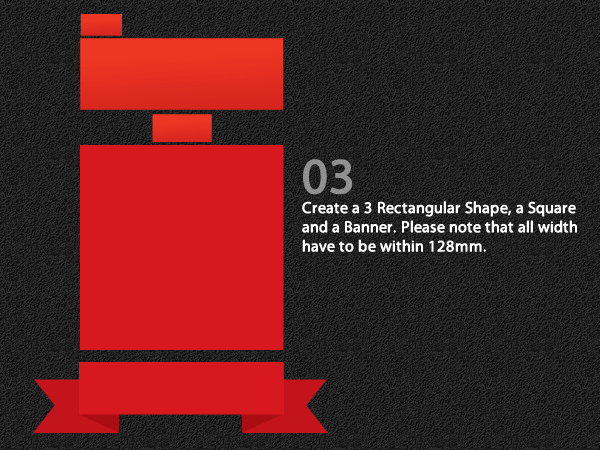
Make a new layer above the background. Use the Rectangle Tool (M) to create 3 rectangular shapes a square and a banner. The width for the shapes should be less than 128mm, to fit on the background.
Step 4
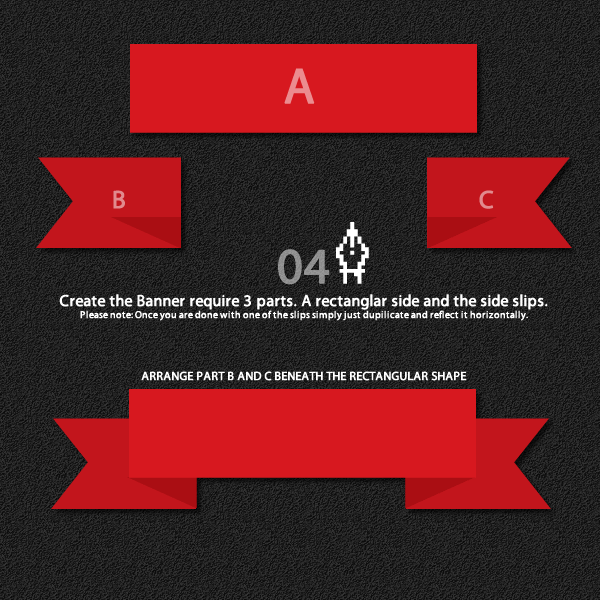
To create the banner, firstly use the Rectangle Tool to create a rectangular shape for the middle and use the Pen Tool (P) to draw the side elements.
To make the side elements, draw a rectangle with a point in the side then add a small triangle (in a darker red) that will make up the shadow. Once you draw one of the side elements, select it and use the Reflect Tool (O) to create one for the other side. Place the middle of the banner on top of the side elements so that it meets the shadows.
Step 5
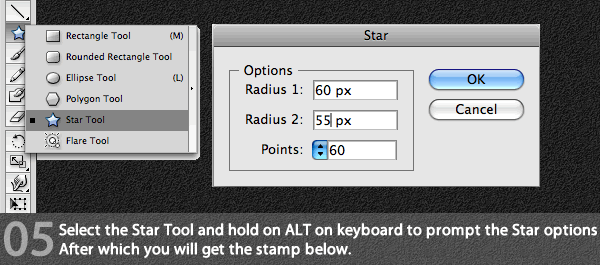
To create the stamp, select the star tool and Alt + Click on the artboard area. The option panel will pop up. Enter 60px for "Radius 1" and 55px for "Radius 2". The points represent the number of sharp points you want for the stamp, I’ve used 60.
Step 6
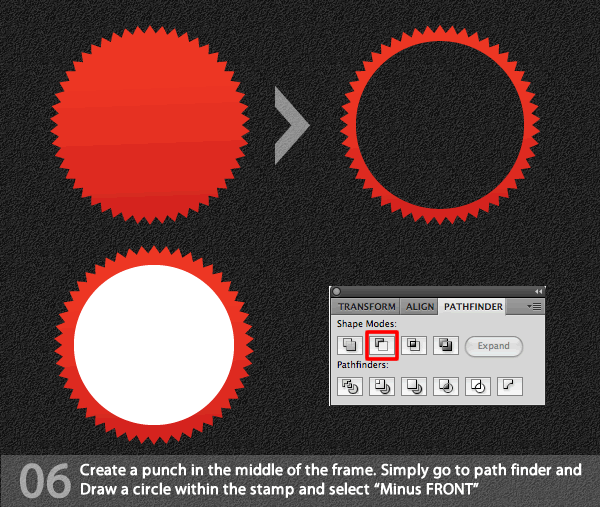
Next draw a smaller inner circle over the star stamp and go to the Pathfinder Panel and select minus front. This will create a transparent area for the stamp.
Step 7
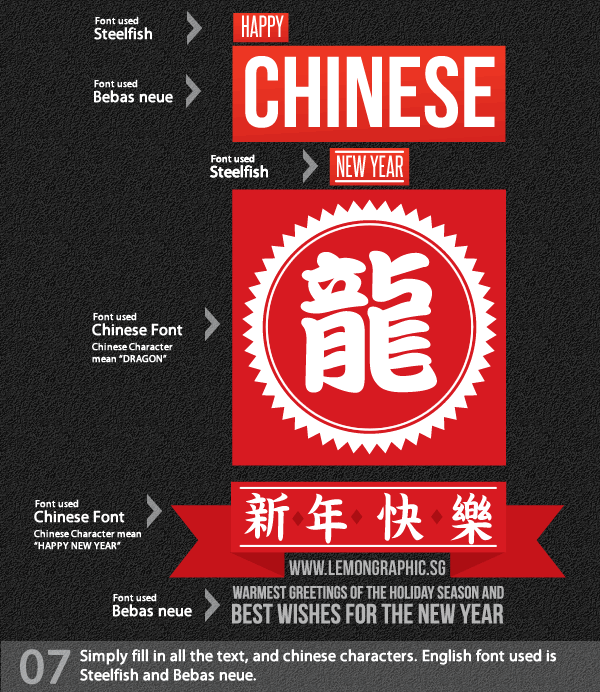
Once you are done with the stamp and the banner. You can start adding typography to the elements.The fonts I have used are indicated on the image below, they are Steefish and Bebas Neue. The Chinese font can be download here.The chinese character on the stamp means "Dragon" in mandarin and the four Chinese words at the bottom is "Chinese New Year"
Step 8
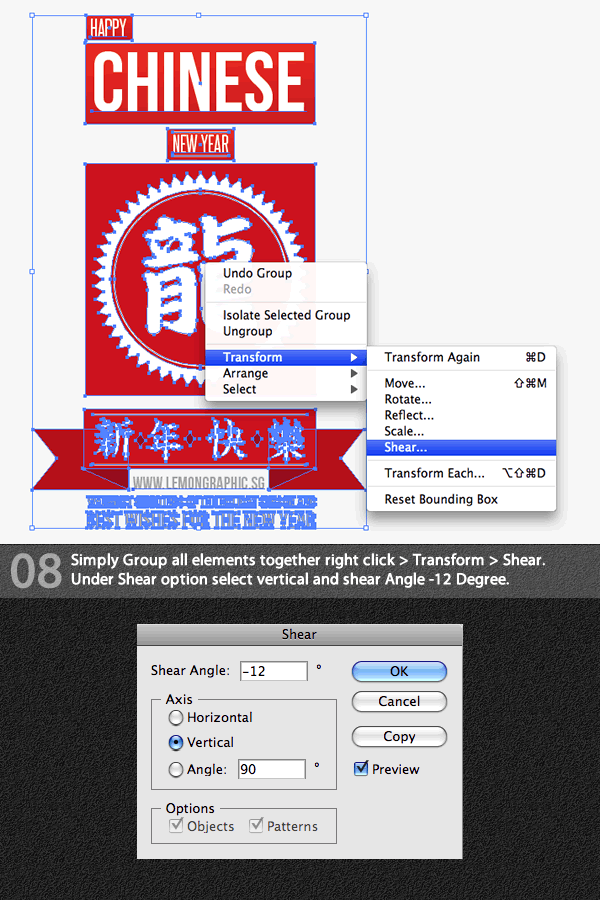
Now group all of the elements together and go to Object > Transform > Shear. The Option Panel will popup, select Shear Angle -12 degree, Axis : Vertical. Click OK.
Step 9
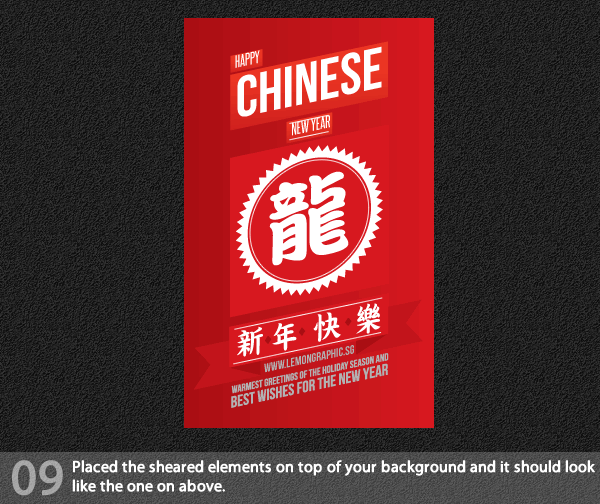
Select the group of elements and test it on the background you previously created. Next we will be creating a shadow to contrast the elements with the background.
Step 10
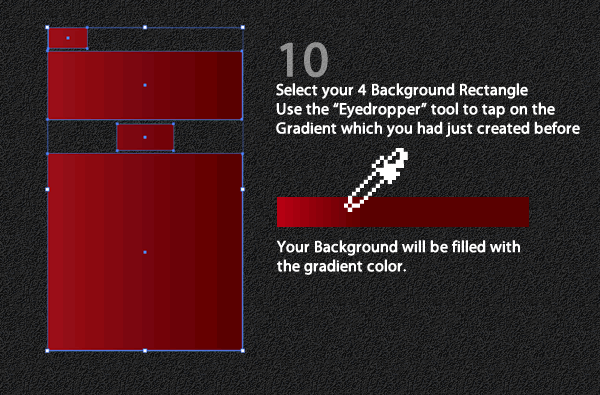
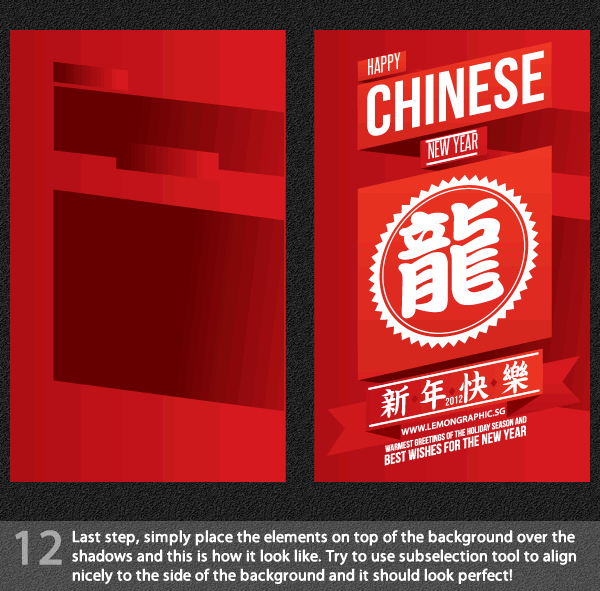
Select the 4 main elements and copy and paste them onto the background layer (Command + C then Command + F) then fill it with a darker gradient to the one currently in use.
Step 11
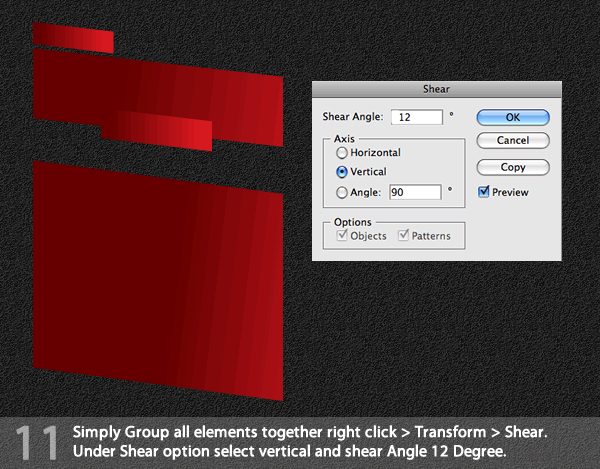
Next group the elements together go to Object > Transform > Shear. Shear the banner as follows, shear angle is 12 degree and axis: Vertical.
Step 12
Finally, place the main elements on top of the background and shadows.
Conclusion
You can adjust the shadow elements by using the Direct Selection Tool to move them around. Now you are done with your unique typography card! I hope you’ve enjoyed this tut.
