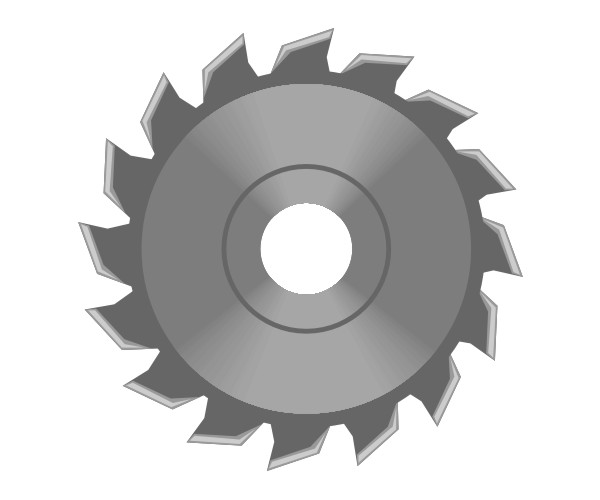
This Quick Tip will teach you how to create a saw blade with a shiny disc using just basic shapes like rectangles, circles and triangle. This is a step-by-step tutorial for beginners. The icons from the inkscape toolbar are added to the images to make it easier to find the tool and function I am describing in the text. Let’s begin!
Step 1
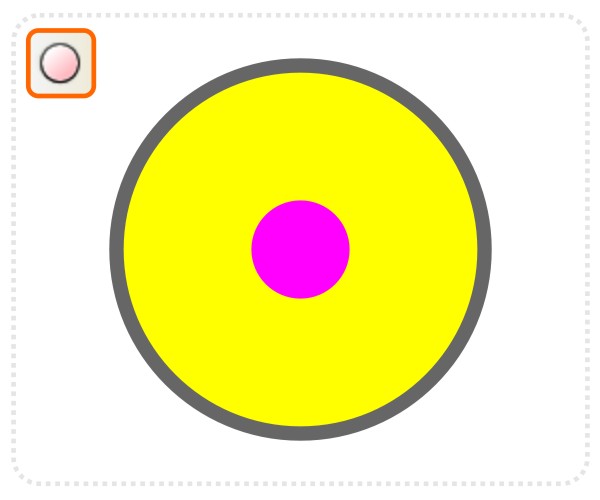
Start out with two larger circles for the blade’s disc. Add a smaller circle for the hole in the center and duplicate it.
Note: If you find it hard to align the shapes, bring up the Align and Distribute panel (Shift + + A). Alternatively create the 1st circle and duplicate the others and scale them down while holding and Shift.
Step 2
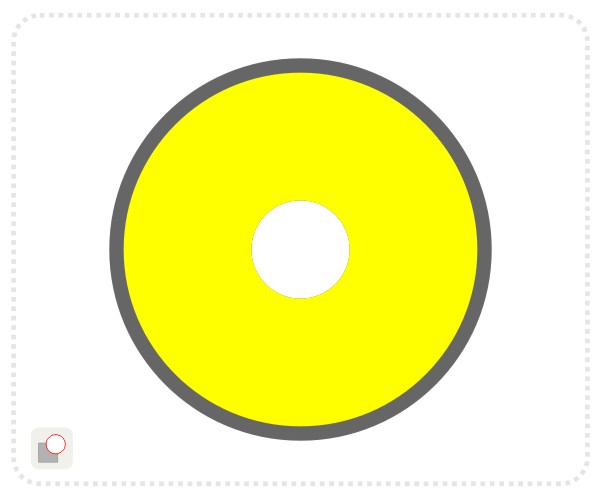
Combine one version with the larger circle and the other one with the second circle via Path/ Difference (Control + -).
Step 3
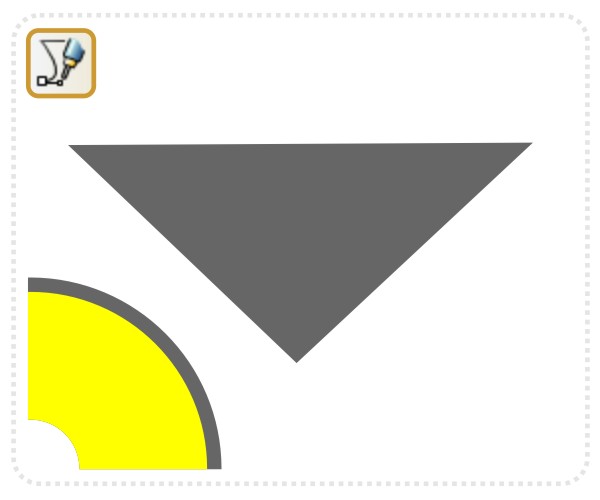
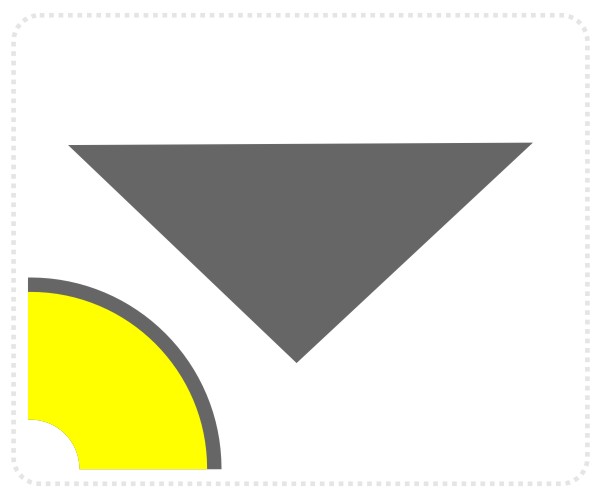
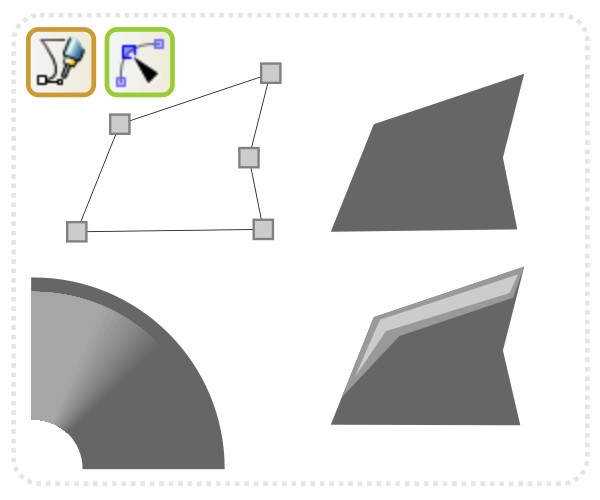
To create the shine on the blade’s disc, use the straight line tool to create a triangle in the color of the biggest circle.
Step 4
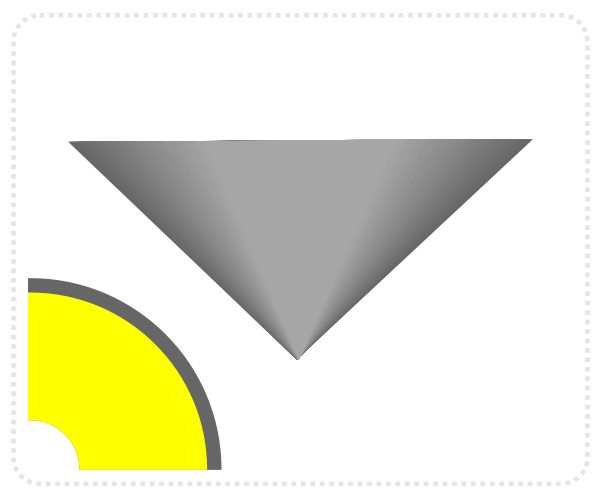
Duplicate the triangle and scale the width down to about one third.

Step 5
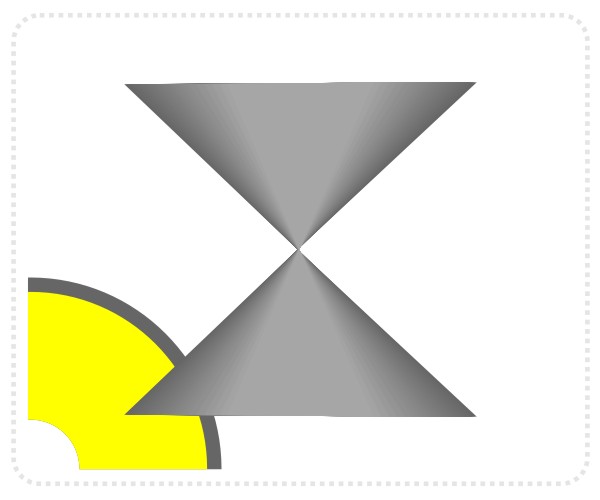
Select both objects and interpolate (Extensions/ Generate from Path/ Interpolate) with 50 steps. The result is a group of 50 objects as well as the two original triangles.
Note: Unlike other vector tools inkscape does not interpolate the color of the objects (at least not in the version I am using).
Step 6
Select the group and assign a white fill. Set the alpha to a low value (e.g. 3). This will give all 50 triangles in the group a very transparent fill but as they are placed on top of each other the result is a nice gradient shine.
Step 7
Select the larger triangle and the group of interpolated shapes. Mirror vertically and place them below. Delete the original small triangle.
Step 8
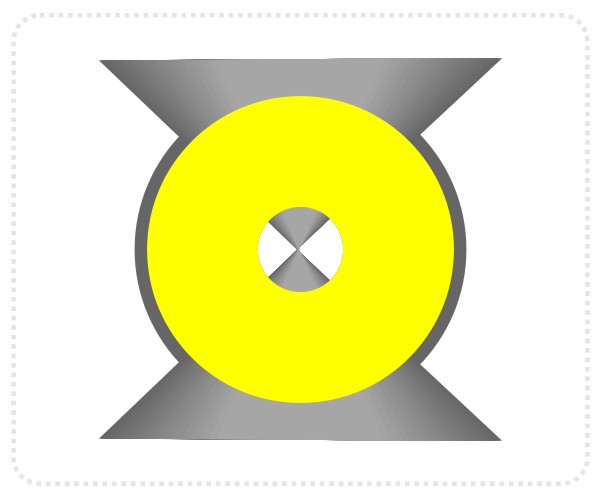
Center the triangles with the circles using the Align and Distribute panel ( Shift + Control +A). Move the smaller ring front (Page Up). It will be the clip container for the shine.
Step 9
Place the triangles in the ring via Object/ Clip/ Set.

Step 10
Use the straight line tool and create the shape of the tooth. Assign it the color of the disc. Duplicate the shape, lighten the color and use the node modifier to make the highlights.
Step 11
Group the tooth and rotate it 90 degrees. Group the two teeth and center them to the rings. Place the group behind the disc shape ( Page Down ). Duplicate and rotate the group a few times to form the full set of teeth. Add additional decor to the disc (e.g. another circle with a stroke but no fill or brand names, size or quality markings).

Conclusion
In order to make the blade spin, create a duplicate and rotate it clockwise by e.g. 8 degrees. Move this copy behind the original and assign a blur effect (e.g. Filter/ Blurs/ Noise Blur).
Note: The tutorial works with some minor adjustments in other vector design programs such as Adobe Illustrator or Corel Draw. These just use different icons, tool and command names, but the functionality is the same.