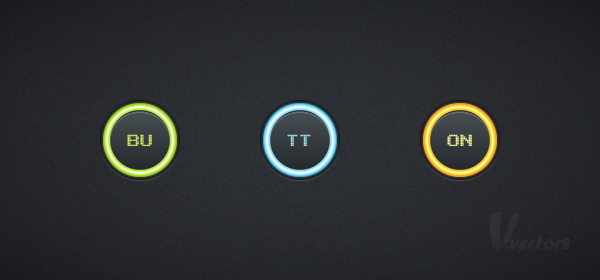
In the following steps you will learn how to create a simple set of glowing buttons. It’s another tutorial that focuses on the Appearance panel as the entire button is created using only one shape with multiple fills and strokes plus some simple effects.
Step 1
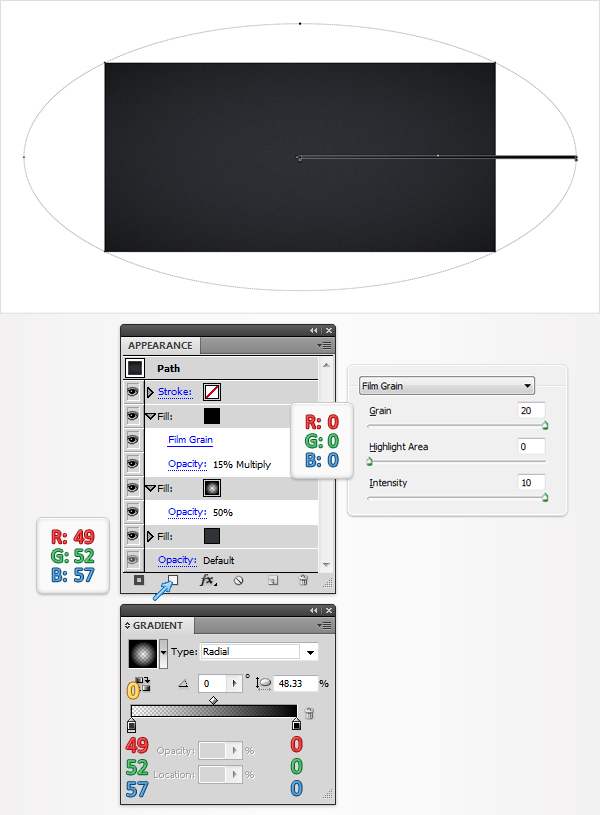
Create a 600 by 300px, RGB document, pick the Rectangle Tool (M) and create a shape the size of your artboard. Fill it with R=49 G=52 B=57, remove the color from the stroke and focus on the Appearance panel (Window > Appearance). Add a new fill for this shape using the Add New Fill button. It’s the little, white square icon from the bottom of the Appearance panel. Select this second fill, lower its opacity to 50% and use the radial gradient shown below. Continue in the Appearance panel and add a third fill. Select it, make it black, lower its opacity to 15%, change the blending mode to Multiply and go to Effect > Artistic > Film Grain. Enter the data shown below and click OK. Move to the Layers panel (Window > Layers) and lock this shape.
Step 2
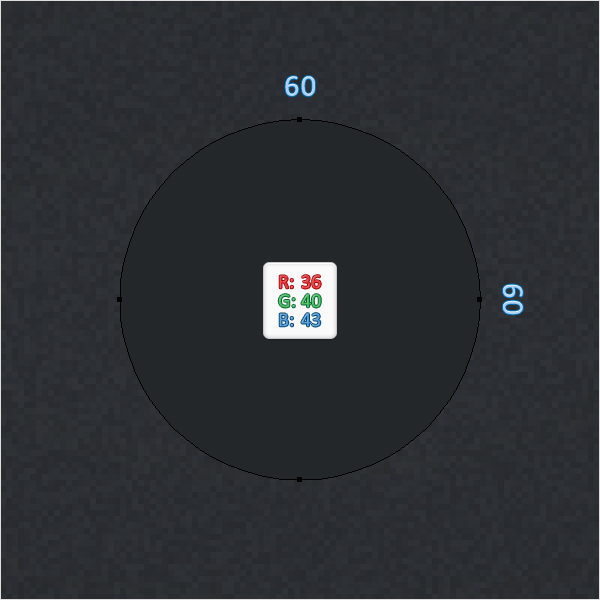
Pick the Ellipse Tool (L) and simply click on your artboard to open the Ellipse window. Enter 60 in the Width and Height boxes and click OK. Obviously, this will create a 60px circle. Fill it with R=36 G=40 B=43 and remove the color from the stroke.
Step 3
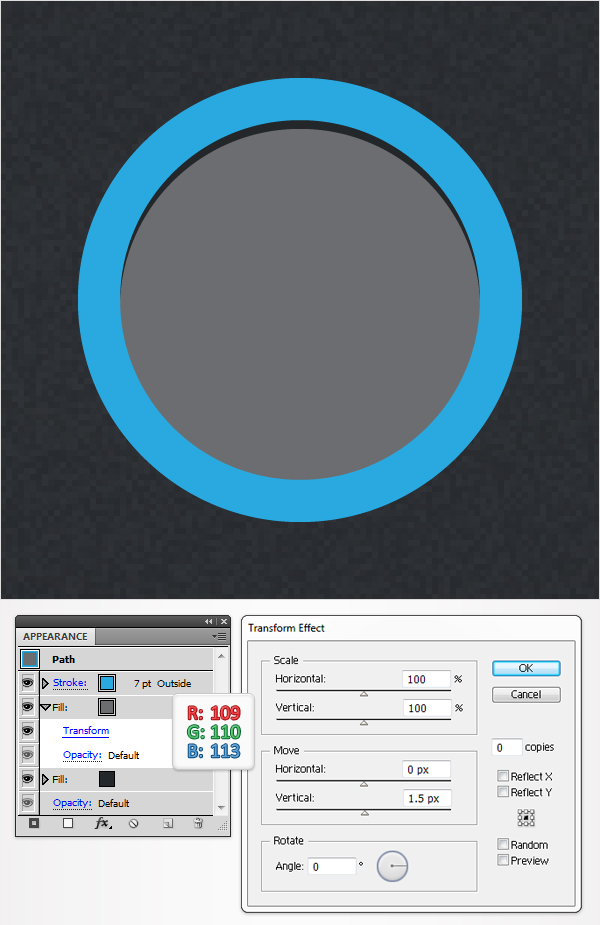
Reselect the 60px circle and add a 7pt stroke. Set its color at R=39 G=170 B=225 and align it to outside.

Step 4
Reselect the 60px circle and add a new fill. Select it from the Appearance panel, set its color at R=109 G=110 B=113 and go to Effect > Distort & Transform > Transform. Enter the data shown below and click OK.
Step 5
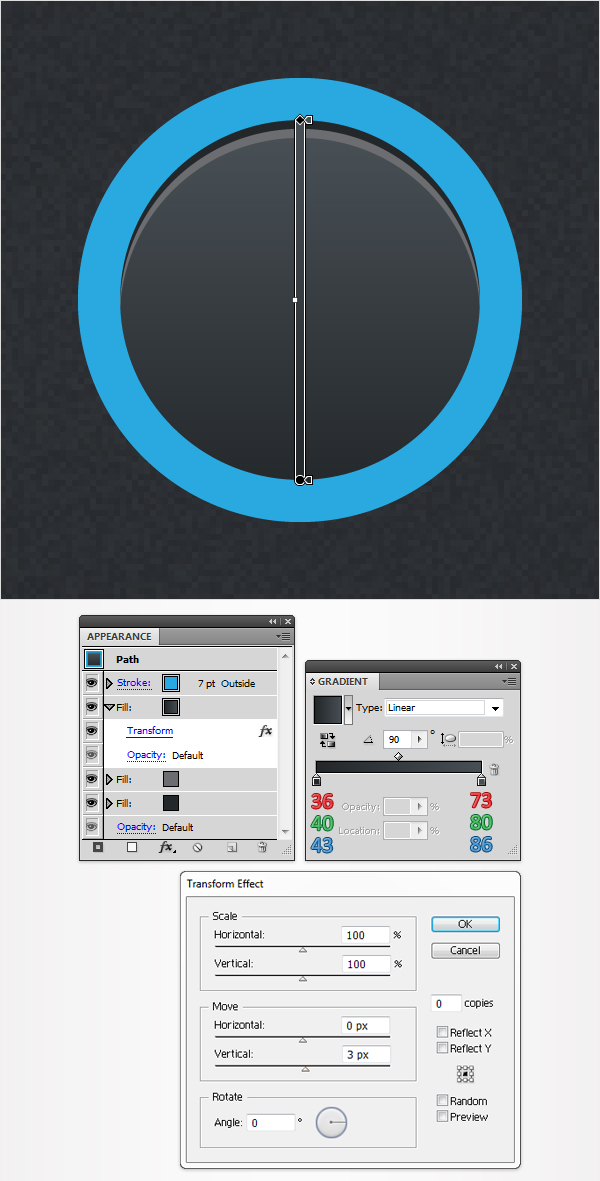
Reselect the 60px circle and add a third fill. Select it from the Appearance panel, fill it with the linear gradient shown below and go to Effect > Distort & Transform > Transform. Enter the data shown below and click OK.
Step 6
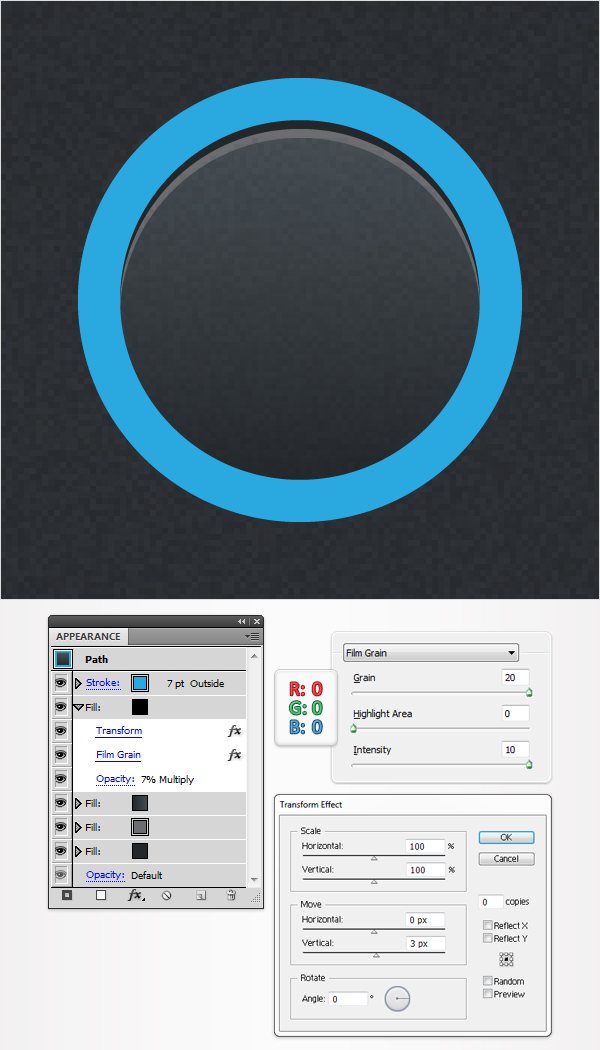
Reselect the 60px circle and add a new fill. Select it from the Appearance panel, fill it with black, lower its opacity to 7%, change the blending mode to Multiply and and go to Effect > Distort & Transform > Transform. Enter the data shown below, click OK then go to Effect > Artistic > Film Grain. Again, enter the data shown below and click OK.
Step 7
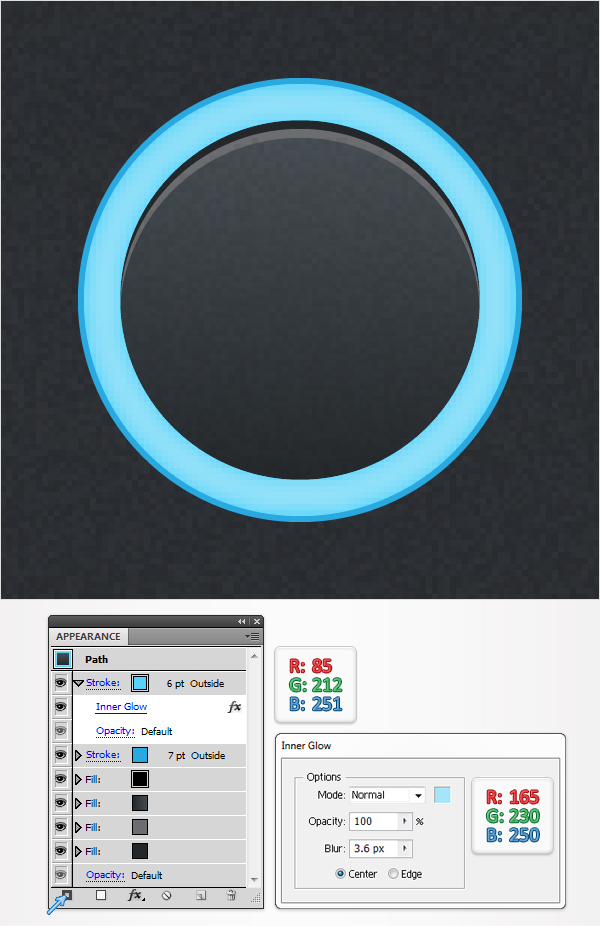
Reselect the 60px circle and add a second stroke using the Add New Stroke button. It’s the little, black square icon from the bottom, left corner of the Appearance panel. Select this new stroke, make it 6pt wide, set its color at R=85 G=212 B=251, align it to outside and go to Effect > Stylize > Inner Glow. Enter the data shown below and click OK.
Step 8
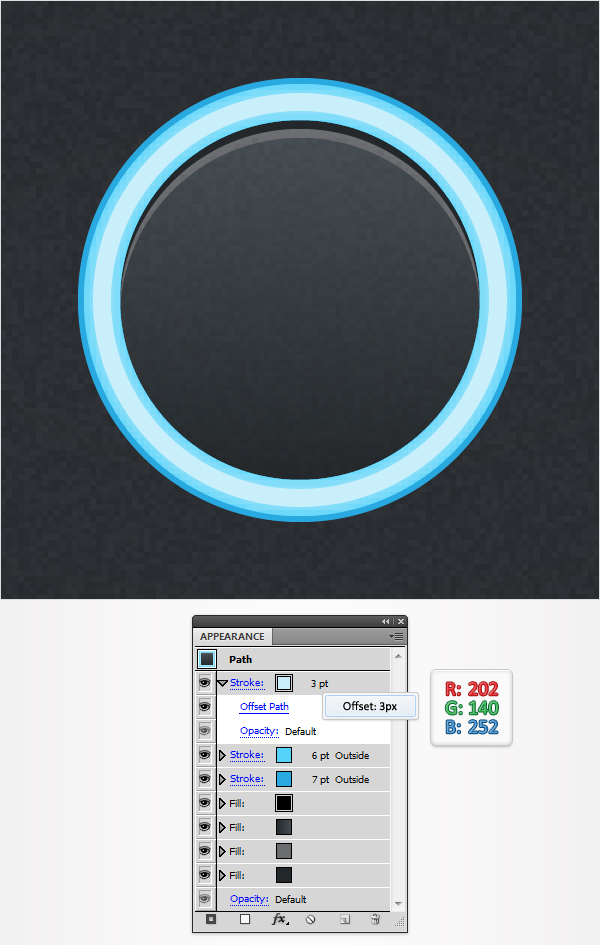
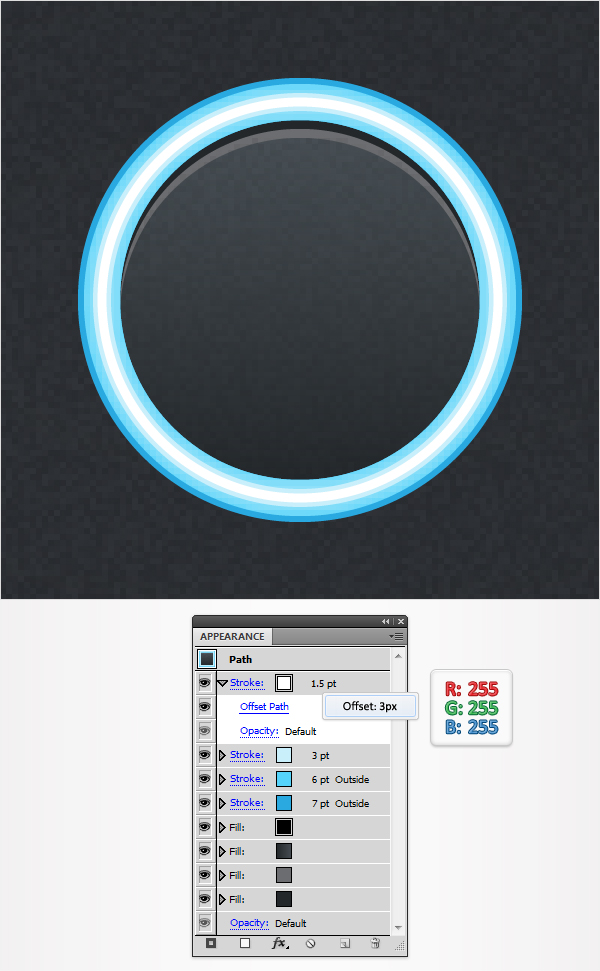
Reselect the 60px circle and add a new stroke. Select it from the Appearance panel, make it 3pt wide, set its color at R=202 G=140 B=252 and go to Effect > Path > Offset Path. Enter a 3px Offset and click OK.
Step 9
Reselect the 60px circle and add a new stroke. Select it from the Appearance panel, make it 1.5pt wide, set its color at R=255 G=255 B=255 (white) and go to Effect > Path > Offset Path. Enter a 3px Offset and click OK.
Step 10
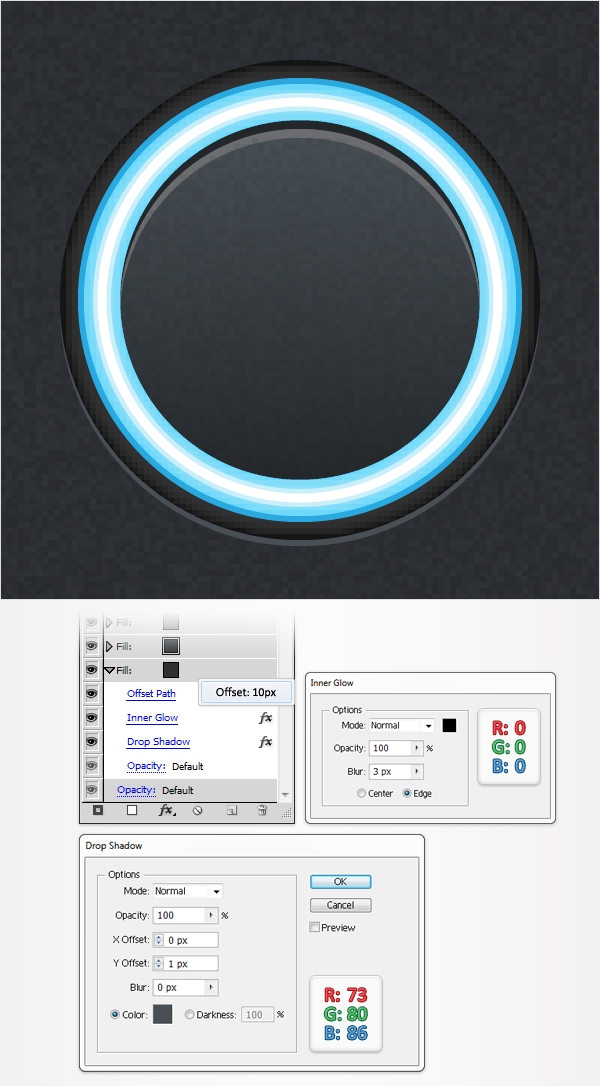
Reselect the 60px circle, add a new fill and drag it in the bottom of the Appearance panel. Select it, set its color at R=50 G=50 B=50 and go to Effect > Path > Offset Path. Enter a 10px Offset, click OK and go to Effect > Stylize > Inner Glow. Enter the data shown below, click OK and go to Effect > Stylize > Drop Shadow. Again, Enter the data shown below and click OK.
Step 11
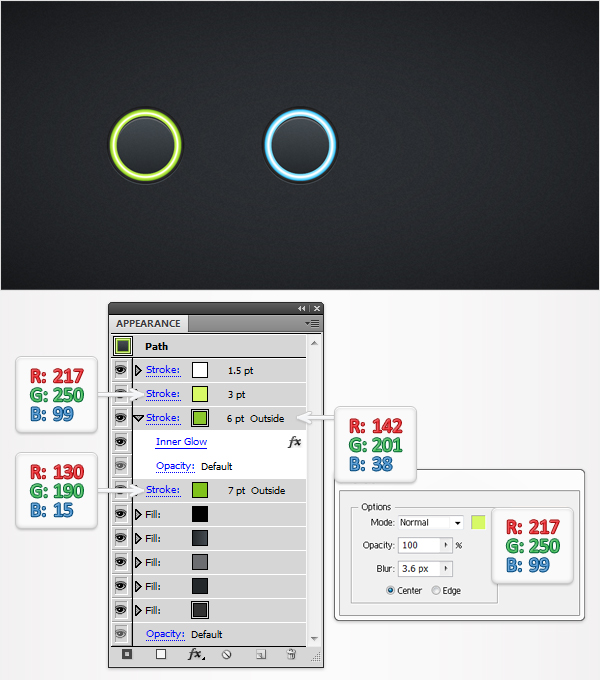
Reselect the 60px circle and duplicate it (Command + C > Command + F). Select this copy, move it to the left and move to the Appearance panel. Focus on the strokes and replace the existing colors with the colors shown below. Also, edit the Inner Glow effect as shown in the following image.
Step 12
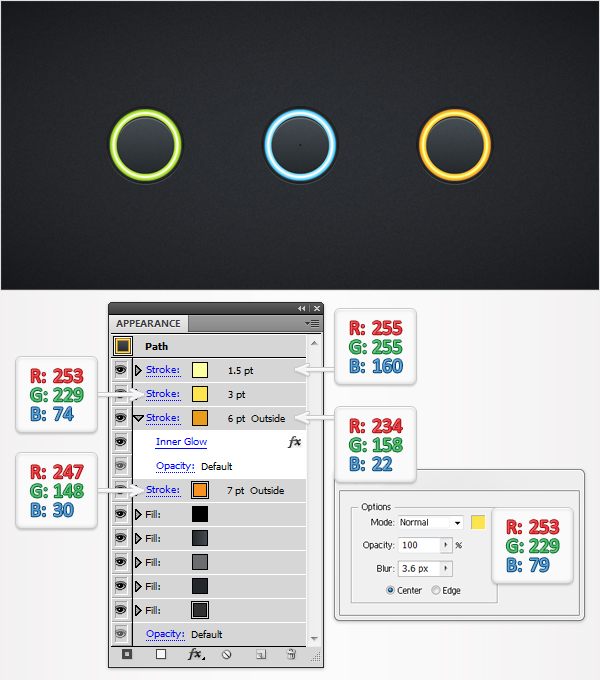
Reselect the 60px circle, make a new copy (Command + C > Command + F) and move it to the right. Again, select it and replace the existing stroke properties with the properties shown below.
Step 13
Finally, pick the Type Tool (T) and add your text. Pick your own font or use the Arcade font with a size of 25pt.

Conclusion
Now your work is done. Here is how it should look. Have fun with the different colors and shapes to see what you can come up with.