In this tutorial we will meet a new friend, the DrawScribe plugin, which is developed by Astute Graphics for a more convenient creative workflow in Adobe Illustrator. It consists of two tools; the InkScribe Tool and the Dynamic Sketch Tool.
I’ll tell you about the features of these tools in the process of creating an illustration of a castle. The tutorial consists of two parts, each one is related to the work of one tool. This first part deals with the InkScribe Tool. This tool is designed to create vector paths consisting of Bezier curves and straight segments, and not only combines the features of drawing and editing tools, but also contains a number of features that you’ll learn about after the jump.
Step 1
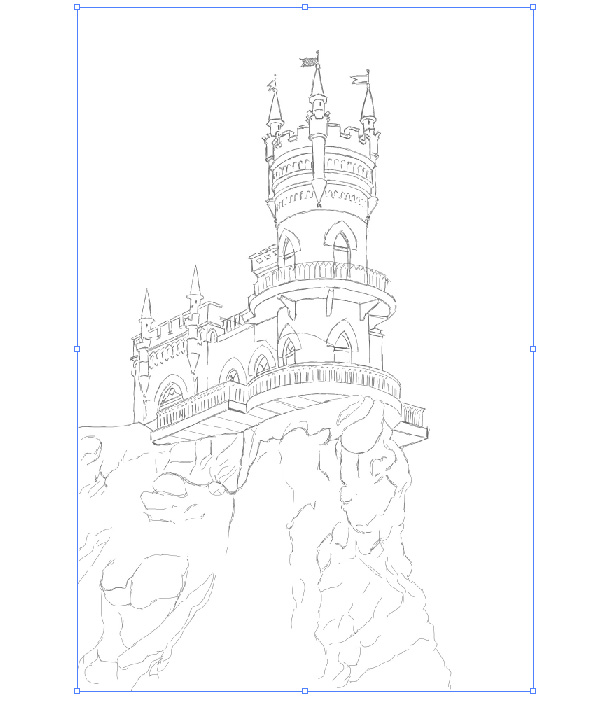
In this tutorial I will use a sketch of a castle, which must be pasted into the document workspace (File > Place).
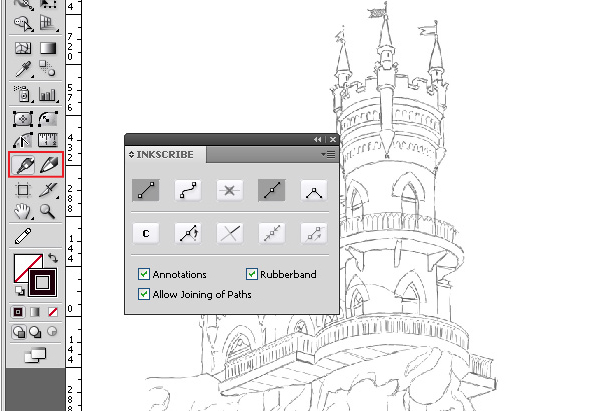
To create basic elements of this artwork, I’ll be using the InkScribe Tool. Let’s take a look at it. After downloading and installing the plugin, the icons with its tools will appear in the bottom of the toolbar. To open the InkScribe panel, go to Window > DrawScribe > InkScribe Panel.
Step 2
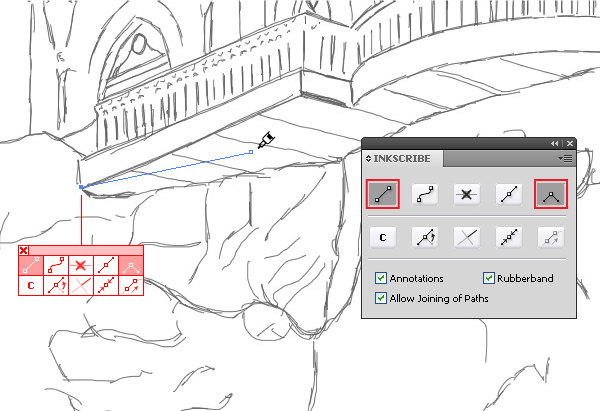
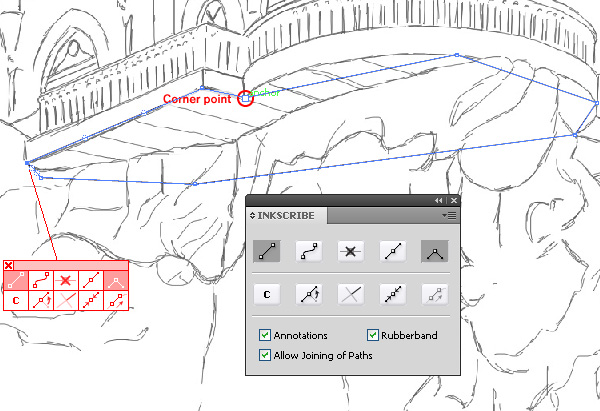
Take the InkScribe Tool, press on the “Draw a straight segment” button and the “Corner point” button in the InkScribe panel and create the first point of the path.
Annotations appear next to the created point, which may contain all of the buttons of the InkScribe panel as it is in my case, or contain only the ones that you use often in your work. The presence of the control elements next to the point will save you time finding the necessary panel, tool or button that can be located in different places of your workspace. You can move the annotations, or disable them if needed.
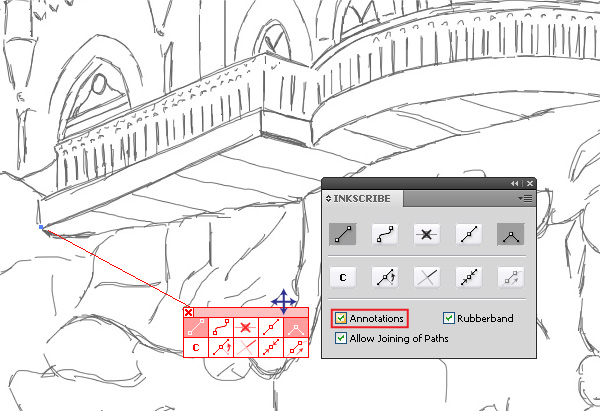
The annotations and the InkScribe panel buttons perform the same command, and you can use whichever is more comfortable for you. So, create a closed path consisting of straight-line segments and corner points.
Step 3
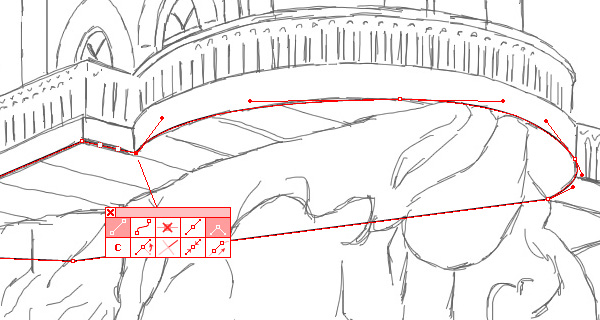
Straight-line segments created with the help of the InkScribe Tool have one remarkable feature. These segments have an additional control element called Ghost Handles.
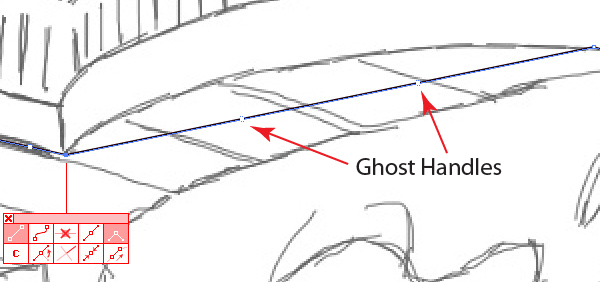
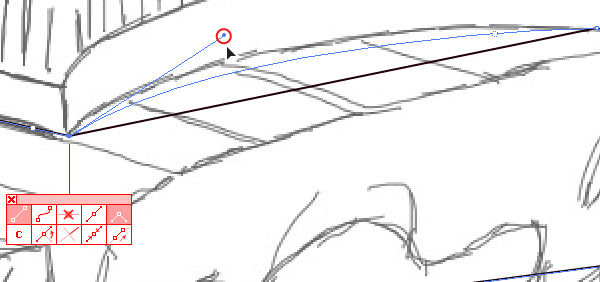
They are presented on segments where the Bezier handles have been retracted, typically straight segments. You can activate each individually by click-dragging the Ghost Handles (which converts them into standard Bezier curve handles) or by dragging along the segment in the right direction to reshape it.
Step 4
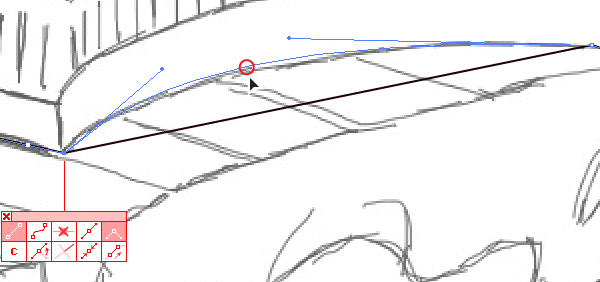
All of these manipulations were done only using the InkScribe Tool, without resorting to shortcuts, or the Direct Selection Tool (A). With the InkScribe Tool you can perform any operations on the path that you used to do previously with the Direct Selection Tool (A). Thus, the InkScribe Tool is not only a path-creating tool, replacing the Pen Tool, but also an editing tool. Change the curvature of the path in those areas where it is necessary according to the sketch.
Step 5
All points remain set to corners, and the shape of the path is far from being perfect.
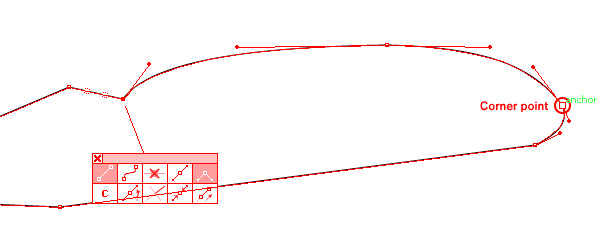
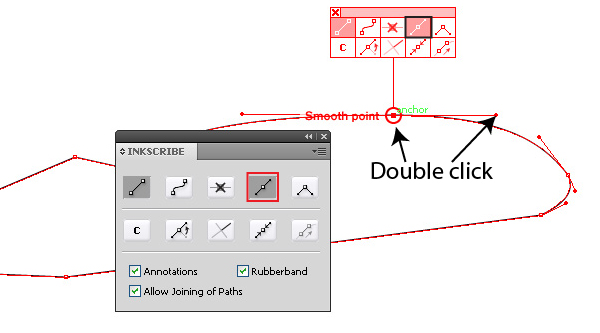
Now I will tell you about the various ways you can change the type of points between Smooth and Corner, and improve the shape of the path with the help of the InkScribe Tool.
To change the type of point you can click on the appropriate button in the InkScribe panel or the annotation. You can get the same result by Double-clicking the point, or at the end of an associated handle.
Step 6
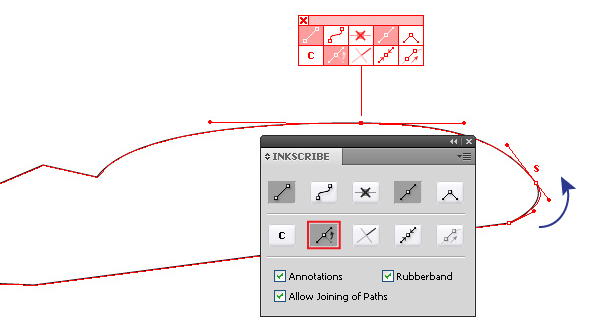
In addition, there is the Smart Smooth mode that converts corner points into smooth ones by interactively moving one of the handles. With the Smart Smooth mode is enabled, dragging one handle of a corner point to within a user-defined threshold angle of the opposing handle, a letter S appears near the point, as shown below. If at this moment you release the mouse button, a corner point turns into smooth one.
Step 7
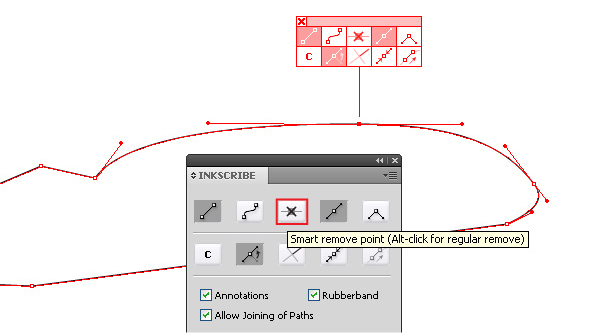
If the shape of the path does not seem to be smooth enough, you can remove extra points with the InkScribe Tool. The profile of the path will remain as close as possible to the original, often ensuring a smoother result. The Smart Remove Point button in the panel or annotation is used for this operation.
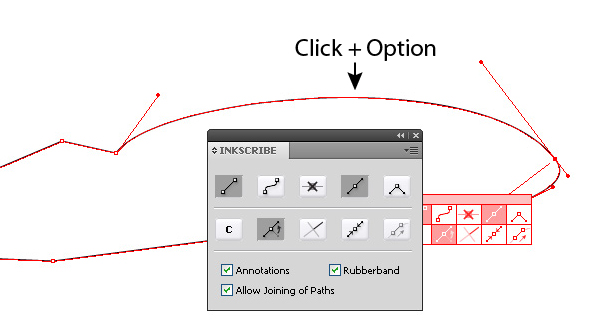
Alternatively, if you click on the point by holding down the Option key, we will get the same result.
Step 8
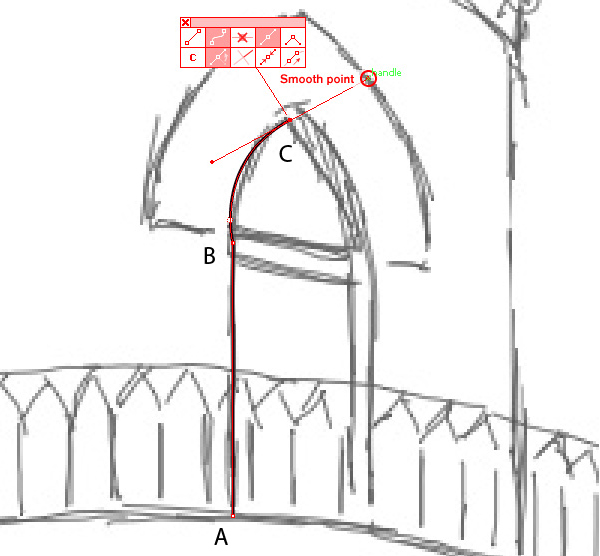
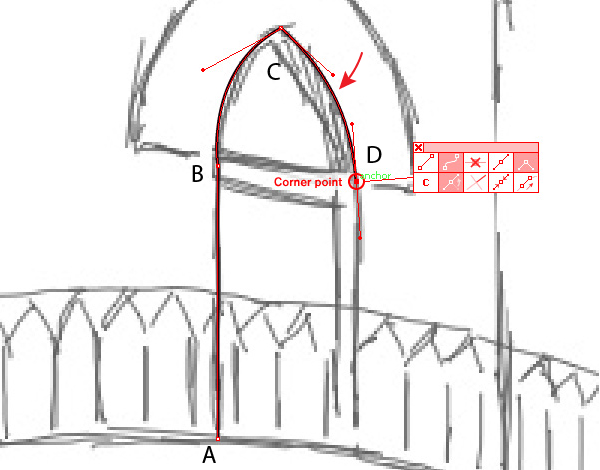
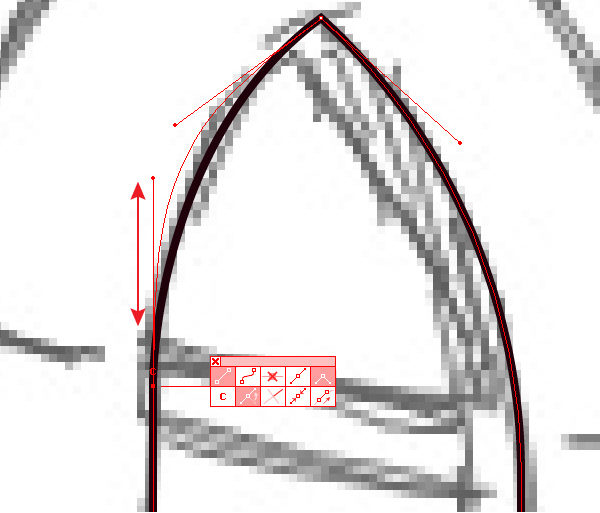
Of course, you can create a path using the Click and Drag method that is familiar to the Pen Tool (P) and combine it with the features of the InkScribe Tool. Let’s take a look at this process by creating the shape of the window. Create a straight line segment AB, create point C and pull its handle curving segment BC.
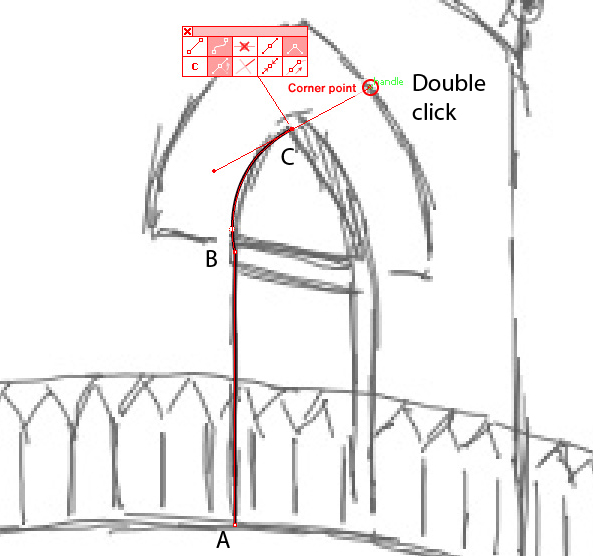
Now convert point C into the corner point by clicking on a Corner point key in the annotation, or by Double-clicking on point C or its handle.
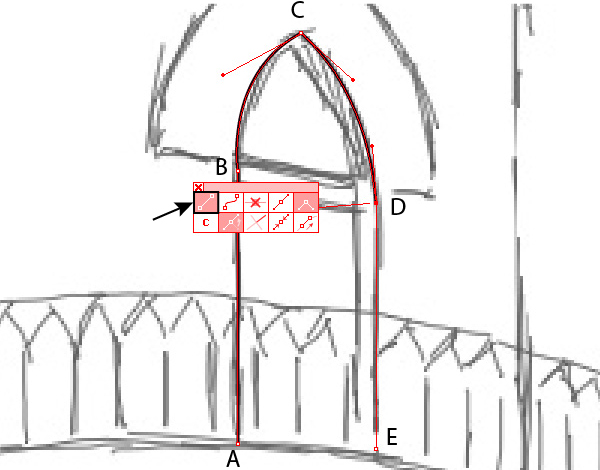
With the help of the InkScribe Tool, change the direction of one of the handles and create a new point D.
Turn on the “Draw a straight segment” mode and create a segment for DE.
To close the path, you can use the “Close or join path” button.
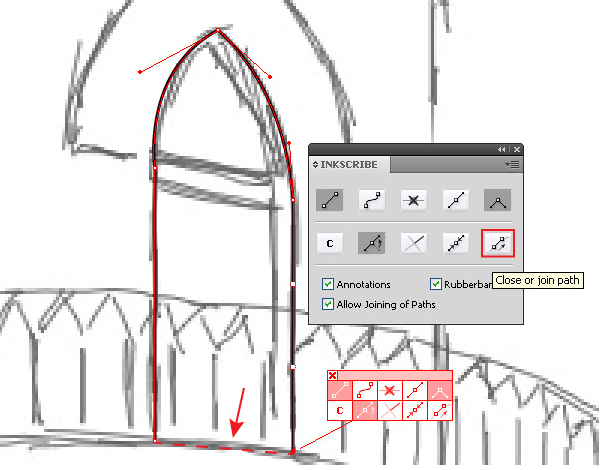
It takes a long time to talk about this process, but it is very quick to actually do it, as all the commands are intuitively easy and the control elements are within your reach.
Step 9
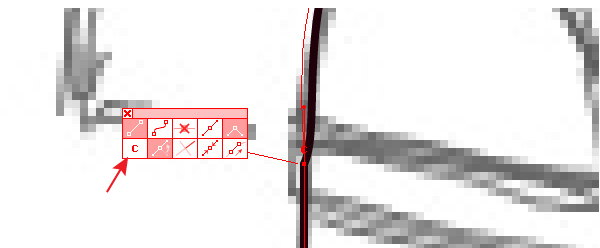
The straight-line segment becomes curved at point B. In order to make the transition smooth, the direction of the handle of the curved segment must coincide with the direction of the straight-line segment.
The InkScribe Tool automates the process of such a straight/curved segment combination. Turn on the Connector mode by clicking on the “C” button in the panel or annotation, and start moving the handle of the curved segment.
At the moment the Bezier handle is within a threshold value of the angle of the straight-line segment, a letter C will appear next to the point. If you release the mouse button and then resume the manipulation on the handle, the movement will be possible only in the direction of the straight-line segment.
Step 10
Now with all the acquired knowledge, create all the basic elements of the castle. No matter how accurate the sketch was, it will still have many inaccuracies, for example, some parallel lines will not be parallel. Work with architectural objects requires precision, so I’m using guides in this artwork to help create the right shape.
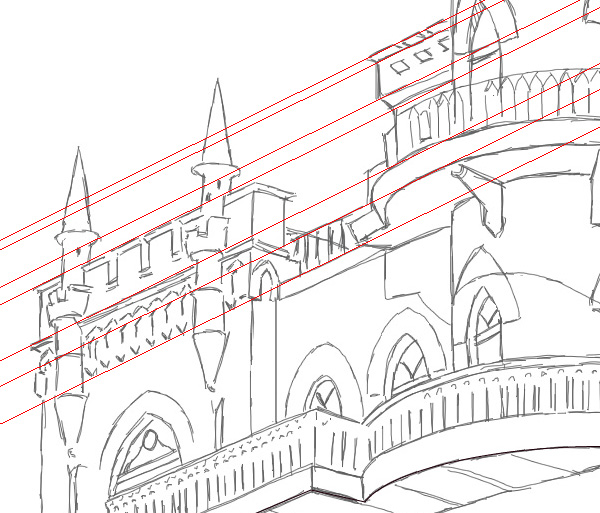
To rotate the guides use the Rotate Tool (R), duplicate them by dragging while holding down the Option key.
Step 11
When creating the objects of complex illustrations, I color them in different colors. This technique allows me to place the objects correctly relative to each other.

Step 12
Before coloring, I create a background. In my case it’s a bright summer sky, so I’m using a linear gradient that contains three shades of blue.
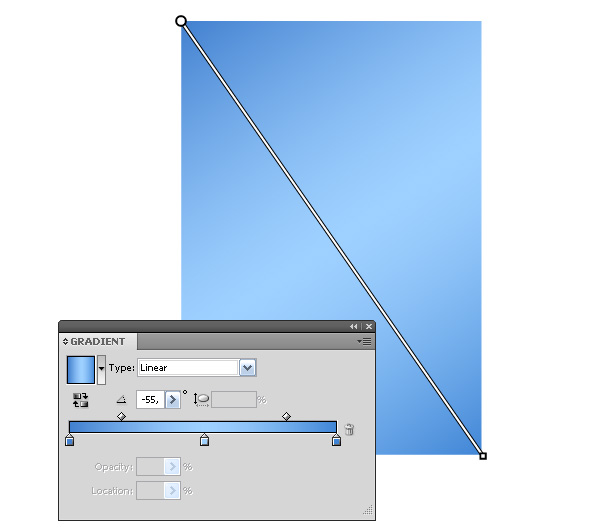
Fill the rectangle with this gradient. The rectangle should be placed below all the previously created objects.
Step 13
The mistake of many illustrators starting out, is that they do not determine the light source(s) before coloring. This must be done. In my case, there is one light source, the sun, and I have it in the top left corner of the composition.

Step 14
Now, using linear and radial gradients, fill all the objects of the castle.

Knowing where the light source is, it is easy to understand where the shadows will be located. The shapes of the shadows are determined by the shape of two objects. The first object is an object that is a source of shade, and the second one is an object on which shadow lies.
Shadows may not be solid in color. In order not to waste time setting the gradient of the shadow, I use a different technique. Fill the shape of the shadow with a solid color such as gray, and set the Multiply Blending Mode in the Transparency panel.
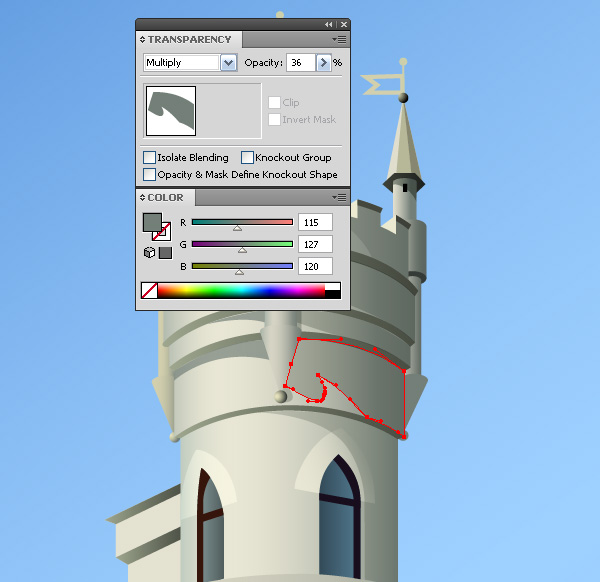
I achieve the required intensity by adjusting the color of the object and its opacity. This technique allows you to achieve the desired result fast.
Conclusion
At this point, let me finish the first part of this tutorial. In the next part, we have new tools and new interesting techniques to explore. The objective of this first part is focused on getting acquainted with the InkScribe Tool.
For those who want to learn more about this tool, you can view DrawScribe movies. You can test the tool by downloading a 14 day trial version of the plugin.
The final image is below. We’ll finish the tutorial and work with the the DrawScribe plugin’s Dynamic Sketch Tool in Part II – coming soon.