This tutorial will show you how to create you own keyboard button. We’ll use basic shape building and pathfinder tools to create our shapes, and then color our button using gradients, while keeping a keen eye on lighting directing. Using the techniques in this tutorial you can create other keyboard buttons using different shapes. Let’s begin.
Step 1
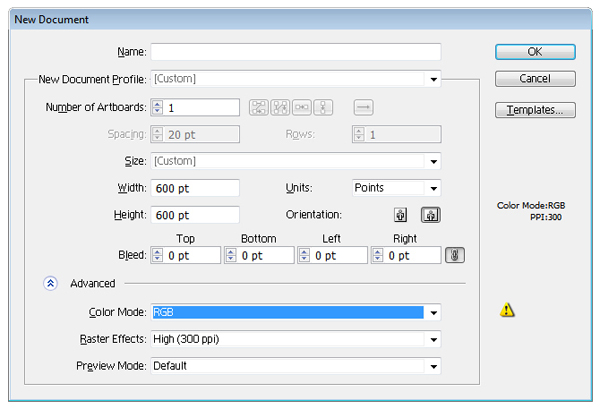
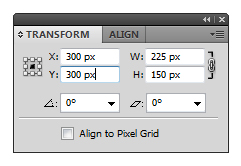
Create a new document (Command + N) with the following settings:
Step 2
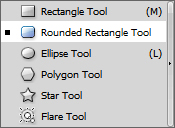
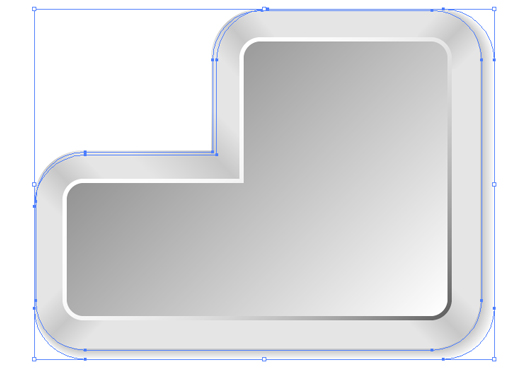
Use the Rounded Rectangle Tool to create two rectangles with the following settings and colors: red and black.
Step 3
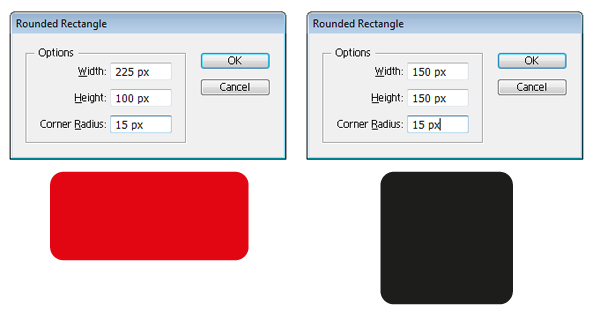
Select the two rectangles and align them using Vertical Align Bottom.
If the Align window is not active or if there is any other window used in this tutorial that you can not find, you can activate it using the Window menu.
Step 4
Place the two layers in the center, using the following settings:
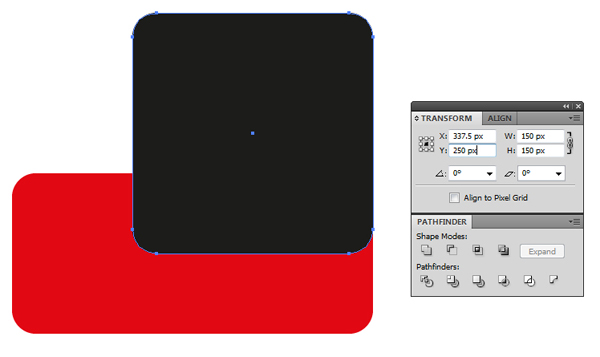
Step 5
Select the black rectangle and move it a bit higher with Transform Y of 250px.
Step 6
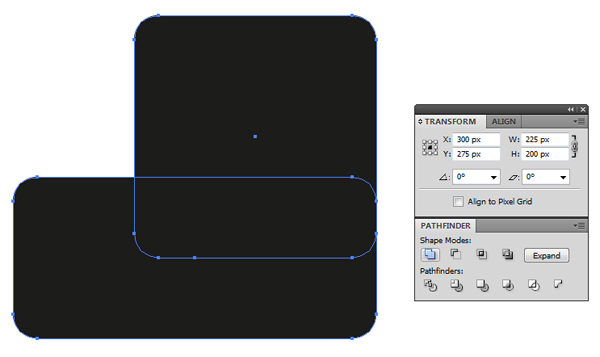
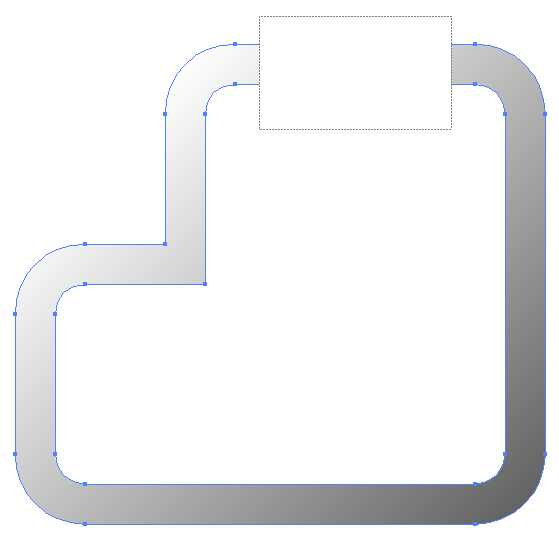
Select the two rectangles and keep the Alt key pressed to select a Compound Shape. Now Expand from the Pathfinder window. Color the button with RGB (R=175, G=175, B=175).
Step 7
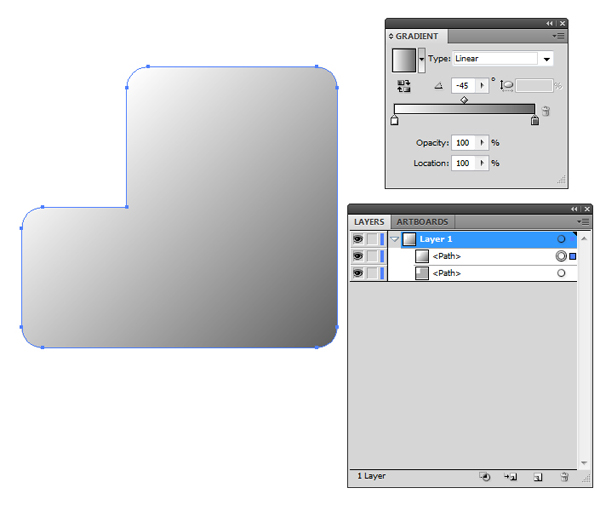
Make a copy of the button using Command + C > Command + F. Color the button with Gradient Tools at one end (R=0, G=0, B=0) and (R=100, G=100, B=100) at the other end, Angle -45.
Step 8
Make a copy of the button using Command + C > Command + F. Modify the angle of the gradient to 135.
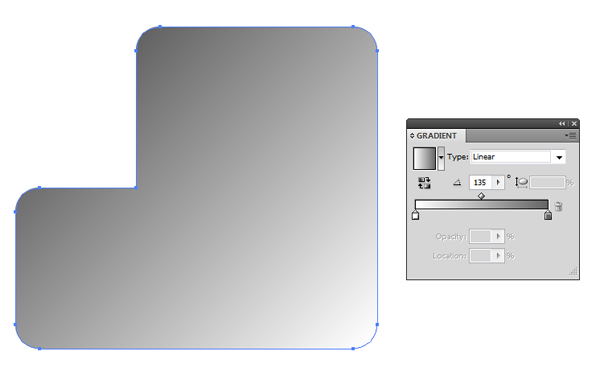
Step 9
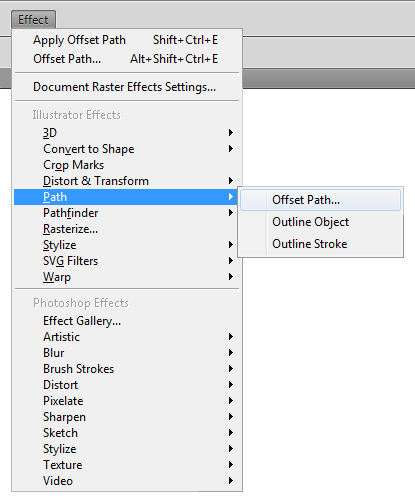
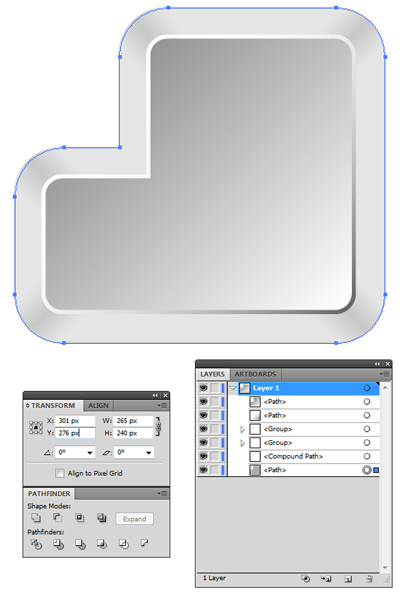
Use Offset Path to shrink the button using Effect > Path > Offset Path.
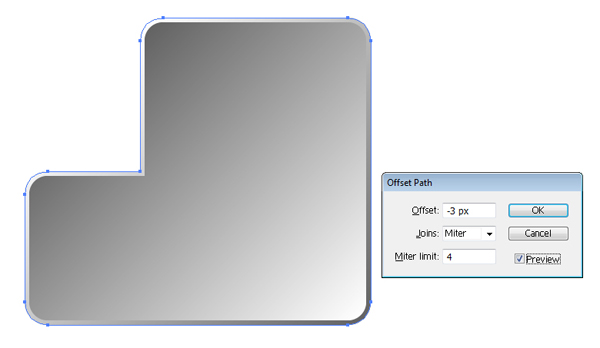
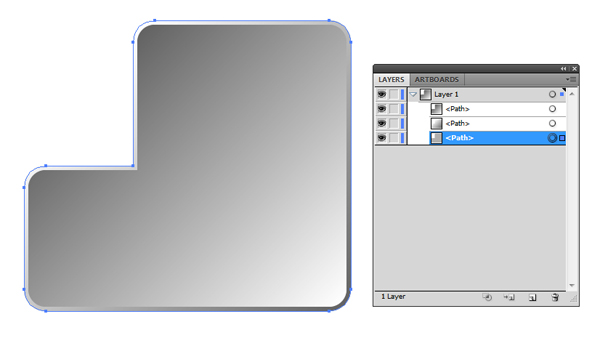
Apply Expand Appearance to bring the buttons to the dimensions using Object > Expand Appearance.
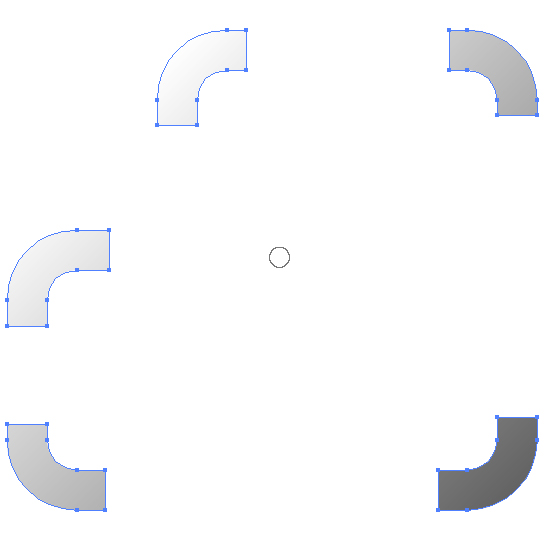
Step 10
Select the first layer and enlarge it using Offset Path (Effect > Path > Offset Path). Apply Expand Appearance to bring the buttons to the dimensions by setting Object > Expand Appearance. Make a copy of the layer using Command + C > Command + F.

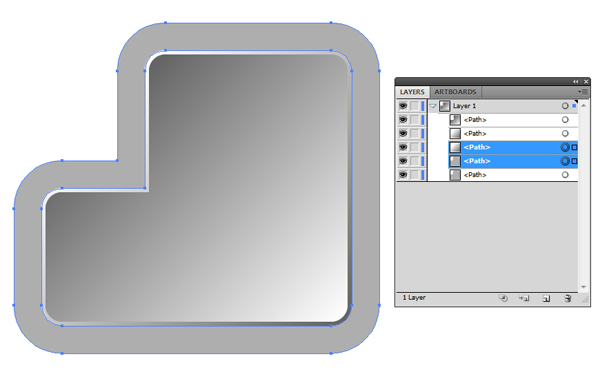
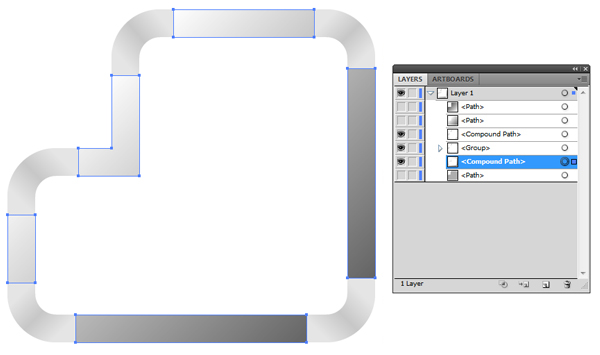
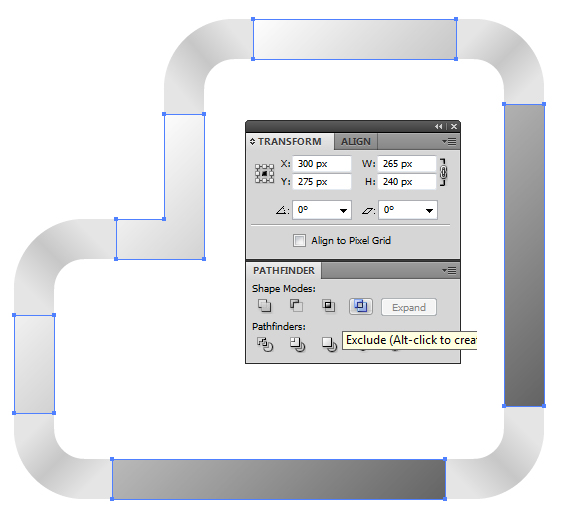
Step 11
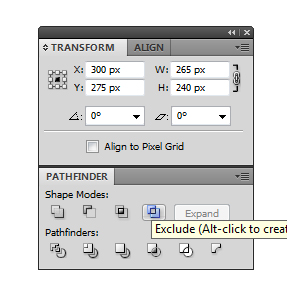
Select the layer in the middle and make a copy (Command + C > Command + F). Select the two layers created, keep the Alt key pressed, select Exclude, and then Expand from the Pathfinder window.
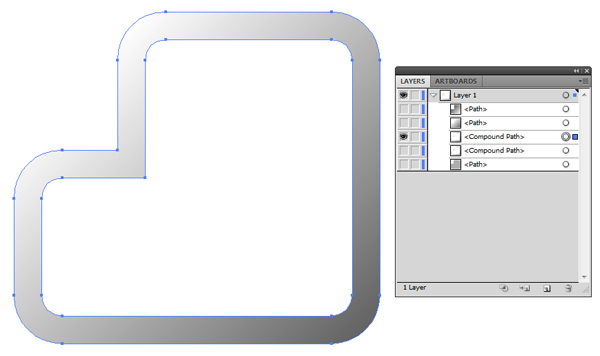
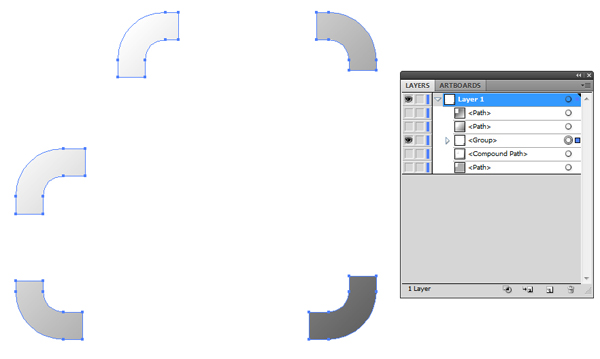
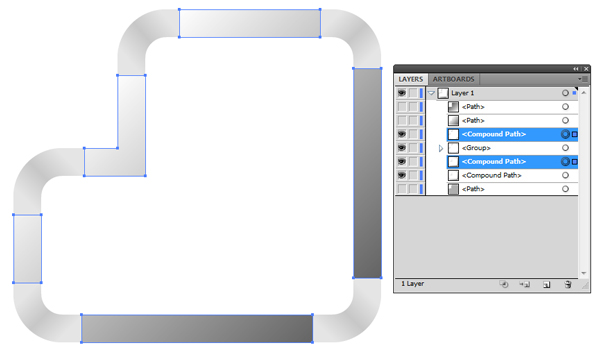
Step 12
Make a copy of the final layer (Command + C > Command + F), and then deselect all other layers, so that the only active layer is the result from applying Exclude.
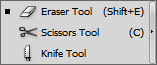
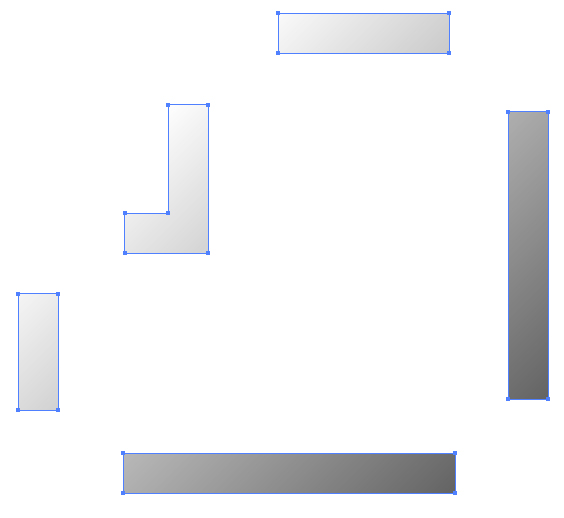
Step 13
Use the Eraser Tool (Shift + E) to delete certain parts of the button, keeping only the corners. In order to make a square/rectangular deletion, keep the Alt key pressed. Double-click the eraser in menu bar to modify the settings of the eraser.
Step 14
Select all the layers and group them (Command + A > Command + G).
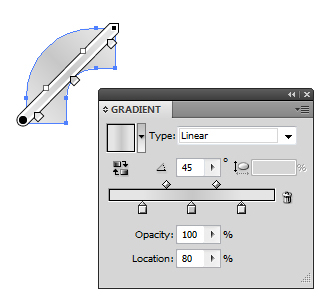
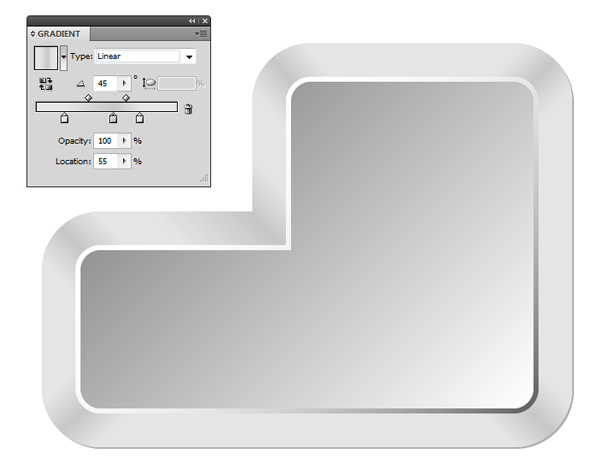
Step 15
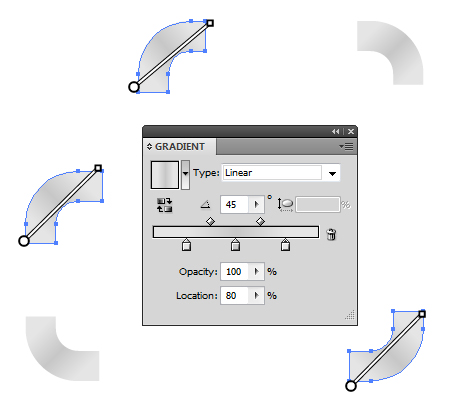
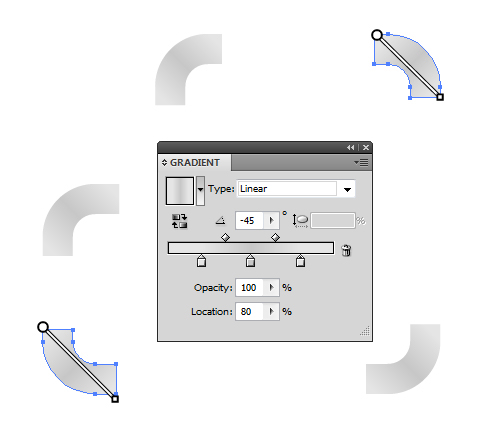
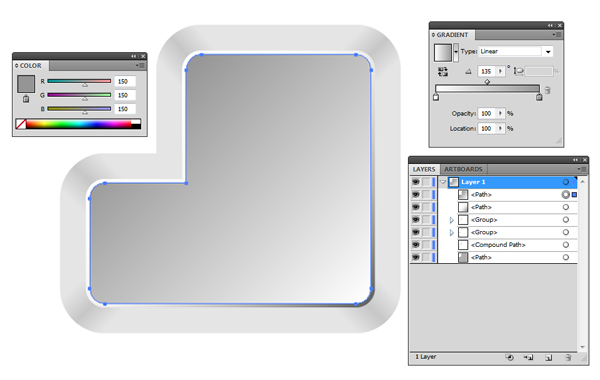
Color the upper left corner with the Gradient Tools at one end (R=230, G=230, B=230), (R=200, G=200, B=200) in the middle and (R=230, B=230, G=230) at the other end, location (R=20, G=50, B=80) with Angle 45.
Step 16
Now we’ll apply the Gradient color on the other corners using the Eyedropper Tool (I). Select the other corners and click the Eyedropper Tool on the colored corner. Now, you will have to make some modifications to the colored corners. To get them into the desired shape: some need to be modified from Angle 45 to Angle -45, and the dimension of the Gradient must be set according to the size of the corner as shown.
Step 17
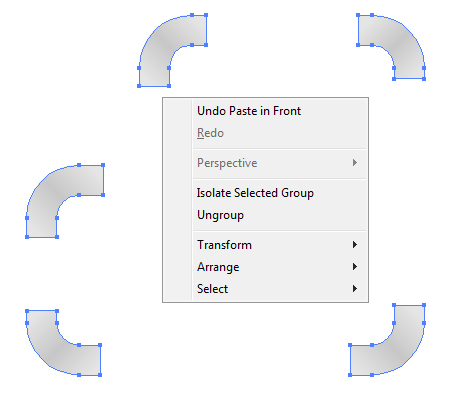
Make a copy of the group of corners using Command + C > Command + F. Now ungroup them and then group/merge them: keep the Alt key pressed to select Compound shape and then Expand them from the Pathfinder window.
Step 18
Activate the next layers to see the image.
Step 19
Make a copy of the layer below using Command + C > Command + F.
Step 20
Select the layer you just copied, together with the layer above, and keep the Alt key pressed to select Exclude and Expand from the Pathfinder window. Keep the Command key pressed to select both layers and click them.
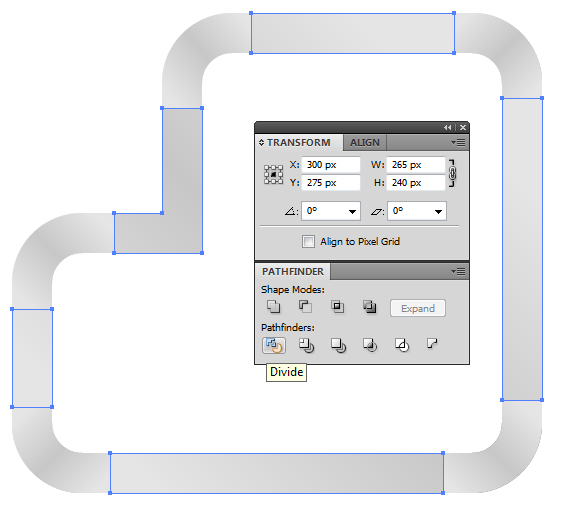
Step 21
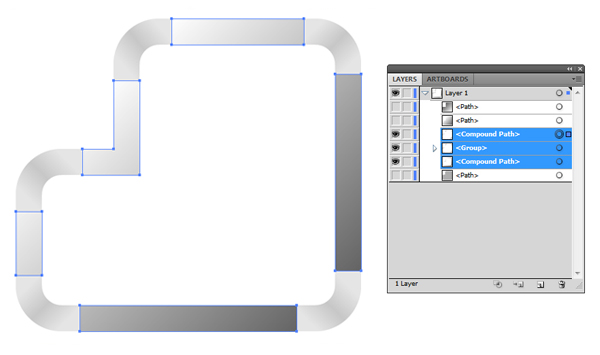
Color all the margins with RGB (R=230, G=230, B=230). Keep the Alt key pressed to select Divide from the Pathfinder window to separate the margins.
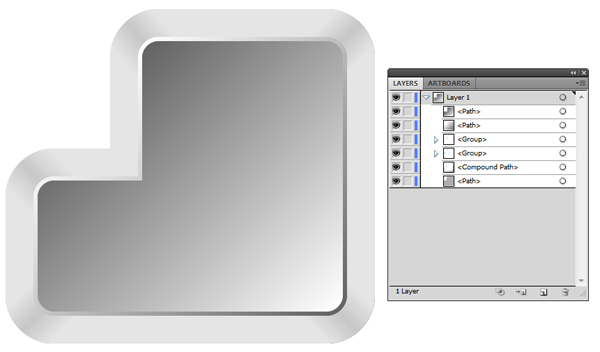
Step 22
Activate all the layers and make small corrections.
Step 23
Color the layer selected with RGB (R=230, G=230, B=230).
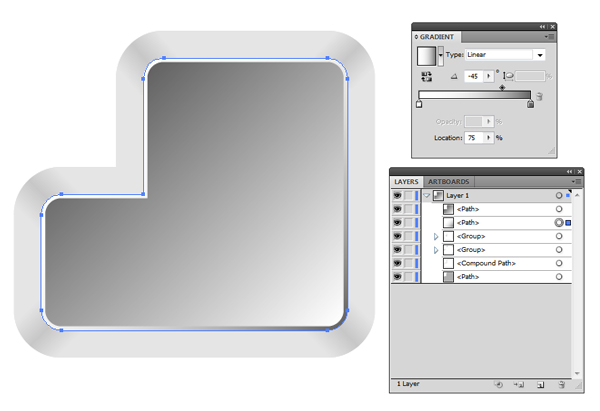
Step 24
Select the layer below and modify the Gradient Slider location to 75.
Step 25
Light up the color of the Gradient on the layer in front.
Step 26
Select the layer and modify its position: transform x=301 and y=276.
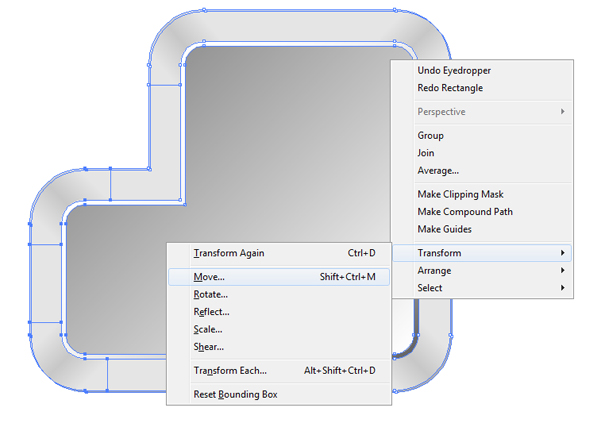
Step 27
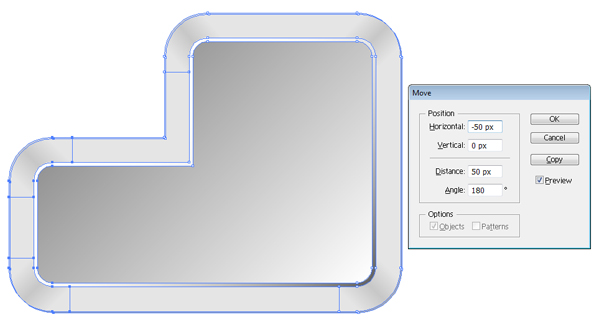
Select part of the layers to lengthen the Direct Selection Tool (A) and then Right-click Transform > Move.

Step 28
Select the margin shown below. Click it with the Direct Selection Tool (A) to add a shadow in the corner. Use the Gradient Tools to color one end with RGB (R=230, G=230, B=230), RGB (R=200, G=200, B=200) in the middle, and RGB (R=230, G=230, B=230) on the other end, with location (20 37 50), and Angle 45.
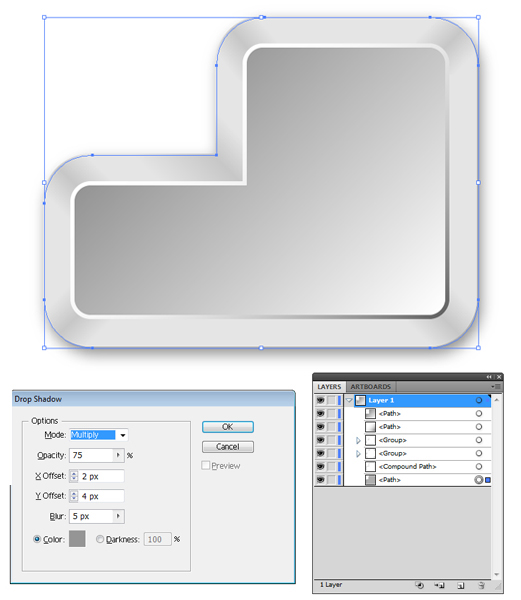
Step 29
Add a little bit of shadow to the button; the easiest way to do this is: Effect > Stylize > Drop Shadow.
Step 30
Another way to add shadow to the button is using a blending mode. Make a copy of the selected layer and copy it to the back using Command + C > Command + B, then color it with RGB (R=200, G=200, B=200).
Make another copy of the layer you just copied, color it white RGB (R=0, G=0, B=0), and place it in the center using Transform: x=275 and y=275.
Use the Move Tool (V) to enlarge the layer in the bottom right corner. Keep the Shift key pressed to maintain the proportion of the button, then select the two layers, and apply Object > Blend > Make (Command + Alt + B).
Conclusion
You can add the “Enter” text and arrow as shown. Now your keyboard button is done.
Using the techniques in this tutorial you can create other keyboard buttons using different shapes. I hope you’ve enjoyed this tutorial.
