Smart Objects are a truly amazing and powerful feature of Adobe Photoshop. In Getting Started With Smart Objects, you’ll learn how to edit your images with non‑destructive techniques, create and edit Smart Filters, and create interesting effects and useful mockups—all while retaining maximum flexibility and editability.
What You'll Learn
Tuts+ instructor Cheryl Graham will take you through the basics of using Smart Objects, and then introduce more advanced features like nesting Smart Objects, using Displacement Maps, and creating recursive images.
You'll learn through practical, real-world examples, like creating a mockup for a T‑shirt design and putting together a fun "picture within a picture". By the end of the course, you'll have a clear idea of how Smart Objects work in Photoshop, and how you can use them to create powerful effects and to speed up your existing workflow.
Here's a free preview of some of the lessons from this course:
What is a Photoshop Smart Object?
In this lesson you'll get an introduction to how Smart Objects work, and see how they allow you to make non-destructive edits to an image layer.
Smart Filters
When you apply a filter to a Smart Object, a Smart Filter (with a mask) is built in. The filters themselves can be changed and edited. It's one of the best things about using Smart Objects!
Using a Camera Raw File as a Smart Object
Camera Raw files can be used as Smart Objects, allowing you to edit the image non-destructively while maintaining a link to the original Raw file. In this lesson you'll learn how to create a photo composite from two different images.
Start Learning With a 14 Day Free Trial
You can take the rest of this course straight away with a completely free 14 day trial of a Tuts+ subscription. Start your free 14 day trial today, to access this course and hundreds of others.
This is a bit of a special interview. Nataliya Dolotko is a Ukranian artist currently living in Germany, creating microstock graphics and tutorials for us here at Tuts+. Read on to learn about what got her into design, her experiences as an artist working for Tuts+, Shutterstock and Fotolia, and where she plans to go with her designs.
Hi Nataliya! Thanks so much for taking the time to do this interview. Let's start with what got you into art.
I am so excited and happy to have this interview! Thanks so much for the
invitation!
Well, I've always enjoyed drawing and was a shy child who drew quietly in
her corner. Since school, my notebooks have been filled with doodles and drawings. When I
finished at Lviv National University in
Ukraine (actually I am a history teacher), I changed a few professions and
couldn't stick with any of them. My family travels a lot and when we
lived in the US, on the recommendation of my friend Tamara Patsay, I started to draw for microstocks. The last time my family lived in
France and I was a teacher at a Ukrainian school in Paris, I decided to stop changing professions repeatedly and to be a professional artist.
Who or what are your main sources of inspiration?
There are a few artists who inspire
me a lot: Beatrix Potter, Jill
Barklem, Jean-Jacques Sempé, Brian
Paterson, Teagan White, and many talented artists on microstock sites. I adore
libraries, museums and art galleries, excursions to castles, children books,
which I read with my daughter, vintage photos, and walking around the beautiful
town of Munich with my family.
Are you formally trained?
I have my masters degree in history. I thought about starting a second degree in art, but decided to learn what I wanted to know through online courses and tutorials. So, I’m totally self taught.
What is your creative process like?
My drawings are my feelings. It's my natural need to
use paper and pencil. I always have a sketchbook and markers or pencils in
my handbag. I'll be drawing on the metro, when
waiting for my daughter in her dance class, or during vacations on a beach. It’s
something that flows from my heart. And once I draw it on paper, I never digitize it. I had feelings, I
splashed them out on paper, and I feel satisfied. But if I’m close to my
computer, I try to draw in Adobe
Illustrator and make money from it.
What programs and tools do you use in creating your work? Anything you're especially fond of that you'd like to recommend?
I always use just Adobe Illustrator or a marker and paper; it is enough to start drawing something. For me, it is very
important to have a good quality marker or pencil, a clean eraser, and a nice
notebook. Many people use sketches at first and then transfer them to computer,
doing a lot of steps before seeing their artwork.
I advocate the simplest way
when you just open AI, create a new document, and that’s it. You have
everything you need there. To organize
my files I use File Explorer. Recently I started to use Moosti, an online time tracker, in order to be more organized. I also like Stabilo, Staedtler, and Faber-Castell
pencils and markers.
For how long have you worked professionally? Is your work as an artist your day job?
My work as an artist is my only job. I started
to draw for microstocks in 2009 and for Tuts+ in 2013, which make up my income. I’m not trying to work on commission; I can’t work under the pressure.
What's your typical workday like? How about your work space?
I start my workday at 7:30 am. Every day I
dedicate half an hour to improving my German, and then I answer emails, draw,
upload images to microstocks, and write tutorials. When I draw, I lose my connection with reality, and sometimes it’s hard to
interrupt myself and do exactly what I need according to my workday plan. At
2:30 pm I go out to pick up my daughter from school.
As a creative person, it’s
very important to be free when working without a boss or time frame where you
need to create something from 8 to 5 pm. But still I need to be very organized to
get something done.
Nataliya's work space, featuring her tools and inspiration.
Currently you create micro stock for Shutterstock and write tutorials for Tuts+. How did you start working with these companies?
I started to draw for Shutterstock and other microstocks in 2009, when I
was at home with my baby. Now it’s the perfect job for me, because my family moves a lot around the world and I can work in any country where we may live. I
draw for other stock sites too, such as Dreamstime, 123RF, Fotolia, Depositphotos, and iStock. I write tutorials for Tuts+,
123RF, and Medialoot. But my first love was Tuts+.
When creating concepts for tutorials, what do you look to for inspiration? Are you focused on hitting trends, taking direction from editors, or do you create things you want and write about them?
I just surf through the internet, often on Pinterest. You know that moment,
when you're scrolling, looking, and then... boom! You have a great idea for the
next tutorial! Also I read advices from editors, keep it in my mind, walking with it
for while and... boom! I'll be making a card on Trello.
When creating content for micro stock, what sort of work do you think sells best for you? Do you create sets of designs with the intention of it being a high seller, or are you focused on creating work you love first with the idea that it's possible it'll sell?
Of course, I pay attention to what sells the best, which season or
holiday, and get the newsletters from the
microstocks. My main goal is to be recognizable and that’s why I focus mostly on what I love. The first priority is my personality in drawing.
What are your goals as an artist?
My biggest goal is to have my own brand.
What words of advice do you have for aspiring designers?
Balance and harmony in everything! To be free and to be self organized. To
be workaholic but remember your family. If you are a graphic designer, you can't focus solely on income and draw
soulless icons for money. But if you have the talent from God to create something
beautiful, you can’t draw just for fun, because it's one of the commandments of
God to develop your own talent. And practice, practice, practice!
Many thanks to Nataliya for taking the time to share her artwork and experiences with us today. I rather love and agree with the idea that sometimes you just have to create because you can. It's a lovely sentiment and really shows with her designs.
For more of Nataliya's work, check out these links around the web:
In this tutorial I’ll guide you through the process of designing a clean and festive themed email template. We’ll start off totally from scratch, drafting the layout with Adobe Photoshop. We’ll be using some basic and intermediate techniques to create this design with conversion in mind. Let’s get it started!
Tutorial Assets
In order to follow along you will need some (freely available) assets:
Begin by creating a new Photoshop document (File > New…) using the settings shown below. The majority of email newsletters have a defined width of around 620 total pixels. I usually use 600px, but anything below 620px is fine. When this is built in HTML it might well be responsive anyway.
Step 2
Let’s set some guides so we have our safe area designed within the bounds of 620px width. Go to View > New Guide… and set some guidelines on the sides as well as a guideline in the middle so we can easily align things later.
Note: Guidelines used for this tutorial: vertical at 40px, 80px, 340px, 600px and 640px.
Tip: You could also use the GuideGuide Photoshop plugin to make this process even quicker.
Step 3
Sticking to Photoshop etiquette we’ll keep things organized and therefore easy to navigate and edit. Let’s create three layer groups named “Header”, “Message”, “Best” and “Quote”. To create groups go to Layer > New > Group… and give each one a title as mentioned. For quick creation of a group just click the folder icon.
Preparing the Background
You shouldn’t make your background too fancy or distracting as many email users won’t see it on smaller screens. Also worth mentioning is that the background shouldn’t be an image as it will be blocked by default on many email clients.
Step 1
Let’s first set the background of the email. Change the foreground color to very light blue #f6f9fb and hit Alt+Backspace to fill the “Background” layer. You can use any other light shade for your email but it is better to have this subtle color that doesn’t distract the recipient but still creates a different mood.
Step 2
Now it’s time to set a background in the safe area where all email content will be put. Pick the Rectangle Tool (U) and draw a white #FFFFFF rectangle between the first and last vertical guidelines that are 600px apart.
Designing the Header
The header of our email is very important and is the crucial point where the email recipient will decide if reading further is worth their time. According to this guide by Nicole Merlin, email expert extraordinaire, it is important to be clear and transparent.
“State the sender, cut the fluff and get straight to the point.”
For this tutorial I will simply put a company name and a link for people to open the email in a web browser in case it doesn’t load properly via the email client. Additionally, I will include a huge image with simple messaging setting the mood and showing the intentions of this email, which is about wishing happy holidays.
Step 3
Open up the “Header” group and pick the Horizontal Type Tool (T). You may find it better to write your company name rather than use a logo because, as I’ve mentioned before, images may be disabled when your email is opened so it can ruin the experience because your logo won’t be visible.
Pick a font that you use for your brand and write your company title, place it on the left top side and give it some space around. In my case I used Open Sans (Bold) 18px size dark grey #434343 for the color.
Step 4
It is very important to provide a link that people can click or tap on and open the email in their browser in case it doesn’t render very well in the email client. Just a simple text link will do the job, placed early on so screen-readers encounter it straight away. I’ve used the same Open Sans (Semibold) font and changed the color to brighter grey #666666 and reduced font size to 13px. Finally place it in the right top corner of the email.
Step 5
Awesome! Now we need to place an image to draw attention of the recipient. We’ll use a Christmas themed photo, adding some gradient effect and copy above it all.
Grab the Rectangle Tool (U) and draw a 600x300px sized box between the first and last guidelines. Then create a new layer on top of it and hold down the Alt key and mouse over the photo layer until you see a little arrow pointing down. When you see it, click on it and you will create a Clipping Mask. Now pick the Gradient Tool (G) and choose the default gradient from red to green.
Now make the gradient by dragging your mouse from top left to bottom right. You will get something like the example below.
Step 6
After that download Bokeh of String Lights on Tree photo from Good Stock Photos and place it over the gradient layer creating a Clipping Mask for this layer too. Finally hit CMD+T and resize the photo.
Pro tip: hold down Shift key to draw/resize proportionally.
Step 7
Now set the layer blending mode to Overlay.
Step 8
Finally let’s write our main message. I’m using white #FFFFFF with the bold, yet elegant typeface Playfair Display (Bold Italic) 52px size to portray the festive feeling. When designing email newsletters make sure to keep your message short and clear so users get it right away.
Designing the Message Area
Another thing that you should keep in mind is designing blocks that can be re-used. For example we’ll design this message block that can be turned into a template so users can change the headline, main copy and call to action button without the need of a designer because everything will be pre-designed. Also they can duplicate such a block and use different messages.
Step 9
It is smart to design your emails in one column and centrally aligned so it can be made into responsive layout easily. Open up the “Message” group and pick the Horizontal Type Tool (T). I’ll be re-using the type layer used for the company title and will increase the font size to 32px and change weight to Extrabold.
Step 10
Now it’s time to say something in more detail, don’t be too long and try to grab reader’s attention, leading the reader to click the call to action button we’ll design in a moment. Using the same Horizontal Type Tool (T) write down your copy, for mine I’ve used the same color as for the “Open in browser” link #666666 and Open Sans (Regular) 18px size.
Step 11
Awesome! You have the reader’s attention and now it’s time to put a call to action button so your email leads somewhere useful. Create a new group called “CTA” and grab the Rectangle Tool (U), after that change foreground color to a red #de1816 that represents the Christmas mood and draw a rectangle shape. In my case it is 240x40px size. Then pick the Horizontal Type Tool (T) and enter the button’s message. I’ve used white #FFFFFFOpen Sans (Bold) 14px size.
Finally we need to close the block by separating it with a line; set the foreground color to light grey #eeeeee and pick the Line Tool (U) with Weight set to 1px. After that draw a horizontal line between the first and last guidelines. Leave some space above the line.
Pro tip: hold down Shift to draw perfectly straight lines.
Designing the “Best of” Area
One very common feature in email digest newsletters is sending out latest articles that readers may have missed or would be interested in. When designing such a module you need to keep in mind that it is going to be a dynamic element so you need to set up the scene leaving the email creator to replace the information.
Step 12
Duplicate the previously used message headline layer by hitting CMD+J and dragging it into the “Best” group. After that, change its title and place it below the line consistently, so you maintain vertical rhythm.
Step 13
Now we’ll list out some best articles of the year. For this tutorial I’ll simply use article images, titles and descriptions from Tuts+ Web Design.
Create a new group called “Article”. Grab the Rectangle Tool (U) and, holding down the Shift key, draw a 140x140px sized box. Then pick an article image and drag it to your Photoshop window, after that create a Clipping Mask as we did before and resize the image if needed.
Step 14
Great! Now we need to enter the article title and short description so the reader can get a quick overview before clicking or tapping. I’ll re-use the section headline layer by duplicating it and reducing the font size and also duplicating the description layer from the “Message” group.
Step 15
Minimize the “Article” group and duplicate for two more times by hitting CMD+J. After that move these duplicated groups below the first one and you will need to change the titles, images and descriptions of these duplicated elements.
Step 16
Finally duplicate the “CTA” group and line layer by selecting them and hitting CMD+J, after that move these layers into the “Best” group and place them below the articles leaving enough space.
Designing the Quote and Footer
The end is very near. Let’s put a final block in our newsletter, an inspiring quote with a secondary call to action to tweet it. Best practice is to repeat the main call to action at the very end of the newsletter, but we will break this rule here and use an inspiring quote to energize the reader.
Step 17
Open up the “Quote” group, pick the Horizontal Type Tool (T) and any quote you like from BrainyQuote. Copy the quote and write it down using the same elegant typeface we’ve used for the graphic at the very top of our newsletter. In my case it is Playfair Display (Italic) 24px size and grey color as used for the copy #666666 earlier.
Step 18
Head over to the Twitter website and copy a tweet button. Take a screenshot by hitting Shift+CTRL+CMD+4 and selecting the Tweet button. After that paste it and place below the quote.
Step 19
One last thing. Every email newsletter has to have an option for people to unsubscribe. It is also good to state why recipient is getting the email in the first place. Reuse the “Open in browser” link from the very top, duplicate it and place it below the content background.
Congratulations!
Our finished design
That’s it! We’re done with the email layout design, now review the layers, delete the unnecessary ones and hand it over to your developer, or even better code it yourself. I’ve touched upon some basic techniques and demonstrated my workflow for designing email layout, I hope you’ve learnt something.
I’d love to hear your feedback and see the outcomes of this tutorial!
December and January are full to the brim with parties and social gatherings. If you’re hosting your own dinner party to celebrate the New Year, personalised place cards can add an extra special touch to the table.
This is a fun tutorial, and glitter is more than encouraged for adding that final glam touch to the cards! We’ll be using Adobe InDesign, but we’ll also do a bit of image editing using Illustrator. You’ll also need access to an A4 color printer (or a friendly professional printer!), as well as scissors, a craft knife, and some optional glitter or glitter glue.
Once you’ve set up the basic layout of the cards you can experiment with different colours and typefaces to match the theme or decor of your dinner table. We'll look at some design rules to follow when designing your own cards, and show you another design example to imitate, which has a more festive, high-contrast look.
1. Prepare the Layout of Your Party Cards
We’ll set up the cards to print on an A4 sheet. Most home printers don’t print to the very edges of the page, so we’ll take this into account when we prepare the layout.
Step 1
Open InDesign. Select New Document from the Welcome window or go to File > New > Document.
Step 2
In the New Document window, keep the Intent as its default setting, Print, and set the No. of Pages to 2.Uncheck Facing Pages.
From the Page Size drop-down menu select A4 and switch the Orientation to Landscape by clicking the right-hand icon.
Adjust the Number of Columns to 2 and increase the Gutter (space between the columns) to 10 mm.
Set the Margins on all sides to 5 mm, and include a Bleed of 3 mm on all sides, if you’re intending to send the cards out to a professional printer.
Click OK.
Step 3
Each card will be 110 mm in Width and 50 mm in Height once folded. So, the entire dimension of one card when laid out flat will be 110 mm in Width and 100 mm in Height.
We can introduce some guides to make laying out multiple cards to each page much simpler. Navigate to the A-Master, by double-clicking on the A-Master page icon in the Pages panel (Window > Pages).
First, drag a vertical guide from the left-hand ruler (View > Show Rulers, if not visible by default) to the center point of the page, at 148.5 mm. Drag a second guide, this time from the top ruler, to the horizontal center of the page, at 105 mm.
These useful guides will be applied to all pages which have the A-Master applied to them, which by default is currently both pages of your document.
2. Pop-Up Cards With Hand-Drawn Snowflakes
Step 1
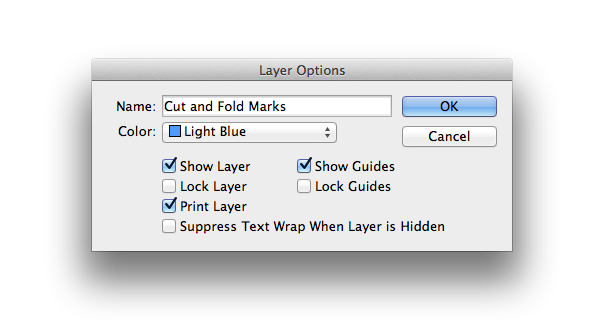
Open the Layers panel (Window > Layers) and double-click the default Layer 1 name. In the Layer Options window, rename the layer Cut and Fold Marks.
Click OK, and then Lock the layer. Create a second layer by clicking the Create New Layer icon at the bottom right of the panel. Rename the layer as Background and click OK. Move the Background layer to sit below the Cut and Fold Marks layer.
Step 2
Navigate to Page 1 of your document, remaining on the Background layer.
Select the Rectangle Tool (M) and drag to create a frame 110 mm in Width and 100 mm in Height. Position this to the top left of your page, resting the lower edge on the central guide, and the right edge against the edge of the left-hand column, as shown.
Select the frame and Edit > Copy, Edit > Paste three times, positioning each frame as shown below.
Step 3
Now it’s time to apply some color to the background of your cards. The decorative elements of the cards are going to be pulled out in white and pale grey, so choose colors that will provide some contrast.
Here I’ve used a pale blue and a charcoal grey to keep the colors of the card looking rustic and muted.
Open the Swatches panel (Window > Color > Swatches) and click the New Swatch icon at the bottom right of the panel. Add the following CMYK swatches to the set of colors:
C=47 M=6 Y=9 K=0
C=65 M=46 Y=37 K=23
Apply the pale blue swatch to the Fill of the two frames on the left side of the page. Apply the dark grey to the two remaining frames. Set the Stroke Color of all the frames to [None].
Step 4
Return to the Layers panel and Lock the Background layer. Unlock the Cut and Fold Marks layer.
Remaining on Page 1 of the document, select the Line Tool (\) and, holding down Shift, drag from left to right to create a short straight line, about 11 mm in Width. Set the Width of the Stroke (either from the top control panel, or the Stroke panel [Window > Stroke]) to 0.25 mm.
Position the line to the left of the page, resting it along the central horizontal guide.
Select the line and Edit > Copy and Edit > Paste. Manoeuvre this second line into a mirrored position on the right hand side of the page.
These lines indicate where the cards will need to be cut.
Step 5
Remaining on the Cut and Fold Marks layer, select the Line Tool (\) as before and, holding down Shift, drag from left to right to create a straight line, about 11 mm in Width.
Adjust the Stroke Weight to 0.1 mm, Type to Dashed and Stroke Color to [Paper]. Position this across the center of one of the cards.
Select the line and Edit > Copy, Edit > Paste three more times, positioning each meeting across the horizontal center of each card.
These lines indicate where the cards will need to be folded.
Step 6
Return to the Layers panel and Lock the Cut and Fold Marks layer. Create a new layer, and rename it as Snowflakes. Position it above the Background layer.
Step 7
Keeping your InDesign document open (and saving it for good measure!), open Adobe Illustrator.
Go to File > Open and select a vector image of snowflakes, like this one from PhotoDune.
Isolate one of the snowflakes, editing it on a fresh Illustrator artboard.
Select the vector and open the Brush Definition drop-down menu from the top control panel. Click the Brush Libraries Menu icon at the bottom left corner of the menu and select Artistic > Artistic_ChalkCharcoalPencil. Apply Pencil - Thick to the vector, adjusting the Stroke Weight to 2 pt.
Change the Fill and Stroke Colors to White (C=0 M=0 Y=0 K=0) and save the artwork as an Illustrator EPS file, checking Transparent from the Format options in the EPS Options window.
Step 8
Return to your InDesign document.
Remaining on Page 1 and on the Snowflakes layer, select the Rectangle Frame Tool (F) and drag to create a small square frame about 40 mm in diameter.
Go to File > Place and select the EPS snowflake image. Click Open. Select Fill Frame Proportionally from the top control panel to arrange the image nicely in the frame.
Using the Free Transform Tool (E) you can also rotate the frame a little to give it a slightly jaunty angle. Position the image frame centrally on the fold line of the top left card.
Repeat the process to create two more image frames with their own snowflakes, at smaller scale than the first frame. Position them either side of the larger snowflake.
Select the trio of image frames and Edit > Copy, Edit > Paste, positioning them identically on the other cards.
Step 9
Return to the Layers panel and Lock the Snowflakes layer, and Unlock the Cut and Fold Marks layer.
When the cards are cut and folded, we want the snowflakes to pop up over the edge of the fold, as shown here.
To be able to do this, we need to create a cut line that flows over the top of the snowflakes.
Navigate to the top left card on Page 1 and select the Pen Tool (P). Giving yourself a small margin proud of the edge of the snowflakes, click sparingly around the perimeter to create a cut line stretching from the fold line on the left side to the fold line on the right edge.
Try to keep the number of corners to a minimum to make the line tidy.
Once you’re happy with the line, adjust the Weight to a very thin value, around 0.01 mm, and set the Stroke Color to [Paper]. The line should be only just visible.
Step 10
We can now introduce some typography to the cards, and you can start to personalise the designs with the names of your guests!
In the Layers panel, Lock the Cut and Fold Marks layer and select the Create New Layer icon. Rename this new layer Typography.
As the card design has a hand-made, rustic look, you should pick a font that looks equally charming. A handwritten, chalky font like Chalk Hand Lettering Shaded will work a treat.
Select the Type Tool (T) and drag to create a text frame 110 mm in Width and 17 mm in Height. Type ‘Name’ and set the Font to Chalk Hand Lettering Shaded, Size 60 pt and Align Center. Set the Font Color to C=65 M=46 Y=37 K=23.
Repeat for your other cards, adjusting the Font Color to [Paper] for the cards with a grey background.
Step 11
As a final step, Lock the Typography, Snowflakes and Cut and Fold Marks layers. Drag your mouse across the whole of Page 1 to select the colored frames and Edit > Copy.
Navigate to Page 2 of the document and Edit > Paste in Place. If you print the cards double-sided, this will ensure that the insides also have stylish colored backgrounds.
3. Prepare Your Cards for Print
Step 1
Once you’re happy with the InDesign artwork you can export the cards to PDF for print.
For printing at home, go to File > Export, selecting Adobe PDF (Print) from the Format drop-down menu in the Export window. Select Press Quality from the Adobe PDF Preset drop-down menu, and ensuring All is checked under the Pages options.
Step 2
If you’re sending the cards to print at a professional printers, you should check All Printer’s Marks and check Use Document Bleed Settings under the Marks and Bleeds options (accessible from the left-hand menu).
Click Export and you’re done! Great work!
4. Why Not Try Out a Different Style?
Place cards are a great canvas for all sorts of designs. You should match your choice of typefaces and colors to the scheme of your dinner setting, or give the cards a theme if you’re hosting a themed party.
Once you have the layout of the cards prepared, as detailed above in Section 1 of the tutorial, you can get experimental with your design choices. Throwing a lavish Great Gatsby-inspired affair? Try introducing an Art Deco frame and gold detailing on your cards. How about a stylish event inspired by Truman Capote’s famous ‘Black and White’ Ball? Apply monochrome detailing for contrast and an elegant serif typeface for added elegance.
The options are endless, and it comes down to your personal preferences. Just remember to keep these simple rules in mind:
Use a typeface which matches the feel of your event (elegant, playful, or minimally modern) and make sure it’s legible at small scale (no one wants to be having to squint to read where they’re meant to be sitting!).
Use color contrast to draw attention to the text (see the example design below).
Include images sparingly. Silhouettes and simple shapes look best and won’t compete with the text.
Make sure your text and images will be centered or appear symmetrical once the cards are folded.
Have fun! Choose designs that will make people smile or will give your guests the impression that an extra special effort has been made. Everyone loves to feel special at an event, and named place cards are a great way of doing this.
To imitate the design of these place cards, which use more contrasting colors and silhouettes for a strong, festive look, you can use another snowflake vector from the vector image of snowflakes we used earlier.
As before, isolate one of the snowflakes, editing it on a fresh Illustrator artboard, switching the Fill Color to White. You can simply Edit > Copy the simple vector in Illustrator and, returning to InDesign, Edit > Paste the vector into the InDesign document directly.
Use bold colors with a wintery feel, like Moss Green (C=61 M=42 Y=100 K=36), a Deep Purple-Blue (C=76 M=72 Y=41 K=37), Cranberry Red (C=22 M=92 Y=100 K=14) and Coal Black (C=75 M=64 Y=67 K=83).
For the names, use an elegant serif typeface with italic characters that merge into each other seamlessly. The font Great Vibeswould be a great choice.
Your Cards Are Looking Awesome!
Once your cards are printed, all you need to do now is whip out the glitter glue and add a few touches of wintery sparkle. Beautiful!
As the music begins to play, a soft breeze fills the space with the undeniable smell of magnolia blossoms. She gracefully enters and begins a “tree pose” with her hands in Namaste form. Our female figure is inspired by the Indian culture for its gorgeous use of color and the grace of its yoga formations. I hope you’ll enjoy the journey as we retrace, step by step to enlightenment.
1. Becoming Flesh and Blood
Step 1
Our first step will be to bring in our sketch. I've scanned her in at 300 dpi
to catch as much of the detail as possible. I'm not as picky about my choice of initial drawing tools, and this particular project was completed with a mechanical pencil.
We'll be working with a clean line quality from Adobe Photoshop and now we can begin to work. I'm working in Adobe Illustrator at a size of 8.5 x 11 inches for this specific project.
When I'm ready to start my layers, I'll label my first layer as "Sketch" and lock the layer to make sure that I won't accidentally move or delete the sketch. We'll be loosely following this as our guideline.
Step 2
Now that our area is ready for rendering, we can start to lay down our colors. I like to go with a two-color Linear Gradient. This allows for a bit more dimension and directional light. Using our Pen Tool (P), we'll start with the body shape.
Step 3
Follow the contours of the body with your Pen Tool (P). You'll notice that I've rendered her skin in three parts. The arms are overlapping the body, which will be useful in our future steps.
2. Adding Facial Contours
Step 1
During this step, we'll apply our most prominent contour lines. We'll use the same color as the skin, but this burnt sienna will take on a darker tone.
Step 2
Layering in the shadows using the same Radial Gradient is recommended. The lightest point of the gradient's Opacity has been lowered to 0%.
Step 3
Upon finishing the eye shading, we can layer on our eyebrows, eyelashes, and sclera of the eye. This is a light silver grey in preparation for future details, which we will cover shortly.
3. Body Highlights and Shadow Shaping
Step 1
Once our initial skin colors have been laid down, we can cover the skin with highlights and shadows to give it more dimension. I like to use a Radial Gradient to create my highlights. Using two gradients of pure white, I've lowered the Opacity to 0% for the outer pure white, which gives us a smooth softness to the skin. Lower the Transparency to 40% and that will allow the highlight to blend with the skin-tone.
Step 2
Progression of the highlights is going well at this stage, but as you can see, she still looks pretty flat. We'll fix that in the next steps.
Step 3
Using a slightly darker version of our skin gradient, we'll include shading and shadows.
Step 4
Even if you won't see all of the shading that we're doing once the clothes have been rendered, it's still helpful to do complete it all. While working as a vector artist for a very well-known company, I was instructed to always finish the body and shading underneath the clothes, just in case anything needed to be moved during editing. I appreciated this process and so follow it even now.
Step 5
Our female figure has now undergone shading and is ready to be enhanced with detail.
4. A Vision of Beauty
Step 1
One of my favorite assets are the eyes. Personality comes through, and they're the first thing to pop off the page. I've begun to create my iris color, a mix of sage green and burnt sienna to create a greenish hazel.
Step 2
Using a pure black solid while using my Pen Tool (P), I'll make the pupil. You'll notice that I've also used a pure white to insert into the sclera. This will give more enhancement to the eye as a whole.
Step 3
Using a dark chocolate, create more depth to the iris of our green hazel eyes as well as a reflection to overlay over the pupil.
5. Makeup Application
Step 1
Add a bit of shine to the lips, to give the appearance of lip gloss.
Step 2
I've made the lip color just a bit darker to complement her skin tone. With the embellishments we'll be creating, we won't need any vibrant makeup.
Step 3
Next, we'll add a little eye shadow to her very low-key look. I'm using a mauve-like color at the end of a two-color Radial Gradient. You'll notice I prefer Radial to Linear because of the shape that the gradient takes. It has a bit of an organic feel and tends to blend better to its base colors.
6. A Touch of Gold
Next, I've started to make the jewelry. You'll notice that I'll be using this combination of color for all of the gold accents. Other than the jewel tones, you won't see much in the use of Stroke lines. This particular Stroke Line is at 0.15 pt.
7. Beauty Is Only Skin Deep
Step 1
While we're enhancing her skin, I wanted to make sure to add a few freckles. I love freckles on skin, and adding a cluster like this and Grouping (Control-G) them together makes it easier to place them.
Step 2
At this point, we've added freckles to the chest area. They will be barely noticeable, but a very nice touch once the entire piece comes together.
Step 3
While I'm finishing up the freckles, I couldn't help but add a few to the bridge of the nose and across the cheeks.
8. Colorful Garb
Step 1
Our figure is finally ready to wear clothes. There are quite a few earth tones included in her skin, so to complement this, I wanted to use a royal purple.
Step 2
This shirt is reminiscent of the traditional choli. A choli is a midriff-baring blouse worn in countries such as India, Sri Lanka, Bangladesh and other countries that wear the traditional sari most complemented by the wearing of this particular garment. By making a three-color Radial Gradient, we can give our choli an almost iridescent glow.
Step 3
Once the choli base color has been made, we can focus on our harem pants. Harem pants are more of a Turkish or Arabic fashion but they're so fun to draw, I just couldn't resist! Here, we've rendered the waist band just parallel to the hips, which is customary to the fashion.
Step 4
Using our amazing iridescent color, we've made folds in the fabric of the pants. To give them a flowy feel, we've used a Feather Effect with a Radius of 0.07 in.
Step 5
Once we've finished our pants, they'll look like this. We acquired a lot of depth from a small bit of work.
9. Rendering Your Peacock Scarf
Step 1
After finishing the pants, we'll move on to our peacock-inspired scarf. I've chosen these colors specifically because of their jewel tones. These rich colors really bring a sense of luxury to our piece.
Step 2
We will apply highlight folds similar to the way we applied the folds to our harem pants. We're still following our sketch underneath loosely.
Step 3
Where there is light, there is dark. Make sure to add a few dark shades to our folds.
10. Embroidering Your Choli
Step 1
We are finally ready to embellish our clothing.
Step 2
As mentioned, I'll be using the same gold from our earrings to create our main embellishments. It's a warm Radial Gradientgold that I hope you'll enjoy seeing in our jewelry as well.
Step 3
In this step, we'll create our smooth jewels. As mentioned, we will be using the Stroke lines very rarely with this particular project. Since it's a very simple shape made effectively with our Ellipse Tool (L), the Stroke is very subtle.
Step 4
After Grouping (Control-G) all of my elements, I'll create a Symbol from this particular jewel. This allows me to make duplicates of it without creating an overly large file. If you're sending this away to a client, this little trick will come in handy.
As I make these Symbols, I can also manipulate the shape. I've taken our already oval-shaped jewel and have Transformed it into a circle.
11. All That Glitters
Step 1
This is another of my favorite things to work on, the jewelry. I'll start the arm bracelet off by using my gold, previously used on the earrings and choli embroidery. We've made a very simple, thick band, which we will encrust with jewels.
Using our template for the purple jewels, we made another set of symbols, but used blue tones to complement the orange in the gold. We've also made a many-faceted sapphire to offset the simplicity of our other smooth jewels. Textures pique interest, and since our goal is to have a project that will take on more than a glance or two from onlookers, this works in our favor.
Step 2
In this step, we've built up a cluster of jewels, using what we already have available.
After creating the cluster, we can place several of them together in an arch to form her necklace.
Step 3
Using our gold color, we have formed multiple rings. With such elaborate embroidery and jewelry, the simple statement comes off modestly without looking too showy or gaudy.
Step 4
Making the anklet is an easy step as well. In Middle Eastern countries, this is a customary decoration to adorn the legs. To create the chain, I've used a single Dashed Strokewith Rounded Caps and Rounded Joint Corners.
The coins were made with Ellipses (L) with the centers Excluded.
Step 5
Our next piece of jewelry will be the belly piercing. We will again use one of our blue jewel Symbols, and our signature gold color.
Step 6
We have created our scarf tassels using our smooth jewel Symbols. In the project file, you will find each of the three color jewels that are featured here as well as in the jewelry.
Step 7
Once we have built up our necklace, we can create matching earrings using the pieces already made. You can see that I've edited two of the jewels to break up the coloring. In order to produce an individual color, you can right-click with your mouse over the Symbol which will bring down an option panel. Move to Break Link with Symbol and Select. This will break that particular Symbol's link and it can now be edited without fear of affecting all of them.
Step 8
This particular string of jewelry is called the Maang Tikka. It is worn on the parting of the hair in place of the red spot (tilaka or 'tika') on the foreheads of Hindu women. It's a beautiful addition to our piece, and I hope you'll appreciate it as well.
12. Lovely Lady Locks
Step 1
We are finally able to start our hair. Using our Pen Tool (P), we can loosely follow our sketch to create the shape we want.
Step 2
After laying down the main color which should remain a bit darker than the rest of our hair as we make it, we can start with our braid. Notice again that you can plainly see the strands of hair, even though we are using the same two-toned Gradient.
We'll continue with this treatment even into the longer hair strands. You do not need to make each one the same width or length. Hair is an organic texture, and you'll appreciate it's wavy, playful nature even more once you have completed your illustration.
13. Just a Bit More Sparkle
We're putting a little more shine on an already glitzy piece, but these will act more as focal points. They can be placed in various places, but use them sparingly.
14. A Balanced Background
Step 1
Now that we have completed our figure, we will make a very simple background to finish up our project. I've used two very calm and tranquil colors that complement the jewel tones. Using a brighter color would unbalance and overtake the composition.
Step 2
One more accent to include will be this sun-inspired background piece. Again, I've used our gold color with Ellipses (L) and Stroke lines. The main sun accent has been Grouped (Control-G) and its Transparency dropped to 50%.
Finished! Our Tranquil Beauty Is Now Ready for Yoga Class!
In this tutorial you will learn how to create some fun line art as a basis for a cute winter illustration.
I'll be collaborating with Melody Nieves. I'll be creating the line art and Melody will be rendering the scene in Adobe Photoshop.
The brief for our winter-inspired piece is:
"Create a culturally neutral winter scene that shows how warm and cool light sources play off snow. Include three white-coated animals to show how the different light plays off them."
Tutorial Assets
The following assets were used during the production of this tutorial:
Any illustration should start off with some planning, and that usually involves working out what your artwork brief requires.
In this case we need:
three white creatures: an arctic hare, a deer, and a snowy owl
snow
two distinct light sources: warm and cool.
Chatting with Melody, we come up with the idea of a forest scene where the animals are decorating an old pine with pine cones and acorns.
Reasons to thumbnail include:
ensuring your client or collaborator are thinking the same thing about the brief
to quickly decide on a composition
to decide on light sources
as a starting point for your client or collaborator to chip in ideas
to make sure all the elements work together in a composition
to brainstorm ideas, viewpoints and perspective
to see if your piece works better in a horizontal or vertical layout
So without further ado I will show you my thumbnailing process!
Step 1
Below I have created some thumbnail rectangles to quickly doodle some ideas.
Step 2
As this piece is going to be concerned with warm and cool lighting, I begin by painting in a sky, a cool light source and a warm one.
Step 3
The I rough out some ideas using simple shapes such as triangles for tree, circles for the owl and hare and sticks for the deer. At this stage it's OK to totally scrap ideas that are not working, and move on to the next one.
Step 4
At this point I remove all the blank rectangles and thumbnails that didn't really work.
Step 5
For this collaboration I send these thumbnails to my co-illustrator Melody Nieves and we choose our favourite compositions. We choose the same thumbnails, but I also liked the one circled in orange.
Step 6
After some discussion we settle on this thumbnail, and as we wish to keep this piece culturally neutral we decide to change the warm light source from tree lights to a lamp which will be held by the hare.
2. Document Setup
Step 1
For this illustration we will be setting up the artwork for print. We want to have an A3 size print, so in the New Document Dialogue (File > New or Control-N) we set:
Width to 297 mm (or 3,508 px)
Height to 420 mm (or 4,961 px)
Resolution to 300 dpi (the standard Dots Per Inch for print)
The Color Mode is set to CMYK as we will be printing this document. However, if your artwork is not for print then set the Color Mode to RGB.
Step 2
I then copy the third rough with the Rectangular Marquee Tool (M) and press Control-Shift-C to Copy Merged (which will copy all layers) and Control-V to Paste into my print document. Then I scale the artwork to the document size by pressing Control-T. Note the rough sketch is of lesser quality than we would normally work at, but as this is just a rough, it will not be seen in the final document.
Step 3
With the thumbnail layer selected, press Control-T to bring up the Transform controls and scale the thumb to the size of the document, and press Enter.
Step 4
In the Layers panel, turn down the layer opacity to around 25% so that the artwork is quite light but you can still see what's going on. Think of this step like using tracing paper. Next press Control-R to bring up the Rulers, and use the Move Tool (V) to drag a guide from the top ruler for your horizon line. This is purely a preference thing, so if you would prefer to draw in a horizontal line on a New Layer (Control-Shift-N) then hold Shift while you use the Brush to create a perfectly straight line.
3. Setting Up Our Brush
For the line art of this piece I will be using a modified default Photoshop brush and below are my settings for the brush.
Press F5 to bring up the Brush dialogue box.
Step 1
Hardness to 100%
Spacing to 1%
Step 2
Shape Dynamics:
Size Jitter 0% with Control set to Pen Pressure
Minimum Diameter 70%
Angle Jitter 0%; Control Off
Roundness Jitter 0%; Control Off
Step 3
Transfer:
Opacity Jitter 0%; Control Pen Pressure; Minimum 0%
Flow Jitter 0%; Control Pen Pressure; Minimum 0%
Step 4
Then save your brush by pressing Create New Brush at the bottom right of the Brush dialogue.
4. Roughing Out the Trees
Here we have two reference images of pine trees. For this illustration we don't want realistic detail, but we do want to convey the overall feeling of a pine tree, so we need to know what we're drawing.
In our first example we can see the branches are springy and fairly uniform, and the silhouette is a triangle. The branches are curved upwards and the foliage is dense.
In our second example this tree is laden with snow. The branches appear chunkier, are horizontal, and in some cases are bent due to the weight of the snow. Our illustration will be taking aspects from both these examples and creating a pleasing pine tree with dense branches covered in snow.
Step 1
Here we reference the first tree. On a New Layer (Control-Shift-N), rough in a big tree using large strokes to simplify the branch shapes. We want a stylised look, so keep the shapes loose.
Step 2
Create a New Layer (Control-Shift-N) and rough in the background tree. As this is an early roughing out stage, it is OK to copy and paste elements for speed. However, I would advise against it for the final illustration line art.
Scale the second tree (Control-T) to approximately 2/3 the height of the first tree.
5. Draw in the Tree Line Art
Step 1
On a New Layer (Control-Shift-N), still using your custom hard brush, reduce the brush size by pressing the Square Bracket [ on your keyboard. To increase the size press ]. Imagine this is like moving from a chunky felt pen to a fine-nibbed pen.
Create a simplified pine needle outline by creating small, rounded W and U shapes; I find they come out better if you work quickly. Add in some dots and circles to give the illusion of detail.
Step 2
While drawing the line art I turn the rough layer on and off to see how the form is progressing. We need to make sure the shape is still readable and some areas aren't busier than others.
6. Rough in the Snow and Create the Line Art
Step 1
Next we rough in the snow in the same way as the lower branches but make them a little lumpier. Keep the snow on the tops of the branches.
Step 2
Next create a New Layer by pressing Control-Shift-N,and begin drawing in the line art. Keep the shapes lumpy, and to keep in style with the tree use wide U and W shapes to create the snow.
7. Background Trees Line Art
Step 1
Draw in the line art for the background trees in the same way as the main tree. Note that you don't need to add as much detail, as they are not the main focus of the image. Take the time to draw the line art for the smaller tree, rather than copying and pasting as we did with the rough.
Step 2
I noticed that I forgot to add a trunk to the foreground tree so I added that in. In our reference images the trunks were quite thin, but I wanted this tree to seem important to the animals, so gave it a larger trunk that implied that the tree was old.
Here we have our tree line art and we are ready to move onto the stars of the piece: the animals!
8. Roughing in the Deer
While this reference image reindeer (2 years) is technically not a deer (it's a reindeer), I really liked the pose, and with enough artistic license I can make this work.
The antlers in this reference imagestag portrait are beautiful, and the face is exactly what I need to create a convincing deer.
Step 1
We begin by roughing in simple shapes to create our deer. Using a triangle for the head, and circles for the ribcage and rear of the deer, we can block in areas of the anatomy. This also helps with proportion and to see how the silhouette looks.
Step 2
On a New Layer (Control-Shift-N), select a different colour and begin to rough out the antlers. Starting with the one closest to the viewer, use long, sweeping lines to simplify the deer shape. If you have trouble working out the forms in complex shapes like this, then create a New Layer (Control-Shift-N) above your reference image and draw simple shapes. Once you have it figured out, try to recreate that in your illustration. It's easy to just copy and paste the tracing, but it will help your drawing skills if you draw it again from scratch.
Step 3
Rough in the second antler. I have drawn the antler the same way around as the first one to make sure I get a similar shape.
Step 4
Next press Control-T to Transform the green antler and go to Image > Image Rotation > Flip horizontal. Arrange the rough antlers on the head using the MoveTool (V), use the Eraser (E) to edit the antler, and paint areas back in using the Brush (B). We want some symmetry but we don't want it to be completely perfect—just something balanced.
Rough in the deer's head by creating a large circle for the main part of the skull, one for the nose, one for the jaw, and a circle at the corner of the mouth for the cheek muscle. Add in a leaf shape for the ear. We aren't going for anatomically perfect, but we want the viewer to know this is a deer and not, for example, a moose.
Step 5
Rough in the bulkier areas of the deer's body with a large Brush (B) in areas where there would be a lot of fat, muscle and/or fur, such as the neck, the front of the torso, and the rear. Remember this is an animal that lives out in a very cold environment so there will be a lot of fur and fat reserves. We want to give ourselves as much information as possible before we start the line art to make the process go smoothly.
Once we have achieved a pleasing silhouette, it's time to draw in our line art.
9. Drawing the Deer Line Art
Step 1
Create a New Layer (Control-Shift-N) and use the hard Brush (B) to start drawing in the line art. Keep the brush size similar to what we used on the tree, or slightly smaller. The line art should be fairly consistent across the whole piece. Elements in the foreground may have a slightly heavier line, which will suggest some depth, but this is not always necessary depending on how the line art is used in the painting stage.
Step 2
In this step I wasn't happy with how clear the leg anatomy was, so on a New Layer (Control-Shift-N) below our clean line art, I sketch in the leg shapes using thin straight lines, triangles for hooves, and circles for the joints.
Step 3
Back on the line art layer I continue on with the line art of the legs and the antlers. I like leaving the eye till last, as it is usually a focal point of the piece. I want to make sure the rest of the illustration works too!
Now that our majestic deer is complete, it's time to move on to our avian friend, the snowy owl!
10. Roughing in the Owl
For our owl, Melody and I thought it would be cute if he was holding a string of acorns and trying to wrap them round the tree. I found this dynamic pose on Photodune, Spotted Eagle Owl (Bubo africanus), which I thought would be good reference.
As before, with any complex shape it's good to break it down into simple forms. The wings are particularly tricky, so here is an example of how I would work out the shapes.
Step 1
Here I've lowered the opacity of the owl photo and drawn in a simple body shape. Draw circles for the rear of the owl and the head, and join them together with curved lines to form a bean.
Step 2
On a New Layer (Control-Shift-N), draw circles for the legs. Here I've included a circle for the joints.
Step 3
Create a New Layer (Control-Shift-N) and add in simple circles for the main body of the foot and small circles for the toes.
Step 4
On a New Layer (Control-Shift-N), again make the tail as basic as you can, using ovals for the main tail feathers. We aren't trying to achieve perfect detail—this exercise is to see how the owl is constructed.
Step 5
On a New Layer (Control-Shift-N), draw in two large circles for each wing so the owl looks like a butterfly. This is for the boned part of the wing and the inner feathers known as the secondaries.
Step 6
Elaborate on the wings by drawing the primaries (outer feathers) with ovals.
Step 7
Add in contoured face lines as a simple cross to show where the beak and eyes should sit, along with the direction the head is pointing in.
Step 8
Here are the isolated owl basic shapes with the owl image turned off. Turn layers on and off to see how all the shapes fit together. Next we will be applying this knowledge to roughing out our cartoon owl!
Step 9
Start off on a New Layer (Control-Shift-N) with any colour and draw out a bean shape for the body. I've made the body slightly chubbier than the owl in the reference image for a cute cartoon effect.
Step 10
On a New Layer (Control-Shift-N) below the body and using a different colour, draw out large strokes for the tail. I've made these quite short and a little wider than the reference image for the cute effect.
Step 11
On a New Layer (Control-Shift-N) below the body in another colour, draw out some sweeping strokes for the primary and secondary feathers. We're combining the basic "butterfly" wing shape into one, as the inner part of the wing isn't really visible.
Step 12
On a New Layer (Control-Shift-N) above the body, I've taken a turquoise and drawn in a rounded triangle for the inner front wing.
Step 13
Next is the tricky part with the primaries. On a New Layer (Control-Shift-N) I take a purple and draw some flicky lines to give the feel of the wing.
Step 14
I'm not completely happy with the primaries' position, but this is an easy fix. Press Control-T to bring up the Transform controls to rotate and scale the wing. Press Enter when you are satisfied with the position.
Step 15
Just a few final tweaks to the owl roughs. Use the Lasso(L) and transform the rear wing using Control-T to Transform.
Step 16
To make sure we have enough information to do the line art, rough in the primaries with a smaller brush.
Step 17
On a New Layer (Control-Shift-N) above these, draw in the cross to show the curvature of the face, eye and beak position. Then rough in some squat circles at the base of the owl for the legs. We're keeping these small, as the legs of the owl would be tucked up next to the body while holding the string of acorns.
11. Drawing the Owl Line Art
Here I haven't really roughed in the face of the owl, but I'm just going to draw something out using this beautiful creature Snowy owl (Bubo scandiacus) as a guide. The characteristics we want to get across are the big eyes, the beak, the flat face, and the dark spotting from the plumage.
Step 1
Working in a similar way to the tree, quickly work in the wings by drawing loose U shapes and adding little dots for suggested detail.
Step 2
On a New Layer (Control-Shift-N), ink in the body, which is mostly a giant bean shape with two sticky-out beans (scientific term!) at the bottom for legs. Birds' legs can be quite hard to draw—it appears as if some don't have thighs, as they are hidden inside the body. Add some small feather details on the legs and draw in some bean-shaped feet. Birds are great fun to draw! Work in the tail feathers and add a spine down the middle of some of them.
Step 3
Next, using the snowy owl reference image, draw in some large cartoon eyes and a smiling beak at the point of the curved cross.
Step 4
Turn off the rough by pressing the small eye on the Layers panel to see how the line art is looking. He's looking fabulously cute, so we move on to the last star of the piece, the hare!
12. Roughing Out the Hare
Here's reference image of the Scrub Hare we will be using.
On a New Layer (Control-Shift-N), rough in the hare from the back by drawing out rough circles as before, using long strokes for the ears. I've taken some shortcuts with the hare and carved in where the tail and the edge of the body is with the Eraser (E). Here we have one paw pointing at the tree as if to direct the owl to where the acorns need to go, and one paw resting on his hip.
13. Drawing the Hare Line Art
Step 1
Lower the opacity of the hare line art and on a New Layer (Control-Shift-N) draw in the line art. Keep the pen size consistent with the rest of the piece.
Step 2
Turn off the rough layer and check whether the line art works. Sometimes when you look at the line art issues can occur, and here I am not happy with his left paw placement.
Step 3
Taking the Lasso Tool (L) I draw around the arm to select it. Then pressing Control-T I rotate the arm round so it's just his elbow that's showing.
Step 4
Press Enter when you are happy with the placement, and Control-D to deselect the arm.
14. Rough in the Lamp
We wanted to change the light source from tree lights to a lamp so that it would be religiously neutral. I found a reference on Photodune for an old lamp, but for quaintness I decide to draw it with a candle instead.
Step 1
On a New Layer (Control-Shift-N) rough out the shape of the lamp. It should be quite large in comparison to the hare.
Step 2
Taking a darker colour on a New Layer (Control-Shift-N), draw in the shape of the lamp with a handle. Note that the handle overlaps the paw at this point—this will be fixed later in the tutorial.
15. Drawing the Lamp Line Art
Step 1
Create a New Layer (Control-Shift-N) and rotate the canvas to draw in the edges. You can do this either by rotating the canvas manually by going to Image > Image Rotation and selecting a rotation option,or by pressing R for the Rotate View tool. A compass should appear on the document, and you can rotate the document that way.
The reason we rotate the canvas is that it's not always easy to draw a line at a certain angle. If this were traditional media you'd turn the paper or sketchbook to make life easier—probably without even thinking.
Keep using the same size inking brush and draw in the shape of the lamp.
Step 2
Rotate the document more to make the drawing of the handle a lot easier.
16. Editing the Hare's Paw and Incorporating the Lamp
Step 1
Press Escape to return the canvas rotation to default. We have turned off the rough layer so we are now left with the lamp line art. As you can see here, the lamp is overlapping the body. What we want is for the lamp to appear in front of the body and the paw to be holding the lamp.
Step 2
Create a Mask on the lamp layer by pressing the rectangle icon with a circle in at the bottom of the Layers panel. Unlink the Mask from the line art by clicking on the chain links between them.
Next take a black Brush (B) and on the Mask paint out the areas of the lamp that overlap the hare's body.
Step 3
That's the lamp fixed, so now move on to the paw. Erase the paw on the line art layer and redraw the paw curling around the handle.
17. Creating the String of Acorns
Step 1
Create a New Document by going to File > New or by pressing Control-N.
Step 2
On a New Layer (Control-Shift-N), rough in an acorn shape including the cap and a bit of stem.
Step 3
On a New Layer (Control-Shift-N) using a slightly larger brush, draw in the clean line art. Add a little hoop around the stalk. You'll see why shortly! Then go to Edit > Define Brush Preset and save the brush.
Step 4
Press F5 to bring up the Brush palette. Try out the brush without any settings. They overlap way too much, so in Brush Tip Shape set the spacing to 132% or until the acorns are evenly spaced.
Step 5
In Shape Dynamics set the Minimum Diameter to 91% and Control to Pen Pressure
Step 6
In the Shape Dynamics set the Angle Jitter to 5% to get the brush tip to look interesting when you draw a stroke and not just straight up and down.
Step 7
In Angle Jitter change the Control to Direction so that the acorns form a chain that resembles lights. Next, save the brush by pressing the square at the bottom of the Brush palette.
Step 8
On a New Layer (Control-Shift-N) above the owl line art, draw an upside-down U to create the acorn chain. This may take a few attempts to get it right.
Step 9
This is why we added in the little loops around the acorns! On a New Layer (Control-Shift-N), draw in a string connecting the acorns, and erase any parts that overlap the loops.
18. Roughing in Pine Cones
Here's the reference of a pine cone which the animals will be using to decorate the tree. This can easily be broken down into simple shapes, so don't be intimidated!
Step 1
On a New Layer (Control-Shift-N) using a large Brush, rough in an egg shape as the basic shape of the pine cone.
Step 2
Lower the opacity of the "egg" layer and on a New Layer (Control-Shift-N) begin drawing in the scales of the pine cone, starting at the bottom. Don't worry about all the little details at this stage. Start off with horizontal strokes and gradually angle them up until you get to the top of the pine cone. Create an upright stem at the top. Then create a New Layer (Control-Shift-N) above this, draw the line art scales around the roughs, and flick some lines towards the centre of the cone to make the scales look 3D. As with the acorn, draw a small loop at the top of the cone.
19. Decorating the Tree
Step 1
Hide the rough cone layers.
Step 2
Add in a rough hoop for where the cone hangs from the deer's mouth. Press Control-T to scale the pine cone and position it correctly.
Step 3
Draw in the hoop so it hangs better from the mouth. Then copy the pine cone by pressing Control-C then press Control-V several times to paste several instances of the pine cones. Move them around the tree using the MoveTool (V).
Step 4
Erase (E) the original hoops and draw them around the branches so they look as if they cut into the snow.
Awesome Work, You're Now Done!
Here we have the completed line art! Depending on how you wish to paint this, you can flatten all the line art layers into one (select all of them by clicking and holding Shift and then press Control-E to merge), or leave them as they are.
Once the line art is complete, I make sure all the layers are correctly labelled to send the artwork to my collaborator. In the next article, Melody Nieves will be talking us though her painting process.
I hope you enjoyed learning how to create this winter scene! I'm looking forward to seeing you next time for some more illustration tutorials!
Look around you. There, all that stuff on your desk. Let's create a pattern of it! In this tutorial you'll create various desk and office icons and compile them into a quick and easy seamless pattern using the Pattern Options panel. Using combinations of basic shapes (circles, rectangles, and triangles), you'll create objects often found within a digital artist's work space, ready for use as a pattern, illustration, or infographics.
1. Drawing the Monitor
Step 1
Open Adobe Illustrator CC 2014 (the techniques and designs can be created in earlier versions of the program, but Live Corners and the Pattern Options panel were introduced in versions CC and CS6 respectively) and create a New Document.
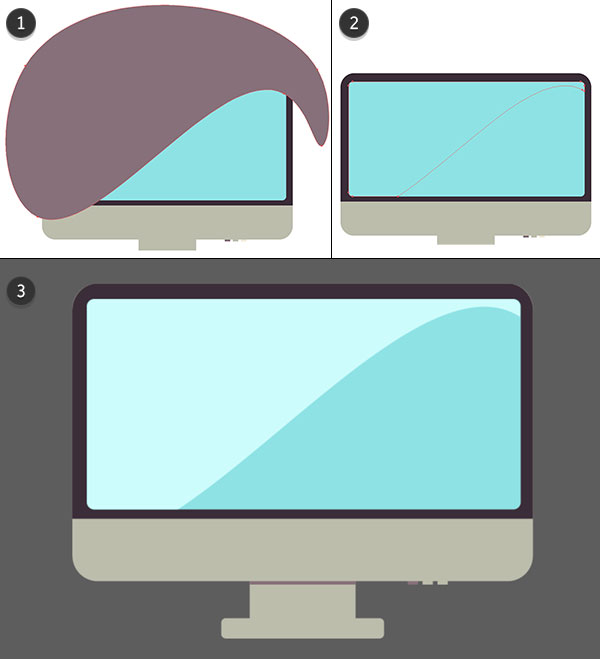
Using the Rectangle Tool (M), draw a horizontal rectangle. With the Direct Selection Tool (A), select the rectangle and pull the Live Corners inward, rounding out the corners of the rectangle. Set the fill color to gray (#bcbdac).
Step 2
Let's turn this rounded rectangle into a computer monitor.
Copy (Control-C) and Paste (Control-V) the rounded rectangle. Draw a smaller rectangle over the lower half of the newly copied rectangle.
Select both rectangles and hit Minus Front in the Pathfinder panel. Set the overlapping rectangle's fill color to dark purple (#3b2d38). Make sure the two shapes are Aligned to the top edge of each other.
Draw a smaller rounded rectangle for the screen of your monitor. Set the fill color to light blue (#8ee2e4).
For the monitor's stand, draw a small vertical rectangle and place it behind the other shapes in the Layers panel. Then, draw a narrow horizontal rectangle at the very bottom (see below).
Step 3
Now let's add some details to the monitor design.
For the glare on the monitor, draw a large curving shape that overlaps the screen with the Pen Tool (P).
Select the blue rounded rectangle and the newly drawn curving shape. With the Shape Builder Tool (Shift-M), select the non-intersecting portion of the curving shape. Deselect all shapes. Delete the extraneous portion of the curving shape.
Set the fill color of the overlapping glare shape to light blue (#8ee2e4). In the Transparency panel, set the Blend Mode of this shape to Screen.
Note the bottom of the monitor design: I drew three small rectangles in varying tones of grey to serve as buttons. I also drew a thin rectangle to show the separation between the monitor's screen and its stand in dark warm gray (#87707a).
Step 4
Let's add some flare to the monitor design.
Using the Ellipse Tool (L), draw two identical circles. Make them overlap slightly and hit Unite in the Pathfinder panel. Using the Delete Anchor Point Tool (-), delete the left and right bottom anchor points.
With the Direct Selection Tool, pull the bottom center anchor point downward. Use the Anchor Point Tool (Shift-C) to convert the anchor point to a sharp point.
Again, use the Anchor Point Tool to convert that bottom-most anchor point to a curve. Manipulate the anchor point's handles so the bottom of the heart curves softly.
Place the heart on the bottom portion of the monitor. Draw brightly colored squares with the Rectangle Tool on the right side of the monitor to create little sticky notes.
Group (Control-G) all of your monitor components together and set the design aside while we move forward onto the other elements of the pattern.
2. Drawing a Graphic Tablet
Step 1
The tablet begins quite simply with a dark, warm gray rectangle overlapping a rounded dark purple rectangle. Move the gray rectangle to the right, slightly, so there's more space on the left side of the design.
Draw two narrow gray rectangles that are the same width as the large dark purple rectangle. Place them at the top and bottom of the gray rectangle (see below).
Create a curving shape for glare on the tablet's surface with the Pen Tool and the Shape Builder Tool as was done with the monitor previously. Set the curving shape's Blend Mode to Screen in the Transparency panel.
Step 2
For the buttons on the left side of the tablet, draw four rounded rectangles in gray, a circle in gray, and a smaller circle in dark purple. Align all six objects to their centers and place them on the left side of the tablet design.
Step 3
The USB cord portion of the design is once again mostly comprised of rectangles.
Draw a vertical rounded rectangle for the plug.
The connection from the plug to the cord is a horizontal rectangle whose rightmost anchor points were moved inward with the Direct Selection Tool and whose corners were rounded out in the Transform panel.
I drew the cord with the Paintbrush Tool (B) and set the brush to the first default brush in the Brushes panel: 5 pt. Round.
The casing of the USB is a rectangle that has been Rotated slightly.
Once again, this portion of the USB is another rotated rectangle. This time, though, the fill color was set to gray (#bcbdac).
Finally, the little holes in the USB are two dark purple rectangles.
Step 4
Put your USB components together on the right side of the graphic tablet design. Group together all of the graphic tablet components, and let's move on to the accessories.
3. Drawing a Stylus and Stand
Step 1
The stylus starts with a long, narrow rectangle in dark purple. Use the Direct Selection Tool to move the rightmost anchor points inward, as though you're pinching the right side of the rectangle (not literally pinching, but giving it that look). Round out the rightmost corners in the Transform panel.
Step 2
For the tip of the stylus, draw a vertical rectangle (the same height as the stylus's rectangular base) in warm gray. Either use the Pen Tool or the Polygon Tool to draw a triangle of the same height.
Unite the rectangle and triangle in the Pathfinder panel. Add a small overlapping rectangle on the left side of the newly united object.
Select both shapes and hit Minus Front in the Pathfinder panel.
Step 3
The rest of the stylus's components are assorted rectangles.
On the left you have the stylus's tip that was just created.
Make sure the tip and the base rectangle line up perfectly.
The right end of the stylus has a dark purple rounded rectangle (it almost looks like a little pill).
Overlapping the right half of the rectangle is a warm gray shape. Create it by adding a gray rectangle overlapping the rightmost third of the base rectangle. Use the Shape Builder Tool to delete the non-intersecting portion as you did previously when drawing the curving glare shape on the computer monitor.
Draw a long, narrow rounded rectangle for the outline of the stylus's buttons.
Draw a smaller dark purple rounded rectangle for the stylus's buttons themselves.
Choose a bright color, like teal (#009989), and draw a narrow, vertical rectangle for the colorful portion of the stylus's tip.
Draw another, even smaller, narrow rectangle in dark purple. Use the Shape Builder Tool, as was done before, to make sure the new shape fits the contour of the stylus's tip perfectly.
Finally, draw a small, rounded rectangle for the stylus's nib.
See below for how the components fit together. If you're using a graphic tablet, try to recreate your own stylus using basic shapes.
Step 4
The stylus's stand is rather simple.
Draw a rectangle and bring the bottom anchor points toward the center of the shape so it forms a trapezoid.
Using the Ellipse Tool, draw two narrow ellipses that match the width of the top and bottom of the trapezoid.
Copy and Paste the top ellipse. Set the stroke color to warm gray. Draw a small ellipse within the copied one and Unite them in the Pathfinder panel to create the little bump seen in the shape below. Use the Pen Tool to draw a slightly curving stroke near the bottom of the stylus stand.
4. Drawing a Notebook and Smartphone
Step 1
One of my most useful tools is my notebook filled with to-do lists and tutorial outlines and notes. Recreating it is a rather easy feat.
For the bookmark's tail, draw a small vertical rectangle. Use the Add Anchor Point Tool (+) to add an anchor point to the bottom edge of the rectangle. With the Direct Selection Tool, pull the anchor point upward until you get the split edge you want. Set the fill color to dark teal (#11766d).
The book itself is a rectangle whose right corners are rounded more than the left. You can do this in the Transform panel by making sure the link icon is toggled off and manually changing each corner's radius.
Draw a long, thin rectangle for the elastic that holds the book closed, and add three brightly colored squares for little sticky notes that stick out from beneath the book's cover. Put all of the components together in the manner seen below (adjust object position in the Layers panel).
Step 2
A smartphone is another set of rectangles piled on top of each other.
Start with a dark purple rectangle. If you fancy your phone having rounded corners, do so. If you'd rather create a phone that resembles your own (or one you wish to own), aim to recreate that design instead.
The screen is a smaller rectangle, this time filled with off-white (#efe8d5).
For the third time in this tutorial, I've drawn a curving shape to replicate glare on my gadget's screen. Set the fill color to off-white and the Blend Mode to Screen in the Transparency panel.
Draw a thin horizontal rectangle at the bottom of the rectangle and set the fill color to warm gray.
Step 3
Let's add something simple to the phone's screen: chat bubbles!
Draw a bright green (#cfbe27) rectangle.
Pull the Live Corners inward to round out the shape.
Use the Pen Tool to draw a curving tail.
Close the shape and Unite the rounded rectangle and the tail in the Pathfinder panel.
Copy, Paste, and create variations of the chat bubble on the phone's screen. Make sure they're placed below the curving glare shape in the Layers panel. Draw little rectangles and circles on and around the phone's edge for buttons, lights, and a camera. Group together all of the smartphone design's components.
5. Drawing Other Office Supplies
Step 1
The pattern needs some large sticky notes strewn about. Draw a square with the Rectangle Tool. Use the Pen Tool to draw a triangle in the lower right corner of the square. Copy and Paste the triangle and rotate it 180° with the Rotate Tool (R). All three objects are the same color, yellow (#f0b300), but the upper triangle is set to Overlay and the lower triangle is set to Multiply.
Step 2
Let's draw a cute mechanical pencil for the pattern. Its parts are very similar to the stylus drawn previously:
A small rounded rectangle forms the graphic lead.
The top of the pencil is a warm gray triangle.
A bright yellow rectangle forms the body of the pencil.
Draw a horizontal gray rectangle for the pencil's clip.
A pink rounded rectangle forms the eraser.
Finally, two small gray rectangles form the band connecting the eraser and clip to the pencil itself.
Put all of the components together in the manner seen below (adjust object position in the Layers panel).
Step 3
What desk is complete without a pink eraser? Draw a bright pink (#f1679b) rectangle. Using the Shear Tool, skew the rectangle to your liking. Pull the Live Corners inward so the eraser is slightly rounded out.
Step 4
An assortment of highlighters is an easy feat when broken down into five simple shapes.
A rounded rectangle in gray forms the highlighter cap's clip.
A rectangle with the top corners rounded forms the cap itself.
Overlap the cap with an ellipse and use the Shape Builder Tool to delete the non-intersecting portion of the shape.
A large rounded rectangle, the same width and corner radius as the cap, forms the base of the highlighter.
Finally, a smaller rounded rectangle, whose Blend Mode is set to Multiply, serves as a decal or label on the highlighter design.
Put all of the components together in the manner seen below. Easily change between colors to create a whole rainbow of small highlighters.
Step 5
Finally, a small spiral notebook is simply a matter of rectangles, circles, and triangles.
Draw a vertical rounded rectangle with the fill color set to warm gray. Copy and Paste the rectangle five times for a total of six spiral shapes.
Draw six circles with the Ellipse Tool. Set the fill color to off-white (#efe8d5) and their Blend Mode to Multiply in the Transparency panel. Make sure the circles are distributed evenly and aligned with the spiral shapes (by way of the Align panel).
Draw a large rounded rectangle with either the Rectangle Tool or the Rounded Rectangle Tool.
Finally, use the Pen Tool to draw an overlapping triangle in the bottom right of the design. With the Shape Builder Tool, delete the non-intersecting portion of the triangle from the rounded rectangle, as was done previously with the glare shape on the computer monitor. Copy, Paste, and Rotate the shape. Both shapes' fill colors are set to off-white, and their Blend Modes are set to Screen (top) and Multiply (bottom).
Step 6
Arrange your components in whatever fashion you'd like. At this point, you can either arrange a flat icon desktop illustration for use as a desktop background or as desktop icons on their own, or continue on ahead to create the final pattern.
6. Putting the Pattern Together
Step 1
Move and Rotate elements around your artboard. This is why I advised groupingeach element's components together: so they'd be easy to move around.
Select all of your elements and hit Make Pattern in the Pattern Options panel. From here, you can further arrange and rearrange your pieces. Feel free to Copy, Paste, recolor, or even create completely new shapes while in editing mode.
When satisfied with your design, hit Done at the top of your document window. You'll find this new pattern in your Swatches panel.
Step 2
I like to layer designs like this. Draw several little circles, each a different color from your design. Arrange them to the best of your ability so they seem to be scattered about. Then hit Make Pattern in the Pattern Options panel. Adjust their position or add additional circles as needed.
Great Job, You're Done!
The final product is two overlapping rectangles with each of the patterns created set as the fill color. Since both were transparent, you can add a third rectangle below the other two for a pop of color behind your design. Share your pattern with us in the comment section below. Go further and recreate your own desk or favorite supplies you use in design.
Follow this tutorial and learn how to transform a website into a winter
wonderland. You can create the menu bars and buttons from scratch, or you can
take these techniques and decorate your own items. At the beginning you will
create a basic menu bar, and then you will learn how to add the snow and the
icicles, snowflakes, sparkles and more winter-themed decorations. At the end,
we’ll experiment with more colors and designs, so let’s get started!
1. Start a New Project
Launch Adobe Illustrator and go to File > New to open a blank document.
Type a name for your file and set up the dimensions, and then select Pixels as Units
and RGB as Color Mode. Next, go to Edit > Preferences > General and set
the Keyboard Increment to 1 px and while there, go to Units & Display
Performance to make sure that the Units are as in the following image. I usually work with
these settings, and they will help you throughout the drawing process.
2. Create a Basic Menu Bar
Step 1
Grab the Rounded Rectangle Tool and draw the first shape with the
dimensions shown. Select purple as the fill color.
Step 2
With the rectangle still selected, go to the Appearance panel and with the purple Fill attribute selected, press the Duplicate Selected Item
icon at the bottom. As a result you will get a second Fill attribute above. Use
a white to black linear gradient at a -90 degrees Angle, and set the Blending
Mode to Soft Light.
Step 3
With the rectangle still selected, duplicate the purple Fill attribute
again. Select the new Fill attribute from the bottom, keep the same fill color, and then go to Effect > Stylize > Drop Shadow and apply this effect four
times. Let’s name this shape “bar‑base”.
These are the settings for the Drop Shadow effects:
Step 4
Next, Copy and Paste in Front (Control-F) the “bar-base” and then remove all
existing appearances by pressing the Clear Appearance icon at the bottom of theAppearance panel. Select black as the fill color, and then go to Object > Create
Gradient Mesh, select 3 Rows and 6 Columns and hit OK. As a result you will get
a mesh grid like in the following image.
Step 5
Now, grab the Direct Selection Tool (A) and use it to select only the
three mesh points indicated below and change their fill color from black to the
corresponding one. After you are done, set this shape to Blending Mode Soft
Light. Let’s name this shape “bar-mesh”.
Step 6
Take the Rectangle Tool (M) and draw a rectangle with the same height
as your menu bar, and position it in the middle. Select light blue as the fill
color.
Step 7
With the blue rectangle still selected, go to Object > Path > Add
Anchor Points in order to add four extra points on the sides (1). Use the Direct
Selection Tool (A) to select only the left and right points from the middle and
move them 10 px inwards by pressing the Left and Right Arrow Keys on
your keyboard (2).
Next, go to the Appearance panel and duplicate the existing blue Fill
attribute. For the new Fill at the top, select a white to black linear gradient
at a -90 degrees Angle and set the Blending Mode to Soft Light (3).
Step 8
Take a closer look at the right side of the blue shape. Take the Pen
Tool (P), draw a V-path following the anchor points of the blue shape, and give it a 1 pt white Stroke. Copy and Paste in Front (Control-F) this path, and then
move the copy 1 px to the right by pressing the Right Arrow Key once. Select a1 pt black Stroke for the second path. Now, Group (Control-G) the two paths and
set the group to Blending Mode Soft Light.
Don’t forget to do the same thing on the left side of the blue shape or
simply reflect the existing group.
3. Create the Snow on Top of the Menu Bar
Step 1
Now that our simple menu bar is ready, we can proceed with the snow and the
other decorations. To add the snow, I recommend using the Pencil Tool (N) instead
of the Pen Tool (P) because it’s easier and we will also get that freehand/natural
look, which in terms of snow is a good thing. Double-click on the Pencil Tool
(N) to open the Preferences window and change the settings. You can see below
the ones that I've used, but feel free to adjust the Fidelity and the Smoothness
to your liking.
Once set, zoom in on the right side of your menu bar and draw a path
similar to the one below. You don’t have to be too precise: the more random the
better.
Step 2
Still using the Pencil Tool (N), draw another random path under the first
one and make sure that you cover only a little of the menu bar. If the end
points of the two paths do not overlap, you can use the Direct Selection Tool
(A) to move them on top of each other as shown in the close-up.
Next, it’s time
to merge the two paths into one. Drag a selection with the Direct
Selection Tool (A) over the two end points from the right (just make sure to
lock the menu bar first) and press Control-J to Join them. Check the Corner
option and hit OK. After that, drag a selection over the two end points from
the left and Join them as well. Fill the resulting shape with white.
Step 3
Still using the Pencil Tool (N), draw a new path under the white shape
but very close to it. The length of this path should be about the same as the
white shape (1). At this point, switch to the Pen Tool (P) and close the two
end points at the top in order to get a shape (2). Copy and Paste in Front
(Control-F) the white shape, and then press Shift-Control-] to bring it in front of
everything. Select this new white copy along with the blue shape and pressSubtract in the Pathfinder panel. You will get a compound path (3) but go to Object> Compound Path > Release and delete the smaller shapes at the top (4).
Step 4
Fill the shape that you have obtained in the previous step with the
color indicated, and at this point the first “piece” of snow is ready.
Step 5
Take the Pencil Tool (N) again and draw a smaller shape on the right end
of the menu bar filled with white (1). Draw another path under it and make sure
that the right and left end points are overlapping (2), and then close the path at
the top as you did before, using the Join function or the Pen Tool (P) (3). Copy
and Paste in Front (Control-F) the small white shape and press Shift-Control-]
to bring it in front of everything. Select this white copy along with the blue
shape and press Subtract in the Pathfinder panel. Fill the resulting shape with
the same color (4). This is the second “piece” of snow.
Step 6
Let’s add more snow on the left side of the bar using the same
technique. First draw the white shape with the Pencil Tool (N) (1), and then create
the shape under it by subtracting (2), and fill it with the same light blue
color (3).
Step 7
Continue to add more “pieces” of snow, some bigger, some smaller, until
you completely cover the top of the menu bar. You can see in the next image the
final result.
Step 8
Use the Pencil Tool (N) or the Pen Tool (P) to draw a shape like the one below, and fill it with the linear gradient shown. You can also draw a few smaller
shapes next to it that are filled with the same gradient, and then select all the
shapes and Group (Control-G) them.
Step 9
Use the group of shapes that you have just created to add more details
on the snow. Make more copies of the group and scale, rotate and arrange them on
top of the snow.
4. Create the Icicles Under the Menu Bar
Step 1
Use the Pencil Tool (N) to draw a random shape in the bottom right
corner of the menu bar, and select white as the fill color. Now, grab the Add
Anchor Point Tool (+) and use it to add a few extra points at the bottom of
this shape (1). Then switch to the Direct Selection Tool (A) and drag only three
of these points downwards to create the first icicles (2). Add more points
using the Add Anchor Point Tool (+) along the length of the icicles, and play
with their handles to create the wavy look (3).
Step 2
Draw a new random shape next to the first one, and then add more points at
the bottom with the Add Anchor Point Tool (+) (1). Use the Direct Selection
Tool (A) to drag two of these points downwards in order to create two new
icicles (2). Add more anchor points along the length of the icicles, and move their
handles to create the wavy look (3).
Step 3
I added one more white shape next to the second one, but you can add as
many as you want. In this tutorial the design is up to you.
Step 4
Now select the three white shapes from the bottom right side of the
menu bar, and Copy and Paste in Back (Control-B). Move these three copies down a
little by pressing the Down Arrow Key on your keyboard once or twice, and select light blue as the fill color.
Step 5
To add more depth, draw with the Pencil Tool (N) or the Pen Tool (P) a thinner
shape on top of each icicle, and fill all of them with the gradient shown.
Step 6
To add more details, draw a few smaller shapes where you have free space, and fill them with the color indicated.
Step 7
The bottom right side of the bar is ready, but you can add more icicles
on the left side. These are smaller so they won’t take a long time to make. Use
the same technique as described above. First, draw the white shape (1), and then Copy
and Paste in Back (Control-B) this shape, move it a little down and change the
fill color (2). At the end, use smaller shapes filled with the same gradient to
add as many details as you want (3).
Step 8
Using the same technique, add more icicles on the bottom left corner of
the menu bar and at this point you are done with the snow and the icicles.
5. Create and Apply a Snowflake Scatter Brush
Step 1
Go to Snowflake and download
the vector snowflakes set created by All-Silhouettes. Then open the
Illustrator file from the archive and copy the snowflake highlighted with blue
into your document. Select white as the fill color, and drag the snowflake into
the Brushes panel to save it as a New Scatter Brush. In the Scatter Brush
Options window, set the Rotation Relative to Path and leave the rest of the
settings as they are. Type a name for the brush and hit OK.
Step 2
Now, take the Pencil Tool (N) again and draw some paths above the snow
as in the next image. Stroke these paths with the Snowflake Scatter Brush saved
earlier and open the Stroke Options window from the Appearance panel. Change
the settings as shown and hit OK. Set the Stroke weight for these paths at 0.25
pt, 0.3 pt, 0.35 pt and 0.5 pt in order to get snowflakes of various sizes.
6. Add Various Winter Decorations
Step 1
Copy the snowflakes highlighted with blue and green from the snowflakes
set into your document. Then fill them with white, scale them, and arrange them on the
left side of the menu bar.
Step 2
Next, from the Symbols panel open the Symbol Libraries Menu and in theNature category find “Trees 1”. Drag the symbol into your artboard and press
the Break Link to Symbol icon at the bottom of the Symbols panel in order to
expand it. Scale and arrange the trees on top of the snow and multiply them if
you want to add more.
Step 3
Now, take a closer look at the trees. Grab the Pencil Tool (N) and draw
some short paths following the branches of the bigger tree. Stroke these paths
with the Charcoal-Thin Art Brush that you can find in Brush Libraries Menu >
Artistic > Artistic_ChalkCharcoalPencil. Set the Stroke weight to 0.5 pt and
the color to white for all of them.
Step 4
Repeat the same process for the other trees but reduce the Stroke weight
even more since the trees are smaller.
Step 5
Multiply the snow-covered trees that you have created and arrange more of them
on the other side of the menu bar.
Step 6
To create the small house, start by drawing a simple house shape filled
with white. For the roof, draw a path with a 1 pt red Stroke and add a small
red shape as the chimney. For the door and windows use the Rectangle Tool (M) and
the gradient shown. To create the snow on the roof, simply draw two paths on
top of the roof and Stroke them with the Charcoal-Thin Art Brush as you did
earlier for the trees.
Step 7
Next, take the Ellipse Tool (L) and draw three ellipses to create the
snowman. Fill them with the radial gradient shown, and then add small black circles
as the eyes and the buttons. Use the Pen Tool (P) to draw a nose and the scarf, and you are done.
Step 8
At this point you can arrange the small house and the snowman where you
want.
Step 9
It seems mandatory to add a lot of sparkles, right? I’ve already
explained how to create one in the Glitter Text Art Effect tutorial. Multiply the sparkle
and arrange as many as you want to enhance your design.
7. Create and Decorate Web Buttons
Step 1
If you've managed to get to this point, then you will be able to create and
decorate a simple button instead of a bar. Start by drawing a smaller rounded
rectangle (1), and then create the grid mesh as explained at the beginning of the
tutorial (2). Add “pieces” of snow at the top and icicles at the bottom (3)
and use the Snowflake Scatter Brush to add more snow (4). Arrange the
decorations that you have created (5) and finally add a few sparkles (6). All
the techniques remain the same.
Step 2
Duplicate or multiply the first button and simply rearrange the existing
decorations to obtain more buttons.
8. Create More Menu Bars
Step 1
Duplicate the purple menu bar with the snow at the top, the snowflakes
and the icicles, but without the other decorations. Select “bar-base” and
replace purple with the shade of green indicated. Keep the rest of the settings
as they are.
Step 2
Next, select the shape from the middle and replace the light blue with
light green. Arrange all the decorations in a different way and you will get a
new menu bar.
Step 3
To create the grayish menu bar, duplicate the purple bar again. Select
“bar-base” and replace purple with the shade of gray indicated. After that,
select the shape from the middle and replace the light blue with pink this
time. The rest of the settings remain the same. Finally, arrange all the
decorations as you want.
Your Winter Wonderland is Ready!
These menu bars and buttons are
pretty basic and they help with the demonstration, but feel free to use any
other website elements to create this winter wonderland look. You can start
from scratch or you can use just a few items to decorate your own menus and
buttons. It is absolutely mandatory to have a lot of fun while doing so, and if
you want to share your winter-wonderland-creation, I would love to see it.
In the first part of this tutorial, fellow Tuts+ instructor, Rowena Aitken showed you how to create the line art for this festive winter collaboration. In today's tutorial, I'll be showing you how to paint it usingAdobe Photoshop and a pen tablet. Let's begin!
Tutorial Assets
The following assets were used in the production of this tutorial.
According to Wikipedia, a Winter Solstice is "is an astronomical phenomenon which marks the shortest day and the longest night of the year." And honestly, that definition does nothing for me visually. But after rummaging around Google Images for awhile, Rowena and I could at least set our eyes on a very specific color scheme.
Here's what we found...
The Color Scheme
Most of the inspiration we saw had beautiful warm tones against a cool lit sky. Essentially, a winter sunset! Though we liked this idea of warm against cool, we ended up changing the light source to better reflect the story.
The Story
I love storytelling. And one of the many benefits to developing a back story to your art is that you force your brain to visualize the scene and all of its details more clearly. So before starting your next project, be prepared to ask yourself this question:
What Story Am I Telling?
Deep within the forest, three close friends, an elk, owl, and rabbit, all gather around in excitement and delight. With a little teamwork and lots of extra pine cones lying around, they decorate the forest in preparation for the coming winter festival.
Adorable right? We thought so too!
Back to Color
Now there are two great ways you can go about color theory when painting digitally. You can start with a definitive color palette where all your main colors are already selected. Or you can start with a base of grayscale tones that allow you to develop the lighting scenario, followed by a gradual application of color. I typically choose the latter setup because I'm always finicky and indecisive when it comes to color in the beginning.
There's a lot to remember here, so I stay focused by making a mental checklist of things to keep in mind while painting.
Things to Keep in Mind
There is one warm light source (the lamp), amidst a cool background (the night sky).
The elk is fully lit, the owl is partially lit, and the rabbit is in silhouette.
Lighting on the tree should diffuse as it progresses upward.
Fur and texture will be affected by the light and shadow.
Everything isn't fully illuminated, so have fun with experimentation.
References
Over on Pinterest we've prepared a list of references for this collaboration. They cover everything we'll need to understand about animal anatomy, winter colors, and general design inspiration for this tutorial. The examples below are just two references we pinned from PhotoDune which helped us learn more about rabbits and owls. I recommend it as a great organizational tool to keep all your references in one place.
1. Prepare Your Line Art
Step 1
Now that we know what we're painting, it's time to review the line art. Here's a reminder of the documentsetupRowena prepared.
Width is set to 3,508 pixels, while Height is set to 4,961 pixels.
Resolution is set to 300 dpi.
Color Mode is set to CMYK (for printing).
It's important to note that because the color mode is set to CMYK, there will be a more limited range of colors as opposed to RGB. This means that not only will you have fewer colors to paint with, but also some adjustment settings will be affected as well. No worries though, we'll still have plenty to work with. So let's take a look at the original line art!
Step 2
The great thing about the file Rowena prepared is that every component is on its own layer. This way I can adjust or even omit any details I see fit. The first thing I do is Delete the Horizon Line layer. I don't really need it for reference since I'll be opting for a natural ground level anyway.
Step 3
I also notice a few more things I'd like to change quickly. Depth of field can be tricky. In "real life" we know that rabbits are smaller than elks, but in this scenario the rabbit is positioned closer to the viewer. Selecting the Rabbit layer I Free Transform(Control-T while holding Shift) to enlarge the rabbit so that it overlaps the elk and illustrates its foreground position more clearly.
I follow these same steps for the Owl layer, except this time I Decrease its size so that it appears further away from the viewer.
Step 4
The last change I made to the line art is really simple. I don't want to make the mistake of painting too much detail on the background trees. So to remind myself of this as well as to trick my eyes into seeing them in the distance, I lower the Opacity to 30%. Now here's the adjusted line art.
2. The Initial Grayscale
Step 1
Painting in grayscale allows artists to set up the proper lighting scenario without the distraction of color. On a New Layer(Control-Shift-N) set to Multiply, use the Brush Tool (B) to paint a gray color for both the elk and tree, a lighter shade for the owl and background trees, and a darker shade for the rabbit. These different shades of gray signify the distance of the characters from the viewer. So in other words, the closer the character, the darker the shade.
Feel free to use the Eraser Tool (E) to clean up the edges, and then set the layer to Lock Transparent Pixels.
Step 2
Duplicate this layer. Because the original is set to Multiply you'll notice that a duplicate creates darker gray values—we don't want this, so Erase the excess tones, making sure the Background Color is set to White.
3. Ambient Occlusion
Step 1
For this next step I'll be using the AmbientOcclusion technique. For a more in-depth look at ambient occlusion, check out Monika Zagrobelna's Zombie Dragon Tutorial. There are so many details to this piece that need shadow, so do to this quickly I use the Lasso Tool (L) to make selections around each character and fill in those selections using a Soft Round Brush (B).
Brush Color set to Black
Opacity set to 20%
The key here is to apply shadows to areas where one object is overlapped by another. In this case the branches overlap the tree stump, so the stump is in shadow. I quickly apply this shading technique to all other areas of the line art.
Step 2
You'll also notice that on this same layer I started to loosely trace over the original line art, especially the sections with snow and tree definition. I do this step as a reminder of all these little details because eventually I will need to delete the line art.
Step 3
Duplicate this layer and Erase the excess as before. Using the Gradient Tool(G) with the preset of Foreground Color to Transparent (Opacity 50%), I'm going to create even more shadows. This time around, when I make a selection with the Lasso Tool (L), I switch over to the Gradient Tool (G) and drag the marker in the direction I want the gradient to appear. Repeat this process for each character as well as the background.
4. Applying the First Round of Color
Step 1
If you turn off the visibility of the line art, the painting really starts to come to life. Now that I have my base, I can move on to color. Just like before, I'm going to Duplicate the previous layer and Erase the excess. With this new layer still set to Multiply, I paint a solid brown color over the rabbit, tree branches, and owl.
Step 2
This color process will involve many layers for adjustments and playing with different blend modes. If the file size gets too big, merge layers whenever possible or even save to additional files. The next three layers will include: a Blue fill set to Screen, a Purple fill set to Color Burn, and a Color Balance Adjustment Layer to help bring out the blues even further.
Step 3
With one more layer set to Color Dodge I fill it with white, bringing the Opacity down to 40%.
5. Adding the Snow Texture
Step 1
To create a subtle hint of texture that will be great for the snow and sky, create a New Layer (Control-Shift-N). Set the Foreground Color to Black and the Background Color to White. Then go to Filter > Render > Clouds to create the texture we'll need.
Step 2
Set this layer to Difference, bring down the Opacity to 15%, and use the Eraser Tool (E) to erase any texture that is overlapping our main focal point.
6. Fix the Color With Adjustment Layers
Step 1
Currently, the colors are a little too bright and saturated. To correct this, I use three different New Adjustment Layers. For the first one, go to Layer > New Adjustment Layer > Hue/Saturation. Bring down the Saturation to -100 to make the whole piece black and white. Next go to Layer > New Adjustment Layer > Color Balance. Adjust the Midtones so that the painting has more Blue and Cyan.
Step 2
Add another New Adjustment Layer for Curves. Remember earlier when I said some settings change depending on the color mode? Well typically in RGB mode, in order to make something darker you have to pull the graph down. In this case we have to do the opposite.
Adjust the Curves on the CMYK, Blue, Cyan, Yellow, and Black Channels. The effect I'm going for is to deepen the overall color scheme while applying a yellow tint.
7. Clean Up
Even with all the adjustment layers and different blend modes I've already applied, I only consider this stage as a solid base for more. My goal here is to make sure that I paint in enough details now, so that I can completely delete the line art later. So before going any further, it's important to clean things up. Using a Hard Round Brush with the Opacity varying between 50% and 100%, I clean up the painting by carving out details, and referring to the original line art every now and then.
Always keep a copy of the line art handy. Up to the last stages of this painting I'll need to refer to it often in order to make sure I'm doing justice to Rowena's illustration.
8. Take a Step Back to Review
At this point I realized I spent way too much time paying attention to details that couldn't possibly translate into the finished piece. What I mean is, if you zoom in on the original line art at 100%, you can see all the incredible details Rowena drew. However, if you zoom out to a more suitable display size for the web, all of those intricate details get lost, or jumbled together.
In a traditional art class, teachers will often tell their students to take a couple steps back from their paintings. Sometimes we get so caught up in the details that we have to step away and make sure the entire piece works harmoniously. So remember that mental checklist from the beginning? This point becomes another thing to keep in mind as I paint.
9. Paint in Highlights
On a New Layer(Control-Shift-N) set to Overlay, I paint in the highlights for the snow, tree, and animals. I want the snow to have a fluffy and realistic feel to it, so I use a Chalk Brush for the texture of the snow and a Standard Soft Brush for the remaining highlights.
10. Add Color to the Animals and Trees
Step 1
Now it's time to add in the real color. Just like in my previous steps, I'll be using an array of adjustment layers and blend modes to color the painting. First I paint the colors for the trees, owl, and rabbit using a layer set to Color Burn. Then I paint the acorns, pine cones, and elk antlers on a layer set to Darken.
Step 2
After cleaning up the painting a little, I add a New Adjustment Layer of Color Balance to give everything a nice blue hue again.
Step 3
So I have plenty of blue going on but I can't forget the warm light source! On a layer set to Vivid Light, I use a Chalk Brush to apply orange to the scene. The parts that are most illuminated from the light source are the bottom of the tree, the lamp, the snow on the ground, and the elk. Although the owl is the furthest away from the light source, I do want to make sure that it catches some of that light.
11. Tree Decorations
Step 1
To paint the pine cone ornaments I refer to some quick references on the web. As the pine cones move up the tree they are hit with less of the light source. I illustrate this by making sure to pay attention to where the light might hit the cone.
Step 2
I follow the same process for the string of acorns. The only difference is that since some of the acorns are in the sky, I also paint in some blue to show that they are affected by their environment.
12. Fur and Feather Textures
Step 1
To make fur, let's create our own brush! Open a New Document (Control-N) with the following settings:
Width:100 px
Height:100px
Take a Standard Hard Round Brush and create two diagonal black dots. Go to Edit > Define Brush Preset, enter a name, and hit OK. You can keep all other default settings, and just add the following:
Custom Fur Brush Settings
Brush Tip: 15% Spacing
Shape Dynamics
Control: set to Pen Pressure
Step 2
Use the Fur Brush to add fur to the rabbit. Start off with a color slightly darker than the rabbit, and then add a few bright hairs for highlights.
Step 3
To celebrate different fur textures, I avoid using the same brush for the elk and rabbit. Instead, I grab a Standard Round Brush (B) and make a couple of thick strokes to represent the elk's fur.
Step 4
I repeat a similar process for the owl's feathers and general features. Using the same brush, I define the highlights of the feathers while paying attention to where the light strikes the owl.
13. Color Correct
Step 1
Every time I introduce New Adjustment Layers to the painting, it tends to oversaturate the colors. Since the background for the sky is now very blue, I add a layer of white set to Hue to desaturate it a bit. Bringing down the layer's Opacity to 40%, I Erase any areas covering the warm light source.
Step 2
Next I apply a purple filled layer, setting the Blend Mode to Soft Light. I repeat the same process from before, erasing any areas that cover up the light source.
Step 3
Applying a yellow tint will give the painting a nice vintage feel. To do this I add a new layer filled with yellow, setting the Blend Mode to Darken with an Opacity of 45%.
14. Refine the Details
Step 1
For the most part, the current color scheme is what I want for the finished product. Hooray! Now I can really move on to the details. For the snow on the ground, I use a Chalk Brush to paint random spots of highlights to represent a beautiful glistening texture. Whenever you're using a textured brush, just let it do its own thing for each stroke. Simply Erase any excess that doesn't belong.
Step 2
Adding highlights to the other mounds of snow also gives off a greater impression of realism. Using a Hard Round Brush (B), I paint loose strokes to represent highlight and texture. As always, diffuse any harsh edges with the Eraser Tool (E).
Step 3
I continue to work around the illustration, refining all the details with a Hard Round Brush(B) and finding a balance of zooming in and out as I paint. You'll notice that some additional details even include bright green highlights for where the light hits the tree. And of course, I absolutely couldn'tresistaltering the colors some more with a purple layer set to Color Burn.
15. Outline for Crisp Edges
This lighting scenario has turned out beautifully. However, I can't help but notice that some details are getting lost in the shadows. To combat this, I paint bright outlines around certain details to make them stand out more.
16. Finishing Details: Stars
It wouldn't be a beautiful night sky without stars, right? Using a Hard Round Brush (B) I paint lots of white and yellow dots to represent the stars in the sky. Duplicate this layer and Erase a few of the stars. Now go to Filter > Blur > Motion Blur and set the Angle to 30 degrees and the Distance to 290. Instant star mania!
All Done! Let's Celebrate!
Collaborating with other artists is fun, but the unfamiliar territory can be daunting! In this tutorial we learned to listen to the process and trust what we know.
You don't always have to have the answer. Keep your eyes open to the experience, experiment a lot, and you'll make out just fine. Good luck!
In this tutorial I'm going to show you how to draw a tonal portrait from your own photograph. No drawing skills are required for this. If you love to draw, you can skip sections 2 through 4 and simply sketch the portrait onto the paper freehand. If you want to draw a portrait with a bit of help, just follow along.
This tutorial creates a portrait the same size as the original photograph. If you'd like to create a large final portrait, you can follow the steps in my tutorial: How to Use a Grid to Enlarge an Image While Drawing. So let's get started!
Materials
Black colored pencil
White colored pencil
Eraser
Drawing pencil, preferably an HB to 2B
Ruler
Sheet of Canson toned paper in a neutral, medium grey
1. Modify Your Portrait
Before we can start sketching on the paper, we need to first alter the original photograph on the computer to make things a lot easier.
Step 1
Open your photograph in Photoshop and open the Adjustments tool bar.
Step 2
Choose the Hue/Saturation button and move the saturation bar over to the far left. Your photograph will now be in black and white. You can also do this by simply choosing Image > Mode > Grayscale.
Step 3
Now we're going to boost the contrast a bit to make the shadows and highlights easier to discern. Go back to the Adjustments tool bar and click on the Brightness/Contrast button.
Step 4
Play with the contrast bar until you have a wide range of values in your photograph. Depending on how high the contrast in your photograph was to start, you may not have to move the bar much.
2. Grid Your Portrait
There are two easy ways to do this. The analog way is to print out your portrait and draw a grid with 1/2" boxes right on it with a pencil or pen. You can also create a grid in Photoshop with guide lines, which I will walk you through below.
Pull guides in from the top and left side to create a grid with 1/2" boxes on your portrait.
3. Grid Your Paper
Now that you have your portrait ready, it's time to prep your paper. I like to have a 1/2" or 1" margin around the outside of my portraits, so make sure your paper is the appropriate size to allow a border.
Step 1
Draw in 1/2" or 1" margins around the outer edges of your drawing so that the inside rectangle matches the measurements of your reference photograph.
Step 2
Mark the sides of your drawing with pencil marks every 1/2". You are making the markers for your grid. Now, draw lines from the top markers to the bottom markers and from the left markers to the right markers. You should have a grid identical to the one on your reference photograph.
4. Sketch Your Portrait
Now that you have identical grids on your photograph and paper, you can easily transfer the portrait.
Step 1
Moving left to right, draw the outlines of the face using the grid to help you know where you are. I usually work left to right and slowly make my way around the head first. A good tip is to look at where the outline starts and ends in each box. Is it touching the middle of the outer grid box line or the corner? It becomes a bit more mathematical when you do it this way, but you won't get lost and you'll be closer to the actual image. Once you go round the head, you can go in and add some inner lines like eyes, ear ridges, etc.
Step 2
Carefully erase the grid lines, making sure to redraw any portrait lines that you accidentally erased. Don't put too much pressure on the paper as it will rough up the surface.
5. Pencil in the Highlights
Look at your photograph and determine where the whitest whites are. Squinting your eyes will help you see them even better. Taking your white colored pencil, draw in the bright highlights.
6. Pencil in the Shadows
Now we'll do the exact same thing but for the darkest shadows. Look at your photograph and determine where the darkest darks are. Squinting your eyes will help you see them even better. Taking your black colored pencil, draw in the darkest shadows.
7. Push the Lighter Areas
Now that we have the brightest highlights and darkest shadows colored in, you can see that we need to start pushing the values because it doesn't really look like a portrait yet. Remember that the color of your paper represents the middle value of your picture. For me, that is a nice grey. Thus anything in my portrait whiter than that nice grey value will be colored in with the white colored pencil and anything blacker than the grey will be colored in with the black colored pencil. The harder you push the pencil and the more times you go over the area, the brighter or darker that area will become.
Step 1
Squinting at your photo reference, begin to draw in areas that are lighter than the middle value of your paper.
Step 2
Look again and push the white even further. The more you look at your portrait, the more you will begin to see lighter areas. Go over areas you penciled in before if it's not quite bright enough now.
8. Push the Darker Areas
We're going to do the same thing now but with the darker areas. Anything in your portrait that appears to be darker than the middle value of your paper will be colored in with your black colored pencil. By now, it should definitely look more like a person than it did when we just had the darkest and lightest spots penciled in.
9. Decide on Your Background
If your portrait has a lot of the grey still showing, then it's a good idea to consider coloring in the background. The rule of thumb is to color it in with the color that will most push your portrait forward at the viewer. So if you have a lot of shadows round the edges of your subject's head, a light background will make them pop. For me, I'm using the black colored pencil because my subject's hair has lots of highlights round the top.
Step 1
Pencil in the background of your portrait. Start with just a single, even layer of the color of your choice.
Step 2
Push your background even further by brightening or darkening several areas. Again, the rule of thumb is to do this where it will most make your portrait pop forward. Thus darkest areas are usually found beside the lightest areas.
10. Final Adjustments
Step back and squint at your portrait. If there are areas that need to be pushed darker or lighter, go in and pencil those appropriately. You want to match your beginning portrait in terms of the range of values whilst covering up any remaining grid lines. This is also the time, if you're like me, that you carefully pencil in the teeth. Teeth can tip a drawing into a cartoon very fast, so if the opening between the lips is small, sometimes it's best to just leave it empty.
Now you have a beautiful portrait that would make a great holiday gift for a family member or friend. Once you have the technique down, you can expand on it by trying different colors. Use a tan paper with cream and brown colored pencils, or a blue paper with baby blue and midnight blue pencils. The possibilities are endless!
We can’t but agree that winter is one of the most beautiful seasons, when nature is sleeping peacefully, covered with pure white snow. Let’s make it less chilly and more enchanting by creating a warm and cozy illustration of a wooden candle lantern. We’ll be using basic shapes, warp effects, and some simple freehand drawing. Let’s start!
1. Create Base Elements From Your Sketch
Step 1
We’ll start by placing our sketch onto the
Artboard of 600x600 px size and turn the sketch layer to a template by double-clicking it and
ticking the Template box.
You can draw your own simple draft, or use
the sketch from this tutorial by downloading the image below directly to your
computer.
Step 2
Now let’s add the first element of our
lantern. That will be its front part. Make a rectangle with the Rectangle Tool (M) and use the Direct Selection Tool (A) to select
its upper and lower right anchor points. Drag the points down to make the shape
slightly skewed, as shown in the screenshot below.
Here is how it should look after this simple
transformation.
Step 3
Select the created shape and use the Reflect Tool (O) to mirror the object
over the vertical axis, thus
creating the second frame. Squash the shape slightly to make it fit the perspective of
our lantern.
Step 4
Select the first frame, which is on the left. Go to Object > Path > Offset Path and
set the Offset value to -15 px (or set another value, usingthe Preview option so that the new shape fits your sketch). Make the same
actions for the second frame, this way forming two holes for the window glass.
Step 5
Now we need to render the top part of our lantern.
Create a narrow rectangle and skew it the same way as we did with the frames of
the lantern, by moving the side anchor points down.
Add the second edge and put it in its
proper place.
Step 6
The next thing to do is to add the “roof”
to the lantern. For this purpose, form an even square with the Rectangle Tool (M) and skew it, moving
its right side anchor points down.
Step 7
For this step we need the Smart Guides to be turned on (View > Smart Guides). Select the two
upper anchor points of our square, and drag them down and to the right in order to make the square flat. Smart Guides will
help to snap the object, placing it in the needed position.
Step 8
Add the inside bottom part of our lantern
in the same way, forming the “floor” on which we are going to place the candle.
Step 9
Let’s switch the fill color of the lantern
parts to some random hues just to see how it looks. Don’t forget to add the
two back faces of the lantern (greyish-blue in the screenshot), as they will be
visible too.
Step 10
It may happen that some of the elements of
our lantern do not match each other. We can fix it easily by repositioning the
anchor points in a few clicks. First of all, let’s switch to Outline Mode (Control-Y). Notice that
our sketch is still visible, as we’ve turned it into a Template.
Zoom in and check the edges of the lantern. Find the
mismatching place and select those anchor points, which you need to put in the
same position. Now turn to the Align panel
and select Align to Selection. Finally,
click on the middle positions of the
Align Anchor Points and Distribute
Anchor Points. Now our points are aligned and perfectly matching! Check out the other edges and fix them if needed.
Step 11
The next element of our lantern is a
so-called “chimney” on the top. Start by forming a squashed ellipse with the Ellipse Tool (L) for the upper part of
the chimney.
Step 12
Add a narrow rectangle, so that its upper
anchor points match with the side anchor points of our ellipse. Go to Effect > Warp > Arch and set the Bend value to -15%, Horizontal in order to make it slightly arched down.
Step 13
Add another rectangle for the foundation of
our chimney. Apply the same Arch
effect to the rectangle, bending the shape.
Step 14
Put the ellipse that we’ve created on top
of all other objects (Control-Shift-]),
select all parts of the chimney and open the Align panel. Set Align to
Selection and click the
Horizontal Align Center to line up the objects.
2. Apply Colors & Make the Lantern
Realistic
Step 1
Let’s enliven the lantern by coloring it into appropriate wooden shades. Start from the back sides, making them
dark brown. Apply lighter brown colors to the front faces of the lantern.
Step 2
Switch the fill color of the windows to
light blue. You can also check the palette for wooden parts in the screenshot
below.
Step 3
We need to cut out the window openings to make the
back parts of the lantern visible through the glass. For this purpose, copy the
glass shapes and keep them, as we’ll need them later (you can hide these copies by
clicking the eye icon in the layers panel). Select both the glass part and the
wooden side behind it, and use the Minus
Front function in the Pathfinder panel.
As a result, you get a hole of a proper
size. Do the same with the second frame. Finally, reveal the hidden glass shapes and
reduce the Opacity in the Transparency panel, making the back
faces of the lantern visible. Cut out the holes in the back faces as well.
Step 4
Move on to the chimney. Let’s make it look
metallic, applying a gold texture effect. Open the Swatches panel, go to Swatch
Libraries > Gradients > Metals,and choose the Gold swatch. Apply the
swatch to the lower tube part of the chimney.
Step 5
Apply the same gold swatch to the top edges
of the chimney. In order to separate it from the tube, Copy the tube shape and Paste
it in Front(Control-C >
Control-F). Fill the shape with light brown color and switch it to Multiply Blending Mode in the Transparency panel, lowering the Opacity down to 40% and making the tube slightly darker.
Step 6
Apply the gold gradient to the top elliptical part of the chimney and add a smaller ellipse in the middle of it. Fill the
newly created shape with a simple linear gradient from light brown to darker
brown, creating the effect of a hole or cavity.
Step 7
Let’s make the lantern more three-dimensional by adding gentle shadows, which will help to create some depth. Duplicate
the front left frame of the lantern and fill the copy with linear gradient
from brown color on the top to white in the bottom. Apply the Multiply Blending Mode, creating a
shadow.
Add a shadow to the right frame as well, using the same technique.
Step 8
We need to add more realism by applying wooden texture to our lantern. Let’s draw it with the help of the Blob Brush Tool (Shift-B). You can see
my brush settings in the screenshot below. For more convenience, create a New Layer and start drawing smooth,
curved and slightly dashed lines, imitating the growth rings on a wooden plank.
Step 9
Continue filling the blank space with
strokes. Don’t worry if they cross the edges—we will get rid of the unneeded
parts.
Step 10
Select all the created lines and Group(Control-G) them. Duplicate the frame shape and put the created
copy on top (the shape filled with black in the screenshot). Select both the
lines group and the frame copy and click the right
mouse button to reveal the pop-up menu. Make Clipping Mask to hide the unneeded pieces inside the mask.
Finally, rearrange the objects (Control-[),
putting the masked object above the shadowed frame and below the “roof” of the
lantern.
Step 11
Continue covering other parts of the
lantern with texture.
Add strokes to the edge of the top part of
the lantern as well.
Be sure that the lines match on the edges
of the frames, making a single curved shape. It is rather easy to fix the shape,
moving the anchor points to the proper positions, as they are still snapped to
the Smart Guides.
3. Render Decorative Elements to Make the
Composition Intricate
Step 1
Let’s create a simple candle, which we are
going to put inside our lantern. Start by creating two squashed ellipses—one inside the other—with the Ellipse
Tool (L). Fill the larger ellipse with radial gradient from darker red on
the edge to lighter red in the center. Fill the inner ellipse with a darker
gradient to create a cavity, as we did with the top part of the chimney.
Duplicate the larger ellipse and move the
copy down, marking the bottom of our candle. Put a rectangle between the
ellipses and Unite the rectangle and
the lower ellipse in the Pathfinderpanel, combining them into a single shape.
Step 2
Add three curved half-rounded elements above
the body of the candle, making the upper element the narrowest. Fill all three shapes with vertical linear gradients from orange to black, switching to Screen Blending Mode, thus making the
shapes bright and semi-transparent. This will give our candle a more three-dimensional
look.
Step 3
The candle wick is a simple rectangle,
filled with a three-colored linear gradient from red on the edges to dark brown in the middle.
Step 4
Now let’s light the candle by adding a flame. Start forming the center of the flame by creating a light yellow circle.
Select the upper anchor point with the Direct
Selection Tool (A) and move it straight up, extending the shape.
Step 5
Go to Object> Path > Offset Path and apply the effect with 5 px Offset value. Fill the newly created shape with linear gradient
from light yellow to brighter yellow. Use the Convert Anchor Point Tool (Shift-C) to move the handles of the
upper anchor point, making the shape more pointed and flowing.
Step 6
Copy the flame shape and Placein Back (Control-C > Control-B),
moving it a few pixels down with the down
arrow key. Fill the created copy with a darker orange color.
Step 7
Let’s place the created candle inside our lantern. Rearrange the objects, moving the candle and placing it behind the
front frames of the lantern. You can move it manually by dragging the object with
the help of the mouse directly in the Layers panel or using the Control-[ and Control-] key combinations.
Select the glass shapes on the front parts
of our lantern and fill them with linear gradients from dark blue in the middle
to bright yellow on the edges. Switch to Screen
Blending Mode and lower the Opacity
to 50%, creating an effect of clean glass with warm overtones from the flame.
Step 8
Move on to the next element of our composition: a glossy red berry. Start by making an even circle with the Ellipse Tool (L) and fill it with
linear gradient from pinky-red in the middle to darker pink on the edge. Form a
few highlights and reflections in Screen
Blending Mode, adding glossiness to our berry.
Step 9
Create a small rounded shape, forming a
small dimple on the top of the berry and emphasize it with a tiny highlight.
Add a small stem, filling it with dark brown gradient. Make a few copies of the created berry and place them in
front of the lantern, rotating the berries in different directions.
Step 10
Add some more winter-themed items, such as
fir branches, which are very easy to form with the help of the Paintbrush Tool (B) (find out how to make such branches in this Festive Wreath Tutorial and add more decorative elements to your liking).
Step 11
We also need to create some reflections on the
glass surface if we want to make it more realistic and smooth. Create a set of
narrow rectangles of varied width and turn them into a Compound Path (Control-8), creating a single object. Rotate the stripes and place them above the glass, cutting off the unneeded
parts either with the help of the Clipping Mask or the Pathfinder panel. Fill the shape with the dark blue color and switch it to Screen Blending Mode.
4. Add Minor Details & Form a Gentle
Background
Step 1
Let’s add a touch of winter by making a
blurred light blue background, reminscent of a frozen window. Create a square the same size as your Artboard (600x600 px)
and apply radial gradient from white on the edges to blue in the center,
placing it closer to the top of the canvas.
Step 2
The lower part of our composition remains
purely white. Let’s cover some of the berries with white shapes, as if they
are dipped in thick snow. Draw a wavy freehand shape with the Pencil Tool (N) and make its upper part
slightly darker with the help of the linear gradient, thus separating the
element from the white background.
Step 3
Let’s give our picture a magical look by
adding some shiny sparkles. Create a circle and apply a contrast radial gradient
from white in the middle to black on the edge. Switch to Screen Blending Mode, creating a tiny white spark. If you want to
make gold, blue or other multicolored sparks, just change the center color to
yellow, blue, etc.
Step 4
Spread the sparks all over the lantern,
increasing the glowing effect by putting the sparks one above the other, making
them even shinier.
Step 5
Now let’s add some depth to our artwork by
creating a gentle bokeh effect behind the lantern. Form a group of circles of various sizes,
overlapping each other, and put them above the background. Fill them with the
same black and white radial gradient, adding one more white slider in the Gradient panel and moving it closer to
the edge, as shown in the screenshot.
Step 6
The last but not the least detail will be
light smoke coming out of the lantern chimney. Draw a few wavy lines with the Pencil Tool (N) and switch the Stroke color to white. Select Width Profile 1 in the Variable Width Profile Menu in the
control panel above.
Finally, select the wavy lines and go to Effect > Blur > Gaussian Blur,
setting the Radius value to 20 pixels and making the smoke soft and airy.
Great Work! Our Winter Candle Lantern Is
Finished!
I hope this tutorial helped you to discover
some new tips and tricks which will be useful and inspire you to create more
whimsical artworks! Have a warm and cozy winter!
This
tutorial will take you on a journey to create an
advanced flower style in the fractal program Apophysis. We will first
explore the 2D principles of this flower style. Then
we will expand upon the idea using the same fractal to create a 3D
version of the flower. Let's begin.
1.
Setting the Stage
Step
1
To
begin, let's select our color gradient. Open the Adjustment
window in Apophysis and switch to the Gradient tab. Choose671_Venice. Underneath the gradient you will see the wordRotate and a slider to the right of it. To the right of these
is a text box. Enter -20 to adjust the gradient.
Step
2
Close
the Adjustment window and open the editor. Create a blank
slate for our fractal by clicking the New Flame button.
2.
Setting Up the Transforms
Step
1
Transform
1 will serve as a foundation on which the rest of the fractal will be
built. Whatever variations we add to this transform will affect the
overall texture and appearance of the fractal. To begin with, we will
aim to have a smooth, silky texture on the flower petals.
Inside
the editor, switch to the Variations tab. Remove the linear
variation from the transform by setting its value to 0.
Next
choose either blur or Gaussian blur as your base
variation. For whichever you choose, enter a value of 0.25 up to 0.6.
This can be modified later as you see fit. If you wish to replicate
my results, I am using 0.41 Gaussian blur.
Step
2
Now
let's add a new transform and take note of the different changes the
fractal undergoes as we modify the transform. Click the New
Transform button in the editor window. This transform will give
our fractal structure or body.
Step
3
Both
the linear and spherical variations are required on Transform 2;
however the values of each are subjective. Change the linear
variation to a value between 0.75 and 1.4. I will be using 0.9 for
linear.
Thespherical variation is needed to create a gap in the center
which we will later modify into the flower shape. Use a smaller
amount of spherical, somewhere between 0.05 and 0.3. For this flower
I will be using 0.15.
You
will notice in the preview window that there are now several
concentric circles around the large circle in the middle.
It also appears that there are pixels radiating in columns outward
from the circles. These two transforms provide the basis for the
flower fractal. We now need to modify some of the transform
properties to further define the flower's appearance.
Step
4
Staying
with Transform 2, switch to the Colors tab inside the editor.
First
change the Weight of this transform to a relatively high
value, somewhere between 10 and 30. I have chosen 20. The weight of a
transform tells Apophysis how much priority to give to the variations
on the transform when creating the fractal.
Transform
color and color speed are also very subjective. We will most likely
need to modify these values toward the end of the creation process.
For now, choose a transform color between 0.1 and 0.35. I will be
using 0.245.
Color
speed affects the distribution of the color palette as a whole
throughout the fractal. The higher the number, the more the color is
spread out until you reach 1. To get the widest distribution of
color, choose a Color speed setting between 0.8 and 0.98. I am
using 0.896.
Quick
tip: You can click and drag to the left and right on the words Color
speed in the Colors tab to watch a
real-time preview of how the colors affect the fractal. This will
allow you to quickly make color adjustments.
Step
5
Select
Transform 1 from the Transform drop-down menu. We need to make
some quick modifications to the colors and weights just as was done
to Transform 2.
The
weight of Transform 1 is much less than Transform 2. This is a basic
principle you can apply in making the majority of fractals:
base/textural transforms have lower weights
whereas structural transforms have higher weights. Use a value
between 0.3 and 0.8 for Transform 1's Weight. I have selected
0.6.
Now
for the coloring adjustments. The Transform color setting can
be tricky and I often like to set it in conjunction with the color
speed setting. Ultimately I chose to go with 0.854.
As
for the Color speed, choose a setting between 0.4 and 0.9.
Remember the click and drag method can be very useful in finding an
ideal setting. After going back and forth a few times between
transform color and color speed, I decided to use 0.58.
We
now have both of the transforms completed for the flower. The next
step is where all of the action takes place!
3.
Adding the Final Transform: Creating Petals
Step
1
The
final transform is a very powerful tool in the Apophysis editor. This
transform applies to the entire fractal and can drastically alter the
entire appearance of a fractal. Add in the final transform by
activating it from the editor toolbar. Click the green triangle
with the FX above it, which will enable the final transform.
Step
2
After
all the hype, don't be disappointed that you haven't seen a change in
the preview window. Just as with any new transform you add,
the linear variation has a default value of 1, and the final
transform is no exception. Switch to the Variations tab and
remove linear by changing the value to 0. You'll notice that
your fractal completely disappeared in the preview window. The linear
variation was keeping all of the pixels plotted on the fractal plane.
Now that there is nothing to plot, your fractal disappears.
Scroll
down in the variations to julian and add in a value of 1.
Finally,
switch over to the Variables tab and change the julian_power
variable to -2. The julian_dist setting should have defaulted to
1 but if not, change it to 1 now.
4.
Finding the Flower
Where's
the flower, you say? We must search for it!
Step
1
Still
in the editor, change back to the Triangle tab. Select
Transform 2 from the Transform drop-down list. At this point
the idea is to make small modifications and really search out a nice
spiral form.
Step
2
Change
the value of the triangle scale to 110. This number is found
between the small and large triangle buttons located underneath the
four move arrows. Click the scale up triangle three times.
Step
3
Now
comes the fun. In the grid of the editor you will see a yellow
triangle. The yellow triangle is a graphical representation of
Transform 2. Click the move triangle left button once in the
editor to be able to see this triangle better.
At
each of the corners of the triangle you will see points: X for the
x-axis, Y for the y-axis and O for the origin of the transform. Click
the O and drag to move the triangle around. Notice how this affects
the fractal. On the edges/corners of Transform 2 you will see lines
that appear to be the corners of a box. You can click these and drag to
rotate the transform.
Utilize
the ability to drag Transform 2 around and rotate it to find a nice
spiral design. Remember that you can always come back at any step in
the process and make modifications.
Step
4
The
petals of the flower are beginning to take shape. We can give more
definition to them by adding in a very small amount of the cross
variation. This variation in addition to what is already on Transform
2 will create small gaps on the petals.
Switch
to the Variations tab. Add in a small amount of 0.01 to 0.04
of the cross variation. I am starting with only 0.015.
I've
only touched on the bare minimum for creating these advanced fractal
flowers. You can add very small amounts of other variations to
Transform 2 to change the shape of the petals. Change the values or
variations on Transform 1 to modify the texture and appearance of the
flower. Modify the julian variables on the final transform, or move
the final transform to create entirely different looks. All of these
are just the beginning of the possibilities for these flowers. Use
your imagination as you make modifications to the fractal, and save
your ideas often so you can return to them.
5.
Going 3D
There
are several different ways to go about creating 3D flowers. Each of
these paths create different styles, some with the petals extending
out and up, and others with the flower mounded more in the center and
protruding more like a rose. We are going to focus on just one style
today but please do not allow your explorations to stop here.
Step
1
We
first need to change our final transform's variable to one that
better supports 3D work. In the editor, make certain you are on theVariations tab. Choose Final from the Transform
drop-down list.
Remove
the julian variation by changing its value to 0. Add 2 to thejulia3D variation.
Finally,
change to the Variables tab. Set the julia3D_power
variable to -2.
Step
2
Close
the Editor window.We need to modify the perspective to create the 3D look and feel.
Open the Adjustment window by clicking the button in the menu
bar of the main Apophysis window.
At the top, on the right-hand side, you will see several values such as Depth
Blur, Pitch, Yaw, etc., that all relate to the 3D
view in Apophysis. Change the Pitch setting to 50. This
setting allows you to change the pitch of the view finder or camera,
if you will, from a 2D setting at 0 to any degree you wish.
Step
3
Close
the Adjustment window and open the Editor. Everything
is in place to make the fractal 3D.
In
the Transform drop-down menu, choose Transform 1.
This
step is absolutely essential in making the flower 3D. In theVariations tab add the value of 1 to the flatten
variation. Yes, it might seem crazy to add something called “flatten”
to a 3D project, but it is imperative that you do so. Otherwise
everything will disappear in the next step.
Step
4
Switch
to Transform 2 in the Transform drop-down menu. Still on theVariations tab, add in 0.2 to the zcone variation. Additionally, add
-0.02 to the ztranslate variation. Take note of the drastic change of
the fractal’s appearance.
6.
Embellishing the Fractal
We
could stop here, but why not add some flair to the fractal?
Perhaps
you would like to add some stamens, the long stem-like
protrusions in some flowers.
Step
1
Switch
to Transform 1 by selecting it from the Transform
drop-down menu. Click the Duplicate Transform button in the
toolbar of the Editor window. This will create Transform 3.
Step
2
Switch
to the Variations tab and click Clear at the bottom to
remove all variation settings on this transform.
Step
3
Pay
careful attention here, as we need to set the values of several
variables. Each of these can be adjusted to your liking later. For
instance, I will likely increase the amount of Gaussian blur once I
have found the positioning of the stamen that I like. Set each of the
variables as follows.
Bubble:
0.016
gaussian_blur:
0.01
zscale:
-0.289
ztranslate:
0.403
zcone:
0.62
post_rotate_x:
0.255
Step
4
Change
the Weight to 0.3. In the Colors tab, change the Color
speed to 1. Feel free to modify the values of the variations on
Transform 3 at any point.
Step
5
Switch
to the Triangle tab. At the top of the editor window, to the
left of the Final Transform button there is a button with PX and a
Triangle. Click this button and it will activate what is known as
the Post Transform mode of the triangle. This mode allows you to move
the entire transform around without affecting the shape of the
fractal variations applied to it. The best way to understand this is
to now either click on the green triangle (Transform 3) and
move it around the window, or use the move and rotate
tools in the Triangle tab to move the triangle around.
Find
an area where you think the stamens of the flower look appealing.
7.
More Flair
Step
1
Finally,
we will add some fun lighting effects to give the fractal more visual
interest. To do this, select Transform 1 from the Transform
drop-down menu and Duplicate this transform. In the Variations
tab, click the Clear button at the bottom to remove all
variations.
Step
2
Add
in a very small amount of blur3D. A value of 0.02 is a good
starting place. Additionally, change the Weight to 0.1.
Step
3
Activate
the Post Transform for Transform 4 and move this transform
around, notice where the lighting shows up in the preview window. You
may wish to add in some ztranslate on the Variations
tab or adjust the amount of blur3D as you move the transform
around.
You
can continue to follow the techniques above to add as many different
effects to the fractal as you like. When you're finished, close the
editor window and we will proceed to setting up the render and
rendering the fractal.
8.
Rendering the Fractal
Step
1
Now
we need to focus the image on an interesting
part of the fractal. Apophysis provides several tools in the main
window toolbar to accomplish this. Use the move and zoom
tools to find a focal point of the fractal.
Step
2
Open
the Adjustment window. Switch to the Rendering tab.
Change the Gamma setting to 3. Close out the Adjustment window.
Step
3
Click
the purple gear in the main window to open the rendering
options. Select a place to save your fractal. For Density
choose 10,000. A Filter Radius of 1 is very nice for flowers.Oversample of 2 or 3 at the most is fine. Once you've adjusted
all render settings, click Start to begin the render. After several
minutes your 3D fractal flower will be complete!
Awesome Work, You've Done It!
By following the steps outlined above, you now have created your first 3D flower in Apophysis. Not only do you have an amazing image, but also the tools to create more stunning fractal artwork.
Take all of these principles and combine them together. Start by modifying Transform 2. Rotate it, move it around, add and remove variations and the amounts thereof. This will allow you to find many different petal shapes. Then experiment with the final transform. Finally, use the different lighting and texture methods to achieve some out-of-this-world designs. You will be amazed and very pleased with the wonderful fractal flowers you can create!
Caricatures are a fun alternative to traditional portraits. The idea is to comically exaggerate particular features to create a humorous representation of that person. Adobe Photoshop's transform, warp, and liquify features are perfect for creating caricatures from a photographic portrait. This tutorial is part of a larger set of instructions found in the Tuts+ course, Fluid Photo Manipulation: Transform, Warp, and Liquify.
Tutorial Assets
This tutorial requires two files. Both are available through the Download Attachment link found with this tutorial. The files you will need are:
A textured background. I created this one using the Adobe Texture Paper Pro extension.
1. Basic Photo Preparation
The essential technique for creating a caricature is to find elements that are already naturally pronounced, and exaggerate them to a comical degree. In our starter photo here, the young man's jaw line is rather large, and his smile is very prominent. The horn-rimmed glasses are noticeable and the hairline looks like it's beginning to recede. These are all aspects of his portrait we can have fun with.
Step 1
The solid white background of the portrait makes it easy to extract the figure from the background. Use the selection technique of your choice—I used the Quick Selection Tool (W) to craft the selection—and then go to Layer > New > Layer Via Copy (Control-J) to create a cutout layer of the man.
Step 2
It's much easier to work with particular features if they are isolated. So use the same technique to cut out the following individual elements. The body and clothing layer should follow the neckline of his shirt.
The head/neck layer should fit nicely inside the neckline of the shirt
Keep the selection large and rough when creating the chin layer—we will make it blend in nicely later.
Keep the mouth layer selection outside the lip area so there's room to blend it in later.
Likewise, keep the selection around the nose rough, with plenty of room to spare.
Keep the selection around the glasses nice and tight, and include the eyes.
Keep the selection tight around the outside contour of the ear, but give yourself room to work with on the inner side.
Step 3
Just to keep things as flexible as possible, lets transform each layer into a Smart Object. Grab each layer individually and go to Layer > Smart Objects > Convert to Smart Object.
2. Transform and Warp
Now that the different features are all on their own layer, we can begin transforming them into an exaggerated caricature. Use the flexibility of the Smart Objects to work with different size combinations to get a humorous effect.
Step 1
A common caricature technique is to make the head extremely large in proportion to the body. To accomplish this, shrink the body layer down significantly with Edit > Free Transform.
Step 2
Use Edit > Transform > Warp to begin shaping the head layer. Fit the neck into the neckline of the shirt and inflate the top of the head. The goal of this step is just to establish the basic shape of the head, and that serves as a foundation for the other layers to build on.
Step 3
Distort the chin layer to elongate it and sharpen it slightly. Try to keep the top aligned so the seams are not overly visible.
Step 4
Make that big grin even larger by stretching out the mouth layer.
Step 5
Caricatures frequently make noses extremely large and exaggerated. Big noses just look funny! Expand the nose layer to comical proportions—even if it overlaps the mouth, it's OK.
Step 6
The glasses layer requires more attention than the simple scaling we used with the other features. The Edit > Transform > Warp tool can be used to help fit the expanded frames onto his face.
Step 7
All the distortion has nearly eliminated the ear on the base head layer. Good thing we have an ear layer to scale up so that it can support the heft of those glasses!
Step 8
Now add a Layer Mask to each layer and use a soft brush with black paint to blend the individual elements into a cohesive whole.
Masking the chin is the most challenging, as you have to work around the hairs of the beard. Just use a smaller sized brush and work carefully. Here's a shot of the chin layer next to the mask layer used to blend it.
Step 9
Add a new layer above all the cutout layers and use the Spot Healing Brush (J) set to Sample All Layers to paint over any obvious seams or trouble areas that escaped the masking process.
3. Fluid Faces
Next up is the true power behind the caricature process. It's the infamous Liquify feature. We've already done much of the warp work with the different transformations, but it's the Liquify feature that is really going to create a fluid, funny, exaggerated appearance. The Liquify tools are powerful and can be unpredictable, but fortunately the feature supports Smart Filtering, so there's no worries!
Step 1
Select all of the cutout layers and the seam cover layer and merge them into a single Smart Object with Layer > Smart Object > Convert to Smart Object.
Step 2
Go to Filter > Liquify. When the dialogue box comes up, check the Advanced Mode to reveal additional controls.
Step 3
Use the Forward Warp Tool with a brush size around 200 to increase the size of his forehead. Gently push the skin area up towards the hairline.
Step 4
Use the Bloat Tool to click a few times on the tip of his nose to make it look more bulbous.
Step 5
Use the Freeze Mask Tool to highlight the frames of the glasses. This will prevent the frames from distorting while we work with the eyes.
Step 6
Use the Forward Warp Tool again to exaggerate the shape of the temple area, and the Bloat Tool to create a slightly larger shape to the eyes—just be sure to reduce the size of the brush to be similar in size to the eyeballs. When finished, click the None button in the Mask Options to unfreeze the masked area.
Step 7
Extend the chin a bit more using the Forward Warp Tool and create a more rounded, bulbous end with the Bloat Tool.
Step 8
Finally, make his smile even bigger by using the Forward Warp Tool to push the corners of his mouth up into the folds on his cheeks. Just be careful not to warp the shape of the teeth.
Apply the Liquify effect and your caricature should look something like this.
4. Artistic Background
Now that we've twisted up this poor man's face, let's make it look more like a painted image. We'll start by having a more artistic background.
Step 1
Add a Layer Mask to the caricature layer and use a textured brush to fade the bottom of the layer out. I chose the Sponge Brush Projection brush preset here. Reduce the Brush Opacity setting to around 40% so the texture builds up gradually.
Step 2
Open the BackgroundTexture.jpg file from the tutorial assets and place it as a layer underneath the caricature layer.
Step 3
Add a new layer over the textured background. Use the same textured brush from the mask work to add in a white brushed border effect.
5. Painted Effect
Now we are ready to transform the caricature itself into a painting. We want to retain some of the photographic qualities, but still give the impression of a hand-painted piece. This is easily done using a smudge painting technique.
Step 1
Smaller details tend to disrupt the smudge painting process, so it's best to smooth them out first. Go to Filter > Blur > Smart Blur. Use a Radius of 2.0 a Threshold of 10.0, with Quality set to High.
Step 2
The highlights in the photo appear a little bright. Correct this by clipping a Curves Adjustment Layer to the caricature layer and using the Curves to decrease the bright areas.
Step 3
Create a new layer at the top of the layer stack. Grab the Smudge Tool with a Brush Size around 40 pixels. Set the Strength to 80% and check the Sample All Layers option. Then begin smudging along the major features of the image. Follow along with the natural grain of the skin to keep the appearance very fluid.
Step 4
Reduce the brush size to about 5 pixels and begin smudging along the smaller details of the image like the eyebrows, individual strands of hair, his eyes, and his teeth.
Step 5
Create a merged layer of the smudge layer, the caricature layer and the adjustment layer by selecting all of them and holding down the Alt key while going to Layer > Merge Layers (Control-E). Then go to Filter > Other High Pass set the Radius to 5.0Pixels. Call this layer Details.
Step 6
Change the Details layer Blending Mode to Overlay, reduce the Opacity to 78%, and then go to Layer > Layer Mask > Hide All. Use a soft, white brush on the mask to reveal the details in the eyes, eyebrows, nose, mouth, and beard.
Step 7
Add a new layer called Dodge/Burn and fill it with 50% gray through the Edit > Fill feature. Set the Blending Mode to Overlay and then use a soft Black brush at 30% Opacity to simulate a Burn effect. Switch to White to simulate a Dodge effect.
Step 8
Add a final color effect. First create a merged layer of all the layers by holding down Alt while going to Layer > Merge Visible. Then go to Filter > Camera Raw and set the Contrast to +10, Clarity to +22, and the Vibrance to +48.
Done!
And now you are finished! Behold your amazing photo caricature work. Now take these techniques and go apply them to photos of your friends and family to create some fun, unique, and personal portraits!
As the year draws to a close, it's the perfect time to step back, take stock of what's happened in the past twelve months, and plan ahead (at least, that's what most people think). And there's one thing we do at Tuts+ in great quantity that gives us plenty to reflect upon: publishing content.
In the past twelve months, we've published 2,500 new articles and tutorials, and over 200 courses, from hundreds of different instructors, in our ten different topic areas. We've merged topics, introduced new functionality, and improved various aspects behind the scenes for our instructors.
Direction & Focus
This year has been about consolidating and better focusing some of our content. We're investing more than ever in our main topics—Code, Design & Illustration, Web Design, and Photo & Video. These have become the content areas that we've doubled down on, for both courses and tutorials.
It's meant scaling back and merging sub-topics in some other areas, such as 3D & Motion Graphics, Music & Audio, and Craft (although we're still continuing to publish tutorial content in those topics every week).
As a result, we've been able to invest more time and attention into our four core topics, and make them as fantastic as we possibly can.
Looking at the Numbers
It's been a busy 12 months at Tuts+, and we're excited to share a few of the numbers around the content we've published. Between December 2014 and November 2015 (inclusive), we've added:
over 2,500 new articles and tutorials
over 200 new courses
over 4 million words (roughly four times the length of the entire Harry Potter series)
over 450 hours of courses (over two and a half weeks watched back to back)
over 450 instructors (with 200 of them being brand new to Tuts+)
We now have a total of almost 19,000 tutorials and 450 courses on Tuts+. There's a lot to learn!
It's Easier to Find What You're Looking For
After publishing thousands of tutorials from different instructors and editors, our content categorisation needed some work! We took the time this year to begin cleaning up how we categorise all our courses and tutorials, and make sure they stay consistent in the future.
You'll now find our category pages to be much more usable, as well as seeing helpful links between relevant tutorials and courses when browsing the site.
A Better Instructor Experience
We've thought carefully this year about the experience of being an instructor at Tuts+, from the on-boarding process for new instructors through to creating an instructor community, providing a better writing experience, and helping people stay up-to-date with what's happening at Tuts+.
Amongst other things, we've finished rolling out a completely custom CMS for tutorials, an instructor discussion forum, and an improved process for getting help when creating a course. We're also sending out a monthly instructor newsletter to everyone who's contributed to Tuts+ in the past.
It's never been a better time to begin teaching at Tuts+, and it's simple to get started!
Your Favourite Courses
Over the last 12 months we've published more than 200 new courses, but which ones were the most popular? Here are your favourite courses published in the last year in each topic (not including our large selection of free courses, as they had an unfair advantage):
For the first time this year, we've begun to have Tuts+ tutorials translated into different languages, to better serve our audience around the world. At the time of writing, we now have over 500 posts in 27 different languages!
All of this is down to our incredible community of Tuts+ readers and instructors, who have been helping with the project. Thank you to everyone who's taken the time to translate a tutorial, and contributed to the project! If you're interested in finding out more, we have a few related blog posts that you might like to read:
Next year, we're going to maintain our focus on content. We'll be experimenting with new types of teaching (including live video interviews and discussions), exploring exciting new areas like 3D printing and drone photography, and continuing to improve how our tutorials and courses interconnect.
We'll be scaling up translations to offer more content than ever, in more languages than ever. And it goes without saying that we'll be working on a few larger, exciting projects that we can't announce yet!
Thanks for being one of our readers, and for using Tuts+ to further your education and career. We hope you'll enjoy everything we have in store for 2015!
What Would You Like to See?
We're always interested in your ideas and feedback about how we can publish content that you'd love to watch, read, and learn from. What would you like to see in 2015, and how can we make Tuts+ better? Have your say in the comments below, or suggest a course you'd like to see!
Geometry with the numbers 4 and 8 means we'll be constructing squares, octagons, octagrams and a few patterns based on them. Let me first quickly define a couple of new words:
Words ending in -gon mean: x-sided shape. An octagon is 8-sided, a decagon is 10-sided, etc.
Words ending in -gram mean: x-pointed star. An octagram is an 8-pointed star, a hexagram a 6-pointed star, etc.
Whereas there is only one regular -gon for each number, there can be several ‑grams (or stars), depending on how the points connect. The more points a polygon has, the more possible stars it contains.
Four different dodecagrams (twelve-pointed stars)
Two more words we will use frequently to describe shapes are: static and dynamic. Very simply, a static shape sits on a side, while a dynamic shape stands on one point.
These adjectives neatly express the feeling we get from these two positions. (Yes, geometry and feeling in the same sentence!)
When constructing any shape, we have to decide whether we want it static or dynamic, and use the appropriate construction method. But these are not the only two possible premises: often we are not starting from scratch, but have to work around a given, such as an existing point, or segment, or a circle, or a specific measurement. Each of these situations calls for a different construction method.
I won't go through each and every one of them, as there are dozens, but I'll show you at least a couple per figure, to explore different ways of doing things.
Shapes
Square (on a Side)
As the title says, this is the method to use if one of the sides is already defined, but it can also be used if you're starting from scratch. In this case, you define the segment yourself before step 1.
Step 1
With AB as your compass opening, draw an arc centered on A. Throughout this entire construction, the compass opening remains the same.
Step 2
Now move the dry point to B and cut the first arc at C.
Step 3
Move the dry point to C to draw an arc that cuts the original arc (centered on A) at another point D.
Step 4
Now move the dry point to D to mark a point E on the arc we just drew.
Step 5
Connect E and A to find F. So far we've done all this to find the perpendicular to AB at A.
Step 6
One last arc: dry point on F, draw an arc to find the fourth point in the square, G. It will cut the arc that had B as its centre.
Step 7
Join G to F and B, to complete the square.
Although this is a useful method, I notice in traditional arts a marked preference for the methods that start with a circle. Perhaps it is a symbolic habit, a reminder that the One (for which the circle is a symbol) precedes all things, or maybe it's just more elegant. Don't discard the above as redundant, though: if all you had was a rusty compass, which is the compass with a fixed opening that our ancestors used, the following method would not be practicable.
Dynamic Square (in a Circle)
Our starting point is a circle with one diameter drawn. Whether the circle or the diameter came first doesn't matter!
Step 1
Draw the bisector to this diameter, as learned in lesson 1. Start by drawing two intersecting arcs...
Step 2
... and connect the intersections. The bisector cuts the circle at two points, so we have a total of four defined points on the circle.
Step 3
Connect the four points.
Static Square (Around a Circle)
Steps 1–2
This is the same as in the previous construction: Starting with a circle with a horizontal diameter, find the bisector so that the circle is cut into four.
Step 3
With your compass opening equal to the circle radius, place the dry point on each of the two original points again, to draw two arcs that form a tangent in the centre.
Step 4
Repeat this, centered on the points defined by the bisector. The four arcs define four points outside the circle.
Step 5
Connect these four points.
With just two more steps, we can create two four-pointed stars.
Static and Dynamic Four-Pointed Stars
Step 6
Join the four points on the circle with the four corners of the static square as shown here:
Step 7
Outline the desired star.
Static Octagon and Octagram (in Square)
Step 1
We start with a square. Draw the diagonals.
Step 2
Dry point on A, compass opening from A to the centre, mark two points on the square.
Steps 3–5
Repeat with dry point on B, C and D.
Step 6
For an octagon, connect the eight points you have marked.
For an octagram, connect the points as shown below. You are basically skipping every other point as you connect them. Notice that this octagram, the classic eight-pointed star, is made of two perfect squares.
If you skip two points when connecting, you get a different octagram:
Notice the smaller octagram created at the heart of the large one!
Dynamic Octagon (in Circle)
Steps 1–4
These are the same steps we followed to construct a static square. Just stop short of joining the four outer points.
Step 5
Connect the outer points diagonally. The diagonals cut the circle at four new points, so that it is now cut in eight.
Step 6
For a dynamic octagon, join these eight points.
For a dynamic octagram, join them skipping every other point, as below, drawing two squares.
Tiles from Central Persia, 14th century
Patterns
So far we've been constructing individual shapes, but we can now start putting them together into tiled patterns or tesselations. One thing to know about tiling: equilateral triangles, squares and hexagons are the only regular polygons that tile without leaving any blank space.
All others, including octagons, will leave spaces of various shapes. This is a drawback in, for instance, packaging, because that space is then considered wasted storage or shipping space. It is not at all a drawback in art, where these small in-between shapes serve as counterpoints to the main shapes, contrasting in size and colour, or merging with them to create unusual new shapes.
Back to our current activity: Three different, simple patterns can be constructed with eight-pointed shapes, and they all have the same basic grid. The grid is based on four circles around a fifth, therefore a grid of squares is also known as a five-circle grid. Let me also mention, just in case you come across the term, that patterns and constructions based on the square are sometimes referred to as root two (√2) patterns. All these terms are different ways of saying we are working with 4 and 8 (and 12, 16 and other multiples).
In constructing the grid, I can't stress enough the importance of working with great precision, especially now we're moving to patterns. Make sure your pencil is sharpened, and take your time.
The Five-Circle Grid
Step 1
Draw a horizontal line and a circle centered on this line, knowing that the sides of the squares in the grid will be equal to this circle's diameter, and that this circle will be the very centre of the grid.
Step 2
Find and draw the bisector. You'll need it to be as long as the horizontal line, but you can always extend it as you go.
Steps 3 & 4
Draw the four arcs again, this time making them full circles. These are the five primary circles that give the grid its name.
Step 5
Draw four more circles with the centres shown here...
Step 6
... and four more.
Step 7
Now draw eight more circles with the centres below. Notice we are simply adding new circles where earlier circles intersect. This can go on over as wide an area as needed, but we're going to add just one more set.
Step 8
Square off this grid by adding the circles at the corners.
We now have 25 circles, but many of them are only needed to build the grid itself. When we start working on a pattern, only the nine tangent circles shown here, which are inscribed in as many adjacent squares, will be our focus.
Step 9
The last step in the grid is to add the diagonals. Connect one way—the circles in the corners are missing the points needed to draw those diagonals, but that will be solved in a minute.
Connect the other way...
Finally fill in the missing ones, thanks to points created by diagonals intersecting the circles.
Here is the grid as needed for the next steps, cleaned up of anything no longer required. The outer square has been drawn to bound the pattern, but that is optional.
Tiled Dynamic Octagons
No further construction is required, because each circle is already divided into 8. All you have to do is connect the dots in each circle.
Floor pattern at Itmad-Ud-Daulah's Tomb, photo by David Castor.
Breath of the Compassionate
This poetic name refers to a pattern of octagrams that are tiled leaving a cross-shaped space between them. Our starting point is again the five-circle grid.
Step 1
The dynamic squares are already marked by the diagonals. To draw the dynamic squares, join the horizontal sides...
Step 2
... then the vertical sides.
Step 3
Now simply outline the eight-pointed stars.
In the finished pattern you can see where the idea of breathing came from: the octagrams are like squares "breathing out" (they expand), while the crosses are squares "breathing in" (they contract).
Tiles from Iran in the Breath of the Compassionate pattern (rotated 45º). Photo by Jean-Pierre Dalbéra.
Tiled Static Octagons
This pattern is based on the static
octagon construction we tried earlier, so we need to apply that on the
grid. Happily, there's no need to draw all the squares and then mark
eight points on every single one of them! We only need the outermost points, because everything joins up together.
Step 1
Dry point on the corner of your bounding square, opening to the centre of the circle, mark two points.
Step 2
Repeat this at the other three corners of the bounding square, marking six more points.
Step 3
Continue doing this with the dry point on the intersections below, which are essentially the corners of the (virtual) smaller squares around each circle.
Step 4
Using a softer pencil so that you can see these lines better over the old grid, connect diagonally all the peripheral points you just marked. This is a new grid with new intersections.
Step 5
Connect the intersections to obtain octagons that are adjacent on one side.
And to finish, here's a whole other pattern that appears if you connect the lines so the octagons overlap:
That's all for this lesson. Solely working with 4 and 8, we learned to construct squares, octagons and both four- and eight-pointed stars in two different states, then the square grid associated with these numbers and four patterns directly yielded by this grid—and there are more out there than can possibly be listed. Next month we will follow the same process with another pair of numbers: 6 and 12.
When you design a character on a 2D sheet, everything is clear for you. Sure, you're showing only one side, but you know exactly how the character would look in any other perspective. However, the 3D artist, whose job is to take your design and bring it to the third dimension, can't read your mind. They can only see what you give to them—one side of a multi-dimensional design in your head. To reduce the risk of misunderstanding, when designing a character try to describe as many aspects of it as possible.
One of the ways to do it is to create a model sheet. Its goal is to show more dimensions than only one drawing would. For example, the front view shows you the full height and width, but it tells you nothing about the depth. Also, the front and back may be totally different.
This is the same object seen from the front (A) and the side (B)
This tutorial will be a simulated process of performing the task of a conceptual artist. I'll show you how to accomplish it step by step, explaining each step in detail—from the analysis of the commission through to the research of the topic, the design, and the full execution of the idea. You don't need any digital drawing software for this, although it's recommended.
1. Commission Analysis
Let's say you're a freelance concept artist. A company producing video games contacts you, you come to agreement, and they tell you what exactly they want you to do:
"It should be one of three playable characters in our game, a male werewolf warrior. In this universe the werewolf is another intelligent race rather than a cursed human, something like the orc or the minotaur. This character is strong, but is more a type of knight than a barbarian. His equipment is made all by himself, because he comes from a tribe, not from a developed civilization.
The game is a kind of fantasy RPG, but its world isn't realistic and harsh. It's very colorful, sometimes exaggerated, and it's also child-friendly. We aim the game to be rated by ESRB as E10+, so it should be a mild version of high fantasy—with all the best things about fantasy, but without the brutal realism that's so popular nowadays (think more Fable than Skyrim or the Witcher). However, we don't want it to be totally fabulous and unbelievable, just a child-friendly kind of realistic."
They also say it's all that can be said about the project, so you've got a free hand about everything that hasn't been described here. What do we do now?
Step 1
We need to convert the information to something more exact—we need facts, not metaphors.
Let's see what we can say about the character:
male
werewolf (intelligent, human-like species)
strong, but not bulky
comes from a primitive tribe
uses/wears primitive equipment
That's pretty enough to create a character, but we've got more info. There's a certain style that needs to be followed:
colorful fantasy
exaggerated elements
child-friendly realism
Step 2
Now we need to expand this information. What does it all mean for us?
Keyword
Expanded Meaning
male
broad shoulders
narrow hips
prominent jaws
werewolf (intelligent, human-like species)
a combination of wolf and human anatomy; anthro-wolf
human intelligence, movement, with added wolf features
strong, but not bulky
prominent muscles
harmoniously built body
able to carry a two-hand sword or an ax
comes from a primitive tribe
wild, ill-mannered
natural, animal moves, unconstrained by customs
uses/wears primitive equipment
no complicated equipment
everything made out of widely available materials (leather, rope, stone)
rough, imperfect clothes/armor and weapons
colorful fantasy
more colorful than realistic
magical version of the Middle Ages
higher technology substituted by magic and crafts
exaggerated elements
the features of some things are made more prominent to put focus on them
child-friendly realism
realism without brutality
no sexual themes
not scary
easily understandable metaphors
Step 3
It's very important to have the character's personality in mind before starting to design—we can say the inside that we don't draw influences strongly the drawn outside. In this case we haven't got the personality information from the company, which may mean one of two things:
The company has planned the personality, but didn't think it was important to share it with us.
The company hasn't planned the personality (yet).
In the first case there's a risk that we will not meet the requirements of the client, because they may have something in mind they didn't share with us, thinking our job is only about the look. To avoid it, always make sure to ask if they have any kind of personality in mind. In the other case it's very likely they'll use your suggestion, as long as it's based on their idea, or at least they'll base the personality on what shines through your design.
The personality shouldn't be totally fanciful—we need to base it on the information we already have. Our character is half-wolf, so we can expect he'll be more or less savage, untamed. He comes from a primitive tribe, not from a civilization that created decorum (good taste), so he can be very straightforward, but also alert and suspicious in contact with strangers. I can imagine him being loyal and honest, just as we imagine wolves, and friendly once one manages to earn his trust.
Can you feel you know the character now? That's just what we wanted!
2. Preparation Process
The most important feature of our character is his species. He's a kind of anthro-wolf, a human-like creature with wolf features. He should look like a wolf that evolved in a similar way to the human, without losing his most distinctive features. To get it right we need to focus on the anatomy of both human and wolf. You can "kinda know" what the human or the wolf looks like, but it's not enough to create a believable character—limited knowledge will limit your creativity.
Step 1: Skeleton Comparison
Wolves and humans are both mammals, so we'll find a lot of similarities in our skeletons:
Shoulder—notice lack of clavicles at the wolf.
Shoulder blade—placed on the back at the human, and on the sides of the wolf.
Wrist
Fingers—wolves walk on them.
Ankle
Heel
Toes—again, wolves walk on them, not on the whole feet like us.
Knees—notice they point the same way.
Elbow
Sacrum—this is where the tail starts, if the animal has any. Pay attention to the rotation of the hips.
Neck—more elastic for the wolf. Notice the point where it attaches to the skull.
Simplified human skeletonSimplified wolf skeleton
Step 2
Now we can design the skeleton of a creature that is a mix of all these features. It doesn't need to be anything final, just a way to organize the hints we can use, something to base our ideas on.
Let's imagine a wolf evolved just like the ape: its upright position gave more freedom for the evolution of hands, but for this to happen the feet must have changed, and the pelvis has been rotated.
The man-wolf can still walk on all fours, and it's always ready to do so in case there's a need to move fast. The tail may be longer, giving more stability, and the clavicles were developed to support the arm (no longer legs) movement.
We can also imagine the upright position will lead to the development of more complicated forms of communication, since it makes it harder to use the whole body for this—our wolf-man may have a more expressive face than normal wolves.
Simplified anthro-wolf skeleton
Step 3: Musculature Comparison
We need to do the same with the muscles. The position makes a big difference here—wolves don't have "arms" in the literal sense, they only have legs. When mixing both anatomies we need to pay attention to the function of the muscles.
Simplified human muscles Simplified wolf muscles Simplified anthro-wolf muscles
Step 4: Detail Study
We know a lot about the general anatomy of the human and the wolf, but it's not enough. There are details of the wolf body that we need to learn to draw. Expecting them to turn out by themselves when we prepare the design may lead to a big disappointment and waste of time. You can create your own study or use my tutorial about drawing wolves for this purpose.
Your first wolf will be far from perfect, and so will be the fifth and the fifteenth. Come back to serious drawing only when it starts to come naturally
Hint: even when you're good at drawing both humans and wolves, always do a warm-up before going on to serious things. It makes the process faster!
3. Design
This is the part where we'll use all the knowledge we've gathered to bring the idea to life.
Step 1
Turn on some dynamic music and go into wild drawing mode. Don't think: just sketch your ideas quickly, on a small scale. Once one silhouette is done, go to another. Don't judge, be fast.
Step 2
Pick your favorite! I decided the second one was looking the best, but it happens rarely. Usually the first sketches are still a part of the warm-up, and only after them does your hand start working more fluently.
Step 3
Now take your character to the playground! Test it and see its viability in various poses. It will help you find and refine the weak spots of the design.
If you think it's too much drawing and you'd rather just go on with the very first sketch you've drawn, you may need some more practice. Sketches like these should come very easily to you—if they don't, you may not be ready yet for this kind of job. It's about picking the best idea out of dozens potentially good ones, not about using the only idea you are able to draw.
Step 5
Refine the idea on a slightly larger scale. Details aren't important yet; focus on the silhouette.
Step 6
A naked wolf-man would look like a wild creature instead of a primitive one. Let's sketch a few possibilities for the outfit:
Step 7
I've chosen the middle one. It's quite simple, with armor that's not too heavy. I imagine our character to be as fast and agile as a wolf, and a wolf would despise any armor that restricted his movements. Besides, the wolf-man is already well protected by his fur and doesn't need to wear anything else to stay warm. What did I include in his armor?
A belt made of leather, without a metal buckle that would be hard to get in a primitive community. I searched for "primitive belt" to find out how it could be done instead.
A "skirt" made of leather strips studded with stones, and fluffy animal tails for greater protection. It's all very movable, so it doesn't constrain the creature.
This belt can be used to tie the scabbard to.
Typical forearm guards, nothing fancy.
This part of the foot isn't flexible, so we can safely cover it too.
A pendant with animal fangs: cliché, but still cool.
Step 8
What kind of weapon may our character prefer? It must be something quite simple to make, fitting his fast combat style. I've chosen a spear with a stone blade and sharp fangs at the end. It can be used for piercing (blade), hitting (fangs), and throwing.
Step 9
So far we've only paid attention to the whole body, so now let's take a look at the face. Make sure you are able to repeat the shapes and proportions, that they're not random. Check if you can maintain the proportions and the same style in other views, too.
Step 10
Make sure the face is flexible enough to change the emotions. The wolf's face isn't as expressive as the dog's, but we can change it for our purpose. It's a kind of evolved wolf, after all!
Step 11
Put all your ideas in a clean sketch, trying to present them as clearly as possible. It doesn't need to be super refined, but make sure there's no doubt about what is what. The client should now tell you if they like the design, and what they'd like to change before going to the next phase. Listen carefully and ask questions if you're not sure about something—it'll save you a lot of time!
4. Execution
Let's assume the client was ecstatic about our design and we've got the green light. We can start working on the full presentation—front, side and back.
Step 1
Using the previous picture as a reference, sketch the front view.
Step 2
Break the front view into simple forms that will be easy to repeat.
Step 3
Draw horizontal lines crossing the body to divide it into parts.
Step 4
Use the lines to draw side and back views without losing the proportions.
Step 5
To draw arms only once, and show both its sides at the same time, we need to modify the front view:
Step 6
Let's start adding details to all the views, part by part to keep consistency. Keep in mind we've already created the design, and now we only reveal it.
Draw the head:
Step 7
The mane:
Step 8
The torso and arms:
Step 9
The legs:
Step 10
The outfit:
Step 11
The weapon:
Step 12
Clean the lines of the sketch.
Step 13
You can add strong outlines to create a border between the inside and the outside.
Step 14
You can also stress the lines within the outline, to define the most important parts.
Step 15
Do the same with all the views:
Step 16
Take a god look at your model sheet and make sure everything is clear. If it's not, you can be sure they'll either guess it, ruining your idea, or bother you from time to time to dispel a doubt. To minimize the risk, add all the details you can think of.
We're Ready to Fight!
The model sheet is ready to be handed to the 3D artist. You can use exactly the same workflow for every character you wish. Keep in mind that quadrupeds may benefit from showing the top view, too, since this is their actual back.
But this is not the end! What about the colors? They're very important for the character—we shouldn't leave this choice to someone else! In the next part of this tutorial I'll show you how to paint the character quickly, using a simple color palette. Stay tuned!
Download the attachment to see a bigger version of the sheet
Winter may be long, dark and cold, but that’s all the more reason to host a cosy dinner party for friends, family or colleagues. Perfect for New Year gatherings, this easy-to-create menu card recalls the geometric glamour of the Jazz Age. This is certainly a piece of print design Jay Gatsby would be proud to have on display!
In this tutorial we’ll be using Adobe InDesign to create a double-sided A5 menu card. No images required—we’ll be using typography, shapes and borders alone to imitate the Art Deco style.
A Note on Art Deco Design
Art Deco was a hugely popular visual style during the 1920s and 1930s, and its influence can be seen across all sorts of visual media from the time, in art, print, architecture, furniture, and interior decor. The main stylistic traits of Art Deco are geometric, symmetrical shapes, the use of rich, often jewel-like colors, and opulent metallics.
Art Deco styles are now enjoying a resurgence in popularity, although arguably the huge influence of the Art Deco movement has never really gone away. Contemporary interpretations of traditional Art Deco typefaces breathe modern life into the style, making Art Deco accessible for InDesign users like us today.
Let’s get started!
1. Prepare the Layout of Your Menu
Step 1
Open InDesign and select New Document from the Welcome window or go to File > New > Document.
In the New Document window, keep Intent as Print and the No. of Pages to 1. Uncheck Facing Pages.
From the Page Size drop-down menu select A5 (148 x 210 mm).
Note: This tutorial shows you how to set up a menu card for professional printing. But if you’re planning to print the invitations at home using an A4 printer, you will need to place two finished cards side-by-side on a new A4 document, set up as LandscapeOrientation.
Set the Margins on all sides to 5 mm, and include a Bleed of 3 mm on all sides.
Click OK.
Step 2
The card will require a series of layers to be set up, allowing us to build up shapes, lines and text to create a 3D effect, which will give us that Art Deco look. It’s good practice to sit different elements on different layers, as it allows you to select or make edits to individual elements more easily.
Let’s create all of the layers now.
Open the Layers panel (Window > Layers). By default, this is grouped with the Pages and Links panels.
Double-click on the default Layer 1 name in the panel to open the Layer Options window. Rename the layer as Background Color and click OK.
Click on the Create New Layer icon at the bottom right of the panel to create a second layer. As before, double-click on the default name for the layer to open the Layer Options window. Rename this layer as Border One. Click OK.
Repeat to create four more layers in the following order:
Color
3D Shapes
Border Two
Typography
Now Lock all layers except Background Color by clicking in the blank space to the right of the eye icon. Click on the Background Color name to allow you to work on that layer.
Step 3
On your document, it will be useful to know the center point of the menu, to allow you to place elements centrally and symmetrically.
Pull out a guide from the left-hand ruler (View > Show Rulers, if not already shown) to the vertical center of the document, at 74 mm.
2. Pick a Color Palette and Bring in a Border
Step 1
Art Deco designs use all sorts of colors, but certain color combinations look classically Art Deco. Gold and black, for example, give an ultra-opulent, luxurious feel to designs, while rose-pink and silver can add a feminine twist.
Rich, jewel-like tones teamed with metallics will always look authentic to the Art Deco style. Here, we’re going to apply colors that are inspired by the Egyptomania movement, which inspired Art Deco designs in the early 1920s.
Go to Window > Color > Swatches to open the Swatches panel. Click the New Swatch icon at the bottom right corner of the panel or select New Color Swatch from the panel’s drop-down menu.
Set the Color Type to Process and Color Mode to CMYK. Set the values to the following percentages:
C=106, M=96, Y=42, K=47
Click OK.
Create three more new swatches in the same way, setting each to the following values:
C=47, M=0, Y=38, K=0
C=20, M=30, Y=65, K=0
C=41, M=0, Y=22, K=0
You now have a set of swatches ready to use: a deep midnight blue, a jade green, a gold, and an icy mint blue.
Step 2
Remaining on the Background Color layer, select the Rectangle Tool (M) and drag to create a frame that extends across the whole page, up to the edges of the bleed on all sides.
Set the Stroke Color to [None] and the Fill Color to the dark blue, C=106, M=96, Y=42, K=47.
Step 3
Lock the Background Color layer and Unlock the Border One layer.
Select the Rectangle Tool (M), as before, and drag to create a frame that meets the trim edge, or page edge of the document, as shown. From the control panel running along the top of the screen, set the Fill Color to [None] and the Stroke Color to the gold swatch, C=20, M=30, Y=65, K=0.
Set the Weight of the Stroke to 2 mm. The colour will align by default to the center of the stroke edge, with some of the color edging onto the bleed. That’s what we want, as the menu will appear to have a very fine gold edge once printed.
Step 4
Lock the Border One layer and Unlock the Border Two layer, which sits above the 3D Shapes layer.
Select the Rectangle Frame Tool (M) and drag to create a frame that extends to the edges of the margin on all sides. From the top control panel, set the Fill Color to [None] and the Stroke Color to the gold swatch, as before, C=20, M=30, Y=65, K=0.
Go to Window > Stroke to open the Stroke panel. Set the Weight to 1 mm and Type to Thick-Thin.
With the frame still selected, go to Object > Corner Options. Set the Size of all corners to 8 mm and Shape to Fancy. Click OK.
3. Build Up Color and Shape on the Menu
We’re going to build up some layers of colored shapes in paler tones to frame the text we’ll be adding to the design later.
Step 1
Lock the Border Two layer and Unlock the Colorlayer.
Drag a guide down from the top ruler (View > Show Rulers) to the horizontal center point of the page, at 105 mm.
Select the Zoom Tool, or hit Z on the keyboard, and, holding down your cursor, drag to create a selection around the top-right quarter of the page. The top-right corner of the page will expand to fill the screen.
Select the Pen Tool (P) and click once where the vertical central guide meets the edge of the fancy border. Click again, forming a horizontal straight line, in the right-hand corner of the border, as shown.
Continue to click, tracing the intricate corner edge of the border.
Click where the horizontal center line meets the edge of the border.
Then click back on the starting point at the top left, to create a triangle shape.
Adjust the Stroke Color of the shape to [None] and the Fill Color to the jade-green swatch you created earlier, C=47, M=0, Y=38, K=0.
Step 2
Select the shape with the Selection Tool (V, Escape) and go to Edit > Copy, and then Edit > Paste.
With the second shape selected, Control-Click (Mac OS) or Right-Click (Windows) > Transform > Flip Horizontal. Move the flipped shape into a mirrored position on the left-hand side of the page.
Step 3
From the top ruler, drag a horizontal guide down to about one third of the way down the page, to around 65 mm.
Select the Pen Tool (P) as before, and click once where the new guide meets the edge of the fancy border, to the right of the page, overlapping slightly with the jade-green shape.
Click towards the bottom corner of the border, to create a straight vertical line.
As we did before, click around the corner edge of the fancy border, and click to create another anchor point at the vertical center point of the page.
Click once again on the starting anchor point to create a triangle shape.
Adjust the Stroke Color of the shape to [None] and the Fill Color to the ice-blue swatch you created earlier, C=41, M=0, Y=22, K=0.
Step 4
Select the shape using the Selection Tool (V, Escape) and Edit > Copy, Edit > Paste.
Control-Click (Mac OS) or Right-Click (Windows) > Transform > Flip Horizontal and move the flipped shape into a mirrored position on the left-hand side of the page.
4. Create a 3D Effect Using Shape and Shadow
Step 1
Lock the Color layer and Unlock the 3D Shapes layer, from the Layers panel.
Hit Z and drag to zoom in on the top right corner of the page.
Select the Line Tool (\) from the Tools panel, and drag to create a line about 73 mm in Length, running along the edge of the jade-green shape as shown.
Set the Stroke Color to the gold swatch, C=20, M=30, Y=65, K=0 and the Stroke Weight to 7 mm.
Select the line and Edit > Copy, Edit > Paste to create a second gold line. Control-Click (Mac OS) or Right-Click (Windows) > Transform > Flip Horizontal and move the flipped line into a symmetrical position on the left-hand side of the page.
Step 2
Drag a horizontal guide down from the top ruler towards the bottom of the page, at 181 mm.
Allowing about a 7 mm margin between the edge of the blue triangle, select the Pen Tool (P) and click at the point where the new guide crosses the shape, as shown.
Click again, following a parallel line to the edge of the shape, where the blue shape meets the fancy border.
Click horizontally upwards, at the top corner of the blue shape.
Click downwards, adjacent to the starting anchor point. Click on the starting anchor point to join up the shape.
Set the Stroke Color to [None] and the Fill Color to [Paper].
Step 3
Select the shape, and Edit > Copy, Edit > Paste to create a second white shape. Control-Click (Mac OS) or Right-Click (Windows) > Transform > Flip Horizontal and manoeuvre the second shape onto the left-hand side of the page.
This is how your design should look so far:
Step 4
Remaining on the 3D Shapes layer, drag a guide from the top ruler down to 49 mm.
Drag a second guide, this time from the left-hand ruler to 112 mm, and then drag a third guide out from the left-hand ruler to 36 mm.
Select the Pen Tool (P) and click once where the left-hand guide meets the edge of the fancy border. Click where the 49 mm horizontal guide meets the center point of the page to create a diagonal line.
Click where the far-right guide meets the edge of the fancy border to create a triangle shape.
From the top control panel, set the Fill of the shape to gold, C=20, M=30, Y=65, K=0, the Stroke Color to the dark blue swatch, C=106, M=96, Y=42, K=47. Set the Stroke Weight to 1 mm and the Type to Thick-Thick.
With the shape selected, go to Object > Effects > Drop Shadow to open the Effects window.
Under the Drop Shadow options, set the Mode to Multiply and the Opacity to 25%. Set the Distance to 1 mm and Angle to 135 degrees. Set the Size to 1 mm.
Navigate over to the Inner Glow option, accessible from the left-hand list of options in the Effects window. Set the Mode to Soft Light and Opacity to 83%. Keep the Technique set to Softer and Source to Edge. Alter the Size to 8 mm and the Choke to 7%.
Click OK.
This has given the triangle shape a soft metallic sheen and a subtle 3D look.
Step 5
Select the gold triangle and Edit > Copy, Edit > Paste. With the shape selected, Control-Click (Mac OS) or Right-Click (Windows) > Transform > Flip Vertical.
Position this second triangle in a symmetrical position, at the bottom of the page.
5. Introduce Gatsby-Inspired Typography
Step 1
There are so many Art Deco-inspired fonts out there to choose from, many of which are free to download and use for personal and/or commercial use.
Here, I’ve chosen to use Andes. It’s a very elegant typeface, with a clean, modern feel, and has a weight strong enough to contrast against the dark background of the menu when set at small size.
Step 2
Back in your InDesign document, return to the Layers panel. Lock the 3D Shapes layer and Unlock the top layer, Typography.
Select the Type Tool (T) and drag to create a text frame about 65 mm in Width and 16 mm in Height. Position this centrally on the page, resting on the horizontal guide towards the top third of the dark blue central space.
Type ‘Menu’ and, from the Character Formatting Controls panel running along the top of the screen, set the Font to Andes Regular, Font Size to 44 pt, Font Color to [Paper] and set the text to Align Center.
Step 3
Click away from the text frame and, using the Type Tool (T) again, drag to create a second larger text frame, about 75 mm in Width and 78 mm in Height.
Type:
‘Starter
(paragraph break)
Spicy Pumpkin Soup
(paragraph break x2)
Main
(paragraph break)
Roast Spring Lamb
(paragraph break)
Chestnut Stuffed Peppers (V)
(paragraph break x2)
Dessert
(paragraph break)
Truffle Mousse’
You can edit the text to list your own chosen dishes.
Highlight all the text with your Type Tool cursor and set the Font to Andes Regular and Align Center.
Highlight ‘Starter’, ‘Main’ and 'Dessert’ individually; set the Font Size to 25 pt and Font Color to the jade-green swatch, C=47, M=0, Y=38, K=0.
Highlight the names of the dishes and set the Font Size to 18 pt and Font Color to gold, C=20, M=30, Y=65, K=0. Increase the Leading of the first line of each list of dishes to 28 pt to give the text some breathing space.
Step 4
Select the Line Tool (\) and, holding down Shift, drag from left to right to create a short horizontal line about 32 mm in Length.
Either from the top control panel or from the Stroke panel, set the Stroke Color to the jade-green swatch, C=47, M=0, Y=38, K=0, Stroke Weight to 0.75 mm and Type to Thin-Thin.
Position the line centrally below ‘Starter’, and above the name of the first dish.
Select the line and Edit > Copy, Edit > Paste twice to create two more copies of the line. Position each centrally below ‘Main’ and ‘Dessert’.
Step 5
You can also add a little decorative element to the menu to give it that extra Art Deco flourish.
ArtDeco is a gorgeous decorative font with a variety of Art Deco-inspired glyphs to choose from. Download the font, and then return to InDesign.
Remaining on the Typography layer, select the Type Tool (T) and drag to create a small text frame about 11 mm in Height. Sit your cursor in the text frame and set the Font to ArtDeco Regular.
Go to Window > Type & Tables > Glyphs to open the Glyphs panel. Double-click your chosen glyph to insert it into the text frame.
Set the Font Size to 30 pt, and the Font Color to gold, C=20, M=30, Y=65, K=0.
Position the text frame to the left of ‘Menu’.
Select the text frame and Edit > Copy and Edit > Paste. Then, Control-Click (Mac OS) or Right-Click (Windows) > Transform > Flip Horizontal, and position this second, flipped text frame to the right of ‘Menu’.
6. Set Up the Reverse Side of Your Menu
To look extra polished and professional, you can set up your cards to have a printed reverse side.
In the Pages panel (Window > Pages) click the Create New Page icon at the bottom right of the panel. For now, remain on Page 1 of the document.
Lock all layers except the Background Color, Border One and Border Two layers. Drag your mouse across the entire page to select all elements on these layers. Then hop up to Edit > Copy.
Navigate down to Page 2 of the document. Go to Edit > Paste in Place. The background color and borders will appear on the page.
Your menu design is finished! Great work, it’s looking fantastic.
Now all we need to do is to export it for print...
7. Export Your Menu for Print
Step 1
To export your menu for print, go to File > Export and select Adobe PDF (Print) from the Format drop-down menu.
Under the General options, select Press Quality from the Adobe PDF Preset drop-down menu.
Step 2
Under the Marks and Bleeds options (scroll through the options from the left-hand side of the window) check All Printers Marks and check Use Document Bleed Settings.
Click Export.
Congratulations!Your glamorous Art Deco menu is ready to send to print!
Tip: Ask your printer to print on paper stock of around a 300 gsm weight to give a sturdy and luxurious feel to the menu cards.
Have a fabulous dinner party in true Gatsby style!
Wallpaper makes a great backdrop for portraits, but the thought of drawing it can be incredibly daunting. In this lesson, I'm going to show you how a single piece of tracing paper can help you create elaborate wallpaper designs with ease.
What You'll Need
Small piece of tracing paper
Drawing paper
Pencil (preferably a 2B or 4B)
Pen
Eraser
Ruler
1. Prepare Your Wallpaper Design
Step 1
Open up your wallpaper image in Adobe Photoshop. If you don't already have a wallpaper image, Google and Getty Images are great places to look for vintage designs.
Step 2
Crop your image down to the simple repeating pattern.
Step 3
Move a guideline onto the center reflecting line of the design.
2. Draw the Design on Your Tracing Paper
Step 1
Measure out a bounding box on your tracing paper in pen. Your design will fit within this box. Think of it as a tile on a floor. The size of the tile will determine the pattern. So the bigger the box, the bigger the end pattern will be.
Step 2
Draw a reflecting line in your box with your pencil to match the reflecting line on your photo reference.
Step 3
Looking at your photo reference, sketch in pencil your wallpaper design in half of the bounding box.
Step 4
Draw over your pencil with pen. This will make things much easier as we move along, because it won't get lost in the pencil.
Step 5
Flip your tracing paper over and with your pen, trace the design you just drew. You should now have the full repeating pattern drawn out on the top of your tracing paper.
Step 6
Using your pencil, shade the entire back side of your tracing paper. Essentially we're creating a carbon paper so that we can now transfer our designs onto the final paper.
3. Draw Out Your Wallpaper
Step 1
Draw a bounding box on your paper. There's no right or wrong here. You simply create a box as large as you would like your end wallpaper design to be. You also need to draw a guideline to figure out where to draw the first repeating pattern. If the reflecting line on your tracing paper is vertical, draw a vertical line down the middle of your paper. If your reflecting line is horizontal, draw a horizontal line across the middle of your paper. Then divide your paper in half the other way.
Step 2
Using the lines you just drew, place your tracing paper, pen side up, on your paper. Align the reflecting line with the first line you drew on your paper. Then shimmy it up and down (or left and right) to figure out where it fits best. It's always a good idea to not have your design end on the bounding box.
Step 3
Using a pencil, trace over the pen lines of your pattern. You'll want to push fairly hard so that a lot of the pencil lead transfers over to the paper. Lift up your tracing paper when you're done. You should now have one repeat pattern on your paper.
Step 4
Move your pattern over to the next location. At this point you might want to open the original wallpaper image you used to see how it repeats. Some patterns repeat in perfect alignment left and right, up and down. Others stagger by row or by column. For me, my design repeats in alignment left to right. So I'm going to move my tracing paper to the left, trace the pattern again, move it right, and trace it again.
Step 5
Once you have one row or column of your wallpaper design drawn out, you need to draw new guidelines for the second row or column. In my case, the rows are staggered halfway between the one above them. So I drew my vertical guides in halfway between the previous guidelines.
Step 6
Continue moving and tracing your design until you have covered the entire space within the bounding box. You may need to apply more lead to the back of the tracing paper after a few traces.
4. Finish Your Wallpaper Design
Step 1
Now that you have your whole design penciled in, it's time to turn it into your final piece. This will depend on what sort of artwork you're making. You may want to paint the wallpaper or use colored pencil to color it in. For me, I'm just doing a simple black ink and white background design, so I'll start going over the pencil lines. Going over your pencil lines first ensures that you don't rub them out by accident as you go along.
Step 2
Fill in your wallpaper shapes to finish it up!
You're Now on Your Way to Being William Morris!
You can use this wallpaper tracing paper trick to create other wallpaper designs, fabric designs, or even repetitive landscapes in your own drawings. This transfer method also works on canvas, and can be painted over instead of inked.
What was your first digital art creation? Do you still have it? Well, we want to see it! There's a lot that you can learn from looking through your old work. And more importantly, taking the time to step back and appreciate your own journey is a fundamental part in becoming a better artist.
Deadline Extended to January 27th, 2015
We're still accepting entries! To give you some more time rummaging through your old pieces, we've decided to extend the deadline. We would love to get to know more about your journey, so submit your comparisons to get featured in January! And if you don't have you very first piece, no worries, anything from your past work is more than welcome for this showcase.
Here's a Look at Your First Creations!
Take a look at the past and present comparisons from these five incredibly talented readers. Learn more about their journey, and show them some love in the comment section!
Alan Rodrigues
I'm
a self-taught artist. I'm not from the U.S. but my dream is to become
skilled enough to work in a studio related to art,
painting, concept art, or even gaming. I know I have much to learn but I am
confident that, given the chance, I would succeed. I'm a lawyer here and as such I still
struggle just to survive, so that's why I'm not
practicing much. I can only do one or
maybe three works a year. I'm trying to change that, so I can do more and more
art, but it's hard. Follow Alan Rodrigues:DeviantArt
Carlyn Clark
After years as a visual artist and Photoshop user I wanted to learn
Illustrator so that I could create repeating patterns for use on
textiles and decorative objects. Thanks to Tuts+, and a few thousand
hours of experimentation, I'm completely self-taught in Illustrator. Follow Carlyn Clark: Website
Kleressia Perry
The first is a portrait of a friend—technically it was not my first portrait in Illustrator, it was just the first artwork that wasn't school
work or doodles. I'm particularly proud of how my faces look now, thanks
to a portrait tutorial on here.
Matt Bowring
My name is Matt Bowring. My first vector image was created in September
2011 and my most recent completed work was in November 2014. I definitely
feel like there has been a lot of progress in three years. I love doing
vector portraits, especially of famous sports stars. I also use vector
to create tons of teaching materials as I am an ESL teacher in the north
of Thailand. Follow Matt Bowring:DeviantArt
Nik Love-Gittins
I started dabbling in digital painting a few years back. I've worked as a game artist since '92, so there is definitely a lot of difference between my first and latest work here. Follow Nik Love-Gittins:Behance
Hey, Where's My Entry?
Don't worry! This is only a small peek at our showcase, so be sure to get your submissions in for our second part in January! Hoping everyone has a fun and safe holiday!
You'll also need to load a default Photoshop brush set. So go to Edit > Presets > Preset Manager, and choose Brushes from the Preset Type drop down menu. Then click the little arrow to the right of the Preset Type drop-down menu, and click Square Brushes near the bottom of the pop-up menu. When the dialog box appears after that, just click Append, and you’ll get the Square Brushes set.
1. Creating the Background
Step 1
Create a new 1150 x 850px document. Set the Foreground color to #424952 and the Background color to #16181b, pick the Gradient Tool, click the Radial Gradient icon in the Options bar, and then click and drag from the center of the document to one of the corners.
Step 2
Place the Grey sparkle texture image on top of the Background layer, change its layer's Blend Mode to Soft Light, and resize it as you like.
2. Creating the Text
Step 1
Create the text in All Caps using the font SansBlack Regular and the color #9a9a9a. Under the Character panel (Window > Character), change the Kerning to Optical, and the Tracking value to 75.
If you are creating more than one line of text, place each line in a separate layer.
Step 2
Pick the Move Tool, select all the text layers you have, and click the Distribute vertical centers icon in the Options bar to distribute the text lines evenly.
Step 3
Place each text layer in a group that has its name (select the layer and then go to Layer > Group Layers). This will help keep things organized for the rest of the tutorial.
Step 4
Duplicate each text layer you have, change the copy's Fill value to 0, and duplicate the copy.
3. Creating the Outer Stroke
Step 1
Pick the Brush Tool and open the Brush panel (Window > Brush). Select a hard round tip, change its Size to 15, and set its Spacing value to 1.
Step 2
Right-click one of the first line's text layers and choose Create Work Path. Create a new layer on top of all the text layers in the first line's group and call it Stroke.
Step 3
Pick the Direct Selection Tool, set the Foreground color to Black, right-click the work path, and choose Stroke Path.
Choose Brush from the Tool drop-down menu and make sure that the Simulate Pressure box is unchecked, and then click OK.
Step 4
This will create the outer stroke. Tap the Return key to get rid of the work path.
Step 5
Follow the same steps to stroke the rest of the text lines you have.
4. Creating the Diamonds Stroke
Step 1
Pick the Brush Tool and choose the Hard Square 10 pixels tip, then modify its settings as shown below:
Brush Tip Shape
Shape Dynamics
Step 2
Create a work path for the first line of text again, create a new layer on top of the Stroke layer and call it Diamonds, and set the Foreground color to #a1a1a1.
Step 3
Stroke the path just as you did when you created the outer stroke previously. This will add the diamonds stroke around the text.
Step 4
Stroke the rest of the text lines you have.
5. Fixing the Overlapping Diamonds
Step 1
Pick the Eraser Tool, choose a hard round tip, and erase the overlapping parts of the diamonds stroke.
Step 2
Pick the Brush Tool, and with the modified diamond brush still selected, click and drag slightly to fill in the empty areas you've just erased.
Step 3
No overlapping parts should be left once you're done.
6. Adding a Drop Shadow to the Original Text Layer
Step 1
Double click the original text layer of the first line of text you have to apply a Drop Shadow effect using the following settings:
Opacity: 25%
Distance: 21
Spread: 13
Size: 21
Step 2
This will add a simple drop shadow. Right-click the styled layer and choose Copy Layer Style.
Step 3
Select the rest of the original text layers, right-click any of them, and choose Paste Layer Style. This will apply the same layer style to the selected layers.
7. Styling the First Copy Text Layers
Double-click the first copy text layer of the first line of text to apply the following layer style:
Step 1
Add a Bevel and Emboss with these settings:
Technique: Chisel Hard
Size: 30
Uncheck the Use Global Light box
Angle: 90
Altitude: 53
Gloss Contour: Ring
Check the Anti-aliased box
Highlight Mode: Linear Light
Shadow Mode - Color: #3c3438
Step 2
Add a Contour with these settings:
Check the Anti-aliased box.
Step 3
Add a Texture with these settings:
Pattern: Squares
Depth: 25%
Step 4
For the Gradient Overlay, click the Gradient box to create the gradient used.
Step 5
To create the gradient, you’ll need to click below the gradient bar to add Color Stops, and when you click each Color Stop, you can change its Color and Location values.
The colors used here are #e14e8f to the left and #7a1c46 to the right.
Step 6
This will style the main part of the text. Copy and paste the layer style to the rest of the first copy text layers you have.
8. Styling the Second Copy Text Layers
Double click the second copy text layer of the first line of text to apply the following layer style:
Step 1
Add a Bevel and Emboss with these settings:
Size: 30
Uncheck the Use Global Light box
Angle: 90
Altitude: 74
Check the Anti-aliased box
Highlight Mode: Linear Light
Shadow Mode - Opacity: 0%
Step 2
Add a Contour with these settings:
Contour: Half Round
Check the Anti-aliased box
Step 3
Add a Texture with these settings:
Pattern: 10 px block
Depth: 20%
Step 4
This will add more definition and shininess to the text. Copy and paste the layer style to the rest of the second copy text layers.
9. Styling the Outer Stroke
Double click the Stroke layer in the first line's group to apply the following layer style:
Step 1
Add a Bevel and Emboss with these settings:
Technique: Chisel Hard
Gloss Contour: Ring
Check the Anti-aliased box
Highlight Mode: Linear Light
Step 2
Add a Contour with these settings:
Contour: Ring
Check the Anti-aliased box
Step 3
Add a Gradient Overlay with these settings:
Style: Reflected
Angle: 45
Use the faucet 160 gradient fill.
Step 4
Add a Drop Shadow with these settings:
Opacity: 65%
Distance: 0
Step 5
This will style the outer stroke. The gradient fill along with the 45° angle will create a reflective, shiny effect, so you can try using different gradients as well. Make sure to copy and paste this layer style to the rest of the Stroke layers you have.
10. Styling the Diamonds
Double-click the Diamonds layer in the first line's group to apply the following layer style:
Step 1
Add a Bevel and Emboss with these settings:
Technique: Chisel Hard
Gloss Contour: Ring
Check the Anti-aliased box
Highlight Mode: Vivid Light
Step 2
Add a Contour with these settings:
Contour: Cone - Inverted
Check the Anti-aliased box
Step 3
Add a Gradient Overlay with these settings:
Blend Mode: Soft Light
Angle: 45
Use the Chrome bar 185 gradient fill.
Step 4
Add a Drop Shadow with these settings:
Distance: 1
Size: 3
Step 5
This will style the diamonds. Copy and paste the layer style to the rest of the Diamond layers you have.
11. Adding the Sparkle Flares
Step 1
Open the Brush panel and pick one of the sparkle brushes from the Stars and Flares Brush Set. The one used here is S&F-6.
Under the Brush Tip Shape tab, decrease the tip Size depending on how big or small you want the flares to be.
Step 2
Under the Shape Dynamics tab, change the Size Jitter to 30% and the Angle Jitter to 100%. What this will do is give you a flare with a different size and rotation angle each time you click to add one.
Step 3
Set the Foreground color to #ebebeb, create a new layer on top of all the groups you have, call it Flares, and change its Blend Mode to Vivid Light.
Then start clicking over different parts and edges of the text to add the flares.
Congratulations! You're Done
In this tutorial, we created a simple gradient background, and added a bokeh texture on top of it. Then we created text layers on which to apply the effect.
After that, we modified two brush tips, created text-based work paths, and stroked those paths to create the outer stroke and the diamonds. We also fixed the overlapping diamonds by erasing and re-adding them.
Then we started applying a couple of layer styles to each of the layers we created, using mainly the Bevel and Emboss and Gradient effects to achieve a reflective, shiny final result.
Finally, we modified a flares brush tip to add flares with different sizes and rotation angles all over the text.
Please feel free to leave your comments, suggestions, and outcomes below.