Quantcast
Channel: Envato Tuts+ Design & Illustration
Viewing all 8952 articles
Browse latest View live

How to Draw Animals: Kangaroos and Koalas

$
0
0
Final product image
What You'll Be Creating

Once upon a time, the big family of mammals was divided into placentals and marsupials. It was so long ago that most of the mammals we know today, like cats, wolves, bears, rodents, and apes only evolved after this point. They are placentals—the animals that seem normal to most of us, because we can see them all around.

However, in the Land Down Under, marsupials still prevail. The dog and the monkey don't seem to be closely related, and it's the same with the kangaroo and the koala. That's also the reason why the Tasmanian wolf isn't really more of a wolf than you!

Today we're going to learn about the two most popular marsupials, the kangaroo and the koala. It's crucial to take a good look at their anatomy, since they can't be based on any of the animals you usually draw. Prepare for weird stuff like 2-in-1 toes, tail-legs, double thumbs, and foot-thumbs. If you're not scared yet, follow me!

1. Kangaroo

Skeleton 

The heavy, muscular bodies of kangaroos are what you see at first, but it's the skeleton that rules the movement and pose of the animal. You don't need to memorize all the bones, but pay attention to the proportions. Here are the elements you need to remember:

  • huge hips
  • small torso
  • long tail
  • extremely long calves
  • long feet
kangaroo skeleton
Skeleton of the red kangaroo

The skeleton of the kangaroo can be simplified. In this form it's easier to use as a base for a pose, while still being accurate.

kangaroo simplified skeleton

Muscles

Kangaroos are very muscular and heavily built. Fortunately, their fur does a good job of hiding the contours of the muscles, so we don't need to draw them all to make the body look realistic. Use the diagram below to understand the shape of the kangaroo's body, but there's no need to memorize it.

kangaroo muscles
Musculature of the red kangaroo

The muscles can be simplified into basic forms, as below. Feel free to create your own simplification that will be easier for you to remember.

kangaroo simplified muscles

The pouch, when stretched, may look like a big egg. Its opening is small, elastic, and it doesn't look like a pocket. Only females have these.

kangaroo pouch

An important part of the kangaroo anatomy is the fluffy hump under the base of the tail. No, it's not what you think. Both males and females have it, and avoiding it for purity's sake will make your kangaroo look less correct.

kangaroo under tail hump

Movement

Kangaroos use two kinds of movement: bipedal hopping and quadrupedal "crawling". They can't walk with their hind legs!

Hopping

A hopping kangaroo uses both its legs simultaneously, "pushing the ground" behind and then pulling them to the front. The rest of the body follows this motion, expanding and coiling up like a coil spring.

  1. The kangaroo is preparing for landing; that's the pose from the "crossing kangaroos" sign. The whole body is "compressed".
  2. The kangaroo hits the ground and starts pushing it strongly. The rest of the body expands a little.
  3. The pushing and expanding goes on...
  4. ...and on...
  5. ...until the feet are too far behind the body to push any more. The whole body is completely expanded, and the tail almost touches the heels.
  6. The legs start coming back to the front, and the body coils up.
  7. Legs closer to the front, the body keeps on coiling up.
  8. Almost ready to land.
kangaroo run cycle frames
kangaroo run cycle animation
A hopping kangaroo

Walking

Kangaroos can "walk" in a quadrupedal way, but it's more like crawling. What's interesting, they use their tail as an additional leg! This way of moving is used for short distances, and it's also quite slow.

  1. The kangaroo leans down from its normal standing position.
  2. It pushes the ground with its hind legs, reaching out with its arms. The tail is pulled to the front.
  3. The kangaroo lands on its hands, and pulls the tail even closer as the legs go farther.
  4. The kangaroo leans on its arms and the tail.
  5. The arms push the ground, and the legs are pushed to the front, using the tail as the footing.
  6. The legs land, the tail stays behind, and the arms finish their pushing phase.
kangaroo walk frames
kangaroo walk animation
A crawling kangaroo

Body Features

  1. Big, pointy ears
  2. Five clawed fingers
  3. Four claws on three toes—read further to learn more!
  4. Long, muscular tail
red kangaroo body
The red kangaroo

Wallaby 

Wallabies are smaller relatives of the kangaroo. Their snout is more tapered and rounded (1), the body is more compact (2), and the legs, especially the calves, are shorter (3).

wallaby vs kangaroo
The red-necked wallaby

The difference between the kangaroo (A) and the wallaby (B) is most obvious when you put them next to each other, with a similar size:

kangaroo vs wallaby

Colors

The red kangaroo is sexually dimorphic, which means males and females look different. The male (A) is reddish-brown, and the female (B) is bluish-gray, both with white undersides. The female can be even half the size of the male, and her claws are shorter.

kangaroo color
The difference between the male and female red kangaroo

A white stripe, less or more visible, comes from the lower jaw to the eye. A darker patch can be seen at the side of the mouth, right where the whisker rows end.

kangaroo stripe face head

Head

I'm going to show a method of drawing the head that should work for every perspective.

Step 1

Start with a vertically flattened ball. This will be the brain case with the back of the lower jaw.

kangaroo how to draw head 1

Step 2

Kangaroos have slightly square mouths, so we can use a square to draw them properly. Start with a smaller ball, and then add a cube (square) inside. This is going to be the upper jaw—the rest of the ball behind it is the lower jaw.

kangaroo how to draw head 2

Step 3

Draw a line between the square and the middle of the forehead. Then draw two lines slightly under it, on the sides. Connect the jaws with the brain case.

kangaroo how to draw head 3

Step 4

Draw the nose using the guide lines we've just drawn.

kangaroo how to draw head 4

Step 5

Draw oval cheeks.

kangaroo how to draw head 5

Step 6

Draw the bones around the eyes in the form of ovals.

kangaroo how to draw head 6

Step 7

Draw the eyes between them. The corner should touch the "nose line".

kangaroo how to draw head 7

Step 8

Add the ears.

kangaroo how to draw head 8

Step 9

Now you can clean up the picture, defining only the lines you need to show the form.

kangaroo how to draw head 9

Eyes

Step 1

Let's go into details. Start with two ovals as the "eye bones", just as before.

kangaroo how to draw eyes 1

Step 2

Draw the eyelids. Place the corner next to the "nose line".

kangaroo how to draw eyes 2

Step 3

Add the pupil.

kangaroo how to draw eyes 3

Step 4

Outline the bones.

kangaroo how to draw eyes 4

Step 5

You can now sketch the eye using the guide lines. For a proper kangaroo look, make the upper lid sloping. The pupil is slit horizontally, but the iris is so dark that it's not very visible.

kangaroo how to draw eyes 5

Nose

The nose of the kangaroo varies among the species. We'll take a closer look at the red kangaroo, but the others are fairly similar.

Step 1

This is where we stopped after drawing the face. We'll add details to the nose.

kangaroo how to draw nose mouth

Step 2

Draw two rectangles in the middle.

kangaroo how to draw nose mouth 2

Step 3

Attach two right triangles.

kangaroo how to draw nose mouth 3

Step 4

Draw two acute rectangles.

kangaroo how to draw nose mouth 4

Step 5

Draw the nose holes—they're very big, and bordered with dark skin.

kangaroo how to draw nose mouth 5

Step 6

Outline the mouth. The lips are split.

kangaroo how to draw nose mouth 6

Step 7

Create the drawing on the base of the guide lines. The front of the snout is not very furry, and piebald, pink-brown skin can be visible here.

kangaroo how to draw nose mouth 7

Ears

Step 1

Start with two ovals, one for the base and one for the main surface of the ear.

kangaroo how to draw ears

Step 2

Connect both ovals.

kangaroo how to draw ears 2

Step 3

Draw the outer surface of the ear.

kangaroo how to draw ears 3

Step 4

Draw the ear with a lot of fine hairs inside.

kangaroo how to draw ears 4

Feet

Kangaroos are one of the few animals that have actual feet and hands instead of feet only. Their hands are pretty regular, but without opposable thumbs. Their feet, on the other hand (sorry!), are more extraordinary—skeletally, they have four toes. Visibly, they have only three toes with one having a double claw. That double claw is used for grooming and scratching.

kangaroo how to draw feet paws hands
Notice that the whole sole is padded, unlike with digitigrade animals

Step 1

Let's draw the feet of the kangaroo. Start by placing the heels on the ground.

kangaroo how to draw feet paws hands 2

Step 2

These guide lines will help you draw the contours of the calves.

kangaroo how to draw feet paws hands 3

Step 3

Draw one very long toe in the middle, and add a smaller one next to it. The double claw is placed on the inner side.

kangaroo how to draw feet paws hands 4

Step 4

These circles will help you draw the bones of the toes. The double claw doesn't touch the ground and it looks more like the dew claw of dogs or cats.

kangaroo how to draw feet paws hands 5

Step 5

Use all the guide lines to draw the contours of the legs.

kangaroo how to draw feet paws hands 6

Hands

The kangaroo hands are much simpler to draw than the feet:

kangaroo how to draw feet paws hands 7

2. Koala

Skeleton

Although koalas may look like fuzzy toys, they have a normal skeleton that you need to understand in order to draw them in various poses. 

  • long forearms and calves
  • big skull
  • vestigial or non-existent tail
  • short body
  • plantigrade paws
koala skeleton

Here's a simplified form of the koala:

koala skeleton simplified

Muscles

All this fuzziness of the koala has one important advantage: there is completely no need to learn the muscles. The body can be easily sketched like this:

koala body muscles simplified

Female koalas have pouches, too, although they're not that distinctive because of the quadrupedal position. The opening faces more to the back than with kangaroos.

Body Features

  1. Big, round, very fluffy ears
  2. Wide neck with a white patch on the chest. Male koalas have a brown, stone-like scent gland here.
  3. Five toes, two opposable thumbs included
  4. Four toes in three—more info below
  5. Rounded rump with no tail
koala body features

Colors

Koalas are rather evenly colored, with white patches on the chest and rump. Koalas from the northern side of Australia (A) tend to be gray and smaller than their southern cousins (B), which can be bigger and more brownish.

koala southern northern comparison

There are other details you need to pay attention to:

  1. You can see pink skin around the eyes and at the mouth.
  2. The nose is black and leathery, but sometimes depigmented in some places, especially at the bottom.
  3. A darker stripe can be visible behind the mouth.
  4. Under all this fur the ears are pink, which sometimes can be seen through the hair.
  5. This longer tuft of hair tends to be lighter in color.
koala face head colors

Head

Step 1

Koalas have huge, round heads, so a ball will be a perfect shape for a start.

koala how to draw head

Step 2

Add another ball for the snout.

koala how to draw head 2

Step 3

Draw two flattened balls inside the previous one for the upper and lower jaw.

koala how to draw head 3

Step 4

The nose is big and oval, so draw it like this, very close to the upper lip.

koala how to draw head 4

Step 5

Add the eyes—they're a bit lower than the nose.

koala how to draw head 5

Step 6

Add the ears.

koala how to draw head 6

Step 7

Clean up the picture.

koala how to draw head 7

Eyes

Step 1

The koala's eyes are small and round, with vertically slit pupils. They're reddish brown in color.

koala how to draw eyes

Step 2

Add very small eye corners.

koala how to draw eyes 2

Step 3

Draw the contours of the bones around.

koala how to draw eyes 3

Step 4

Clean up the picture.

koala how to draw eyes 4

Mouth

Step 1

This is what we've drawn while sketching the head. Let's add some details now.

koala how to draw nose mouth

Step 2

Draw two ovals for the nostrils.

koala how to draw nose mouth 2

Step 3

Add the inside of the nostrils.

koala how to draw nose mouth 3

Step 4

Define the outlines.

koala how to draw nose mouth 4

Step 5

Finish the picture. The nose is leathery and usually black, with patches of pink at the bottom.

koala how to draw nose mouth 5

Ears

The koala's ears are very characteristic, but it doesn't mean they're easy to draw. Let's see why.

Step 1

Start with an oval as the base of the ear, and a circle as the main surface.

koala how to draw ears

Step 2

Connect both objects.

koala how to draw ears 2

Step 3

Define the inside of the ear.

koala how to draw ears 3

Step 4

Here's where the fun begins. Draw a long cluster of fur pointing down.

koala how to draw ears 4

Step 5

Add a lot of fur to the inner edge, too.

koala how to draw ears 5

Step 6

Draw long hair covering the back of the ear. It's so long that it's visible from the other side, too.

koala how to draw ears 6

Step 7

This long hair grows inside the ear, too.

koala how to draw ears 7

Step 8

Clean up the lines. You can make the ear more or less fluffy, like a bunch of fur, or with a bit of the actual, pink ear visible under it.

koala how to draw ears 8

Feet

What's fascinating, the koala's hands have two opposable thumbs. As if that was not enough, their feet have a thumb too—luckily, only one. They also have a double finger just like kangaroos, used for scratching.

koala how to draw paws feet
A—hand; B—foot

Step 1

To draw the koala's feet. start with simple triangles for the forearms and calves, and ovals for the heels.

koala how to draw paws feet 2

Step 2

Add the toes, paying attention to what is visible on the inner and the outer side.

koala how to draw paws feet 3

Step 3

Add circles to the tips of the toes.

koala how to draw paws feet 4

Step 4

You can now sketch the feet.

koala how to draw paws feet 5

3. Draw a Kangaroo and Koala Illustration

Now I'm going to show you an example of how to use all this information in practice.

Step 1

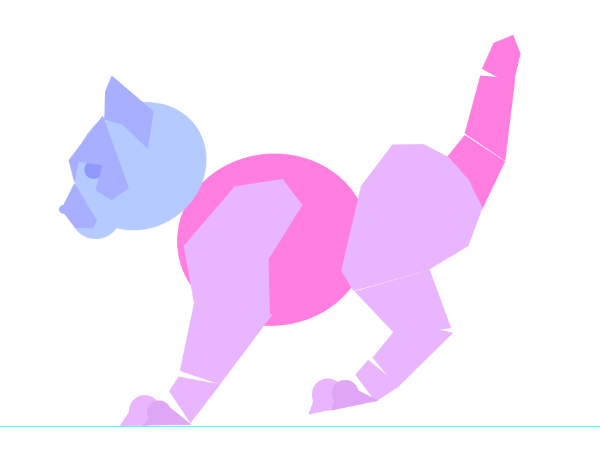
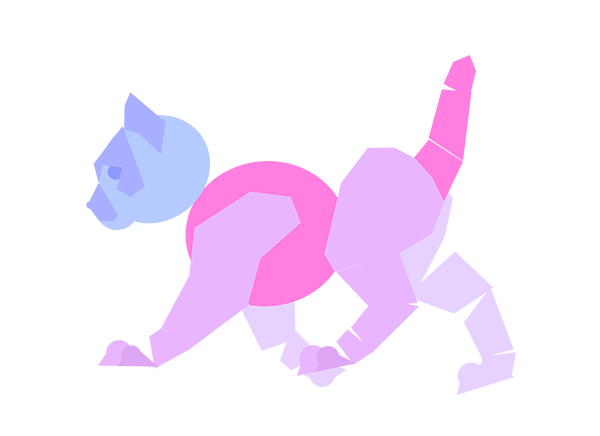
Start with a doodle picturing your idea. Don't think too much about the anatomy or the details—just draw what you have in mind.

how to draw kangaroo koala illustration

Step 2

Use the simplified skeleton diagram to clean up the pose.

how to draw kangaroo koala illustration 2

Step 3

Add the big blocks of the body, just as described.

how to draw kangaroo koala illustration 3

Step 4

Draw the heads, following the instructions from before.

how to draw kangaroo koala illustration 4

Step 5

Do the same with the feet/hands.

how to draw kangaroo koala illustration 5

Step 6

You should now have all the lines you need to build your line art on them.

how to draw kangaroo koala illustration 6

We're Done Here!

We did this! Now you should know everything you need to draw an anatomically correct kangaroo or koala, in every pose you wish. You can also use this information to create a completely new marsupial, so different from all the animals people usually draw! If you like other animals too, make sure to check my profile for more tutorials. Until next time!

kangaroo illustration final

Create a Lisa Frank Inspired Colourful Pegasus in Adobe Illustrator

$
0
0
Final product image
What You'll Be Creating

Are you an avid lover of things that are chock full of color and assaulted with buckets of glitter? This tutorial will show the step by step process of bringing a little horse with wings from drab to fab. Hold on to your crayons, ladies and gentlemen, and bring your sunglasses as we take flight and soar into another prismatic adventure.

1. Creating the Body

Step 1

We've embarked on a colorful journey, but it didn't start out that way. Like most of my projects, I start with pencil to paper. There were no bells and whistles, merely a mechanical pencil and bound sketchbook. I used my scanner at 300 dpi to scan in the finished line work.

I've cleaned up the line quality in Adobe Photoshop and now we can start our project. I'm working in Adobe Illustrator at a size of 11 x 8.5 inches for this specific project.

I like to keep my layers as neat as I can, and labeling them as you go is a good practice. I've labeled the first layer "Sketch" and locked the layer to make sure that I won't accidentally move or delete the sketch. 

Your starting sketch

Step 2

Using our Pen Tool (P), we'll start to outline our little horse. I've outlined the head, body and front legs as a whole, excluding the back legs.

Starting the Body Color

Step 3

Using these particular colors for the body, I can interchange the shading to vary between the main body and the back leg color. The Stroke is a standard 1 pt, which will be a constant with this particular project. The additional hint of color helps to give him a little extra lift off the page.

Body Color 1
Body Color 2
Finished Body Color

Step 4

Using a Radial Gradient of blues, with one side brought to 0% Transparency, I've started adding shading under the limbs. It's very subtle, but effective.

Body Shading
Finished Leg Shading

Step 5

In this particular step, we'll add his facial features using the same blue Radial Gradient as the shading.

Adding Detail to the Head
Adding Detail to the Body

2. Adding Body Depth With Shading

Step 1

Now that our Pegasus has enough shading, we can add our highlights. The blue of his skin is merely our base. The white will show up nicely over it, especially after applying a Feather effect to it. This seamlessly blends the two layers together for the desired look.

Adding Body Highlights

Step 2

Using our Feather effect at a Radius of 0.1 in, we'll put our white layer under the blue details of his face and body.

Feathering Face Highlight
Working on Body Highlights

Step 3

At this point, we'll have a very clean-looking horse base. This is only the first step to our color explosion, so hopefully you can contain your excitement far better than I can.

Finished Body Contouring

3. Creating Fancy Feet

Step 1

To create a fancy look to our little winged horse, we'll add golden hooves. Again, we'll be using a Stroke line with a two-toned Radial Gradient of 1 pt.

Hoof Color

Step 2

At this point we have used the same color to create our hooves. We've completed all of them, and we can now move on to the next step.

Finishing Up the Hooves

4. Adding Additional Body Shading

Step 1

Next, we will use the same treatment on the back legs as used with our main body. The highlight is just a bit darker than the main body color, to create depth. If we had used the same pure white, this would only flatten the overall piece.

Adding Contour to the Back Legs

Step 2

At this point, we have treated our highlights, and our body is now ready for a few more details before we can apply our prismatic colors.

Finished Body Color

5. Adding Wings

Step 1

We'll now start at the base of our wing. I'm using the same treatment as the body, but you'll notice that towards the bottom of the wing base, I have a layer of white that extends over the Stroke line and blends the wing and body once the Feather effect is applied.

Adding Base of Wings

Step 2

Our wing is coming along nicely. We'll add texture to our wing to separate it from the "smooth" muscular body. If you're using the same color, it's important to differentiate between the two body features.

Adding Base of Wing Details

Step 3

I want to create billowy, soft base wings, so I'll add a little more highlight to the root of each of these shaded cluster gatherings.

Once I have completed those, I will add the main shape of the wing. We will later complete the wing and add quite a bit of detail to make this feature come alive.

Feathering the Base of the Wing
Finishing Up the Base Wing Texture

Step 4

We'll add a mixture of longer feathers towards the tips of the wing and shorter ones as they reach towards the base of the wing. It has a very bird-like feel that will serve our needs well.

Adding Feathers to the Wing

6. Creating the "Mane" Color

Step 1

If you've been as patient as I have been, then you're soon to be rewarded. We're finally ready to add rainbow colors! In order to keep our fun organized, we'll start by making seven bars using our Rectangle Tool (M). 

Creating Color Sample Bars

Step 2

I'm using the basics of my knowledge of rainbow colors to start us off. This will consist of R.O.Y.G.B.V or simply put: Red, Orange, Yellow, Green, Blue, and Violet. I'll start with a hardy red two-toned Linear Gradient with a two-toned 1pt Stroke line and work my way through the basic spectrum colors. I've also taken the lighter color of each of the bars and changed my Transparency to 70%. I'm using this as a blending tool to give our hair a smooth gradation as we apply the layers.

Adding Color to the Bars

Step 3

Next, I've added pink to our spectrum to give it a smoother transition from red to violet. The pink is also a nice addition for that extra pop of color that I can only assume we both love.

Completed Color Bars

Step 4

Next, we'll start applying our color, starting with the red. We'll follow the color bars as we've laid them out along the the mane. If you need to, you can lay the main color blocks down and then apply the smaller hairs afterward.

Beginning the Hair
Continuing the Hair
More Hair Rendering
Adding Mane Colors

Step 5

At this point, I've turned off the layer associated with the Pegasus body. You'll see that you won't need to add every single hair behind the head, especially since you won't see it once we make the Pegasus body visible again.

Adding Hair Details
Finishing Up the Main

Step 6

Now that our mane is beautifully rendered, we'll add a bit of shading to the lower half. 

Adding Shading to the Mane

7. Rendering the Tail and Ankle Fur

Step 1

Once my mane is completed, I will use the same steps to create a full and vibrant tail to match.

Starting the Tail Coloring
Finishing Up the Tail

Step 2

I've enjoyed using these colors so much that I've also applied them to the ankle fur of our Pegasus. I've decided to use my warmer colors for the front legs and the cooler colors for the back legs.

Adding Front Hoof Fur

Step 3

At this stage, I've started to apply the cooler-colored back ankle fur. I opted to split the colors to allow more room for each color.

Adding Back Leg Fur

Step 4

We can now finish up the ankle fur with some glossy highlights. I love how full and carefree the fur feels. This is a happy animal, so the more spirit we can add to him, the better.

Completing the Ankle Fur

8. Finishing the Wings

Step 1

Let's return to our large fluttery wings. We can't very well leave them as they are—they need just as much attention as the rest of the piece. Using the same coloring as our body shading, I've made small separations in the feather to give it texture.

I can now take my Unitetooland bring all of these little pieces together to form one feather texture. 

Creating Feathers

Uniting Feather Details

Step 2

In this step, I've started applying the feather texture to each feather base. To save time, I'll Copy (Control-C) and Paste (Control-V) the same texture to each.

Creating More Feather Details

Step 3

After a little more work on the feather textures, we've completed them and can now add shading to give depth. Notice that I did not bring the shadow all the way up the wing. I stopped close to the top, and doing so gives the appearance of the wing curving towards us.

Adding Shadows to the Wing

Step 4

I've made a duplicate of our finished wing and added it to the back as its own Layer.

Adding a Back Wing

9. Polishing the Facial Features

Step 1

Next, I've taken the ear color and replaced it with a happier and healthier color. A light blush of pink works well with his overall complexion.

Adding Pink to the Ear

Step 2

Our Pegasus is now ready for a bright and vibrant eye, but we won't stop with just a bright color. We can do better than that!

Adding Color Main Color to the Eye

Step 3

Using our Star tool, we'll add our first star of many. I've added a Stroke to it and have changed my edges to Cap: Round Cap and Joint: Round Join in my Stroke settings. I'll now take this and move to my tabs at the top of the page. Go to Object > Expand and click on the Stroke as the only component that you would like to expand. Press Unite in our Pathfinder tab to form one full star.

We're now ready to make duplicates of varying sizes within our eye.

Creating Star for Eye
Adding Multiple Stars

Step 4

After applying our happy little stars, we can overlay our shine to brighten up his eye.

Finishing Up Starry Eyes
The Completed Starry Eye

10. Rendering the Rainbow Bridge

Step 1

Our Pegasus is now ready to ride a rainbow. Using the sorted colors from our color blocks, we'll form a less than even arch of color. I've made this loosely, without the need of a sketch. This is your turn to express yourself and have fun with the process, so make it as loopy as you'd like.

Beginning the Rainbow
Continuing the Rainbow

Step 2

The finished rainbow bridge will look something like this. It's now ready to blend.

Completing the Coloring of the Rainbow

Step 3

Take all of your rainbow bridge pieces and Group (Control-G)them for easier selection. Using our Gaussian Blur with a Radius of 6.3 px, create a blended rainbow. I don't want the rainbow to be too intense, so I've lowered the overall Transparency to 80%.

Blurring the Rainbow Together

11. Creating a Background and Clouds

Step 1

Once your Layers are locked, create a new one which will have our background color. I'm using another two-toned Radial Gradientto make a lightly colored background. I love how soft these colors are. They really complement the entire piece.

Creating a Background

Step 2

Our next step includes adding an assortment of fun shapes. These shapes will eventually become wispy clouds using our Gaussian Blur.

Adding Clouds
Blurring Clouds

Step 3

After applying enough fun shapes, we've come up with a rather nice display of clouds. The only thing missing is a mess of glitter!

Completing the Clouds

12. Creating Glitter Symbols

Step 1

One of the simplest ways to make glitter is to make a number of Ellipses (L)and use varying degrees of Transparency. Knowing me, I'll go glitter crazy, so our best bet will be to make this cluster of newly made glitter into a Symbol. This allows us to use the same glitter cluster over and over again, without adding copious amounts of data to our file. 

Creating Circles
Creating Glitter

Step 2

In this step, I've already applied two of my Symbols and as they lay over one another, I'm building up his glamorous look.

Applying Glitter to the Hair and Wings

Step 3

I've applied glitter to his mane, tail, wings and ankle fur, and now to the rainbow bridge itself. I advise you to go as glitter crazy as you feel the need to be!

Adding Glitter to the Road

Step 4

Our last step will be to apply larger sparkles to enhance our glitter. This makes it look more like glitter and less like dandruff. 

Adding Shine to the Picture      

Finished! Our Prismatic Pegasus is Ready to Take Flight!

I really do hope you've enjoyed this tutorial. If you do try to create your own prismatic Pegasus, please share your experiences and hopefully your art with us! If you're in the mood to create more enticingly colorful projects, I recommend you check out: Create a Rainbow Vomiting, Kawaii Unicorn in Adobe Illustrator as well as How to Create a Punk Nouveau Mermaid in Adobe Illustrator. Stay fabulously colorful, friends!

Finished Rendering 

Harness the Elements: Paint Frozen Water in All Its Forms

$
0
0
Final product image
What You'll Be Creating

Water is a complicated structure. It is transparent, and despite it being so clear, we can see it somehow. And even in its most "normal" state, liquid, water has many forms, so different from each other. Although water looks so simple—and is simple in its construction—you can't learn how to paint it once and for all. It's because you don't really paint water, but the effect it has on the world seen through it.

In this tutorial I'll show you how to manage the most popular forms of frozen water: icicles, falling and lying snow, frost, ice, and hail. We're going to use a whole range of Photoshop tools to make the process of creation fast and easily repeatable. Layer Styles, custom brushes, Blending Modes, Filters, Patterns, and the Mixer Brush Tool will all feature. Even if you're not interested in frozen water, check it out just to see how creatively these tools can be used to give you the effect you want.

1. Paint an Icicle

Step 1

Get yourself a nice background, like this. Transparent things can't exist without a background! Create a New Layer and use the Lasso Tool (L) to draw the outline of an icicle. You can easily do it with a mouse, because it should be a bit rugged anyway.

paint icicle photoshop layer style 1

Step 2

Fill the selection with any color using the Paint Bucket Tool(G).

paint icicle photoshop layer style 2

Step 3

Duplicate (Control-J) the background and put it over the icicle. Clip it with the Clipping Mask (Control-Alt-G).

paint icicle photoshop layer style 3

Step 4

Click the original background layer and apply Gaussian Blur (Filter > Gaussian Blur) to it to separate the background from the icicle.

paint icicle photoshop layer style 4

Step 5

Click the copied background and use the Free Transform Tool (Control-T) to shrink it inside the icicle. It will simulate the lens effect going on in the ice. In some cases it's good to flip the image, too.

paint icicle photoshop layer style 5

Step 6

Press Control-M to open the Curves editor. Pull the curve down a bit to make the icicle darker.

paint icicle photoshop layer style 6
paint icicle photoshop layer style 7

Step 7

Duplicate the icicle and drag the layer to the top. This is the layer we'll create the style on.

paint icicle photoshop layer style 8

Step 8

Double-click the layer. Drag the Fill Opacity to 0 to make the icicle transparent. Remember: the exact values we'll use here may depend on the size of your object, so instead of copying what I used, try to understand why I did it and modify the effect to your needs.

paint icicle photoshop layer style 9

Step 9

Check Inner Glow—it will define the edges of the icicle.

  • Use Overlay Mode to make the edges bright (1).
  • Set white as the color (4).
  • Play with the Size to place the glow right on the edges (5).
  • Add a bit of Noise to imitate the bubbles of air trapped inside the icicle (3).
  • Change the Opacity to strengthen or weaken the effect (2).
paint icicle photoshop layer style 10

Step 10

Check Inner Shadow—it will add more volume to the icicle. 

  • Set Overlay as the Blend Mode (1).
  • Change the Contour to Cone - Inverted (4).
  • Play with the settings to place the shadow nicely in the center (3).
  • Add a bit of Noise (5).
  • Change the Opacity to soften the effect (2).
paint icicle photoshop layer style 11

Step 11

Check Gradient Overlay—it will add a frosting effect to the base of the icicle.

  • Select Screen as the Blend Mode (1).
  • Click the Gradient, select the white marker, and drag its rhombus to the right, which will drag the whiteness up (3).
  • Change the Opacity if you want a subtler effect (2).
paint icicle photoshop layer style 12

Step 12

Check Pattern Overlay to add a texture to the icicle.

  • Set the Blend Mode to Soft Light (1).
  • UsetheSatin pattern (of the set Patterns) (3).
  • Scale the texture to avoid a flat, repeatable look (3).
  • Change the Opacity if you want to modify the strength of the effect (2).
paint icicle photoshop layer style 13

Step 13

Check the Texture of Bevel & Emboss—it will add a final gloss to the icicle.

  • Select the same Pattern as before (1).
  • Scale it to roughly fit the previous one (2).
paint icicle photoshop layer style 14

Step 14

In the main settings of Bevel & Emboss:

  • Select Ring as the Gloss Contour (2).
  • Set the Shadow's Opacity to 0 (4).
  • Play with the Size to get the perfect shape of the highlights (1).
  • Change the Highlight's Opacity if you want to adjust the effect (3).
paint icicle photoshop layer style 15

Step 15

If you want, you can easily add some shine using the default Outer Glow from the Layer Style.

paint icicle photoshop layer style 16

Step 16

If you create a new Style based on what we've just done, you'll be able to reuse it as many times as you wish. Remember to create a new layer for every icicle!

paint icicle photoshop layer style 17
paint icicle photoshop layer style 18

2. Create a Falling Snow Brush

Step 1

Let's create a brush for heavy snow. Create a New File and use the Soft Round brush to paint four to seven fluffy dots. Make them variable in size, with big distance in between. Then go to Edit > Define Brush Preset.

photoshop digital paint snow brush 1

Step 2

Now open the Brush Settings (F5). First, make the Spacing bigger to avoid jamming. The exact value will depend on the size of your brush.

photoshop digital paint snow brush 2

Step 3

Check Shape Dynamics. Give the brush a small Minimum Diameter (the strokes will be variable in size) and big Angle Jitter (every cluster of the brush will be rotated for randomness).

photoshop digital paint snow brush 3

Step 4

Check Scattering and choose a value that fits you. Don't make it too big or you'll lose control over the stroke.

photoshop digital paint snow brush 4

Step 5

Check Transfer to make the brush variable in opacity.

photoshop digital paint snow brush 5

Step 6

Test the brush in a new file. It should work like a spray. If there's something not right about it, play with the settings. Then Save the brush by clicking the white card icon at the bottom of the F5 window.

photoshop digital paint snow brush 6

Step 7

We can use the same method to create a light snow. Create a New File and paint three dots with the Soft Round brush. Give them a big distance in between. Define Brush Preset as before.

photoshop digital paint snow brush 7

Step 8

Give the brush a big Spacing.

photoshop digital paint snow brush 8

Step 9

Add the Angle Jitter.

photoshop digital paint snow brush 9

Step 10

Make the brush heavily scattered.

photoshop digital paint snow brush 10

Step 11

Check Transfer.

photoshop digital paint snow brush 11

Step 12

Test the brush and change the settings if necessary. Then save the brush.

photoshop digital paint snow brush 12

3. Paint Falling Snow

Step 1

Creating the brush is relatively easy, but even the most professional brush will not give you the effect you want unless you know what effect you want exactly.

photoshop digital paint snow 1
That's certainly a scene with a falling snow, but is it what we want?

Perspective plays a big role in perceiving falling snow. Covering the whole scene with white dots isn't the way—it will make it flat and unrealistic. To make it more natural, we need to divide the scene into five areas:

  1. The background: all the layers of the snow are so thick that together they make a light wall, blending into a cloudy sky. To imitate this effect, simply cover the background with heavy mist.
  2. A bit closer to us, single snowflakes are visible. They're very thick and small, like a spray of white dots.
  3. The closer they are to us, the bigger the snowflakes appear. Because of perspective they also seem to move faster. A little bit of Motion Blur will help you imitate this effect.
  4. As we get closer, the snowflakes become very big, and not too dense, otherwise they would cover important parts of the picture. Their speed seems to be even greater, and so is the blur.
  5. This is the area right before your eyes, where one or two snowflakes are able to cover your whole vision. Use them sparingly, with very strong blur; you can also use the bokeh effect here, to pretend that some of the snowflakes have landed on the lens of the camera.
photoshop digital paint snow 2
More or less stages can also be distinguished, depending on the perspective you use

Step 2

Let's create a simple scene to present the effect on. It doesn't need to be anything perfect, but just make sure that it has at least basic perspective, with the background, the foreground, and all the steps in-between. 

photoshop digital paint snow 3

Step 3

Create a New Layer and paint a big white stroke with the Soft Round brush.

photoshop digital paint snow 4

Step 4

Lower its Opacity so that the background is whitish rather than blue.

photoshop digital paint snow 5
photoshop digital paint snow 6

Step 5

Apply the Layer Mask and paint over the columns with black, so that they aren't affected by the whitening effect.

photoshop digital paint snow 7
photoshop digital paint snow 8

Step 6

Create a New Layer and cover the scene with dense, small snowflakes.

photoshop digital paint snow 9

Step 7

Again, use the Layer Mask to cut the columns out of its influence.

photoshop digital paint snow 10

Step 8

Create a New Layer and paint another layer of snow, this time bigger and less dense.

photoshop digital paint snow 11

Step 9

With the layer selected, go to Filter > Blur > Motion Blur. Use a small Distance and an Angle adjusted to the strength of wind in your scene.photoshop digital paint snow 12

photoshop digital paint snow 13

Step 10

Create a New Layer and paint another layer of snow, again bigger and less dense.

photoshop digital paint snow 14

Step 11

Again use Motion Blur to give a sense of speed. Use a bigger Distance, and you can also change the Angle a bit to give more dynamism to the scene.

photoshop digital paint snow 15
photoshop digital paint snow 16

Step 12

Create a New Layer and add the last layer of snow. It's not obligatory and sometimes it covers crucial elements of the picture, so experiment with it and check if you need it.

photoshop digital paint snow 17

Step 13

This layer should have the strongest blur, since it's totally out of focus. You can even add a bit of Gaussian Blur (Filter > Blur > Gaussian Blur) to strengthen this effect.

photoshop digital paint snow 18

Step 14

To stress the fact that the other column is farther from us, we can add a bit of aerial perspective here caused by heavy snow. Create a New Layer and paint a big stroke with the Soft Round brush.

photoshop digital paint snow 19

Step 15

Use the Layer Mask to reveal the front column.

photoshop digital paint snow 20

Step 16

Lower the Opacity of the layer to give the other column a hazy look.

photoshop digital paint snow 21

Step 17

You can use the same method to create a light snow, much friendlier to the actual content of your picture.

photoshop digital paint snow 22

Notice the difference between the most intuitive use of the snow brush and slightly more sophisticated methods. But doesn't this last picture look a bit odd? Such heavy snow in the air and none of it on the ground? Well, let's work on it!

photoshop digital paint snow 24

4. Paint Lying Snow

Step 1

Create a New Layer above your scene. Select the ground area and Fill it with bluish gray (#d6d8e3).

paint lying snow brush quickly 1

Step 2

Use the Layer Mask (or the Eraser Tool, if you're feeling lazy) to reveal the columns, defining the snow-only area.

paint lying snow brush quickly 2

Step 3

Fix the edges around the columns to make them more gentle.

paint lying snow brush quickly 3

Step 4

Now we're going to use a neat trick, available for CS5 and higher. Create a New Layer and use the Ellipse Tool (U) when holding Shift to draw a circle.

paint lying snow brush quickly 4

Step 5

Create a New Layer and fill it with grayish blue (#6d85ad). Use Control-Alt-G to clip it to the circle.

paint lying snow brush quickly 5

Step 6

Use the Soft Round brush and a brighter version of the previous color (#e5e4ec) to shade the circle and make it ball-like.

paint lying snow brush quickly 6

Step 7

Grab the Mixer Brush Tool (you can find it just where the Pencil tool) and change it to Dry, Heavy Load. Make sure that Sample All Layers is unchecked.

paint lying snow brush quickly 7

Select all the layers of the ball and Merge (Control-E) them. With the Mixer Brush Tool active, take the Soft Round brush and change its Spacing to a very low (2–4%) value. Make the stroke big enought to fit the ball inside, and then hold Alt and click firmly in the center.

paint lying snow brush quickly 8 mixer brush

Test it! If it's too slow, reduce the image's resolution or the Spacing of the brush.

paint lying snow brush quickly 9 mixer brush

Step 8

Create a New Layer. Using our new 3D brush to paint small "waves" in the background.

paint lying snow brush quickly 10

Use a slightly bigger stroke for another layer...

paint lying snow brush quickly 11

... and bigger for another...

paint lying snow brush quickly 12

... and even bigger as we go farther...

paint lying snow brush quickly 13

... until we reach the foreground.

paint lying snow brush quickly 14

Step 9

Clip (Control-Alt-G) the "waves" to the snow area. Reset the Mixer Brush Tool by selecting Reset Tool in its settings. Now you can use the same tool to blur the stripes left by applying a big Spacing.

paint lying snow brush quickly 15
paint lying snow brush quickly 16

Step 10

Create a New Layer and Fill it with with blue picked (I) from the sky in our scene. We're going to use it to give a more fitting color to the shadows in the snow.

paint lying snow brush quickly 17

Step 11

Double-click it and go to the Blend If section. We want to have the bluish shade only in dark areas, so hold Alt, grab the white marker, and drag it to the left side.

paint lying snow brush quickly 18
paint lying snow brush quickly 19

Step 12

Change the Blending Mode to Soft Light to make the bright areas brighter.

paint lying snow brush quickly 20

Step 13

With distance the contrast is decreasing, so we need to cover the shadows in the background with something bright. Create a New Layer, Fill it with any color, and then double-click it to add Gradient Overlay. Make it a white-white gradient, and make the part that's closer to us fully transparent.

paint lying snow brush quickly 21
paint lying snow brush quickly 22

Step 14

Pick the color of the sky, create a New Layer and paint the columns' shadows. Adjust the shape of the shadows to the 3D form of the snow.

paint lying snow brush quickly 23

Step 15

Change the Blending Mode to Multiply toreveal the snow beneath. Play with the Opacity, if it's too dark.

paint lying snow brush quickly 24

Step 16

Create a New Layer. Grab the Light Snow brush we've made before, and sprinkle the snow with tiny strokes.

paint lying snow brush quickly 25

Step 17

This glow of tiny crystals shouldn't be visible in the shadow, so use Blend If to fix it.

paint lying snow brush quickly 26
paint lying snow brush quickly 27

Step 18

White strongly reflects every light, so a visible reflected light is going to be visible at the back of the columns. Create a New Layer and paint a slight bluish glow with the Soft Round brush.

paint lying snow brush quickly 28

Step 19

Use Blend If to remove the glow from the dark crevices. If the glow is too bright, change the Blending Mode to Screen and lower the Opacity.

paint lying snow brush quickly 29
paint lying snow brush quickly 30

Step 20 

Create a New Layer and paint snow on the top of the columns using the Hard Round brush with opacity. Pick the colors from the ground.

paint lying snow brush quickly 31
paint lying snow brush quickly 32

Step 21

The sky is a bit too clear, so create a New Layer right above the background and paint a big, white stroke with the Soft Round brush.

paint lying snow brush quickly 33

Step 22

Lower the Opacity of this layer until the sky fits the lighting.

paint lying snow brush quickly 34

Step 23

You can now add falling snow to make the scene complete.

paint lying snow brush quickly 35
paint lying snow brush quickly 36

5. Create a Frost Brush

Step 1

Frost consists of many little ice crystals stuck together. To create a brush that imitates this effect, we'll start with a single snowflake-like structure. Create a New File, Fill the background with black, add a New Layer, and draw this little star using any hard brush you like.

photoshop digital pain frost brush 1

Step 2

Set the Opacity to 20%.

photoshop digital pain frost brush 2

Step 3

Create a New Layer and sprinkle the star with white dots.

photoshop digital pain frost brush 3

Step 4

Merge all the layers, then Invert the colors (Control-I). Go to Edit > Define Brush Preset to save it.

photoshop digital pain frost brush 4

Step 5

Go to the Brush Settings (F5). Check Shape Dynamics and add a big Size Jitter and a bit of Angle Jitter.

photoshop digital pain frost brush 5

Step 6

Add a little bit of Scattering.

photoshop digital pain frost brush 6

Step 7

You can check Transfer, though it's not obligatory.

photoshop digital pain frost brush 7

Step 8

Use the brush to outline the object you want to cover with frost. The bigger the object, the smaller the stroke.

photoshop digital pain frost brush 8

Step 9

The outline isn't enough—we need the bottom layer, too! Create a New File and again fill it with black. Create a New Layer and draw these little scales:

photoshop digital pain frost brush 9

Step 10

Change the Opacity to 40%.

photoshop digital pain frost brush 10

Step 11

Add a New Layer and draw tiny dots to make it sparkle. Save it as we've done before.

photoshop digital pain frost brush 11

Step 12

Give this brush a big Spacing to keep the "scales" separate.

photoshop digital pain frost brush 12

Step 13

Check Shape Dynamics and give it similar values as before.

photoshop digital pain frost brush 13

Step 14

Check Transfer.

photoshop digital pain frost brush 14

Step 15

Use this brush on the body of the object.

photoshop digital pain frost brush 15

6. Paint Ice on a Lake

Step 1

Start by defining the level of water according to perspective.

photoshop digital pain ice frozen lake 1

Step 2

Create a New Layer, draw a rectangle with the Rectangular Marquee Tool (M) to select the water area, and fill it with any color.

photoshop digital pain ice frozen lake 2

Step 3

Use the Layer Mask or the Eraser Tool (E) to cut out the columns above the water level. It will be our Clipping Mask for the future layers.

photoshop digital pain ice frozen lake 3

Step 4

Duplicate (Control-J) the background, put it above the clipping mask, and clip (Control-Alt-G) it. Go to Filter > Blur > Gaussian Blur—it will make the ice layer look thicker.

photoshop digital pain ice frozen lake 4
photoshop digital pain ice frozen lake 5

Step 5

The ice will have a reflection on it, and while it's very easy to reflect the background, more work is needed for the columns. Their reflection must follow the perspective! To achieve this effect, select one side with the Pen Tool (P), make a selection of it (Control-Shift-Enter), and Copy (Control-Shift-C) the content. Paste the side and Edit > Transform > Flip Vertical, and then place it on the bottom.

photoshop digital pain ice frozen lake water 6

Step 6

Use the Free Transform Tool (Control-T) to adjust the side to the perspective of our scene. Grab the corners while holding Control to manage them individually.

photoshop digital pain ice frozen lake water 7

Do the same with all the sides.

photoshop digital pain ice frozen lake water 8

Step 7

Duplicate the background once again, clip it to the rest, and Edit > Transform > Flip Vertical. Place it so that it looks like a reflection of the sky, and merge (Control-E) it with the reflection of the columns.

photoshop digital pain ice frozen lake water 9

Step 8

Go to Filter > Filter Gallery and select the Distort > Glass filter. It will give a nice texture to the surface—ice is rarely perfectly smooth!

photoshop digital pain ice frozen lake water 10
photoshop digital pain ice frozen lake water 11
photoshop digital pain ice frozen lake water 12

Step 9

Select the Gradient Tool (G). Add the Layer Mask to the the reflection, and in this mode draw a black-white gradient vertically from top to bottom. It will make the area closer to us less reflective—it's a matter of the angle, and it's known as Fresnel effect.

photoshop digital pain ice frozen lake water 13

Step 10

Change the Blending Mode of the layer to Screen and play with the Opacity if necessary.

photoshop digital pain ice frozen lake water 14

Step 11

Use the mask of the layer to paint the columns' shadows—shadows can't reflect anything.

photoshop digital pain ice frozen lake water 15

Step 12

Create a New Layer (still clipped) and Fill it with any color. Double-click it and give it a Pattern Overlay, with the Wrinkles pattern.

photoshop digital pain ice frozen lake water 16
photoshop digital pain ice frozen lake water 17

Step 13

Right-click the layer and select Rasterize Layer Style. Use the Free Transform Tool (Control-T) and Control-drag the corners to adjust the pattern to perspective.

photoshop digital pain ice frozen lake water 18

Step 14

Apply Filter > Noise > Add Noise with a very small amount of noise. Add the Layer Mask and use the trick with the GradientTool, this time drawing it vertically from bottom to top.

photoshop digital pain ice frozen lake water 19

Step 15

Change the Blending Mode to Soft Light and lower the Opacity.

photoshop digital pain ice frozen lake water 20

Step 16

Create a New Layer and paint scratches.

photoshop digital pain ice frozen lake water 22

Step 17

Double-click the layer and set Bevel & Emboss for it. Set the Fill to 0% and lower the Opacity.

photoshop digital pain ice frozen lake water 23
photoshop digital pain ice frozen lake water 24

Step 18

You can use the method of drawing icicles to paint the border between the columns and the ice. Notice I've played with the Opacity of the style to adjust it to this lighting.

photoshop digital pain ice frozen lake water 25

Step 19

Now we're going to use the Mixer Brush Tool again for a nice trick. Use the Rectangle Tool (U) to draw a rectangle, then double-click it and apply the style below. You can also paint it manually—the goal is to have a bright top, then a bit of half-transparent white ending in a blurry way.

photoshop digital pain ice frozen lake water 26
photoshop digital pain ice frozen lake water 27

Step 20

Use the Free Transform Tool to make the rectangle narrower. Then select it as a sample for the Mixer Brush Tool as we've done with the snow, and paint cracks in the ice. It normally occurs in deep containers, with a thick layer of ice, but it will look cool here too.

photoshop digital pain ice frozen lake water 28
photoshop digital pain ice frozen lake water 29

Step 21

There are often air bubbles trapped in ice. Create a New File and paint a single bubble.

photoshop digital pain ice frozen lake water 30 bubble brush

Step 22

Duplicate and resize the bubble to create a few of them.

photoshop digital pain ice frozen lake water 30 bubble brush 2

Step 23

Invert (Control-I) the colors, then Edit > Define Brush Preset.

photoshop digital pain ice frozen lake water 30 bubble brush 3

Step 24

Apply the settings as below:

photoshop digital pain ice frozen lake water 30 bubble brush 4
photoshop digital pain ice frozen lake water 30 bubble brush 5
photoshop digital pain ice frozen lake water 30 bubble brush 6
photoshop digital pain ice frozen lake water 30 bubble brush 7

Test the brush—it should work like magic!

photoshop digital pain ice frozen lake water 30 bubble brush 8

Step 25

Paint small bubbles here and there.

photoshop digital pain ice frozen lake water 31

Step 26

Create a New Layer under the pattern. Fill it with light, unsaturated blue (#788c9f).

photoshop digital pain ice frozen lake water 32

Step 27

Change the Blending Mode to Multiply. Now the water looks darker, since less light reaches the bottom.

photoshop digital pain ice frozen lake water 33

Our ice is done! Just look:

photoshop digital pain ice frozen lake water 34

7. Create a Hail Brush

Step 1

This one is going to be easy:

  • Create a New File.
  • Draw three white dots on the black background; give them a big distance in-between.
  • Invert (Control-I) the colors.
  • Edit > Define Brush Preset.
photoshop digital paint hail brush 1

Step 2

Give the brush a big spacing...

photoshop digital paint hail brush 2

Step 3

... no Size Jitter, and a lot of Angle Jitter...

photoshop digital paint hail brush 3

Step 4

... and a bit of Scattering. Save the brush.

photoshop digital paint hail brush 4

Step 5

We can use this brush just like snow. Start with a brighter sky...

photoshop digital paint hail brush 5

... then add the farthest and smallest layer...

photoshop digital paint hail brush 6

... then a closer and bigger one, with a bit of blur. Remember: the direction should be almost vertical, since hail is heavy and not so easily pushed by wind.

photoshop digital paint hail brush 7

Closer, bigger, more blur...

photoshop digital paint hail brush 8

... and even closer, bigger, more blurry.

photoshop digital paint hail brush 9

Step 6

We need to put some of the hail on the ground. Create a New Layer and paint a lot of hail here.

photoshop digital paint hail brush 10

Step 7

Use the Free Transform Tool (Control-T). Control-drag the corners to adjust the shape to perspective.

photoshop digital paint hail brush 11

Step 8

Add a smaller, denser layer in the background.

photoshop digital paint hail brush 12

Step 9

Clean up the columns.

photoshop digital paint hail brush 13

Step 10

Play with the Opacity to make the balls less striking.

photoshop digital paint hail brush 14

Step 11

You can add a few bigger balls here and there in the air.

photoshop digital paint hail brush 15

That Was Cool!

I hope this lesson showed you how useful Photoshop can be in automating the process of painting, and how little is needed to create a stunning effect from scratch. In the next part of this tutorial we'll take care of liquid water, and later in the series we'll move on to other elements, to draw things like lava and clouds. Stay tuned!

10 Essential Tips & Tools All Adobe Illustrator Beginners Should Learn

$
0
0

Things aren't how they used to be. In the past, programs with limited functions made it easier to pinpoint which tools you should be learning as a beginner. These days, however, given how many tools, tips and tricks there are to learn, you can often feel overwhelmed and not know where to start.

I've been using Adobe Illustrator for well over 10 years now and I'm obsessed with vector. I'm here to share with you my 10 essential tips and tools all Adobe Illustrator beginners should learn, and link you to a tutorial or two which will help you learn how to use them. These items were all tools and tips which have become part of my regular vector process and without them, I think I'd wither and die. Or just not create as well as I'd hope. It's the same thing, really—let's be honest.

So enough, let's get stuck into this list.

1. Don't Be Afraid of the Pen Tool

The Pen Tool can be a scary tool for beginners. It took me a while to be able to "tame" it, but don't let this put you off. Once you've mastered this tool, you can take on anything in Adobe Illustrator.

I'd highly recommend you check out this fantastic tutorial by Web Design Editor Ian Yates on how to use the Pen Tool. It even has a downloadable exercise at the end of the tutorial.

Illustrators Pen Tool The Comprehensive Guide

It is true that you can create some pretty awesome vector graphics without needing the Pen Tool. If you check out the tutorials by regular Tuts+ Instructor Andrei Marius, the majority of his tutorials are done without the Pen Tool. He is solid proof you can create without the Pen Tool. This being said, my advice is to push yourself and go for it. It's not as bad as you think!

2. Master Clipping Masks

Clipping Masks were a game changer for me. So much so that I wish I had discovered them a lot sooner in my Adobe Illustrator journey. 

Masks limit a pattern, group of shapes, paths or whatever you wish to a specific area, and have a multitude of uses. I found them an incredible time saver and for this reason, I think every beginner should learn to use them. 

I highly recommend our beginners tutorial on Clipping and Opacity Masks. This is a perfect tutorial which shows you the benefits of both in an easy-to-follow format.

Beginners tutorial on Clipping and Opacity Masks

3. Become One With the Pathfinder Panel

I love the Pathfinder panel. It's true. When it comes to creating shapes made out of other shapes, the Pathfinder panel has a selection of options to help you create the perfect shape. It's especially useful given trends of flat design and illustrations made from basic shapes. Check out our comprehensive guide to the Pathfinder panel by regular Tuts+ Instructor Cheryl Graham.

Shape Modes with Pathfinder panel

I'm not finished though. Once you've learnt the many ways of the Pathfinder panel, kick it up a notch and learn how to use the Shape Builder Tool. It's like Shape Modes, but a lot quicker!

Find out more about Shape Creation with Adobe Illustrator with our handy Tuts+ Course.

4. Embrace the Appearance Panel

Do you find yourself duplicating the same shape over and over again to add different fills at different opacities over the top of each other? Well you're doing it wrong. You could be doing the same thing but with just one shape, by using the Appearance panel.

The Appearance panel and Graphic Styles seemed like something only advanced users knew when I first started out. I was intimidated by it. But once you learn how to use the Appearance panel, it will rock your world. Here's something to blow your mind: guess how many anchor points and shapes make up the following single sliced kiwi fruit?

How many anchor points and shapes make up a single kiwi

If you answered anything other than four anchor points/one shape, you're so wrong and you should learn how to use the Appearance panel! Just one shape was used to create this, and it demonstrates exactly how powerful the Appearance panel is.

5. Learn How to Make Brushes

If there's one function of Adobe Illustrator which I geek out on, it has to be the ability to make and use my own custom brushes. Finding new uses for brushes and creative ways to apply them is my vector drug. 

I find I use art brushes more than any other type, especially these Width Profile inspired brushes (this is actually one of my first tutorials for Tuts+!).

Width Profile Brushes

There are many different types of brushes you can create, and once you learn them inside and out, you'll find many practical and experimental ways to use them. Check out our roundup of our favourite Brush tutorials here on Tuts+.

6. Practice Layers Panel Zen

Now this doesn't really benefit the end result of your vector work (unless you're selling your work as a vector file), but I strongly recommend that beginners learn how to organise their vector files. That means everything from organising and naming your Layers panel to getting rid of colours and resources in your file which are not being used.

We all know that being organised makes things easier in the long run, as there's less confusion. So to take one thing away from the learning process to make it easier for you, practice Layers panel Zen. Check out this awesome tutorial by Kate McInnes on how to organise and save a vector file.

Look at that organised Layers panel

7. Fall in Love With Color

There are many aspects of Adobe Illustrator which are there to make life that little bit easier. One of those for me are the Swatch libraries, which come with every version of Illustrator. These range from funky gradients to palettes of skin tones to default patterns and textures. 

These can be found by going into your Swatches panel and going into the drill-down menu. From there select Open Swatch Library and then marvel at the selection you're presented with.

I'm a big fan of the skin tone palettes and the basic pattern textures. Check them out and have a play with them.

In addition, there is the awesomeness of Recolor Artwork and Adobe Color (previously called Adobe Kuler). Find out more about these and more from my Adobe Color/Kuler app tutorial.

Recolor Artwork sexy

8. Have Fun With Pattern Options

It wasn't until Illustrator CS6 that patterns were made easy with Pattern Options, and I tell you, it's like the heavens have opened and blessed every vector artist. Pattern Options, even if you don't actively create patterns, is one of the most fun functions you can come across. I may be overselling it a bit but I remember when it was released, all I wanted to do was create patterns.

But you can create so much more with Pattern Options. Think of the endless possibilities of creating your own seamless textures! That's what grabbed me and helped me kick my artwork up a notch.

Check out this great beginners tutorial on creating a honeycomb pattern by the wonderful Mary Winkler. This utilizes the Pattern Options tool and gives you a taster of what can be created.

Honeycomb goodness

9. Save Your Vector Art Correctly

I have this great annoyance with some vector artists. As talented as they can be with coming up with fantastic artwork, they fall at the last hurdle. And I don't want you to make the same mistake. It's a fundamental function which even if you ignore everything I've written here today, I want you to take on board... learn how to save your vector art correctly.

If you're saving your vector as a gif, jpg or png, I want you, for the love of all that's scalable—please, I'm begging here—to learn how to Save for Web. It's really pretty easy but often overlooked. 

The first step is to make sure that your Artboard is correctly exposing all the artwork you want saved. You can use the Artboard Tool (Shift-O) to do this.

Secondly, go to File > Save for Web. Select your file type and BAM! 

Of course if you're confused about what to save your file as, this handy tutorial by Cheryl Graham helps you understand the different file types in the Save for Web dialog box.

Save for Web Dialog Box

10. Accept It Doesn't Happen Overnight

The last tip isn't specific to Adobe Illustrator but to most new skills you begin learning, but I feel it's very true for those getting into vector art. It's to understand that you're not going to be a pro overnight. Don't beat yourself up if you can't get it right first, second, tenth time when you're starting out. Vector art is hard for anyone new.

Over the past couple of years, more than most, I've seen vector art grow from strength to strength. The need for it in design and illustration has made it such a sought-after skill, and it's worth adding to your toolkit. 

Have fun with it, take part in the many vector communities out there, and challenge yourself. Just don't be afraid to fail. Pick yourself up and keep at it, as it's a rewarding medium to work with.

Keep Pushing Yourself, You'll Get There!

You don't know how easy you've got it. As a vector beginner, you've got a lot of resources out there, both within Adobe Illustrator and beyond, with the sheer amount of tutorial content out there for you. Keep researching and keep pushing yourself. Don't let my green-faced envy put you off here—put your head up high and embrace this scalable path you're venturing on. It's a good one. It's an amazing one.

For further reading, check out these two great articles to kick off further adventures into Adobe Illustrator:

And for those who are not beginners, I ask you, do you agree with my list? 

If not, for the sake of the beginners who come here seeking infinite solace, please add in the comments what you feel should have been included, and if you know of a handy tutorial to add for that tip, please add it. Sharing is caring!

How to Create a Walking Kitten Animation In Adobe Photoshop

$
0
0
Final product image
What You'll Be Creating

Creating frame animations in Adobe Photoshop is simple, but the real power of it isn't in the tool, but in the way you use it. 

Today I'll show you how to create a six-frame animation of a quickly walking kitten. The most intuitive way to create an animation would be to draw it frame by frame, but with Photoshop there's no need for that. I'll show you a set of little tricks that will make animating easier and faster, and the animations themselves smoother. 

First we'll draw a kitten from scratch, and then we'll convert it to simple shapes, understand the movement, and adjust the shapes to the movement to give them life.

This is a beginner-friendly version of Create a Run Cycle Animation From Scratch in Adobe Photoshop.

1. Sketch a Kitten

In this part we're going to sketch a kitten in a simple, side view. If you're not a beginner at drawing, feel free to skip it and draw your own sketch.

Step 1

Open Photoshop and create a New File (Control-N). Use 2000 px for Width and 1500 px for Height.

photoshop new file

Step 2

Create a New Layer over the background. You can use the shortcut Control-Alt-Shift-N, or click the icon as shown below:

photoshop new layer

Select any Brush (B) you like for sketching, and roughly draw the idea from your head. Do it quickly—don't think too much, and don't erase the lines.

photoshop draw sketch kitten cat simple

Step 3

Set the Opacity of the layer to 20%.

photoshop draw sketch kitten cat simple 2

Step 4

Create a New Layer the same way as before. Now we're going to build more thought-out shapes on the base of the sketch.

Start with a "6" that will imitate the chest and the back.

photoshop draw sketch kitten cat simple 3

Step 5

Add another 6-like shape for the head and the back of the neck.

photoshop draw sketch kitten cat simple 4

Step 6

A little "C" will make the snout.

photoshop draw sketch kitten cat simple 5

Step 7

Two elongated "S"'s will make the legs. Add a short line for the tail.

photoshop draw sketch kitten cat simple 6

Step 8

Add two flattened domes for the paws.

photoshop draw sketch kitten cat simple 7

Step 9

We need to work on the legs some more to get the shape right. These lines will be the elbow and the heel of the cat.

photoshop draw sketch kitten cat simple 8

Step 10

Add more guide lines to divide the legs into parts.

photoshop draw sketch kitten cat simple 9

Step 11

Our "skeleton" is done. You can now delete the sketch, and change the Opacity of the skeleton to 20% as we did before.

Step 12

Now we'll be building the actual body. Use the guide lines on the legs to create the chunks as shown below:

photoshop draw sketch kitten cat simple 10

Step 13

Now add the paws.

photoshop draw sketch kitten cat simple 11

Step 14

Use straight lines to build the shape of the head.

photoshop draw sketch kitten cat simple 12

Step 15

Now take care of the lower part and connect the head with the chest.

photoshop draw sketch kitten cat simple 13

Step 16

This shape will make the eye socket:

photoshop draw sketch kitten cat simple 14

Step 17

Put the eye inside.

photoshop draw sketch kitten cat simple 15

Step 18

"Stick" a triangle on the head—it will be the base for the ear.

photoshop draw sketch kitten cat simple 16

Step 19

Sketch the ear.

photoshop draw sketch kitten cat simple 17

Step 20

Finish the picture with any other lines you can find.

photoshop draw sketch kitten cat simple 18

Step 21

Delete the previous layer, leaving only the background and the line art. Our kitty is done and ready to have fun!

photoshop draw sketch kitten cat simple 19

2. Split Up the Body

We need to cut the body into separate chunks to animate them individually. Don't worry, no kittens were harmed in the making of this tutorial!

Step 1

Again, lower the Opacity of the layer and create a new one. Can you see any circles/ovals in the body? Draw them!

photoshop draw sketch kitten cat simple prepare for animation

Step 2

Try to show the contours of the body by using only straight lines. Just imagine you're drawing a constellation!

photoshop draw sketch kitten cat simple prepare for animation 2

Step 3

Take the Pen Tool (P). It doesn't only draw paths for selection, it can also draw editable, vector shapes. Change the mode to Shape and pick any Fill color you like.

photoshop vector drawing animation

Step 4

Click the points ("stars") of your "constellations" one by one, until you've closed the shape. Every shape creates its own layer automatically. For ovals use the Ellipse Tool (U) in Shape mode.

photoshop draw sketch kitten cat simple prepare for animation 3
photoshop draw sketch kitten cat simple prepare for animation 4

This is what you should end up with:

photoshop draw sketch kitten cat simple prepare for animation 5

Step 5

A lot of layers have been added to the list! To avoid a mess, Control-select them, and then Group (Control-G) and label them.

photoshop draw sketch kitten cat simple prepare for animation 6

Step 6

Test the body! If you Control-click the shape, the group it's in will be selected. You can move a whole body part, and rotate or scale it (Control-T). Because these shapes are vector, they don't lose their quality no matter how strongly you modify them.

photoshop draw sketch kitten cat simple prepare for animation 7
Don't forget to undo the changes!

3. Prepare the Movement

There are three basic gaits of a cat. Cats can walk, and they can run with great leaps, but there's also a middle way. It's called the pace, and it looks like a fast walk. Do you recall your cat running to you when it hears the "sound of noms"? That's the gait.

cat pacing gait pace walking animation cycle frames

The funny thing about this gait is that it's literally based on two frames:

  • Left side legs to the front, right side legs to the back
  • Right side legs to the front, left side legs to the back
cat pacing gait pace walking animation cycle frames 2

To make it smoother, we're going to add two frames between those, giving us six in total. That's going to be easy!

Let's take a closer look at the frames we'll need:

  1. Left side legs go to the front; right side legs to the the back; rump goes up, headgoes down.
  2. Left side legs are landing; right side legs take off.
  3. Left side legs are pushing the ground to the back; right side legs get pulled to the front.
  4. Left side legs go to the back; right side legs to the the front; rump goes up, headgoes down.
  5. Left side legs take off; right side legs are landing.
  6. Left side legs get pulled to the front; right side legs are pushing the ground to the back.
cat pacing gait pace walking animation cycle frames 3

It's still quite complicated, isn't it? Luckily for us, it's a fully symmetrical gait—one side repeats the exact movement of the other, with a slight delay. So we can actually create only one side, and then copy it to the other!

Just see how a one-side movement looks:

  1. Legs go to the front; rump goes up, headgoes down.
  2. Legs are landing.
  3. Legs are pushing the ground to the back.
  4. Legs go to the back; rump goes up, headgoes down.
  5. Legs take off.
  6. Legs get pulled to the front.
cat pacing gait pace walking animation cycle frames 4
cat pacing gait pace walking animation cycle frames 5

This is exactly what we need to do with our kitten. Let's get started, then!

Step 1

Some kind of ground is necessary to create a proper movement. We don't need to draw anything—just use the Control-R shortcut and drag the top ruler down, under the kitten's paws.

photoshop guides rulers
cat pacing gait pace walking animation cycle frames 6

Step 2

We're going to play with all the body parts now, so duplicate (Control-J) all of them and store them in a new group (Control-G) for a back-up. Hide the group by clicking the eye icon next to it.

photoshop animation kitten body animal simple

Step 3

We're starting the actual animation now, using the first frame as a reference. Select the front leg group and press Control-T. This runs the Free Transform Tool that you can use to scale and rotate the object. Can you see the "cross-hair" in the center of the box? You can drag it anywhere to define the real center of rotation.

Do it now—drag it to the place where the arm is attached to the chest...

photoshop animation kitten body animal simple 2

... then rotate the leg. Hit Enter when you're done, or Escape if you want to cancel the change and try again.

photoshop animation kitten body animal simple 3

Step 4

In the first frame of the animation our cat is reaching out far with its arms, paws included. Rotate the front paw so that it's ready for landing.

photoshop animation kitten body animal simple 4

Step 5

In this step both front paws are in the air, so the chest, neck, and head aren't supported. Select the head layer, hold Shift and press ArrowDown to move the head down. In the next frame you'll move it twoArrows Up (which means "a bit higher"), and then Shift-Arrow Up ("back to the base position"), and after that the cycle will repeat.

photoshop animation kitten body animal simple 5

Step 6

To reach so far with the forelimbs, the chest must be rotated a little.

photoshop animation kitten body animal simple 6

Step 7

In this step the hips are a bit higher, so just like with the head, hold Shift and press Arrow Up twice.

photoshop animation kitten body animal simple 7

Step 8

The hind leg imitates the movement of its front counterpart, so rotate it properly.

photoshop animation kitten body animal simple 8
photoshop animation kitten body animal simple 9

Step 9

The paws need to prepare for landing too.

photoshop animation kitten body animal simple 10
photoshop animation kitten body animal simple 11

Step 10

We're going to move the tail too during the animation for a bit more aliveness of the whole.

photoshop animation kitten body animal simple 12

We did it! Our cat has the same position as the reference.

photoshop animation kitten body animal simple 13

Step 11

Select all the parts and duplicate (Control-J) them. Group (Control-G) the original and name it 1. Hide it.

photoshop animation kitten body animal simple 14

Step 12

Now do the same with the second frame as a reference. Rotate the front leg...

photoshop animation kitten body animal simple 15

... put the paw on the ground...

photoshop animation kitten body animal simple 16

... rotate the hind leg, put it a bit lower...

photoshop animation kitten body animal simple 17

... place the paw properly...

photoshop animation kitten body animal simple 18

... move the head up...

photoshop animation kitten body animal simple 19

... rotate the chest...

photoshop animation kitten body animal simple 20

... and straighten the tail.

photoshop animation kitten body animal simple 21

If you change the Opacity of the previous frame (group), you should be able to see something like this. You can use it as a base for the next pose.

photoshop animation kitten body animal simple 22

Step 13

Do the same with every frame. Make sure to keep a half-transparent first frame on when working on the last one—they should be consistent.

photoshop animation kitten body animal simple 23

Step 14

There is a three-frame delay between the movement of one side in relation to the other. In order to show it:

  • Duplicate the legs of Frame 1 and move them to Frame 4.
  • Duplicate the legs of Frame 2 and move them to Frame 5.
  • Duplicate the legs of Frame 3 and move them to Frame 6.
  • Duplicate the legs of Frame 4 and move them to Frame 1.
  • Duplicate the legs of Frame 5 and move them to Frame 2.
  • Duplicate the legs of Frame 6 and move them to Frame 3.

Place the copied layer at the bottom of the group.

photoshop animation kitten body animal simple 24
photoshop animation kitten body animal simple 25

4. Run a Test Animation

Before we go any further, we need to check if the animation looks OK.

Step 1

Delete every layer except the frame-groups and the background, if there are any.

photoshop how to create animation frames animal running

Step 2

Right-click every layer and select Convert to Smart Object. This way the group will be converted to a layer, but if you ever want to get to its content, just double-click it.

photoshop how to create animation frames animal running 2

Step 3

Open the Timeline panel (Window > Timeline). We want the animation to go on endlessly, so set the looping option to Forever.

photoshop how to create animation frames animal running 3

Step 4

To create an animation, just open the panel's menu and select Make Frames From Layers. Tadah!

photoshop how to create animation frames animal running 4

Step 5

That's not all. First Delete the redundant frame made by the background.

photoshop how to create animation frames animal running 5

Step 6

Select all the layers by clicking the first and the last one while holding Shift—you will now modify them all at once. Click the Frame Delay and set 0.1 seconds.

photoshop how to create animation frames animal running 6

Step 7

With all the frames selected, Show the background layer.

photoshop how to create animation frames animal running 7

Step 8

Hit Space and enjoy!

photoshop how to create animation frames animal running 8

Step 9

If you didn't enjoy it, don't worry, we can fix everything! Just double-click the layer you'd like to change, modify the content (rotate or move what you wish) and Save (Control-S). The change will be automatically applied to the animation. When you're done, open the Timeline menu and Delete Animation—we don't need it for now.

photoshop how to create animation frames animal running 9

5. Draw Animated Line Art

We've got a perfect base for an animation now! Time to add lines to it. Curious how to keep them consistent across the frames?

Step 1

We're going to use a special brush for the line art. Go to Window > Tool Presets to open the panel below. Then, with the Brush Tool (B) active, open the menu and select DP Brushes. My favorite line art brush is DP Comic Inker of this set.

photoshop how to draw line art animation

Step 2

Create a New Layer above the first frame. The head is the only element that doesn't change during the animation (it only changes position), so we can draw it only once. Here's how I did it:

photoshop how to draw line art animation 2
photoshop how to draw line art animation 3
photoshop how to draw line art animation 4
photoshop how to draw line art animation 5
photoshop how to draw line art animation 6
photoshop how to draw line art animation 7
photoshop how to draw line art animation 8
photoshop how to draw line art animation 9
photoshop how to draw line art animation 10
photoshop how to draw line art animation 11
photoshop how to draw line art animation 12
photoshop how to draw line art animation 13
photoshop how to draw line art animation 14
photoshop how to draw line art animation 15
photoshop how to draw line art animation 16

At the very end, hide the base for a moment and fix the shape, if you don't like something about it.

photoshop how to draw line art animation 17

Step 3

Duplicate the head and place a copy over every frame. Adjust their position to the base.

photoshop how to draw line art animation 18

Step 4

Draw the back, and then make the layer more transparent (less Opacity), go to another frame and repeat.

photoshop how to draw line art animation 19
photoshop how to draw line art animation 20
photoshop how to draw line art animation 21
photoshop how to draw line art animation 22
photoshop how to draw line art animation 23
photoshop how to draw line art animation 24

Step 5

Do the same with every element of the body. The smaller the area you re-create on every frame, the more chance the lines will be consistent.

photoshop how to draw line art animation 25
photoshop how to draw line art animation 26
photoshop how to draw line art animation 27
photoshop how to draw line art animation 28
photoshop how to draw line art animation 29
photoshop how to draw line art animation 30
photoshop how to draw line art animation 31
photoshop how to draw line art animation 32
photoshop how to draw line art animation 33

Step 6

Use the Magic Wand Tool (W) on the outside of every frame. If it does select the inside of the body too, locate and fix the gaps in the outline, and try again.

photoshop how to draw line art animation 34

6. Color the Animation

Step 1

Now, make the selection once again. Make sure to select everything outside the body.

photoshop animation line art color cell shading

Step 2

Invert the selection (Control-Shift-I). The inside of the body should be selected now.

photoshop animation line art color cell shading 2

Step 3

Create a New Layer and drag it under the sketch. Fill (G) the selection with any neutral color. Repeat for every frame.

photoshop animation line art color cell shading 3

Step 4

You can now delete the vector bases—they did their job. The filled shapes will be our new bases, but we need to link them with their line arts first. To do this, place your cursor between a base and its line art, hold Alt and click. It will create a Clipping Mask.

photoshop animation line art color cell shading 4

Repeat with every frame:

photoshop animation line art color cell shading 5

What do we need Clipping Masks for? Place a New Layer between the base and the line art, paint something, and see for yourself!

photoshop animation line art color cell shading 6
photoshop animation line art color cell shading 7
1—without Clipping Mask; 2—with Clipping Mask

Step 5

Create a New File for a moment. We need to choose colors for our kitten. You can paint them with a brush, but I suggest you draw them with the Ellipse Tool (U) in Shape mode, so that you can change their color easily. This is what I've chosen:

  1. Main fur color: #e38016
  2. Secondary fur color: #ffead3
  3. Eyes: #1ecc78
  4. Nose: #ffa2b8
photoshop animation line art color cell shading 8

Step 6

Open the Window > Swatches panel. To clear your list, hold Alt and click the first swatch quickly until they're all gone. Then pick (I) the color you want to add, hold Alt and click the empty area.

photoshop animation line art color cell shading 9

Step 7

Create a New Layer clipped to the first frame. Use the DP Comic Inker brush and the secondary fur color to paint the underside. Sharp edges are easier to re-create on other frames than soft ones. Do this for every frame.

photoshop animation line art color cell shading 10

Step 8

Grab the Lasso Tool (L) and draw a ragged selection with it. Then Cut the inside. This way we'll fix the edges. Repeat it for every frame.

photoshop animation line art color cell shading 11
photoshop animation line art color cell shading 12

Step 9

Create a New Layer for every frame and paint the eye and the nose.

photoshop animation line art color cell shading 13

Step 10

Let's see how to add stripes to every frame without painting them one by one.

Find the frame where the front leg is as vertical and straight as possible. Then create a New Layer and paint thick stripes on it.

photoshop animation line art color cell shading 14

Step 11

Use the Lasso Tool (L) to draw "furry" edges on the bottom of the stripes. Fill them with their color.

photoshop animation line art color cell shading 15

Step 12

Use the Lasso Tool again to cut the top part.

photoshop animation line art color cell shading 16

Step 13

Right-click the layer and select Convert to Smart Object. Now the stripes will be easier to modify. Duplicate them, clip if they got unclipped, and drag to the next frame. Adjust the rotation to the next position.

photoshop animation line art color cell shading 17

If needed, use the WarpMode to adjust the shape without re-painting it. When you're done, come back to the frame where the original stripes are, duplicate them once again and go to another "stripeless" frame. Do this with every frame, always using the original to create a copy.

photoshop animation line art color cell shading 18

Step 14

You can use this technique to create stripes on the whole body!

photoshop animation line art color cell shading 19

Step 15

Let's redo the animation. This time we've got too many layers to use the Convert Layer to Frames method. However, the alternative is still simple:

  • Create a New Frame by clicking the white card icon.
  • Show the Clipping Mask with its content, and hide others.
  • Repeat!
photoshop animation line art color cell shading 20

The content of a clipping mask can't be shown without it, so you only need to hide the mask to hide everything that's clipped to it.

Step 16

Test the animation. Check if the stripes work as intended, and fix anything that seems wrong.

photoshop animation line art color cell shading 21
photoshop animation line art color cell shading 22

7. Shade the Animation

Step 1

Create a New Layer and paint shadows with dark blue (#112e6a).

photoshop animation line art cell shading

Step 2

Cut their edges with the Lasso Tool as before.

photoshop animation line art cell shading 2

Step 3

Change the Blending Mode to Multiply—it will make the layer transparent and dark—and lower the Opacity to 20%. Do the same for every frame. To keep consistency, you can duplicate the head as a separate part.

photoshop animation line art cell shading 3
photoshop animation line art cell shading 4

Step 4

Create a New Layer for the light. Use unsaturated orange (#ffd790) to paint the light with the same technique as the shadow.

photoshop animation line art cell shading 5
photoshop animation line art cell shading 6

Step 5

This time use Overlay for the Blending Mode—it has a brightening effect. Change the Opacity to 30%.

photoshop animation line art cell shading 7
photoshop animation line art cell shading 8

Step 6

White should reflect more light, so let's add it. Create a New Layer and paint plain white stripes in the illuminated area.

photoshop animation line art cell shading 9

Step 7

Go to Filter > Blur > Gaussian Blur and select the Radius that makes the stripes blend with the body, but without losing their brightness.

If you want to apply the same filter to another frame, just hit Control-F—it will be applied with the same settings as before.

photoshop animation line art cell shading 10
photoshop animation line art cell shading 11

8. Finish and Save the Animation

Step 1

We're going to add waving whiskers now. Create a New Layer above all the frames and paint them, using black, white, or a creamy color.

photoshop animation whiskers

Step 2

Duplicate the whiskers twice. Leave the original as it is. Select the second one and go to Filter > Liquify, and use the Forward Warp Tool (the one on the top) to change the shape of the whiskers. When you're done, do the same with the third layer.

Now, show the first layer of whiskers for frames 1 and 4, the second for 2 and 5, and the third for 3 and 6. They should be waving now!

photoshop animation whiskers 2

Step 3

Add a New Layer on the top and Fill it with black.

photoshop noise layer grain

Then go to Filter > Noise > Add Noise.

photoshop noise layer grain 2

You can make it brighter by adding Filter > Sharpen > Sharpen a few times.

photoshop noise layer grain 3

Step 4

If you change the Blending Mode to Overlay, you'll see a nice texture applied to the kitten.

photoshop noise layer grain 4

Play with the Opacity to get the effect you like.

photoshop noise layer grain 5

Step 5

Ready to finish it? Use the shortcut Control-Alt-I to change the size. The smaller it is, the more detailed it will seem.

photoshop size change

Step 6

Use Control-Alt-Shift-S to Save for Web. Since we've used very flat shading and few colors, the overall size of the animation should be less than 200KB, which is perfect for most sites. If it's not, reduce the amount of Colors and play with other settings.

photoshop save animation how to make gif

Meow!

Phew, that was a lot of work! But our kitten is finally alive and happy, ready to explore the world. You're now more advanced in Photoshop, so if you liked this tutorial, make sure to check the ones about creating flight animation and the run cycle of the cheetah

I also would like to hear from you—if you're having problems with any of the steps, let me know in the comments section. I read all of them!

photoshop kitten running walking animation pace gait
Did someone say "tuna"?

New Course: Designing Media Kits That Sell

$
0
0

Printed media kits are a driving force behind any promotional campaign and are still widely used today. In Designing Media Kits That Sell, you'll learn all the key components of a media kit, and how to design one for maximum impact. 

Media kit designed in the Designing Media Kits That Sell course

What You'll Learn

Whether you're designing a kit for your blog or for a big-time publication, this course gives you all the tools you need to create a media kit that sells.

Tuts+ instructor Nicki Hart will guide you through everything you need to know to get started designing all the components of a media kit in Adobe InDesign, from the press release to the CD/DVD labels. You'll see how to set up the documents, how to create a strong design, and how to print and assemble all the elements to create a professional-looking media kit.

Watch the Introduction

Start Learning for Just $15

You can take our new course straight away by subscribing to Tuts+. For just $15 a month, you get access to this course and hundreds of others, with new ones added every week.

Learn How to Give Ephemera a New Life

$
0
0
Final product image
What You'll Be Creating

Giving ephemera a new life is easy with a few simple preparation steps. We'll prime our antique paper and then start to paint on the image of your choice. In the end, we'll have a new piece of artwork created using something old as the base.

What You'll Need

Ephemera Painting - supplies
  • Ephemera paper 
  • Drawing paper
  • Glue 
  • White acrylic paint
  • Other acrylic paint
  • Paint brushes
  • Micron felt-tip pen
  • Drawing pencil (4B or 6B)
  • Tracing paper 
  • Sharpie 
  • Tape
  • Photograph or image in your sketch book

1. Prepare Your Paper

Step 1

Tape down your drawing paper to a drawing board or your desk. You'll be painting the ephemera, and you don't want to final painting to be warped by the wetness. 

Your drawing paper should be about 1" larger in both directions than your ephemera so that you have place to put your tape. You want to make sure you don't tape right up to where the ephemera will go, to ensure you have an easier time taking the tape off at the end. So if you left 1/2" margins for the ephemera, put your tape at the 1/4" mark on each side.

Ephemera Painting - taping down your paper

Step 2

Glue your ephemera paper to your drawing paper. I am using rice paste since it's acid-free and archival safe, but you can use Elmer's Glue or even a simple glue stick. If using Elmer's Glue, I would recommend watering it down a tiny bit and painting it on. We're gluing our ephemera paper to another piece of paper to strengthen it and ensure your painting process doesn't ruin it.

Ephemera Painting - gluing down the ephemera

Step 3

Now we're going to paint over our ephemera with watered down, white acrylic paint to seal it. This way your ink won't bleed into the older paper. Add water to your white acrylic paint and carefully paint it over the ephemera. You don't want it to be too opaque. 

Ephemera Painting - painting on the wash

Step 4

The paint will dry less opaque than it first appears. Compare the image below (wet paint) with the following images (dry paint). If it's too light after it dries, paint another thin wash on top. I like to set my work in front of a fan to dry faster. 

Ephemera Painting - finishing the wash on the ephemera

2. Transfer Your Image

There are two ways to get your image onto your ephemera, and both will use the same technique. Because you can't erase pencil easily when it's on top of acrylic paint, we'll be using tracing paper. You can either use a sketch from your sketch book or a printed image; in either case, you can follow the steps below.

Step 1 

Lay your tracing paper over your sketch or printed image. Carefully Sharpie the outline of the subject matter onto the tracing paper.

Ephemera Painting - tracing your image

Step 2

Flip your tracing paper over, and draw over the lines with a 4B or 6B drawing pencil.

Ephemera Painting - adding graphite to the trace

Step 3

Flip your tracing paper over again so the Sharpie side is up. Position it over your ephemera paper where you want your image to go. Then, using your pencil, draw over your Sharpie lines. You want to use enough pressure to make the graphite transfer. You can lift up a corner and peek to make sure it's transferring.

Ephemera Painting - transferring your image

Step 4

Lift off your tracing paper. You should now have your image transferred onto your ephemera.

Ephemera Painting - image transferred to ephemera

3. Paint Your Subject

Step 1

Using solid white acrylic paint (or whatever color your subject is), carefully paint within the outlines of your image. As you can see, I left a tiny ring of pencil lines around the outside. This is because the paint can sometimes pick up the graphite and dirty the paint.

Ephemera Painting - fill in your image with paint

Step 2

You have probably now lost your inner lines. Once your paint completely dries, carefully lay your tracing paper over your image and retrace the inside lines.

Ephemera Painting - re-trace the inner lines

Step 3

Now the fun finally begins! Carefully paint in your subject with solid acrylic paint. For works like this, I prefer to keep things simple. Not much blending or mixing. Instead, I use simple, solid colors. Don't worry about it looking blocky; we'll be covering it with ink. As before, it speeds things up to set your painting in front of a fan to dry.

Ephemera Painting - add color to your image

4. Ink Your Subject

Step 1

Once your paint is completely dry, start to ink your piece with your Micron felt-tip pen. It should flow smoothly over the acrylic paint. I love using felt pens to make fur. Here is where you can go round the outside of the subject with your ink to cover up the remaining graphite. Work slowly and make sure you give your ink time to dry to ensure you don't drag your hand through it and smear ink everywhere.

Ephemera Painting - start inking the image

Step 2

Carefully work your way round your subject until you have inked in the whole piece. You can see that I went in with a little dab of white paint to bring out the cat's eye. Feel free to go back in with paint and then repeat inking in that area if you need to push value.

Ephemera Painting - finish inking the image

5. Final Step

If you have any areas where graphite is still visible, go in with your paint and cover over it. You can see where I did this here on the cat's nose. It would be nice to erase the graphite, but sadly it just smears when it's on top of acrylic.

Ephemera Painting - final image

You've now completely transformed your ephemera paper into a painting!

There are some people who love to keep ephemera safe and sound, but I prefer to give it a new life. You can take this skill and move on to add extra pieces of ephemera via collage. This is a great way to use old maps, letters, photographs, etc.

How to Create Infographics With Connector Tools in CorelDRAW

$
0
0
Final product image
What You'll Be Creating

In this tutorial we'll use some of CorelDRAW's excellent tools for creating infographics and flowcharts. Using the Connector Tools, found in the Toolbox, we'll quickly and easily draw lines from various nodes to create a fantastically designed flowchart. You'll also learn techniques in using the Pen Outline Tool, Attributes Eyedropper, and the Smart Fill Tool.

1. Setting Up the Document's Layout

Step 1

Create a New Document and use the Rectangle Tool (F6) to draw a large rectangle over over your document page. Set the rectangle's color in the Object Properties docker.

Draw a small rectangle and adjust the corner's radius in the Property Bar to 0.22" or so. Hit No Outline under the Outline Pen (F12) and set the fill color in the Object Properties docker.

Draw a rounded rectangle

Step 2

Figure out your infographic's layout by drawing various rectangles and circles with the Rectangle Tool and the Ellipse Tool (F7). Use the Smart Fill Tool to fill your current rectangle (or any shape) with any color and you'll instantly have a copy of that rectangle in a new color, eliminating the need to Copy (Control-C)Paste (Control-V), and recolor singular objects. Set up your fill and outline options in the Property Bar.

Set up your simple shape layout

Step 3

A graphic like this works well with a limited color palette. I chose brown, teal, pink, and white. Group (Control-G) together your objects once satisfied with their placement.

Finalize your layout

CopyPaste, and recolor all of the objects in the group to dark teal in the Object Properties panel. 

Copy Paste and recolor your layout

Place the pasted group behind the original group in the Object Manager docker. Use your arrow keys to move the pasted group down and to the right so it's offset slightly (see below).

Place the pasted group behind the original

2. Using the Connector Tools

Step 1

Using the Right-Angle Connector, connect the top brown box to the brown circle.

Use the rounded right-angle connector

In the Property Bar, choose from a variety of arrow styles for the path's end cap.

Choose an arrow for the connector ends

Adjust the connector stroke's style, radius, and size in the Property Bar.

Choose a connector style in the Property Bar

Step 2

Select the connector and choose a color with the Outline Color Tool (Shift-F12). Choose a color that easily stands out from your background color.

Choose your connector color

I chose a white dotted line with an arrow on the right side of the connector line. Draw another connector line from the top rectangle to one of the rectangles on the side (try the top shape in the left column).

Displaying the color and style choice

Step 3

Let's say you've been playing with different connector lines and styles and want to easily change one or more to an existing color and style. Choose the Attributes Eyedropper from the Toolbox, sample the connector you want to keep, and apply it to the other two connector lines.

Every attribute of the sampled object will transfer over to the object to which the eyedropper is applied.

Use the attributes eyedropper to transfer object attributes

Step 4

Connect the smaller rectangles to each other with the Straight-Line ConnectorTool. Connect the circles to the rectangles with the Rounded Right-Angle Connector Tool.

Use additional connector tools

3. Finalize Your Design

Step 1

If you find you don't like your layout, use the Pick Tool to drag objects around your layout, and you'll notice that the connector lines, unless deleted, will change with the moved object. Additionally, not all of the objects need to be connected or have the drop shadow applied earlier.

Finalize your infographic layout

Step 2

Use the Text Tool (F8) to write out information or filler text on each of your flowchart's objects. Choose header and body text and adjust text attributes in the Text Properties docker. For more on using the Text Tool in CorelDRAW, check out How to Use the Text Tool in CorelDRAW.

Add text using the Text Tool

Great Job, You're Done!

CorelDRAW has fantastic tools for the creation of infographics. From its Text Tool to Perfect Shapes to these Connector Tools, the process of creating various styles of graphics is streamlined and incredibly easy. Check out these relevant CorelDRAW tutorials for more tools in creating informative illustrations:

The final infographic design

Community Project Showcase: Your First Creations—Part Two

$
0
0

New to this project? Check out part one of our Tuts+ Community Project celebrating Your First Creations.

Your First Creations—Part Two

We all come from humble beginnings. And when that dreaded creative block hits, sometimes the best thing you can do is see how far you've come with a little trip down memory lane.

We asked you to take us along your personal journey, from the first art you ever created digitally to what you're creating today, and the results were amazing! Let's take a look!

Past and Present Creations by Our Readers!

Take a look at these incredible comparisons from our readers below. Show them some love in the comments, and feel free to tell us more about your own art journey!

Jenny Le

Past and Present Art by Jenny Le

I'm Jenny Le from Vietnam, and I've been reading Tuts+ since 2010 when I first started learning Photoshop. I was so impressed by the artworks and tutorials here and wished I could create such awesome pieces one day. Here is my first photo manipulation made in October 2010, and one of my newest works from December 2014 named, "Flowers Lullaby".
Follow Jenny Le:DeviantArt | Facebook

Usha Desai

Past and Present Art by Usha Desai

Tuts+ has been my tutor and guide for more than three years. There is nothing as helpful as Tuts+ tutorials on the web to learn vector illustrations. Today, I have included my stock vectors from GraphicRiver and look forward to more challenging projects.
Follow Usha Desai:Facebook

Aundria Martinez

Past and Present Art by Aundria Martinez

As an artist, my joy is dreaming and creating. On the job, that translates into work like invitations, creating custom graphics for clients, newsletter design, and cutting vinyl. At home, I enjoy writing, painting, and making jewelry and other crafts in my spare time. Above are sample character designs. The first is from 2007 when I started experimenting with CG, and the second is from 2012 of a character design for a friend.
Follow Aundria Martinez:Behance

Kiran Venugopalan

Past and Present Art by Kiran Venugopalan

I am Kiran Venugopalan and I'm currently working as a Motion Graphics Designer.
I discovered Photoshop in 2009 by accident (although I have been drawing on paper since I was a kid). Five years later, I have learned so much thanks to Tuts+ and the proof is in the pudding! I work in After Effects mostly, but I love Photoshop and Illustrator too! I am a "Jack of all trades", so I posted my favorite artworks from the years 2009 to 2015. My design process has come a long way!
Follow Kiran Venugopalan: DeviantArt

Alice Catrinel

Past and Present Art by Alice Catrinel

My first "serious" attempt at digital painting was way back in 2007. It was done with only a mouse and I was so proud of myself! Since I lived in a small town at the time, I used tutorials to learn how to draw better, and acquired a tablet several years later. My journey was not without bumps, but I did manage to get this far today.
Follow Alice Catrinel: DeviantArt

Arvydas Venckus

Past and Present Art by Arvydas Venckus

I'm Arvydas Venckus from Lithuania. I've been into pencil drawings my whole life, but when I bought my first tablet I started to take digital art more seriously. During these four years from my first completed digital painting, I made a few mobile game designs, web designs, tons of portraits, some illustrations, murals, 3D architectural visualizations, and the list goes on. Nowadays it's a bit harder to find time for art, because it's my final year in gymnasium and exams are near, but whenever I get a free minute I try to improve as much as I can!
Follow Arvydas Venckus:Behance | Facebook

Franck Beaume

Past and Present Art by Franck Beaume

Hi, I'm Franck (Tuts+ Community Project addict)! There are so many awful projects on my backup drives but I think I've found the worst. It dates back to 2009 and was made for a "photo manipulation" contest. Hope you don't like it! I am a self-educated Photoshop user and in six years of practice I have learned many things, including: always try to improve your skills, push the limits of each tool, be vigilant about details, emphasize quality over quantity, share your works, and take each comment as an opportunity to improve. The most recent project is one of my 2014 personal works, "Stratospheric Jump", made for the 2014 Fotolia 10 Collection Contest.
Follow Franck Beaume:Behance

Iti Shree

Past and Present Art by Iti Shree

I am a beginner and this is my first and latest work!

Trent M. Stier

Past and Present Art by Trent M Stier

My name is Trent M. Stier, and I am out of Omaha, Nebraska. I have been working as a full time Graphic Designer for two years now, and I feel that I improved quite a bit since I started drawing. I visit Tuts+ daily and work through as many of the tutorials as I can, so I know that is one of the major reasons for my improvement.

Get Inspired

Feeling a little left out? If you are new to digital art, feel free to take a look at these learning guides to kick off your own amazing creations. Good luck!

How to Create Realistic Water Drop Reflections in Adobe Photoshop

$
0
0
Final product image
What You'll Be Creating

As part of our series on creating custom Photoshop Brushes from Scratch, I published a Quick Tip on how to capture and create custom water drops and turn them into brushes in Adobe Photoshop. If you missed that, please take a moment and read through it here first: How to Create Custom Water Drop Brushes in Adobe Photoshop.

This Quick Tip is an extension of that lesson. But here we will use those brushes to create a photo manipulation of realistic water drops.

1. Gather Resources

To complete this project you will need the water drop brushes from the previous Quick Tip. You can download those with the Download Attachment link associated with this tutorial.

You will also need an image to use for the backdrop. Just about any image can work, but the effect is better with one that looks gray and rainy. I used this Street Scene.

2. Install Brushes

If you haven't already installed the water drop brushes, go to Edit > Presets > Preset Manager. Make sure the Preset Type is set to Brushes and press the Load button. Navigate to the CustomWaterDrops.abr file to install the brushes.

Use the Preset Manager to install the brushes

Notice the five new water drop Brush Presets in your brush library.

3. Add the Basic Water Drops

The idea of this project is to simulate the appearance of looking through a window that has a splattering of rain drops on it. So the first and most obvious step is to create those drops.

Step 1

Open the street scene image and add a New Layer (Control-Shift-N) called Water Drops.

Add a layer for the water drops

Step 2

Fill the layer with white by going to Edit > Fill and selecting White from the Contents pull-down menu.

Fill the layer with White

Switch to the Brush Tool (B) and open the Brush Presets panel. Make sure the foreground color is set to Black and use the new Water Drop Brushes to add a splattering of water drops.

Step 3

Use the Magic Wand Tool (W) with a Tolerance of 5 and the Contiguous option enabled. Click on a portion of the white background area to create a selection of the white background but not the water drops.

Select the white backdrop

Create a layer mask by going to Layer > Layer Mask > Hide Selection.

Mask out the water drops

Step 4

Change the layer's Blending Mode to Overlay. Then double-click the layer to open the Layer Style dialogue box and add the following style settings.

Add an Inner Shadow layer style:

  • Turn Off the Use Global Light
  • Size: 24 px
Inner Shadow layer style

Add an Inner Glow layer style:

  • Opacity: 34%
  • Glow Color: #f2f3f5
  • Size: 10 px

Add a Drop Shadow layer style:

  • Turn Off the Use Global Light
  • Distance: 12 px
  • Size: 9 px

So the water drops should now look something like this.

Water drops with layer styles

4. Create the Background Effect

If this were an actual photograph and the camera were focused on the water drops, the background would be out of focus.

Step 1

Duplicate the background with Layer > Duplicate Layer or press (Control-J). Then run a Gaussian Blur filter on the copy. Use a Radius of 10 px.

Blurred Background

Step 2

Control-click on the Water Drop layer mask to create a selection. Then make sure the blurred background layer is the active layer and go to Layer > Layer Mask > Hide Selection. Now the blurry effect is removed from the water drops.

Remove blur from the water drops

Step 3

Add a Hue/Saturation adjustment layer and reduce the Saturation to -29 and set the Lightness to +7. Then clip the adjustment layer to the blurred background layer with Layer > Create Clipping Mask (Alt-Control-G).

Clip a HueSaturation Adjustment layer

Step 4

Add another New Layer (Shift-Control-N) called Vignette. Fill this layer with white and set the Blend Mode to Multiply. Then go to Filter > Lens Correction (Shift-Control-R). In the Custom tab, slide the Vignette amount slider down to -74.

Lens Correction filter

This will add a subtle darkening to the outside edges of the image.

Add vignette to make the drops stand out

5. Add Reflections to the Water Drops

A close study of actual water drops reveals an amazing phenomenon. Each drop contains a full reflection of the surrounding environment. The reflection is distorted due to the curve of the water surface, but it is undeniably there. Adding this tiny detail really helps the illusion become more convincing.

Step 1

Create another Duplicate of the background layer with (Control-J). Use Free Transform (Control-T) to Scale the copy down to about half the size of the original. Then move this layer up to the top of the layer stack.

Add a scaled down copy of the background to the top of the layer stack

Step 2

Control-click the layer thumbnail to create a selection around it. Then go to Filter > Distort > Spherize. Set the Amount to 100%.

Spherize setings

Step 3

Cancel the selection with Select > Deselect (Control-D). Then Duplicate the distorted layer with (Control-J). Hide the original layer and use Free Transform (Control-T) to Move and Scale the copied layer to fit over a single drop of water.

Move distorted reflection over a single drop

Change the layer's blending mode to Overlay and reduce the Opacity to 60%.

Blending the reflection into the drop

Step 4

Continue to make copies of the distorted layer until all the larger drops have reflections over them.

Several reflection layers

Step 5

Shift-click all the reflection layers and group them together with Layer > Group Layers (Control-G)

Group Reflection Layers

Control-click the layer mask for the Water Drops layer to create a selection. Then use the selection to create a mask for the Reflections group with Layer > Layer Mask > Reveal Selection.

Masking the Reflections group

Step 6

Add an Inner Glow layer style to the Reflections group with these settings.

  • Opacity: 48%
  • Glow Color: #eaeae6
  • Source: Center
  • Size: 49 px
Inner Glow for reflections group

Step 7

For a more distinctive reflection effect, move the Reflections group beneath the Water Drops group.

Brighter reflections by changing the layer order

Awesome Work, You're Done!

Final Water Drop Effect

Keep in mind that the techniques and settings presented here are just one way to approach this effect. These are not magical settings. You should experiment with images of your own and find what works best in your own project.

If you've tried this for yourself, I'd love to see what you've created with it! Add your work in the comments below.

Facebook JPEG Compression: How to Get the Best Image Quality on Your Timeline

$
0
0

We’ve all done it, uploaded a picture that looked fantastic in our editing software only to recoil in horror at the compressed mess that now sits on our Facebook timeline. In this Quick Tip, I'll help you get the best quality result possible when uploading your pictures.

Deciphering the Guidelines

Facebook has given us these guidelines:

facebook guidelines
Facebook's guidelines on image uploading

So let’s see what works. We’ll start with regular images.

Regular Images on the Timeline

Facebook suggests we upload at either 720px, 960px or 2048pxwide for the best results. This is the picture I’m going to be using for our comparison:

example picture
Example picture to use on Facebook

I saved the picture at each of the mentioned widths and uploaded them; then saved the Facebook-compressed versions back to my computer.

The first thing to note is the difference in file size. If I go through each one we’ll get lost in numbers, so to take the middle width; 960px, the file I started with was 523kb and the one I saved back from Facebook was 86.9kb so already we know there’s going to be drastic compression.

Here are all three sizes at 100% after Facebook:

facebook compression comparison
A comparison of the three suggested widths to use on Facebook

We can note artifacting on all three pictures, particularly around the top of the bridge so I’ve focused on that for demonstration purposes. The larger image (top left) has the least obvious signs of compression and most people wouldn’t be looking at it this closely so it would be even less noticeable, unlike the 720px which is as big as it’s ever going to get.

I tried the same file sizes with PNG instead of JPEG and got similar results, so I won’t bore you with them here.  It’s worth noting that PNG creates a larger file-size so Facebook is just going to want to cut that down (a bit more about this later). The only time I find this makes a real difference with timeline images is if they include text, like if you’re uploading something with a logo, for example.

Cover Photos

This is the photo I’m going to use for my cover:

example cover photo
My example cover photo

If I tried to upload this at the full resolution (some 7000px wide), this is what happens:

facebook cover with compression
Facebook cover with full resolution picture used

Not good at all. Facebook recommends firstly resizing to 851 x 315 so let’s try that:

facebook cover with resized photo
Facebook cover with resized photo but still over 100kb

Better, but still a lot of distortion around the puffin in particular. This picture is still almost 300kb though and Facebook recommends100kb so this time, I used File > Save For Web (Control-Shift-Alt-S) in Adobe Photoshop and adjusted the Quality get the final image under 100kb:

save for web
Use Save For Web to get your image under 100kb
facebook cover under 100kb and resized
Cover at 851 x 135 and saved at under 100kb 

As you can see, this gets the best result yet. Sometimes I do find with cover photos that I can get a slightly better result using a PNGrather than a JPEG, but as I mentioned earlier, it’s harder to keep those file sizes down to below 100kb so try both and see which works for you.

Summary

Here are some points to remember:

Getting the Best Results for Timeline Images:

  • Upload a large size
  • Save at maximum quality
  • Use PNG for images with text (logos)

 Getting the Best Results for Cover Images:

  • Resize to 851 x 315
  • Use Save For Web and get down to below 100kb
  • Try JPEG and PNG to see which looks best

The images are never going to be completely without compression, not unless Facebook change how they do things, but we can get them to look much better with a little tweaking here and there.

Twitter JPEG Compression: How to Create the Best Quality Image for Your Feed

$
0
0

For pictures on your feed, Twitter don’t appear to restrict us nearly as much as Facebook does, so posting a decent quality picture to a feed should be relatively easy, right? Well, it's trickier than you might think. This Quick Tip aims to get your JPEGs displayed in the best way possible.

Twitter Feed Pictures

Twitter has given us these guidelines:

twitter guidelines
Twitter's Guidelines

We’re focusing on JPEG in this Quick Tip so all examples are in that format. It would seem that with a 5MB limit we already have a lot more to play with than Facebook. But is that necessarily the case? A 5MB file might be compressed by Twitter down to the same as a 3MB or a 1MB file with varying states of distortion. So let’s find out!

example picture
Our example picture

I uploaded three versions of my above example to my Twitter Feed; a 3000px (4.2MB) file, a 2000px (2.2MB) file and a 1000px (734kb) file. This is how they came out:

pictures after twitter compression
Pictures after Twitter Compression

I saved each image which had been auto-resized to 600px by Twitter (you can only save the preview but I could screen capture the full-view version which you see above) and noticed that the file sizes were very interesting. 

The 3000px 4.2MB image had come out at 47.2kb, the 2000px2.2MB at47.5kb and the 1000px 734kb at 52.4kb.  So the larger of the images had actually gone down to the smallest size. Interesting when you look at the compression on each. The largest image has some compression artefacts but it’s also lost a lot of its sharpness across the whole image. The smallest is now the largest file size, but the compression is very pronounced around the outlines of the people. 

As in the case of Facebook, it seems that larger images fair better; but not too large. In my own experience, somewhere around 1500-2000px is about right and if you can lower the file size with Adobe Photoshop's Save For Web option then all the better.

Header Photos

This is my example:

test header
Example header

Upload of a High Resolution Image

Firstly I tried this at very high resolution, 5000pxwide and 8MB – the max Twitter will allow is 10MB.

large resolution twitter header
Large resolution Twitter header

That looked pretty good to me. It’s cropped in a little but as it was a hi-res image, that’s okay. You can see there’s very little visible compression here.

I was pretty smug, until I hit save:

after saving
The compression after saving was pretty bad

The compression happened after saving the good looking image. You can now see compression around the edges and an overall loss of sharpness

So what if we upload the same thing but after resizing to Twitter’s recommended 1500 x 500px?

Upload of Twitter's Recommended Size Image

Recommended size for twitter header
Twitter's recommended header size

It’s cropped in like the other did but the compression is nowhere near as bad. Here are the comparisons side by side:

comparisons at 100
Comparisons of a large size and Twitter's recommended size at 100%

You can see the loss of definition in both but the one on the left is far worse, with quite visible distortion, especially around the writing on the boat.

What If...

Twitter's guide's clearly worked better than a full size image but I wondered; what if I took their size, kept the same ratio but doubled the size. I created a 3000px by 1000px image and tried that:

Twitter header ratio doubled
I tried doubling Twitter's recommendation, 3000 x 1500px

Aha! This looks much better to me; there are still signs of compression but you can see from the 100% preview in the corner, the writing on the boat is much clearer and the edges of objects have far less visible artefacting.

Summary

Third party websites are always going to compress our images, we just have to find the best way possible of displaying them with these restrictions. Their guidelines are there for a reason but that's not to say having a play around won't get you better results.

Getting the best results for feed images

  • Upload a large(ish) size, ideally between 1500px-2000px
  • Save at maximum quality possible
  • Reduce the file size with Save For Web

Getting the best results for cover images.

  • 3000px by 1000px worked well for me
  • It must be under 10MB 
  • It will crop in but the results will be far better than resizing to the recommended 1500px by 500px

See Also

Facebook also compresses your images. Yesterday we looked at how to get the best results for your timeline.

Creative Arabic Calligraphy: Square Kufic

$
0
0
Final product image
What You'll Be Creating

Square Kufic (kufi mrabba'), sometimes known as bannâ'i ("masonry script") is a particular style of Kufic that is going to allow us to create composition using the basic structural forms of the letters. Indeed, Square Kufic (abbreviated SK) is the barest of all Arabic writing styles, and an interesting precursor to pixel art, although it was originally made up of bricks and tiles and used on a large scale in architecture.

This style is absolutely not concerned with legibility: it is understood that the message, the Word, is there, and gazing upon it is enough to receive its blessing. Literacy may have been limited in the past, but beauty was always accessible to all, and it is the beauty of the pattern that matters. In its simplest form, SK is austere, and derives its beauty from the purity of its austerity; but it lends itself to clever, even playful variations only limited by one's creativity. More than any other calligraphic practice, creating in SK feels very much like solving a puzzle, giving it particular appeal for problem-solvers.

The following selection of examples gives an idea of the possibilities offered by this style.

Panel from the Topkapi scroll
Panel from the Topkapi scroll, showing the grid underlying the design.
Mosque-shaped composition
Mosque-shaped composition, Turkey.
The first verse of the Quran composed in the shape of the name Muhammad
The first verse of the Qur'an composed in the shape of the name Muhammad, itself in Square Kufic.
Composition with an overlapping effect
Composition with an overlapping effect.
Combination of calligraphy and geometry
The minaret of the Royal Mosque in Ispahan
The minaret of the Royal Mosque in Ispahan, and the basic module making up its decoration (photo by Patrick Ringgenberg)
Clever design where the black and white spaces both spell Allah
Clever design where the black and white spaces both spell "Allah"

Basic of Square Kufic

One Rule

Square Kufic has only one strict rule: absolute evenness of full and empty spaces. We can observe this in the following classic design for the word Allah, where the initial Alif is placed horizontally over the rest of the word (a liberty typical of SK) so that the overall shape is a square.

The rule of evenness

Nowhere is the black or white thicker than the unit (which is one square of the grid). This is evenness. Contrast this with the following two errors:

Errors to look out for

On the left there is a block of four empty spaces, on the right a block of four full spaces. Either way, the evenness is lost. In a larger and more complex composition, such accidents would stand out as they break the overall balance. This, then, is the one big mistake to watch out for when composing in SK. It can be trickier to notice than in these examples. 

Below, for instance, is an early composition of mine with one serious (and unsolvable) mistake that I never noticed at the time. Can you find it? (The answer is in the downloads folder, spot-the-error.png)

Spot the error

What this rule implies for the creation process is that we must find ways to fill all the space so that no irregular white is left. To this end, the following exceptional liberties are taken.

Liberties in Square Kufic

Change of Direction

In a Square Kufic text, each word can face in a different direction. Every horizontal and vertical in the grid is a potential baseline. Not only this, but the direction can change mid-word, as seen here in a rendering of "Allahu akbar": after the Kâf in أكبر, the connecting line rotates 90º and continues upward, so that the last two letters are on a baseline that is perpendicular to the original. This effectively fits the sentence into a square (a desirable shape both because it looks complete, and because it can then be used as a tiling unit). In fact, this change of direction can even take place mid-letter, for the more elaborate letters such as Sâd or Sîn.

Change of direction mid-word

Here is a much more complex composition where I have assigned different colours to the four different orientations of the words (as best I could make it out), and circled sudden rotations. What this doesn't show is the direction of reading (only possible for one who already knows the verse!), which is in a clockwise spiral that begins in the lower right corner and ends in the centre.

Rotations in a large composition

Placement

The following composition, from the façade of the Royal Mosque in Isfahan, is just legible enough to recognize the sentence: "الله هو الذي لا اله الا هو". Knowing this, we notice that the three circled Alifs are placed quite liberally, where they conveniently fill the space, not where they would normally be in the word.

Liberal placement

That said, the words themselves are arranged liberally (in addition to being rotated) so that they fit. The displaced letters are still adjacent to the word they belong to, and the displaced words to those they precede and follow in the sentence: as long as this condition is fulfilled, order and direction can be manipulated.

Letters

Letters still need to connect as they normally would, and take on the form appropriate to their place in the word, but they can be distorted to often extraordinary degrees to fill the space. The following chart shows some (by no means all) examples of forms distorted beyond the normal use of letters.

Letter chart 1
Letter chart 2

Notes:

  1. The isolated Alif can grow a head or a foot as needed.
  2. Some letterforms are no longer distinct: the differences between ن and ب, or ف and ق, are no longer relevant.
  3. Letters that would normally be extended, such as ب or ط, can be extremely compressed. Conversely, narrower letters can find themselves very stretched.
  4. Tails or heads can fold in to make a letter into a rectangle, and that can be stretched at will. 
  5. What would normally be a discreet and optional notch is here emphasized into a filler extension, changing the silhouette of the letter altogether.
  6. The relationship of the letter to the baseline no longer matters.
  7. Despite being in final or isolated position, these letters have no tail, making them easier to fit.
  8. Mid-letter change of direction.
  9. The ascender has here been moved to an unconventional position.
  10. The initial form of ع can here also be used in a medial position, where it can be helpful because it is a rectangular shape that can stretch upwards.

Dots

The diacritic dots (the dots that differentiate letters) are often left out of SK compositions altogether. When included, they can add visual interest, and this can be enhanced by giving them a contrasting colour or shape. Like letters and words, they can be placed with a certain amount of liberty.

Panel including dots in the composition
Panel from Medersa Bou Inania in Morocco, reading بركة محمد, where diacritic dots are used.

Omitting diacritic dots, on the other hand, opens the door to using filler dots: they are not part of the script at all, but serve to fill spaces when that can't be done otherwise, such as the bottom left corner in this rendering of Rahmân.

Filler dot

Sometimes it's unclear whether such dots are really fillers, or diacritics included when and if convenient—for instance, does this dot above actually belong to the Nûn that sits on top of the word? In complex compositions where legibility is jettisoned, it may be pointless to try and find out. When composing, out of artistic perfectionism, I would personally outline two rules of thumb:

  • Either use diacritic dots in full, or none, in which case filler dots can be used.
  • Diacritic dots can be made to stand out by a change of colour or shape; filler dots should blend in with the design.

Repetitions and Rotations

Many of the historical examples we've seen tend to fit a word or sentence in a square, or at least a rectangle. This is not a necessary feature of SK, but an easy way to create large patterns (as opposed to using a long text). Squares, indeed, can be tiled, whether by repetition or rotation, or a combination of both, with no trouble—just make sure to leave half a unit all around. When two tiles are put together, this will add up to one unit, preserving the rule of evenness.

Tiling squares

Rectangles can also be tiled, but it's not so simple to create a finite pattern with them. If the rectangle's ratio is random, all we can really do is repeat it in one direction, for instance as a cornice, or rotate it and assemble it as shown below right, to create a square composition. Bear in mind that the longer (or narrower) the rectangle, the bigger the space left in the centre. Unless you intend to create a design in that space, you really want it to be as small as possible. 

Tiling random rectangles

Rectangles with a regular ratio (1:2, 1:3, 1:4 etc) are preferable to work with, because they can be assembled into squares, which can then be rotated and so on more freely. For instance, here's a complex composition made possible (and simple) by a 1:2 rectangle.

Tiling a rectangle with a regular ratio

Important: Don't forget to include the extra unit that runs around the word in your calculations! If you count the height and width of this last design, it is 11x23; only by adding the extra unit do you get 12x24, which is the 1:2 ratio proper. The calligrapher who designed this motif was experienced and aware of this. If he had made the text into a 1:2 ratio prior to adding the surrounding space, it would have completely messed up any attempts to tile it.

Measurements without and with the extra unit

As a matter of interest, here's the composition of this last tile, and a similar neighbouring one: they are both made of one sentence that has been rotated and added to itself to create the rectangle.

Rectangles made of mirrored words

Deliberate Spaces 

I have said above that evenness is a rule that must not be broken in SK, because it creates unsightly irregularities in the overall pattern. However, leaving regular spaces, so that they create a pattern within the pattern, is a skillful bending of that rule, as is leaving a large central space where something different can happen. Such is the case below, where the ascenders are skillfully connected to create a geometric knotted pattern. The diagonal positioning of the pattern, contrasting with the text, only adds to the striking overall effect.

Central geometry

Taking It Further: Other Grids

The downloadable Exercise folder that accompanies this course contains a square grid template for you to print out and work on. You will also find there a triangular grid and different angles of skewed grids, because the principles of Square Kufic can be applied on any grid, including bent ones!

Skewed Grid

A skewed grid functions the same as a square grid because its units are also four-sided—all that changes is the angle at which the two sets of lines are set (so the square units become diamond-shaped). This produces an isometric effect, or fake perspective. If we take, for instance, our earlier الله اكبر design and draw it on a skewed grid, the result seems to be seen in perspective. (The reason this perspective is "fake" is that the lines are parallel and will never meet in a vanishing point.)

Skewed grid

In the design below, the direction of the grid is different in each of the arms of the star, resulting in an optical illusion: we see a folding effect. A similar feel can be achieved by combining a skewed with a square grid.

Star combining different skewed grids

Triangular Grid

This is slightly different, as this grid requires three sets of lines, set at 60º to each other (the unit is an equilateral triangle). Rather than squares and rectangles, this grid frames compositions in triangles and hexagons. You can see the grid behind the following design (and note in passing the central name, Ali, which is repeated six times in both white and red!)

Hexagonal composition using the triangular grid

The triangular grid is confusing at first because we are really not used to working with a triple axis. To get accustomed to it, print out Triangular-grid.pdf and start by isolating a single triangle in it. You can't go wrong—any triangle you draw along the grid lines will be equilateral.

Basic triangular grid

So, instead of just vertical and horizontal, we have three possible directions: leaning forward, leaning backward, and horizontal. How do our letterforms translate into this new frame of reference?

The three axis

Here's a rule of thumb (but not cast in stone): Horizontals are still horizontal, verticals translate as leaning forward, and closing angles translate as leaning backward.

Letters in the triangular grid

Try a few words in the reference triangle, making sure to fill it completely: that is the equivalent of fitting a word into a clean square.

Fitting a word in the triangle

More Grids

There is no end to the grids that can be created, once we start feeling comfortable with the logic of SK. The design below, for instance, seamlessly morphs from a square to a concentric grid. There is no set method to it: the calligrapher drew concentric circles based on the square grid (looking at the vertical and horizontal white lines, we can see how the distance between the circles is equal to a square unit), and used visual judgment to estimate when the straight lines could begin to follow the curves instead. The transition is subtle and the overall effect surprisingly successful.

From square to concentric grid

Step-By-Step Creation of a Square Kufic Design

Here's a walkthrough of the creation of a design from a sentence. For this I selected two lines from a poem by Lebanese master calligrapher Samir Sayegh:

قاف اخر الطريق
قاف نهاية العاشق

"[The letter] Qâf is the end of the road [tarîq]; Qâf is the end of the lover ['âshiq]"

For clarity of the diagrams, the process was drawn in Adobe Illustrator, with View > Show Grid and View > Snap to Grid activated. It can just as well be done the traditional way, however: on gridded paper. A fine grid (such as in the attached file Square-grid.pdf) is better to ensure the design fits your paper.

Step 1: Visualizing

The very first thing I do is write the word or sentence in square characters, without trying to solve anything, just to see what I'm working with. Since the word قاف occurs twice, I tried writing it two different ways. I'm unsure at this point whether I'll use the dots or not.

Process snapshot 1

What I note at once is that the second sentence is much longer than the first, and cannot be compressed (there is no long letter I could shrink). If I want to make it shorter, I'll have to move these groups of letters (circled red) on top of the preceding ones, but that would add a lot of height; or I can omit the second قاف (circled green). On the other hand, there is a ط in the first sentence which I could stretch (circled blue) to make that sentence longer. For now these are just possibilities I bear in mind, because I don't have a set idea of what I want the result to look like; I'm exploring what these two lines can offer.

Step 2: Solving the Spaces (First Attempt)

Next, I see what I can modify in the first line to fill those empty spaces.

Process snapshot 2

Not bad, but the ط doesn't work. However, if I raise the overall level by one more square, I can make its ascender bend back over the letter to fill that space, like so.

Process snapshot 3

This does work: I have succeeded in making a rectangle out of the first sentence. Yet I'm not happy with this, because I'm working with two sentences, and if I isolate them both as closed shapes like this one (which is relatively easy), there will be "seams" in my final composition; it will not be an integrated whole. So I backtrack a bit and return the letters in this test to proportions that I find pleasing. The bottom works well so I keep it. I give the word قاف a different colour so I can see it.

Process snapshot 4

Step 3: Second Attempt, Differently

Now, this is almost luck, but the gaps above the words are quite clean and can be filled by straight lines, as shown below in pink. They also measure an odd number of units, which is desirable because, as shown here, lines inserted from above would fit in neatly and respect the gap-full-gap-full sequence. The only place where there's a clash is over the ط, but as I can easily extend that letter to get the additional space I need, there's no problem here at all.

Process snapshot 5

So, just to see how that pans out, I bring up my second sentence and rotate it 180º, to see whether it could fit in the gaps of the first. Much of the process in SK is trying possibilities until you hit on something you can work with—in time that becomes streamlined as you come to instinctively ignore directions that would lead to a dead end.

Process snapshot 6

I colour the individual words so I can see better, position the top sentence so there's no clash, try to fill the gaps with the dots I hadn't included so far... An obvious problem is the difference in length which I spotted earlier.

Process snapshot 7

Step 4: Solving Length Disparity

I already know there's nothing I can compress to solve this, so it's time to try some directional changes. I rotate the word on the far left to see if that would help. This has potential, as filling the remaining gaps would not be difficult, and as for the circled letters, which stick out so badly, I can swap them both for a form that will be flush with the rest of the line—that's why I've been ignoring them so far. 

In the meanwhile I have decided there would be far too many diacritic dots if I included them all (21, to be exact), so I make a decision that is only appropriate for this specific text: I will only include the dots that belong to the letter Qâf ق (which appears four times), since these two lines are about this letter. This way, I can enjoy the visual interest that dots bring, while making Qâf stand out in the design, which makes sense here.

Process snapshot 8

Step 5: Trying Something Else

At this point I have an idea and start a different sketch to try it out: can I have the ق in the centre, with the four other words of the poem wrapping around it in a square? 

Process snapshot 9

After some moving around and modification of letters, I manage to form a block around the Qâf. The remaining blank space can be filled by its two dots, which I had originally omitted. But this shape is not a square, nor an good rectangle.

Process snapshot 10

To make it a square, I would have to reduce its height by four units so it fits the red square...

Process snapshot 11

... or reduce its height by two and increase its width by two, to fit this other red square.

Process snapshot 12

This I manage to do, but the result is frankly not exciting. Also, I've had to do some extreme manipulations that, while not forbidden, just don't sit well with me: the extra-compressed Tâ' ط, the Râ' ر so tall it looks like a Lâm ل, the Alif ا nowhere near where it should be, and the two dots that you'd never guess belong to Qâf.

Process snapshot 13

Step 6: Return to the Original Plan

I therefore abandon this idea and return to the two lines fitting together. A few modifications are enough to fully fill the gaps and merge both lines into one rectangle.

Process snapshot 14

Step 7: Finalizing the Module for Rotation

The word at the left end can easily be fixed to be part of it, as below...

Process snapshot 15

... but I decide to leave it out. The longer the rectangle, the bigger the central space when it is rotated to create a square, so leaving that word out to have a shorter rectangle makes for a tighter final composition.

Process snapshot 16

Step 8: Enhancing the Composition

Now I bring back, in a different way, my idea of having Qâf, the subject of the poem, at the centre. This central space is an entity of its own and could contain anything, even an image or a different calligraphy style. Here I'm going to stick to SK, but I am free with the scale, so I can create a design and then scale it up to fill the space. Only the space is square, so once again I'm looking for a square-fitting design. While the Qâf on the left is neat and a perfect square, I very much want to include the dots, so I'm going to go with the one on the right...

Process snapshot 17

Here's how it looks after being made to fit the space. I'm not satisfied—it just looks too blocky in this size—so I'm going to try something else.

Process snapshot 18

I rotate the design and scale that up: much better. There is a pleasing contrast in scales, but the central design is still small and intricate enough not to jar.

Process snapshot 19

Step 9: Colours

I finalize it with colours, picking out the pattern of dots in a contrasting hue.

Process snapshot 20 final

This was an insight into how composing in Square Kufic may go. Work processes are highly personal and develop organically with practice. All you need to begin exploring this style are the grids included here, a pencil and an eraser—and patience, as it requires much trial and error in the beginning. I recommend starting with individual words on a square grid before moving on to multiple-word compositions, skewed grids, and finally the triangular grid!

Nomadic Designer Toolbox: Tips, Services & Hacks

$
0
0

9-5 is fast becoming an outdated concept and has proven to be counter-productive for many creatives. Freelancers and location-independent designers are seeking for new ways to live, work and travel. The digital nomad movement has been around for some years now but just recently started to get serious traction. As a digital nomad myself I’d like to present my adventurous lifestyle whilst providing you with some tools and further information on getting started with your own adventures.

Chiang Mai, Thailand

What is the Digital Nomad Lifestyle?

What if I told you that it would cost just $641 per month to live in exotic Chiang Mai, Thailand. For that you get cafés, incredible food and culture, compared to $4,854 per month in San Francisco or a massive $5,332 per month in New York? According to Nomad List, there are ten cities worldwide where you can live and work comfortably for under $1,000 per month.

Nomad List
The quite brilliant Nomad List by @levelsio

Imagine how much you could see and experience, whilst saving up at the same time!

Our generation might just be the luckiest ever, especially if we look at things in relation to opportunities and freedom. I always dreamed about traveling the world, exploring places I’d seen on TV and in magazines while at the same time working hard to become a designer.

Then about half a decade ago it hit; the digital nomad movement began. Through publications like Tim Ferriss’ The 4-Hour Work Week and Chris Guillebeau’s The Art of Non-Conformity it became clear that 9-5 was becoming a dated concept for work and that the corporate ladder may not be the best choice for every career.

In the past year I’ve read a lot about digital nomadic adventures from Pieter Levels, Jon Yongfook and Noel Tock, I’ve been fascinated by the idea of traveling and working at the same time, especially since my skill-set and the work I do allow me to do so.

The digital nomad lifestyle is, in essence, a minimal lifestyle based on traveling the world and doing digital work, whether that be writing, designing, programming or anything else that necessitates being online. 

Work Routine

Discipline and a sound work routine are the only way to get things done on the road. Moving through different time zones, unknown places and new cultures you will step out of your comfort zone, you will be excited, you will be terrified, sometimes you’ll feel euphoric, sometimes lost and lonely.

Develop Your Morning Routine

For more than six months I’ve been getting up early no matter the time zone. At one stage that meant 6am; now I am rising at 5am, whether in Budapest, Kuala Lumpur or Los Angeles. I exercise five days a week, which helps me recharge my batteries and start each day with a clear head. I’ve started meditating, using guidance from Calm, Omvana and currently Headspace.

httpswwwheadspacecom
www.headspace.com

However, you don’t have to become the early bird to get stuff done, I don’t believe in the 9-5 routine in all cases; you are different and so am I. Experiment and analyse how you work, identify your peak hours, notice when you feel down. Plan your day to work smarter, not harder. I tend to be more creative and focused in the early morning, this is when I do most of my writing and designing. Emails and social media literally drain my energy so I usually leave those for the afternoon when I don’t feel like doing creative work.

I highly recommend reading some of the My Morning Routine interviews where you will find hundreds of different routines from artists, writers, designers and entrepreneurs.

Where do Digital Nomads Work From?

There are many ways to get the job done. If you use Airbnb, make sure to ask your host about Wifi speed and alternative ways to get online. In many places in the world you simply can go to a coffee shop with free Wifi and work there.

Get $25 credit for your next trip on Airbnb.

Cafés

Cafes 4 Nomads is a great tool for finding cafés to work from in Thailand and Australia.

Workfrom lists places to work with an ability to filter results and find a place that is quiet or has food.

Work From Cafe has a huge collection of cafés around the world with short evaluations on service, food, wifi speed etc.

Co-working Spaces

Another very appealing option is co-working spaces. You don’t just get a comfy place with fast internet and coffee supply but amazing like-minded people around you. I personally like Hubud, The SEA and LineupHub.

Copass allows you to work from hundreds of co-working spaces on the planet with one single membership. The freedom to work and connect to awesome folks anywhere.

ShareDesk marketplace provides a platform for mobile professionals to discover and book work and meeting spaces on the go–by the hour, day, or month.

Desk Surfing gives you the freedom to work where you want. And who you want to work with. Desksurfing is co-working at any given place.

Nomads to Follow and Learn From

Digital nomads are the types of people who explore and share their experiences and knowledge in order to help others who aspire to do the same thing. Their goal is simple; to inspire people to pursue something more than just an average lifestyle.

I can’t benefit from digital nomads as “mentors” as they are spread out all across the world, but by reading and studying their work I am able to learn, conceptualise my own journey and expect the unknown from people who have been there. Digital nomads are eager to help if you ask.

Below is a list of people I recommend you start following, reading their blog posts and interacting with in order to learn more about their lifestyles. Entrepreneurs, writers, bloggers, designers, programmers, photographers; there are many different people to follow and be inspired by.

Jon Yongfook is a stylish entrepreneur running Beatrix, an app for social content discovery and scheduling. You’ll love his 1 Year as a Digital Nomad - How to Build a Business by the Beach article with numbers, costs and experience running a startup from by the sea.

Pieter Levels is a serial entrepreneur, launching 12 startups in 12 months having launched Nomad List, #nomads and many more things related to his digital nomadic lifestyle. He writes about startups, lifestyle and traveling.

Kavi Guppta is a nomadic writer and journalist working with Forbes and currently residing in Perth, Australia. Kavi shares interesting stories and photos from travels with his wife.

Noel Tock is an entrepreneur, designer and programmer who has been vagabonding all around the world–speaking, working and building businesses.

Tomas Jasovsky is a designer who travels the world with his girlfriend and blogs a lot about their experiences.

Marina Janeiko is a UX designer and co-founder of the What’s It Like startup. She actively shares traveling and business tips, writes about and interviews digital nomads on the Nomad List blog.

Alex Mathers is a nomadic illustrator, designer and writer. Alex shares a lot of valuable advice on running your own business and writes great books for creatives.

Pete Rojwongsuriya is designer, entrepreneur and photographer. He’s founder of Travelistly and Bucketlistly; startups which bring you travel and life inspiration. Pete shares amazing photos from his journeys as well as informative blog posts.

James Seymour-Lock is a nomadic designer and co-founder of Simple as Milk design agency. He blogs about his experiences, workflow and travel adventures whilst sharing amazing photos.

Productivity Tools

“Work smarter, not harder” is a mindset most digital nomads need to adopt in order to have more time to explore and enjoy traveling. To do this identify the 20% of your work that produces 80% of outcome and stick to that (you can’t do everything, after all).

Rise early, do some productive work and go out to the beach, try out hiking, surfing, sightseeing, come back and do the rest of what you’ve planned for the day.

There are many cafes with the kind of cozy environment that will inspire you and get your creative juices flowing. Move around and work in blocks is a method presented by Buffer, suggesting you perform one set of tasks in one cafe then move around and do the rest elsewhere.

Communication

While being a digital nomad you’ll face many challenges inherent to being in remote places and different time zones. Communication is key to a successful nomad’s career. Designers and stakeholders alike have to think about leveraging technology to get as smooth and clear communication as possible with clients or colleagues.

Nomads I know (and from personal experience) mostly use Skype and Google Hangouts for team/client chats, Basecamp for client communication, Slack and HipChat for internal communication.

File Sharing

Big files can become a nightmare when you go to places with slow internet, however, you should always think of backing up your documents and ways of sharing them. Dropbox and Google Drive are great services for sharing resources (depending on the clients) and make sure you read Pieter Levels’ advice on backing up your data in How I Went From 100 To 0 Things (Or How I Was Robbed of All My Stuff)

Planning & Time Management

As I’ve already mentioned discipline and routine are the keys to success when living as a traveling designer. Make sure you spend some time every day to plan your month, week and day work. Trello has proven to be a great tool for many digital nomads I’ve met during my travels. For time tracking, nomads recommend Toggl, RescueTime and TeamWeek for to keep schedules ticking over.

Design Tools

Now let’s take a look at some design tools that designers use on the road. Many designers still stick to old school Adobe Photoshop and Illustrator to get the job done but alternatives like Sketch are getting serious attention nowadays, especially for UI and mobile design.

Paper and pencil are holding on strong when it comes to wireframing, though tools like UXPin and OmniGraffle are the top choices among digital wire-framing tools.

You’ll also find nomadic designers use InVision and Marvel for creating interactive prototypes and gathering feedback.

Inspiration

As a digital nomad being on the road you’re already fortunate to experience new cultures, see amazing places and meet interesting people. Besides that you can always head to Dribbble, Behance or DeviantArt for design inspiration. For more websites check Top 10 Websites for Visual Inspiration.

"Coding and crushing it." by Noel Tock

Music is a great source of inspiration too. Most nomads use Spotify for music, together with noise cancelling headphones or MA600i earbuds. Here are a couple of my favourite Spotify playlists for getting into the zone: 

Money

A huge headache when traveling the world is money and financial management. Before leaving you must take care of all your financial dependencies like debt, loans, insurance and other taxes. Make sure you tell your banks that you will be traveling–suddenly realising your bank cards have been blocked just because you’re in a different country is no laughing matter.

Self-Employment Taxes

Most of the digital nomads I’ve encountered, including myself, are freelancers–in other words, self-employed. Make sure to look up your country’s self-employment terms to find out about national insurance contributions, taxes and tax return deadlines to avoid debt and penalties. For UK readers check GOV.UK, USA readers check USA.GOV and Australians check Australian Taxation Office.

Depending on the amount of time you reside in one place you may want to consider starting your business abroad. Doing so can mean you enjoy lower taxes and improved benefits. Personally, my business is UK-based, but here are 7 countries that are better for your business than UK according to the Telegraph.

Always separate tax money from your personal income, ideally in a separate bank account. This way you'll be safe when the tax return time comes and, trust me, it will save you a lot of stress.

Insurance

Safety first. Traveling is fun but sometimes things go wrong; trying out that exotic meal or drinking dirty water can get you into big trouble. Travel insurance is a must if you want peace of mind and to have that safety net whenever your health is at risk.

For insurance there are many different options you can choose from. If you happen to be traveling within the bounds of one continent it is probably cheaper to get an insurance from one of your local insurance companies. I've used Gjensidige, if... and some other small Lithuanian insurance companies, but there are travel insurance plans specifically designed for digital nomads, for example with World Nomads.

Money Management

Tracking your income and expenses is crucial when running your own freelance business. While traveling it may get even more complex as you will have ever changing currencies and unexpected charges from your banks. Make sure you plan out your budget every week, or at least a month, and review your finances to avoid stress later. Below are some great tools to get started, some of these provide personal and business finance tracking and multi-currency support so you'll be in a good company.

Nomads I know use Xero, Mint, Wally, Expensify or spreadsheet templates for Google Docs.

Invoicing

Another time consuming (but very important) thing in running your business on the road is invoicing. Keeping track of and organizing your invoices monthly will make you feel relieved once time for tax returns comes round. Organized bookkeeping takes time, but you can hire an accountant to help you with that. I'd recommend checking Bench.

For free and paid invoicing software check the following services that many freelancers and entrepreneurs use, including XeroWave accounting, FreshBooks, Paypal and Invoiceto.me.

Miscellaneous

Now let’s take a look at all the extra things that you’ll want to take on the road including books, cameras, equipment and more.

Books

You will have a lot of time to read while traveling, including bus trips, long flights or simply unproductive days. For these situations I recommend you read or listen to podcasts. For reading on your laptop, tablet or mobile phone check out Pocket, Instapaper or ReadKit

The following are recommended books to learn more about digital nomad lifestyle:

Accessories

What about a traveling bag, suitcase or backpack? That’s a topic for an entirely new article, but here are some crucial accessories from traveling designers I’ve met.

  • NomadKey, your key sized cable.
  • For bags and backpacks check Samsonite, Minaal and Tumi bags.
  • Make sure you get a World Travel Adapter, it will save you plenty of money and stress when traveling.
  • For taking pictures many nomads rely on their phones or GoPro cameras.

Further Reading:

We’ve covered a lot, but I can’t share everything in one article, there’s just so much to talk about! You may still have questions on packing, finding accommodation and cheap flights, finances and insurance. For these and other matters check out the following articles or feel free to reach out to me on Twitter @tomaslau.

I look forward to hearing your nomadic experiences in the comments!

Create a 3D Retro Text Effect Using Layer Styles in Adobe Photoshop

$
0
0
Final product image
What You'll Be Creating

This tutorial will show you how to use layer styles, smart objects, and some other basic elements in Adobe Photoshop to create a simple, retro looking, 3D text effect.

Tutorial Assets

The following assets were used during the production of this tutorial:

1. Creating the Background Gradient

Step 1

Create a new 800 x 600px document, and duplicate the Background layer.

Duplicate the Background Layer

Step 2

Double-click the Background copy layer to apply a Gradient Overlay effect using the following values:

  • Check the Dither box
  • Style: Radial
  • Scale: 150%
  • Create the Gradient using the colors #c8c5b8 to the left and #aaa593 to the right.
Gradient Overlay

This will create the background gradient.

Background Gradient

2. Adding Subtle Noise to the Background

Step 1

Duplicate the styled Background copy layer, and then right-click the new copy and choose Rasterize Layer Style.

If you're working with CS6 or earlier versions of Photoshop, you'll need to group the layer (Layer > Group Layers), and then merge the group (Layer > Merge Group) instead.

Set the Foreground color to #c8c5b8 and the Background color to #aaa593.

Noise Layer

Step 2

Go to Filter > Noise > Add Noise, change the Amount to 5 and the Distribution to Uniform, and check the Monochromatic box.

Add Noise Filter

Step 3

Change the Background copy 2 layer's Blend Mode to Darken. This will add subtle noise to the background gradient.

Noise Layer Blend Mode

Step 4

Click the Create new fill or adjustment layer icon at the bottom of the Layers panel and choose Levels.

Levels

Step 5

Change the Shadows value to 72, the Gamma to 1.05, and the Highlights to 236. This will adjust the coloring of the background.

Levels Values

3. Creating the Text and the 3D Extrusion

Step 1

Create the text in All Caps using the font Freshman Normal. The Size is 125pt, the color is #43a0a8, and the Kerning is set to Optical.

Create the Text

Step 2

Duplicate the text layer and drag the copy layer below it.

Duplicate the Text

Step 3

Enter the Free Transform Mode by going to Edit > Free Transform (Command-T). Tap the Right Arrow Key once, and then tap the Down Arrow Key once as well, to move the copy text one pixel to the right and one pixel downwards. Then hit the Return key to accept the changes.

Transform the Text

Step 4

Press the Option-Command-Shift-T (Alt-Ctrl-Shift-T for Windows) ten times to duplicate the layer with the transformation to create the 3D extrusion.

Create the 3D Extrusion

4. Creating the Smart Objects for the 3D Extrusion and the Shadow

Step 1

Select all the copy text layers, and change the text color to #c7b299.

Change Copy Text Layers Color

Step 2

With all the copy text layers still selected, go to Filter > Convert for Smart Filters. Rename the smart object's layer to 3D Extrusion, duplicate it, drag the copy below it, and rename the copy to Shadow.

Creating the Smart Objects

5. Styling the Original Text Layer

Double-click the original text layer to apply the following layer style:

Step 1

Add a Stroke with these settings:

  • Size: 2
  • Position: Inside
  • Color: #f2eee1
Stroke

Step 2

Add an Inner Shadow with these settings:

  • Color: #464646
  • Opacity: 100%
  • Uncheck the Use Global Light box
  • Angle: 129
  • Distance: 5
  • Spread: 50
  • Size: 2
Inner Shadow

Step 3

Add a Pattern Overlay with these settings:

  • Blend Mode: Soft Light
  • Pattern: Fine diagonal lines

You can actually try the other patterns in the set as well—some of them look really cool.

Pattern Overlay

This will style the main text layer.

Styled Text

6. Styling the 3D Extrusion

Double-click the 3D Extrusion layer to apply the following layer style:

Step 1

Add a Bevel and Emboss with these settings:

  • Technique: Chisel Hard
  • Size: 13
  • Uncheck the Use Global Light box
  • Angle: 82
  • Altitude: 11
  • Check the Anti-aliased box
  • Highlight Mode - Opacity: 0%

What you're doing here is changing the Bevel and Emboss's Angle and Altitude values to create a 3D shading based on the extrusion's angle.

Bevel and Emboss

Step 2

Add a Contour with these settings:

  • Check the Anti-aliased box.
Contour

Step 3

Add a Color Overlay with these settings:

  • Color: #265559

This is the part where you choose the extrusion's color, so feel free to change it up if you like.

Color Overlay

You can see how this creates the illusion of a flat 3D effect just by using a couple of effects. You can of course further enhance the result you get by adjusting the shadow for the corners that need adjusting.

Styled 3D Extrusion

You can also pick the Move Tool and move the 3D extrusion a tad upwards if you like. Just take the time to work with the result you get if you feel like it.

Adjusting the 3D Extrusion

7. Working on the Shadow

Step 1

Select the Shadow layer, then go to Filter > Blur > Motion Blur. Change the Angle to -55 and the Distance to 20. You need the Angle value to match the 3D extrusion's angle.

Motion Blur

Step 2

Change the Shadow layer's Blend Mode to Multiply, and then use the Move Tool to drag the shadow and move it around until you like how it looks.

Motion Blur Blend Mode and Position

Step 3

Click the Create new fill or adjustment layer icon at the bottom of the Layers panel and choose Hue/Saturation.

HueSaturation

Step 4

Click the Clip adjustment to layer icon at the bottom of the Properties panel, and change the Saturation value to -65.

Adjust Saturation

Congratulations! You're Done

In this tutorial, we created a gradient background and used the Add Noise filter to add a subtle noise effect to it.

Then we created the text, duplicated it with a transformation to create the 3D extrusion, and converted the copy layers into Smart Objects to create the shadow layer as well.

After that, we styled the text and the 3D extrusion layers to achieve the 3D retro effect.

Finally, we created the shadow using the Motion Blur filter, adjusted its layer's Blend Mode and color, and moved it around to achieve the final result.

Please feel free to leave your comments, suggestions, and outcomes below.


How to Create a Seasonal Yin Yang Illustration in Adobe Photoshop

$
0
0
Final product image
What You'll Be Creating

In today's tutorial, I'm going to teach you how to create a beautiful seasonal yin yang illustration. I'll focus on simple cheats to help you lay down a quick sketch for your painting using Adobe Photoshop and a pen tablet. Let's get started!

Tutorial Assets

The following assets were used in the production of this tutorial:

What Is a Yin Yang?

According to the ever omniscient Wikipedia, a yin yang, or yin & yang, "describes how apparently opposite or contrary forces are actually complementary, interconnected, and interdependent in the natural world, and how they give rise to each other as they interrelate to one another." A mouthful right?

In layman's terms, everything in this world is made up of both good and bad, or yin yang.

We'll use the seasons to illustrate this notion of polar opposites by focusing on two very different seasons: the beautiful frost of winter and the enchanting bloom of spring.

Set Up the Canvas

So let's begin! Set up the canvas to the following specifications:

  • Width set to 3000 x 2400 pixels
  • Resolution set to 300 dpi

1. Trace the Yin Yang Outline

Since there are many repetitive details planned for this painting, we'll cut corners a little and save time by tracing several references. And before you make a weird face at me―yes, tracing has its benefits. It develops muscle memory and allows you to create perfect sketches for each component of this illustration.

Begin by tracing our Yin Yang Reference using the Ellipse Tool (U) for the circle and the Pen Tool (P) for the inner curve.

The Yin Yang Base Shapes

Use the Ellipse Tool (U) again, to create two smaller circles for each side. You can always make sure these circles line up perfectly by keeping your Smart Guides on. 

The Final Yin Yang Sketch

2. Trace the Rose Reference

Step 1

Set your Brush settings as follows:

  • BrushColor set to Black.
  • Size set to 6 pixels.
  • Opacity, Flow, and Hardness all set to 100%.
  • Hit F5 for the Brush panel, select Transfer, and change the Opacity Jitter Control to Pen Pressure.

Step 2

Hide the visibility of the original yin yang layers. Copy and Paste the Rose Reference on a New Layer and resize it with the Free Transform Tool (Control-T) to a generous size.

Zoom (Z) in 400% and begin tracing the rose with clean, smooth strokes. Focus on capturing the purest details of each petal and try not to include unnecessary details like wrinkling or tears. 

Trace the Rose Reference

Once you're done, your rose should like this.

The Final Rose Sketch

3. Trace the Snowflake Reference

Step 1

Before we piece everything together, the last thing we need to trace is the snowflake. Just like before, Hide the visibility of your Rose Layer. Next, Copy and Paste your Snowflake Reference onto the canvas, resize it, and begin tracing. 

Begin Tracing the Snowflake

Step 2

Since the snowflake has a lot of repetitive shapes, we can easily trace one side, and then Duplicate it several times for the other sides. Rotate the remaining duplicates into place with the Free Transform Tool (Control-T). 

Position Duplicates to Finish the Snowflake

Continue these steps until the snowflake is complete. 

The Final Snowflake Sketch

4. Create a Custom Snowflake Brush

By turning this snowflake into a custom Photoshop brush, we can use the brush as a stamp for our next steps. To do this, select the Rectangular Marquee Tool (M) and draw a rectangle around your snowflake sketch. Then go to Edit > Define Brush Preset and hit OK after naming your new snowflake brush.

Create a Custom Snowflake Brush

5. Stamp the Snowflake Side

Step 1

Now unhidethe visibility layers for the yin yang. Using your Brush Tool (B), select your new Snowflake Brush and begin stamping snowflakes along the left side of the yin yang. Erase any edges that overlap onto the background with the Eraser Tool (E).

Stamp the Snowflakes onto the Yin Yang

Step 2

Each side of the yin yang holds a smaller circle that represents its connection to its polar opposite. Using these circles as guides, hover your Snowflake Brush over the top circle to stamp it into place. Go to the original yin yang layer and Erase the guide so that it no longer shows through.

Separate One Snowflake from the Rest

Add some more snowflakes and smaller circles scattered about to complete the snowflake side.

The Completed Snowflake Side

6. Create the Rose Side

Step 1

Hide the Snowflakes Layer so you can work with the roses without any distraction. Next, position your rose with the Free Transform Tool (Control-T). 

Place the First Rose with the Free Transform Tool

Step 2

Duplicate the rose layer several times, positioning each new rose on the right side of the yin yang. You don't want this to be a perfect pattern of roses, so make some roses overlap others, or even hide them along the edges for a more dynamic composition. Erase any bits of sketch that overlap from one rose onto another, making sure to allow some room for petals to peek out nicely.

You can keep the roses as small or as big as you'd like during this process. I ended up with 19 roses that vary in size, while creating a nice transition as they get closer to the top snowflake. 

Make Several Duplicates and Position into Place

Step 3

Remember to create an extra Duplicate for the single rose that must sit amongst the flurry of snowflakes on the left. Use the bottom circle as a guide for resizing, and position the rose with the Free Transform Tool (Control-T). 

Position the Single Rose into Place with the Free Transform Tool

Here is the yin yang with the completed rose side.

The Yin Yang with the Completed Rose Side

7. Flip the Sketch

It was at this stage that I realized the winter and spring sides should be switched. A quick search online also showed that yin yangs favored a position where the top curve was on the left side, not the right. Flipping the sketch is pretty easy though, so just go to Image > Image Rotation > Flip Canvas Horizontal. Once you're finished, Merge all the sketch layers together. 

Flip the Yin Yang Sketch

Here is the completed yin yang sketch. 

Final Sketch for the Yin Yang Illustration

8. Start the Grayscale Base

Step 1

Starting with a grayscale base allows us to transition easily into color by establishing a solid lighting scenario. To prep for this technique, create a New Layer (Control-Shift-N) underneath the Sketch Layer. Use the Elliptical Marquee Tool (M) to trace the outside of the yin yang and Fill the selection with a light gray color. Set this base layer to Lock Transparency Pixels. 

Fill the Base for the Grayscale Painting

Step 2

Duplicate the base layer and set it to Multiply. Hit D on your keyboard to set the Default Foreground and Background Colors to black and white. Begin Erasing any extra gray fill. 

Set the Duplicate to Multiply and Erase Excess

Step 3

Using the Polygonal Lasso Tool (L) , trace the left side of the yin yang. Select the Gradient Tool (G) and set the preset to Foreground to Transparent with an Opacity of 50%. Now drag the marker so that it creates a nicely blended gradient as it moves up the roses. 

Add a Gradient to the Left Side

Repeat this process for the right side. This time create an opposite gradient effect by dragging the marker downward to create a dark to light effect on the right curve.

Add a Gradient to the Right Side

9. Shade the Roses

Step 1

Next we'll be using the Ambient Occlusion technique to shade each rose. Use the Polygonal Lasso Tool (L) to Trace and Select one rose petal. Set the Brush Tool (B) to the color black with a Hardness of 0% and an Opacity of 20%.

Select a Petal with the Lasso Tool

Step 2

Now let's begin shading! Learning about Ambient Occlusion can completely transform your digital painting process. So feel free to study up on this topic before performing this step. With a Large Soft Brush, begin shading the inner part of the petal that would normally be in shadow. Focus the brush towards the inner part of the petals so that the shadows softly dissipate across them.

Shade the Roses

Not sure what I mean yet? Here's a quick animation to break it down.

Ambient Occlusion Shading Animation

Step 3

Continue shading each petal for all 19 roses. This step takes the longest of any in the tutorial. Be patient and take your time, because the result will be incredibly worth it in the end. 

The Complete Shading for One Rose

Here is the completed rose side with shading.

The Completed Rose Side with Shading

10. Fill the Snowflakes With White

Step 1

Filling the snowflakes with white will allow them to pop nicely against the gradient background. First, select the Sketch Layer. Use the Magic Wand (W) to select the inside of a snowflake. Next, Fill the snowflake with white using the Paint Bucket Tool (G), making sure to complete the fill on a separate New Layer.

Fill the Snowflakes with White

Step 2

Continue this process until all your snowflakes are complete. Finish it off by painting in white dots using a Hard Round Brush set to 100% Opacity.

Fill All the Snowflakes on the Right Side

11. Create the Background

Step 1

Before we can officially move on to color, we have to get rid of this boring white background. Since I usually organize my layers into one massive group, I'm going to right-click to Duplicate the group. Merge all the layers together from the duplicated group. Now you should have a copy of the completed yin yang ready to resize. Control-T while holding the Shift key to use the Free Transform Tool and enlarge the second yin yang. Scale it enough so that it completely covers the white background. 

Resize the Duplicated Yin Yang

Step 2

Go to Edit > Transform > Flip Horizontal. Then go back to Edit again, to Flip Vertically.

Flip the Background Horizontally and Vertically

Step 3

Adjust the Opacity of the background to 38%. Go to Filter > Blur > Gaussian Blur and set the Radius to 3 pixels. 

When you're finished with these steps, bring the Opacity of the Sketch Layer down to 25%. Here is the grayscale painting so far.

The Final Grayscale Painting

12. Correcting the Shapes and Position

Step 1

It's always good to get feedback on your work. And after a couple of rounds of feedback I change the overall position of the yin yang so that the curves hook more inward. This also means that I have to reposition the snowflake and rose so that they are parallel from each other again, since they would otherwise be forced out of alignment. 

Correct the Position of Your Painting and Elements

Since most of my layers are merged together by now, I simply rotate the symbol with the Free Transform Tool (U), and use the Polygonal Lasso Tool (L) to Select, Copy, and Paste, the snowflake and rose into their new positions.

Step 2

Using the Polygonal Lasso Tool (L) again, I Select, Copy, and Paste additional snowflakes and roses into place to cover up any pockets of empty space. Afterwards, I crop the image by making a selection with the Marquee Tool (M), and going to Image > Crop. Here is the final grayscale.

Final Grayscale Painting

13. Add Color With Adjustment Layers

Step 1

On a New Layer (Control-Shift-N), use a Hard Round Brush to paint the rose side with a salmon color. Set this layer to Color Burn. Duplicate the layer and set it to Screen with an Opacity of 60%.

Set Layers to Color Burn and Screen

Right-click to Duplicate this layer again, setting the third layer to Color Burn.

Set the Duplicated Layer to Color Burn

Step 2

Now the overall color scheme looks a little too bright. Create a New Adjustment Layer for Brightness/Contrast, bringing the Brightness down to -73 and the Contrast up to 64 to deepen the colors. 

Add an Adjustment Layer for Brightness and Contrast

Step 3

On a New Layer, take a bright pink color and lightly brush it over the top roses, setting the layer to Soft Light.

Step 4

Now it's time for the winter colors! Add a New Layer (Control-Shift-N) and Fill it with a blue color. Set this layer to Soft Light and use the Eraser Tool (E) to erase any roses that would be covered by the blue. 

Set a Blue Layer to Soft Light

Step5

For crisper blues, add a New Adjustment Layer for Channel Mixer, and adjust the Red and Blue Channels for richer, more vibrant hues.

Adjust with the Channel Mixer

14. Clean Up Your Painting

Painting is like cleaning your room—you can only let it get but so messy before realizing you should clean up a bit. Luckily we've kept everything pretty neat and tidy, so there's really not too much to do. Use a Hard Round Brush to begin filling in parts of the painting where colors are missing or not blending well together.

Clean Up Your Painting

15. Last Adjustment Layer

 A New Adjustment Layer for Levels is always mandatory for that added boost in vibrancy for your paintings. 

Add a New Adjustment Layer for Levels

16. Add Highlights

We're closing in on the finish line! For that beautiful crisp appearance, add highlights to the roses. Use a Hard Round Brush with varying opacity to paint bright orange highlights on the outer edges of some petals. Focus only on petals that are being hit the most by light.

Add Highlights to the Roses

And We're Done!

Many beautiful symbols are rooted in international philosophies, and I really hope you've enjoyed following along this fun and colorful piece. May you always own your inner yin yang, and find beauty and peace even in rough times. Good luck!

The Final Yin Yang Illustration

The Basics of Drawing Type & Creating Your Own Handwritten Font

$
0
0
Final product image
What You'll Be Creating

Ever wanted to give your digital layouts and designs a truly personal touch? In this tutorial we’ll look at how you can create a font from your own handwriting, for use on your computer. 

The tutorial will be split into three parts. Firstly, we’ll look at the basics of drawing a typeface. Then, once we’re warmed up, we'll see how you can optimise your handwriting to ensure high quality and versatility. And lastly, we’ll analyse some different methods for getting your font onto the computer and converting your hand-drawn letters into a digital font.

1. Practice Drawing Type

What you’ll need for the first part of this tutorial:

  • drawing paper (white)
  • sharpened HB or 1H pencil
  • ruler with millimetre measurements

You probably write scribbled notes or lists every day, but you’re rarely conscious of your handwriting. When you suddenly become very aware of your own handwriting, it can start to look unnatural.

You should first get into a more natural mode of writing. I find the best way to do this is to practice drawing a typeface. This is also really useful as it makes you more aware of the key characteristics of a typeface, and makes you more able to recognise common features (consistencies) between different characters within a typeface. This will prove useful when we start to refine our own handwritten characters, and optimise them for digitisation.

Step 1

Lay your ruler flat across the page, at a horizontal angle, as straight as you can make it. Take your sharpened pencil and, pressing down moderately hard, draw a line above the top edge of the ruler. 

If your ruler is a standardised 30 mm-wide ruler, you can keep the ruler in place, and draw a second line along the bottom edge of the ruler. This has the benefit of ensuring both lines are perfectly parallel. Otherwise, simply create two horizontal lines, 30 mm apart. The lower line represents the Baseline, and the top line is the Cap Height

Mark out the top 10 mm third of the total height between the lines and draw a third horizontal line with your ruler and pencil, pressing down more lightly to make a slightly fainter line. This line represents the x-height. Swot up on your typography terms, such as x-height and baseline, in my article on The A to Z of Typography.

drawing baseline

Step 2

You can repeat the sequence of lines, using the same measurements from Step 1, to create a page filled with lines. This is your own writing grid, on which you can practice drawing typefaces.

sequence of lines

Step 3

Open a software program where you can easily edit text, such as Adobe InDesign, or even Microsoft Word or Pages

Select a classic Serif typeface, such as Adobe Caslon Pro, which is shown here, or Garamond. To practice drawing a typeface it’s best to pick a serif to draw at first, as sans serif typefaces have more subtle features, and can be more tricky to draw accurately if you’re a beginner.

Type the following characters: ‘H n o y’, with a space between each. These are good characters to pick, as they display a range of different features: two vertical stems and a crossbar on the ‘H’, an aperture and serifs on the ‘n’, a fully enclosed counter on the ‘o’, and a sweeping descender and diagonal arms on the lowercase ‘y’.

caslon pro sample

If you’re working in InDesign you can also switch on the baseline grid (View > Grids & Guides > Show Baseline Grid) to more easily see how the proportions of the characters line up with each other.

view baseline

Blow up the characters at large scale on your screen, or zoom in. Now you can start to draw the characters. Alternate between using your ruler and drawing strokes by hand. Don’t worry if your attempts look a little messy—the aim of this exercise is for you to become comfortable with drawing type, and to observe the characteristics of the typeface and the similarities (or differences) between each character.

drawing caslon

You will notice that serif typefaces are based on the principles of symmetry and order. Extend the strokes from the edge of the characters and notice the angles and proportions. Stems are almost always the same width, whatever the character, but you might notice that the size of the serifs is slightly larger on the uppercase ‘H’. Notice also that some parts of the characters are thinner; these sorts of stroke are called hairlines.

Step 4

Though we won’t apply all of these characteristics to our handwritten font, it’s really important to recognise that all typefaces are governed by a set of rules, whether formal, which is more common with serif and sans serifs type, or informal, which is more common with hand-drawn, painted or handwritten typefaces.

Once you’ve practiced drawing a typeface, or several typefaces if you want, you should start to do a bit of research on handwritten typefaces, to help you think about how you want your handwritten font to be organised.

Go to a font resource site like FontSquirrel or DaFont and take a look at the handwritten fonts available there. Pick a font that you think shares qualities with your own handwriting and download it. 

Choose a software programme that will allow you to view the full set of characters in the font. Adobe InDesign is a good choice, but you could also use Glyphs, which we'll take a closer look at later on.

In InDesign, create a text frame and set the Font to your newly downloaded font. Here, I’ve chosen Wagnasty. Go to Window > Type & Tables > Glyphs to open the Glyphs panel. You’ll be able to see the full set of characters available in the typeface. 

glyphs panel

Make a note of the types of characters that are present, and what’s notably absent. For example, in Wagnasty we’ve got:

  • a full set of uppercase letters, A to Z
  • no lowercase letters
  • a full set of numbers, 1 to 9
  • full-stop (.), comma (,), colon (:), semi-colon (;), exclamation mark (!), question mark (?)
  • apostrophe (‘)
  • round (parentheses) brackets (), square brackets [], braces/curly brackets {}, and chevrons <>
  • some basic maths/equation symbols (= + %)
  • hashtag (#)
  • some currency symbols
  • asterisk (*)
  • forward slash (/), backslash (\), dash (-), swung dash (~), vertical bar (|)

This is a basic set of characters that would allow you to write most things in the English language without too much of a problem.

You should also note if the font has any additional weights, e.g. bold or italic. More often than not, a handwritten font will have only one regular weight, as the font needs to look authentic. Applying a different weight might look unnatural.

Most handwritten fonts have a similarly basic set of characters. Like Callie Hand:

Callie Hand font

Or some might include a few more, like Journal, which includes some quirky hand-drawn symbols or images:

Journal font

2. Writing Your Own Characters

Now that you’ve practiced drawing typefaces, and had a look at the range of handwritten typefaces out there and the characters available within each typeface set, you can start to think about putting your own personalised typeface together.

For this section of the tutorial you’ll need the following:

  • lined paper (a scruffy old notebook will suffice)
  • drawing paper (white; and with some texture if you want to give a more informal, rustic appearance to your characters)
  • sharpened HB or 1H pencil
  • ruler with millimetre measurements
  • a fine-point liquid ink pen in black (I like to use a Pilot Hi-TecPoint)
  • eraser

Step 1

Many people will have developed over time two or more variations of their handwriting. When I write down longer passages of text, my handwriting tends to join together, and slant slightly to the right, creating an italicised cursive type.

italic cursive writing

However, there are a number of problems with trying to convert cursive, or script, handwriting to a digital font. You would have to ensure that the kerning (space between characters) is set down very precisely, so that the characters always appear perfectly joined up. You would also have to ensure that every combination of characters would look perfectly joined up, which is very difficult without having to spend hours post-editing the script on your computer.

So, unless you’re looking for a headache, it’s recommended that you look to digitise handwriting that is not cursive. Instead, it should have stand-alone characters that will not need to be refined to correspond precisely with any given neighbouring character. 

Luckily, I often use a different variation of my handwriting, usually for annotating documents or writing quick notes. It’s all set in uppercase, and is not joined up. It too has a slight italic slant.

block capital writing

Pick out a short passage from a book, and copy out the text onto lined paper using your natural handwriting style. While doing your best to keep the writing natural, try to make sure the characters are not joined up or touching too much. It doesn’t matter if you mix upper- and lowercase letters. But note, if you want to do that, you will have to eventually create a full set of uppercase characters and a full set of lowercase characters.

book passage

You can also practice writing out a few symbols, such as exclamation marks or brackets.

punctuation marks

You can use this book passage as a useful reference for when you start to create your final handwriting sample. It doesn’t always feel natural to write individual characters, in an A to Z order, so you can look over to the passage and see how you created a ‘G’ or an ‘F’, for example, when you were writing in a flowing, natural way.

Step 2

Return to your drawing paper. Take your pencil and ruler and, following Steps 1 and 2 of Part One of the tutorial (above), draw a sequence of three lines, representing the cap height, x-height and baseline. 

In Part One, we created a group of lines that measured 30 mm in total height. However, if you tried to write naturally at this scale, you would certainly struggle! Reduce the total height between the Cap Height and Baseline to 6 mm; mark out the top 2 mm third of that to show the x-height

line widths

You might even find that this is still too large to allow you to write naturally without straining. Write a couple of characters onto the paper, to see what size you naturally write your characters. 

Reduce the total height to 4 or 5 mm if you’re more comfortable writing at a smaller scale.

Repeat the sequence of lines until you have filled the page.

drawing narrow lines

Step 3

Take your ink pen (the black ink will create good contrast for scanning later on) and rotate the paper just a little anti-clockwise. This is to avoid straining the arm too much as you write.

At the same pace you would normally write, write the uppercase characters from A to Z in one go, along the same line if you have room. 

handwriting letter set

If you make any mistakes, simply try again on the next line down. But don’t worry about any minor errors or quirks in the writing. You want the writing to look organic and natural, and perfecting it too much will get rid of that.

Referring back to the list of characters we noted in Part One of the tutorial, write down other characters in the same natural style, and at the same scale. If you want to, you can also write a set of lowercase letters, a to z, as well.

numbers and punctuation marks

Step 4

Allow the ink to dry completely, and then take an eraser and carefully rub out the pencil lines around the characters so that you are left with a lovely set of clean characters, ready to be scanned.

erase pencil lines

3. Scanning and Digitising Your Font

For this final part of the tutorial you will need:

  • a scanner (or alternatively a tripod and digital camera)
  • Adobe Illustrator
  • access to a font editor/conversion software programme, e.g. FontLab Studio or Glyphs (you can get a free 30-day trial of Glyphs, and a mini version is available on Mac apps)

Note: We’ll take you through the process of using Glyphs in this tutorial, but there are loads of great type editing programmes out there. I personally find Glyphs to be very user-friendly, but many typographers will also put forward strong cases for FontLab and RoboFont.

Step 1

Setting the scanner to a high dpi (I scanned at 1600 dpi), scan in your handwriting sample. 

Save the file as a TIFF or JPEG. Then open Adobe Illustrator and create a New Document.

Go to File > Place and select your scanned image. With the image selected, open the Image Trace panel (Window > Image Trace). With the Preview box checked, set the Mode to Black and White, and adjust the Threshold, Paths and Corners levels until you’re happy with the accuracy of the trace. Click Trace.

image trace window

Then, with the image still selected, go to Object > Image Trace > Expand. As a final step, Control-Click (Mac OS) or Right-Click (Windows) > Ungroup. 

Now you need to get rid of all the white sections on the image. Open the Layers panel (Window > Layers) and create a new layer. Drag it down to sit the new layer below the image layer. Select the Rectangle Tool (M) and drag to create a rectangle that extends across the whole artboard. Set the Fill to a contrasting bright color.

Now you can see more easily where there is white on the image. Select the white area around the outside and delete. Select the smaller white areas inside the bowls and counters of characters, and delete.

deleting white from vector

You’ve successfully vectorized your handwriting, great work! 

Step 2

Now open your font editing software. Here, I’m going to take you through the process of digitising your handwritten font using Glyphs.

Go to File > New to create a new Glyphs font. On the left-hand side of the Glyphs window that opens you’ll see a menu of options, listing groups of characters you can add to the font. 

Click Letter to view the full set of menu options. To insert uppercase letters, select Uppercase. A full set of uppercase characters, from A to Z, appears in the window.

Double-click a character to edit it directly. 

Glyphs new window

Hop back over to Illustrator and select the relevant vector character. Go to Edit > Copy.

vector of character

Return to Glyphs, and go to Edit > Paste. Glyphs will place the vector in the window, ready for you to scale and adjust. The numeric values at the bottom of the screen are editable, allowing you to adjust the space to the left and right sides of the character, affecting the kerning. 

editing character in Glyphs

To the left of the window you can see ‘-’ and ‘+’ symbols, which allow you to scale the character. You can also manually adjust the scale, using the Scale (S) tool accessible in the tools panel running along the top of the window.

increasing scale

You should use the guides on the screen as a guide, sitting the bottom of the character on the Baseline, and the top of the character (if it’s uppercase) meeting the Cap Height line.

Step 3

You can flick back to view the full set of characters by clicking the Font tab towards the top of the window.

Repeat the process above, double-clicking characters in Glyphs to open them, and flicking back and forth between Illustrator and Glyphs, copying and pasting characters across.

completing the set of characters
character set

You can also start to add in other sorts of characters, using the left-hand menu in the Glyphs window. You will have to manually add Numbers and Punctuation marks, selecting them from the pop-out menus and selecting Generate.

adding numbers
adding punctuation
exclamation mark

Step 4

Once you’ve added in all the characters for your font you can give it a name. 

Go to File > Font Info to open a new window. 

Font Info

Give the font a suitable name, and you can also add in additional details, such as your name, your website and your Copyright info. Once you’re done, simply close the window.

Font name

Step 5

Once you’ve edited the characters in your font you can export it as a digital font. 

Go to File > Export

Export to digital font

Keep the default options as they are, to create an OpenType Font, then click Next. Save the font in a folder that’s easily searchable.

OpenType Font

You can exit Glyphs and navigate to your chosen folder, to view the font file. 

otf font in folder

You can then install this on your computer, as you would any standard .otf font.

installing with Font Book

Conclusion

Your handwritten font is now complete, and ready to use as a digital font across your own documents. Use it to add a personal touch to notes or annotations, or incorporate it into design layouts to make your artwork truly unique!

typing your characters

Let’s recap what lessons we’ve covered in this tutorial. We looked at:

  • how to practice drawing type, and recognise common elements and rules across typefaces
  • how to apply those drawing lessons to your own handwriting, optimising it for digitisation
  • how to scan your artwork and vectorise it in Illustrator
  • how to convert your vectors to a digital font, editing it using Glyphs or other font editing software

Awesome work! Have fun creating more of your own fonts—why not experiment with different hand-drawn or painted styles?

How to Create a Fun Wiener Text Effect in Adobe Illustrator

$
0
0
Final product image
What You'll Be Creating

In this tutorial you will learn how to create a wiener pattern brush and how to use it to create a nice text illustration. 

For starters you will learn how to create the main shapes using basic tools and effects, a simple blend, and some blending and vector shape building techniques. Moving on you will learn how to save two simple patterns and how to create your own pattern brush. Finally, you will learn how use your brush and how to add some subtle shading and highlights using several Drop Shadow effects and a bunch of tiny compound paths.

1. Create a New Document and Set Up a Grid

Hit Control-N to create a new document. Select Pixels from the Units drop-down menu, enter 600 in the width and height boxes, and click on the Advanced button. Select RGB, Screen (72ppi), and make sure that the Align New Objects to Pixel Grid box is unchecked before you click OK.

Enable the Grid (View > Show Grid) and the Snap to Grid (View > Snap to Grid). For starters you will need a grid every 5 px, so simply go to Edit > Preferences > Guides > Grid and enter 5 in the Gridline every box and 1 in the Subdivisions box. Try not to get discouraged by all that grid—it will make your work easier. And keep in mind that you can easily enable or disable it using the Control-" keyboard shortcut.

You should also open the Info panel (Window > Info) for a live preview with the size and position of your shapes. Do not forget to set the unit of measurement to pixels from Edit > Preferences > Units > General. All these options will significantly increase your work speed.

new document setup grid

2. Create the Main Shapes

Step 1

Pick the Rectangle Tool (M) and focus on your Toolbar. Remove the color from the stroke, and then select the fill and set its color to R=57 G=181 B=74. Move to your artboard, create a 20 x 50 px shape, make sure that it stays selected, and then go to Effect > Stylize > Rounded Corners. Enter a 10 px Radius and click OK.

main shapes

Step 2

Make sure that your green rectangle is still selected and go to Object > Expand Appearance. Select the resulting shape and simply make a copy in front using the Control-C > Control-F keyboard shortcut. Make sure that only this fresh copy is selected, and replace the existing fill color with R=180 G=43 B=0.

main shapes

Step 3

Using the Rectangle Tool (M), create a 5 x 30 px shape, set the fill color at R=223 G=88 B=30 and place it as shown in the following image. Make sure that this new rectangle stays selected and go to Effect > Stylize > Rounded Corners. Enter a 2.5 px Radius, click OK, and then go to Object > Expand Appearance.

main shapes

Step 4

Focus on your Toolbar and simply click on the Blend Tool to open the Blend Options window. Select Specified Steps from the Spacing drop-down menu, enter 10 in that white box, and click OK. Now, select your brown and orange rounded rectangles (make sure that you do not select the green one) and then simply hit Alt-Control-B (or go to Object > Blend > Make) to create a new blend. In the end things should look like in the second image.

main shapes

Step 5

Disable the Snap to Grid (Shift-Control-') and then go to Edit > Preferences > General and make sure that the Keyboard Increment is set to 1 px.

Focus on the Layers panel, open the existing layer, select your green rounded rectangle and make two copies in front (Control-C > Control-F > Control-F). Select the top copy and move it 1 px up using the up arrow button from your keyboard. Reselect both copies made in this step, open the Pathfinder panel (Window > Pathfinder) and click the Minus Front button.

Make sure that the resulting shape stays selected, bring it to front (Shift-Control-]) and focus on the Appearance panel. Replace the existing fill color with a simple black (R=0 G=0 B=0), lower its Opacity to 30% and change the Blending Mode to Soft Light.

main shapes

Step 6

Reselect your green rounded rectangle and make two copies in front (Control-C > Control-F > Control-F). Select the top copy and move it 3 px up using that same up arrow button from your keyboard. Reselect both copies made in this step and click the Minus Front button from the Pathfinder panel.

Make sure that the resulting shape stays selected, bring it to front (Shift-Control-]) and focus on the Appearance panel. Replace the existing fill color with a simple black, lower its Opacity to 20% and change the Blending Mode to Soft Light.

main shapes

Step 7

Reselect your green rounded rectangle and make two copies in front (Control-C > Control-F > Control-F). Select the top copy and move it 5 px up using that same up arrow button from your keyboard. Reselect both copies made in this step and click the Minus Front button from the Pathfinder panel.

Make sure that the resulting shape stays selected, bring it to front (Shift-Control-]) and focus on the Appearance panel. Replace the existing fill color with a simple black, lower its Opacity to 10% and change the Blending Mode to Soft Light.

main shapes

Step 8

Enable the Snap to Grid (Control-'). Reselect the three black shapes made in the last three steps and go to Object > Transform > Reflect. Check the Horizontal box and then simply click the Copy button. Make sure that your newly created shapes are selected and place them as shown in the third image.

main shapes

Step 9

Reselect your green rounded rectangle and make two copies in front (Control-C > Control-F > Control-F). Select the top copy and move it 1 px to the right using the right arrow button from your keyboard. Reselect both copies made in this step and click the Minus Front button from the Pathfinder panel.

Make sure that the resulting shape stays selected, bring it to front (Shift-Control-]) and focus on the Appearance panel. Replace the existing fill color with a simple white (R=255 G=255 B=255), lower its Opacity to 30% and change the Blending Mode to Soft Light.

main shapes

Step 10

Disable the Snap to Grid (Control-'). Reselect your green rounded rectangle and make two copies in front (Control-C > Control-F > Control-F). Select the top copy and move it 4 px to the left using the left arrow button from your keyboard. Reselect both copies made in this step and click the Minus Front button from the Pathfinder panel.

Make sure that the resulting shape stays selected, bring it to front (Shift-Control-]) and focus on the Appearance panel. Replace the existing fill color with a simple black, lower its Opacity to 20% and change the Blending Mode to Soft Light.

main shapes

Step 11

Reselect your green rounded rectangle and make two copies in front (Control-C > Control-F > Control-F). Select the top copy and move it 2 px to the left. Reselect both copies made in this step and click the Minus Front button from the Pathfinder panel.

Make sure that the resulting shape stays selected, bring it to front (Shift-Control-]) and focus on the Appearance panel. Replace the existing fill color with a simple white, lower its Opacity to 50% and change the Blending Mode to Soft Light.

main shapes

Step 12

Reselect your green rounded rectangle and make two copies in front (Control-C > Control-F > Control-F). Select the top copy and move it 1 px to the left using the left arrow button from your keyboard. Reselect both copies made in this step and click the Minus Front button from the Pathfinder panel.

Make sure that the resulting shape stays selected, bring it to front (Shift-Control-]) and focus on the Appearance panel. Replace the existing fill color with a simple black, lower its Opacity to 40% and change the Blending Mode to Soft Light.

main shapes

Step 13

Enable the Snap to Grid (Control-'). For the following steps you will need a grid every 1 px, so go to Edit > Preferences > Guides & Grid and enter 1 in the Gridline every box.

Using the Rectangle Tool (M), create a 3 x 26 px, white shape, place it as shown in the first image and go to Effect > Stylize > Rounded Corners. Enter a 1.5 px Radius, click OK and then go to Object > Expand Appearance. Make sure that the resulting shape stays selected, lower its Opacity to 30% and change the Blending Mode to Soft Light.

main shapes

Step 14

Using the Ellipse Tool (L), create two 6 x 4 px black shapes and place them as shown in the following image. Make sure that both shapes remain selected and move to the Appearance panel. Simply lower the Opacity to 20% and change the Blending Mode to Soft Light.

main shapes

3. Create the Wiener Ends

Step 1

Using the Rectangle Tool (M), create a 10 x 5 px shape, place it as shown in the first image and set the fill color to R=41 G=171 B=226. Focus on the bottom side of this blue rectangle and switch to the Direct Selection Tool (A). Select the left anchor point, drag it 5 px to the right and then grab the Delete Anchor Point Tool (‑). Simply click on the right anchor point to remove it and this should turn your blue rectangle into a triangle as shown in the second image.

wiener ends

Step 2

Make sure that your blue shape is still selected and go to Effect > Warp > Bulge. Enter the properties shown in the following image, click OK and then go to Effect > Warp > Arc Upper. Enter the attributes shown below, click OK and then go to Object > Expand Appearance.

wiener ends

Step 3

Disable the Snap to Grid (Control-'). Make sure that your blue shape is selected and make two copies in front (Control-C > Control-F > Control-F). Select the top copy and move it 1 px to the left. Reselect both copies made in this step and click the Minus Front button from the Pathfinder panel. Fill the resulting shape with black, lower its Opacity to 50% and change the Blending Mode to Soft Light.

wiener ends

Step 4

Make sure that your blue shape is selected and make two copies in front (Control-C > Control-F > Control-F). Select the top copy and move it 2 px to the left. Reselect both copies made in this step and click the Minus Front button from the Pathfinder panel. Fill the resulting shape with white, lower its Opacity to 50% and change the Blending Mode to Soft Light.

wiener ends

Step 5

Make sure that your blue shape is selected and make two copies in front (Control-C > Control-F > Control-F). Select the top copy and move it 1 px to the right. Reselect both copies made in this step and click the Minus Front button from the Pathfinder panel. Fill the resulting shape with black, lower its Opacity to 30% and change the Blending Mode to Soft Light.

wiener ends

Step 6

Make sure that your blue shape is selected and make two copies in front (Control-C > Control-F > Control-F). Select the top copy and move it 1 px up. Reselect both copies made in this step and click the Minus Front button from the Pathfinder panel. Fill the resulting shape with black, lower its Opacity to 30% and change the Blending Mode to Soft Light.

wiener ends

Step 7

Reselect your blue shape and simply replace the existing fill color with R=180 G=43 B=0.

wiener ends

Step 8

Enable the Snap to Grid (Control-'). Using the Ellipse Tool (L), create a 6 x 2 px blue shape and place it as shown in the first image. Make sure that this new shape is selected and make two copies in front (Control-C > Control-F > Control-F). Move to the Layers panel, select the bottom copy, and move it 1 px down. Reselect both copies and simply click the Minus Front button from the Pathfinder panel. Fill the resulting shape with white, lower its Opacity to 50% and change the Blending Mode to Soft Light.

wiener ends

Step 9

Reselect your blue shape, replace the existing fill color with a simple black, and change the Blending Mode to Soft Light.

wiener ends

Step 10

Select all the shapes highlighted in the first image and go to Object > Transform > Reflect. Check the Horizontal box and then simply click the Copy button. Make sure that your newly created shapes are selected and place them as shown in the second image.

wiener ends

4. Create Your Wiener Pattern Brush

Step 1

Reselect your blend and go to Object > Expand.

wiener pattern brush

Step 2

Return to gridline every 5 px, so simply go to Edit > Preferences > Guides & Grid and enter 5 in the Gridline every box. Using the Rectangle Tool (M), create a 30 x 20 px shape, set the fill color at R=0 G=104 B=55, and place it as shown in the first image. Reselect this rectangle along with the rest of the shapes made so far and duplicate them (Control-C > Control-F). Drag these copies to the right and place them as shown in the second image.

wiener pattern brush

Step 3

Focus on your left set of shapes and pick the Shape Builder Tool (Shift-M). Holding the Shift button from your keyboard, simply drag a selection along your green rectangle roughly as shown in the first image, but make sure that you don't go over the edge. Now, select that green rectangle and get rid of it using the Delete button from your keyboard. In the end things should look like in the third image.

wiener pattern brush

Step 4

Keep focusing on your left set of shapes. Select all these shapes and use the Shift-Control-G keyboard shortcut to Ungroup them. Now, select the shapes that make up the bottom end of the wiener and Group them (Control-G). Then select the shapes that make up the top end of the wiener and do the same thing.

wiener pattern brush

Step 5

Move to the right set of shapes and pick again that same Shape Builder Tool (Shift-M). Holding the Shift button from your keyboard, simply drag a selection along the top side roughly as shown in the first image. Again, make sure that your selection does not go over the edge of that green rectangle. Move to the bottom side of this set of shapes and repeat the technique. In the end things should look like in the third image.

wiener pattern brush

Step 6

Keep focusing on your right set of shapes. Select all your green shapes and get rid of them. In the end things should look like in the second image. Select all these shapes, Group them (Control-G) and place them as shown in the third image.

wiener pattern brush

Step 7

Reselect all the shapes made so far and go to Object > Transform > Rotate. Set the Angle at -90 degrees and then click the OK button.

wiener pattern brush

Step 8

Select the group that makes up the left end of the wiener (highlighted in the following image) and simply drag it inside the Swatches panel (Window > Swatches) to save it as a simple pattern. Double-click on this new pattern, rename it "startTile", and then make sure that you hit that Cancel button.

wiener pattern brush

Step 9

Select the group that makes up the right end of the wiener (highlighted in the following image) and turn it into a pattern. Double-click on this new pattern, rename it "startTile", and then make sure that you hit that Cancel button.

wiener pattern brush

Step 10

Select the group that makes up the body of the wiener (highlighted in the following image) and click the New Brush button from the Brushes panel (Window > Brushes). Check the Pattern Brush box and then click the OK button to open the Pattern Brush Options window.

Name it "Wiener Brush", enter the attributes shown below and then move to the Tile boxes. Open the Start Tile drop down window and add the "startTile" pattern from that list, and then open the End Tile drop down window and add the "endTile" pattern. Finally, click OK and you should find your new pattern brush inside the Brushes panel.

wiener pattern brush

5. Create the Wiener Text

Step 1

Disable the Grid (Control-') and the Snap to Grid (Shift-Control-'). Pick the Type Tool (T), click on your artboard, and add your grey (R=178 G=178 B=178) piece of text. Make sure that it stays selected and open the Character panel.

Use the Freestyle Script font and set the size at 200 pt. Move to the Layers panel and lock this piece of text to make sure that you won't accidentally select/move it. Using the Pen Tool (P) (or the Brush Tool (B)), draw some smooth paths as shown below, trying to use the text that lies in the back as a rough reference. Add a subtle black stroke for these paths.

wiener text

Step 2

Focus on your Layers panel and get rid of that piece of text. Select the paths and replace that subtle black stroke with your "Wiener Brush" pattern brush.

Make sure that all these paths remain selected and go to Effect > Stylize > Drop Shadow. Enter the properties shown in the top left window (in the following image), click OK and then add the other four Drop Shadow effects shown below.

wiener text

Step 3

Enable the Grid (Control-') and Snap to Grid (Shift-Control-'). Switch to gridline every 1 px, so go to Edit > Preferences > Guides & Grid and enter 1 in the Gridline every box.

Using the Ellipse Tool (L), create a 1 px circle, a 2 px circle and a 3 px circle, make them all black, and place them as shown in the first image. Select all these tiny circles and simply hit Control-8 to turn them into a compound path. Make sure that your compound path stays selected, lower its Opacity to 40%, and change the Blending Mode to Soft Light.

wiener text

Step 4

Multiply your black compound path (Control-C > Control-F) and spread the copies roughly as shown in the following image.

wiener text

Step 5

Using the Ellipse Tool (L), create a 1 px circle, a 2 px circle and a 3 px circle, make them all white, and place them as shown in the first image. Select all these tiny circles and turn them into a new compound path (Control-8). Make sure that it stays selected, lower its Opacity to 40%, and change the Blending Mode to Soft Light.

wiener text

Step 6

Multiply your white compound path (Control-C > Control-F) and spread the copies roughly as shown in the following image.

wiener text

6. Add Some Mustard

Step 1

Finally, you can add some mustard using the scatter brush and the techniques mentioned in this detailed tutorial (step 4.1 to 6.7—skip the part with the blend).

add mustard

Step 2

Follow the same tutorial if you wish to learn how to create this neat mustard container, or simply take it from the source file.

add mustard

Congratulations! You're Done!

Here is how it should look. I hope you've enjoyed this tutorial and can apply these techniques in your future projects.

final product

Design a Hardback Cover for a Young Adult Fiction Book in Adobe InDesign

$
0
0
Final product image
What You'll Be Creating

Young Adult Fiction is an ever-growing sector of the publishing industry, and a popular genre for self-publishers. Grown-up novels for teens need cover designs that bridge the gap between childish and mature, while exploring themes of emotional angst, growing up, relationships, family and school. Design elements can be put together to convey the mood and message of the book, as well as to directly appeal to a potential reader. 

Here, we’ll look at how handwritten typography, papery collage-inspired textures and strong color combinations can be combined to create an attractive cover design. We’ll explore how you can create a genre-appropriate design using the typefaces, tools and techniques available to you in Adobe InDesign. We’ll also hop over to Adobe Illustrator to create a simple vector image.

In this tutorial we’ll be creating a design for a hardback dust jacket, with flaps that allow the jacket to fold over the hardcover. 

final front cover
final back cover

1. Set Up the Layout of Your Cover in InDesign

In this tutorial, we’ll be creating a dust jacket for a hardback (hardcover) book, with Demy dimensions (8 1/2 x 5 7/16 inches [216 x 138 mm]) and a 26 mm spine. This is a standard size for some hardback covers, though there are a number of other standard sizes you can design to as well.

Note: A 26 mm spine will result in a relatively slim book. You can adjust the width of the spine to suit your own purposes by using the Page Tool (Shift-P) to adjust the width of the document later. 

The spine width should accommodate for the number of pages and the weight (thickness) of the paper used for the inside pages. For hardback covers you should also allow an additional 3 mm either side of the spine for the shoulder of the book, i.e. the fold of the hardcover leading to the edge of the back cover and the edge of the front cover.

So in this tutorial we are creating a jacket with a 26 mm spine, but 6 mm of this (3 mm each on the left and right sides) will form the shoulders of the book.

Firstly, however, we’ll put together the front of the dust jacket only. This will allow you to look at the front cover in isolation, before completing the full jacket.

Step 1

Open InDesign and select New Document from the Welcome window, or go to File > New > Document.

In the New Document window set the Intent to Print, No. of Pages to 2 and uncheck Facing Pages. From the Page Size drop-down menu select Custom... to open the Custom Page Size window. 

Set the Width to 138 mm and Height to 216 mm. Type ‘Demy Hardback’ into the Name text box and click Add, and then OK.

custom page size

Step 2

Back in the New Document window, set the Margins to 10 mm on all sides, and set the Bleed to 8 mm on all sides. Click OK

new document

This page is the correct size for the front of your cover only. Though we will want to submit a whole cover to the printer, complete with spine, back cover, and flaps, it’s a really good idea to design your front cover only at first. This allows you to judge better how the cover will look from a reader’s perspective, when the book is on display.

We’ll use the Page Tool (Shift-P) later in the tutorial to add the spine, back cover and flaps to the document. 

From the left-hand Ruler drag a vertical guide out to 69 mm. This marks the center point of the front cover, which is useful to have when you start to place elements on the page.

guide on page 1

2. Layer Color and Texture to Create a Backdrop

What elevates professional cover designs is often the subtle use of background texture, to make the cover feel tactile.

Step 1

Open the Layers panel (Window > Layers) and double-click on the default Layer 1 name. Rename the layer as Paper and click OK

layer options

Remaining on Page 1, select the Rectangle Frame Tool (F) and drag to create a frame 138 mm in Width and 232 mm in Height. Position centrally on the page, so that the frame extends up to the edge of the top bleed and the edge of the bottom bleed.

rectangle frame tool

Step 2

Teen heroes and heroines are often found scribbling in their diaries or doodling on their school exercise books. You can introduce this idea by giving the dust jacket a paper background. 

You can either take your camera and photograph the open page of a lined notebook, as I’ve done here, uploading the image to your computer via a scanner, or download a suitable stock image. Try this photo for a scrunched-up effect, or this image for a cleaner, simpler look.

With the image frame you created in Step 1 selected, go to File > Open. Select the paper photo and click Open. Arrange the image in the frame (double-click to directly select, and hold Shift to resize) so none of the paper edges are visible.

paper texture

With the image frame selected, go to Object > Effects > Transparency and set the Mode to Multiply. Reduce the Opacity to 40% and click OK.

effects window

Step 3

Return to the Layers panel and Lock the Paper layer. 

Click the Create New Layer icon at the bottom right of the panel. As before, double-click the layer name to open the Layer Options window. Rename the layer as Background Color and click OK.

layer options

Select the Rectangle Tool (M) and drag to create a frame 138 mm in Width and 232 mm in Height. Layer over the top of the paper image frame.

Open the Swatches panel (Window > Color > Swatches) and select New Color Swatch... from the panel’s drop-down menu, accessible at the top right of the panel. Create a new CMYK Swatch, C=68 M=0 Y=24 K=0, and click Add and OK.

new color swatch

Set the Fill Color of the rectangular frame to this new blue swatch. Set the Stroke Color to [None].

blue background

With the colored frame selected, go to Object > Effects > Transparency and set the Mode to Multiply and Opacity to 100%. This brings through the texture of the background paper.

transparency effect

You can also add a bit more depth to the background with an Inner Glow. Select Inner Glow from the left-hand menu in the Effects window and set the Mode to Hard Light. Reduce the Opacity to 54%. Set the Technique to Softer, Source to Edge, Size to 15 mm and Noise to 4%. Click OK.

inner glow
background color

3. Introduce Handwritten Type

Handwritten or hand-drawn typefaces give cover designs a less formal, more personal feel. 

Step 1

Pick out three fonts for use on the cover design:

  • One font needs to be a legible, clean sans serif. Here, I’ve used Calluna Sans.
  • Your second font will be used for the title, and should be an attractive, informal hand-drawn typeface that looks great at large size. I’ve gone for the lovely REIS
  • We’ll need to choose a third font for rendering the author’s name. A naive, handwritten type like Arsenale White looks playful and diary-like.

Once you’ve downloaded and installed your chosen fonts, return to InDesign and to the Layers panel.

Create a New Layer, and rename it as Typography - Title. Lock the Background Color layer.

layer options

Step 2

We’re going to create separate frames for each word of the book’s title:‘The Infinity of Clouds and Us’.

Select the Type Tool (T) and drag to create a new text frame about 29 mm in Width and 26 mm in Height. Type ‘The’ and set the Font to REIS Regular, Size 77 pt and Font Color to [Black]. Position the frame towards the top left corner of the page.

REIS font

Select the Type Tool (T) and drag to create a second text frame about 135 mm in Width and 60 mm in Height, positioning it centrally on the page just below ‘The’. Type ‘Infinity’ into this new frame and set the Font to REIS Regular, Size 175 pt and Font Color to [Paper].

white font

Create a further four text frames and set the type to the following sizes and colors:

  • ‘Of’: Size 90 pt, Font Color [Black]
  • ‘Clouds’: Size 147 pt, Font Color [Paper]
  • ‘And’: Size 126 pt, Font Color [Paper]
  • ‘Us’: Size 230 pt, Font Color [Black]

Position the frames roughly as shown in the layout below:

title type

Select each frame individually and hover your mouse over the bottom right corner of the frame until a Rotate icon appears. Rotate each frame a little either to the right or left to give the text a jaunty look.

rotated text frames

Step 3

Now we need to add in the author’s name: ‘Jenny Smith’.

Lock the Typography - Title layer. Create a fourth new layer, from the Layers panel, and name it Typography - Author.

layers panel

Create a new text frame, about 45 mm in diameter. Type ‘jenny’ and set the Font to Arsenale White, Size 100 pt, Font Color to [Black], and set the text to All Caps from the Character Formatting Controls panel running along the top of the screen. 

character formatting controls panel

Position the text frame in the top right corner of the page.

As we did with the other text frames, hover over the bottom right corner of the frame and rotate a little upwards, anti-clockwise. 

rotate text

Edit > Copy and Edit > Paste the text frame and edit the text to read ‘smith’. Increase the Font Size to 106 pt. Position the frame below ‘jenny’, and slightly to the right, so that the ‘h’ almost touches the edge of the colored background.

rotate text clockwise

4. Create a Dreamy Design With a Cloud Vector

Step 1

Lock the Typography - Author layer and create a new layer; name it Clouds. Drag the layer down so that it sits below the Typography - Title layer. 

layers panel

Open Adobe Illustrator and create a new document at any size. 

You can create a very simple cloud shape using the Arc Tool (find it under the Line Segment Tool drop-down menu, in the Tools panel). 

Arc Tool

Click and drag to create a simple sequence of curves, working from left to right. Use the Direct Selection Tool (A) to edit the depth of the curves until you’re happy with the shape. 

arc
sequence of arcs

Move around in a rough oval, until you have a cloud shape like this:

whole cloud shape

Then, with all the lines selected, go to Object > Path > Join to create an enclosed shape. Finally, select the shape and go to Edit > Copy.

joined paths

Step 2

Return to InDesign and your cover document. Go to Edit > Paste to drop in the cloud vector.

pasted vector

You can treat the vector as you would a shape or frame in InDesign. From the top control panel, adjust the Stroke Color to [None] and set the Fill Color to [Paper].

Position the cloud so that it fits snugly in the bottom left corner of the page. Go to Object > Effects > Drop Shadow and set the Mode to Normal. Reduce the Opacity to 45%, Distance to 1 mm and set the Size to 1 mm. Click OK.

effects panel
cloud vector

Edit > Copy, Edit > Paste the cloud shape a further three times, positioning them haphazardly across the page layout. Resize and flip them (right-click (Windows) or Control-click (Mac OS) > Transform > Flip Horizontal), layering one cloud behind the top text frame of the title.

clouds on front cover

Step 3

As a final touch to the front cover you can add in a bit more text, maybe a subtitle, or a brief blurb about the author. 

Lock the Clouds layer and Unlock the Typography - Author layer. Type ‘Author of (paragraph break) Misfit in Class (paragraph break) and Diary Love’. Set the Font to Calluna Sans Regular, Size 15 pt, Font Color [Black]. 

Pull out the names of the other books in All Caps, and in a new pink swatch, C=2 M=76 Y=16 K=0 (add from the Swatches panel). Rotate the text frame a little anti-clockwise, and position over the top of the cloud in the bottom left corner of the page.

tagline
final front cover

5. Expand Your Dust Jacket

You can keep the front cover artwork as it is, on Page 1. Navigate down to Page 2 of the document—we will expand this page to create the full dust jacket design.

Step 1

We need to expand the page to accommodate the following:

  • 2 x 70 mm width flaps
  • 1 x 138 mm width back cover
  • 1 x 138 mm width front cover
  • 1 x 26 mm width spine (inclusive of 6 mm allowance for shoulder fold)
  • 1 x 12 mm width allowance between the flap edge and back cover edge, to accommodate the fold
  • 1 x 12 mm width allowance between the flap edge and back cover edge, to accommodate the fold

This comes to a total width of 466 mm (plus an 8 mm bleed). The height of the document will remain unchanged.

Select the Page Tool (Shift-P) from the Tools panel. Click once on the page to select it and adjust the Width of the page to 466 mm.

page tool
expanded page width

Step 2

From the left-hand Ruler(View > Show Rulers), pull out a number of vertical guides to the following X positions: 70 mm, 82 mm, 220 mm, 223 mm, 233 mm (the center point of the spine), 243 mm, 246 mm, 384 mm and 396 mm.

guides

Step 3

Return to the Layers panel and Unlock all of your layers. Navigate back to Page 1 of your document and drag your mouse across the page, selecting all the elements from the front cover. Go to Edit > Copy, and return to Page 2.

Edit > Paste the content onto Page 2 and, using the Free Transform Tool (E) to keep it all temporarily grouped together, position it on the right side of the page—the guides have formed a perfect 138 mm-wide gap for the content to sit in.

pasted content

6. Format the Spine of the Cover

Step 1

Lock all the layers except the Paper and Background Color layers. Drag your mouse over Page 2 to select all elements on those layers. Go to Edit > Copy, Edit > Paste. 

Reduce the Width of both the paper image frame and the colored frame to fit the width of the spine (26 mm) and position centrally on the page, to the left of the front cover artwork.

spine background

Step 2

Create a new layer in the Layers panel, named Spine. Lock the other layers.

layers panel

Select the Type Tool (T) and create a long narrow text frame. Type ‘The Infinity of Clouds and Us’ and set the Font to Arsenale White, Size 31 pt, Font Color to [Black] (though set ‘clouds’ in [Paper]), and set the text to All Caps. 

Select the text frame and right-click (Windows) or Control-click (Mac OS) > Transform > Rotate 90 Degrees CW. Position towards the top of the spine, using the central guide (at 233 mm) to centralise it.

text on spine

Create a second text frame and type the author’s name. Set the Font to Calluna Sans Regular, Size 15 pt, All Caps and Font Color to the pink swatch, C=2 M=76 Y=16 K=0. Layer the text frame over the top of one of the cloud shapes if possible. Don’t shy away from allowing the clouds to cross over guides.

authors name

7. Design the Back Cover

Step 1

Lock the Spine layer and Unlock the Paper and Background Color layers.

Select both the paper image frame and the colored frame that form the background of the front cover artwork (don’t select the spine background) and Edit > Copy, Edit > Paste. Position to the left of the spine artwork.

back cover background

Lock the Paper and Background Color layers and Unlock the Clouds layer.

Select one of the cloud shapes and Edit > Copy, Edit > Paste. Enlarge the size so that it almost fills the width of the back cover, and position towards the top of the page, centrally on the back cover section.

cloud vector on back cover

Repeat the process, copying and pasting three more cloud shapes, setting two in [Paper] and one in [Black]. Place the black cloud at larger scale, centrally on the back cover, slightly pushed to the right. Place a smaller white cloud bridging across the left flap and left side of the back cover. Place another small white cloud to the bottom right of the back cover, allowing it to cross onto the spine.

cloud shapes on back

Step 2

Lock the Clouds layer and create a new layer; name it Back Cover. 

Select the Ellipse Tool (L) and drag to create a long oval. Position over the top of the white cloud shape towards the top of the back cover. Select the Type Tool (T) and click once in the oval frame to transform it into a text frame. Set the Font to Calluna Sans Regular, Size 12 pt and Leading 16 pt. You can type in the book’s blurb here, or, for now, just go to Type > Fill with Placeholder Text to insert some ‘dummy’ text into the frame.

text frame for blurb

Repeat the same process, creating a second text frame, and layering it over the top of the black cloud shape. Adjust the Font Color to [Paper]. This is the perfect place for a critic’s quote or short review to go.

text frame on back cover

You can also add in a barcode at the bottom of the cover. Use the Rectangle Frame Tool (F) to File > Place an image of the barcode, and you can add a pink rectangle frame underneath it, which might be a suitable place to put pricing information.

barcode and pricing

8. Think About the Flaps!

A dust jacket wraps around the hardcover, and has flaps that fold over the far edges of the front and back cover, which are only visible on opening the book. These are great places to put extra information that might intrigue the reader who picks up the book—a brief biography of the author and a more detailed blurb of the book.

Step 1

Lock the Back Cover layer and Unlock the Paper and Background Color layers.

Edit > Copy the paper image frame and colored background from the back cover artwork and Edit > Paste. Reduce the width so that both frames fit on the right flap, extending up to the edge of the right-hand bleed.

Adjust the Fill Color of the top frame to [Black]. 

black background for flap

Drag your mouse over the right-hand flap to select the paper image frame and colored background and Edit > Copy, Edit > Paste. Manoeuvre the two pasted frames over to the left-hand flap, and adjust the Fill Color of the top frame to [Paper].

white background for flap

Step 2

Lock the Paper and Background Color layers, and create a new layer named Flaps.

Navigate over to the right-hand flap and use the Type Tool (T) to create a tall, narrow text frame, about 43 mm in Width

You can type in a more detailed blurb for the book here, setting the Font to Calluna Sans Regular, Size 11 pt and Leading 14 pt. Set the first paragraph of text in blue, C=68 M=0 Y=24 K=0, and the remainder of the text to [Paper]. 

You can also add in pricing at the bottom of the flap, and another cloud shape for decoration (Unlock the Clouds layer to copy and paste an additional shape).

text on flap

The left-hand flap is traditionally a good place to have a little biography of the author, and perhaps an author photo, if you have one available. Remaining on the Flaps layer, introduce another text frame 43 mm in Width, setting the text to, as before, Calluna Sans Regular, Size 11 pt and Leading 14 pt. Set the first paragraph of text to pink and the remainder of the text to [Black]. 

author bio and optional photo

Your dust jacket design is complete! Fantastic work, you’re almost ready to send the artwork to print.

final cover artwork

9. Export Your Dust Jacket for Print

Step 1

Before you export your work, you should check for any spelling errors and run a Preflight(Window > Output > Preflight) to check for any errors, such as text overspilling text frames. Once the green light shows, you're good to go!

preflight panel

Step 2

All that’s left to do now is to export the artwork to PDF, ready for printing. 

Go to File > Export... to open the Export window. Select Adobe PDF (Print) from the Format drop-down menu. Name the file and click Save.

In the Export Adobe PDF window select Press Quality from the Adobe PDF Preset drop-down menu. In the Pages section, under Range, type 2, if you’ve kept a copy of only your front cover on Page 1.

press quality

Under the Marks and Bleeds section, click to select All Printer’s Marks under the Marks menu and click to select Use Document Bleed Settings under the Bleed and Slug menu. Click Export.

marks and bleeds
final exported PDF

Conclusion

Congratulations! You now have your book cover ready to be sent to the printers. 

final product front
final product back

Be sure to get in touch with your printer before you send the artwork to print, to receive paper samples and a proof, and to also get their recommendations for paper stock and weight.

In this tutorial, you have learned how to design a fun, informal dust jacket for a hardback book using Adobe InDesign. This type of design would be suitable for a Young Adult Fiction title, but the layout principles could be used for creating any hardback jacket.

The traits of cover design for this young adult genre include handwritten or hand-drawn typography, bold, contrasting colors, paper- and collage-inspired textures and graphics, and haphazard, naive layouts (a relaxed grid). Now, why not try creating your own version of a young adult fiction cover, using some of these common elements?

How to Use the Blend Tool in CorelDRAW

$
0
0
Final product image
What You'll Be Creating

In this tutorial we'll create a long shadow icon with the Blend Tool in CorelDRAW. We'll start by creating a book icon, perfect for an app that holds contact information, a diary, or datebook. In doing so we'll construct the design using basic shapes and linear gradients. The blended shadow completes our icon, giving you the tools and techniques to create a whole set of icons in this style.

1. Constructing the Book

Step 1

Open a New Document in CorelDRAW.

  1. Use the Ellipse Tool (F7) to draw a circle. Set the fill color to teal (#04D6CF) in the Object Properties docker and make sure the shape's Outline is set to none.
  2. Draw a rectangle in the center of the circle with the Rectangle Tool (F6) and use the Shape Tool (F10) to round the corners. Alternatively, you can adjust the corner radius in the Property Bar. Set the fill color to dark tan (#D19547).
  3. Draw a thin rounded rectangle near the top of the tan rectangle. Set the fill color to light cream (#FFF8C2) and make sure it overhangs the right side of the tan rectangle.
  4. Select both the tan and cream colored rectangles and hit Intersect in the Property BarDelete the original cream rectangle and make sure the new shape created has its fill color set to light cream (#FFF8C2).
Draw circles and rectangles for the base of the icon design

Step 2

Now that we have the basic book shape, we need to add details to the design, starting with the book's binding.

  1. Overlap most of the right side of the book with a rectangle. The non-overlapping portion will be the book's binding.
  2. Select both the new rectangle and the book's tan rectangle and hit Intersect in the Property BarDelete the original overlapping rectangle and set the fill color of the newly made shape to tan (#EDB974).
  3. Overlap the top portion of the book with a rounded rectangle drawn with the Rectangle Tool.
  4. Intersect the base book shape with the new rounded rectangle shape and set the fill color to (#D19547). This shape should be lighter than the rest of the design, but I'll be applying Linear Fountain Fills to each of them once I've finished laying out my entire design.
Create the binding and top of the book

Step 3

Let's move on to adding Fountain Fills to the design.

  1. Start with a thin rectangle on the top edge of the front of the book.
  2. As we did previously, Intersect the rectangle from the tan book shape and Delete the extraneous rectangle shape. Set the fill color to a Linear Fountain Fill from tan (#D19547) to light tan (#EDB974).
  3. Select the book binding shape and set the fill to a Linear Fountain Fill that goes from dark tan (#B87F35) to brown (#7D5827). Use the Interactive Fill Tool to place the gradient on the left side of the shape (see below).
  4. Apply a Linear Fountain Fill to the main book shape as well, going from tan (#D19547) to light tan (#EDB974). Also note the shadow shape in the inside of the book's pages, created from two overlapping shapes.
apply linear fountain fills to each shape

Step 4

Let's define the book's pages a bit more.

  1. Draw four long, thin rectangles using the Rectangle Tool.
  2. Select all four rectangles and hit Weld in the Property Bar.
  3. Select the newly welded shape and the rounded page shape and hit IntersectDelete the extraneous rectangle shapes and set the fill color of the intersected rectangles to a tan tone (#DBBB83) with the Transparency set to 50 in the Object Properties docker.
Create individual pages with small rectangles

Step 5

It's time for some final, optional details for your icon design.

  1. Draw a few rectangles on the right side. Align them to the left and Distribute them evenly from the top in the Align and Distribute docker.
  2. Place them beneath the other book icon components in the Object Manager docker. Set their fill or fountain fill colors to those of your choosing.
  3. Add a ribbon peeking out of the top of the book by drawing a rectangle with pointed tails and drawing a smaller rectangle on the top edge. Group (Control-G) all of the book components together.
Add ribbons and page tags

Step 6

Finally, for this section, as a show of what we've just done, here's a look at the outline and the filled-in versions of the icon. You can see the placement of each shape and how they cleanly overlap thanks to the use of Intersect.

Comparing the outline and the final version of the icon design

2. Creating the Long Shadow

Step 1

Draw a small rounded rectangle over the book icon in dark teal (#07ADA7). Duplicate(Control-D) the rectangle and place it to the lower right, diagonally, from the original rectangle. Set the Outline to none and the Transparency of the second rectangle to 100.

Using the Blend Tool, drag the tool from the first rectangle to the second.

Create a simple blend with the blend tool

Step 2

In the Object Manager docker, Select the higher of the two rectangles in the blend and set its fill color to a darker teal (#0Dbfb9).

Edit the colors in the blend

Step 3

With the blend selected, adjust the ObjectAcceleration slider to the left side and the Color Acceleration to the right side of the slider in the Property Bar.

Adjust the object and color acceleration settings

Step 4

Originally, I had the amount of steps set to 400, but found that to be far too intense. Instead, I set it to 125 steps, as it's still a smooth blend, but also isn't as solid a block of teal. It's entirely up to you how strong, smooth, or even the placement of your blend is.

Adjust the amount of steps in your blend

Step 5

Group the book icon, blend, and teal circle together. Duplicate the circle and make sure it's Aligned with the original. Select the icon group and go to Object > PowerClip > Place Inside Frame. Select the overlapping teal circle and your icon will be clipped to that shape, ready for export.

Clip the icon to the circle shape

Great Job, You're Done!

Now that you've learned how to use the Blend Tool in CorelDRAW, why not make a whole set of mobile app icons? Whatever you do with this tool and program, share with us in the comment section below! For more CorelDRAW tutorials, check out the following:

The final blended icon design
Viewing all 8952 articles
Browse latest View live