The Eyedropper Tool is a multi-functional tool which you can use to speed up your workflow in Adobe InDesign.
The main functions we’ll cover here are the tool’s ability to lift colors from a placed image for applying to text and other elements in your document, and also its use as a tool for applying the formatting attributes of one element to another element in no time at all.
Let’s explore how to use the tool and what you can do with it.
1. Activate the Eyedropper Tool
Step 1
Open InDesign.
Navigate to the Tools panel. If it's not open by default, go to Window > Tools, or select Reset Essentials from the Workspace drop-down menu at the top-right of the screen.
Step 2
Towards the bottom of the Tools panel, in the fourth section down, you’ll spot the Eyedropper Tool, which is symbolised by a pipette icon. Click on the icon to activate the tool. You can also activate the tool by hitting I on the keyboard.
2. Use the Tool to Create a Color Palette
The Eyedropper Tool allows you to lift colors from a placed image. This is a really useful technique for creating a color palette of complementary shades to use in your InDesign document.
Step 1
After creating your New Document (set the Intent to Print in the New Document window), create a frame using the Rectangle (F), Ellipse or Polygon Frame Tool. Go to File > Place and select an image. A photo with strong colors, or an illustration with a detailed, varied color palette will work best, and will allow you to extract more colors.
Here, I placed Alvaro Guzman’s pumpkin illustration in a Polygon Frame, and set it within a set of six Polygon Shapes made using the Polygon Tool.
Step 2
Select the Eyedropper Tool (I) from the Tools panel. Hover over a part of the image with a strong color.
Click once and the eyedropper cursor appears filled.
You will notice at the bottom of the Tools panel that the color picked up by the Eyedropper Tool has now appeared in one of the square icons.
You can edit the color from here, but an easier way to do it is to open the Swatches panel(Window > Color > Swatches [F3]) and select New Color Swatch... from the drop-down menu (accessible from the top-right corner of the panel).
If your image is a CMYK image, the Eyedropper will pick up a CMYK Swatch. If it's an RGB image it will pick up an RGB Swatch. The image I've used here is RGB, but I want to change it to a print-friendly CMYK color.
To do this, simply select CMYK from the Color Mode drop-down menu. The swatch will convert to the closest CMYK match for that color. Click Add and then Done.
Step 3
Repeat the process from Step 2, hovering the Eyedropper Tool (I) over different areas of your image to pick up a range of colors. Convert to CMYK if needed, and add to the Swatches panel.
You can apply your new swatches to elements in your document, such as text, shapes, and frames. From a single image you can extract a huge range of different colors, all of which will complement the image and your InDesign layout as a whole.
3. Use the Tool to Copy Formatting
The Eyedropper Tool doesn't just pick up colors; it can also be used to pick up and apply formatting characteristics. This is a quick and simple alternative to setting up and applying Styles.
Step 1
In your InDesign document you may have applied some formatting (Font, Weight, Size, Leading, Color, etc.) to a section of text. Here, I set the subtitle to an article in Zombie Holocaust, Regular, Size to 19 pt, and Font Color to C=74 M=37 Y=100 K=27.
Step 2
I want to apply the same formatting to a quote pulled out from the main body of the text. In order to do this, highlight the text you want to apply the formatting to, using the Type Tool (T).
Select the Eyedropper Tool (I) from the Tools paneland hover over the text you want to pick up the formatting characteristics from. Click once.
The formatting will be applied to your highlighted text. Easy!
Step 3
You can also copy formatting from shapes and frames, as well as text. In this example, I created a shape using the Rectangle Tool (M), and applied a Fill and Stroke Color, and a Stroke Type, Dashed (3 and 2).
I created a second shape using the Ellipse Tool (L) and selected it with the Selection Tool (V, Escape).
Then I selected the Eyedropper Tool (I) from the Tools panel and hovered over the rectangle shape. I clicked once and the formatting was applied to the circle shape. The shape doesn't change to a rectangle, but all the formatting characteristics, such as Color and Stroke Weight, are transferred to the second shape.
Conclusion
The Eyedropper Tool is an often neglected tool which can really help you to speed up your workflow when creating a document in InDesign. Next time you want to create a unique color palette or apply a text style quickly to another section of text, give the Eyedropper Tool an outing!
Last time we were designing and sketching a zombie dragon. Today we're going to make it more real by creating a digital painting in Adobe Photoshop. I'll show you a clean, non-destructive way of painting digitally—we'll be using Layer Masks and maps known from 3D modeling. I'll explain to you how ambient occlusion works and how to add color and lighting to it with proper Blending Modes. We're going to create a complete piece of concept art with three very simple brushes you'll make yourself. Follow me!
1. Prepare the Workspace
Step 1
We need to prepare the sketch we created before. If your line art has been drawn traditionally, scan it or take a good photo of it.
Step 2
Create a New File (Control-N) and choose dimensions that will let you work comfortably. The bigger, the better, but don't go overboard! If you're not sure about how big you can go, try 5000 px x 5000 px, choose a complicated brush, and paint a big stroke quickly. If it doesn't lag, you're free to go.
Paste your line art to the file and, if necessary, scale it with the Free TransformTool (Control-T).
Step 3
Name the layer with the sketch lineart. Change its Blending Mode to Multiply so that only its lines are visible.
2. Create the Resources
Now we need to prepare the tools we'll be working with.
Step 1
It's good to prepare the color scheme before the actual painting. This way we'll avoid unpleasant surprises. Our zombie dragon will be made of bones, muscles, ligaments and skin, and we know what colors these things have. We only need to extract dominant shades out of them and put them in our color scheme.
First, let's find images that depict the topic in the ideal way. You can use Google Image Search for it. What do we need to find?
Muscles—you'll find the best results under muscles autopsy, but it's not recommended for sensitive people. Instead, you can try something more indirect, like raw steak, or some other kind of meat you can safely look at, or even a frame from some low-budget horror movie that's more funny than scary. If you're lucky, you should get some bluish tint of veins.
Bones—type animal bones to clarify.
Skin—depending on what effect you need, you may type various keywords. In my vision bat skin will work the best.
Be careful—here there be monsters!
Step 2
Choose the best images and paste them to a new file. Create a mix of them without leaving any white spaces. When you're done, Save for Web (Control-Shift-Alt-S).
Step 3
Use Color Thief or any similar site to extract the color scheme out of the image. In my case, one scheme is all I need, but you can create separate schemes for muscles/bones/skin. Paste the screenshot to the main file and name the layer color scheme. Lock image pixels to avoid mistakes—this way you'll be able to move the color scheme around without a risk of modifying it. You can also create a Swatches preset out of it, if you like this method more.
Step 4
Every artist needs a brush! Let's create three very basic ones.
The first one we need is a classic round brush with Opacity Transfer. You probably have one in your palette—if you don't, find the most similar one and adjust the settings as shown below.
Step 5
You can save the brush in the normal way (the "white card" icon under the settings), or create a tool preset. The other way is especially convenient when you've got a lot of brushes in the palette and want to use just a few of them for this particular painting, or when you want to use brushes from separate palettes quickly.
Open the Tool Presets window and click the card icon. Name it Transfer Brush and save without color.
Step 6
The next brush will be hard, used for painting flat colors and clean shapes. Its settings should be similar to these, so you can take any round brush and modify it. Afterwards, save it as a new Brush or a new Brush Preset. In the other case, name it Hard Brush.
Step 7
Take the Transfer Brush and modify it to make it soft. Name it Soft Brush.
Step 8
We've got all we need to start painting!
3. Create a Clipping Mask
First we need to define the general shape, cutting the object out of the environment. In Photoshop it can be done easily with a Clipping Mask.
Step 1
Lower the Opacity of thelineart layerto make it more subtle. Create a New Layer above it and name it Mask. Select Hard Brush and draw the outline of the dragon, paying special attention to inside shapes too. Take your time, and do it carefully—this is an important step!
Step 2
Use the Magic Wand Tool (W) in Add to Selection mode to select all the areas outside the dragon. Invert the selection with Control-Shift-I.
Step 3
Create a new layer and fill the selection using the Paint Bucket Tool (G). Then merge it with Mask by selecting them both and clicking Control-E.
Step 4
To attach any layer to our Clipping Mask you just need to place it right above the Mask layer (or any clipped layer) and hit Control-Alt-G. Nothing on that layer will cross the border of Mask.
4. Ambient Occlusion
For this illustration we're going to use Layer Maps.
This method has been very popular recently, but I'd like to mention one
important thing. It's not an ultimate, best‑of-the-best technique. It
works very well when you've got clean line art and a good plan for
every aspect of the picture. It's not recommended for illustrations
created "on the fly", when you're not sure what you're painting and
what colors you want to use.
We're going to define the areas that can't be reached easily by light. Keep in mind that what we'll paint doesn't exist separately in reality. It's a map—a concept from 3D modeling, where the influence of light is divided into separate layers. In painting, an AO (ambient occlusion) map makes 3D line art—something that defines the edges clearly, but at the same time doesn't need to be removed at any point.
The technique I'm going to show you is lazy, fast, and perfect for detailed works, but I'm sure once you understand what the goal is, you'll be able to develop your own technique for painting ambient occlusion.
Step 1
Let's clip the lineart layer and add another layer between it and the Mask. Name this layer bg and fill it with white.
Step 2
Add a new layer above lineart. Name it AO1. Fill it with black, then lower the Opacity to 85%.
Step 3
Add a Layer Mask to AO1.
Step 4
Select the Layer Mask and use the Soft Brush to fill the spaces between the lines of line art with white (painting with black—black reveals what's under the layer, white covers it). Don't cross the lines, and don't blend the separate areas!
Step 5
Select AO1 and Duplicate (Control-J) it. Hide AO1 and name the copy AO2. Select its Layer Mask and paint the contours with the Transfer Brush, this time using dark gray. If the areas are overlapping, paint only the contours of the one that's closer to you.
(If you're getting lost with all these layers, download the attached file and use it as a reference.)
Step 6
Duplicate the layer once again, hide it, and name the new one AO3. Now we're going to use a trick that depends on your version of Photoshop.
CS5 or Higher
Select the Mixer Brush Tool from the Brush menu and simply blend it all, leaving the contours alone. Gosh, I love this tool!
CS4 or Lower
You can try to use the Blur Tool here, but most likely it won't get you proper results. To retain control over it, use the Soft Brush and blend the areas manually, picking colors with the Eyedropper Tool (I). The goal is to hide the strokes.
Step 7
Create a New Layer above AO3,fill it with white, and name it AO4. Lower the Opacity to 50%. Add the Layer Mask and reveal the contours subtly with the Transfer Brush.
Step 8
We're done! You can play with AO4's Opacity to get the result you want, but remember—this isn't really shading! We don't need dark shadows here. Turn off the lineart layer to see our AO map in all its glory.
5. Flat Colors
Time to start painting for real. If creating the AO map bored you, here's some good news—now you'll be able to paint freely without any risk of losing details. Now we're going to simply put another map on top of it.
Step 1
Create a New Layer, and name itFlat Colors. Set its Blending Mode to Multiply—this way the layers below will be darkened by the colors, but not covered with them. Use the Hard Brush and colors from our color scheme to define the main color areas.
Step 2
Duplicate (Control-J) the Flat Colors layer and hide the original. This time grab the Transfer Brush and paint color admixtures from our color scheme. It's very rare for organic materials to be colored with only a single shade. For example, white human skin looks best when it's mixed with green and blue. Use this as a chance to add a slight texture.
6. Light and Shadow
We'll create separate maps for lighting, too.
Step 1
Create a New Layer and name it shadow. Fill it with the dark version of the ambient light; in our case, it will be blue: #050323. Lower the Opacity to 80%.
Step 2
Add a Layer Mask to shadow and use the Transfer Brush to paint the illuminated areas. Use gray for subtle light and black for strong light. If you want to fix something, simply use white—no eraser necessary! Stick to the rules we've used for AO painting—pronounce the edges and don't bring light into crevices.
It's good to remember that interesting lighting is actually redundant, even undesired, when it comes to concept art. Your lighting should present the creature in the most natural way, without concealing the crucial parts. No need to bring drama!
The closer you get to the edges without crossing and blurring them, the harder the edges will look
Step 3
Colors change properties depending on their background. Let's add a New Layer right on the bottom and name it background. Use the Soft Brush and the Transfer Brush to sketch the colors and lighting of the background. It doesn't need to be detailed at all—we only need the color scheme to use for lighting.
Step 4
Create a New Layer, and name it light. Fill it with the color of the main light source (here, #c7ffb5). Set the Blending Mode to Overlay—it accents bright areas—and add a Layer Mask. Fill it with black to hide it all, and then use a white Transfer Brush to draw (reveal) the brightest parts. Use small strokes to create a texture.
Strong lighting should be added subtly, with small strokes. Avoid covering the whole illuminated area!
Step 5
Now we can add specular light. Muscles are normally covered with a shiny membrane, so let's use it to make the dragon slightly glossy. It's a fresh zombie, after all!
Create a New Layer, and name it specular light 1. Use the Hard Brush to paint tiny spots of light in the most prominent points. You can use the non-invasive method with a white layer and black layer mask, or just draw them the usual way. Be careful—the more you use them, the weaker visually they get!
Step 6
To soften the effect, we can add another layer (let's name it specular light 2) and add a bit of blur with a white Transfer Brush.
7. Final Polish
Our dragon is finished in a technical sense, but we don't need to stop here!
Step 1
Let's darken the lower part of the beast to blend it better with the ground and bring the focus to the upper part. To do this, create a New Layer and name it fog. Fill it with a random color and then double click to get to Blending Options.
First, change the Fill Opacity to 0%.
Second, add Gradient Overlay and build a gradient of white (for the upper part) and dark cyan (#010b0e, for the lower part). Set the Blend Mode to Multiply and change the Angle to fit the lighting.
Step 2
Our zombie looks pretty friendly, so let's add some gore! Use dark red (#4c0000) and the Transfer Brush to add blood here and there.
Step 3
Simple white spots will add a bit of appealing shine to the blood.
Step 4
We can use veins as another nice accent. Make them dark blue and slightly shiny.
Step 5
Let's work on the ground now. It's not really important for the illustration, but it will be a nice accent. I used a texture from texturemate.com, changed its Blending Mode to Overlay, and adjusted its perspective with the Free Transform Tool (Control-T, hold Control when clicking points to move them individually).
By adding a Layer Mask to the texture layer you can easily blend it into the background.
Step 6
I added a few bones to create a sense of scale. Sometimes it's good to add a human silhouette for this.
Step 7
Add an Adjustment Layer Levels. By checking the histogram we'll be able to check if the contrast is appropriate. Drag the markers to fit the graph between them.
Another way of checking the values is to put a black layer in Saturation mode on the top. Also, turn the background off for a while to see how the creature looks on its own.
Step 8
We're now coming to the end. If you don't like something about your picture, the main advantage of working with maps is that you can now edit them separately, without destroying the picture as a whole.
You can add a more complicated background, but it's not really necessary. When our goal is to show the creature, adding a background would not only be a waste of time—it would break the clarity of our message. You can even remove the background and add a simple gray wall—nobody will complain!
My final advice for this final stage is: take break, get yourself some coffee, read a few pages of a book. Get some distance, then come back and check what strikes you the most about the picture. For me it was the lack of back light, so I've added it with the Soft Brush, but since everything's got its own layer, you're free to change anything!
Braains!
Today we've learned how to plan our illustration and prepare the right tools for it, then how to build an illustration step by step, map by map. Now you know how to create ambient occlusion, lighting, and specular reflection, and how to keep an eye on every aspect of the painting to make it editable in the end.
Do you think it's slow and too planned? What if you don't have any particular plan in your mind and want to design something as you go? What if you need to be fast? There's another method for that, and I'll show it to you in my next tutorial. Stay tuned!
In this tutorial, you will learn how to create a
Halloween-inspired illustration featuring a cute kitten. You will mostly use ovals and other basic shapes.
It's bit longer than usual but easy to follow, and will lead to an adorable final
result. Let's get started!
1. Creating the Head
Step 1
Hit the Ellipse
Tool (L) and create an ellipse. Remove the stroke color if you have one, and set
the fill color to R=216 G=217 B=218. Take the Direct Selection Tool (A) and
select the left and right anchor points, then move them down.
Step 2
Now let's create the ears. We need to draw a triangle
(using the same fill color) and we will create it from the Polygon Tool. Take the Polygon
Tool and click on your artboard. In the new dialogue window, type 3 Sides with
any Radius. Then click OK.
Keep it selected and go to Effect > Warp >
Bulge. In the new window, Warp Options will pop up. Be sure to set the Style toBulge, Bend 60%, Distortion Horizontal 0%, Vertical 0%. Make one more copy of
the ear in front (Control-C, Control-F), then make it smaller and set the
fill color to R=243 G=117 B=121. We just created one ear of the kitten.
Step 3
Rotate the ear a little bit and place it on the head.
Keep the whole ear selected and right-click your mouse. In the pop-up window,
select Transform > Reflect. Select Vertical axis of reflection and pressCopy.
Move the second ear and place it on the right-hand side. To make the ears
right in the middle of the head, you can select both ears, right-click the
mouse and select Group. Press the Shift key and hold, and then select the head
and the ears together. Go to the Align panel (Window > Align) and pressHorizontal Align Center.
Step 4
Now on to the eyes. Choose a green fill color (R=141
G=139 B=0) and using the Ellipse Tool (L) draw an oval. Draw another oval over
it and make the fill color darker (R=96 G=91 B=3). Draw a small white circle as a highlight.
Rotate the
eye a little to the left. Then create another eye: right-click the mouse and hit Transform > Reflect, Vertical, Copy. Move the new eye on the right-hand
side.
Step 5
Draw a pink oval with the fill color R=243
G=117 B=121. Keeping it selected, hit the Convert Anchor Point Tool (Shift-C)
and press on the lowest anchor point to make this sharp. We just created the
nose. Place the nose between the eyes, slightly lower.
Step 6
Using the color from the head, we will draw the fur.
Adjust the Pencil options: double-click on the Pencil Tool (N) and set theTolerances Fidelity to 4 px and Smoothness to 40%. Check Fill New Pencil Strokes and
then press OK. Try to draw something like in the image below. To close the
path, you need to hold the Alt button as you finish the path. Draw three
different pieces of fur: on the top of the head, and on the left and right cheek. The head is
done!
2. Creating the Body
Step 1
Using the Ellipse Tool (L) draw an oval (fill colorR=216 G=217 B=218). Take the Direct Selection Tool (A) and, moving the handles,
create a shape like in the image below.
Step 2
Put the body under the head (Control-X, Control-B).
Step 3
Now, we will create a division between the head and the body. Just
select the head, make a copy behind (Control-C, Control-B) and move it down a
little bit. Make the fill color darker (R=201 G=202 B=204). Then select
the body, and make a copy in front (Control-C, Control-F). While holding the Shiftkey, select the darker copy of the head, and on the Pathfinder panel press theIntersect button.
Step 4
This next shape is designed to show the hind paw
of the kitten. Draw an oval using the Ellipse Tool (L) with a fill of R=201 G=202 B=204. To
make the top and bottom anchor points sharp, take the Convert Anchor Point Tool
(Shift-C) and press on these anchor points. Then go to Effect > Warp >
Arc. In the new dialogue window, enter the following: Style Arc Vertical, Bend
50%, Distortion Horizontal 0%, Vertical 0%. Press OK. Then expand this shape(Object > Expand Appearance).
Put the shape where the hind paw has to be. Also, if
you don't like the result you made in the previous step, move the handles of this
shape using the Direct Selection Tool (A) to achieve the result you want.
Step 5
To draw the front legs, start with an oval. Using
the Direct Selection Tool (A), move the handles to create the shape shown below. Make another copy (Control-C, Control-B) and make it darker(R=201 G=202 B=204) and a little wider.
Step 6
Take the two shapes you made in the previous step and
put them into their places. Then take just the darker shape and place it where the second
paw has to be. Send this second front paw to the back (Control-X, Control-B).
Step 7
The last part of this cutie is a tail! Again, draw an
oval (the same fill color as the body and head). Send it to the back (Control-X, Control-B) and go to Effect > Warp > Arc. In the new dialogue
window, enter the following: Style Arc Horizontal, Bend -30%, Distortion
Horizontal -65%, Vertical 0%. Press OK. Then expand this shape (Object >
Expand Appearance). This cute kitten is done!
3. Creating the Witch Hat
Step 1
Hit the Polygon Tool and click on your artboard. In a
new dialogue window, type 3 Sides with any Radius. Set the fill color at R=0
G=0 B=24. Go to Effect > Warp > Arc. In the new window, select Style Arc
Vertical, Bend -30%, Distortion Horizontal 0%, Vertical 0%. Press OK. Then
expand this shape (Object > Expand Appearance). Using the Direct Selection
Tool (A), move the handles of this shape to achieve the following result.
Step 2
Make a new copy in front (Control-C, Control-F).
Make the new copy lighter (R=23 G=23 B=44) and make sure that the tops of these
two shapes are at the same point.
Set the fill color to R=234 G=96 B=19 and draw a
circle on the top. To create a nice round circle, hold the Shift key when
creating this shape. Create one lighter (R=243 G=115 B=33) copy of this orange
circle to add volume.
Step 3
Draw an oval for the bottom part of the witch hat.
Make a copy of it in front (Control-C, Control-F). Take the Direct
Selection Tool (A), select the lowest anchor point on this new copy, and move it
up. Keep the last created shape selected, and again make one more copy in the
back (Control-C, Control-B). Move it up and set the fill color at R=66 G=66
B=84. The witch hat is done!
Step 4
Let's decorate this hat with a bow to make it even
more adorable. Draw an oval (did you notice that we are creating this
illustration mostly from ovals?). Hit the Eyedropper Tool (I) and take the
same orange fill color as the pompom on the top of the hat. Move the top and bottom anchor points to the left
using the Direct Selection Tool (A).
Create a second copy of it (Control-C, Control-V)
and put them together as shown in the second image. Keep these two shapes selected,right-click your mouse and select Transform > Reflect. Then selectVertical axis of reflection, Angle 90 degrees, and press Copy. Move the two new
copies to the right.
Step 5
Create an oval (fill color R=243 G=115 B=33) in the
middle to make the knot of the bow. The two dark narrow ovals behind the knot will show
us the folds of the bow.
Step 6
Group the whole bow and place it on the hat.
4. Putting the Witch Hat on the Kitten
Select the whole hat, don't group it, and place it on
the kitten's head. Just select the back part of the hat and press Control-X,
Control-B to send this to the back.
5. Pumpkin Carving
Step 1
First we need to draw a pumpkin. Draw an orange oval,
fill color R=243 G=115 B=33. Move the left and right anchor points a down a
little.
Step 2
Make another copy in the back (Control-C, Control-B), move it to the left, and rotate a little to the right. Set the fill color
for the new copy at R=234 G=96 B=19. Keep it selected and create a reflection
of this (right-click the mouse and hit Transform > Reflect, Vertical, Copy).
Move this third part to the right.
Select the copy you made in this step (image 1) and
create a new one behind (Control-C, Control-B). Slide it to the left and
set the fill color at R=221 G=83 B=14. Make a reflection of this copy (right-click the mouse and Transform > Reflect, Vertical, Copy), and slide it to
the right.
Step 3
Now let’s start carving the eyes. We will start with a triangle (R=191 G=60 B=2). Go to Effect > Warp> Bulge. In the new dialogue window, enter the following: Style Bulge
Vertical, Bend 50%, Distortion Horizontal 0%, Vertical 0%. Press OK.
Step 4
Create the second eye. Keep it selected and hold
the Alt key to move it to the side.
After that, draw two circles and place them as in
this image. Select the two circles together (remember to hold the Shift key for
this), take the Eyedropper Tool (I) and take the same color from the
corresponding part of the pumpkin.
Step 5
To carve the mouth, create an oval with a dark orange fill
color, the same as the triangular part of the eye (use theEyedropper Tool (I)). Make the left and right anchor points sharp (use theConvert Anchor Points Tool (Shift-C). Then go to Effect > Warp > Arc.
Enter Style Arc Horizontal, Bend -50%, Distortion Horizontal and Vertical 0%.
Press OK. Add two rectangles, (using the Rectangle Tool (M)) with the same
fill color as the corresponding part of the pumpkin.
Step 6
Position the mouth where it should be.
6. Putting the Kitten on the Pumpkin
Let’s help the kitty climb on the pumpkin.
7. Drawing the Spider
Step 1
A gray oval (R=109 G=110 B=112) will make the body of
the spider. Slide the left and right anchor points down.
Draw an eye using two circles with light gray and
black fill colors. Make two eyes by copying and pasting,and place them as shown.
Step 2
Make the stroke color the same as the body of the spider
and on the Stroke panel check Round Cap. Then go to the Tools panel and double-click
on the Pencil Tool (N). In the new dialogue window, make Tolerances Fidelity 4
px and Smoothness 40%. On the Stroke panel, make the Stroke Weight very thick
(relative to the body of spider) and draw four legs.
Keep these legs selected and make a reflection to create four more legs. Move them to the right.
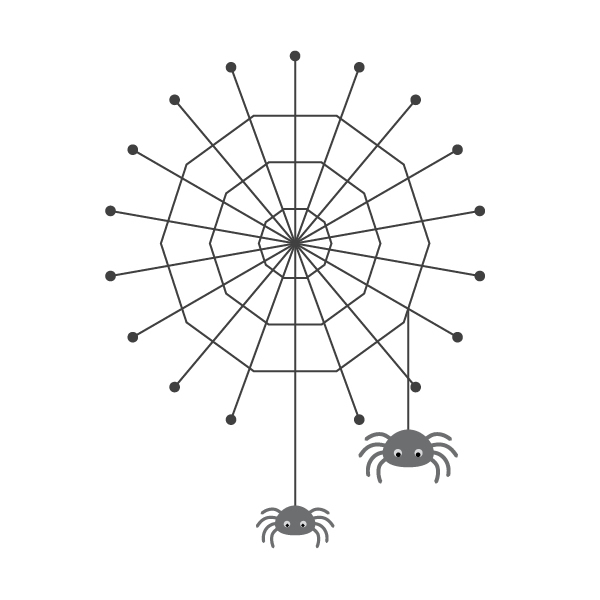
8. Creating the Spider Web
Step 1
Set the stroke color at R=64 G=64 B=65 and delete the fill color. Take the Polygon Tool and click on your artboard. Type 10 Sides
with any Radius. Create two more of the same polygons, each one being smaller
than the one drawn before.
Take the Line Segment Tool and hold the Shift key to
draw a straight line. With the same fill color, draw two tiny circles on the ends.
Group the circles and the line. Place this line in the middle of the polygons.
Keep the line selected and press the Rotate Tool (R),
then press the Enter key. A new window will pop up. Type 15 or 20 degrees and
press Copy. Keep pressing Control-D to repeat your last movement.
The spider web is done.
Step 2
Settle the spiders there.
9. Creating the Background
Create two circles as shown in the following image.
The smaller circle should have a fill color of R=35 G=31 B=32, and the bigger one R=88 G=89
B=91.
Keep the bigger circle selected and go to Effect >
Distort and Transform > Zig Zag. Then enter Options Size 4 px, Absolute,
Ridges per Segment 20, Points Smooth, and press OK.
10. Placing the Background
Place the two circles you made in the previous step behind everything
you created before. As you can see, I made a few spiders and a couple of spider webs.
Arrange everything as you like.
11. Creating the Striped Background
Now we need to create another background. Take theRectangle Tool (M) and create a rectangle with 600 px width and height. Put it behind
everything. Set the fill color at R=243 G=242 B=227.
Afterward, create one more copy in the front, and make it
darker (R=216 G=214 B=168) and more narrow.
Keep the new green stripe selected, hold Shift and Alt, and move this stripe to the right. Then keep pressingControl-D to repeat your last movement. Stop when you fill up the light green
square.
12. Placing the Striped Background
Select the light green square and darker green
stripes together, and place them behind everything you made before. Your
illustration is done! Congratulations!
Conclusion
See! You can create adorable illustrations just using
basic shapes! I hope you've learned a few tricks and can apply them on your
own. I can’t wait to see your results below!
This
tutorial will equip you with the skills to create a style of fractal
known as tiles. The concept of a tile (think subway tile or kitchen
backsplash) is ideal for a fractal application because of the
repeating pattern of self-similarity. In this tutorial we will
explore the power of post-transforms, learn how to apply a final
transform, and explore different formulas known as variations within
the Apophysis program.
Explanation
of Tiles
The
fractal tile style comes in a wide variety of shapes, from squares to
hexagons and beyond. All of them follow the same basic ideas to
create a pattern. Once you've conquered the structure for a tile, the
possibilities are literally endless, with a whole plethora of fun
formulas to be added and shapes to explore. Today we will focus our
attention on the basic square tile.
1. Basic
Structure of a Square Tile
Step 1
To
begin creating the structure for our square-tiled fractal, open theEditor and click the button for a New/blank flame.
Step 2
The
next step is to set up the first transform. We do this because it will
serve as a template for the rest of the tile structure. Setting up
this one transform and copying it saves us a lot of time and work, and
is also good practice because it prevents us from making easy
mistakes by forgetting steps or mistyping values.
We
will leave the Variation set to linear=1 as the linear formula is the
backbone of this type of tile. Change the Weight of Transform 1 to10. On the Colors tab, set the Color Speed setting to 1. The effect of
this will not be apparent right now, but will become evident as we
continue.
Step 3
Finally,
we need to move this initial transform into place. Move Transform 1
left one unit. Move this same transform up one unit.
Step 4
Now
that the first piece of our tile is in place, we can create the rest
of the tile structure. Each of these transforms will be a duplicate
of the first transform we setup.
Duplicate
Transform 1 by clicking the Duplicate Transform button at the top of
the editor. Move this transform to the right by two units.
Step 5
Duplicate
Transform 2 by clicking the Duplicate Transform button. MoveTransform 3 down by two units.
Step 6
Lastly,Duplicate Transform 3. Movethis transform to theleft by two units.
This
completes the basic structure of a square tile.
2. Add the First Shape
The
number of options for putting shapes into fractal tiles is
staggering. For this tutorial, we'll look at a few different
variations and how they can be used to create some amazing artwork.
Step 1
Create
a New Transform.
Step 2
At
this point, it is good to have the variation preview turned on in the
editor. This allows us to see what the particular variation is doing
on the fractal plane. It also allows you to visualize what each
transform's effect is on the fractal and can provide invaluable
information as you design your own fractals.
Right-click
in the grid-portion of the editor window and choose the option Show
variation preview.
Step 3
For
this transform, we need to use the Variations tab of the editor.
Remove the 1 from Linear by changing it to a 0. You should now see
many small dots in the preview window. This shows you the structure
of the tile we set up. To get an even clearer picture, scroll down to
find the Blur variation and add 0.5 to Transform 5. You will see the
dots become clearer. Change the Blur value back to 0 to continue.
Step 4
To
begin adding some shape to our tile structure, find the variationBubble and change the 0 to 1.
Step 5
At
this point, the Bubble variation is too big to be useful in our tile.
We could reduce the amount of the variation to 0.25 or perhaps even
smaller. However, by doing so, we reduce the affect of the variation,
which is not what we're aiming for as it will affect the shape.
Instead we are going to force the transform to become smaller and at
the same time retain the round shape of the Bubble variation when set
to 1. This is an incredibly powerful technique that will allow you to
retain the shape of a variation known as
post-transform. This is an over-simplified explanation, but use it to
your advantage: when you activate the post-transform, you keep the
original shape and can move it at will.
To
activate the post-transform mode, look for the button in the top menu
bar of the editor that has a Px and a triangle. Click this button to
enter the post-transform editing mode.
Step 6
With
the post-transform mode active, switch to the Triangle tab. We want
to shrink the size of Transform 5. Change the value in the Scale Box
(the one with a triangle on either side) to 200. Click the Scale Down
Triangle twice.
Step 7
We
can edit the shape of this transform more by deactivating the
post-transform mode and then scaling down the transform two more times
by 200.
Step 8
The
next step is to add more structure. Create a New Transform. Remove
the Linear variation by changing it to 0. Add Cylinder to this
transform by changing its value to 1. The cylinder variation will
give a long bar or tube shape.
Step 8
Once
again, at a value of 1, the cylinder transform is too large to fit
nicely into our tile. It needs to be scaled down just as the bubble
transform was. Enable post-transformmode, and scale down Transform 6
by the value of 200 three times. In the preview window, you'll now see
the circles from the bubble transform appear connected by a long bar
which is our cylinder transform.
Step 9
Let's
modify this transform some more. With post-transform mode still
active, moveTransform 6 to the left 0.5 units and up 0.5 units.Rotate this transform 45 degrees counter-clockwise. Notice that each
time we modify the position of this transform, the shape does not
change, only the position. This is the power behind the
post-transform mode. If we were to perform these same actions with
post-transform turned off, the entire shape of the fractal would
change drastically.
Step 10
We
can get more shape out of this transform by one more trick. Turn
post-transform mode off, andscale down this transform by 200 once.
This technique will put more texture into the transform and give us a
more 3D appearance.
Step 11
To
frame out the rest of our shapes, duplicate Transform 6. Enable
post-transform mode once again. This time, rotateTransform 7 90
degrees clockwise and moveit one unit to the right.
3. Creating
a More Complex Structure
Step 1
We've
now completed a very basic tile structure and shape. Add a New
Transform and remove the linear variation from this transform by
changing Linear from 1 to 0. Change the values of Juliascope in theVariations tab from 0 to 1. Enable the post-transform mode and scale
down by 200 and then again by 125. Movethis transform up one unit.
Finally, switch to the Variables tab and change the juliascope_power
to 2 and juliascope_dist to 1. These modifications really fill in the
rest of the fractal and give it a solid and powerful appearance.
Step 2
Now
is a good time to adjust the weights of transforms. Originally we set
the weight of the first four transforms to 10. This allows the
structure of the tile to hold despite how many more additional
transforms we add, allowing us to continue to see what the tile looks
like while we design it.
Change
the weightof the transforms to the following:
Transform
5: Bubble: 2
Transforms
6 and 7: Cylinder: 3
Transform
8: Juliascope: 3
Notice
how changing these weights affects the overall appearance of the
fractal. You may also notice a few annoying bright spots near the
middle of the fractal. (This will depend on your current gradient).
Let's fix those now.
Step 3
Switch
to the Colors tab. For each of the transforms 5 through 8, change theOpacity value from 1 to 0. Pay careful attention to the preview
window as you make each change and notice how the bright spot changes
to conform to the same color values as the rest of the fractal.
Step 4
This
is a good time for us to pick a color palette for the finished
fractal. Close the Editor and open the Gradient selection window.
Choose gradient 558_Explosion.
Step 5
Close
out of the gradient selection and open the Editor window. Open theColors tab. Remember when we set each of the linear transforms to a
color speed of 1? We did this so that all of the color changes we
make now will be consistent across the entire fractal.
Make
the following changes to each of the transforms:
Transform
5: Transform Color: 0.150 and Color Speed: -1
Transform
6 and 7: Transform Color: 0.708 and Color Speed: -1
Transform
8: Transform Color: 0.608
To
give more prominence to the Juliascope transform (Transform 8),
change the Weight from 3 to 4.
4. Adding a Final
Transform
Step 1
To
give our fractal more punch, we can add a final transform. The final
transform will affect the entire fractal shape by influencing it with
any formula or combination of formulas we choose.
Enable
the final transform by clicking the Fx button with the little
triangleat the top of the editor menu bar. You will see a grey
triangle appear in the editor.
Step 2
This
final transform begins just like any other new transform we add, with
the linear variation set to 1. Remove this by switching to the
variations tab and changing the value of Linear to 0.
Step 3
Add
to the final transform 0.5 of the Foci variation and notice the
change of the overall shape. Additionally, add in 0.1Spherical.
There is a slight, but visually appealing change to the shape of the
fractal. Combining variations like this, even positive and negative
amounts, can create some incredible images.
5. Cleanup
and Rendering
The
last few steps involve cleaning up the fractal and rendering.
Step 1
Close
the editor and use the zoom and movetools in the main window to find a nice location on
the fractal to render.
Step 2
Open
the Adjustment panel and change to the Rendering tab. Change theGamma setting to 3.5 for a slightly clearer render.
Step 3
The
final step is to render the fractal. Open the Render dialog by
clicking thepurple gear in the main window. From here, set theDensity to 10,000. The Filter Radius setting of 0.455 will work
nicely for the detail in this fractal. An Oversample of 2 is ideal.
Click Start to begin the render.
Explore
the different final transforms first. Add several. Use negatives.
Be bold! You will be amazed at the variety of images you can get just
from changing these. Next, challenge yourself by removing the final
transform and move some of the other transforms to new locations.
Then, try changing the variations to create something new. If you
would really like a challenge, start from scratch and try to create a
hexagon or other type of tile.
Below are a few samples of what you can create with fractal tiles and Apophysis.
If you want to start a new career in children's illustration, or if you're an illustrator looking to strengthen your skill set, take a look at our Fundamentals of Children's Illustration video course.
What You'll Learn
This course will teach you how to create illustrations for children, with three hands‑on projects in Adobe Photoshop and Adobe Illustrator. You’ll learn how to work with color modes and tell the difference between RGB and CMYK, how to use storyboarding, how to scan and paint your illustrations, and how to add special effects.
Tuts+ instructor and Adobe Certified Expert Kirk Nelson will teach you how children’s illustrations differ from standard illustrations, and will give you some great techniques to take your children’s illustrations to the next level.
There’s a different illustration for you to work on in each chapter. First you'll scan a pencil-on-paper drawing and apply painting effects to it. Then you'll create an illustration using digital drawing techniques. And finally you'll work on a digital illustration project built on basic vector shapes.
Watch the Introduction
Start Learning With a 14 Day Free Trial
You can take our children's illustration course straight away with a completely free 14 day trial of a Tuts+ subscription. Start your free 14 day trial today, to access this course and hundreds of others.
"Create a cartoon zombie and incorporate the letter Z."
Zombies are awesome, and it is almost Halloween, so of course! As an extra challenge I will be using just two brushes.
To make a very funky-looking cartoon zombie I will be covering my process of taking a brief through to completion, with tips and tricks along the way including the wonder that is clipping masks. I'll also show the importance of thumbnailing, taking a rough sketch to a final creepy conclusion, line art tricks, and a smattering of colour theory.
I will be using stock images from Photodune and DeviantART as reference for creepy undead poses.
Tutorial Assets
The following assets were used during the production of this tutorial.
For this illustration we will be setting up the artwork for print. We want to have an A3 size print so in the New Document Dialogue (File > New or Control-N) we set:
Width to 3,508 px
Height to 4,961 px
Resolution to 300 dpi (the standard Dots Per Inch for print)
The Color Mode is set to CMYK as we will be printing this document. However, if your artwork is not for print then set the Color Mode to RGB.
Step 2
To prevent us creating the artwork too close to the edge where it may be cut off, create a 100 pixel (px) safety zone using Guides.
Bring up the New Guide dialogue box by going to View > New Guide where we will create four guides. For each guide you will have to reopen the New Guide dialogue box.
Vertical 100 px then click OK
Horizontal 100 px then click OK
Horizontal 4,861 px (height of document minus 100 px) then click OK
Vertical 3,408 px (width of document minus 100 px) then click OK
Select the boundary with the Rectangular Marquee Tool (M) and hold down Shift to select all four sides. It can be helpful to have Snap enabled (View > Snap) and ensure Snap To > All is selected.
Next create a New Layer (Control-Shift-N) and Fill (G) the selection with a mid grey.
Control-D to Deselect the area, then go to View > Clear Guides to remove the blue guides. I like to create a grey boundary rather than use guides, because even with snapping turned off, the brush can find itself snapping to the guides, creating undesired straight lines.
2. What is a Zombie? Defining our Artwork Brief
For this we have a very straightforward brief :
"Create a cartoon zombie and incorporate the letter Z."
According to Wikipedia a Zombie is "an animated corpse raised by magical means, such as witchcraft.The concept has been popularly associated with the Vodou religion, but it plays no part in that faith's formal practices."
So what does this tell us? We need to create a walking corpse! If you refer to popular culture, we have a fairly stereotypical view of zombies. Groaning animated bodies with distorted joints, moaning eerily, often with open wounds and signs of decay. Films such as Evil Dead, Shaun of the Dead, 28 Days Later and Dawn of the Dead, and games like Silent Hill, Left4Dead and Plants vs. Zombies probably form our stereotypical view of zombies.
Collecting References Based on the Zombie Description
For our zombie I have found some fantastic reference images from DeviantArt and Photodune for poses and anatomy. The area of the zombie I would need most help with would be the skull, so I waited until my thumbnail was chosen to take some reference pictures of my model skull. If you are going to be creating portraits and characters it is a great idea to get well acquainted with anatomy by studying the human form; life drawing classes are excellent for this. I find it very helpful to have a model skull on my desk, especially if I need to work out a tricky angle for a head. There are plenty of stock image sites that have turnarounds of skulls if you can't bring yourself to be greeted by a skull on your desk every day!
3. Brushes
Here are the two brushes we will be using for this tutorial. The first is the Hard Edge Custom Brush. Here are my settings.
Hard Edge Custom Brush Settings
Press F5 to bring up the Brush dialogue box.
Use a Standard Hard Round Brush Tip
Hardness to 100%
Spacing to 1%
Shape Dynamics
Size Jitter 0% with Control set to Pen Pressure
Minimum Diameter 70%
Angle Jitter 0%; Control Off
Roundness Jitter 0%; Control Off
Transfer
Opacity Jitter 0%; Control Pen Pressure; Minimum 0%
Flow Jitter 0%; Control Pen Pressure; Minimum 0%
Then save your brush by pressing Create New Brush at the bottom right of the Brush dialogue.
The second is the Soft Edge Custom Brush. Here are my settings.
Soft Edge Custom Brush Settings
Press F5 to bring up the Brush dialogue box.
Use a Standard Hard Round Brush Tip
Hardness to 0%
Spacing to 1%
Shape Dynamics
Size Jitter 0% with Control set to Pen Pressure
Minimum Diameter 70%
Angle Jitter 0%; Control Off
Roundness Jitter 0%; Control Off
Transfer
Opacity Jitter 0%; Control Pen Pressure; Minimum 0%
Flow Jitter 0%; Control Pen Pressure; Minimum 0%
Then save your brush by pressing Create New Brush at the bottom right of the Brush dialogue.
4. Thumbnailing for Composition
Thumbnailing is a great, fast way to work out a composition before you start work. Thumbnails are small squares or rectangles set up to the orientation of your document. In these you can quickly rough out poses and compositions to see which is the best use of space and which piece has the best silhouette.
Step 1
Below I have created nine portrait rectangles and roughed in a "Z" to each, as this is a central item to the piece. Then using rough, simple shapes I have made up some poses based on reference images and imagination. The three I feel are most undead have been circled in red.
Step 2
Next I isolate my favourite three to see which is the strongest. The first reminds me of a bear, and the second is good but not as awkward as the last one. Normally awkward wouldn't be what we're after but seeing as we want a disjointed walking dead dude, this is perfect.
Step 3
I then copy the third rough with the Rectangular Marquee Tool (M) and press Control-C to Copy and Control-V to Paste into my print document. Then I scale the artwork to the document size by pressing Control-T. Note the rough sketch is of lesser quality than we would normally work at, but as this is just a rough, it will not be seen in the final document.
5. Bringing the Zombie to LIFE!
Taking my rough pose, I create a New Layer (Control-Shift-N),then take a different colour and begin roughing out the human anatomy onto the zombie pose. I start with the skull, using my own reference of a skull and refining the pose using Photodune: scary bloody zombies waiting for a prey as reference.
Then using Photodune: Anatomical Overlays with Internal Organs as reference I make sure the anatomy is approximately right to make our character believable. It can be helpful to block out large shapes for the rib cage and pelvis, and then draw in the details on a New Layer (Control-Shift-N).Taking my model skull, I arranged it at an angle with the mouth open, and then took a few photos with my phone. I chose the best shot and saved that as reference.Taking the skull reference and the face of a female "zombie" I begin work on roughing out my zombie's face. To ensure I am not getting lost in details I like to have a zoomed out window of my artwork open. Window > Arrange > New Window for FILENAME.PSD. Thisis an identical copy of the document which I keep zoomed out. The benefit of this is that you can work on either document and it will update immediately. Good if you notice a detail you wish to change when zoomed out.
6. Clean the Rough Sketch
Step 1
Lower the opacity of the rough sketch. I decided the lower jaw wasn't needed, and without it the zombie dude looks creepier.
Step 2
Taking the hard brush on a New Layer (Control-Shift-N),I begin to clean up the line art, adding little details as I go such as wrinkles, pock marks, spots, dirt, dimples, tears, and holes. Creating details at this stage means less work in the colouring stage and gives the illusion of more structure than there really is. Rather than going with a traditional black I have opted for a dark purple. I have done this as I want the zombie to have some green and red tones, so purple will be a pleasant contrast and make the greens and reds look more vibrant.
Step 3
I continue all over our zombie until it is complete and I am satisfied with the level of detail.
7. Create a Flat Base
To make life easy we are going to create a solid silhouette for our zombie. We do this so we can Lock Transparency on the layer and colour quickly without going outside our lines.
Step 1
To do this create a New Layer (Control-Shift-N)
Step 2
Rough in the silhouette in a mid grey using the Hard Brush.
Then take a hard edge eraser to tidy up the edges of the silhouette. You can paint in the silhouette carefully by hand, but I prefer this method.
Step 3
Once you have gone round the whole outline, name the layer Base by double clicking on the layer name in the Layers panel.
Step 4
Create a New Document (File>New or Control-N).
Step 5
Then go to Image > Image Rotation > 90° CW to make the document landscape. Select the Line Art and Base from our original artwork and drag them into the Landscape A3 Document. Create a guide line under the feet of the zombie by pressing Control-R to bring up the rulers, then using the Move Tool (V) drag a horizontal guide down from the top ruler.
Step 6
Next I select the Line Art layer and Base by clicking on the Base layer, holding Shift then clicking on the Line Art layer. Then drag both layers down to the New Layer icon (shown below) at the bottom of the layers palette.
This will make a direct copy of both layers and keep them in the same place. Do this once more to create another copy. Next select the Move Tool (V) and select one set of Line Art and Base. Holding Shift press the Left or Right Arrow keys to move the zombie across the document to give three identical illustrations. For each Base layer select Lock Transparent Pixels in the Layers Panel. Lock Transparent Pixels means that we cannot paint outside the grey pixel silhouette. Think of this as masking off the outside of the zombie with digital tape.
Now we are ready to rough in some colours!
8. Colour Roughs
To colour over the silhouettes we will be using Clipping Masks. I use these all the time as a non-destructive way of painting an element. On the layer above the silhouette, create a New Layer (Control-Shift-N) then right-click on the New Layer and select Create Clipping Mask. Anything created on this layer will only show on whatever pixels are available on the layer below.
To create Core Shadows on my illustration I will be taking the Local Colour andpainting it on a Multiply Layer. For a more realistic approach you can tweak the Local Colour to have a warmer or cooler tone depending on your light source, but for this piece I wanted a cartoon style render. For Highlights and other details I will be colour picking from the MagicPicker Color Wheel and I will cover why I chose these colours.
Step 1
Create a New Layer (Control-Shift-N) above the first grey zombie and right-click to select Create Clipping Mask.
Step 2
Take your Hard Edge Brush and start applying colours from your first palette over the zombie. You don't have to be neat with this step, it's just to give you an idea of how the colours look together. This will also make it quicker when you go to paint your final design, as any colour guesswork is taken out. Feel free to add in some new colours if you don't feel they work, or if the overall feeling isn't quite working. I have done this in the first one, where I wanted to see what the darks would be like against such an intense skin tone.
Step 3
Repeat the process over the second and third zombie.
Step 4
Look at the three designs side by side and see which works best. Feel free to do this as many times as you like if the colour scheme just isn't working for you.
Here's what I think of the three schemes:
Colour Choice 1: Teals, greens and blues feature heavily, with accent colours of red and orange. Good creepy feel, but I think it's a bit bland.
Colour Choice 2: Friendlier colours, using purples and pinks with a teal base and an orange accent colour. I like this, but it's maybe a bit too cutesy.
Colour Choice 3: Autumnal colours, mainly reds and oranges to contrast strongly with the mossier green skin. I feel this scheme is the most dramatic and has a discordant, uncomfortable feel, so I will go with this one.
9. Rendering: Sketch Setup
Now it's rendering time! But first we need to create a new layer, and lock our line art layer.
Step 1
Create a layer below the clean line art.
Step 2
Select the line art layer and set the Blend Mode to Multiply. The reason we do this is to make the line art more visible over any artwork we create below. Then Lock the layer by clicking on the padlock icon on the Layers panel.
10. Creating Flats
Making flats is one of my favourite things about digital painting. You can be as messy and loose as you like, but it doesn't matter as the edges are kept clean.
Step 1
Colour pick the burgundy of the zombie's shirt by pressing Alt while having the Brush (B) selected.
Step 2
Create a New Layer (Control-Shift-N) above the zombie silhouette,then right-click on the New Layer and select Create Clipping Mask.
Step 3
Begin to paint in the shirt. The edges of the body will be clean, but as you can paint anywhere within the silhouette you will have to paint areas such as the collar in neatly. Don't worry, though, as after you've done this groundwork, the applying of "paint" becomes easy and carefree!
Step 4
Repeat this process for all the elements such as his underwear, shoes, and socks, and don't forget the little details such as the brain, eyes, and teeth.
Step 5
Although each layer is "clipped" to the silhouette, we need to make sure we can't colour outside our boundaries. So for each element,select the layer and press the Lock Transparency button.
Step 6
Turn off the line art layer by clicking on the little eye next to the layer. We do this to see if there are any areas we have missed. Your zombie should look a little like this!
11. Local Colour
Local colour, according to Wikipedia, is "the natural color of an object unmodified by adding light and shadow or any other distortion. Local color is best seen on a matte surface, due to it not being reflected, and therefore distorted. In Fine Art Realism, this refers to the color the brain perceives an object to be. For example, an apple is red."
So what does this mean for our zombie? Using palette 3, we make things on him the colour they really are—well, the colour we want them to be, cause we all know that zombies aren't real... right?
Green for his undead, rotting skin
Red for his ripped shirt, sock accents and y-front banding
Orange for his oh-so-cool high-top shoe
Dark orange for his BRAAAAIIINNNNNNNNS! and knee bandage
Pale grey-green for his socks, underpants, eyes, teeth, and shoe details
Tip: It's a great idea to limit your palette and make sure that you repeat colours around your piece to give it a unified look.
12. Shadows and Core Shadows (Dark Areas)
Here are some definitions from Santa Monica College professor Cary Childress:
"Shadows: Shadows are the voidence of light. Shadows do not change color but only lower the value (slightly cooler in color is OK). Shadows should only lower the value 2-3 value steps. (More in higher contrasty light, less in Softer, flatter light.)
"Core Shadow:The Core or Core Shadow is the darkest part of the object. Usually the vertical side away from light source. Same side as shadow."
Step 1
Let's do a first pass on our shadows. Create a New Layer (Control-Shift-N) set to Multiply in the Layer Blend Modes, set to Clipping Mask above the Skin base, and with the same green as the skin.
Taking the Hard Brush,start to paint in the areas of shadow. Pay attention to areas such as the eye socket, where there is a sharp change in light. Next, take the Eraser (E) and select the Soft Brush and cut into the dark shadows where there is a gentle change in light, for example in the curve of the skull. Define areas from soft (form shadows) to hard (cast shadows). This usually applies with a strong light source. Using contrasting hard and soft edges will help define the form.
Tip: If you don't feel very confident using this method, then reduce the opacity of the eraser and work into these areas slowly.
Tip 2: Place a model skull or a round object on your desk while you draw, with a similar light source set up, so that you get an idea of how the hard and soft shadows form.
Step 2
Core shadows are the really dark areas where light doesn't get to at all. So to achieve this we will be layering on another shadow layer using the MultiplyLayer Blend Mode and the same green, plus a hard brush as before. Areas where little light would reach would be under the cheekbone, inside the nostrils, deep in the eye socket, etc.
Step 3
Carry on over the entire piece using the Clipping Mask and using the Local Colour on a Multiply layer to create shadows and core shadows.
13. Highlights
Step 1
Continue the process of creating New Layers and Clipping Masks.
Here's a close-up on the highlights of the zombie's face. I have taken a paler green based on the skin tone, and gone in with a Hard Edge Brush (B),then softened some edges using a Soft Edge Brush Eraser (E).
Note here that the highlighton orange becomes a higher saturation yellow. It's only a slight change, but rather than adding black, grey or white to change colours, move up the spectrum slightly. For example, to make a red highlight, move slightly towards orange and increase the saturation. The reason we do this is to create more of a pop!
Step 2
It's also fun to play with the Layer Blend Modes to give different effects. Here I have used a saturated orange on a Soft Light layer to give a subtler highlight.
Here are some helpful notes on the difference between shade, tint and tone.
Shade: Any hue with black added
Tint: Any hue with white added (also known as Saturation)
Tone: Any hue with grey added
Here's an example of what I mean. The central hue is the original purple, and to lighten it I have added a pink by sliding the hue slider and changing the Tint slightly. The darks have been created in a similar way by moving the hue towards the blue and changing the Shade slightly. This gives a more pleasing result.
Photoshop's default Color Picker is similar to MagicPicker, but using MagicPicker you can keep this window open and change colours on the fly. Have a play around with the hue slider using either the Photoshop Color Picker or MagicPicker to create more interesting palettes than simply adding black, white or grey to the mix.
Practice colour choices over the entire piece. Remember to keep your colours unified!
14. BRAINS!
Because zombies have a thing for grey matter (or orange in this case) I thought I would show you the steps for creating shiny brains!
Step 1
Remove your brain from your skull and place it on your desk. Add a light source to see how shiny it is. Try poking it...
Step 2
Once you've replaced your brain select the Brain flat layer.
Step 3
Create a New Layer (Control-Shift-N) set to Multiply, and make sure it's clipped to the Brain layer.
Create a Mask by holding Control and clicking on the preview window of the flat brain in the Layers panel. Next, click on the icon of a rectangle with a circle in the middle, at the bottom of the Layers panel. This will create a mask of the whole brain shape. Then click on the transparent preview of that layer so that we don't paint on the mask.
Select the brain orange by holding Alt with the Brush selected,and paint in areas away from the light source using the Hard Brush.
Step 4
Now let's add core shadows. Create a New Layer (Control-Shift-N) set to Multiply, and make sure it's clipped to the Brain layer.
Holding Alt, drag the mask from the Shadows layer onto the Core Shadows layer, then click on the transparent layer preview.
Select a purple from the MagicPicker Color Wheeland paint in some Core Shadows for extra brainy pop!
Step 5
To add highlights, select the lighter orange from our palette.
Create a New Layer (Control-Shift-N) set to Multiply, and make sure it's clipped to the Brain layer.
Holding Alt, drag the mask from the Core Shadows layer onto the Highlights layer, and then click on the transparent layer preview.
Paint in highlights that would be in the areas closest to the light source.
Step 6
For specular highlights, create a New Layer (Control-Shift-N) set to Multiply, and make sure it's clipped to the Brain layer.
Holding Alt, drag the mask from the Highlights layer onto the Specular layer, and then click on the transparent layer preview.
Select a very pale yellow from the ColorPicker,and add in some intense specular highlights to give the brain a wet, glistening look.
There you have it. BRAAAAAAAAIIIIIIIIIIINNNNNS!
15. Creating the Z
Before starting the Z, hide all the zombie detail layers by pressing the "eye" icon next to the respective layers.
Step 1
We'll start with a base silhouette. On a New Layer (Control-Shift-N), paint in the silhouette of the Z using the HardBrush.
Step 2
On a New Layer (Control-Shift-N),right-click and select Clipping Mask. In the Layer Blend Modes select Multiply and use the same colour as the base to paint in the shadows, being sure to use the same light source as for the rest of the zombie.
Step 3
Next create a New Layer (Control-Shift-N) set to Clipping Mask,and then select a lighter, warmer purple and paint in subtle highlights.
Step 4
For the ropes I have already created a silhouette in orange. Repeat the New Layer process as before with Clipping Masks by painting in highlights with a yellower orange.
Step 5
Create a New Layer (Control-Shift-N) set to Clipping Mask. Then taking a pale purple, add in some highlights on the nubs of the bones and along the length to create a slight sheen. If you want the bones to be really shiny, add in a tiny, pure white highlight in these highlighted areas. Use pure white verysparingly!
As the bones are a background feature, we don't want to distract from the detail of the zombie, so keep it simple.
16. Finishing Touches
Before we start, turn all your layers back on by pressing Alt while clicking on a hidden layer.
Step 1
Fill a New Layer (Control-Shift-N) with a desaturated teal.
Step 2
Now it's time to add some creepy darkness! Add a Gradient (Alt-G) of the burgundy red on a layer above, set to Hard Light in the LayerBlending Modes.
Step 3
Select the Ellipse Tool (Alt-U),and while holding Shift to constrain scaling, draw out several circles for celestial objects filled with a near, but not quite, white.
Step 4
Duplicate the stars layer by dragging it down to the New Layer icon on the Layers panel, Right-click on the lower layer and select Rasterize, then Filter > Gaussian Blur, and set the blur to give the appearance of a glow.
Step 5
On a New Layer (Control-Shift-N) set to Multiply in the Layer Blending Modes below all the zombie and letter artwork, paint in some grounding shadows under the feet of the zombie and the base of the Z using the Hard Brush.
Step 6
Change the border to white.
Voila!
I hope you enjoyed creating a zombie from scratch, I certainly did! With simple steps like clipping masks, you'll be creating an army of the undead in no time.
Looking forward to seeing you next time for some more illustration tutorials!
The latest Envato Stories video comes from Hasselt, Belgium, where the team met up with Tuts+ video production instructor Jordy Vandeput. Jordy has been teaching on Tuts+ since the start of 2013, as well as running his own video production company.
Since buying his first camera at the age of 12 Jordy has been passionate about filmmaking. In his teaching he gets the most out of knowing that he can help another person fulfil their ambitions.
His advice to those starting out is to always keep learning and practising and eventually it will come: "Give it some time and never give up."
To get started learning with Jordy, check out some of his courses for Tuts+:
Readers may know Robert Iza's work from the webcomic "The Eternally Injured Ninja" or as a storyboard artist for the Nickelodeon series "Breadwinners". In this interview, Iza discusses his artwork, inspiration, working for Nickelodeon, art shows in galleries, and more. I am pleased as punch to share his work and an insight into his life below.
Hey Iza, Thanks so much for the interview! Let's start at the top: What got you into animation and illustration?
OK, so basically, I knew when I was a kid I wanted to make cartoons. As I grew up though, I got into comic books, anime, and live action movies. I took video classes in high school, and wanted to go to USC for film school. I switched schools senior year when my family moved down to California from Washington state. I wasn't able to take the video class they had 'cause I had already taken more classes then they had, so to fill the credit I needed to graduate, I took an animation class. I fell in love with animating.
Robert Iza himself.
Who or what inspires you in your work?
I have so many. Jim Henson, Tex Avery and all the Looney Tunes guys are huge influences. Genndy Tartakovsky, Craig McCracken, Aaron Springer, Paul Rudish, Chris Savino, CH Greenblatt, Craig Kellman, Lou Romano, Tim Biskup, Scott Wills, Dan Krall, Daisuke Tsutsumi, Bill Cone, Osamu Texuka, Akira Toriyama, Hayao Miyazaki, Thurop Van Orman, and many many more.
Rocky and Bullwinkle fan painting.
But those are a lot of direct influences off the top of my head. Also all kinds of silly video games: Animal Crossing, Parappa the Rapper, Gitaroo Man, Katamari Damacy, Pikmin, Pokemon, Zelda, Megaman, and more.
Fozzie Bear of Muppets fame.
Are you formally trained? If so, where did you go, what degree did you achieve, and what was the experience like? If not, how did you work up your portfolio for professional work?
After the end of high school I had heard of CalArts, but it sounded too scary or intimidating to me, so I didn't look into it until years later. I ended up going to what I consider the McDonalds of art school, the Art Institute of LA. While I did learn some things, they had a weird agenda, and wouldn’t let me focus on pre-production and 2D (I knew I wanted to get into storyboarding and work in TV more than feature animation). I was passionate about it regardless, and got myself an internship at Cartoon Network, which was a fun and valuable learning experience, and met a ton of awesome people.
I ended up quitting school after three years, and then struggled for a really long time. I got back into painting, did a whole bunch of gallery shows, and went through bouts of depression and trying hard to get work in the industry. After that time I just worked really hard to get better at doing the type of work I knew I wanted to do, and took as many tests as I could. I cannot stress enough how long and slow the whole process has been, but in the end I consider it totally worth it 'cause I couldn't do anything else with my life. Nowadays, I feel most people who want to work in this industry can find tons of information and learn on their own, and not necessarily need to go to school, as it's so expensive and just puts people in debt. School is what you make of it either way.
What is your creative process like?
If I really need to work something out when working, I'll either draw in my sketchbook (to figure out paintings, illustrations or designs) or on post it notes if I'm just thumbnailing out a storyboard at the beginning.
Sketches and breakdown of shapes
For painting traditionally, I like to use gouache on watercolor paper or illustration board, or sometimes cel vinyl acrylic on canvas or just about any surface. It all just depends on what I'm working on of course.
What programs and tools do you use in creating your work? Anything you're especially fond of that you'd like to recommend to readers?
On the computer I tend to use Adobe Photoshop the most, and then I also sometimes use Toon Boom Storyboard Pro, Adobe Flash, and sometimes Adobe After Effects. I've also tried Paint Tool SAI and Autodesk Sketchbook Pro.
Digital drawing of "One Piece" fan art.
For how long have you worked professionally?
I've kind of been all over, from smaller studios to freelance and full-time gigs at some of the larger studios for about the past six to seven years.
Animal Crossing fan art.
What's your typical workday like? What's the typical "day-in-the-life" of a storyboard artist?
That simply depends on where you're at in the process, and how things work as far as production flow on any given production. Not only can it be different based on what studio you're at, but even two different productions at one studio will run differently. It's kind of all dependent on the show creator/show runner and the Line Producers, and Production Managers.
Breadwinners for example is scripted (where the writers write up a script) and then they make a radio play (which is the character voices, some sound effects, sometimes finished music, or temp music, or simply a click track to show the general tempo of any given scene.) Then the board artist takes that, and working with their director, will work through the shots of their scenes of that episode, plot it out roughly in Adobe Flash, and then continue to board in Adobe Flash. Adding in more animation if something specific needs to be called out, addressing notes when you get them, making changes, and cleaning up as you move ahead.
It can be hectic and all over the place, and you try to do your best to stay on top of everything, as the script and radio play can change all the time. Most shows don't run this way though, as it's more of a split between scripted shows and board driven. Scripted shows approve a script, then the board artist works out the board based on the script, possibly with some wiggle room to add gags if they see fit, or sticking strictly to the script, again. Depending on the show, they thumbnail it out and then pitch it to see where it's at, get notes, and continue to move ahead. Then, once that's approved, a board revisionist will work on it and address more notes as well as, usually, clean up and put drawings more on model.
Board driven is similar, but the main differences are that they work from a simple outline, and then work to fully flesh out the writing of what happens as well as all the dialogue and the gags and such. It's usually the most open process for the board artist to put their sensibility in the boards.
How about your work space? Can you give us an insight into how and where you work?
For the most part I'm usually on my computer desk at work or home, working on a Cintiq and a Mac at work, and a Yiynova and PC laptop at home. Each has their pros and cons, but I think I personally prefer Mac/Cintiq when it gets down to it. They're both doable though.
Iza's painting workspace
I like to work with at least two to three lamps so I have a good amount of lighting. For supplies, I use Col-erase pencils, mechanical pencils, paint brushes, gouache, a small rag, a palette plate to mix and reuse paint, and a container for paint water.
Fresh cut illustration board.
I cut a whole bunch of illustration board to start with for the whole project. I use an X-acto blade, a cutting mat, and just roughly rule out the pieces, then cut. For commissions and anything based on something it's always nice to print out some reference just to get a good idea of the source material.
Here's my process:
I draw the initial sketch I want. I copy it using my copy machine, and get it to a size I want to fit it within the board. I take a regular pencil and rub graphite on the back of the copied sketch.
Next, I fit the copied sketch around the board and then use a pen to trace over it. This lightly transfers the sketch on the board.
It comes out very light on the board, but just enough to get what I want.
Next, I simply start painting with the background and work from back to front with any objects or details.
From that point, I keep painting 'til I'm done.
And there you have it. This is one of three ways I work when painting.
Iza's painting process as described above.
Do you find time for freelance work? Additionally, what projects have you done in the past?
Occasionally. I've gotten to do a little here and there, but while I have full time work and am doing my short on top of that right now not a whole lot of time for freelance. The last awesome bit of freelance I got to do was character designs for a project in development at Disney TV. While things didn't pan out ultimately for that project, it was a blast to work on and just a fun experience all around.
The other notably enjoyable freelance experiences I had were doing freelance background paint and color styling for a short pilot at Cartoon Network by Ian Jones-Quartey called "Lakewood Plaza Turbo", which was just tons of fun and so amazing! And then a super short stint helping out on my friend Alex Ahad's video game Skullgirls.
Gamera painting.
As previously mentioned, you're currently working with Nickelodeon as a storyboard artist for the delightfully strange show "Breadwinners". How did you get the job? What other projects/networks have you worked on?
I had done a storyboard test for Breadwinners. By the time I had just about forgotten I did the test, I was contacted by them to come in for an interview, and then offered the job.
I've been on Breadwinners for a little over a year now. I've also done work on MAD at WB, freelance work for Cartoon Network and Disney TV, and worked at Playdom/Disney Interactive up in the Bay Area for two years before heading down to LA for more work in animation.
Breadwinners artwork.
You've got an animated short coming up for Nick. Firstly, congratulations! I'm excited to see it. Secondly, tell us about it, please!
Yes, thank you, I could not be more grateful to Nickelodeon and all the executives and people who've been nothing but supportive and helpful of me and my vision with my short. (Gabe Swarr, Mary Harrington, Jill Sanford, Joanna Leitch, and Kevin Lee to name a few!) The shorts program usually takes the finished shorts and puts them online at some point. As to when exactly I'm not sure, but once anything happens, you'll hear me speak up about it for sure. They might also put them on TV, but again, not sure if or when. I've been having a blast learning the whole process, and getting to pick some individuals to work with on it! I really cannot wait to show everyone once it's done! They had posted a kind of basic premise for my short online already, so I'll post that again here (I don't know if I can say much else aside from that).
Shelf Life by Nickelodeon storyboard artist Robert Iza – While working at a warehouse full of everything, overprotective cat Ashley is driven to the brink of madness after her oblivious best friend Max gets himself fired.
You've done work for group gallery art shows. What's your preferred medium when creating a piece for a show? Do you want to do a solo show (or show with one or two other artists, where you'd be creating multiple pieces to fill the space with fantastic design)?
Gouache and cel vinyl acrylic are my media of choice for pieces in shows. There's something so calming and therapeutic/medatative about working with traditional painting. I've gotten to have pieces at QPop Gallery in Little Tokyo, downtown LA, and a few other gallery spaces like Meltdown Comics, APW Gallery in NY, and Gauntlet Gallery in San Francisco.
Various paintings Iza has done for gallery shows.
I haven't done a solo show, only pieces for group shows, but would absolutely LOVE to do a solo show at some point. It'll be a fun challenge to create a whole series of pieces based on one theme. The whole things sounds absolutely wonderful, and I hope I get the opportunity at some point.
Sailor Moon painting for QPop gallery's Sailor Moon tribute show in 2014.
Your web comic, The Eternally Injured Ninja, went on indefinite hiatus this past year. Understandable considering the work discussed above. What other comics have you created in the past?
It did. Haha, yes, I had simply gotten too busy, and it's no easy task keeping up a comic with a deadline of once a week. I think lots of people don't understand how much time has to go into it when you have a full time job and a life, as well as whatever may pop up unexpectedly. But it was most certainly a lot of fun and a nice challenge. If anything, I'd be most hard on myself about it. It was hard to put up something I wasn't fully happy with, but it's what you'd do sometimes because you just didn't have the time to make it the way you really want to. Either way I'm so incredibly grateful to Gabe Swarr, Katie Rice, and the whole Dumm Comics group for having given me the opportunity to be a part of Dumm Comics for the long run that I did!
Do you plan on (or just hope you can) continue EIN? Any other comic plans for the future?
I've done a couple comics with the art collective Lava Punch and their anthologies. The most recent one was a large full color anthology called The Black Torch that we had a Kickstarter for. I've only ever done one Eternally Injured Ninja printed mini comic, and have enough material to do a nice little book of the comics I did for Dumm. I have an idea for a new mini comic with EIN, so hopefully I get around to doing that as well. It's certainly not dead, just on the back burner. I really want to work hard on the writing side of that comic, and make sure it's really fun and silly.
What are your overall future goals, as an artist (or as an animator)?
My big goals right now are to get my own show, continue to make cartoons, and contribute to great fun, silly stuff. Hopefully have my own gallery show, make more printed comics, toys and puppets and whatnot. I also want to do more cooking, and get better at it. To continue taking improv classes and sketch writing classes and get better at writing in general. I also don't play any instruments, but would like to take a stab at learning the banjo. Travel to a few places I really want to visit, and try to do my best to stay positive and enjoy as much about life as I can.
What words of advice do you have for aspiring animators?
The biggest things I would say to do are:
Practice, Practice, Practice!!! You can never do too much working on your skills and studying things!
Nuture your friendships and connections with friends in the industry, it’s super small, everyone knows everyone, there’s no point in being a dick to anyone.
Put your work out there!!! What good is working hard and getting better if no one sees it? If no one knows you can do that? Super important!
Be persistent! This isn’t a quick and easy thing to work out. But if you’re super determined, and have good support from friends and family, it will work out eventually.
Do you know what you want to do specifically? Then do it! Do LOTS of it! Don’t stop! If you don’t know, try lots of things and figure out what you enjoy and can get super passionate about. If you’re motivated to do something you’ll totally do it no matter how challenging. Focus on doing the things you enjoy when you can, but it’s also good to have a basic understanding of the whole process. Study the work of people you admire, try to break down why you like it, why you don’t, why it works or not, and all aspects of it.
It’s all gonna take time, so utilize that time as best you can! Don’t stress out too much, be flexible yet have goals.
Kamen Rider fan art painting.
Many thanks to Iza for taking the time out of his busy production schedule to answer questions and give us an insight into the world of a working animator and gallery artist. To further follow his artwork and career, check out the links below:
As a comic artist, one of the comments I get the most is: "I don't know how you're able to draw the same character over and over again so that they're recognizable!" Even artists who are reasonably fluent in drawing humans can still find this challenging, which is why I put together this final lesson.
This is the next stage in learning to draw people: being able to draw a person repeatedly, and from different angles, without losing their likeness. It's not an essential skill for all illustrators, but anyone making a story book, or a comic book, or any such project where characters are recurrent, will feel the need for it.
An easy way around it, often used in animated series and older comics, is consistent clothing, i.e the same person always wears the same thing and has the same hair style. This feel old-fashioned and even childish by now, but it's still very common in some manga, and aspiring artists emulating that get into the bad habit of relying completely on hair and clothing to identify people.
What, then, does one do when a character needs to change their outfit? Or in the situation below, different time periods meaning different clothing and hair style, and even the eye colour has changed, yet this is the same person.
This lesson is not concerned at all with such secondary identification factors. Let us look at how to draw characters as if they were real people, and the first step, obvious as it may sound, is to know what they look like.
1. Know Your Character's Features
Do you know what characterizes your character's features? Or are you drawing generic eyes, noses, and face shapes? This first part doesn't require drawing skills, only being able to really see them in your mind's eye. It's perfectly okay, in the beginning, to base your characters on people you know, while the generic features in your mind get replaced by the diversity of reality.
Think of a close friend, someone you can visualize clearly. Can you describe the shape of their nose? Eyes? Mouth? Is their chin protruding or weak? Are their earlobes attached or detached? Odds are you cannot, because you have a general picture of them in mind, but the details break down when you try to look at them closely.
This is easy to change, as you just need to start paying attention to individual features by themselves. Next time you see that particular friend, look closely, and write down what you see. I did say write down, not draw. We cannot keep a grasp on what we can't name. By describing the identifying features that you see to yourself, you make their distinctiveness conscious, and then you know what you're drawing. You can do that in your own head at any time and anywhere, looking at people around you, and it doesn't stop at a person's face, as we'll see below.
Face
The face is naturally where we look for the most amount of details to recognize a person. We have covered this a great deal in Advanced Facial Features. You can use the diagrams from that tutorial, showing different shapes of eyes, noses, lips and faces, to put a name to what you see in real people—and of course you'll find there are even more shapes out there.
If you have an old magazine at hand, you can scribble the descriptions right on the photos, as below, training your eye to see them at a glance. It's particularly useful to compare the faces of people of the same gender and age that way, as even if they look alike at first, there are always clues that make them unique. (Bonus points if you try this with people of another ethnicity. The ugly old myth that "all X look alike" is nothing more than unwillingness to look.)
Photo by Andrea Pavalleno
Later on, when you create your own characters, you'll notice that there's no such thing as a generic nose any more, and that you actually can no longer draw without being specific in your drawing...
Below are three secondary female characters in my comic. Their very different features betray equally different personalities. Guess who's easygoing, who's a princess and who's a tough cookie?
Hands
While your work may not call for close-ups of hands at all, if it does, then don't neglect this body part, which we have already looked at in detail. Remember male and female hands don't look alike, and further than this, we do tend to be able to recognize the hands of our friends and family. Long fingers, short fingers, fine hands, coarse hands, work-damaged, carefully manicured...
Posture
Have you ever found yourself recognizing someone in the distance by how they stand, or how they walk? Posture is another big clue for identification. We're constantly told we should stand straight, so we may tend to always draw people who stand straight, but in reality there are many degrees of posture. We each have our signature posture, like the characters below, who each stand differently.
Dress style
Note that this is about a person's style, not about a costume. You're not designing one outfit that this person will wear all the time, unless they're in a uniformed profession (policeman, priest) or have a reason to make such a fashion statement. In my comic Malaak, one character, Adrian, always wears the same T-shirt and scarf, accentuating his odd personality... but then we discover there's a reason for it!
But while in real life few people wear the same thing day in, day out, most people do have a distinct dress style, and that is something that very much matters in a character. This dress style not only creates consistency, but also conveys much of the character's personality and/or situation.
Students may have a limited wardrobe, while fashion-conscious young women may never be seen wearing the same thing twice. Shy people wear unremarkable clothing, whereas exuberant people get away with the oddest or most visible things. Men usually have a far less diverse array of clothing and colours than women, and so on.
There's plenty of inspiration for designing a dress style, so just observe people around you. A good question to start from could be: Does this person dress for looks or practicality? Do they want to be noticed, or to blend in?
My main character Malaak was raised modestly, and dresses prettily but in a way that doesn't stand out. In contrast, her friend Zeina, who loves attention, always wears something unusual and eye-catching, with good taste decidedly optional. On the other hand Yeraz is an archaeology student by day and trains in Wushu by night—sporty outfits dominate her life at the moment!
My characters' personalities even show through what they dress up as for Halloween...
Exercise 1
Create a reference/character sheet for a real, existing person. Your grandma, your best friend, a teacher—anyone whom you can enroll for this, and safely stare at and sketch for a while (or take various pictures of for reference).
Do it as if you needed to instruct someone else on how to draw that person accurately. Observe, and take note of all that is distinctive about that person: the many details of the face, hair, general silhouette and posture, and dress style, but also essential personality traits, so that your imaginary assistant knows what facial expressions would be in character.
Since this is your first exercise of the sort, don't worry about going overboard with the details. It is with practice and experience that you start cutting down on them effortlessly. Do have fun doing it! As an example, I made this reference sheet of a friend whom I was using as model for my character Adrian. There are many distinct details about him, foremost of which is his almost constant poker face.
Exercise 2
Now do the same, but designing your own character. There is no "correct" way of going about it; you could start with features and derive personality from them, or the other way round, or design the person to go with a certain dress style or role. What's important is that by the time you're done, you know your character's features as if he or she were a real person!
Note: Please do not emulate the "character sheets" found on art sites consisting of a single drawing of the character and a wall of backstory and irrelevant details. The purpose of these documents is to know what characters look like to the last detail, not what kind of tea they drink. A good ref sheet is a priceless aid you create for yourself; I pull out all of mine every time I'm working on my comic. Even though I know my characters like old friends, they help me stay true to them even as my style evolves.
2. Know How to Draw Those Features From Various Angles
Once you're fully aware of what is distinctive in your character, it's time to make sure you can draw these traits. This is where, to the question "How can I make my character look right all the time?" the answer is too often "You need to learn to draw."
It may sound harsh but really there's no way around it; if one hasn't attained a certain fluency of drawing, if one can't draw simple shapes from different angles, then one cannot realistically expect to succeed in this much more advanced stage. I really do understand the desire to start drawing more exciting stuff (i.e people) straight away, but patience, perseverance and practice are the only road to lifelong results.
Exercise
Use a willing friend again, or if not possible, gather pictures of a celebrity, as they'll be easy to find from many different angles. Focus on just one feature at a time, sketching it from different directions. This needn't be onerous, as you'll notice that some angles are a bit repetitive, and that you can get a good grip on a feature if you have it from front, side, three quarters, above and below. For instance, I started by studying Samuel L. Jackson's nose:
Then, Audrey Hepburn's face contours:
In this way you build up an understanding of these features as 3D shapes. Feel free to reduce them to simpler geometric shapes if you have trouble at first. And don't forget to compare different features under similar angles. For instance, how do different eyebrows look when seen in extreme perspective? Are they still distinct or do they start to look the same? I tried, and found that they still retain individuality, even though the shape of the arch fades with perspective.
By now you will be sufficiently drilled to carry on with your own practice, filling in your own gaps depending on your own purposes. One could write thousands of pages describing every detail of the wonder that is the human body, but I believe that past a certain amount of theory, all one really needs is to observe life and to practice—neither of which ever come to an end! I hope these lessons have been enjoyable and helpful to you, as we conclude our Human Anatomy Fundamentals series here.
In this tutorial, you'll create a devilish text effect in Adobe Illustrator.
For starters you will learn how to create devil horns using some basic tools and vector shape-building techniques, as well as a simple blend plus some other effects and masking techniques.
Using a free font, several built-in brushes, and the Appearance panel, along with a bunch of blending techniques, you will learn how to create the main text shape and how to add shading, highlights and subtle textures.
Moving on, you will learn how to add a textured background using a simple rectangle, the Appearance panel, and some raster effects. And finally, taking full advantage of the Stroke panel and the Gradient panel, you will learn how to create the devil's tail using only one curly path.
1. Create a New Document and Set Up a Grid
Hit Control-N to create a new document. Select Pixels from the Units drop-down menu, enter 600 in the Width and Height boxes, and then click on the Advanced button. Select RGB, Screen (72 ppi), and make sure that the Align New Objects to Pixel Grid box is unchecked before you click OK.
Enable the Grid (View > Show Grid) and then Snap to Grid (View > Snap to Grid). You will need a grid every 1 px, so simply go to Edit > Preferences > Guides > Grid, enter 1 in the Gridline every box and 1 in the Subdivisions box. Try not to get discouraged by all those gridlines: the grid will make your work easier. Keep in mind that you can easily enable or disable it using the Control-" keyboard shortcut.
You should also open the Info panel (Window > Info) for a live preview with the size and position of your shapes. Do not forget to set the unit of measurement to pixels from Edit > Preferences > Units > General. All these options will significantly increase your work speed.
2. Create the Main Shapes for the Horn
Step 1
Pick the Ellipse Tool (L) and focus on your toolbar. Remove the color from the stroke then select the fill and set its color at R=39 G=170 B=225. Move to your artboard and simply create a 65 x 61 px shape.
Step 2
Make sure that the Ellipse Tool (L) is still active and replace the existing fill color with R=237 G=28 B=36. Create a 62 x 45 px shape and place it as shown in the first image. Switch to the Selection Tool (V) and select both shapes made so far. Open the Pathfinder panel (Window > Pathfinder) and simply click the Minus Front button. In the end things should look like in the second image.
Step 3
Set the fill color at R=0 G=161 B=75, reselect the Ellipse Tool (L), create a 58 x 52 px shape, and place it as shown in the first image. Replace the existing fill color with R=237 G=28 B=36, then create a 52 x 46 px shape and place it as shown in the second image.
Step 4
Using the Selection Tool (V), select your green and red shapes, focus on the Pathfinder panel and simply click the Minus Front button.
Step 5
Set the fill color at R=247 G=148 B=30, reselect the Ellipse Tool (L), create an 80 px circle and place it as shown in the following image.
Step 6
Make sure that your orange circle is selected, and make a copy in front (Control-C, Control-F). Select this copy along with your green shape, and click the Minus Front button from the Pathfinder panel. Simply hit Shift-Control-G to Ungroup the resulting group of shapes. Select the tiniest green shape and get rid of it using the Delete button from your keyboard. In the end things should look like in the third image.
Step 7
Select the remaining orange circle along with your blue shape and click the Minus Front button from the Pathfinder panel. Ungroup the resulting group of shapes (Shift-Control-G), then select the tinier blue shape and remove it.
Step 8
Focus on your green shape and grab the Direct Selection Tool (A). Select the top anchor point, then move to the top bar and enter 0.4 px in the Corners box.
This feature is only available for CC users. The best solution to replace this effect would be the Round Any Corner script that can found in this article: 20 Free and Useful Adobe Illustrator Scripts. Save it to your hard drive, return to Illustrator and grab the Direct Selection Tool (A). Select that anchor point and go to File > Scripts > Other Script. Open the Round Any Corner Script, enter a 7 px radius and click OK. The end result might look a bit different, but it's really not that noticeable. Feel free to try a different value for the radius. In some cases you will have to increase/decrease the value mentioned in that Corners box.
Step 9
Focus on your blue shape and reselect the Direct Selection Tool (A). Select the top anchor point return to the top bar and enter 1 px in the Corners box.
3. Create the First Horn
Step 1
Select your blue shape and replace the existing fill color with R=169 G=124 B=80, then select the green shape and replace the existing fill color with R=60 G=36 B=21.
Focus on your Toolbar and simply click on the Blend Tool to open the Blend Options window. Select Specified Steps from the Spacing drop-down menu, enter 75 in that white box, and click the OK button. Reselect the two shapes made so far, and simply hit Alt-Control-B (or go to Object > Blend > Make) to create a new blend. In the end things should look like in the second image.
Step 2
Focus on the Layers panel (Window > Layers) and open your blend. Select the bottom shape (the one with a dark brown fill color) and make a copy in front (Control-C, Control-F). Select this copy and drag it outside the blend, in the top of the Layers panel. Make sure that this copy is still selected and replace the existing fill color with a simple blue (R=39 G=170 B=225).
Step 3
Disable the Snap to Grid (View > Snap to Grid) then go to Edit > Preferences > General and make sure that the Keyboard Increment is set at 1 px.
Make sure that your blue shape is selected and make two copies in front (Control-C, Control-F, Control-F). Select the top copy and move it 1 px up and 1 px to the left using the arrow buttons from your keyboard. Reselect both copies made in this step and click the Minus Front button from the Pathfinder panel. Ungroup the resulting group (Shift-Control-G), remove the tinier shape then select the remaining one and focus on the Appearance panel (Window > Appearance). Set the fill color at black (R=0 G=0 B=0) then simply click on that Opacity piece of text to open the Transparency fly-out panel. Lower the Opacity to 10% and change the Blending Mode to Multiply.
Step 4
Reselect your blue shape and make a new copy in front (Control-C, Control-F). Select this copy, move it 1 px up and 1 px to the left then duplicate it (Control-F, Control-F). Select this new copy and move it 2 px up and 2 px to the left. Reselect both copies made in this step and click the Minus Front button from the Pathfinder panel. Ungroup the resulting group (Shift-Control-G), remove the tinier shape, and then select the remaining one and set its fill color at R=96 G=57 B=19.
Step 5
Reselect your blue shape and make a new copy in front (Control-C, Control-F). Select this copy along with the brown shape made in the previous step, and click the Intersect button from the Pathfinder panel. Make sure that the resulting shape stays selected, lower its Opacity to 70% and go to Effect > Blur > Gaussian Blur. Enter a 2 px Radius and click OK.
Step 6
Make sure that your blue shape stays selected and focus on the Appearance panel. Select the existing fill and change its Blending Mode to Soft Light. Then open the Gradient panel (Window > Gradient) and simply click on the gradient thumbnail to replace the existing fill color with the default black-to-white linear gradient. Keep focusing on your Gradient panel, set the angle at 90 degrees, and then move to the gradient colors. Select the left slider and set the color at black. Then select the right slider, set the color at R=237 G=28 B=36 and enter 0 in that Opacity box. Keep in mind that the yellow zero from the Gradient images stands for Opacity percentage.
Step 7
Make sure that the shape edited in the previous step is still selected, focus on the Appearance panel, and add a second fill using the Add New Fill button. Select this new fill, set the color at black, lower its Opacity to 30%, and change the Blending Mode to Overlay. Then go to Effect > Artistic > Film Grain. Enter the properties shown in the following image, click OK and then go to Effect > Sketch > Torn Edges. Enter the properties shown in the following image and click OK.
Step 8
Return to the Layers panel, focus on your blend, and this time duplicate the top shape (the one with a beige fill color). Select this copy and drag it outside your blend, right above it.
Make sure that this new shape stays selected, focus on the Appearance panel and select the existing fill. Replace the existing fill color with white, lower its Opacity to 70% and change the Blending Mode to Color Dodge. Then go to Effect > Path > Offset Path, enter a -2 px Offset and click OK. In Effect > Blur > Gaussian Blur, enter a 2 px Radius and click OK.
Step 9
Select all the shapes made so far and simply hit Control-G to Group them. Next, you'll need a simply masking technique to get rid of those pixelated edges.
Focus on the Layers panel, open your group, focus on the blend, and duplicate that dark brown shape (Control-C, Control-F). Select the copy, replace the existing fill color with white (R=255 G=255 B=255), and then simply drag it outside the group, at the top of the Layers panel.
Step 10
Reselect your white shape along with the group, open the Transparency panel (Window > Transparency), and simply click the Make Mask button. In the end things should look like in the second image.
If you're not an Illustrator CC user you need to open the fly-out menu of the Transparency panel and click the Make Opacity Mask command. Move to the Layers panel, double click on the name of your masked group, and rename it "HORN".
4. Create the Main Text Shape and Place the Horn
Step 1
Set the fill color at R=145 G=12 B=8 and grab the Type Tool (T). Simply click on your artboard and add the "DEVIL" piece of text. Use the Fatso Caps font and set the size at 120 px.
Make sure that your text stays selected, and simply hit Shift-Control-O (or go to Type > Create Outlines) to turn it into paths. Ungroup the resulting group of shapes (Shift-Control-G), then turn those letter shapes into a simple compound path using the Control-8 keyboard shortcut (or Object > Compound Path > Make). Move to the Layers panel, simply double click on this new compound path and rename it "DEVIL". We'll use this compound path plenty of times in the following steps, and naming it will make it much easier for you to find it.
Step 2
Reselect your "HORN" group and place it roughly as shown in the first image. Make sure that it stays selected and go to Object > Transform > Reflect. Check the Vertical box, then simply click the Copy button to create a horizontally-flipped copy. Select this copy, drag it to the left, and place it roughly as shown in the third image.
5. Add Shading and Highlights for Your Main Text Shape
Step 1
Select your "DEVIL" compound path and go to Object > Path > Offset Path. Enter a -3 px Offset and click OK. Select the resulting compound path and make a copy in front (Control-C, Control-F). Select this copy and simply move it 1 px down using the down arrow button from your keyboard. Reselect both shapes made in this step and click the Minus Front button from the Pathfinder panel. Turn the resulting group of shapes into a simple compound path (Control-8) and set its fill color at white.
Step 2
Reselect the white compound path made in the previous step, lower its Opacity to 70% and go to Effect > Blur > Gaussian Blur. Enter a 7 px Radius and click OK.
Step 3
Select your "DEVIL" compound path and make two copies in front (Control-C, Control-F, Control-F). Select the top copy and move it 1 px up. Reselect both copies and click the Minus Front button from the Pathfinder panel. Turn the resulting group of shapes into a compound path (Control-8), set the fill color at black, lower its Opacity to 30%, and change the Blending Mode to Soft Light.
Step 4
Select your "DEVIL" compound path and make two copies in front (Control-C, Control-F, Control-F). Select the top copy and move it 4 px up. Reselect both copies and click the Minus Front button from the Pathfinder panel. Turn the resulting group of shapes into a compound path (Control-8), set the fill color at black, lower its Opacity to 20% and change the Blending Mode to Soft Light.
Step 5
Select your "DEVIL" compound path and make two copies in front (Control-C, Control-F, Control-F). Select the top copy and move it 9 px up. Reselect both copies and click the Minus Front button from the Pathfinder panel. Turn the resulting group of shapes into a compound path (Control-8), set the fill color at black, lower its Opacity to 10%, and change the Blending Mode to Soft Light.
Step 6
Select your "DEVIL" compound path, and go to Object > Path > Offset Path. Enter a -1 px Offset and click OK. Select the resulting compound path and make a copy in front (Control-C, Control-F). Select this copy and simply move it 1 px down. Reselect both shapes made in this step and click the Minus Front button from the Pathfinder panel. Turn the resulting group of shapes into a simple compound path (Control-8), set the fill color at black, lower its Opacity to 30%, and change the Blending Mode to Soft Light.
Step 7
Reselect your "DEVIL" compound path and make two copies in front (Control-C, Control-F, Control-F). Select the top copy and move it 2 px down. Reselect both copies and click the Minus Front button from the Pathfinder panel. Turn the resulting group of shapes into a compound path (Control-8), set its fill color at black, change the Blending Mode to Overlay and go to Effect > Blur > Gaussian Blur. Enter a 3 px Radius and click OK.
Step 8
Reselect your "DEVIL" compound path and make two copies in front (Control-C, Control-F, Control-F). Select the top copy and move it 1 px down. Reselect both copies and click the Minus Front button from the Pathfinder panel. Turn the resulting group of shapes into a compound path (Control-8), set the fill color at black, lower its Opacity to 50% and change the Blending Mode to Soft Light.
Step 9
Select your "DEVIL" compound path and go to Object > Path > Offset Path. Enter a -4 px Offset and click OK. Select the resulting compound path and make a copy in front (Control-C, Control-F). Select this copy and simply move it 5 px down. Reselect both shapes made in this step and click the Minus Front button from the Pathfinder panel. Turn the resulting group of shapes into a simple compound path (Control-8) and set its fill color at white.
Step 10
Reselect the white compound path made in the previous step, lower its Opacity to 60%, change the Blending Mode to Overlay and go to Effect > Blur > Gaussian Blur. Enter a 5 px Radius and click OK.
Step 11
Reselect all the shapes made so far (except the two "HORN" groups) and Group them (Control + G). Move to the Layers panel and simply rename this new group "TEXT". Open it and duplicate your "DEVIL" compound path (Control-C, Control-F). Select this copy, replace the existing fill color with white and drag it outside the group, at the top of the Layers panel. Reselect this white compound path along with your "TEXT" group and simply click the Make Mask button from the Transparency panel. In the end things should look like in the fourth image.
Step 12
Focus on the Layers panel, open your "TEXT" group and duplicate that "DEVIL" compound path (Control-C, Control-F). Select this copy and drag it outside the group, at the top of the Layers panel.
Focus on the two "HORN" groups, open those blends and duplicate the dark brown shapes. Select these two copies and drag them to the top of the Layers panel.
Reselect all three copies made in this step and click the Unite button from the Pathfinder pane. Make sure that the resulting group of shapes is selected, turn it into a compound path, and set the fill color at R=145 G=12 B=8. Move to the Layers panel and simply rename this new compound path "Shadow".
Step 13
Make sure that your "Shadow" compound path stays selected, send it to back (Shift-Control-[ ) then go to Effect > Stylize > Drop Shadow. Enter the properties shown in the top-left window in the following image, click OK, and then add the other four Drop Shadow effects shown below.
6. Create the Background
Step 1
Pick the Rectangle Tool (M) and simply click on your artboard to open the Rectangle window. Enter 600 in the Width and Height boxes, then click the OK button. Make sure that the resulting shape stays selected, send it to back (Shift-Control-[ ), and set the fill color at R=145 G=12 B=8. Move to the Layers panel and simply rename this new rectangle "Background".
Next, you will need to center your "Background" shape, so open the Align panel (Window > Align). Set the aligning to Artboard (open the fly out menu and go to Show Options if you can't see the Align To section as shown in the following image), make sure that your shape is selected, then simply click the Horizontal Align Center and Vertical Align Center buttons. In the end your rectangle should cover the entire artboard as shown in the following image.
Step 2
Make sure that your "Background" rectangle is still selected, focus on the Appearance panel, and add a second fill using that same Add New Fill button. Select the new fill, lower its Opacity to 50%, and add the radial gradient shown in the following image. Remember that the yellow zero from the Gradient image stands for Opacity percentage, and use the Gradient Tool (G) to stretch your radial gradient as shown in the following image.
Step 3
Make sure that your "Background" rectangle is still selected and add a third fill. Select it, set the color to black, lower its Opacity to 5%, change the Blending Mode to Color Burn, and go to Effect > Artistic > Film Grain. Enter the properties shown in the following image and click OK.
Step 4
Make sure that your "Background" rectangle is still selected and add a fourth fill. Select it, set the color at black, lower its Opacity to 7%, change the Blending Mode to Color Burn, and go to Effect > Sketch > Note Paper. Enter the properties shown in the following image, click OK, and go to Effect > Artistic > Film Grain. Enter the properties shown in the following image and click OK.
7. Add Some New Fills and Stroke for Your Main Text Shape
Step 1
Focus on your "TEXT" group, reselect that "DEVIL" compound path, focus on the Appearance panel, and add a second fill using that same Add New Fill button. Select this new fill, add the linear gradient shown in the following image and go to Effect > Path > Offset Path. Enter a -10 px Offset, click OK and go to Effect > Blur > Gaussian Blur. Enter a 4 px Radius and click OK.
Step 2
Make sure that your "DEVIL" compound path stays selected, focus on the Appearance panel, and add a third fill. Select it, lower the Opacity to 40%, and add the linear gradient shown in the following image. Don't forget that the yellow zero from the Gradient image stands for Opacity percentage.
Step 3
For the following steps you will need some built-in brushes. First, open the Brushes panel (Window > Brushes). Next, open the fly-out panel of the Brushes panel and go to Open Brush Library > Artistic > Artistic_ChalkCharcoalPencil, and a new panel with a bunch of art brushes will open.
Make sure that your "DEVIL" compound path is selected, and focus on the Appearance panel. Select the existing stroke, lower its Opacity to 30%, change the Blending Mode to Soft Light, and simply add that "Chalk" art brush.
Step 4
Focus on the bottom side of that panel with the set of art brushes, and simply click the right arrow button to move to the Artistic_Ink set of brushes.
Make sure that your "DEVIL" compound path is selected, focus on the Appearance panel, and add a second stroke using the Add New Stroke button. Select this new stroke, change its Blending Mode to Soft Light, and simply add the Ink Drop scatter brush.
Step 5
Return to the bottom side of that panel with the set of brushes and click the right arrow button until you reach the Artistic_Watercolor set of brushes.
Make sure that your "DEVIL" compound path is selected, focus on the Appearance panel, and add a third stroke using that same Add New Stroke button. Select this new stroke, lower its Opacity to 50%, change the Blending Mode to Color Burn,and simply add the Watercolor Stroke 1 art brush.
8. Add a Bunch of Subtle Shapes and Paths
Step 1
Enable the Snap to Grid (View > Snap to Grid). Using the Ellipse Tool (L), create a 5 px circle, a 3 px circle and a 2 px circle, and place these tiny shapes roughly as shown in the following image. Make sure that these three shapes are selected, set the fill color at black, then lower the Opacity to 30% and change the Blending Mode to Soft Light. Finally, Group (Control-G) these little circles.
Step 2
Multiply the group of circles made in the previous step, spread the copies roughly as shown in the following image, and randomly rotate them.
Step 3
Disable the Snap to Grid (View > Snap to Grid). Return to that panel of brushes and hit the left arrow button until you get to the Artistic_Paintbrush section.
Grab the Brush Tool (B), select the Dry Brush 7 art brush, and draw some black paths along those narrow gaps from your letters. Once you're done, select all these paths and Group them (Control-G). Make sure that this new group is selected, lower its Opacity to 30%, and change the Blending Mode to Soft Light.
Step 4
Reselect your "DEVIL" compound path, make a copy in front (Control-C, Control-F), and drag it to the top of the Layers panel. Make sure that this fresh copy is selected and simply hit the D button from your keyboard to replace the existing Appearance attributes with the default ones (white fill and 1pt, black stroke). Remove the black stroke and keep the white fill.
Reselect this white compound path, along with the group of black brushes made in the previous step. Focus on the Transparency panel, and simply click the Make Mask button. In the end things should look like in the second image.
9. Create the Devil's Tail
Step 1
Using the Pen Tool (P) or the Brush Tool (B), create a curly path as shown in the first image and focus on the Appearance panel. Add a black stroke, make sure that there's no fill color, and then move to the Layers panel and drag this path below that "Shadow" compound path. Keep focusing on the Layers panel, and simply rename the path made in this step "Tail".
Step 2
Make sure that your "Tail" path stays selected, focus on the Appearance panel, and simply click on that "Stroke" piece of text to open the Stroke fly-out panel.
Set the Weight at 6 px, then open the right Arrowheads drop-down menu and select Arrow 2. Keep focusing on the Stroke panel, enter 25% in both Scale boxes, check the Extend arrow tip beyond the end of path button, and select Width Profile 5 from the Profile drop-down menu.
Return to the Appearance panel, make sure that your stroke stays selected, and move to the Gradient panel. Add the linear gradient shown in the following image and check the Apply gradient across stroke button. Keep in mind that the blue number from the Gradient image stands for Location percentage. You can easily add a new gradient slider for your gradient simply by clicking on the gradient bar.
Step 3
Make sure that your "Tail" path stays selected, focus on the Appearance panel, select the existing stroke, and simply duplicate it using the Duplicate Selected Item button.
Select this new stroke, lower its Opacity to 50%, change the Blending Mode to Soft Light, and move to the Gradient panel. Check the Apply gradient within stroke button, and then replace the existing linear gradient with the one shown in the following image. Don't forget that the yellow zero from the Gradient image stands for Opacity percentage while the blue number stands for Location percentage.
Step 4
Reselect your "Tail" path, focus on the Appearance panel, and make sure that the entire path is selected (simply click on the "Path" piece of text from the top of the Appearance panel). Then add the five Drop Shadow effects shown in the following image (Effect > Stylize > Drop Shadow).
Congratulations! You're Done!
Here is how it should look. I hope you've enjoyed this tutorial and can apply these techniques in your future projects.
For the past few months we (and when I say “we” I mean the amazing Tuts+ community) have been translating tutorials across the Tuts+ network. So far we have well over 300 translations in nearly 30 languages! Here are some of the most popular examples from Tuts+ Design & Illustration.
Do you have a solid grasp of English and written fluency in another language? If so, and you’re willing to get involved, we’d love to have you translate some of our tutorials! Any languages are welcome, find the link in the sidebar of a tutorial you’d like to translate, click it to visit the form and enter your details to volunteer.
Or, perhaps you have a favourite tutorial which you’d like to see translated into another language? Let us know in the comments. Lastly, stay up to date with Translation Project news by signing up to the newsletter!
You've made a pixel art character, it looks pretty normal, and it's wearing regular clothes. But Halloween is approaching, and we should get in on the trick-or-treating action.
We'll take our character and a little kid character, and dress them up as Batman and Chucky, just because. We'll also be making a jack o'lantern to set the mood.
In the previous tutorial we already made our character at almost the smallest size possible, but there's still some leeway to shrink it further and make a child version.
Step 1
Remember to keep an original copy of your characters, to save them all for any future use.
Now, with a copy of the original character, we can move/overlap some sections of it to shrink it down, or we can delete some sections of pixels and then bring the pieces back together, which would look like this:
Step 2
Now it's only missing some retouches to the shirt neck, the arm, and one of the legs. Notice them and apply them.
We've given a child to our character, and without much labor!
2. Child's Play
Let's turn the little kid into the murderous Chucky. You'll want to check some reference images.
Step 1
Here I've changed the pants color slightly and turned them into overalls. The straps and top lines of the overalls are a darker shade of the blue. And I added a red pixel on the chest for the "Good Guys" logo. It's a tiny detail, and shouldn't be high contrast.
Step 2
The shirt should be different. So we'll create a long sleeve with a more saturated red tone and dark alternating stripes.
All stripes will be of different colors, but it'll be better aesthetically if two different colors with the same level of brightness aren't in contact. So let's try to keep the darker colors alternating with the lighter ones.
Step 3
We'll change the colors of the stripes, but the cuffs and neck should stay red as in the original.
Step 4
The pants should also have striped cuffs, but because of how few pixels we've got there, let's just use the same red from the shirt with one or two pixels height.
Step 5
The body is done, so let's change the hair color to ginger and give the kid a receding hairline to get closer to Chucky's look.
Step 6
Let's go for the creepier look Chucky had in the later movies, so we'll add some wisps of hair to the back of the head and edit the hair highlights.
Step 7
And, of course, the facial scars, which could be the same color as it has on the neck but could also have a slightly redder hue.
Step 8
One final detail would be a kitchen knife, Chucky seems to have an affinity for them. We can imply that he's holding it with his unseen hand and just add a little blade on the side:
3. The Dark Knight
Now let's turn our grownup character into the caped crusader. Again, have a look at reference images. I've chosen to do the batsuit from The Dark Knight because that's just a great movie.
It's an armored and slightly complex suit; we won't be able to get all the detail in (sadly the bat symbol on the chest isn't really possible to convey at this resolution) but we will get a bunch of subtle details in.
Step 1
Let's start by making our character's clothes all black. We'll use four shades of grey for this; I'm using 50%, 35%, 20%, and 5%, which is the shade I use on outlines.
Step 2
For the suit's neck we'll keep the original shirt neck line with the darkest shade, but right above that we'll add a few pixels of the second darkest shade, and above that another line of pixels of the darkest shade. So we're keeping the neckline and the character's jawline, and the lighter pixels in between represent the plates of the suit that cover the neck.
Step 3
Now paint the whole head (except around the mouth, of course) with the second darkest shade of grey. The hole for the mouth could have a few different shapes. This is the shape I thought looked best, but you can try alternatives.
Step 4
The nose will be two vertical pixels of the lightest grey and the eyes will each be two horizontal pixels of the darkest grey. In relation to our character these features have shifted a pixel up but it's for the best because the dark grey separating the nose from the mouth hole heightens the contrast of these features.
Step 5
Now with the second lightest grey we'll do highlights that extend from the top of the head to the cheekbones, but without coming into contact with the nose or mouth hole.
Step 6
We'll add additional highlights, now with the lightest grey on the forehead for extra volume and detail; see how these new highlights help convey the menacing frown Batman always carries around.
Step 7
Now for the bat ears. Here in red are the new pixels they will occupy:
And on the right the finish they should have.
Now the cowl is complete. On to the body armor! We can drop the lightest shade of grey and use only the darkest three shades for most of the rest.
Step 8
Let's make the whole arm grey (second darkest shade) and make the innermost arm outline extend to the neck (should line up) to add a break on the suit, representing where the armor plates meet.
Step 9
Leave the shoulder highlight in place (should be the 35% shade) but remove any leftover highlight below the neck and add some highlights for the biceps (two pixels should do) and for the fist (one pixel).
Step 10
Finally for the arm let's add some darker shades as well; a couple of pixels (darkest grey shade) below the shoulder to show off the armor plates, and one pixel slightly below the bicep highlight to make that bicep pop out some more. Also we'll add one more right above the fist highlight to give a touch of volume to the forearm.
And, of course, don't forget about Batman's trademark gauntlet fins.
Step 11
Now on the chest we'll add a nice big highlight for the pectoral area of the suit. This is where the bat symbol goes, of course, but trying to add it would only mess with our careful shading, so it'll be best left out. Our Batman will still be recognizable enough.
Step 12
Right over the pants line let's add Batman's utility belt, which we'll do as a bronze kind of color, without standing out so much. Let's fill the area in between the belt and the pectoral highlight with the darkest shade and add a tiny hint to the six-pack abs these superhero suits always make sure to include.
It's only a four-pack in our case but I think that'll do. The torso is finished.
Step 13
Now on the legs the only highlights we'll have will be on the thighs, knee pads (should look like exclamation points) and the toes:
Step 14
Let's add more detail with the darkest grey shade: a pixel a bit below each knee pad, and a vertical line from the back of the knee to the bottom of the boot.
Step 15
We'll also add a few retouches to the underpants area… I don't mean to get graphic but Batman does wear groin armor. So to get those volumes I added some minimal dark shading to the top of the thighs and some lighter grey just below the middle of the belt.
So now our Batman's only missing one thing: the cape!
Step 16
Marked in red are the pixels we'll be adding, and to the right how we'll be coloring them.
I added an extra pixel to the boot heel because without that I think it's easier to confuse the cape with the heel. Notice there's a bit of lighter grey toward the bottom of the cape and how it sort of cuts into the shoulder, as if it comes out of the clavicle area.
And thus, Batman is complete!
4. Jack O'Lantern
Step 1
To make our jack o'lantern, we'll start the same way we did with our character: with the face. The eyes and mouth of jack o'lanterns are usually triangular and zig‑zaggy, so you could use little inverted Vs for the eyes and a zig-zag line for the mouth.
When the pumpkin is done these lines might be a little hard to read because of how the pixels are not solidly united, so we'll double them vertically (just select and alt-nudge one pixel down) to look like this:
You might want to keep both versions and see which you like most in the end.
Step 2
The edges of the pumpkin will be 15 px across by 13 px high, and the face should sit low on this square because of the top view we're using.
Step 3
Round the edges of the square and fill with an orange color.
We'll move the face away for a moment to give our pumpkin some texture: the vertical ridges pumpkins tend to have. The black line at the top is where the stem will go and where the ridge lines should ideally meet. Even though we can't properly convey the lines curving and meeting at such a small size, we can try:
But for the most part they'll simply be vertical lines.
Step 4
Now let's put the face back on and select an area at the top to increase brightness to convey lighting and the pumpkin's volume a little better. I used custom colors instead of simply increasing brightness; you might want to try yellower hues on the lighter colors and redder hues on the darker ones.
Step 5
For the stem, we should add a shade of green that doesn't stand out too much. It'll be a three-pixel line plus dark outlines around it.
Step 6
And to finish up the stem let's add a highlight to the tip and replace the black horizontal lines where the stem and rind meet with softer shades; darker than the stem and rind but not quite so black.
Step 7
Similarly, for the face we can use a color that's darker than the rind but not so black and that helps to get a smoother finish.
Step 8
As a final detail we'll be adding a shadow. We didn't need shadows before, but in the case of the jack o'lantern it makes sense, as it's a shape that's considerably wider than its footprint.
I like to use black at 20% opacity when it comes to shadows.
I mentioned in the original character tutorial not using black on the outlines for this reason; if you've been doing outlines black then the magic wand won't be able to separate the outlines from the shadows. This isn't a big deal but it can eventually be a nuisance.
So this is how our finished jack o'lantern would look, and the image on the right shows how it would look if we kept the first, lighter face.
I like both but the lighter face can be harder to read when zoomed out, and it's easier for the pumpkin texture to interfere with it. So I'm more likely to use the bolder one.
Who Are You Dressing As?
So now your costumed characters and spooky jack o'lantern are ready!
Did you make the house from the house tutorial? Because your characters would look more at home trick-or-treating with a house behind them:
Our tutorial will create a very evil if not sinister rabbit named
Orifice. The beauty of this tutorial is that all of this was achieved
using only a mouse. ALL OF IT! I do hope this will encourage those who
longingly stare at tablets and Cintiqs online to believe that they can
achieve just as much with what they have. Your tools are what you make
them... they can be what holds you back, or the driving force propelling
you forward.
1. Fleshing Out the Sketch
Step 1
Our first step will be to bring in our drawing. I used my scanner at 300 dpi to catch as much of the detail as possible. This process can be a bit difficult if you're using material in a bound sketchbook. You'll notice the slight blur of the tail. This happens when the book page curls inward at the binding.
We'll be working with a clean line quality from Adobe Photoshop and now we can begin. I'm working in Adobe Illustrator at a size of 8.5 x 11 inches for this specific project.
When I'm ready to start my layers, I'll label my first layer as "Sketch" and Lock the layer to make sure that I won't accidentally move or delete the sketch. We'll be loosely following this as our guideline.
Step 2
I enjoy laying my main gradient colors down first and foremost. This is where I start to control the first signs of light and shadow and choose where my light source will be coming from.
I've chosen two slightly different tones, both of which I will be using in this tutorial. This Gradient on the right is made from a pure black to steel gray, and the gradient to the right is made from a pure black to deep moss color. Believe it or not, we'll be utilizing both of these. We'll start with the steel gray and apply it to our rabbit using our Pen Tool (P).
Step 3
In our Layers tab, we'll assign one layer specifically as "Head",
and start to create our pieces. If you want to make the process go as
smoothly as possible, I would recommend also creating a "Body" layer as
well. Using our handy-dandy Pen Tool (P), we'll start to follow
the main pencil lines of our rabbit. I've started with the ear, but you
can start just about anywhere. I prefer starting with the facial
contours rather than the body.
Step 4
At this point, we've vectored our "Head" pieces and "Body" pieces with our first color. I'm using this color first in order to see the color contrast later in my fur. This will become more obvious as we flesh and "fur" out our rabbit.
2. Adding Facial Details
Step 1
I've started to use my Gradient to add details to his face. Half of my Gradient layer is comprised of a pure black, and the other is also a pure black but with its Opacity brought down to 0%.
Step 2
Our next step is to create the white sclera, which will be our dead eye. We've also switched from a Linear Gradient to a Radial Gradient.
A simple Ellipse(L) has been used to represent the pupil. It gives off a very strained or blown-out look, which I prefer in my creepy-eyed characters.
Step 3
Using our Radial Gradient again, we will create a new color for the "working" eyes. I went with a nice bloodshot red. With this color, we're bringing out the intensity of his gaze and making him a foe to be reckoned with.
Step 4
We can now include our scar tissue, to illustrate that this rabbit has been through a few things. Scars give character. Don't be afraid to add a few.
Step 5
Some of the scars need a little more definition, so after adding a stroke line of 0.25% I've used my Width Tool(Shift-W) to give them a little more girth.
Here is the end result. Notice that our scar looks a better and more defined. We won't stop there though. Read on to see where this magical scar ride ends.
Step 6
The nose of our rabbit, Orifice, is fairly simple to make. Using a Linear Gradient for the main parts, we can speckle small Ellipses over the surface to act as dimples around the nostrils.
After we've covered the surface of his nose, we can add a simple highlight Gradient to show the direction of our light source.
Step 7
Next, we can add Orifice's teeth. Using a light taupe in our Radial Gradient we'll follow our sketch's guidelines to form the teeth. We'll place our new teeth behind the upper jawline.
At this point, we've added a fine set of chompers to the
sides of his mouth. We can leave this particular set on top of the jaw
line. We've also added one tooth behind his head.
Step 8
Add a few lines to define the teeth. The additional shading and highlights give Orifice's new teeth better form.
Step 9
As promised, we've returned to our scar. I loved how it looked before, but this just adds that extra level of realism to our otherwise cartoonish Orifice. We're using the same color scheme, but our Opacity has been set to 40%.
The next view shows what a few layers of "scar tissue" can do to take your look from drab to fab.
3. Creating Texture With Fur and Skin
Step 1
My first task is to create an entirely new Layer which we can call "Fur". You don't have to stick with this name, but it helps to separate newly completed, smaller pieces from your previous work. I prefer not to accidentally select work that I'm not working on, so both the "Head" and "Body" layers are locked.
We've started using our "Rabbit Fur" to create more texture to his skin. Check these images to see the progression.
Step 3
The progress is going well with the fur on Orifice's face. To lessen the confusion, I'll contain all of my hairs into a Group (Control-G). I can then take this group and turn the Opacity to 40%. The hair on his body doesn't have to be a full on color to be appreciated. Sometimes it's the subtlety that is appreciated.
Step 4
Our next step will be to apply staples to our scars. We'll use our Rounded Rectangle to create them.
When making your staples, try not to make them too neat. This is a monster who has essentially been put back together, most likely not by skilled hands.
Step 5
The next step is to make a layer of shadow to go underneath the staples we created on his face.
Step 6
In order to emphasize that this is the mouth of a bloodthirsty monster, we'll render some drool. One of the beautiful features of Adobe Illustrator CS6 is that you can make a Stroke line and include a Gradient to it.
As you can see, it conveys a whole new look to what we already have.
Step 7
After completing the drool, I've moved on to accenting Orifice's face with more shadows. He's an animal that lurks in the darkness, so it's only fitting that we cloak him in it. This sharpens the work that we already have rendered as well.
Also, I've started changing his body from our steel gray to the more preferred deep moss color. Again, the first color was merely to allow me to see my fur texture in a better light.
Step 8
I haven't used much in the way of blurs, but sometimes a nice Gaussian Blur gives a softness to your work. It's good for creating depth, as well as a great glow effect.
Step 9
Add your highlighted hairs to Orifice's face. Since we know that our light source is coming from the right of our composition, this is where the majority of our lighter hairs will be made.
Step 10
With our newly made light hairs layered over our head, we can now go in with a dark moss green. Notice that most of my new layer of fur is going against the scar tissue. This creates the illusion of the skin being uneven and partially jagged. Scar tissue is never completely smooth, and when you see hair growing around it, it conforms to the path that it is given to grow.
Step 11
In the following shots, you can see the amount of detail applied with just the moss green hairs.
Step 12
After applying a nice grouping of hair to the face, we can apply a few highlights using our Feather Effect. Doing this over the cheek bones, forehead, and the bridge of the nose takes our 2D image one step further and creates more realism.
Step 13
To add to his intentionally evil look, I've added a few holes in his teeth using only one Linear Gradient. These cavities make him look almost weathered and dare I say it, "rotten to the core".
4. Creating a Spooky Sign
Step 1
Using a similar technique that was used on his drool, we've created a symbol on Orifice's forehead. The idea is that this is made of fluid, so liquid-like highlights have been added to convey that it has reflective properties.
A new duplicate layer can be made of our sign and a Gaussian BlurEffect can be applied. We're using a blur effect of 4.4 px in this composition. The ending result gives us an eerie glow, fit for a monster rabbit. I've also decided that Orifice's drool would be more pronounced if we used the same color scheme. The green pops off the page and makes for a striking complement to the skin.
5. The Fur Hits the Body
Step 1
We will be applying the same steps as we did to the face. Start with your darker hairs and work with the body contours.
Step 2
After working on our body hair, we'll start to cover his arms and fingers. You will find it more helpful to group fingers and certain body parts as you finish them. This allows you to maneuver through all of your many pieces without clicking on something unnecessary.
Step 3
This is a good example of how to apply a little highlight to the palms. After laying down our hair layers, we've gone back into our hand like we did with our cheeks, brow, and nose bridge. There's now a fullness to the hand that we once didn't have.
Step 4
By the time we've finished applying our hair, shadows, and highlights, we will finally have an almost fully rendered bunny. So far, so good.
5. Adding Accessories
Step 1
Next, we will proceed to lock our layers temporarily. The layer that we've entitled "Fur" will be our new construction area for creating our metal objects.
Step 2
Using a Radial Gradient, we'll start to create Orifice's metal collar. It's meant to look clunky and uncomfortable, so if your collar looks similar to this to start off, you're on the right track.
Overlaying this collar are patches of discolored metal. Since Orifice is essentially a patchwork creation, it wouldn't be a stretch that his collar and other accessories would be as well.
Step 3
At this point, we're applying rivets to some of his metal work. I'm again using our Ellipse Tool (L) to create these simple details.
Once those are completed, we can add a little texture to show that the rest of his collar hasn't held up as well through the years. Go to Windows > Brush Libraries > Artistic > Artistic_ChalkCharcoalPencilto locate this particular brush. Your new pattern can now Mask this layer to complete the look.
Step 3
Use the same effect on his cuffs. Notice the gritty feeling you're getting from using this readily available brush.
Step 4
What is a monster without his claws? Since you've been grouping your parts, this will be an easy process. He seems a lot more threatening now that he has these pointy digits.
Step 5
We've given his nails a bit more shine, and we're also adding extra scars. Remember, scars build character and offer us a look into our character's past life experiences.
We're building an unwritten scenario that we want our audience to conclude for themselves.
Step 6
Next, we'll start to add some scar tissue to his arm. I wanted there to be a feeling of him pulling out his own hair, or making a canvas out of his own skin in preparation for something very visual. This particular character has a very odd, almost serial killer
trait. He collects his killings on his arm with small scratches.
Step 7
Our rabbit's scratches have now been added, and to illustrate that maybe he has just "fed" or killed, we'll add a few highlighted scratches. I liked the idea of him using his own acidic saliva to carve out these scars, so I've also added a little bubbling to the skin. Very gross, but highly effective
6. From Flesh to Bone
Step 1
Orifice is nearly finished. We're adding Orifice's lunch, with all the fix'ns to put it humorously. The skull is made from another Radial, and I'm sticking to the same color palette for the entire skull area. We'll use a softer tone, by incorporating a Feather Effectto main portion of the skull.
Step 2
What would we be without our brains? We're going to give Orifice something to satisfy is voracious appetite. Since this is the brain of a deceased person, I wanted to make it just a little green. I wanted the appearance of rotting meat, and I think this color contributes nicely to the idea.
We'll also create a few maggots to sprinkle over Orifice's dinner. You can be as generous as you want with these little creatures. They only serve to enhance your piece.
Step 3
I want you to believe that Orifice's saliva is very acidic, so I've added a few spots to show corrosion. Honestly, I don't know if I'd want to meet this character at all now.
Step 4
Create a bit of a bone pile for your character using the exact color scheme used with the first skull.
Step 5
Using our Artistic_ChalkCharcoalPencil Brush again, we've made dried blood to cover a few areas of our bone pile. Textures are very fun to work with, and just the right amount will enhance what you already have.
Step 6
Next, we'll add a little shadow behind it all by duplicating the bones (excluding the spattered blood layer), and Uniting them with our Pathfinder Tab.
7. The Last Bits and Pieces
Step 1
Even a scary monster can have a few boo boos. Even though he's a scary monster, he was still referred to as someone's pet. To indicate that he's still loved, I put a band-aid on his knee.
Step 2
Last but not least, we'll add a few flies to buzz around the rotting flesh.
Step 3
To indicate that they are moving haphazardly, I've created a Stroke Line to show the flight path of our bumbling flies. We'll lighten this and change the final color, but it's difficult to see white on white, so we're using a bright color to illustrate the new line. I've changed the settings to a Dash line as well.
Step 4
Last, but certainly not least, I've added a bit of glow to our creepy crawlies.
Finished! Our Creepy Pet Orifice is Ready to Hunt!
In this tutorial, you will learn how to create a very easy bat icon using just
one shape—an ellipse. Also, you will learn how to cut off shapes and to make an Offset Path. It's one of the easiest tutorials I've ever posted!
1. Creating the Bat
Step 1
Start by creating a New document (File > New) with 600 px width and 420 px height. We will first create the body. Take the Ellipse Tool
(L) (fill color R=0, G=0, B=24) and draw an ellipse. Keeping it selected, take
the Convert Anchor Point Tool (Shift-C) and click on the lowest anchor point
to make it sharp. Then take the Direct Selection Tool (A), select the left and
right anchor points, and move them up a little bit. You will get something like
an upside-down raindrop.
Step 2
Using the Ellipse Tool (L), draw a circle and place it like in the image
below—this is the head. To make a nice round circle, hold the Shift key as you
create this shape.
Step 3
Now we’ll create the ears. Copy-paste the shape you made in step 1.1 and
make it shorter and smaller. We now have one ear. Rotate the ear slightly to the left
and place it as in the image below. While keeping it selected, right-click
your mouse and select Transform > Reflect. Once you get the dialogue box,
select Axis Vertical, Angle 90 degrees, and press Copy. Move the new ear to the
right.
Let's align everything. Select two ears, right-click the mouse and hit Group.
After that, select all the body parts. Then go to the Align panel (Window >
Align) and click the Horizontal Align Center button.
Step 4
We will create the wings now. Draw an ellipse, and then draw four more using a
different color and place them as in the image below. Can you see the bat wing
shape now? Go to the Pathfinder panel (Window > Pathfinder) and press the Minus
Front button.
Step 5
Put the wing on the right side of the bat. Right-click the mouse and
select Transform > Reflect. In the dialogue window, select Axis Vertical,
Angle 90 degrees. Press Copy. Move the other wing to the left.
Select the two wings
and group them (right-click the mouse and hit Group). Then select the whole bat. Go
to the Align panel (Window > Align) and press Horizontal Align Center. Your
bat is just perfect!
2. Creating the Background
Step 1
Slightly rotate the bat to the left. Create a circle using the Ellipse Tool
(L) while holding the Shift key. Set the fill color at R=87, G=16, B=103.
Create another smaller circle (fill color R=115, G=47, B=134). Send the circles
to the back (Control‑X, Control-B).
Step 2
Holding the Alt key, start moving the bigger darker circle a little bit up
and diagonally. Hold the Alt key to make a copy of path. Select the darker
bigger circle you made in step 2.1 (not the copy you just made) and make a
third copy of it (Control-C, Control-F). Keep it selected, then hold theShift key, select the second copy (which you moved diagonally) and press theMinus Front button on the Pathfinder panel. You will get a moon shape.
Color this shape with darkest violet color (R=66, G=7, B=81).
Step 3
Select the whole bat and on the Pathfinder panel press the Unite button—you
will get one path. Keep the bat selected, and while holding the Shift key,
select the biggest circle. Go to Object > Path > Offset Path. In the new
dialogue window, make Offset 15 px (your Offset can be different than mine).
Make Joins Miter, Miter Limit 4, and press OK.
Step 4
Keep this new shape selected and on the Pathfinder panel, press the Unite
button. Send it to the back (Control-X, Control-B). Set the fill color atR=136, G=73, B=156. Now…that's it! You’re done!
Conclusion
Congratulations! You just made a clear, simple and nice bat icon!
This tutorial will show you how to layer a couple of grunge and watercolor brushes, then use them with some textures to create a wall with a real vintage look. After that, we'll combine the text and some dripping brushes to add the writing on that wall. Finally I'll give you some tips on adjusting the lighting so that you can end up with an intense, vivid design.
This effect is inspired by the promotion images for the new season of American Horror Story: Freak Show.
Tutorial Assets
The following assets were used during the production of this tutorial.
Open the 35.jpg image from the French Wallpaper Patterns 1 pack, then go to Image > Adjustments > Levels. Click the Sample in image to set white point icon, then click the peachy orange colored part in the image. This will set it along with any lighter points to white.
Step 2
Go to Image > Adjustments > Hue/Saturation, click the Colorize box, and then change the Hue to 32, the Saturation to 18, and the Lightness to 40.
Step 3
Go to Edit > Define Pattern, and type in a name for the pattern.
2. Patching the Crack Texture
Step 1
Create a new 1280 x 720 px document, then place the Crack 5 texture on top of the Background layer. Resize it as needed, but for a result similar to the one in this tutorial, make sure to keep the top and bottom parts open at the ends of the document as shown in the screenshot below.
In order to get a neater result, we will need to get rid of the hole extending to the right of the image, which is what we'll be doing next.
Step 2
Pick the Stamp Tool, and a soft round 25px brush tip. Press and hold the Option/Alt key, then click at the beginning of the part that you want to use as an edge for the hole to the right.
Step 3
Release all, then click and drag to use the part you sampled earlier to patch the hole. You can undo and resample a couple of times until you get a result you like. Don't fill the whole part yet, just make sure to create the edge.
Step 4
Now pick the Patch Tool, make sure that the Patch option in the Options bar is set to Normal, and that the Source button is clicked. Then, click and drag to create a selection around the remaining part of the hole.
Step 5
Click inside the selection and drag it down until you find a part of the wall you like, then release. This will patch that part pretty nicely.
Step 6
You can also use the Spot Healing Brush Tool to get rid of any other spots or parts you don't like, by simply painting over them.
Step 7
When done, go to Filter > Noise > Reduce Noise, and change the Strength to 10, the Preserve Details value to 37, the Reduce Color Noise value to 84, and the Sharpen Details value to 75, and make sure that the Remove JPEG Artifact box is unchecked.
Step 8
Finally, go to Image > Adjustments > Hue/Saturation, and change the Hue to -64 and the Saturation to -70.
3. Masking Out the Crack's Center and Adding the Concrete Texture
Step 1
Pick the Magnetic Lasso Tool, then click at the beginning of one of the crack's sides to start creating a selection. Drag slowly at the edges, and if you need to force it to add a point, click once where you want the point to be added, then continue dragging.
You can play around with the settings in the Options bar, like increasing the Frequency value if necessary.
Step 2
When you're done, you can use the Polygonal Lasso Tool, and click the Add to Selection icon in the Options bar, to add any left-out parts at the top and bottom of the image.
When the selection is complete, go to Select > Inverse.
Step 3
Click the Add layer mask icon at the bottom of the Layers panel. This will add a layer mask that will remove the center of the crack.
Step 4
Place the ConcreteBare0183 image right below the crack texture layer, and rename its layer to Concrete, then resize it as needed, making sure not to leave any empty areas.
Step 5
Go to Image > Adjustments > Hue/Saturation, and change the Hue to -12 and the Saturation to -20.
Step 6
Double-click the crack texture layer to apply a simple Drop Shadow effect using the values below:
Opacity: 25%
Distance: 10
Size: 10
This will add the first layer of shadow to that part.
4. Enhancing the Crack's Color, Adding the Pattern, and Modifying the Edges
Step 1
Create a new layer on top of all layers, call it Fill Color, and change its Blend Mode to Color. Then set the Foreground color to #968978, and use the Paint Bucket Tool to fill the layer with that color.
Step 2
Create another new layer, call it Pattern, and change its Blend Mode to Multiply. Then with the Paint Bucket Tool still active, choose the Pattern fill from the Options bar's dropdown menu, and fill the new layer with the pattern you defined at the beginning of this tutorial.
Step 3
Command/Control-Click the crack texture's layer mask thumbnail to create a selection.
Select the Fill Color layer, then click the Add layer mask icon to apply the same layer mask to it. Repeat that for the Pattern layer as well.
Step 4
Place the PlasterWhite0080 texture on top of all layers, rename its layer to Edges, click the Add layer mask icon, and fill the layer mask with Black.
Pick the Eraser Tool, and make sure that the Foreground color is set to Black, and that the layer mask is still selected.
With a small soft round brush tip, start erasing some parts along the edges to show the masked texture back for those parts.
Not all the edges should be erased. A couple of areas around the crack should be just fine. This will make the final result look more realistic and interesting.
5. Grunging Up the Wallpaper
Step 1
Create a new layer on top of all layers, and call it Border 1. Change its Blend Mode to Multiply and its Opacity to 70%, set the Foreground color to #524741, and then use any of the Grunge brushes to darken up the document's edges.
Step 2
Create another new layer, call it Border 2, change its Blend Mode to Linear Burn, and use a soft round brush to add another darkening layer to the grungy edges.
Step 3
Create one more layer, and call it Grunge Overlay. Change its Blend Mode to Multiply and its Opacity to 50%, then scatter some of the Grunge brushes randomly over the wallpaper (the part that has the pattern).
Step 4
Create a new layer and call it Highlight. Change its Blend Mode to Soft Light, set the Foreground color to #acacac, and use a soft round brush tip to highlight some areas of the crack's edges. Then, add the same previous layer mask to the layer just like you did for the Fill Color and Pattern layers before.
Step 5
You can also create another layer and call it Shadow, change its Blend Mode to Multiply, and use the same Foreground color to darken up any areas that need darkening along the edges. Don't forget to add a layer mask for this layer too.
6. Intensifying the Crack Edges' Shadow and Staining the Concrete Center
Step 1
Create a new layer on top of the Concrete layer, and call it Center Shadow 1. Change its Blend Mode to Multiply and its Opacity to 50%, set the Foreground color to Black, then use a big soft round brush tip to add some shadowing to the edges in order to create more depth.
Step 2
Create another new layer on top of the Center Shadow 1 layer, and call it Center Shadow 2. Change its Blend Mode to Linear Burn, and set the Foreground color to #342915.
The first part of this step is to pick a round brush tip with a Hardness value of 70%, then create some dark, intense shadow areas below a few parts of the crack's edges. You can use the Eraser Tool to help you shape those shadows to match the shape of the edges that are supposed to be casting them.
The second part is to pick the Eraser Tool, and use the brush 24 from the Watercolours 3 PS 7.0 pack to erase parts of the outer edges of the shadows you created.
Step 3
Next, start creating new layers between the crack and the Center Shadow 2 layers, and change each of those layers' Blend Modes to Multiply, then choose shades of green and brown colors to add stains to the concrete center using the Watercolours 3 PS 7.0 brushes. Place those layers in a group and call it Center.
Step 4
The brushes and colors used in this tutorial from bottom to top are:
Layer - Color - Brush
1 - #998675 - 28
2 - #a6a497 - 30
3 - #a6a497 - 29
4 - #998675 - 27
5 - #342915 - 29
6 - #a6a497 - 09
7 - #342915 - 22
7. Adding the Text
Step 1
Create the text using the font Nightbird, the font Size99 pt, the color #993133, and set the Tracking value to -25.
Step 2
Go to Edit > Transform > Rotate, rotate the text slightly, then hit Return/Enter to accept the changes.
Step 3
Create a new layer on top of the text layer, call it Drips, and set the Foreground color to #993133. Then add some of the Drips 1 Brush Pack for Photoshop or Gimp brushes to a couple of the letters you have. You can combine more than one brush for the same letter as well.
Step 4
Select both the text and the Drips layers, then go to Layer > Merge Layers, rename the merged layer to Text, and change its Blend Mode to Multiply.
Step 5
You can use the Watercolours 3 PS 7.0 brushes to erase some parts of the text if you like.
Step 6
Go to Image > Adjustments > Hue/Saturation, and change the Saturation to 10.
Step 7
Create a new layer on top of the Center Shadow 2 layer, call it Stain, change its Blend Mode to Linear Burn, set the Foreground color to #b3897c, and add the brush 28 from the Watercolours 3 PS 7.0 pack behind the text. You can modify some of its settings if you like, as shown in the next step.
Step 8
Open the Brush panel (Window > Brush), change the Size to 400, and check the Flip Y box, then add the brush.
8. Lighting and Final Touches
Step 1
Click the Create new fill or adjustment layer icon at the bottom of the Layers panel and choose Levels. Make sure to place its layer on top of all layers, then change the Highlights value to 245.
Step 2
Click the Create new fill or adjustment layer icon again, but this time choose Brightness/Contrast, and change the Contrast value to 10.
Step 3
Double click the Fill Color layer to apply a Gradient Overlay effect using the following values.
Blend Mode: Overlay
Opacity: 35%
Style: Radial
Scale: 150%
Check the Reverse box
Use the Black to White gradient fill.
This will make the effect look more vivid.
Step 4
Pick the Dodge Tool, choose a soft round brush tip, and set the Range to Midtones and the Exposure to 50% in the Options bar. Select the crack texture's layer, then start brightening up its edges a little bit.
Congratulations! You're Done
In this tutorial, we patched, modified, and masked a crack texture to create the base of a pattern-filled wallpaper.
Then, we added the fill color and pattern to the crack texture, as well as a couple of brushes to make it look more vintage and grungy. We used other brushes to add highlights and shadows, creating more depth and dimension.
Then we created the text, added some drips, and merged and blended both layers with the design.
Finally, we enhanced the lighting, and added some finishing touches to bring the design to life and make it look more vivid.
Please feel free to leave your comments, suggestions, and outcomes below.
In this tutorial you'll learn how to use gradients, effects like drop shadows and outer glows, and custom brushes in order to render a Halloween-inspired scene that looks as if it's made of dimensional, illuminated paper cut-outs. While nothing beats carefully cutting and layering shapes in various types of paper, this tutorial will let you try out the style and design ideas without investing in the tools and techniques needed for paper cutting.
1. Preparing Your Document
Step 1
Create a NewDocument in Adobe Illustrator CC 2014 (note that this tutorial is still applicable to earlier versions of the program—this is just what I used to create the design). Make it about 8 inches by 10 inches.
First, let's set up our color palettes outside of the artboard. Use the Rectangle Tool (M) to draw two small squares. One should be black while the other should be a bright color like yellow, blue, or orange (imagine that this color will be the lightest and brightest light you'd use to illuminate your design). Use the Blend Tool (W) to create a blend of 10 steps between the two shapes. Instantly, you've created an easy reference for your color palette. Select colors from your chosen blend with the Eyedropper Tool (I).
Step 2
Draw a large black rectangle overlapping your entire artboard. Use the Ellipse Tool to draw an ellipse that takes up most of the artboard, but leaves a slight border between the ellipse and the edge of the artboard. The rectangle will serve as the background and the circle will serve as the frame for our composition. Lock both shapes in the Layers panel for now.
2. Creating a Lacy Frame
Step 1
Use the Blob Brush Tool (Shift-B) to draw tree branches or antler-like shapes on the left side of the ellipse drawn in the previous section. Extend the design past the boundary of the ellipse and continue drawing additional doodle shapes such as half circles, teardrops, and triangles.
Step 2
When satisfied with your tree branch design, Select all of its components and Unite them in the Pathfinder panel (your Blob Brush Tool settings may have already merged them while drawing, which is fantastic and saved you a small bit of time).
Close any open sections of the design with a couple of curving lines following the contour of the blue ellipse and drawn with the Blob Brush Tool.
Use the Direct Selection Tool(A) to select and delete the interior shapes within your design.
Continue across the entire tree branch design.
If you find you have large portions of your shape that are filled in, draw new shapes over them and Unite these newly drawn shapes in the Pathfinder panel.
Hit Minus Front in the Pathfinder panel to delete these new shapes from the main design.
Step 3
Copy (Control-C) and Paste (Control-V) the left side of the frame and Reflect it over a Vertical axis. Align the two shapes and Unite in Pathfinder.
Step 4
Set the frame's fill color to a Radial Gradient with the Gradient Tool (G) that goes from black to the first or second step (from the left) in the blend you created in Section 1, Step 1.
Unlock the ellipse in the Layers panel and apply a Linear Gradient that goes from the middle step to the lightest in the blend created in Section 1, Step 1. You'll be referring to that blend quite a bit throughout this tutorial.
3. Applying Effects to Create Dimension
Step 1
Use the Pen Tool (P) to draw a curved branch across your composition.
Step 2
Set the fill color of the branch to the same Radial Gradient used in Section 2, Step 4.
Step 3
In the Appearance panel, apply a Drop Shadow (Effect > Stylize > Drop Shadow) with the following attributes:
Mode: Multiply
Opacity: 75%
X Offset: 0.03 in
Y Offset: 0.03 in
Blur: 0.1 in
Color: Black
Create a New Fill above the first in the Appearance panel and apply an Outer Glow (Effect > Stylize > Outer Glow) with the following attributes:
Mode: Overlay
Color: Light Yellow (the brightest color from your blend created in Section 1, Step 1)
Opacity: 100%
Blur: 0.2 in
The attributes and process for adding them in the Appearance panel will be used repeatedly throughout this tutorial. You can also add them to the lacy frame created in Section 2.
Step 4
Draw two smaller ellipses with the Ellipse Tool that match the background ellipse and have the same Drop Shadow and Outer Glow as that applied in the previous step. Place them beneath the frame and branch objects, but above the ellipse background shape in the Layers panel.
Use the drawing tool of your choice (I used the Pencil Tool(N)) to create bush-like shapes in the bottom left corner of the design. Apply the same gradient to this shape from Step 2 of this section. Copy and Paste the shape a few times, layering them in the lower left corner. Apply an Outer Glow to the bush-like shape furthest to the back within your design.
Step 5
For an additional pop of light, draw a large shape (it could look as strange as the one I've drawn below, or could be a large ellipse or rectangle) with the drawing tool of your choice. Apply a Radial Gradient that goes from the brightest yellow of the blend created in Section 1, Step 1 at 100% to 0%Opacity with the opaque color in the center of the gradient.
Adjust the shape of the gradient with the Gradient Tool so that it's oblong and fits entirely inside the boundaries of the shape you drew. Set the Blend Mode to either Overlay or Screen in the Transparency panel and adjust the Opacity of the glowing shape as you desire. Place it behind the bush shapes drawn in the previous step in the Layers panel.
4. Create Fanciful Forest Creatures
Step 1
Use the drawing tool of your choice (in this case, I used the Pen Tool) to draw a wolf, deer, swan, or unicorn-like creature, starting with the head and neck. As I prefer the most fanciful creatures, mine is a combination of three of those for this delightful composition. Draw the creature in profile, adding shapes that denote its body and limbs. When you're satisfied with your design, Unite all components in the Pathfinder panel.
Step 2
Use the Rectangle Tool to draw small squares and the Direct Selection Tool to manipulate the anchor points so the shapes look more like diamonds. Select all of them and hit Unite in the Pathfinder panel. Select the body of your creature and hit Minus Front in the Pathfinder panel. Repeat the process with small circles and simply-drawn facial features on the creature.
Step 3
Place the creature object within your composition. I nestled mine in the lower right corner and applied the gradient from Section 3, Step 2.
5. Making a Custom Bat Brush
Step 1
Let's create a quick and easy bat for our custom brush.
Draw a small circle with the Ellipse Tool and create a bat wing with the Pen Tool. You could also create the shape by cutting ellipses out of a trapezoid (I find it easier to draw it manually).
Copy and Paste the left wing and Reflect it over a Vertical Axis to create the right side.
Draw two triangles for bat ears.
Manipulate the angle and shape of the wings by either rotating them or editing the curve of each shape's anchor points with the Direct Selection Tool. Unite your shapes in the Pathfinder panel.
Step 2
Select the bat and in the Brushes panel's options hit Create a New Brush. Choose Scatter Brush from the brush type list. Adjust the Scatter Brush's options (size, rotation, orientation, etc.) as you see fit. You can check out the settings I chose below. Whatever you choose, know that you can always adjust the brush even after it's been created and saved.
Step 3
Select the newly-made brush in the Brushes panel and draw a curving, swooping stroke over your composition. Adjust the brush as needed to get the amount and flight pattern of bats you'd like to have within your design.
In the Appearance panel, set the Blend Mode of the stroke to Lighten and apply an Outer Glow similar to the one created in Section 3, Step 3.
6. Additional Compositional Elements
Step 1
Draw additional bush-like shapes as we did in Section 3, Step 4. Add an additional glowing Radial Gradient shape by drawing an ellipse and using the same gradient from Section 3, Step 5 (it's a good step). Place it behind one or a couple of bush-like shapes and set the Blend Mode to either Overlay or Screen (and adjust the Opacity as wanted).
Step 2
This is the third group of bush-like shapes. Much rounder than the other two groups, this one was also created with the Pencil Tool and serves to add depth in our spooky/weird forest scene.
Step 3
I nestled a circle, drawn with the Ellipse Tool, beneath the top frame piece (drawn during Section 2). Apply a Linear Gradient with midtones from the blend created in Section 1, Step 1. Optionally, add dimension yet again to this shape with a Drop Shadow.
Step 4
I added sparkly little stars strewn around my strange forest's sky. In order to see how they fill the composition easily, I drew a bright yellow ellipse (this is entirely optional, as it will not be carried over to the final design in any way).
Draw many, many little circles. Select all of them and go to Effect > Distort & Transform > Pucker & Bloat. Enter -17% so the circles Pucker a bit and become little sparkles. Expand them under Object.
Step 5
Set the fill color to bright yellow, reduce its opacity a bit, and apply a subtle Outer Glow to your sparkle stars. I found it easiest to Group(Control-G) them together before doing this. Place the sparkle stars within your composition behind everything except for the gradient ellipse that's serving as the background.
Step 6
In the foreground, draw some swirly ghost shapes. Cut out their faces using the same method from Section 4. Apply both an Outer Glow and Drop Shadow to your ghost group.
Step 7
Make those ghosts pop with another Radial Gradient circle placed behind darker elements within your composition. Use the same gradient and layer attributes from Section 3, Step 5.
Step 8
Draw a large circle over the entire composition with a Radial Gradient set at a very light yellow or even white at 100% Opacity to yellow at 0% Opacity. In the Transparency panel, set the Blend Mode to Soft Light and Opacity to 50% or less. Doing so will centralize the imaginary light shining through your digital paper cut.
Step 9
You've probably noticed that throughout this tutorial elements are sometimes overlapping all over the artboard and other times they're neatly tucked away into the boundaries of the ellipse.
When you're done creating your composition, Group all of your components together. Draw an ellipse over your design (or Copy and Paste the background ellipse drawn in Section 1, Step 2). Select both the ellipse and your artwork group and Create a Clipping Mask (Control-7). Now your work has been non-destructively clipped to the boundaries of the ellipse.
Brilliant! You're Done!
I hope you found this tutorial to be enlightening. By pairing gradients with Drop Shadows and Outer Glows, we've created a spooky forest design reminiscent of carefully cut paper shapes lit up by backing lights in a shadow box (just like grandma used to make!). Show off your illuminated designs in the comment section below.
The following assets were used during the production of this tutorial:
Plain white paper
Oil-based paint
A brush or a simple stick
1. Preparing the Canvas
First, prepare a clean sheet of paper. For the paint, you can choose between oil‑based paint and water-based paint. Oil-based paint is much glossier than water‑based paint and much thicker. In this case, I chose oil-based paint because its spatter is also similar to a blood spatter.
Using a brush or a simple stick, spill the paint onto the paper. Wait for the paint to dry. Oil-based paint takes longer to dry; you may need to leave it for a day. After it is dry, scan the paper at the highest resolution.
2. Editing the Scanned Image
Step 1
Open the scanned paint spatter and click Add Adjustment Layer > Levels from the Layers panel.
Move the parameter sliders to the center until the paint spatter has a higher contrast and we have a solid white color on the paper.
Step 2
Add a Brightness/Contrast adjustment layer, and increase the contrast value.
Step 3
In making a custom brush, we only need black and white pixels in the image. Convert this paint spatter into a black and white image by adding a Black & White adjustment layer. Drag the available sliders until you have maximum blackness, but be careful not to destroy its highlight.
Step 4
Make a new layer on top and then cover every paint spatter on the paper's edge with white. We do not want to see any sharp edges in the brush.
3. Converting to Brush Tip
Step 1
Click Edit > Define Brush Preset. Give it a memorable name and then click OK.
Step 2
From now on, you will find it as a custom brush tip inside Photoshop. Activate the Brush tool and then right-click on the canvas. In the Brush Tip dialog box, you will find this latest brush tip at the end of the list. Click to activate it.
Step 3
Set the foreground color to red and then click once in a new canvas file to test the result.
4. Import and Export Brush
Step 1
We can also export the brush into a file. Click Edit > Presets > Preset Manager and then select Preset Type: Brushes. This is where Photoshop places all its brushes. Click the brush that you want to export. To select multiple brushes, hold Shift while clicking the brush. Click Save Set to import.
Step 2
In the next dialogue box, save it as a brushes file. You can send this file to your friend.
Step 3
To import the brush file, open the Brush Options dialog box and then click its context menu in the top-right corner. Select Load Brushes and choose the brushes‑file.
5. Variation
There are at least three ways to make your brush appear more unique:
Combining it with another brush
Deleting part of the brush using another custom brush
Playing with its opacity
Step 1
You can combine the brush simply by applying another brush on top of the previous‑one.
Step 2
Another way of varying the brush is by deleting some of the brush using another custom brush.
Step 3
You can also try to rotate the brush shape by right-clicking and dragging the arrow on the brush preview.
Conclusion
From this tutorial, I hope you understand the basics of creating a custom brush. Of course you can simply download a free custom brush or buy one. But using your own custom brush will definitely make your design unique.
Go ahead and don't be afraid to experiment. Step out of your comfortable designer's workroom and start creating your own brush. Below is a simple piece of red text in the style of the Dexter TV series, made by painting with a blood spatter brush. I bet you can replicate this easily.
Those who follow my tutorials will know there are three common themes: portraits, cats, and silhouettes. In this tutorial, I'll be creating a simple, Pen Tool-free sunset cat scene, using Blends and Image Trace. If you're using a version of Adobe Illustrator older than CC, Image Trace will be known as Live Trace with more or less the same settings, so don't worry, you can join in!
This one is perfect for beginners, so let's get stuck in.
Tutorial Assets
In order to complete this project, you'll need to find an image of a walking cat. If you're not using your own cat, I recommend using the following stock image which you can purchase from PhotoDune:
Once you've created a new landscape document in Adobe Illustrator, let's create four rectangles with the Rectangle Tool (M). I've created the first rectangle and then copy and pasted it in front, used the Free Transform Tool (E) and reduced the height of it and changed the colour. Then I repeated the process for the other two rectangles. This is so they keep the same width and are all aligned to the bottom of the initial rectangle.
I've used the following colours:
Yellow: #f7931d
Red: #be1e2d
Blue: #262261
Blue/Black: #0d0d12
Step 2
Select all four rectangles and create a Blend by going to Object > Blend > Make (Alt-Control-B). If you've not gotten a smooth gradient of colour, then keep the Blend group selected and go to Object > Blend > Blend Options and change the Spacing to Smooth Color.
2. Create a Fence From a Blend
Step 1
Using the Rectangle Tool (M), create a long, thin rectangle at one side of your artboard. Then duplicate it and move it to the other side. If you've got Smart Guides (Control-U) enabled, then you should be able to line it up. However if this isn't the case, select both objects and go into the Align panel and select Vertical Align Bottom.
Step 2
Select both shapes and create a Blend with them (Alt-Control-B). This may create the result shown below, but don't worry, I'm going to show you how to correct it in the next step.
Step 3
To change the Spacing of the Blend, while the Blend group is selected, go to Object > Blend > Blend Options and change the Spacing to Specified Distance and change the unit to 25 mm.
3. Complete Your Fence
Step 1
I want more of a picket fence look, so in order to do this I'm going to need to alter the two shapes in the Blend. With Smart Guides enabled (Control-U) and using the Pen Tool, I'm going to add points at the top middle of both rectangles in the blend. Now don't worry, we're only using the Pen Tool to add a single point on each of the two shapes.
Remember to add the points to both the rectangles and in the same place to ensure you've got a smooth blend.
Then use your arrow keys to nudge the point upwards, an equal number for each of your posts, to create a triangle top to your pickets.
Step 2
To hold all of the pickets together you'll need to create a couple of railings. So with the Rectangle Tool (M), draw two long, slim railings as shown below.
Step 3
There's one issue here... the fence is floating above the surface of the floor. We're going to have to turn some of these pickets into posts that are stuck in the ground.
In order to amend some of the pickets to be posts, we're going to have to change the length of some of the shapes. In a blend, you can only change the shapes creating the blend and not the shapes created by the blend. So to access the shapes we need, we're going to have to Expand the blend.
Do this by selecting the blend, then going to Object > Expand and ticking all the settings, then clicking OK.
Step 4
If you were to use the Free Transform Tool to extend the length of the posts as they currently are, it would distort the triangle/pointed top of the pickets. They wouldn't all be uniform. So what you'll need to do is use the Direct Selection Tool (A) to select the bottom two points of your posts, then use your arrow keys to nudge them down.
I've made every fourth picket a post.
4. Use Image Trace on a Cat Stock Image
Step 1
It's time to add a cat casually walking along our picket fence. You can use your own cat for this or draw your own, however I've opted for a stock image of a cat.
What makes this image especially good is that it's on a nice clean background, and of course the cat itself is black. This makes it a purrfect candidate for Image Tracing (see what I did there?).
Step 2
Go to File > Place and locate your cat image and place it onto your artboard. You're going to need to resize the image using the Free Transform Tool (E), so the paws are touching the pickets. To do this accurately, change the image to Blending Mode Multiply, Opacity 100% and hide the sky background. Then you can line up the image.
Step 3
Now that your cat is lined up, let's select Image Trace from along the top bar. There's a button you can select which will give you the Image Trace options, and you can use the settings below to give a textured outline to the shape.
Step 4
The eagle eyed of you will notice that with the picket fence and cat on top of the sky, there's a slight grey outline. This is because vectors are anti-aliased to a pixel screen. So those pixels overlapping onto the background are lower opacities of black set to Blending Mode Normal. This creates this halo effect around the shape.
As we're working with black filled shapes we can set these to Blending Mode Multiply to get rid of the halo effect. You can see the difference below.
5. Create Stars From Blends
Step 1
To create a star, you're going to need to draw two circles with the Ellipse Tool (L), with the outer circle set to Opacity 0% and filled with off white. This is so the blend changes from 100% in the middle to nothing on the outside to give a glowing effect.
However, when you create a blend from these shapes you end up with a different result than you usually do when you set it to Spacing: Smooth Color.
Step 2
This is because both shapes are of the same fill colour, so there's no change! The only thing that is changing is the Opacity, so there's no smooth progression in colour. To get around this, you need to change the Spacing to Specified Steps and enter a value to create a smooth transition in opacity. I've used 20 Steps here.
Step 3
The glow from this star isn't that "realistic"... so let's add an additional shape inside the blend. In the Layers panel, go into your stars group and duplicate one of the circles. Then with the Free Transform Tool (E), make it just bigger than the smaller group. This shape should be sandwiched between the other two circles.
Then change the Opacity to 30%. This then alters the transition in opacity and creates a more star-like glow effect.
Step 4
Now you could duplicate this star across the canvas and alter the shapes in size, which would be the easiest thing to do... not the most effective though. However this is a tutorial and I want to show you how to do this via a Scatter Brush.
With the star selected, go into the Brushes panel and select New Brush. In the pop-up, select Scatter Brush and use the settings below, then click on OK.
Step 5
Using the Paintbrush Tool (B), add three scribbled lines in the sky to create your stars.
Step 6
Then alter the Opacity of the strokes to vary the brightness of the stars. The lowest line is set to Opacity 30% as the sun is still setting and the visibility of the stars will be faint.
6. Add the Finishing Details
Step 1
Let's finish off our scene. The first thing we're going to do is add a vignette effect. We could do this with a gradient, but since this is a tutorial based on blends, let's use those instead.
A vignette effect will darken the edges. In order to do this, we need to create two circles with the Ellipse Tool (L) and make the central shape white and the outer black. Then create a Blend (Alt-Control-B).
Step 2
The set the blend to Blending Mode Multiply. This will make the white shapes transparent, thus creating a transparent radial gradient effect. You can then go into the blend and adjust the size and place of the shapes.
Step 3
To make the cat more visible, go into the blend group for the sky and simply adjust the height of the blue rectangle to allow a lighter transition in colour behind the cat.
Awesome Work, You're Done!
You're now done! As you've placed your sky within the boundaries of your artboard, don't worry about the overlapping shapes.
Happy Halloween and I'll catch you in my next tutorial.
In this special Halloween edition of our series of Vector Portraits courses, Tuts+ Design & Illustration Editor Sharon Milne will teach you how to start with regular stock photographs and transform them into spooky images inspired by Halloween and Day of the Dead.
You'll work step by step through two projects, a zombie child and a sugar skull woman. Along the way you'll learn some important skills, such as rendering skin, creating realistic hair, and much more.
Watch the Introduction
Start Learning With a 14 Day Free Trial
You can take our new course straight away with a completely free 14 day trial of a Tuts+ subscription. Start your free 14 day trial today, to access this course and hundreds of others.
Sometimes you want to paint something, but your idea is too elusive to plan the picture properly. You just start painting and the result is unpredictable. In this tutorial I'll show you a fast method to paint freely and spontaneously, while keeping control over the process. I'll teach you how to tame your imagination and use it to bring an idea to life. A fast process requires simple tools, so we're going to use only one, self-made brush. Adobe Photoshop isn't obligatory here, but you'll need to work some things out yourself if you use other programs.
In order to prove to you how fast this method is, I decided to do something uncommon. In this tutorial I'll show you the process of painting four cute bat-cats at the same time. It doesn't mean you need to do the same! Don't follow me directly, just follow my advice, observing how I apply it to four different designs. Learning from comparison is quite effective—you only get the essence, without irrelevant noise.
As a warm-up for this tutorial, take a look at these ones. Why? Because here I'll be teaching about painting, not about painting certain animals. Yes, there is a difference!
Before we start working, we need to prepare the workspace and tools. Imagine Photoshop as a huge room full of artist tools—we need to choose the ones that will be useful for us.
Step 1
First, create a New File (Control-N). Set the Width and Height depending on your computer—5000 x 4000 px can be too much for some. 2000 x 1000 px is much safer and should be enough for one design.
Step 2
Set the Color panel to show HSB Sliders—much more color theory friendly than RGB. If the Color panel isn't showing, open it with Window > Color or by hitting F6.
Step 3
Select 90% gray and fill the background with the Paint Bucket Tool (G).
Step 4
Lock the layer to keep it from modification.
Step 5
We need a brush to paint with. Let's create a really simple one.
Create a New File for a moment, and Hide the background. Add a New Layer (Control-Shift-N) and draw a hexagon with the Polygon Tool. The size doesn't matter, just remember to set 6 Sides. Then go to Edit > Define Brush Preset (the name doesn't matter either).
Step 6
Hit F5 to see the settings. Change the Spacing to 1% for smooth strokes, and check Transfer to make it opacity-based. Hit the white card icon in the bottom right to save the brush.
Why don't we use a simple round brush? The reason is it's too simple. In the case of speedpainting we want a bit of chaos that we'll be able to transform into something we couldn't have imagined before. A hexagon is simple—because it's almost round—and a bit unpredictable at the same time. Just what we need!
2. Design the Pose
For every part of the sketch we're going to create a new layer. So, for every step you'll do the following:
Create a New Layer (Control-Shift-N)
Do the step
Lower the Opacity (press V, then hit a number—1 for 10% Opacity,5 for 50% Opacity, and so on. 0 will give you 100% Opacity)
Step 1
We need to start with a gesture drawing. It will define the rhythm of body and make it independent from the details. The spine is the main element we can use for it—cats have very flexible spines, so feel free to go crazy with it! You can also add the chest, head, and hips to keep control over the silhouette.
Draw a flexible line, attach the chest, hips and head
Cat 1
The first one is looking up, and I want it to be catching something in the air.
Cat 1—basic pose
Cat 2
This one is probably sleeping.
Cat 2—basic pose
Cat 3
A crazy position for a crazy cat!
Cat 3—basic pose
Cat 4
This one is walking fabulously.
Cat 4—basic pose
Here they are all together:
Step 2
Legs can be added along with the gesture, but I decided to create a separate step for this to make it clearer.
Both front and hind legs are similar to the letter S
Cat 1
One pair of legs is raised, while the other keeps the cat standing.
Cat 1—legs added
Cat 2
We've got a real tangle here! Cats are best at this.
Cat 2—legs added
Cat 3
One pair to the front, one pair to the back—let's show the flexibility of a cat's body.
Cat 3—legs added
Cat 4
This one is going to be the easiest!
Cat 4—legs added
Step 3
We don't need to know the exact musculature for this purpose. Use the scheme below to create the main body parts. Ignore fur at the moment, and make the silhouette slim!
Both front and hind legs are built of the same parts as our arms and legs, so it's rather easy to remember
Cat 1
Cat 1—body
Cat 2
Cat 2—body
Cat 3
Cat 3—body
Cat 4
Cat 4—body
Step 4
Our cats can fly! We're going to add very simple bat wings to them. Start with a triple-bent line:
S-shape again! It's because wings are actually arms
Cat 1
Wings our helping our cat balance its body during this position.
Cat 1—base for wings
Cat 2
This cat is sleeping, so it's keeping its wings folded on its back.
Cat 2—base for wings
Cat 3
One wing is folded, the other is is being expanded unintentionally because of this extreme flexion.
Cat 3—base for wings
Cat 4
The wings follow this cat's careless gait.
Cat 4—base for wings
Step 5
Add four fingers to every wing—one thumb on the top and three long fingers under the third part. Use long fingers for realistic wings and short fingers for cute ones.
The long fingers have joints just as your fingers, too, so you can use this facet more a more complicated pose
Cat 1
Fully expanded.
Cat 1—wing-fingers
Cat 2
Fully folded.
Cat 2—wing-fingers
Cat 3
A medial state.
Cat 3—wing-fingers
Cat 4
Fully expanded.
Cat 4—wing-fingers
Step 6
Connect the fingers with a membrane.
Only the thumb is free of membrane. Don't forget about the part between the "wrist" and shoulder
Cat 1
Cat 1—wings done
Cat 2
Cat 2—wings done
Cat 3
Cat 3—wings done
Cat 4
Cat 4—wings done
Step 7
We need a better base for the most important details—the face and paws. It can be done very simply; just treat it as a skull.
Cat 1
Cat 1—head and paws
Cat 2
Cat 2—head and paws
Cat 3
Cat 3—head and paws
Cat 4
Cat 4—head and paws
Step 8
And, the best step of them all. The body is well defined, so it's not very likely we'll break anything. Let your imagination go wild!
Cat 1
A playful, young cat with furry front and bald back. I kept a normal nose, but added big bat ears.
Cat 1—full line art
Cat 2
A peaceful demon—the front of a house cat and the back of a nightmarish beast.
Cat 2—full line art
Cat 3
What could be a better base for a bat-cat than a sphynx cat? I've used a bald body, long tail and wrinkled face as the most important points of this design.
Cat 3—full line art
Cat 4
Norwegian forest bat? Spooky raccoon? This must be a furry pet from hell!
Cat 4—full line art
Our designs are done! Notice how different concepts can be created on a base of the simple "bat-cat" idea. To prepare it for further work, remove all the layers except the last one. Name that layer line art.
3. Add the Colors
Time for colors! We're going to use a simple method based on the color theory tricks I described in this article.
Step 1
Create a New Layer (Control-Shift-N) and place it under the line art (hint: Control‑[ and Control-] can be used to move the layer up and down). For a moment, turn off Transfer in brush settings to paint a solid background under the line art, then turn it on again. Now... paint! For the first time you don't need to think about light and all that nonsense. Just paint the colors you need, with no shading and no details.
Name this layer Mask and clip the line art to it with Control-Alt-G.
Paint, don't think!
Cat 1
Cat 1—flat colors
Cat 2
Cat 2—flat colors
Cat 3
Cat 3—flat colors
Cat 4
Cat 4—flat colors
Step 2
From now on, we're going to do the following for every step:
Create a New Layer above the previous one.
Clip the layer to Mask with Control-Alt-G.
We need the line art, but at the same time we don't want to see it. Let's compromise—use the Eyedropper Tool (I) to pick the color that's probably hidden under the line, move the Brightness slider a bit to the left, and paint over the lines. Remember to follow the color, but other than that, you don't need to be too careful.
Cat 1
Cat 1—line art covered
Cat 2
Cat 2—line art covered
Cat 3
Cat 3—line art covered
Cat 4
Cat 4—line art covered
Step 3
Add more details, picking the colors you need from the picture, but without adding any new ones for shading. Use a big brush!
Cat 1
Cat 1—color sketch
Cat 2
Cat 2—color sketch
Cat 3
Cat 3—color sketch
Cat 4
Cat 4—color sketch
Step 4
Use the Paint Bucket Tool (G) to fill the layer with a dark version of the ambient light color (for example, dark blue #0b0c29).Change its Opacity to 70%.
Add a Layer Mask to the layer.
Select the Layer Mask.
1—layer selected; 2—layer mask selected
Paint weakly illuminated areas with gray and strongly illuminated with black. Use white as an eraser. Don't just reveal the light, but also paint small illuminated details, like hair.
1—black; 2—50% bright gray; 3—10% bright gray At this stage we're painting light by removing shadow
Cat 1
Cat 1—shadow added
Cat 2
Cat 2—shadow added
Cat 3
Cat 3—shadow added
Cat 4
Cat 4—shadow added
Step 5
Now we want to paint details on the illuminated areas with a more interesting color. Pick the color from the area with the Eyedropper Tool (I) and then:
If the light source is warm, move the H slider to the side of warm hues. If it's cold, do it the other way around.
Lower Saturation a little bit.
Increase Brightness.
Sample configuration for warm light
Paint on the illuminated areas without covering them completely. Simply paint the details with a slightly smaller brush than before.
Cat 1
Cat 1—first light
Cat 2
Cat 2—first light
Cat 3
Cat 3—first light
Cat 4
Cat 4—first light
Step 6
Since we've got a pretty good idea about the general shape of every cat, we can cut the redundant parts off. Add a Layer Mask to the Mask and paint over the cut area with black. Turn off Transfer for a while to make it easier.
Cat 1
Cat 1—clipping mask
Cat 2
Cat 2—clipping mask
Cat 3
Cat 3—clipping mask
Cat 4
Cat 4—clipping mask
Step 7
If the shadowed areas look too dark, you can add reflected light to them. To find a perfect color, pick the color from the shadow and then:
If the reflected light is warm, move the H slider to the side of warm hues. If it's cold, do it the other way around.
Lower Saturation.
Increase Brightness.
Sample configuration for cold reflected light
Now paint subtle light in the shadows. Don't touch the illuminated areas!
Treat reflected light as a normal, but weak light
Cat 1
Cat 1—reflected light
Cat 2
Cat 2—reflected light
Cat 3
Cat 3—reflected light
Cat 4
Cat 4—reflected light
Step 8
For fine details, painted with a small brush, use a more intense version of Step 5. Don't paint details in the shadow! You can also use this step to paint over any dark outlines that are left on the border of the Clipping Mask.
Cat 1
Cat 1—second light
Cat 2
Cat 2—second light
Cat 3
Cat 3—second light
Cat 4
Cat 4—second light
4. Final Touches
Step 1
So far we've been taking care of the lighting only. Now we can add details independent from light.
Cat 1
Cat 1—no face details Cat 1—whisker holes and pupil added Cat 1—eye shading Cat 1—whiskers, their shading, and a moth Cat 1—details
Cat 2
Cat 2—no face details Cat 2—whisker holes Cat 2—whiskers and their shading Cat 2—details
Cat 4—no face details Cat 4—whisker holes and pupil Cat 4—eye shading Cat 4—whiskers, their shading and eye-shine Cat 4—details
Step 2
If want to add more distinctive, colorful lighting, there's a simple trick for this. When moving along the Hue slider, sometimes it's hard to pick the right color. You can work around it by painting a stroke of the light source's color, then setting its Opacity to 30%.
Now you can pick the color, make it a little bit Brighter and less Saturated, and add more lighting. It will fit!
It works for both the main light source and reflected light:
Cat 1
Cat 1—complete shading, one light Cat 1—complete shading, two lights
Cat 2
Cat 2—complete shading, one lightCat 2—complete shading, two lights
Cat 3
Cat 3—complete shading, one lightCat 3—complete shading, two lights
Cat 4
Cat 4—complete shading, one lightCat 4—complete shading, two lights
Step 3
Now you can add your personal tricks that weren't described in this tutorial and fix all the mistakes you can find (for example, that horrible Cat 2's paw). Then play with the background to present your creature in the most appropriate way.
We're Done!
You've just learned how to bring your ideas to life, quickly and in color, without any planning, no matter how different they are. Maybe it wasn't that fast this time, but now that you know these tricks, you'll be able to use them almost unconsciously in your projects. Do you want to try something more Photoshop-oriented? Check my tutorial about painting with Blending Modes and Layer Masks.